| On the right side of the page, there is a directory index, which can jump to the content you want to see according to the title |
|---|
| If not on the right, look for the left |
1, Three virtual machines for experiments
1. Build Linux virtual machine environment
2. Install EPEL release for Linux
- If you are installing desktop Standard Edition, you only need to install EPEL release

yum install -y epel-release
- Solve the situation that the process may be occupied
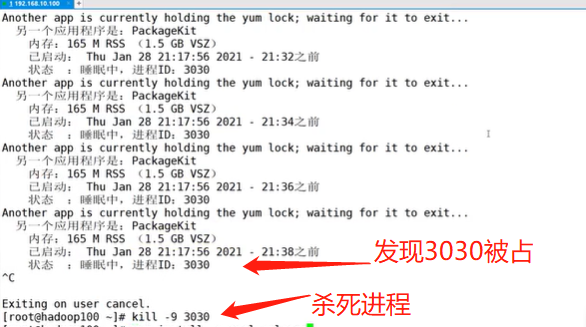
kill -9 3030
- If you are installing the minimum system version, you also need to install the following tools
➢ net-tool: Toolkit collection, containing ifconfig Wait for orders
[root@hadoop100 ~]# yum install -y net-tools
➢ vim: editor
[root@hadoop100 ~]# yum install -y vim
3. Turn off the firewall
In an enterprise, usually the company will set up a very secure firewall externally, so we turn off the linux firewall

➢ Turn off the firewall
	[root@hadoop100 ~]# systemctl stop firewalld
➢ Turn off firewall and start automatically
	[root@hadoop100 ~]# systemctl disable firewalld.service
4. Enable the permission to add sudo to execute the root command for non root users
Non root users cannot use the root command, and sometimes we need non root users to execute some commands to enable sudo permission
- Enter sudoers file

- Find the following command and modify it (Hadoop 100 is a non root user in my linux)
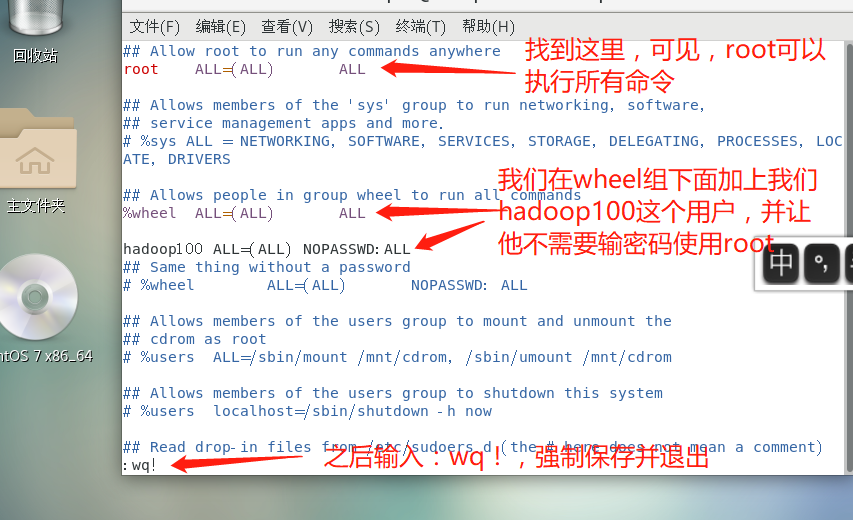
hadoop100 ALL=(ALL) NOPASSWD:ALL
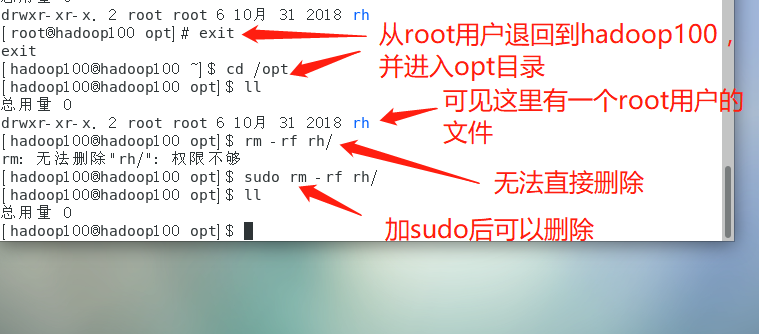

➢ Delete the specified folder
	sudo rm -rf rh/
➢ create folder
	[hadoop100@hadoop100 opt]$ sudo mkdir module
	[hadoop100@hadoop100 opt]$ sudo mkdir software
	[hadoop100@hadoop100 opt]$ ll
	Total consumption 0
	drwxr-xr-x. 2 root root 6 4 September 14:49 module
	drwxr-xr-x. 2 root root 6 4 September 14:52 software
➢ Change the user of the file to hadoop100
	[hadoop100@hadoop100 opt]$ sudo chown hadoop100:hadoop100 module/ software/
	[hadoop100@hadoop100 opt]$ ll
	Total consumption 0
	drwxr-xr-x. 2 hadoop100 hadoop100 6 4 September 14:49 module
	drwxr-xr-x. 2 hadoop100 hadoop100 6 4 September 14:52 software
5. Uninstall the JDK of the virtual machine
The desktop board is equipped with a JDK by default. We need to uninstall it. If the installation is minimized, we don't need it
- Enter root and uninstall

rpm -qa | grep -i java | xargs -n1 rpm -e --nodeps
➢ rpm -qa: Query all installed rpm software package
➢ grep -i: ignore case
➢ xargs -n1: It means that only one parameter is passed at a time, that is, if multiple parameters are found in the previous query and unloaded one by one instead of unloading together, it is easy to crash
➢ rpm -e –nodeps: Force uninstall software
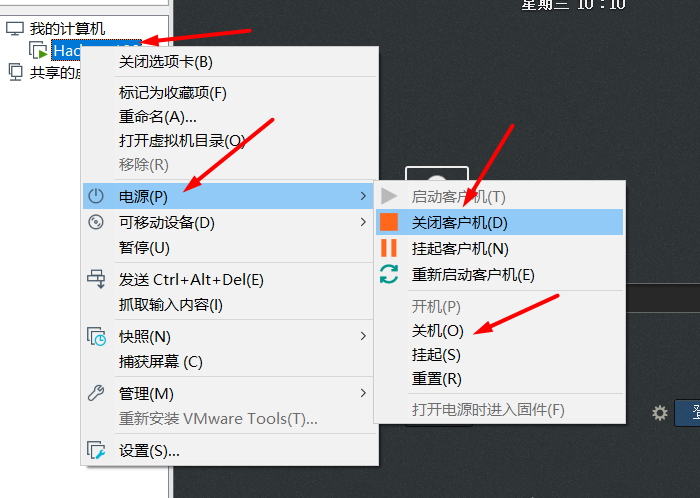
6. Clone the virtual machine after restarting it
- Restart the virtual machine (so that the changes just made are not wrong)

- Shut down the virtual machine
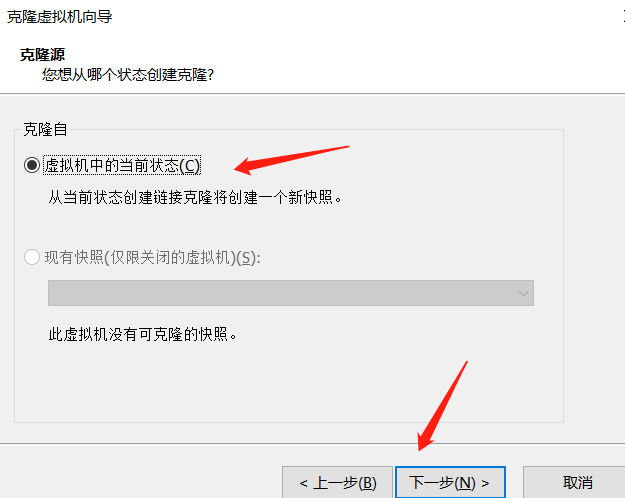
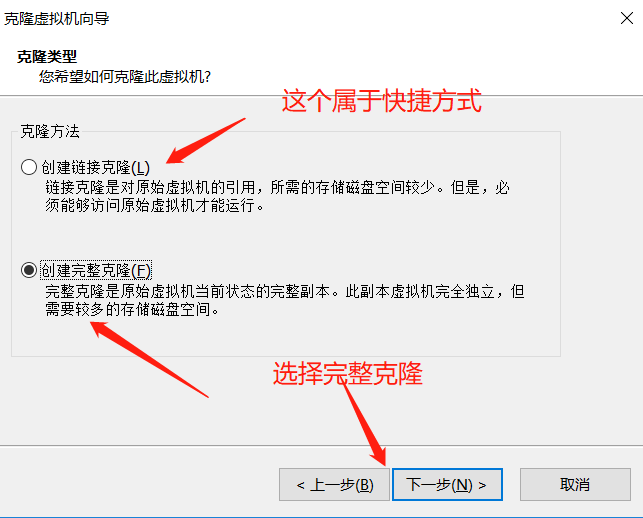
- Clone virtual machine
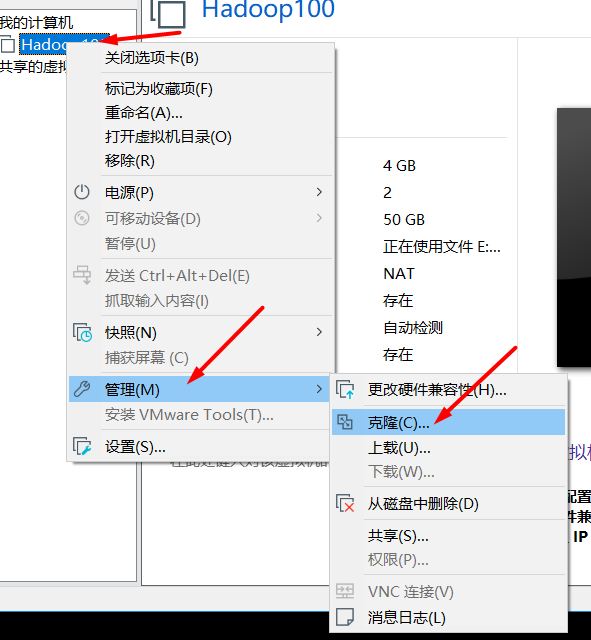
- How to select each option
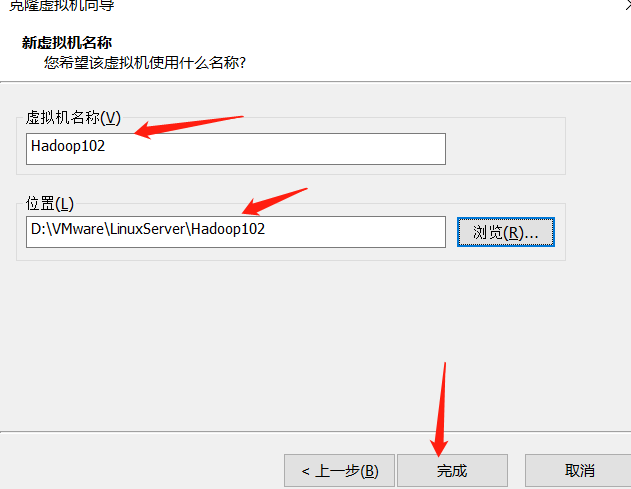
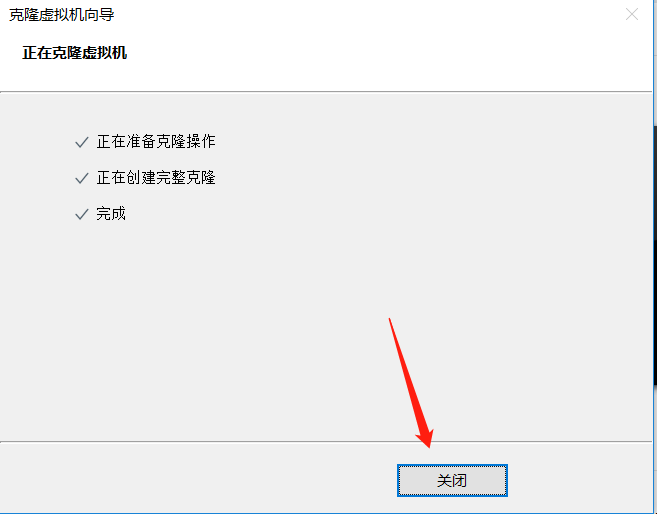
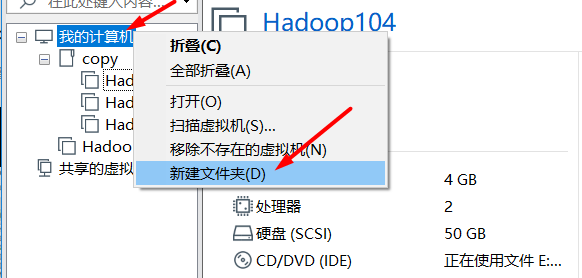
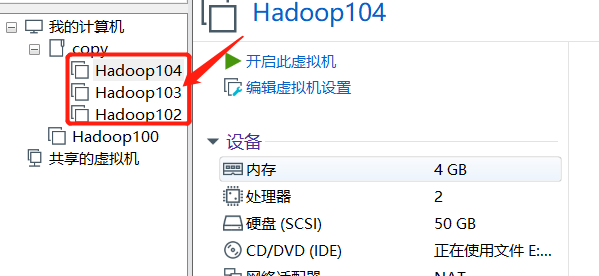
- Clone three virtual machines and put them in a folder. We use the cloned three virtual machines, but we don't need the Hadoop 100 at the beginning. We keep cloning in the future, because the virtual machines are easy to break down in the follow-up study, so we only need to clone three more
- How to delete virtual machines? (here's just how to delete it. It's convenient to delete it when the virtual machine is broken in the future. Now it's OK, so don't really delete it.)
- Remove is only to remove the virtual machine from the list, but it still exists locally and can be added back in the future
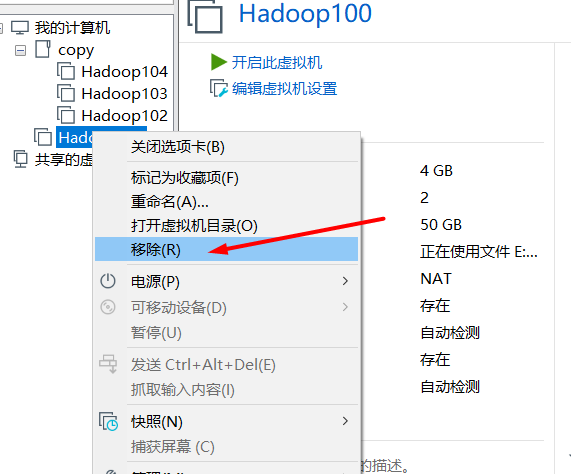
- Completely deleted (unrecoverable)

7. Configure ip and hostname for the cloned virtual machine
- Open Hadoop 102 virtual machine, enter root user, and use vim to edit the ip address

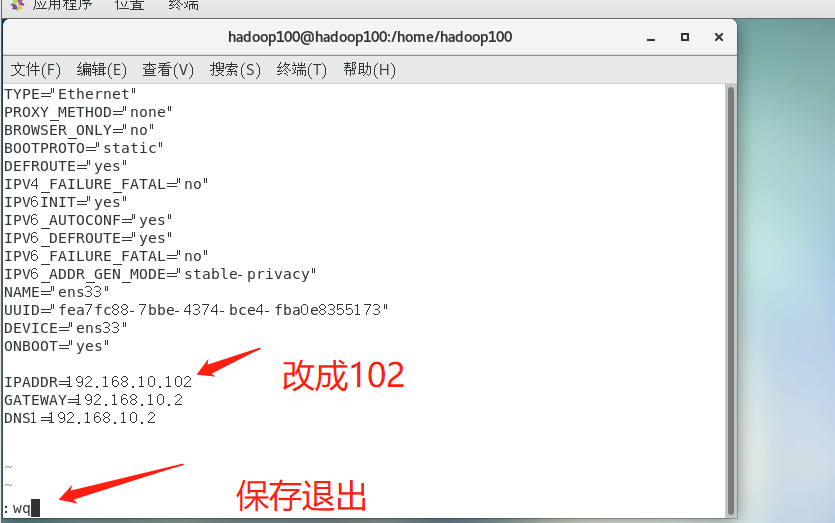
➢ Note that when the following command hits ifcfg-ens After, the number behind each virtual machine is different. You can press the key on the keyboard TAB The key is automatically supplemented to prevent errors
vim /etc/sysconfig/network-scripts/ifcfg-ens33
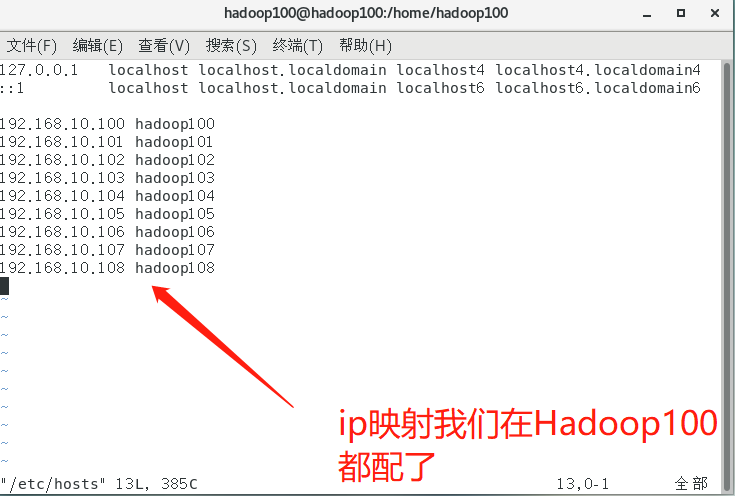
- Change host name


- mapping

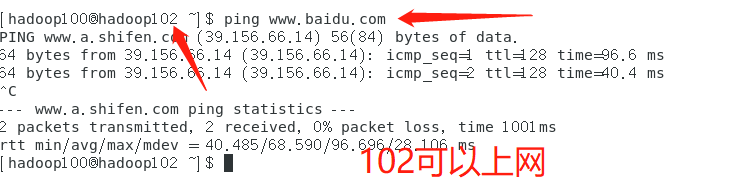
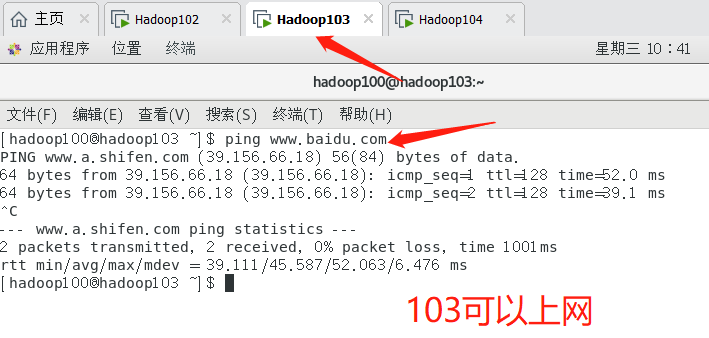
- Restart the virtual machine

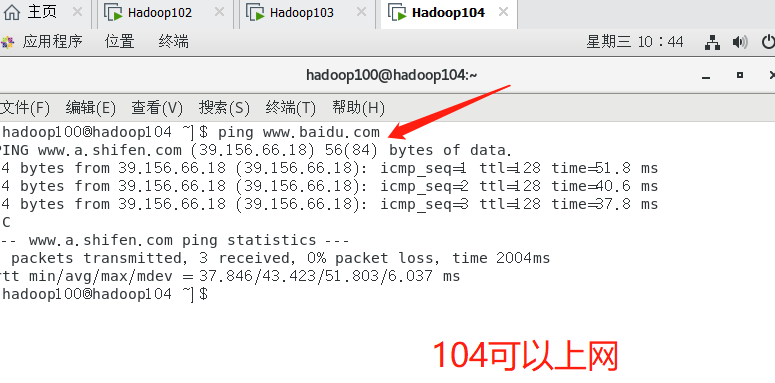
- According to the above steps, configure 103 and 104 virtual machines, change 103ip to 103104ip to 104, change the host name to match your own, and then see whether each virtual machine can access the Internet
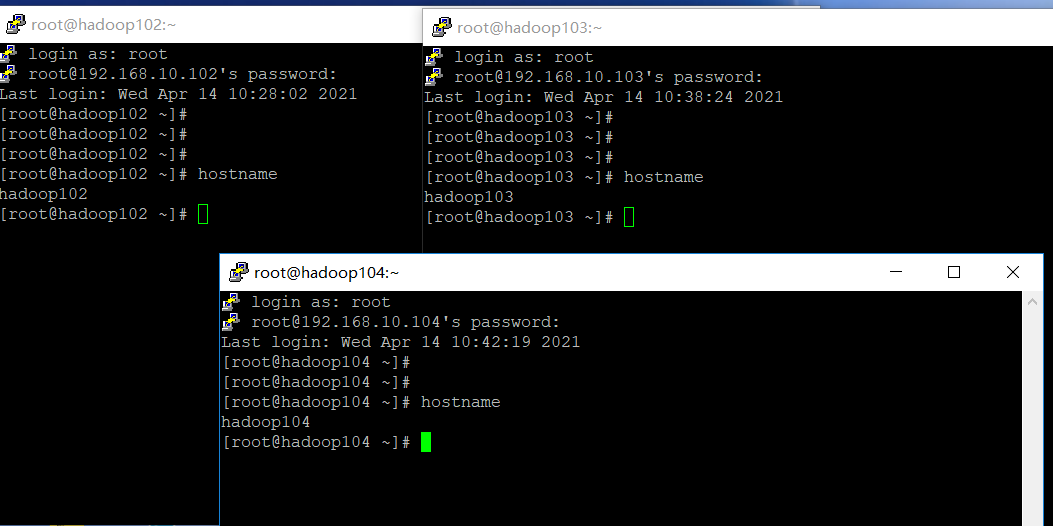
6. Connect three virtual machines remotely through putty tool
2, Development environment
1. Install JDK for virtual machine
| Just install Hadoop 102, and then copy 103 and 104 |
|---|
| First, we need to get jdk8 and Hadoop 3.0 of linux 1. X linux package |
|---|
- JDK https://www.oracle.com/java/technologies/javase/javase-jdk8-downloads.html

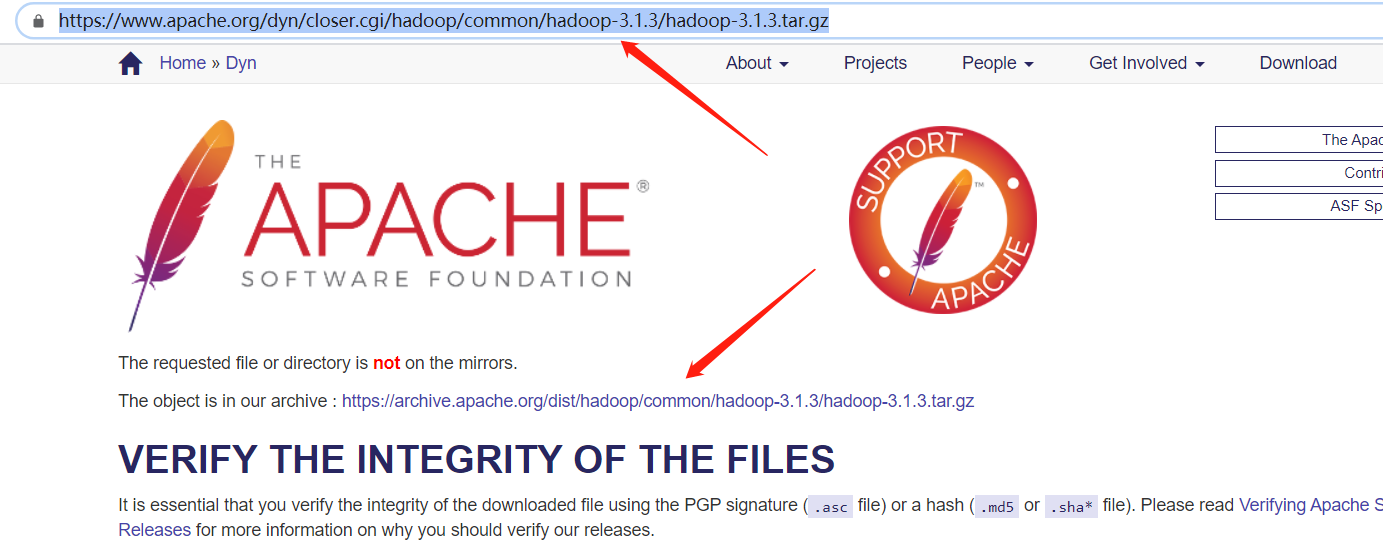
- Hadoop https://www.apache.org/dyn/closer.cgi/hadoop/common/hadoop-3.1.3/hadoop-3.1.3.tar.gz
| Transfer the two packages to the virtual machine through the remote transmission tool |
|---|
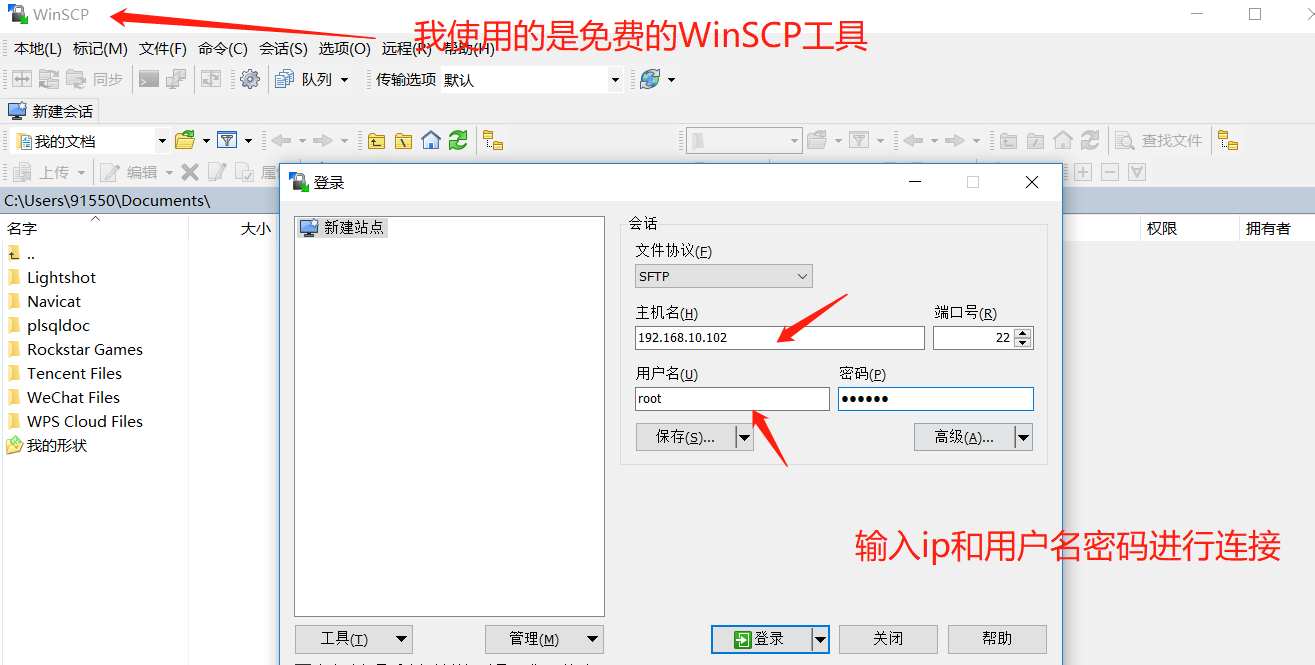
- Connecting virtual machines remotely using WinSCP
- Transfer the package we just downloaded to the virtual machine
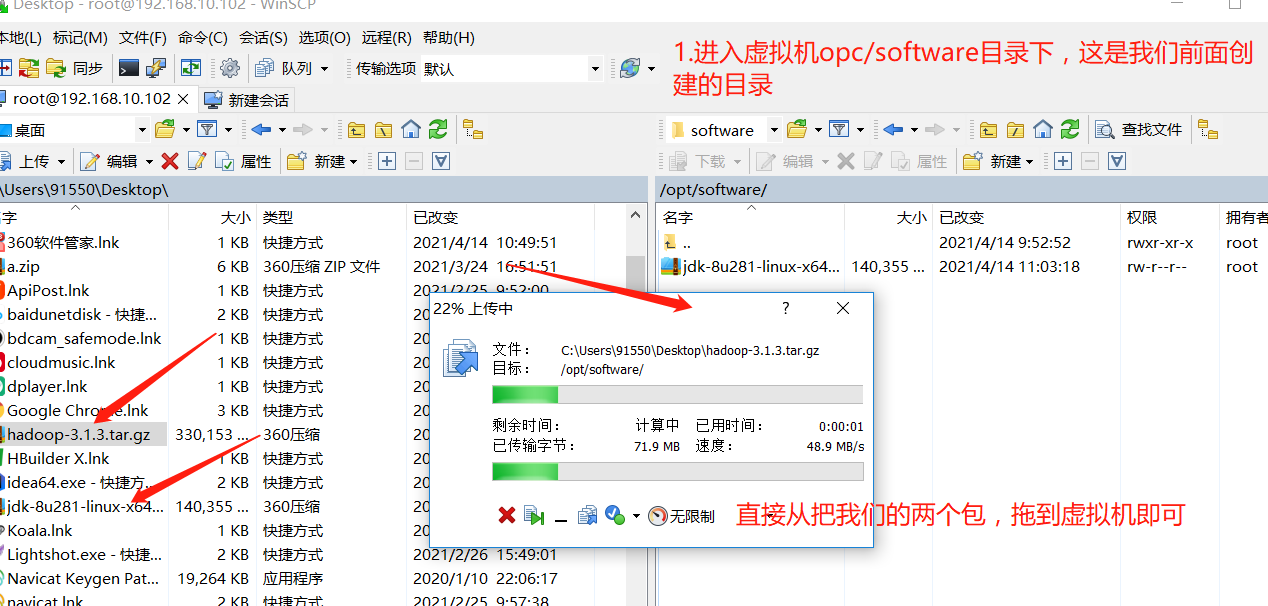
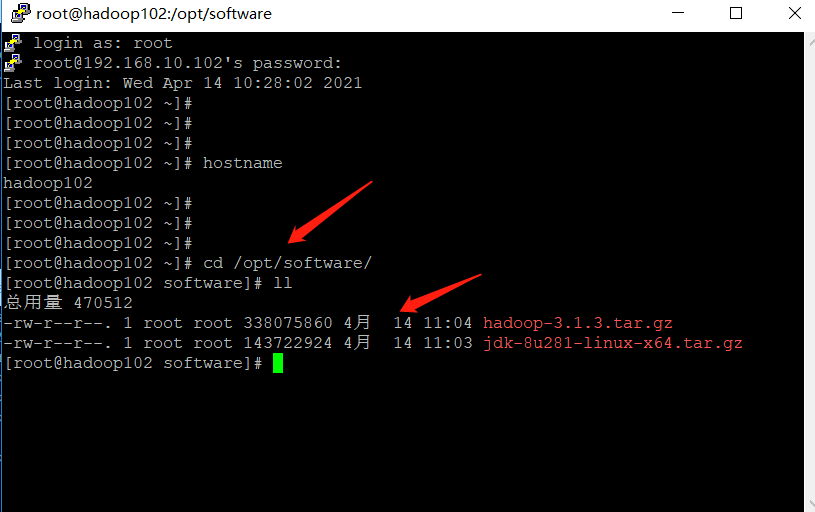
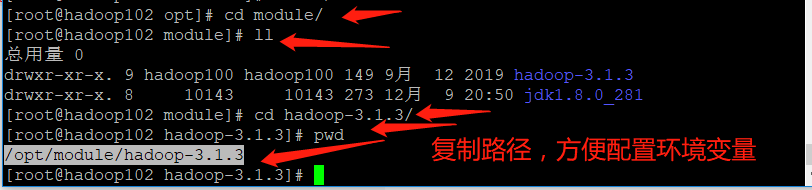
- Enter the virtual machine directory and check whether the file is transferred successfully
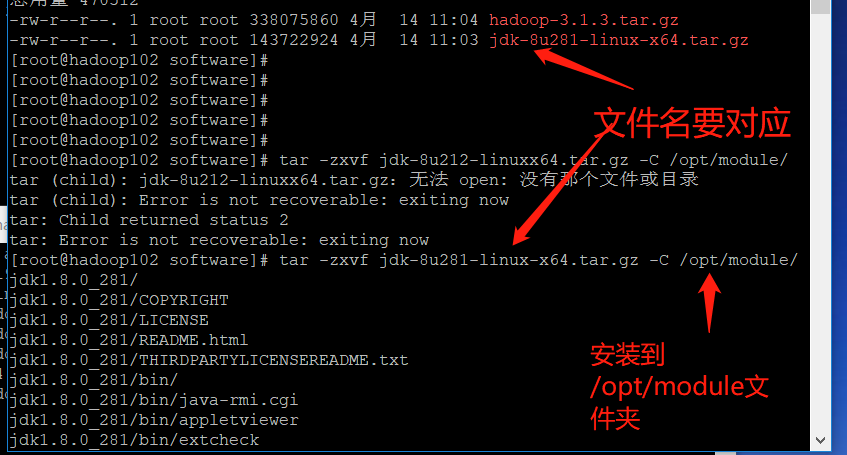
tar -zxvf jdk-8u281-linux-x64.tar.gz -C /opt/module/
| Configure JDK environment variables |
|---|
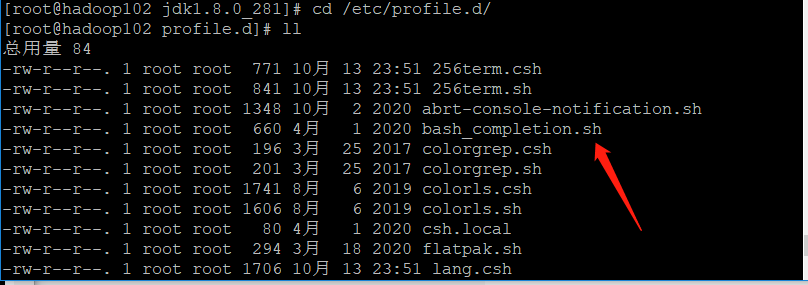
- Enter / etc / profile D folder (it can be seen that there are many files with SH suffix. When the virtual machine starts, these sh files will be loaded in turn and the environment variables will be loaded in)
- Create your own sh file my_env.sh, which means my environment variable, is created and opened directly with vim

- Configure environment variables
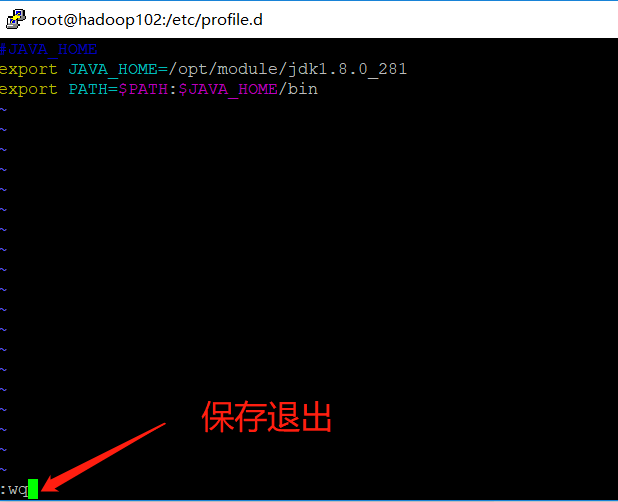
➢ #JAVA_HOME ,#Indicates a comment
➢ export Represents a global declaration and exposes the content
➢ JAVA_HOME=/opt/module/jdk1.8.0_281,to configure JAVA_HOME,Then we install JDK Directory of
➢ $PATH Represents a reference PATH,:Indicates splicing
➢ $PATH:$JAVA_HOME/bin Indicates in the original $PATH On the basis of splicing JDK environment variable
#JAVA_HOME
export JAVA_HOME=/opt/module/jdk1.8.0_281
export PATH=$PATH:$JAVA_HOME/bin
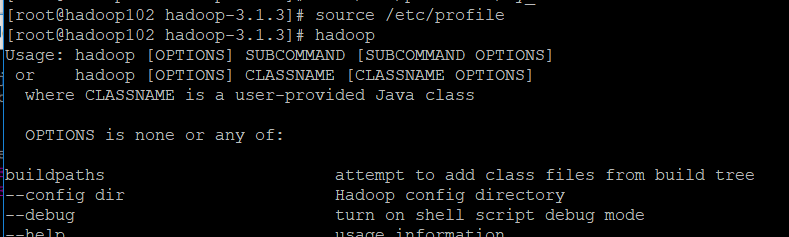
- Reload the environment variables (if no information comes out after entering java, try to restart it)
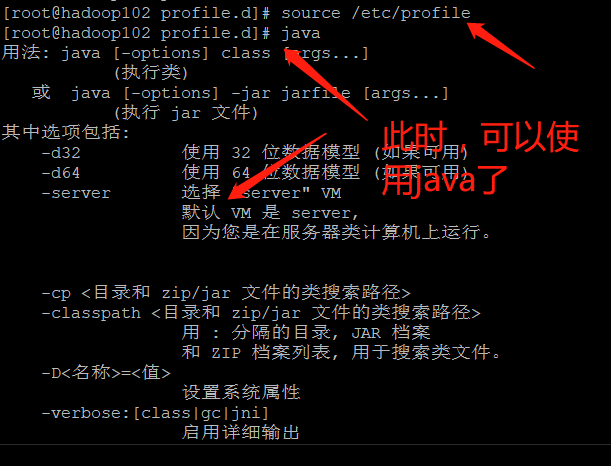
source /etc/profile
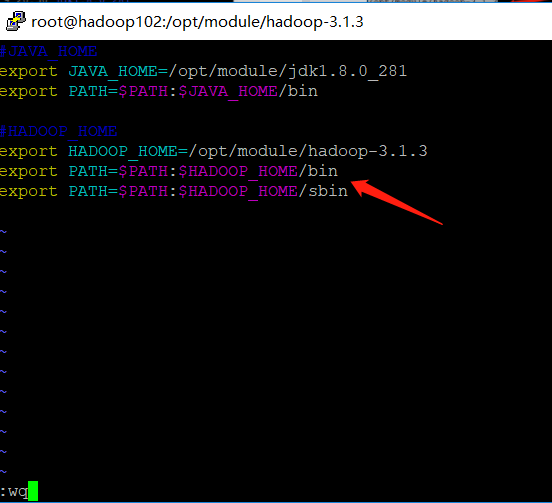
| Install Hadoop and configure Hadoop environment variables |
|---|
| To configure hadoop environment variables, you need to import bin and sbin directories |
| The bin directory mainly includes yarn and other components |
| The sbing directory mainly includes the sh files for starting components such as yarn |
- install

- Configure environment variables

- Check for success
3, Cluster distribution (this chapter mainly introduces common tools to facilitate cluster management)
1. Script distribution
| At present, we only have one virtual machine with JDK and hadoop running environment. We can distribute the environment to two other servers through script distribution |
|---|
| If you don't want to learn scripts, you can choose to install jdk, install hadoop and configure environment variables on the other two virtual machines using the above steps |
1. scp(secure copy)
| scp |
|---|
| scp can copy data between servers |
➢ Basic syntax:
	scp -r $pdir/$fname $user@$host:$pdir/$fname
	Command recurses the path of the file to be copied/User destination name@host:Destination path/name
➢ premise(My following commands are operated according to the following conditions. If you are different from mine, you need to replace it with your own)
	stay hadoop102,hadoop103,hadoop104 All have been created/opt/module and/opt/software
	Two directories, and the two directories have been modified to the same non root Users, such as mine, are
	hadoop100
➢ The command to change the directory to the specified user (I changed it here to hadoop100)
	sudo chown Hadoop100:Hadoop100 -R /opt/module
- On Hadoop 102, copy the jdk to Hadoop 103
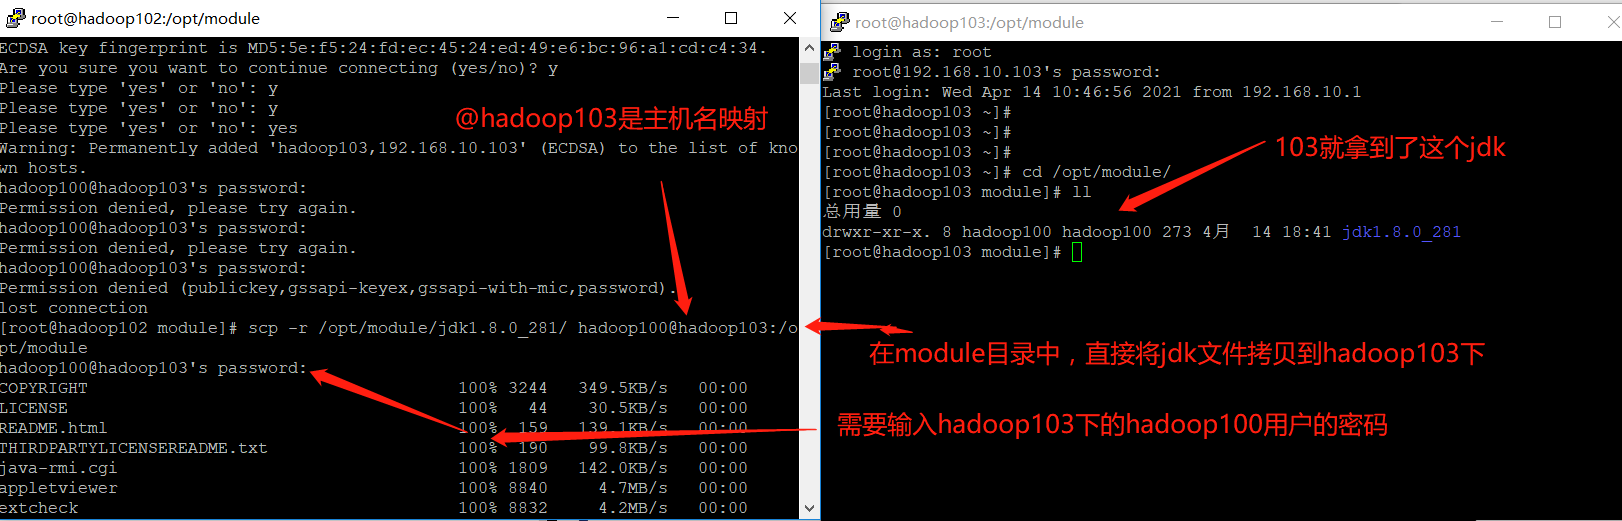
➢ The following command is to use scp The command recursively converts/opt/module/jdk1.8.0_212 catalogue
	Copy to, specify ip Virtual machine/opt/module Directory and belongs to hadoop100 user
	@hadoop103 It is host address mapping, which we introduced earlier, vim /etc/hostname to configure
scp -r /opt/module/jdk1.8.0_212 hadoop100@hadoop103:/opt/module
- On hadoop 103, copy the hadoop installation package of hadoop 102 to hadoop 103 (in fact, it can be transmitted together with the above command to transmit JDK. Here is to introduce different methods)
➢ The following command is,Will specify ip of/opt/module/hadoop-3.1.3(Also specify the owner of this file)
	Copy to current virtual machine /opt/module/Under the directory, the file owner is the current user
scp -r hadoop100@hadoop102:/opt/module/hadoop-3.1.3 /opt/module/
- On hadoop 103, copy all jdk and hadoop in hadoop 102 to hadoop 104
➢ The following command is,Will specify ip(hadoop102)Copy the specified directory of to another specified directory ip(hadoop104)
	Under the specified directory of
scp -r hadoop100@hadoop102:/opt/module/* hadoop100@hadoop104:/opt/module
2. rsync remote synchronization tool
| A very important thing |
|---|
| [ hadoop100@hadoop102 ~]As long as the user sees the current directory, @ home ~, the following code will appear frequently in the current directory, @ home ~: as long as the user sees the current directory |
| rsync |
|---|
| It is mainly used for backup and mirroring |
| Fast, avoid copying the same content and support symbolic links |
| Difference between rsync and scp: copying files with rsync is faster than scp. rsync only updates the difference files. scp is to copy all the files. |
➢ Basic syntax:
	rsync -av $pdir/$fname $user@$host:$pdir/$fname
	The command option parameter is the path of the file to be copied/User destination name@host:Destination path/name
	among
		-a Archive copy
		-v Show copy process
- In Hadoop 103, if you perform the previous scp operation, we can make some changes to the files just copied, and then synchronize the files of Hadoop 102 through rsync for recovery
➢ Enter first hadoop-3.1.3 And then delete wcinput folder
	[hadoop100@hadoop103 hadoop-3.1.3]$ rm -rf wcinput/
- In Hadoop 102, the files of Hadoop 102 are synchronized to Hadoop 103
➢ Enter first hadoop-3.1.3 Under the directory
➢ The following command is,By archiving copies and displaying the replication process
	take hadoop-3.1.3 Synchronize files to hadoop103 In the file
rsync -av hadoop-3.1.3/ hadoop100@hadoop103:/opt/module/hadoop-3.1.3/
3. Cluster distribution script
| Circularly copy files to the same directory of all nodes |
|---|
| We want the script to work in any path, so we put it in the path where the global environment variable is declared |
- Create an xsync file in the / home/hadoop100/bin directory

[hadoop100@hadoop102 opt]$ cd /home/hadoop100
[hadoop100@hadoop102 ~]$ mkdir bin
[hadoop100@hadoop102 ~]$ cd bin
[hadoop100@hadoop102 bin]$ vim xsync
- Write the code (directly copy the following code. In the past, you mainly need to press the i key to enter the insertion mode, otherwise you will start inserting when you encounter the i letter of the copied content. The linux paste command is shift+insert)
It is for reading and cannot be used directly. There are too many comments in it. If you want to copy and execute, please copy the following version
#!/bin/bash
#1. Number of judgment parameters
if [ $# -lt 1 ] # Judge whether the parameter is less than 1, $#Indicates the number of parameters obtained, - lt indicates less than
then # If the condition is true, execute
echo Not Enough Arguement! # Prompt no parameters
exit; # Exit program
fi # if end
#2. Traverse all machines in the cluster
for host in hadoop102 hadoop103 hadoop104
do # The loop body do and done are a pair, marking the beginning and end of the loop body
echo ==================== $host ==================== # Printing $host means getting the value of the current loop variable host
#3. Traverse all directories and send them one by one
for file in $@ # Loop, traversing the number of directories, $@ represents the incoming files, such as a.txt and b.txt
do # Circulatory body
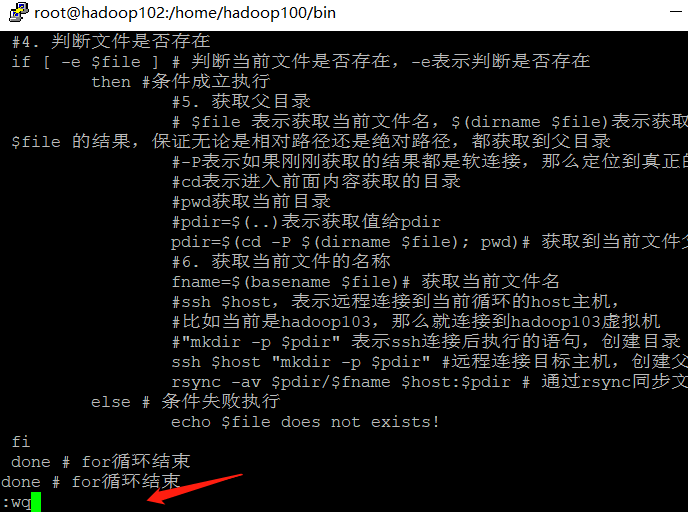
#4. Judge whether the document exists
if [ -e $file ] # Judge whether the current file exists, - e means judge whether it exists
then #Conditions established and implemented
#5. Get parent directory
# The absolute path of $dirfile or the relative path of $dirfile indicates the execution result, regardless of whether it is the absolute path of $dirfile
#-P means that if the results just obtained are all soft connections, locate the real directory
#cd means to enter the directory obtained from the previous content
#pwd get current directory
#pdir=$(..) Indicates to get the value to pdir
pdir=$(cd -P $(dirname $file); pwd)# Get parent directory of current file
#6. Get the name of the current file
fname=$(basename $file)# Get current file name
#ssh $host indicates that the host is remotely connected to the current loop,
#For example, if it is currently Hadoop 103, connect to the Hadoop 103 virtual machine
#"mkdir -p $pdir" indicates the statement executed after ssh connection to create directory
ssh $host "mkdir -p $pdir" #Connect to the target host remotely and create the parent directory
rsync -av $pdir/$fname $host:$pdir # Synchronize files via rsync
else # Condition failed to execute
echo $file does not exists!
fi
done # End of for loop
done # End of for loop
#!/bin/bash
#1. Number of judgment parameters
if [ $# -lt 1 ]
then
 echo Not Enough Arguement!
 exit;
fi
#2. Traverse all machines in the cluster
for host in hadoop102 hadoop103 hadoop104
do
 echo ==================== $host ====================
 #3. Traverse all directories and send them one by one
 for file in $@
 do
 #4. Judge whether the document exists
 if [ -e $file ]
 then
 #5. Get parent directory
 pdir=$(cd -P $(dirname $file); pwd)
 #6. Get the name of the current file
 fname=$(basename $file)
 ssh $host "mkdir -p $pdir"
 rsync -av $pdir/$fname $host:$pdir
 else
 echo $file does not exists!
 fi
 done
done
- Make the script xsync have execution permission
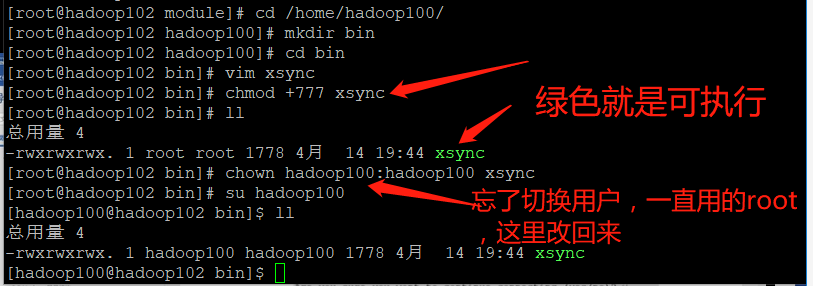
➢ chmod +x Indicates to the execution authority,+x Indicates that the file name is displayed in other colors, such as chmod +777 It's green
[hadoop100@hadoop102 bin]$ chmod +x xsync
- Test script
[hadoop100@hadoop102 ~]$ xsync /home/hadoop100/bin
- Copy the script to / bin for global use. This / bin is from linux, not from home
[hadoop100@hadoop102 bin]$ sudo cp xsync /bin/
- Synchronize environment variable configuration (root owner)
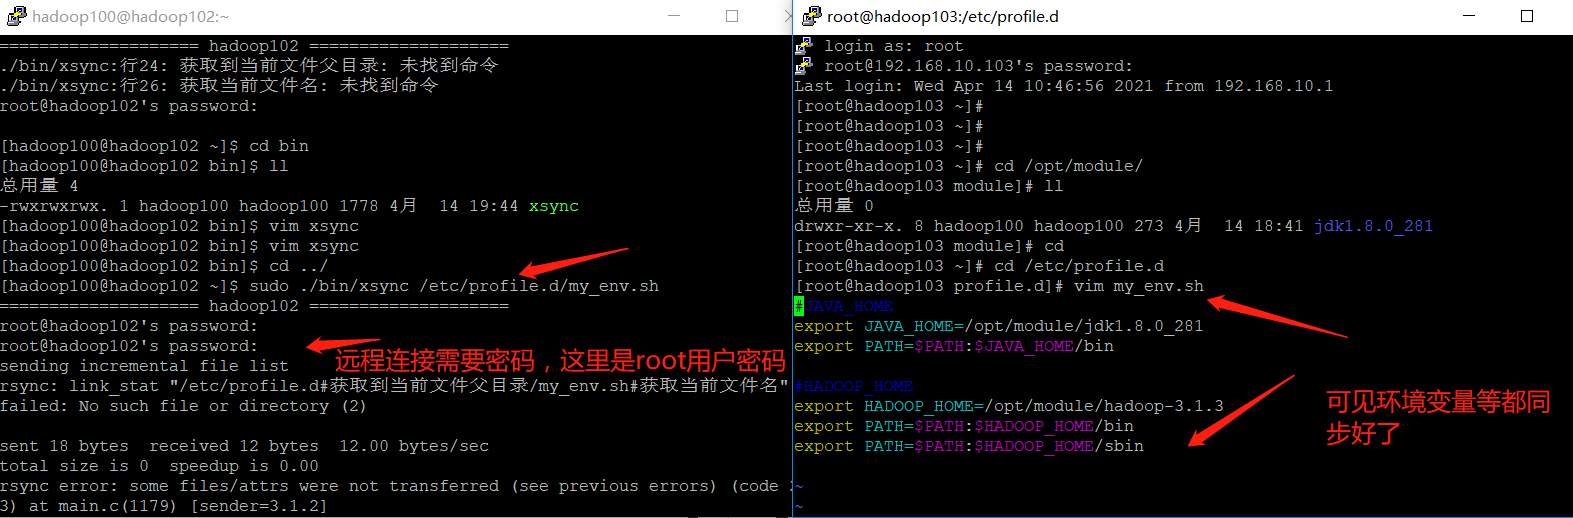
➢ Note: if used sudo,that xsync Be sure to complete its path,
	because sudo The command is by root To execute, and we xsync stay hadoop100 of home Inside,
	root It can't be executed directly, but only through./Come and find an absolute path to help him find it
[hadoop100@hadoop102 ~]$ sudo ./bin/xsync /etc/profile.d/my_env.sh
- Make environment variables effective
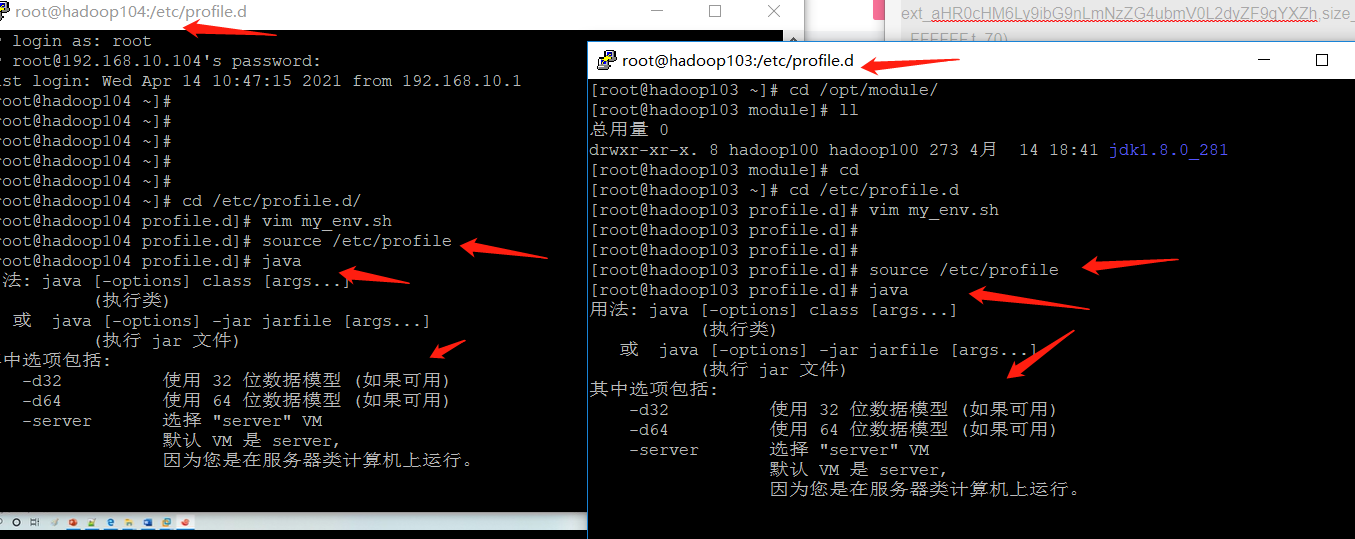
[hadoop100@hadoop103 bin]$ source /etc/profile
[hadoop100@hadoop104 opt]$ source /etc/profile
2. ssh password free login (solve the problem that you need to enter a password every time when distributing scripts)
| Configure ssh, and its simple, direct introduction to the command |
|---|
➢ Basic syntax, remote connection to another server
	ssh Of another computer IP address
➢ ssh Error connecting Host key verification failed Solutions
	[atguigu@hadoop102 ~]$ ssh hadoop103
➢ If the following appears
	Are you sure you want to continue connecting (yes/no)?
	input yes,And enter
➢ Disconnect the remote connection and return to your server
	[atguigu@hadoop103 ~]$ exit
- Secret free login principle (set a private key and a public key, we will distribute the public key to others, and then these people will save the public key. We keep the private key confidential. Each time we establish a connection, I first send a data encrypted with the private key to the connection object, and the connection object obtains the encrypted data. Only the corresponding public key can be decrypted. If the decryption is successful, it means that it can be established Connect, then encrypt a copy of data with the public key and send it back. After receiving the data, we decrypt it with the private key to complete the connection)

- Generate public and private keys
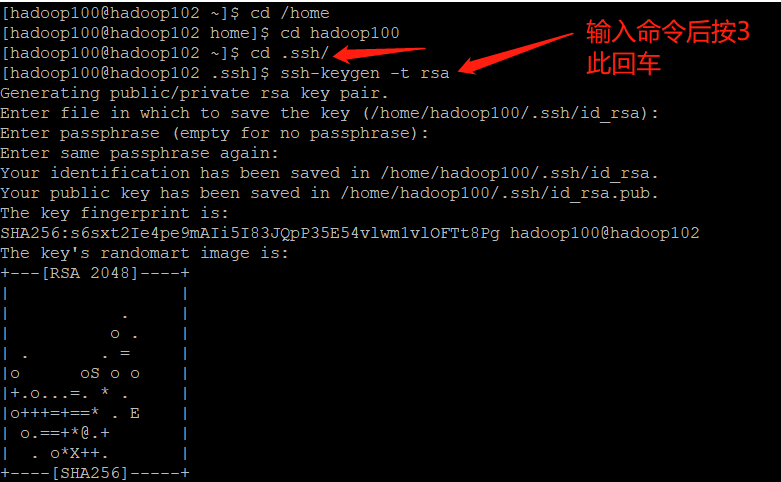
[hadoop100@hadoop102 .ssh]$ pwd /home/hadoop100/.ssh
[hadoop100@hadoop102 .ssh]$ ssh-keygen -t rsa
 Then hit (three carriage returns) and two files will be generated id_rsa(Private key) id_rsa.pub((public key)
- Copy the password free public key to the target machine
[hadoop100@hadoop102 .ssh]$ ssh-copy-id hadoop102
[hadoop100@hadoop102 .ssh]$ ssh-copy-id hadoop103
[hadoop100@hadoop102 .ssh]$ ssh-copy-id hadoop104
- Hadoop 100 users are used on Hadoop 103, and some non secret logins are also configured to Hadoop 102, 103 and 104. Similarly, the same commands need to be configured on Hadoop 104
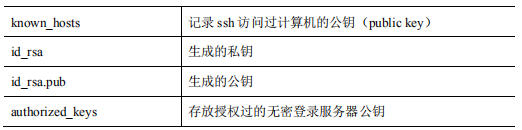
- File functions under the. ssh folder (~ /. ssh)
4, Cluster configuration
| hadoop 3 running mode, we only introduce fully distributed |
|---|

| Fully distributed operation mode requirements |
|---|
| We have already done the first five steps |
- Prepare 3 clients (turn off firewall, static IP, host name) as previously done
- Done before installing JDK
- Configuration of environment variables has been done previously
- Done before installing Hadoop
- Configuration of environment variables has been done previously
- Configure cluster
- Single point start
- Configure ssh
- Get together and test the cluster
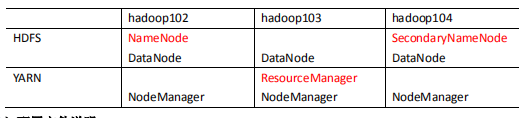
| Cluster deployment planning |
|---|
- NameNode and SecondaryNameNode should not be installed on the same server
- Resource manager also consumes a lot of memory and should not be configured on the same machine as NameNode and SecondaryNameNode.
- If your machine is very powerful, you can ignore the above two and install it on the same server
| Profile description |
|---|
| Hadoop configuration files are divided into two types: default configuration files and user-defined configuration files. Only when users want to modify a default configuration value, they need to modify the user-defined configuration file and change the corresponding attribute value |
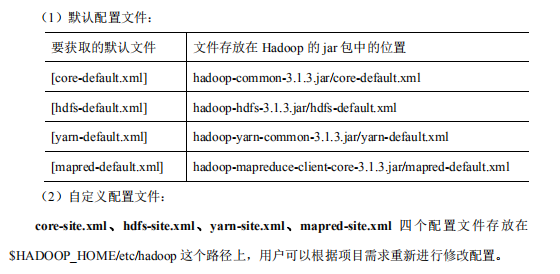
1. Configuration file

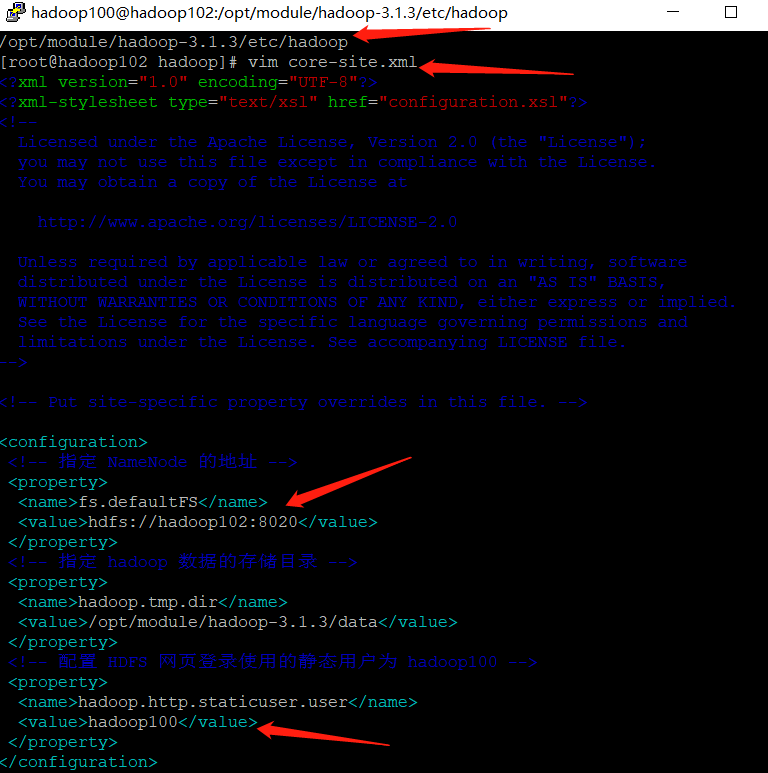
[hadoop100@hadoop102 ~]$ cd $HADOOP_HOME/etc/hadoop
[hadoop100@hadoop102 hadoop]$ vim core-site.xml

<?xml version="1.0" encoding="UTF-8"?>
<?xml-stylesheet type="text/xsl" href="configuration.xsl"?>
<configuration>
 <!-- appoint NameNode Address of -->
 <property>
  <name>fs.defaultFS</name>
  <value>hdfs://hadoop102:8020</value>
 </property>
 <!-- appoint hadoop Storage directory of data -->
 <property>
  <name>hadoop.tmp.dir</name>
  <value>/opt/module/hadoop-3.1.3/data</value>
 </property>
 <!-- to configure HDFS The static user used for web page login is hadoop100 -->
 <property>
  <name>hadoop.http.staticuser.user</name>
  <value>hadoop100</value>
 </property>
</configuration>
| HDFS configuration HDFS site xml |
|---|
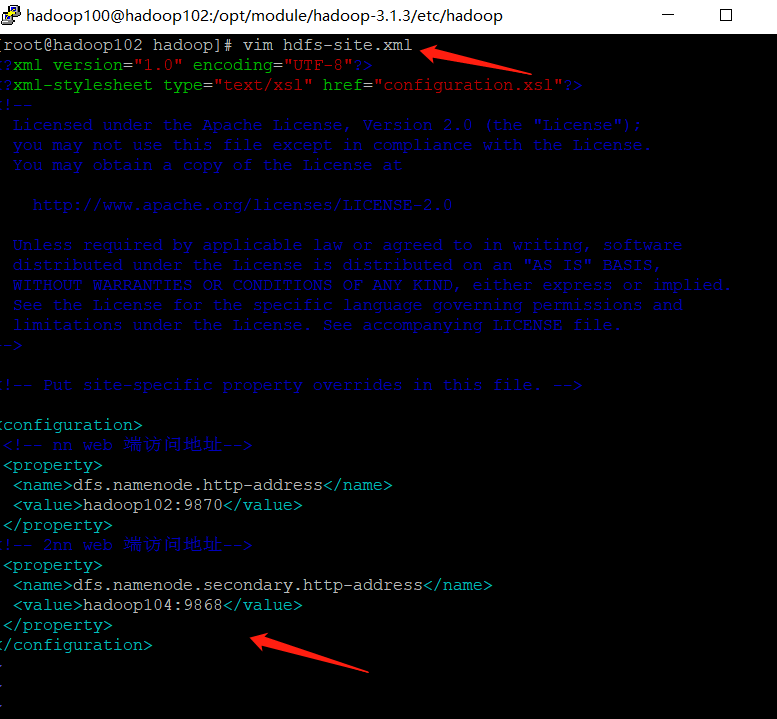
[hadoop100@hadoop102 hadoop]$ vim hdfs-site.xml

<?xml version="1.0" encoding="UTF-8"?>
<?xml-stylesheet type="text/xsl" href="configuration.xsl"?>
<configuration>
 <!-- nn web End access address-->
 <property>
  <name>dfs.namenode.http-address</name>
  <value>hadoop102:9870</value>
 </property>
<!-- 2nn web End access address-->
 <property>
  <name>dfs.namenode.secondary.http-address</name>
  <value>hadoop104:9868</value>
 </property>
</configuration>
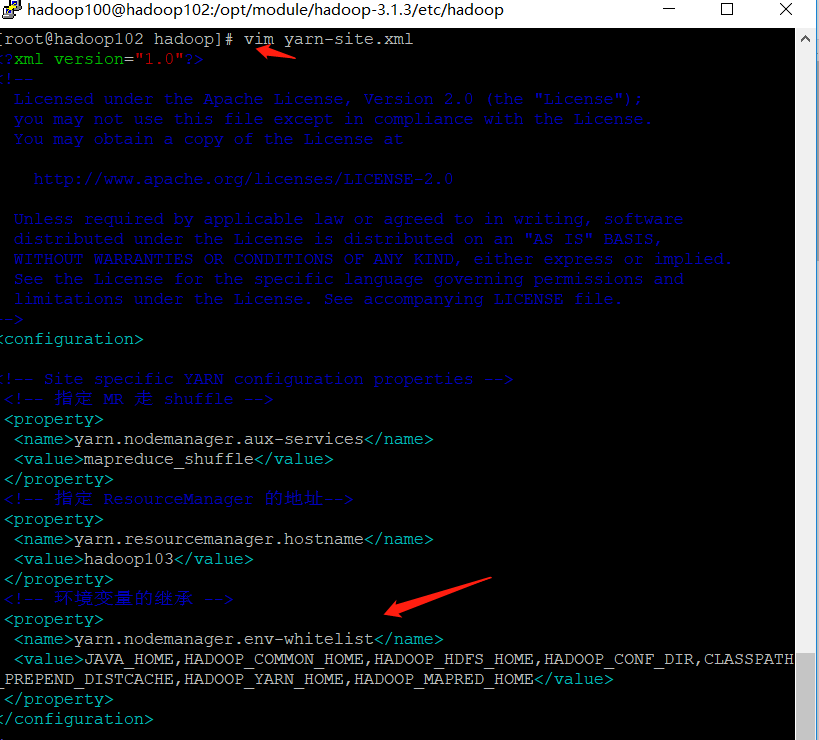
[hadoop100@hadoop102 hadoop]$ vim yarn-site.xml

<?xml version="1.0" encoding="UTF-8"?>
<?xml-stylesheet type="text/xsl" href="configuration.xsl"?>
<configuration>
 <!-- appoint MR go shuffle -->
 <property>
  <name>yarn.nodemanager.aux-services</name>
  <value>mapreduce_shuffle</value>
 </property>
 <!-- appoint ResourceManager Address of-->
 <property>
  <name>yarn.resourcemanager.hostname</name>
  <value>hadoop103</value>
 </property>
 <!-- Inheritance of environment variables -->
 <property>
  <name>yarn.nodemanager.env-whitelist</name>
  <value>JAVA_HOME,HADOOP_COMMON_HOME,HADOOP_HDFS_HOME,HADOOP_CONF_DIR,CLASSPATH_PREPEND_DISTCACHE,HADOOP_YARN_HOME,HADOOP_MAPRED_HOME</value>
 </property>
</configuration>
| MapReduce configures mapred site xml |
|---|
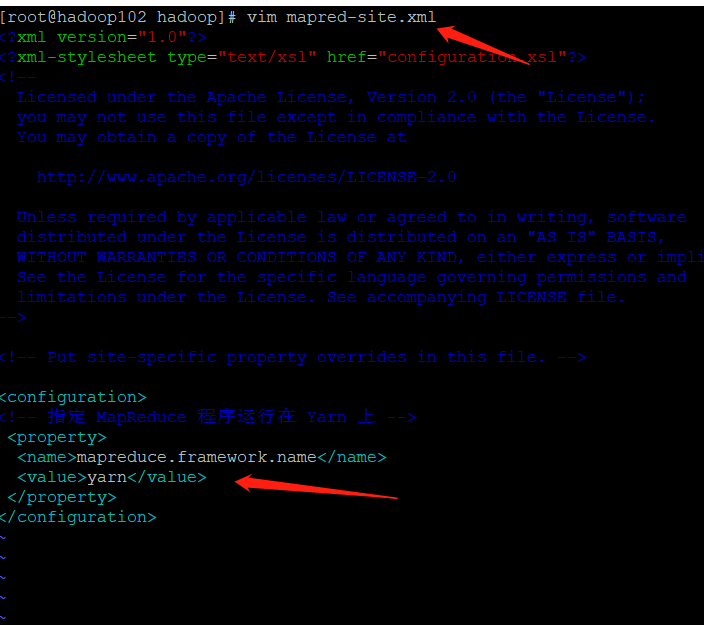
[hadoop100@hadoop102 hadoop]$ vim mapred-site.xml

<?xml version="1.0" encoding="UTF-8"?>
<?xml-stylesheet type="text/xsl" href="configuration.xsl"?>
<configuration>
<!-- appoint MapReduce The program runs on Yarn upper -->
 <property>
  <name>mapreduce.framework.name</name>
  <value>yarn</value>
 </property>
</configuration>
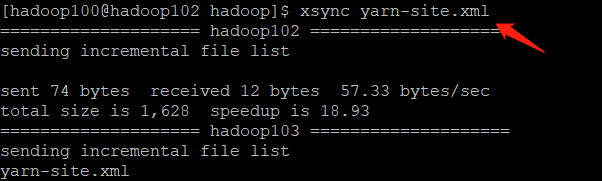
| Cluster distribution profile |
|---|
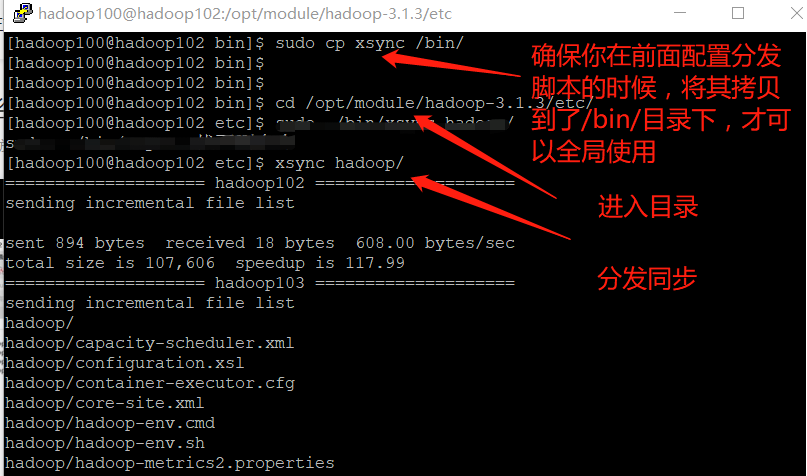
[hadoop100@hadoop102 hadoop]$ xsync /opt/module/hadoop-3.1.3/etc/hadoop/
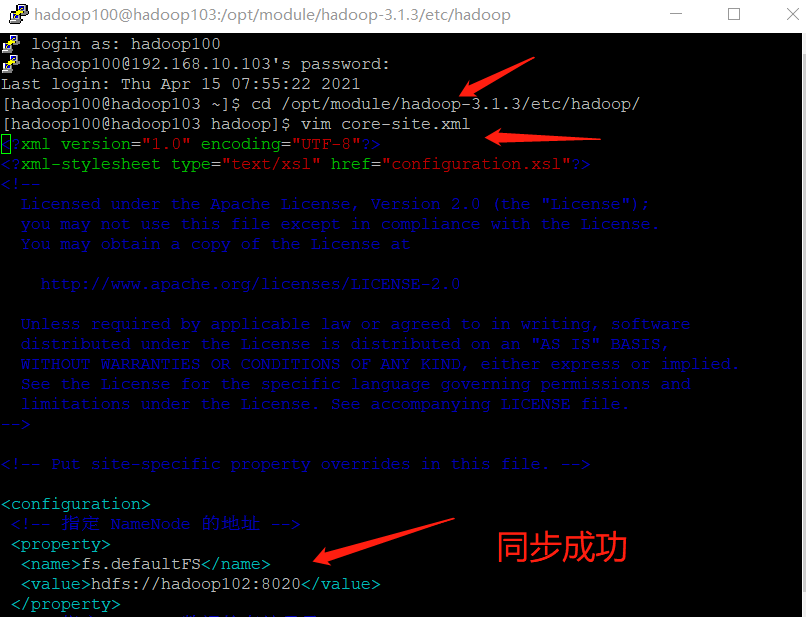
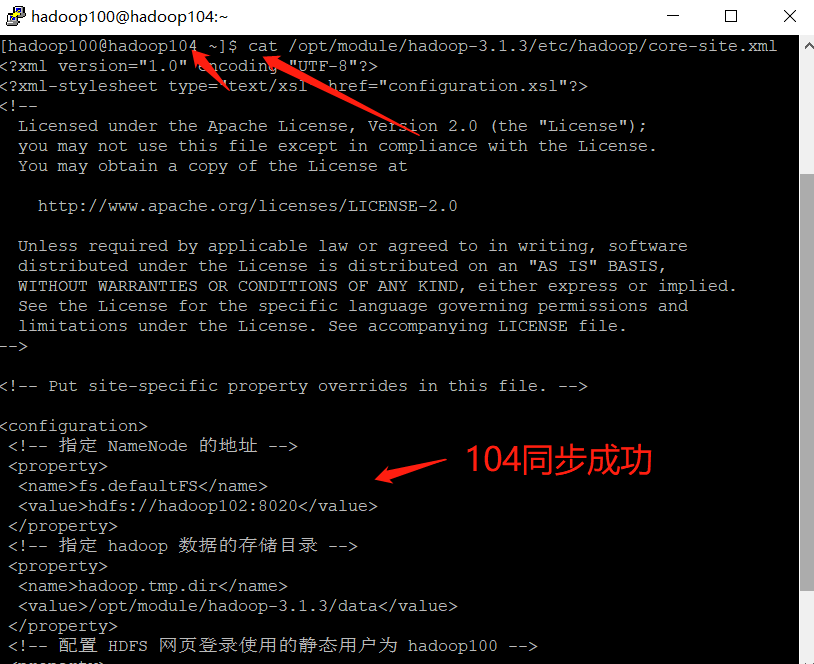
[hadoop100@hadoop103 ~]$ cat /opt/module/hadoop-3.1.3/etc/hadoop/core-site.xml
[hadoop100@hadoop104 ~]$ cat /opt/module/hadoop-3.1.3/etc/hadoop/core-site.xml
2. Group cluster (just finished configuration, now it's time to start)
| Configure workers |
|---|
| workers tell how many nodes there are in the hadoop cluster. We have three nodes in total, so we configure three |

➢ to configure workers
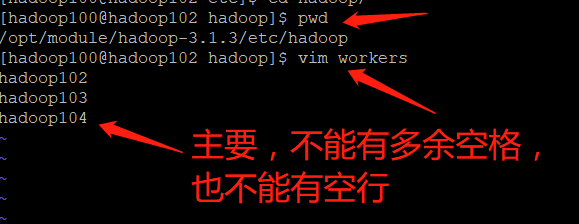
[hadoop100@hadoop102 hadoop]$ vim /opt/module/hadoop-3.1.3/etc/hadoop/workers
➢ The contents of the file are as follows. Note: no spaces are allowed at the end of the contents added in the file, and no empty lines are allowed in the file.
hadoop102
hadoop103
hadoop104
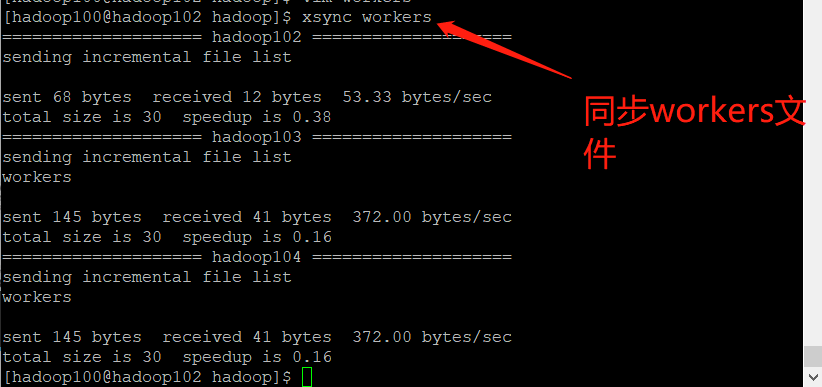
➢ Synchronize all node profiles
[hadoop100@hadoop102 hadoop]$ xsync /opt/module/hadoop-3.1.3/etc
- If the cluster is started for the first time, the NameNode needs to be formatted
The NameNode needs to be formatted in the Hadoop 102 node (Note: formatting NameNode will generate a new cluster id, which will lead to the inconsistency between the cluster IDs of NameNode and datanode, and the cluster cannot find the past data. If the cluster reports an error during operation and needs to reformat NameNode, be sure to stop the NameNode and datanode process first, and delete the data and logs directories of all machines before formatting (chemical)
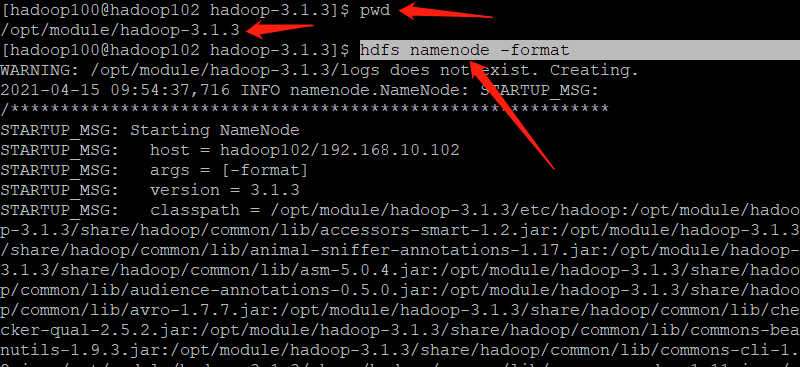
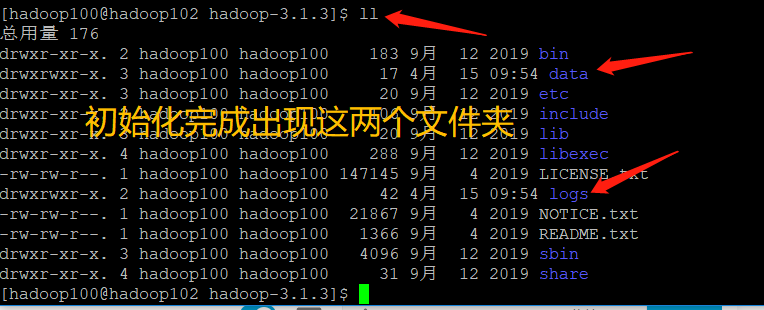
[hadoop100@hadoop102 hadoop-3.1.3]$ hdfs namenode -format
- Start HDFS


[hadoop100@hadoop102 hadoop-3.1.3]$ sbin/start-dfs.sh
- Start YARN on the node (Hadoop 103) where the resource manager is configured
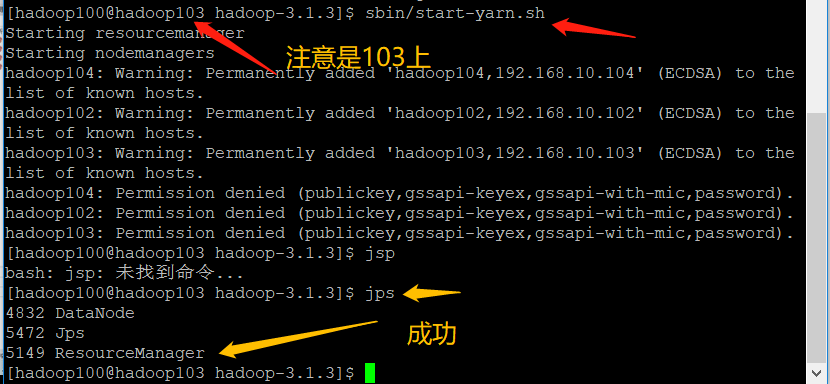
[hadoop100@hadoop103 hadoop-3.1.3]$ sbin/start-yarn.sh
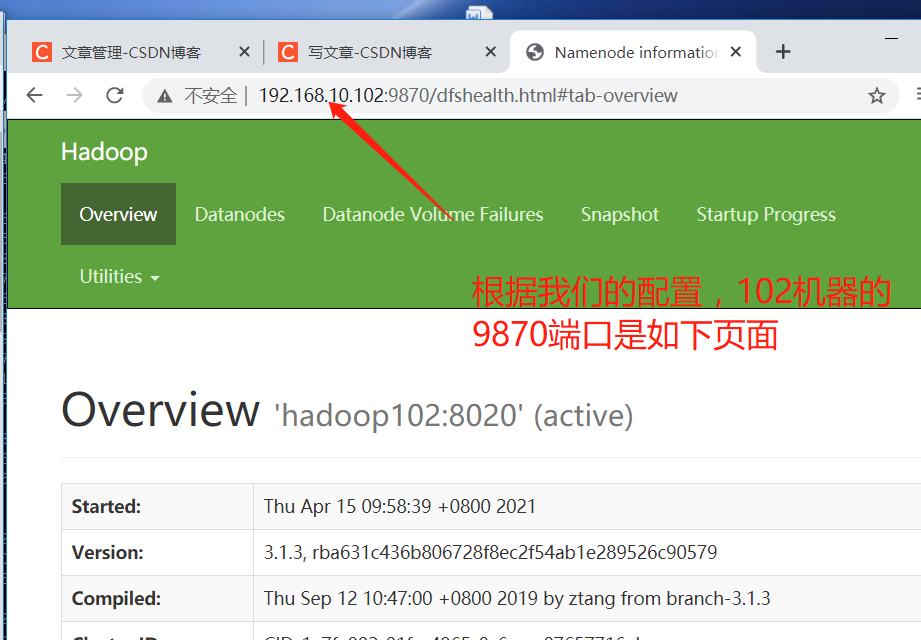
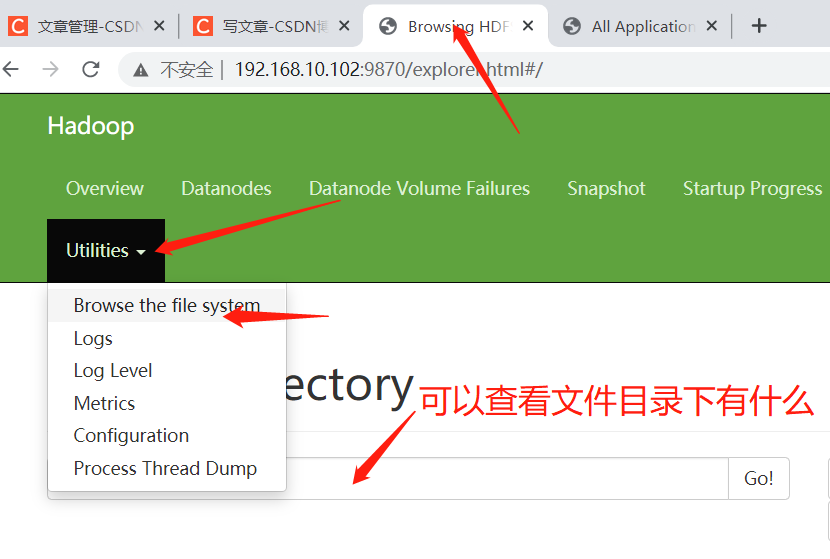
- View the NameNode of HDFS on the Web side
- Browser input http://hadoop102:9870
- View data information stored on HDFS
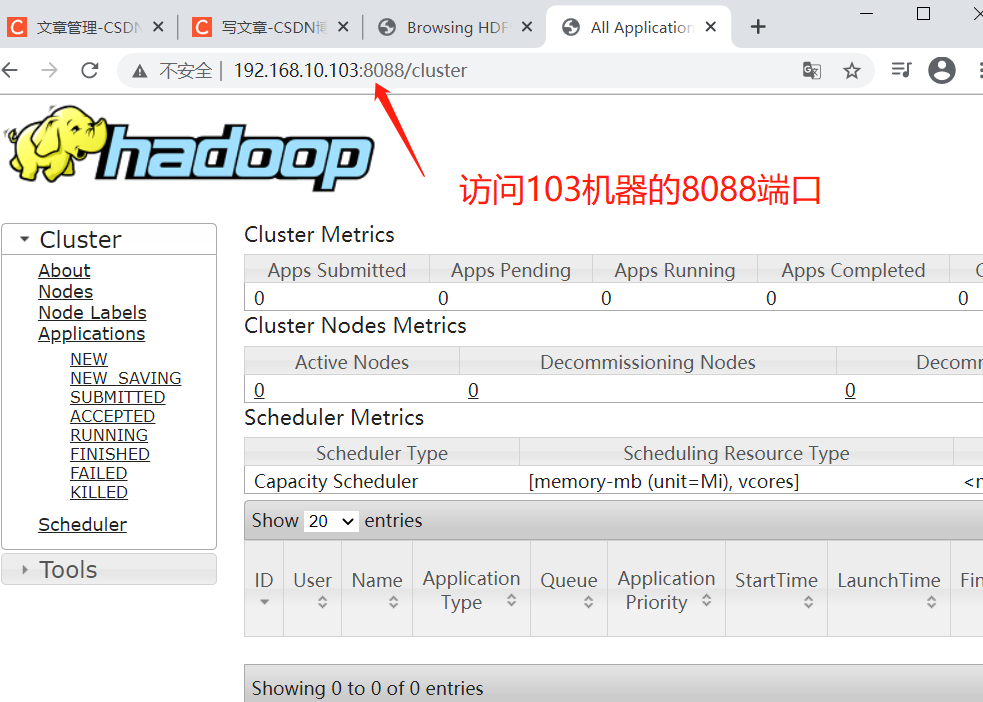
- View YARN's ResourceManager on the Web
- Enter in the browser: http://hadoop103:8088
- View Job information running on YARN
| Basic cluster test (just upload 1. Files to the cluster and do it. If you haven't learned anything else, it's hard to understand. Just understand it) |
|---|
- Upload files to cluster
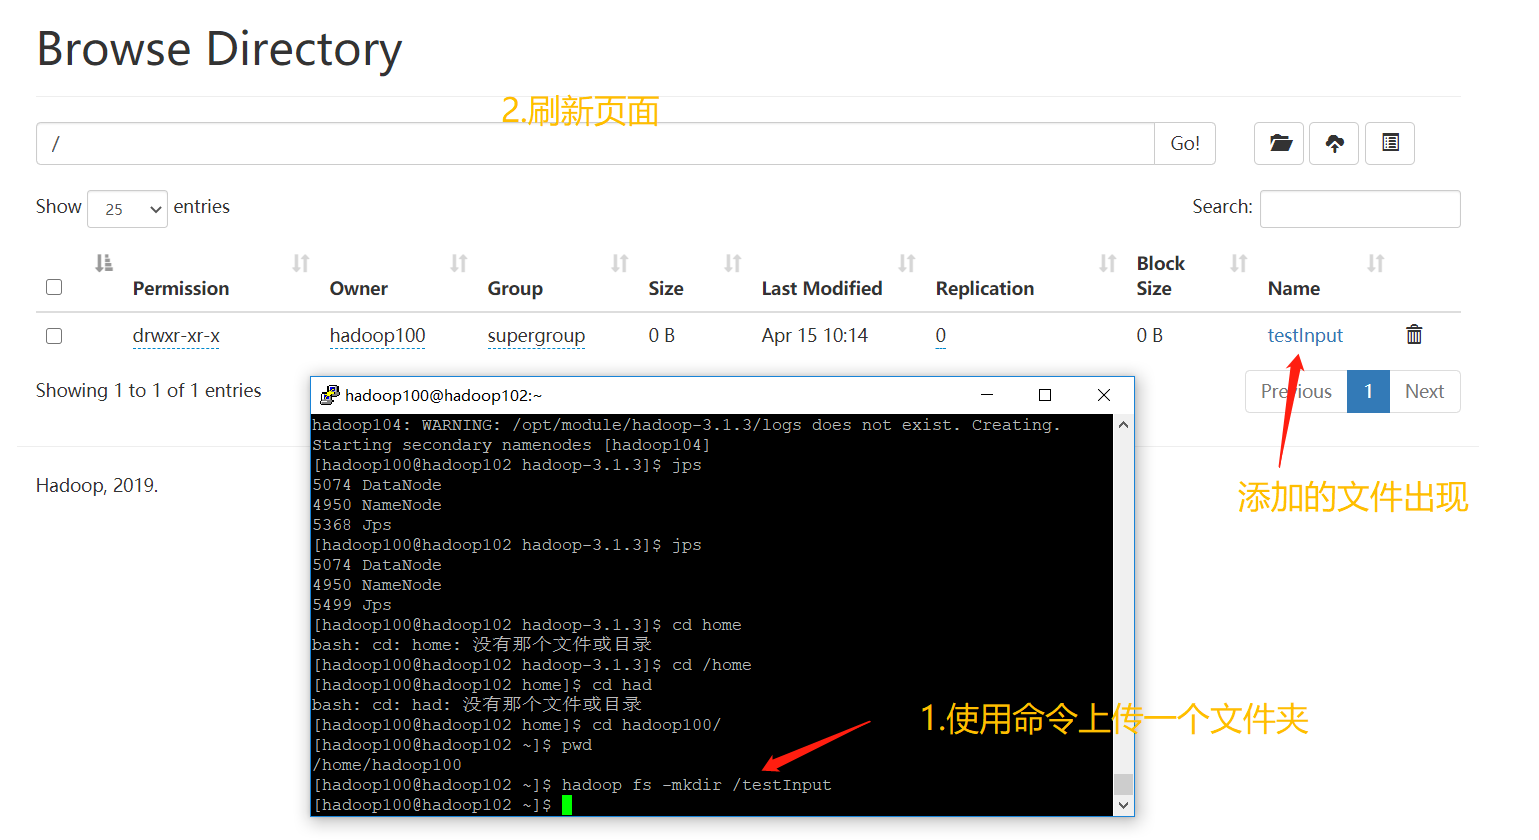
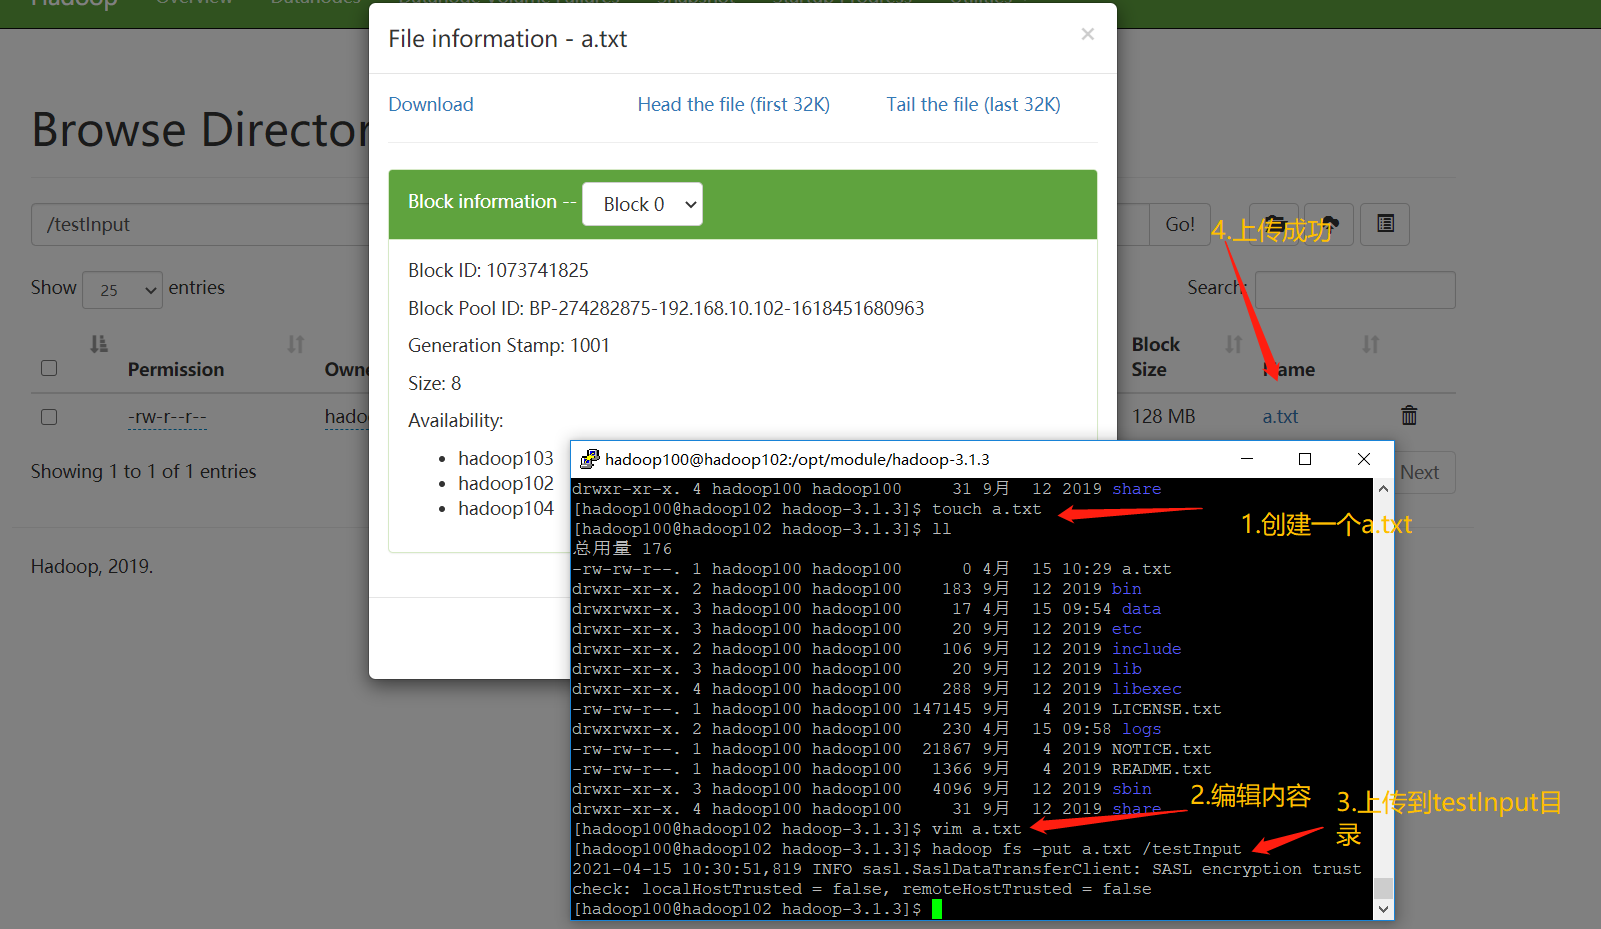
➢ Upload small files
[hadoop100@hadoop102 ~]$ hadoop fs -mkdir /input
[hadoop100@hadoop102 ~]$ hadoop fs -put $HADOOP_HOME/wcinput/word.txt /input
➢ Upload large files
[hadoop100@hadoop102 ~]$ hadoop fs -put /opt/software/jdk-8u212-linux-x64.tar.gz /
➢ Delete file
[hadoop100@hadoop102 ~]$ hadoop fs -rm -r /input
- The storage location of the file after uploading and the contents of the file stored on the disk by HDFS
➢ HDFS File storage path
[hadoop100@hadoop102 subdir0]$ pwd
➢ give the result as follows
/opt/module/hadoop-3.1.3/data/dfs/data/current/BP-1436128598-
192.168.10.102-1610603650062/current/finalized/subdir0/subdir0

➢ HDFS Disk storage file content
[hadoop100@hadoop102 subdir0]$ cat file name
➢ give the result as follows
hadoop yarn
hadoop mapreduce
atguigu
atguigu
- Splicing (just understand that the following file is a compressed form of a large file in volumes. We can splice it through cat command and then decompress it with tar command to obtain the original file)
➢ It is assumed that there are the following documents
-rw-rw-r--. 1 hadoop100 hadoop100 134217728 5 June 23-16:01 blk_1073741836
-rw-rw-r--. 1 hadoop100 hadoop100 1048583 5 June 23-16:01 blk_1073741836_1012.meta
-rw-rw-r--. 1 hadoop100 hadoop100 63439959 5 June 23-16:01 blk_1073741837
-rw-rw-r--. 1 hadoop100 hadoop100 495635 5 June 23-16:01 blk_1073741837_1013.meta
➢ Splicing
[hadoop100@hadoop102 subdir0]$ cat blk_1073741836>>tmp.tar.gz
[hadoop100@hadoop102 subdir0]$ cat blk_1073741837>>tmp.tar.gz
[hadoop100@hadoop102 subdir0]$ tar -zxvf tmp.tar.gz
- download
[hadoop100@hadoop104 software]$ hadoop fs -get /jdk-8u212-linux-x64.tar.gz ./
- Execute the wordcount program
[hadoop100@hadoop102 hadoop-3.1.3]$ hadoop jar share/hadoop/mapreduce/hadoop-mapreduce-examples-3.1.3.jar wordcount /input /output
3. Configure history server
| If you turn off the page and want to review the history of the task after YARN is executed, it cannot be reviewed when the task is executed, because it is not saved |
|---|
| To solve the problem, we need to configure a history server |
| Configure mapred site xml |
|---|
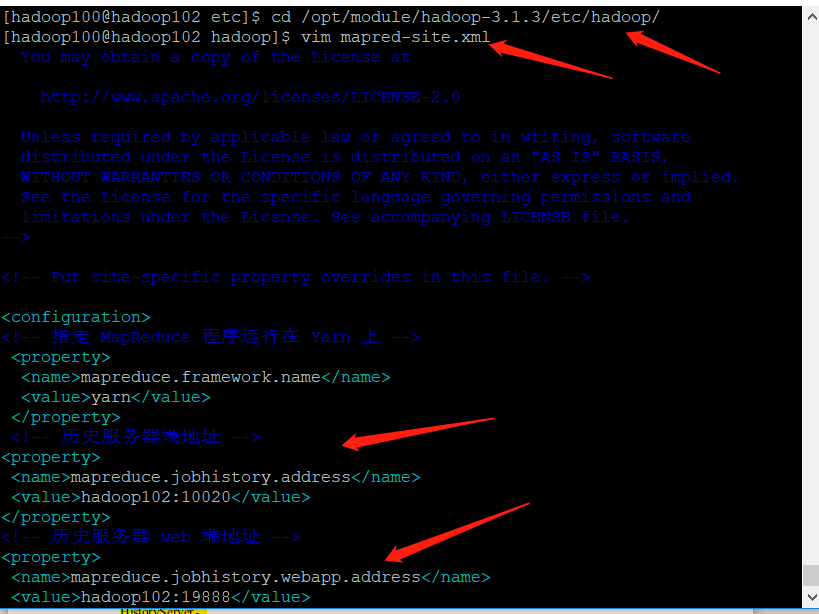
[hadoop100@hadoop102 hadoop]$ vim mapred-site.xml

➢ Add the following configuration to this file.
<!-- Historical server address -->
<property>
 <name>mapreduce.jobhistory.address</name>
 <value>hadoop102:10020</value>
</property>
<!-- History server web End address -->
<property>
 <name>mapreduce.jobhistory.webapp.address</name>
 <value>hadoop102:19888</value>
</property>
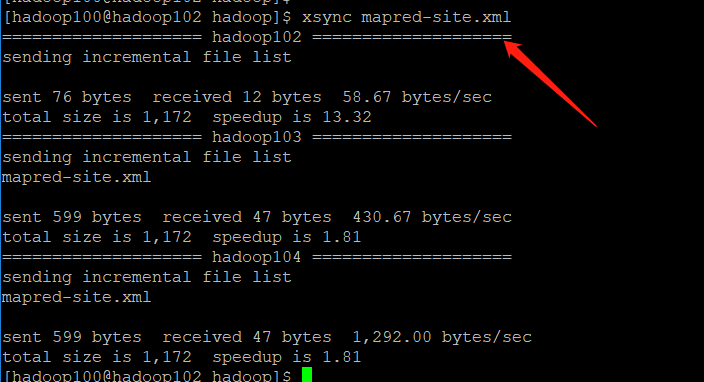
[hadoop100@hadoop102 hadoop]$ xsync $HADOOP_HOME/etc/hadoop/mapred-site.xml
[hadoop100@hadoop102 hadoop]$ mapred --daemon start historyserver
| Check whether the startup is successful |
|---|

[hadoop100@hadoop102 hadoop]$ jps
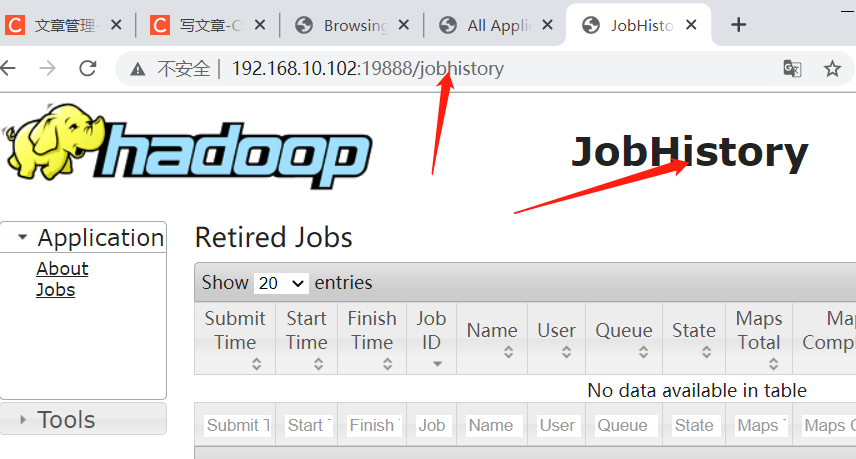
| View historical work records |
|---|
| http://hadoop102:19888/jobhistory |
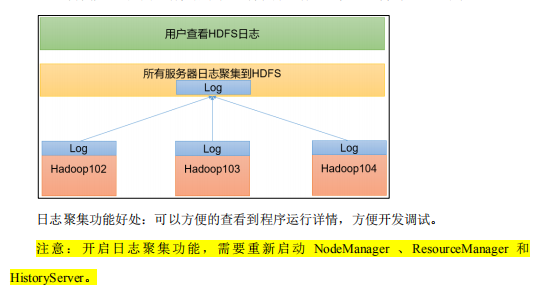
4. Configure log aggregation
| Log aggregation |
|---|
| After the application runs, upload the program running log information to the HDFS system |
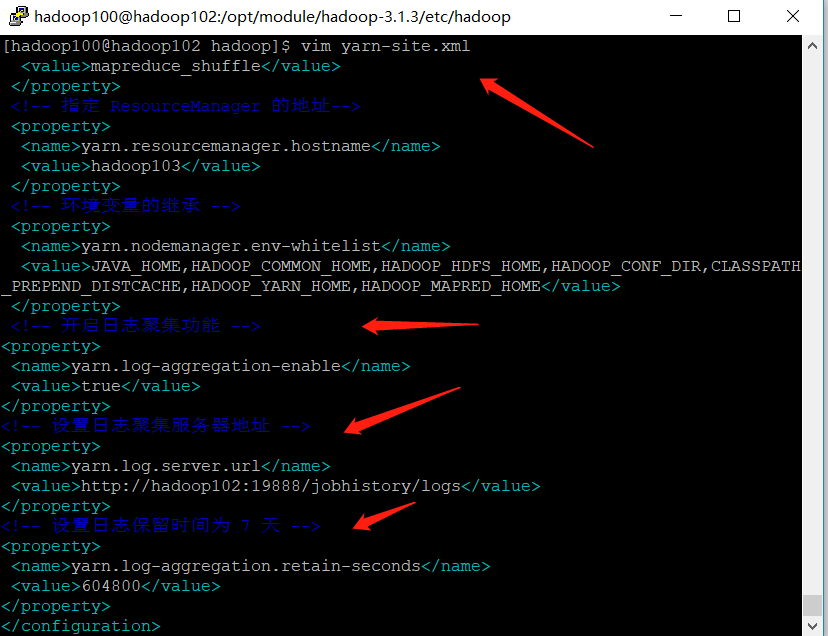
[hadoop100@hadoop102 hadoop]$ vim yarn-site.xml

➢ Add the following configuration to this file.
<!-- Enable log aggregation -->
<property>
 <name>yarn.log-aggregation-enable</name>
 <value>true</value>
</property>
<!-- Set log aggregation server address -->
<property>
 <name>yarn.log.server.url</name>
 <value>http://hadoop102:19888/jobhistory/logs</value>
</property>
<!-- Set the log retention time to 7 days -->
<property>
 <name>yarn.log-aggregation.retain-seconds</name>
 <value>604800</value>
</property>
| Distribution configuration |
|---|
[hadoop100@hadoop102 hadoop]$ xsync $HADOOP_HOME/etc/hadoop/yarn-site.xml
| Close NodeManager, ResourceManager, and HistoryServer |
|---|
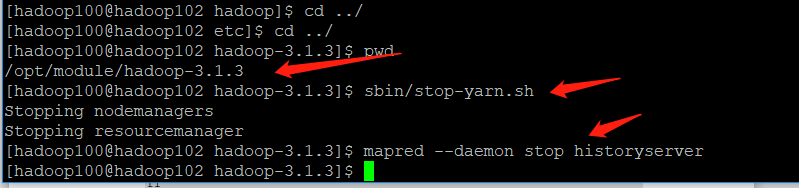
[hadoop100@hadoop103 hadoop-3.1.3]$ sbin/stop-yarn.sh
[hadoop100@hadoop103 hadoop-3.1.3]$ mapred --daemon stop historyserver
| Restart the closed process |
|---|
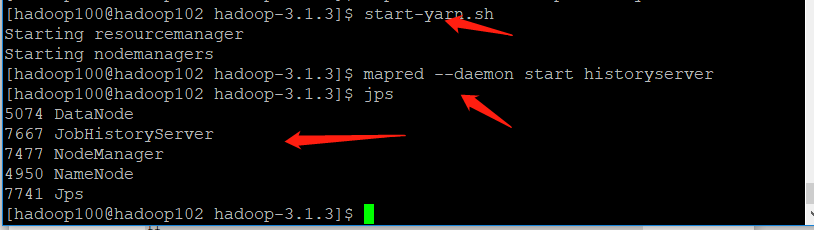
[hadoop100@hadoop103 ~]$ start-yarn.sh
[hadoop100@hadoop102 ~]$ mapred --daemon start historyserver
5, Summary of common cluster operations
1. Overall start and stop
➢ Each module starts separately/Stop (configuration) ssh Is the premise
	1)Overall startup/stop it HDFS
		start-dfs.sh/stop-dfs.sh
	2)Overall startup/stop it YARN
		start-yarn.sh/stop-yarn.sh
➢ Each service component starts one by one/Stop (e.g HDFS There are two services. The above command is to start all at once, and this is to start the specified service)
	1)Start separately/stop it HDFS assembly
		hdfs --daemon start/stop namenode/datanode/secondarynamenode
	2)start-up/stop it YARN
		yarn --daemon start/stop resourcemanager/nodemanager
2. Common scripts for Hadoop cluster
1. hadoop cluster startup and shutdown scripts (including HDFS, Yan and Historyserver)
- And xsync distribution scripts in one folder

➢ Create script
[hadoop100@hadoop102 ~]$ cd /home/hadoop100/bin
[hadoop100@hadoop102 bin]$ vim myhadoop.sh

➢ Edit the following
#!/bin/bash
if [ $# -lt 1 ]
then
 echo "No Args Input..."
 exit ;
fi
case $1 in
"start")
 echo " =================== start-up hadoop colony ==================="
 echo " --------------- start-up hdfs ---------------"
 ssh hadoop102 "/opt/module/hadoop-3.1.3/sbin/start-dfs.sh"
 echo " --------------- start-up yarn ---------------"
 ssh hadoop103 "/opt/module/hadoop-3.1.3/sbin/start-yarn.sh"
 echo " --------------- start-up historyserver ---------------"
 ssh hadoop102 "/opt/module/hadoop-3.1.3/bin/mapred --daemon start historyserver"
;;
"stop")
 echo " =================== close hadoop colony ==================="
 echo " --------------- close historyserver ---------------"
 ssh hadoop102 "/opt/module/hadoop-3.1.3/bin/mapred --daemon stop historyserver"
 echo " --------------- close yarn ---------------"
 ssh hadoop103 "/opt/module/hadoop-3.1.3/sbin/stop-yarn.sh"
 echo " --------------- close hdfs ---------------"
 ssh hadoop102 "/opt/module/hadoop-3.1.3/sbin/stop-dfs.sh"
;;
*)
 echo "Input Args Error..."
;;
esac

➢ Exit after saving, and then grant script execution permission
[hadoop100@hadoop102 bin]$ chmod +x myhadoop.sh

➢ implement
[hadoop100@hadoop102 bin]$ myhadoop.sh stop
[hadoop100@hadoop102 bin]$ myhadoop.sh start
2. View three server Java process scripts: jpsall
[hadoop100@hadoop102 ~]$ cd /home/hadoop100/bin
[hadoop100@hadoop102 bin]$ vim jpsall

#!/bin/bash
for host in hadoop102 hadoop103 hadoop104
do
 echo =============== $host ===============
 ssh $host jps
done
➢ Exit after saving, and then grant script execution permission
[hadoop100@hadoop102 bin]$ chmod +x jpsall
| Remember to synchronize after writing the script |
|---|
[hadoop100@hadoop102 ~]$ xsync /home/hadoop100/bin/
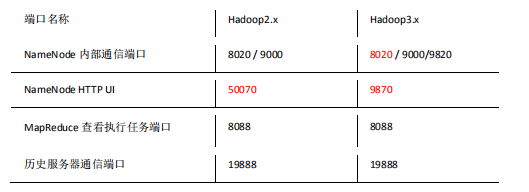
3. Common port number and profile description

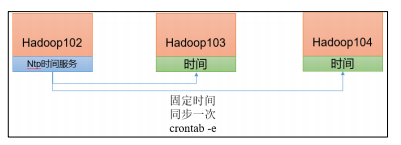
4. Cluster time synchronization (you can understand it and do not need to follow the configuration)
- If the server is in the public network environment (can connect to the external network), cluster time synchronization can not be adopted, because the server will calibrate with the public network time regularly;
- If the server is in the Intranet environment, the cluster time synchronization must be configured, otherwise the time deviation will occur after a long time, resulting in the asynchronous execution of tasks by the cluster.
- Find a machine as a time server, and all machines will synchronize with the cluster time regularly,
- The production environment requires periodic synchronization according to the accuracy of the task to the time. In order to see the effect as soon as possible, the test environment adopts one minute synchronization
| Time server configuration (must be configured by root user) |
|---|
1. Check ntpd service status and startup and self startup status of all nodes
[hadoop100@hadoop102 ~]$ sudo systemctl status ntpd
[hadoop100@hadoop102 ~]$ sudo systemctl start ntpd
[hadoop100@hadoop102 ~]$ sudo systemctl is-enabled ntpd
- Modify NTP of Hadoop 102 Conf configuration file
[hadoop100@hadoop102 ~]$ sudo vim /etc/ntp.conf

➢ 1: Authorization 192.168.10.0-192.168.10.255 All machines on the network segment can query and synchronize time from this machine
	modify #restrict 192.168.10.0 mask 255.255.255.0 nomodify notrap
	by restrict 192.168.10.0 mask 255.255.255.0 nomodify notrap

➢ 2: The cluster is in the LAN and does not use the time on other Internet
	modify
		server 0.centos.pool.ntp.org iburst
		server 1.centos.pool.ntp.org iburst
		server 2.centos.pool.ntp.org iburst
		server 3.centos.pool.ntp.org iburst
	by
		#server 0.centos.pool.ntp.org iburst
		#server 1.centos.pool.ntp.org iburst
		#server 2.centos.pool.ntp.org iburst
		#server 3.centos.pool.ntp.org iburst
➢ 3: When the node loses its network connection, it can still use the local time as the time server to provide time synchronization for other nodes in the cluster
	Add the following
		server 127.127.1.0
		fudge 127.127.1.0 stratum 10
- Modify the / etc/sysconfig/ntpd file of Hadoop 102
[hadoop100@hadoop102 ~]$ sudo vim /etc/sysconfig/ntpd

➢ 1: Synchronize hardware time with system time
	Add the following
		SYNC_HWCLOCK=yes
➢ 2: restart ntpd service
	[hadoop100@hadoop102 ~]$ sudo systemctl start ntpd
➢ 3: set up ntpd Service startup
	[hadoop100@hadoop102 ~]$ sudo systemctl enable ntpd
- Other machine configurations (must be root)
➢ 1: Turn off all nodes ntp Service and self start
	[hadoop100@hadoop103 ~]$ sudo systemctl stop ntpd
	[hadoop100@hadoop103 ~]$ sudo systemctl disable ntpd
	[hadoop100@hadoop104 ~]$ sudo systemctl stop ntpd
	[hadoop100@hadoop104 ~]$ sudo systemctl disable ntpd
➢ 2: Configure other machines to synchronize with the time server once a minute
	[hadoop100@hadoop103 ~]$ sudo crontab -e
	The scheduled tasks are as follows:
	*/1 * * * * /usr/sbin/ntpdate hadoop102
➢ 3: Modify any machine time
	[hadoop100@hadoop103 ~]$ sudo date -s "2021-9-11 11:11:11"
➢ 4: 1 Check whether the time is synchronized with the server in minutes
	[hadoop100@hadoop103 ~]$ sudo date
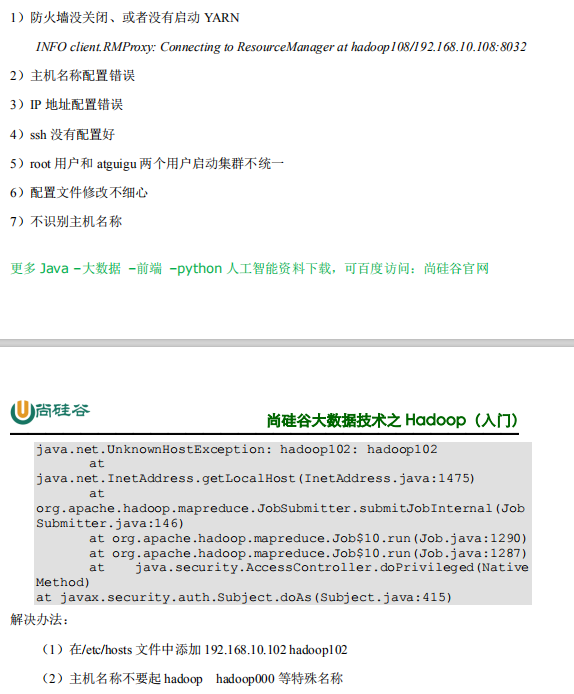
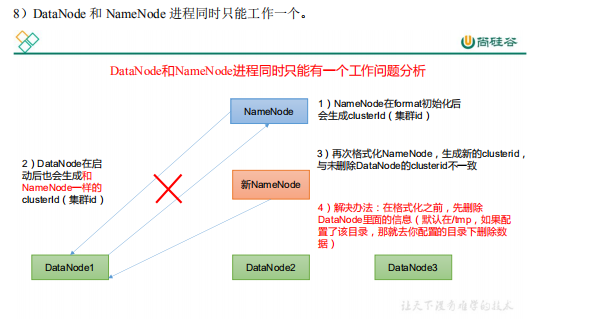
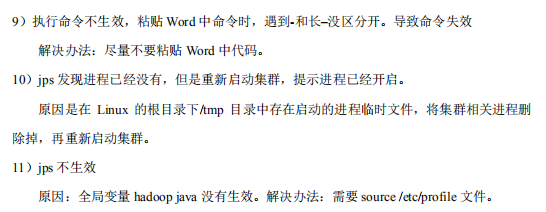
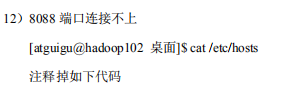
6, Common errors and Solutions