Note: This article is very long and should be read. Reprinting without permission is strictly prohibited! Please obtain the permission of the author before reprinting
Write in front
During the holiday, I was doing a service outsourcing competition, which was related to federal learning, so I wrote this blog (Series) to record my learning.
Thanks to my senior zjj, most of the content of this blog is also from his hands. He led a real Xiaobai, and now a Xiaobai who knows a little. Here is a link to his csdn homepage (but I don't seem to know 55 yet. I'll add it here when I get there!)
No more nonsense, let's start now!
Download and install VMware WorkStation 16
Run the file vmware-workstation-full-16.0 Exe and complete the operation according to the prompt.
Key: (I won't provide this, dddd, search by yourself)
Install CentOS7 (those already installed can be omitted. This part is more detailed)
CentOS 7.0 is installed here Version of 9
-
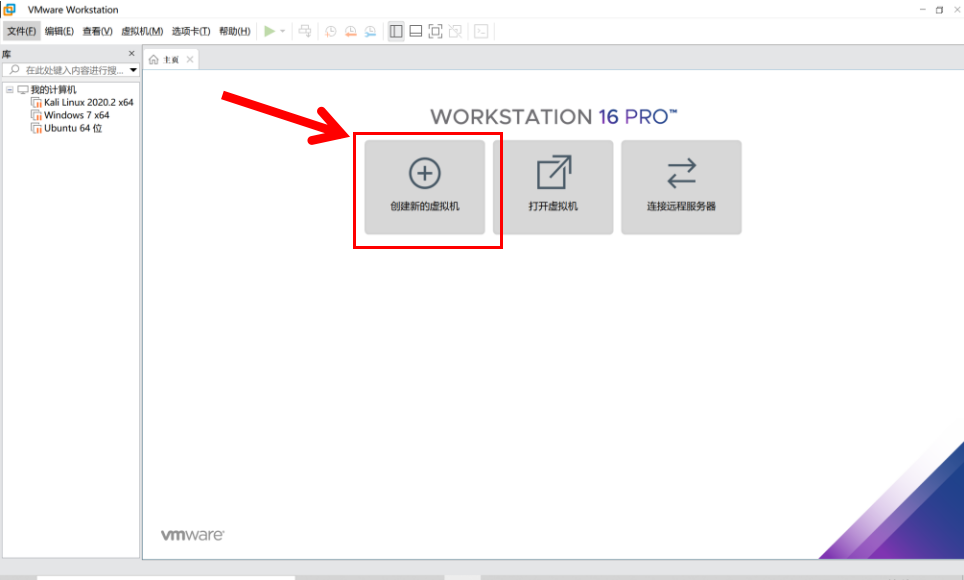
Click "create new virtual machine" on the home page. You can also click file - > new virtual machine
-
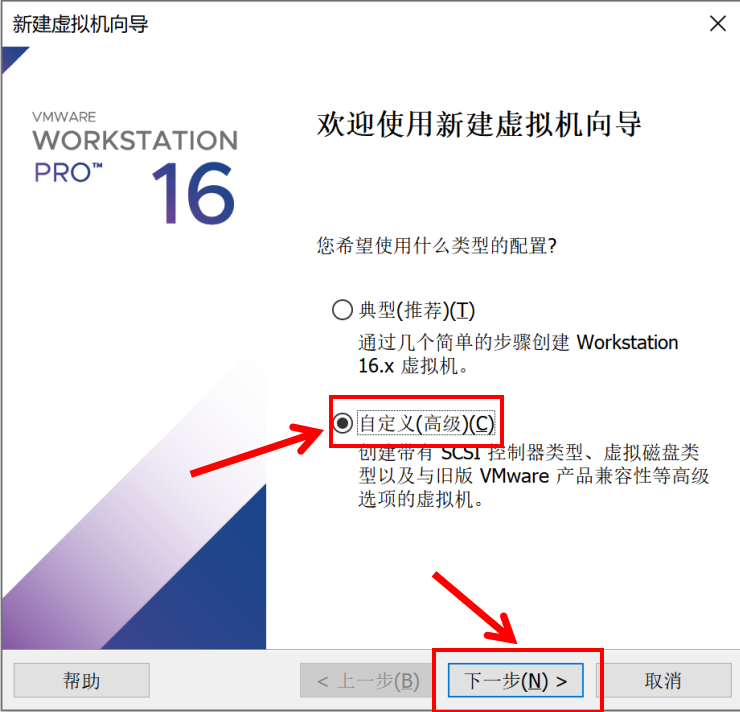
Select "customize (Advanced)" and click "next"
-
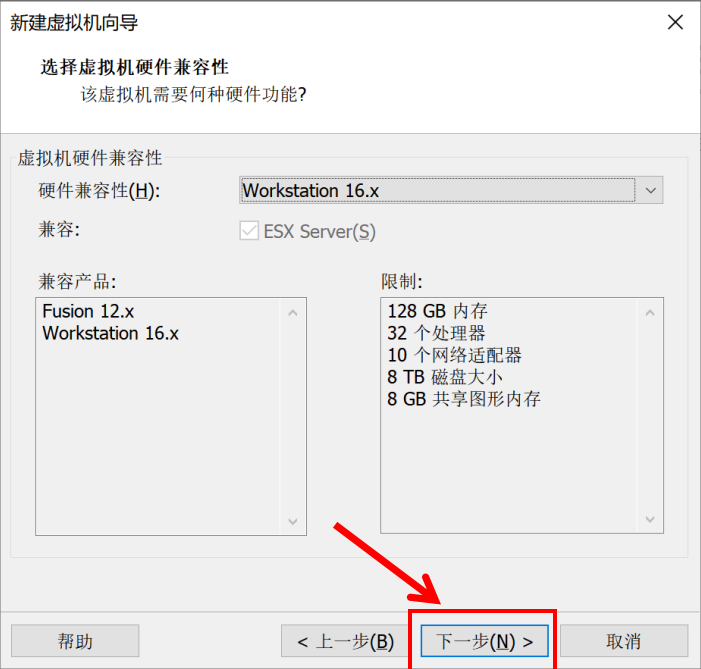
By default, click "next"
-
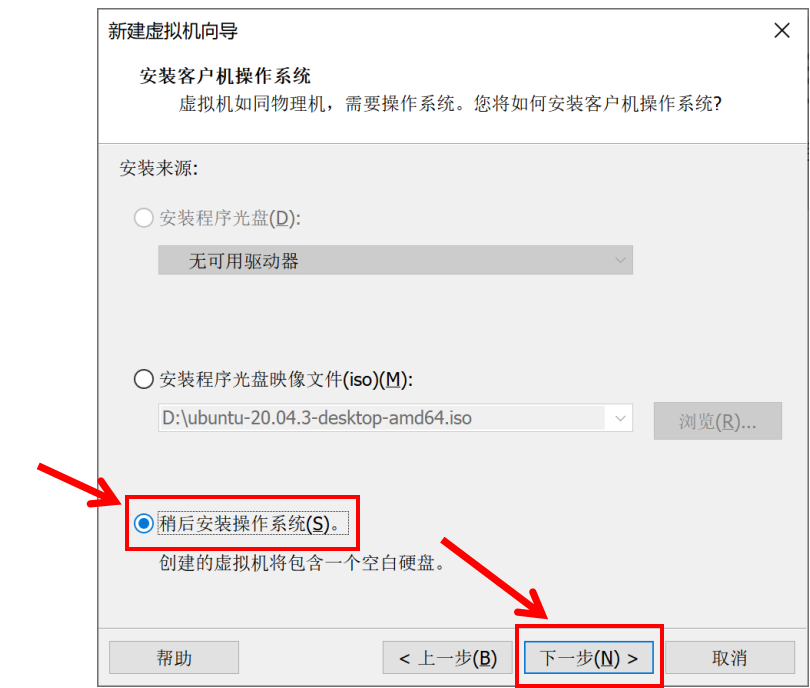
Select "install the operating system later" and then click "next"
-
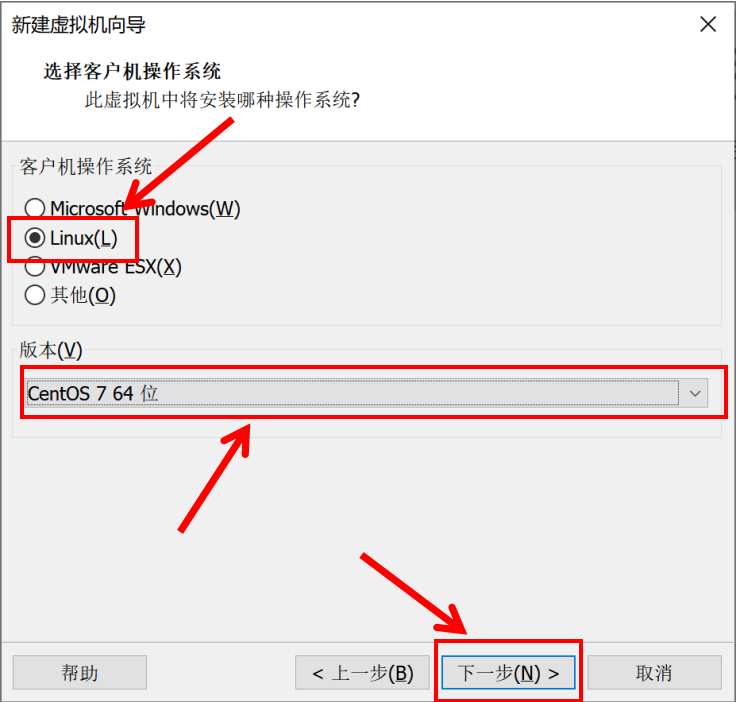
Select Linux as the operating system of the client, CentOS7 64 bit as the version, and then next
-
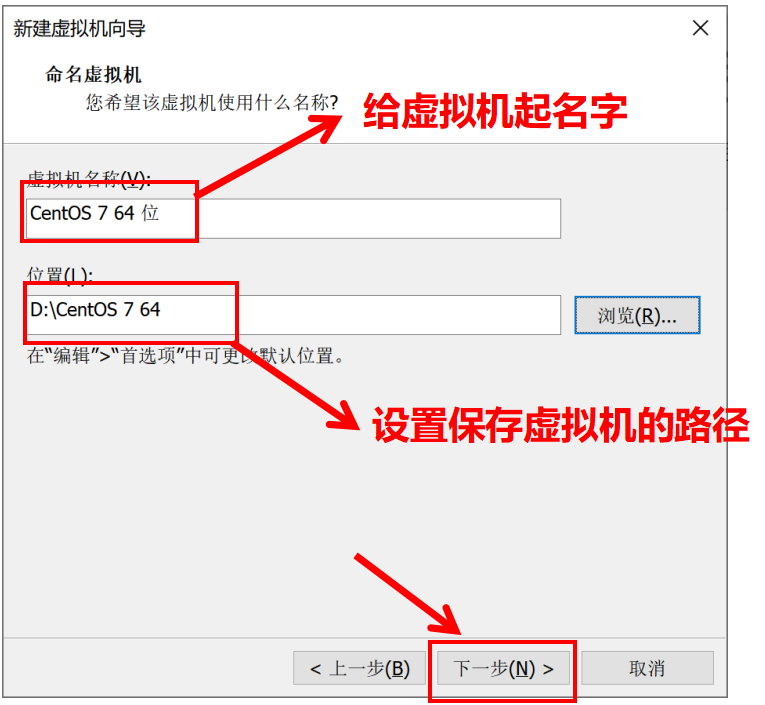
Name the virtual machine, set the save path, and then go to the next step
-
Configure the processor. I've tried a single processor. The system is too slow. I suggest more. Next step

-
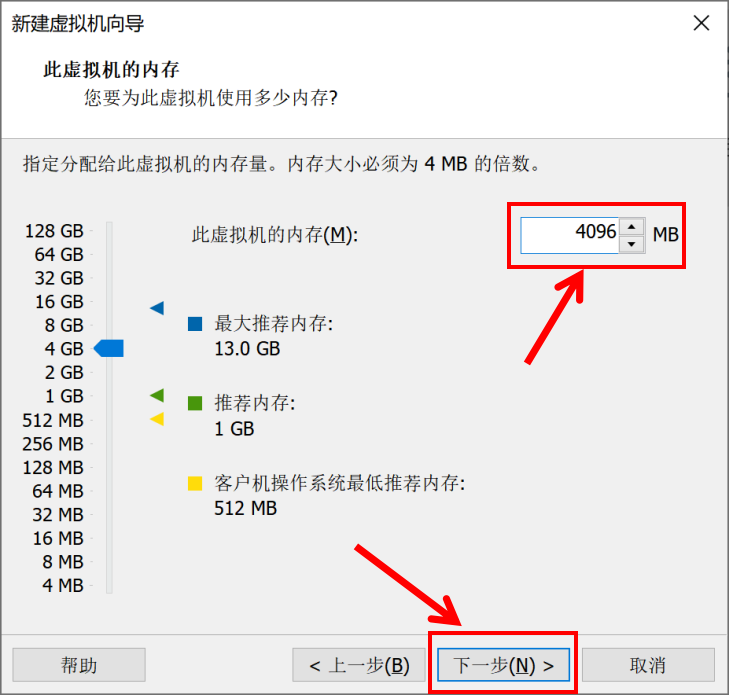
Allocate memory, which is similar to cpu. If there are fewer cards, go to the next step
-
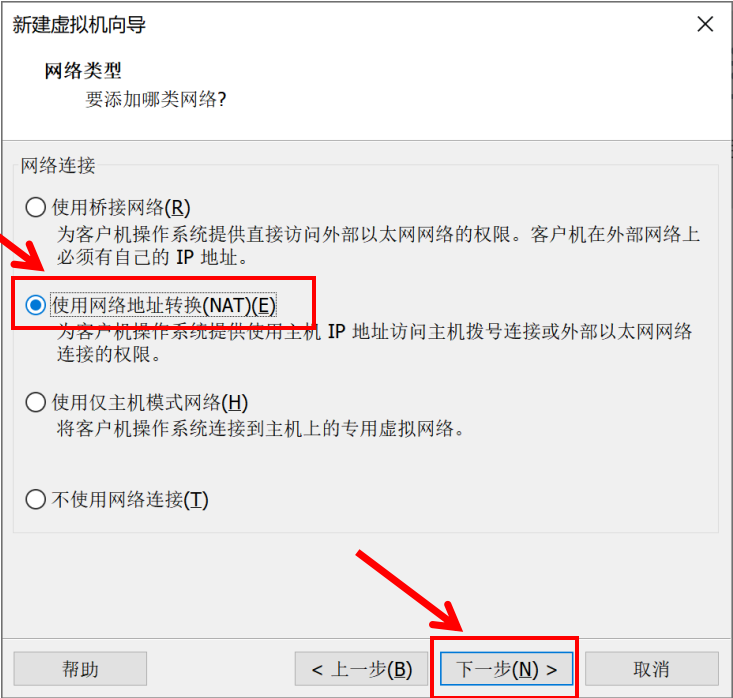
Generally, NAT is selected. It is OK by default. Next step
-
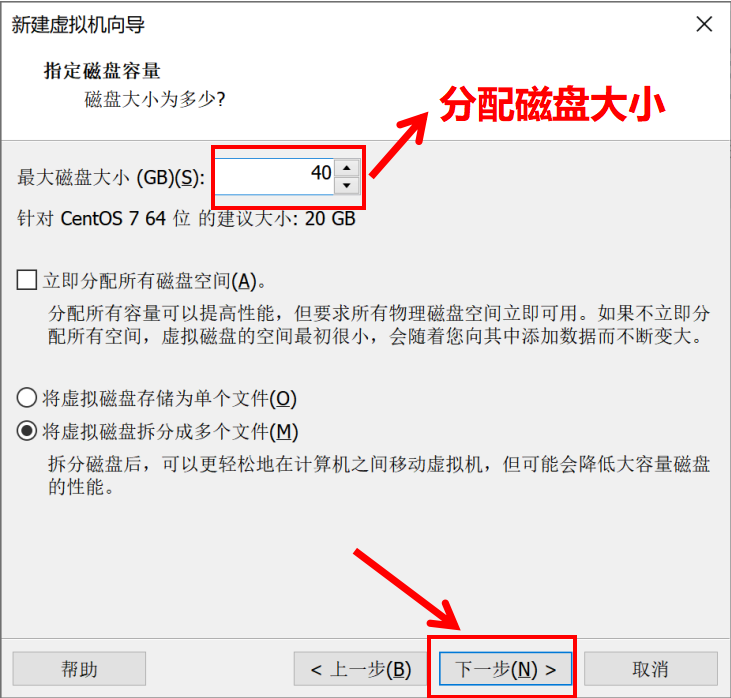
Next, default all the way until the disk capacity is specified. Give multiple points and reserve space for fat. Next
-
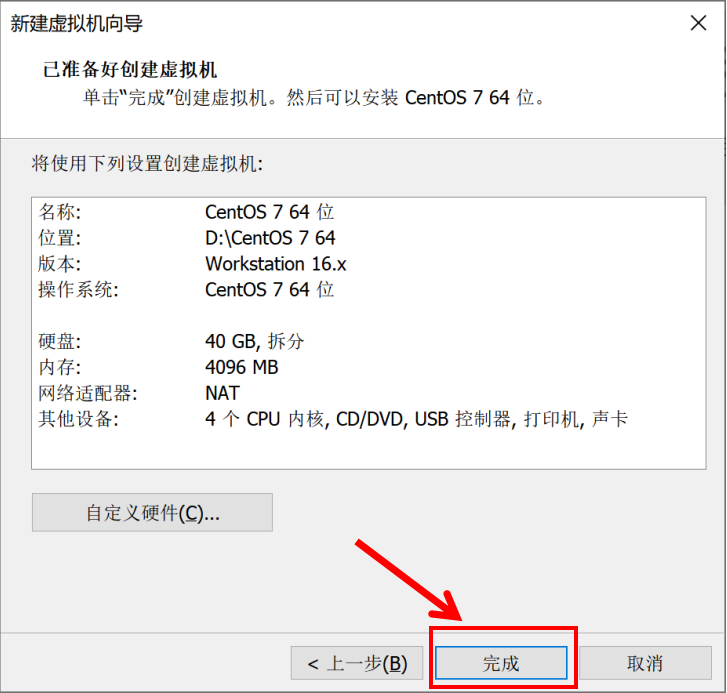
Always default to the next step, and finally click finish.
-
In the virtual machine, click virtual machine – > settings – > CD / DVD (IDE), select your own image file, and select centos-7-x86 here_ 64-DVD-2009. ISO is enough

-
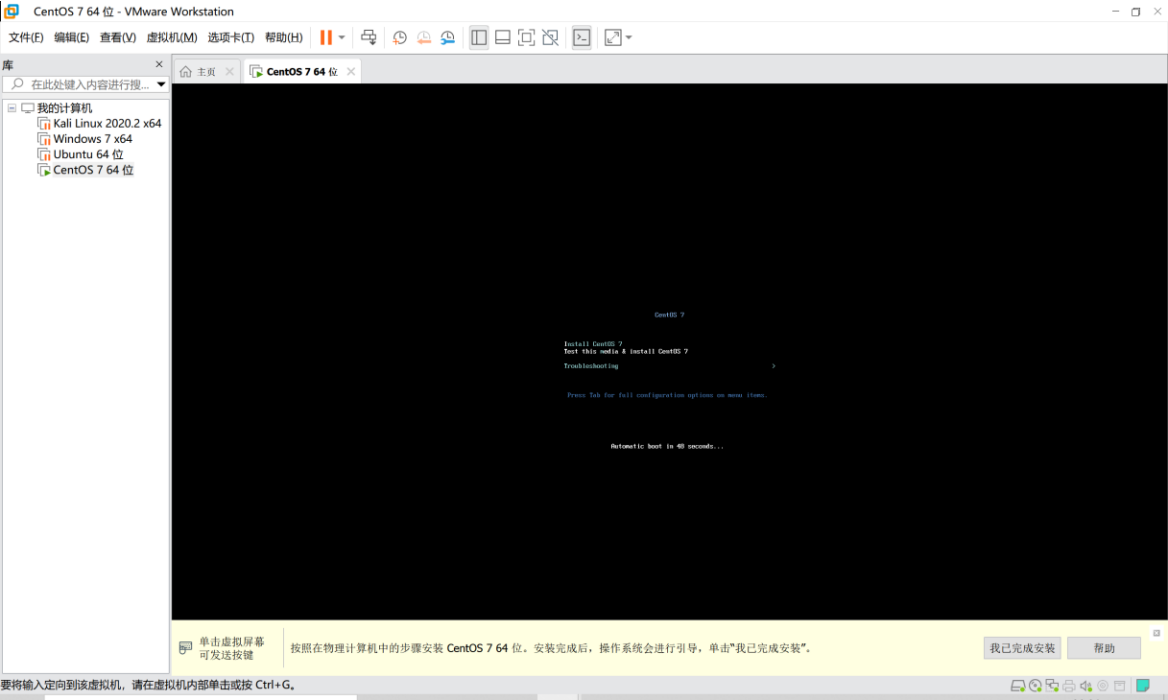
Start the virtual machine, enter the system installation, press enter and wait
-
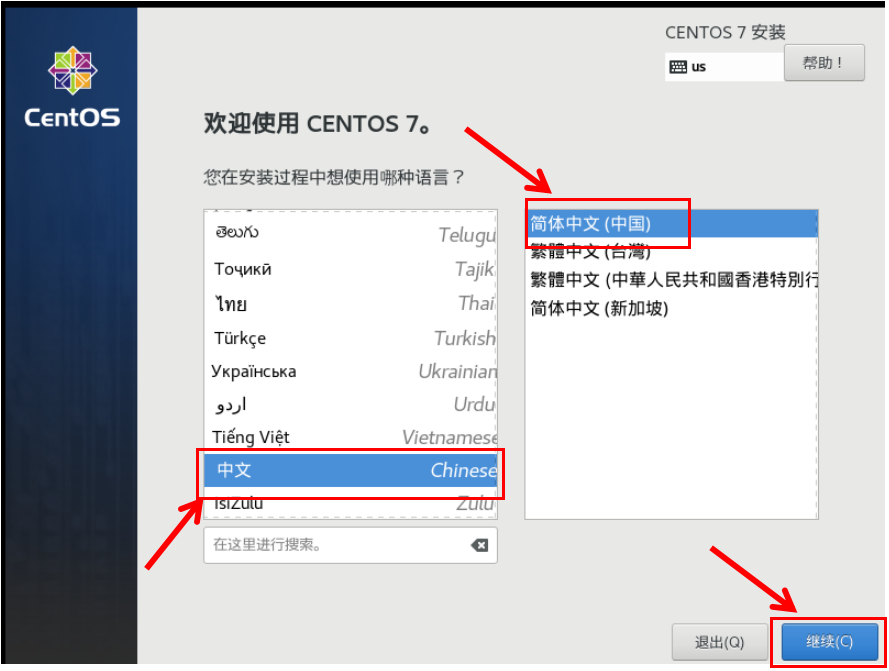
Easy to learn and understand, choose Chinese
-
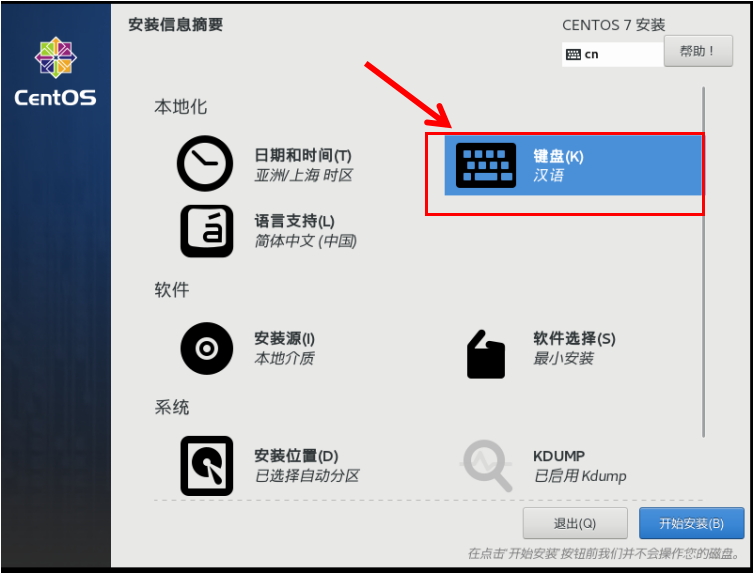
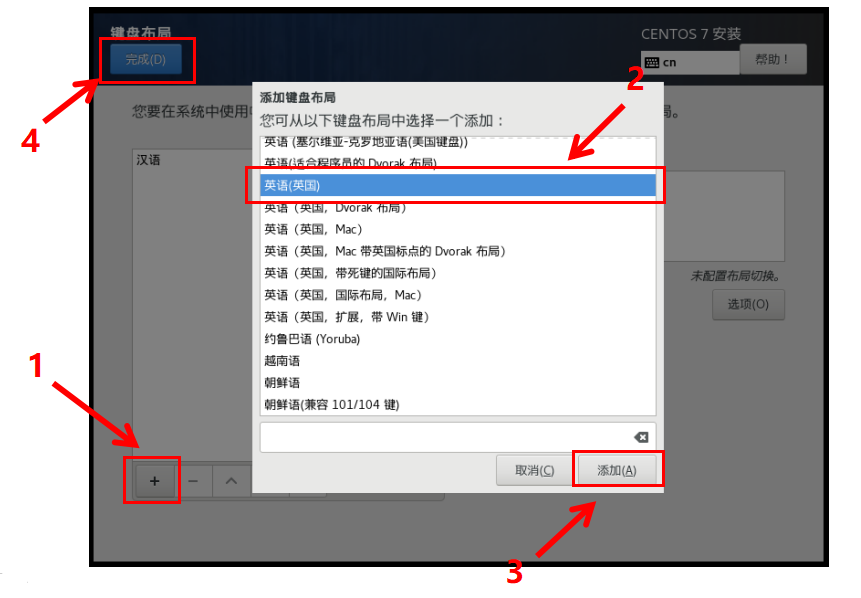
Select keyboard and add English
-
After the disk partition is clicked in, it is completed directly
-
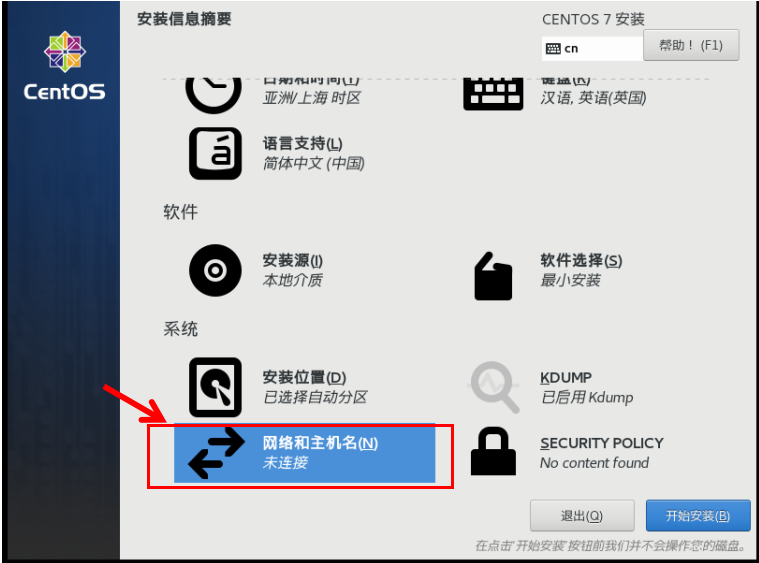
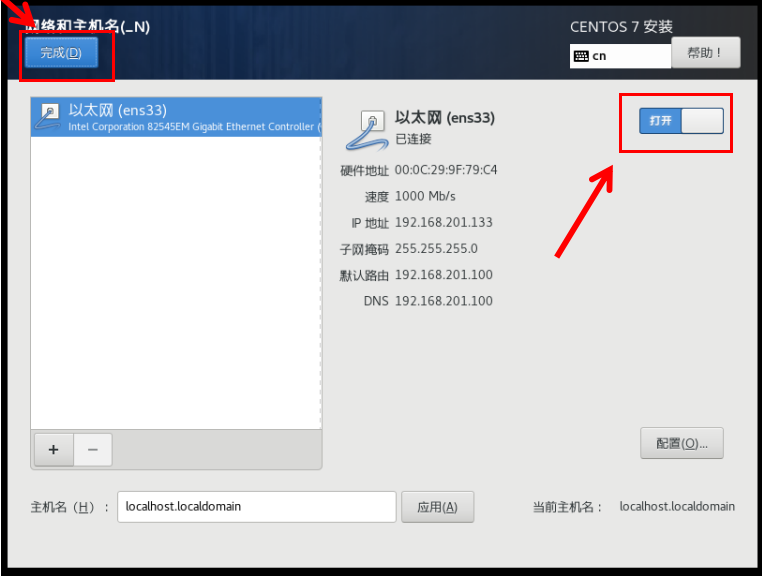
Select "network and host name" and open the network
-
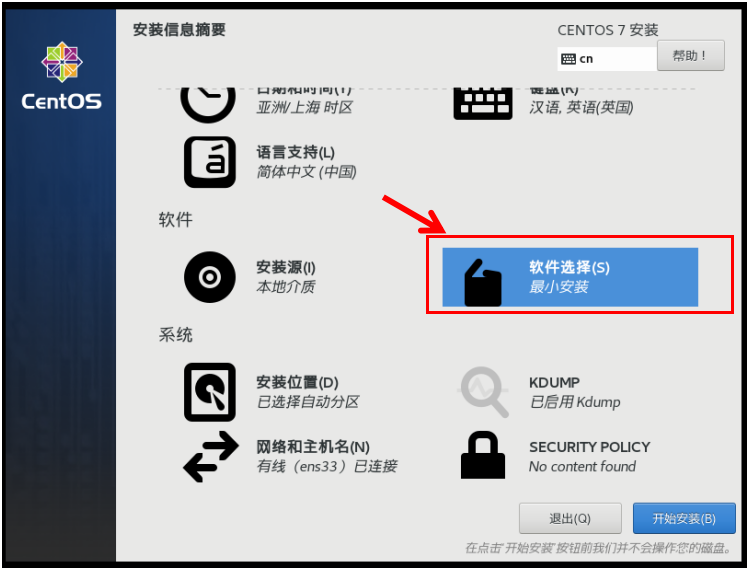
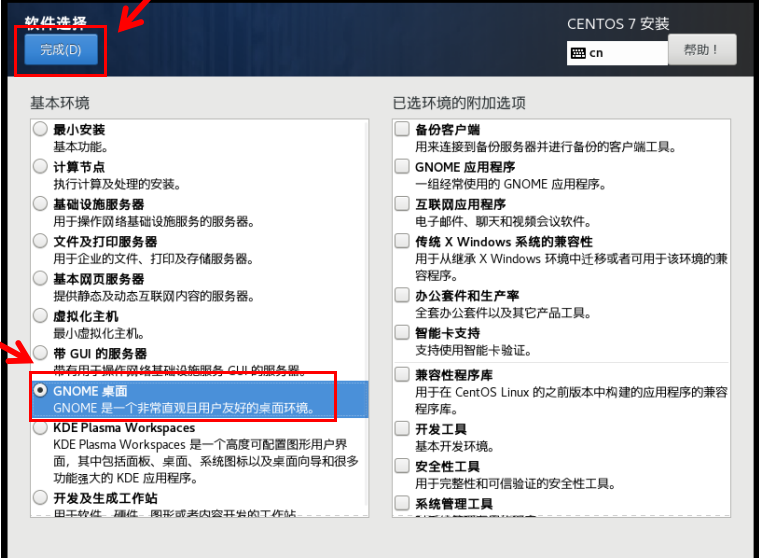
Select "software selection" to install the software
-
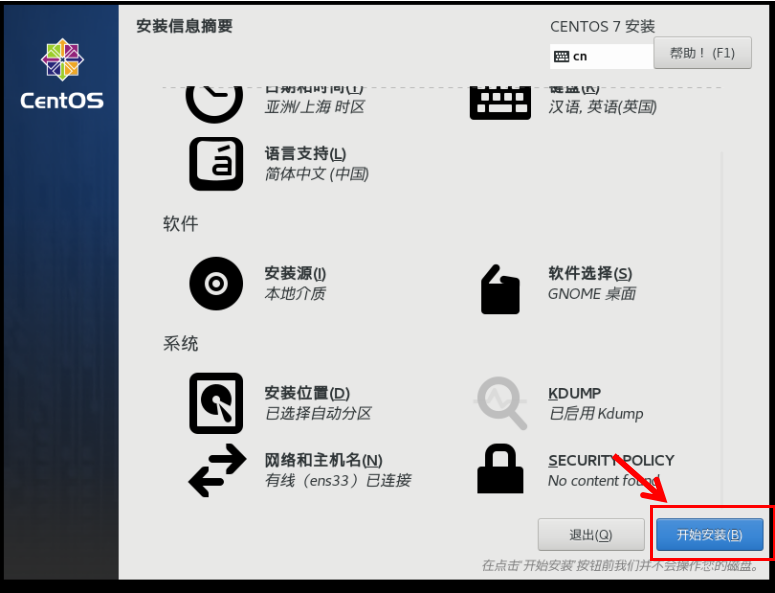
Click Start installation
-
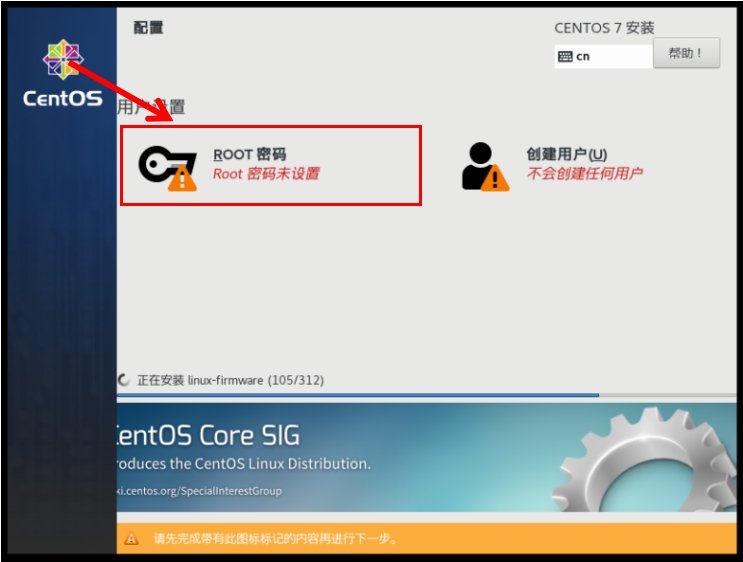
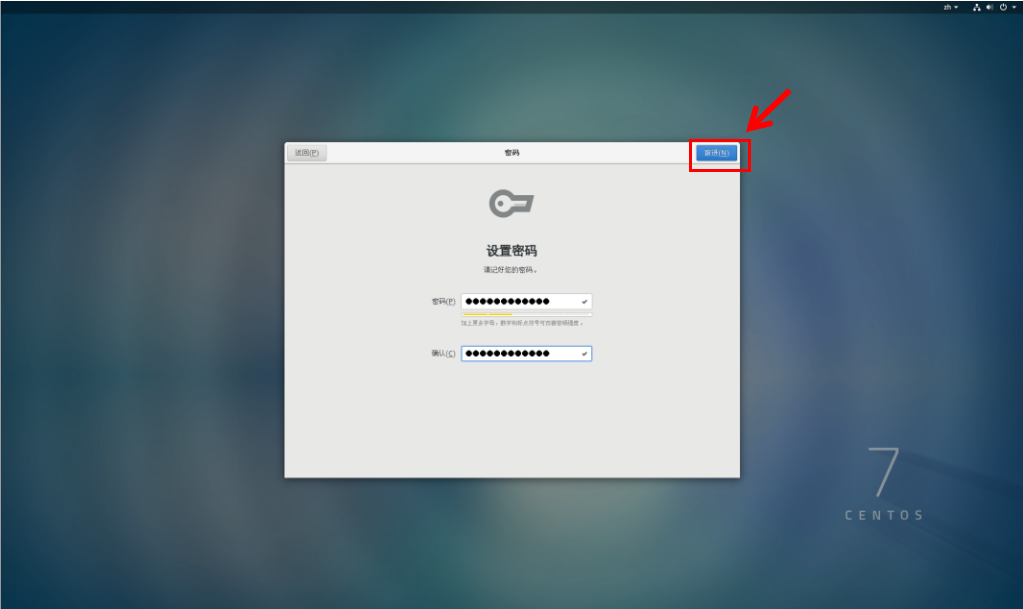
Set the password and create the user. The user can not create it
-
Wait. When it's finished, restart it
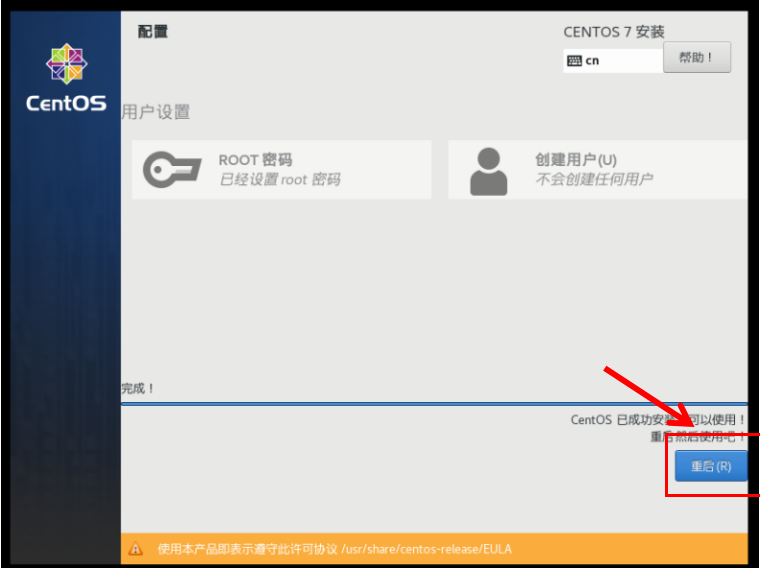
-
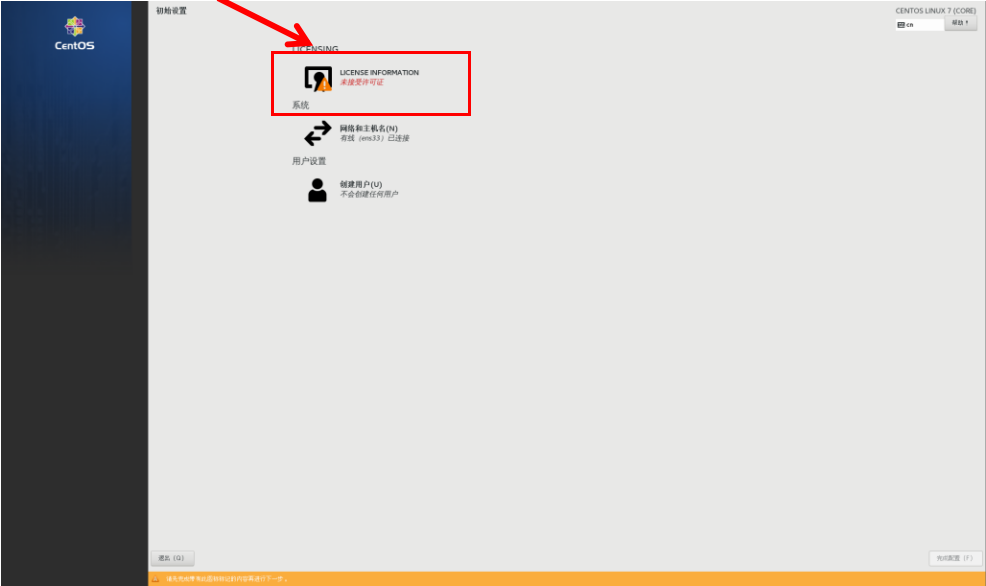
Just go in with permission, click agree and finish
-
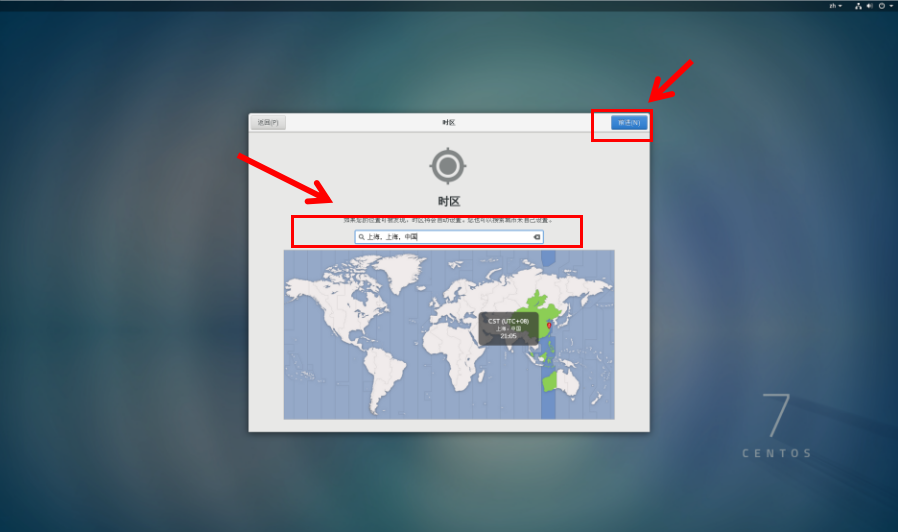
Then move on until you choose the region and Shanghai
-
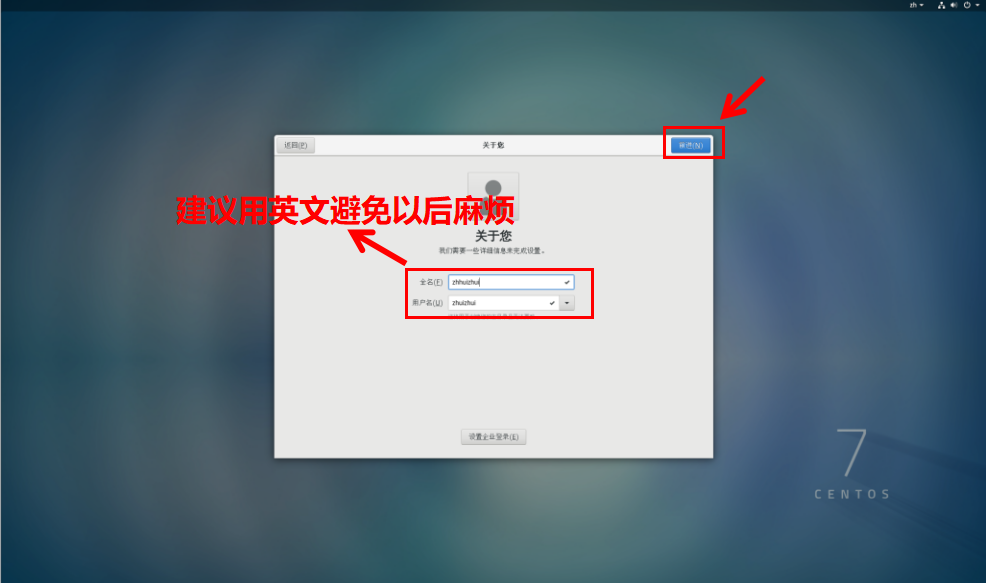
Then move forward, skip, etc. write in English in "about you" and move forward
-
Password setting, forward
-
Installation of CentOS7 system completed

Install python3 (note that the network should remain connected)
- Right click the desktop to open the terminal
- Use root privileges
su
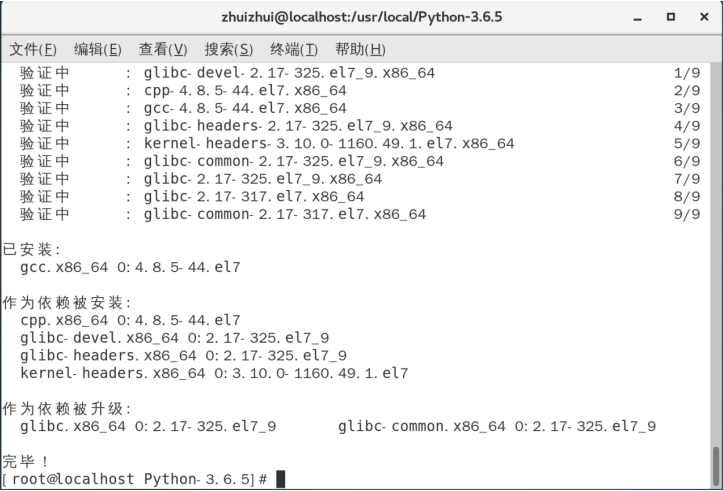
- Install Python 3.0 Some dependent packages of 6
rm -f /var/run/yum.pid
yum install openssl-devel bzip2-devel expat-devel gdbm-devel readline-devel sqlite-devel
The results shown in the figure below indicate success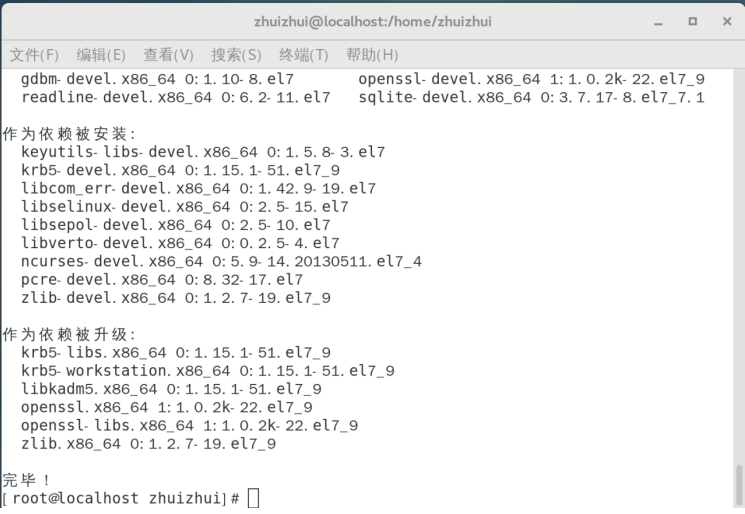
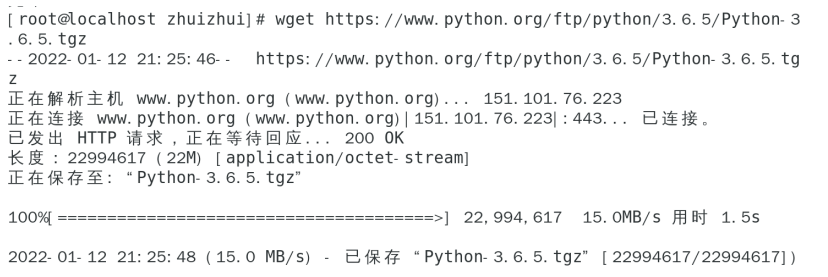
- Download Python 3 six point five
wget https://www.python.org/ftp/python/3.6.5/Python-3.6.5.tgz
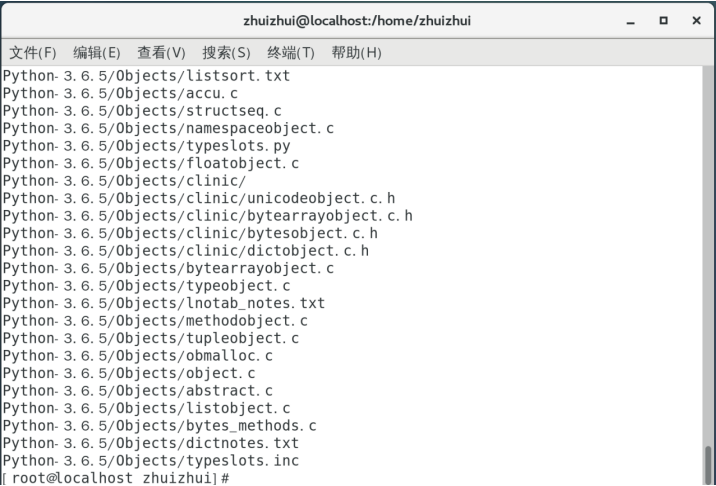
- Extract to the specified folder
tar -xzvf Python-3.6.5.tgz -C /usr/local
- Enter the extracted file
cd /usr/local/Python-3.6.5

- Install gcc using yum or up2date
yum install gcc
- compile
./configure prefix=/usr/local/python3
make && make install
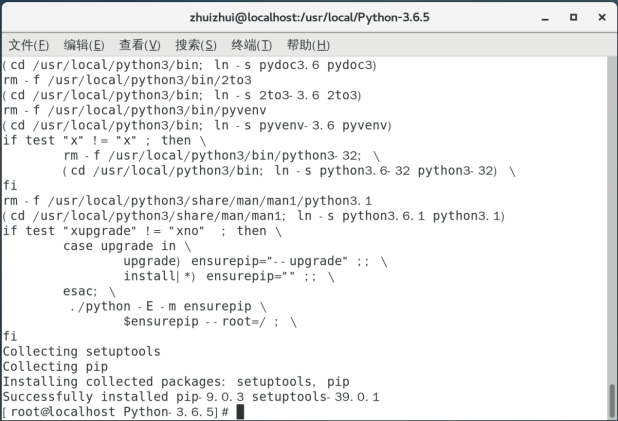
- Configure soft links
cd /usr/bin
mv python python.backup
ln -s /usr/local/python3/bin/python3.6 /usr/bin/python
ln -s /usr/local/python3/bin/python3.6 /usr/bin/python3

- Change Python in the first line of the following three files to python2
After entering the file, enter i to indicate insertion, and the bottom will become INSERT, which can be modified at this time.
After modifying the contents of the file, save it and press Esc+:+wq to save it
vim /usr/bin/yum
vim /usr/libexec/urlgrabber-ext-down
vim /usr/bin/yum-config-manager
Install docker
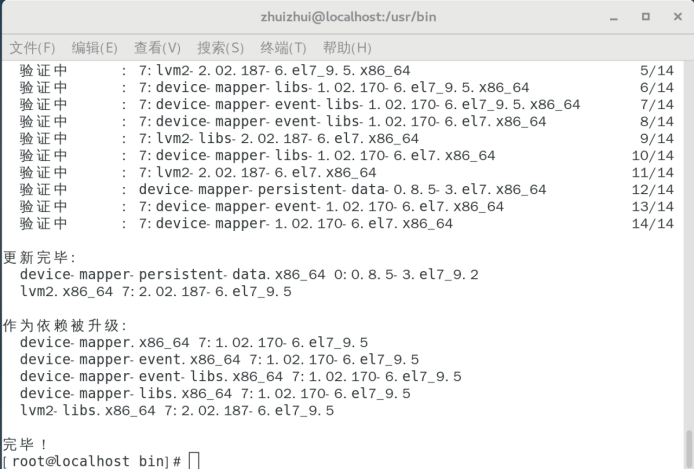
- Install the package using yum or up2date
yum install -y yum-utils device-mapper-persistent-data lvm2
- Install docker engine community
Use Docker warehouse for installation:
Before installing Docker engine community on the new host for the first time, you need to set up the Docker warehouse.
After that, Docker can be installed and updated from the warehouse.
yum install -y yum-utils \
 device-mapper-persistent-data \
 lvm2
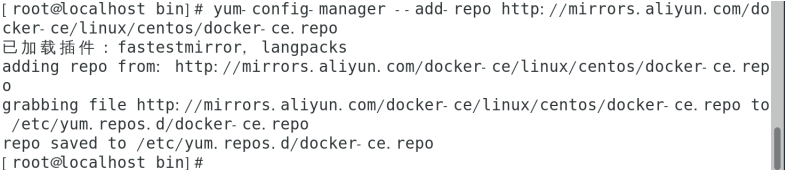
- Set up a stable warehouse
yum-config-manager --add-repo http://mirrors.aliyun.com/docker-ce/linux/centos/docker-ce.repo
- To install docker engine community:
To install a specific version of docker engine community, list the available versions in the repository, and then select and install them. The steps are as follows:
Lists and sorts the versions available in your repository. This example sorts the results by version number (from high to low):
yum list docker-ce --showduplicates | sort -r
Install a specific version with its full package name, which is the package name( docker-ce)Add the version string (second column) from the first colon(:)Continue to the first hyphen and use hyphens(-)separate. For example: docker-ce-18.09.1:
yum install docker-ce-18.09.0 docker-ce-cli-18.09.0 containerd.io
Start and join the startup self start:
systemctl start docker
systemctl enable docker

By running hello-world Image to verify that it is installed correctly Docker Engine-Community
docker run hello-world
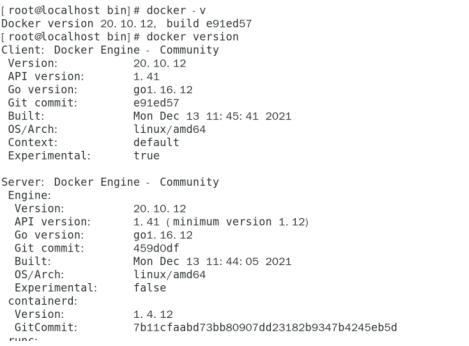
Check version
docker -v
docker version
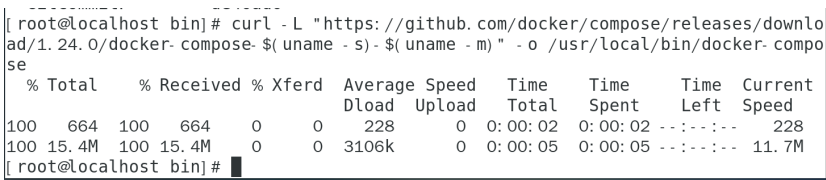
- Install docker compose
curl -L "https://github.com/docker/compose/releases/download/1.24.0/docker-compose-$(uname -s)-$(uname -m)" -o /usr/local/bin/docker-compose
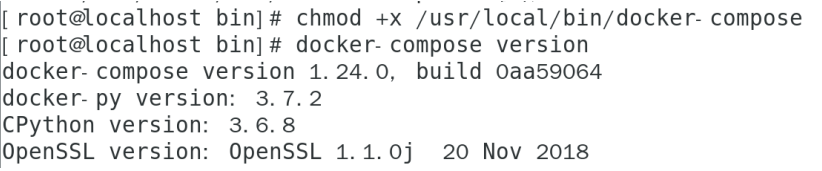
- View version
chmod +x /usr/local/bin/docker-compose
docker-compose version
Docker command
| instructions | effect |
|---|---|
| docker images | Display mirror |
| docker ps -a | View the list of containers in the current system. |
| docker ps -l | The containers that were last run are listed, including those that are running and those that have been stopped. |
| docker start | Start one or more containers that have been stopped |
| docker stop | Stop a running container |
| docker rm | Delete one or more containers |
| docker exec | Execute commands in a running container |
| docker restart | Restart container |
| docker stop [container name / container ID] | Stop container operation |
Download fat project
- Download:
wget https://webank-ai-1251170195.cos.ap-guangzhou.myqcloud.com/docker_standalone_fate_1.6.0.tar.gz
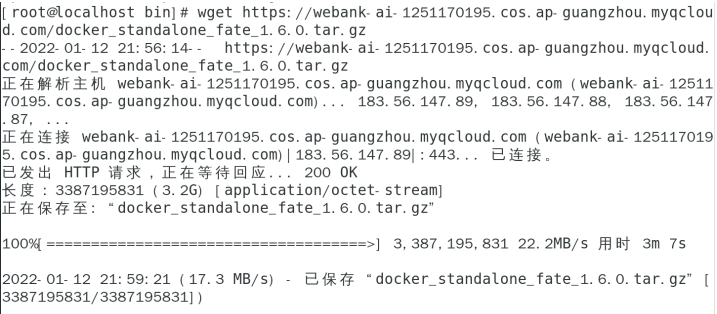
Or the docker_standalone_fate_1.6.0.tar.gz import directly from this machine (recommended)
- Decompression:
tar -xzvf docker_standalone_fate_1.6.0.tar.gz

- Deployment:
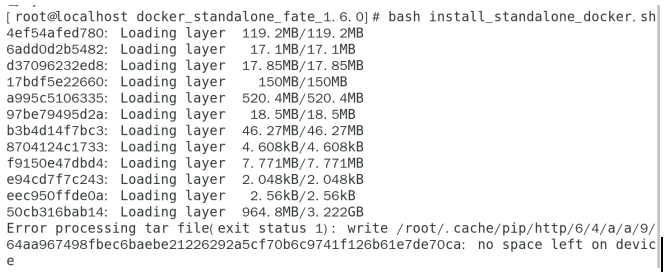
cd docker_standalone_fate_1.6.0
bash install_standalone_docker.sh
- Unit test:
CONTAINER_ID=`docker ps -aqf "name=fate"`
docker exec -t -i ${CONTAINER_ID} bash
bash ./python/federatedml/test/run_test.sh
- Toy test:
CONTAINER_ID=`docker ps -aqf "name=fate"`
docker exec -t -i ${CONTAINER_ID} bash
python ./examples/toy_example/run_toy_example.py 10000 10000 0
Fate command
- View Table
python python/fate_flow/fate_flow_client.py -f table_info -n experiment -t breast_homo_host
- Delete table
python fate_flow_client.py -f table_delete -n $namespace -t $table_name
python fate_flow_client.py -f table_delete -j $job_id
python python/fate_flow/fate_flow_client.py -f table_delete -n experiment -t breast_homo_host
Horizontal Federation learning example
- Upload training data
python python/fate_flow/fate_flow_client.py -f upload -c  /fate/examples/dsl/v1/homo_logistic_regression/upload_data_host.json
python python/fate_flow/fate_flow_client.py -f upload -c  /fate/examples/dsl/v1/homo_logistic_regression/upload_data_guest.json
- Submit training tasks
python python/fate_flow/fate_flow_client.py -f submit_job -d /fate/examples/dsl/v1/homo_logistic_regression/test_homolr_train_job_dsl.json -c /fate/examples/dsl/v1/homo_logistic_regression/test_homolr_train_job_conf.json
- Forecast data
python python/fate_flow/fate_flow_client.py -f submit_job -c /fate/examples/dsl/v1/homo_logistic_regression/test_predict_conf.json
 Remember to modify test_predict_conf.json In the file model_version: {jobid}
Horizontal Federation learning example
- Upload training data
python python/fate_flow/fate_flow_client.py -f upload -c  /fate/examples/dsl/v1/homo_logistic_regression/up_dt_guest.json -drop 1
 python python/fate_flow/fate_flow_client.py -f upload -c  /fate/examples/dsl/v1/homo_logistic_regression/up_dt_host.json -drop 1
- Training tasks
python  python/fate_flow/fate_flow_client.py -f submit_job -d /fate/examples/dsl/v1/hetero_logistic_regression/test_hetero_lr_train_job_dsl.json  -c /fate/examples/dsl/v1/hetero_logistic_regression/test_hetero_lr_train_job_conf.json
hetero_secureboost
hetero_secureboost
test_secureboost_train_dsl.json
test_secureboost_train_binary_conf.json
- Training tasks
python python/fate_flow/fate_flow_client.py -f submit_job -c /fate/examples/dsl/v1/hetero_logistic_regression/test_predict_conf.json
 Remember to modify test_predict_conf.json In the file model_version: {jobid}
Write at the end
Special thanks
When I really typed down the full text, I realized how hard it was for zjj senior students to make tutorials for us at that time. It was too tired!
The tutorial of senior students is presented in the form of word. In order to show it more intuitively and make it more convenient for them to see, I wrote this blog.
ending
If you like this article, you might as well like it
Any questions are welcome to be raised in the comment area and discussed together for common progress!
More fat learning progress will be continuously updated in the future