0x00 Preface
This article will explain the construction process of Vue code view from the aspects of structure and function. You can understand the following contents:
- Use vue cli 4 to build a component library and detailed configuration information from 0.
- Multi environment build configuration of the project.
- Release, deployment and continuous integration of the project website.
- Project NPM package release.
- Custom markdownload resolver for project components.
This article is 📚 Element 2 source code Learning Series After understanding the structure and principle of the open source component library through the previous articles, what should I do if I build a component project myself? The next step is the process of practice, which can be regarded as "the unity of knowledge and practice"! After reading patiently, I believe it will be helpful to you!
0x01 project overview
Create project
This project uses Vue CLI 4.x for project creation.
// Installation environment
npm install -g @vue/cli
// Create project
vue create vue-code-view
After entering the command in the terminal, follow the steps below to create the project:
- Select Manually select features.
- Select Babel, router, CSS, pre processors, linter / formatter and other functions.
- Select vue version 2.X
- Select whether to use history mode for routing. The default is yes.
- Select CSS preprocessor sass / SCSS (with node SASS).
- Select code style, format verification linter / formatter, and configure ESLint + Prettier.
- Detect Lint on save when selecting the verification time
- Select Babel, ESLint and other configuration files and store them in the dedicated configuration files.
Configure multiple environment variables
Create new. Env,. Env.deploy,. Env.production and other files in the project root directory.
With Vue_ The variables at the beginning of app will be statically embedded into the package on the client side by webpack.DefinePlugin. The code can be accessed through process.env.VUE_APP[xxx] access.
NODE_ENV and base_ URLs are two special variables that are always available in code.
.env\
Vue cli service serves the default local development environment configuration
NODE_ENV = development
VUE_APP_PUBLIC_PATH = /
.env.production\
Vue cli service build default environment configuration (formal server)
NODE_ENV = production
VUE_APP_PUBLIC_PATH = /
VUE_APP_ENV = pub
.env.deploy\
Environment configuration for github pages build deployment. VUE_ APP_ PUBLIC_ The path setting / Vue code view is used for virtual directories.
NODE_ENV = production
VUE_APP_PUBLIC_PATH = /vue-code-view
VUE_APP_ENV = deploy
Directory structure adjustment
The default src directory stores the project source code and the resource files to be referenced. Create a new examples folder under the root directory for the project sample website, and move the files under the src directory to the examples file. src directory stores the source code of project components.
The adjusted root directory file structure is as follows:
├── examples   // Project sample website
|  ├── App.vue
|  ├── assets
|  ├── components
|  ├── main.js
|  ├── router
|  └── views
├── src       // Project component source code
|  ├── fonts
|  ├── index.js
|  ├── locale
|  ├── mixins
|  ├── src
|  ├── styles
|  └── utils
├── public
├── package.json
Configure basic vue.config.js
The project default entry. / src/main.js is configured as follows:
{
  entry: {
    app: [
      './src/main.js'
    ]
  }
}
Create vue.config.js in the root directory to modify the default configuration.
const path = require("path");
const resolve = (dir) => path.join(__dirname, dir);

module.exports = {
  configureWebpack: (config) => {
    // Project entrance
    config.entry.app = "./examples/main.js";
  },
  chainWebpack: (config) => {
    // add alias
    config.resolve.alias
      .set("vue$", "vue/dist/vue.esm.js")
      .set("@", resolve("examples"))
      .set("@assets", resolve("examples/assets"))
      .set("@src", resolve("src"))
      .set("@views", resolve("examples/views"))
      .set("@router", resolve("examples/router"))
      .set("@store", resolve("examples/store"));
  },
};
Run npm run serve and the project website runs normally.
0x02 project construction
npm scripts configuration
Adjust the scripts configuration script in package.json and add -- mode xxx to select different environment configurations.
"scripts": {
  // Development environment launch project sample website
  "dev": "vue-cli-service serve ",
  // Component library construction
  "dist": "vue-cli-service build  --mode production --target lib --name vue-code-viewer --dest lib src/index.js",
  // Project sample website construction
  "deploy:build": "vue-cli-service build --mode deploy"
}
Component building
The component library is built by specifying the entry file src/index.js and setting parameters and options.
Usage: vue-cli-service build [options] [entry|pattern]

Parameter options:
  --mode        Specify environment mode (Default: production)
  --dest        Specify output directory (Default: dist)
  --target      app | lib | wc | wc-async (Default: app)
  --name        Library or Web Components Name in mode (Default: package.json Medium "name" Field or entry file name)
Building a library outputs:
- lib/vue-code-viewer.common.js: a CommonJS package for the packer.
- lib/vue-code-viewer.umd.js: a UMD package used directly for browsers or AMD loader s.
- Lib / Vue code viewer.umd.min.js: compressed UMD build.
- lib/vue-code-viewer.css: extracted CSS file.
Component NPM package Publishing
The attribute values in the configuration package.json file are used for npm publishing.
- Name: package name, which is unique. Need to go npm registry Check to see if the name is already in use.
- Version: package version number. Refer to semantic version 2.0.0 for version number rules. Each time you publish to npm, you need to modify the version number, which cannot be the same as the historical version number.
- Description: description of the package, describing the main functions and uses of the package.
- main: entry file. This field should point to the package file after the project is compiled.
- unpkg: UMD mode entry package file
- Keyword: keyword, array, string.
- Author: the author of the package.
- Private: private. It needs to be modified to false to publish to npm
- license: open source agreement.
- repository: Git Repo information of the package, including type and URL.
- Home page: the url of the project's official website.
to update package.json Document content:
{
  "name": "vue-code-view",
  "version": "0.3.9",
  "description": "A code editor component based on Vue.js 2 ",
  "main": "lib/vue-code-viewer.common.js",
  "unpkg": "lib/vue-code-viewer.umd.js",
  "scripts": {},
  "dependencies": {},
  "peerDependencies": {},
  "devDependencies": {},
  "keywords": [
    "vue",
    "components",
    "codemirror",
    "code editor"
  ],
  "repository": {
    "type": "git",
    "url": "git+https://github.com/andurils/vue-code-view.git"
  },
  "author": "andurils",
  "license": "MIT",
  "homepage": "https://andurils.github.io/vue-code-view"
}
Add. npmignore file and set to ignore the published file. Publish to npm files, and only the existing lib directory, package.json, README.md are reserved.
# Ignore directory
examples/
node_modules/
public/
build/
src/
dist/
deploy/
# Ignore specified file
.browserslistrc
.eslintignore
.prettierignore
.env
.env.*
*.js
Next, after registering an account on npmjs.com, execute the npm publish command to publish the component package.
After publishing successfully, enter the NPM homepage of the component npm/vue-code-view , you can see the project configuration information above.

Project sample website construction
Update vue.config.js, run npm run deploy:build to build the project sample website, and output it to the deploy directory.
const path = require("path");
const resolve = (dir) => path.join(__dirname, dir);
const IS_PROD = ["production", "prod"].includes(process.env.NODE_ENV);

module.exports = {
  publicPath: process.env.VUE_APP_PUBLIC_PATH || "/",
  productionSourceMap: false,
  outputDir: process.env.VUE_APP_ENV === "deploy" ? "deploy" : "dist",
  configureWebpack: (config) => {
    // Project entrance
    config.entry.app = "./examples/main.js"
  },
  ...
};
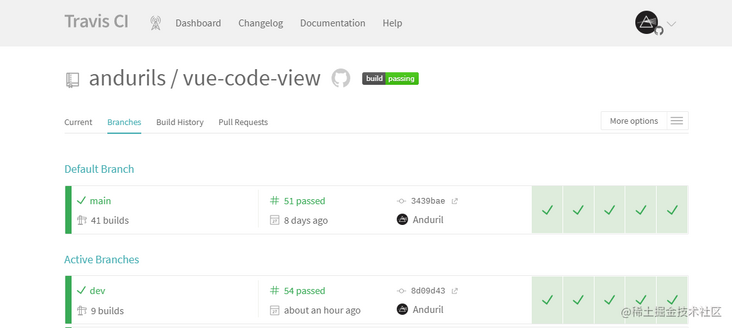
Continuous integration
Use Travis CI's continuous integration service to automatically build the project sample website and deploy it to the GH pages branch.
Add the. travis.yml file under the root directory to specify the behavior of Travis. By setting, once there is a new Commit in the code warehouse, Travis will look for the file and execute the commands (build, deploy, etc.).
y
sudo: false
language: node_js
node_js: 14
install:
  - yarn

script: npm run deploy:build
after_script:
  - mkdir temp_web
  - cd temp_web
  - git clone --depth 1 -b gh-pages --single-branch https://${TravisCI_Token}@${GH_REF} && cd vue-code-view
  - echo 'copy && commit'
  - rm -rf js fonts
  - cp -rf ../../deploy/** .
  - git config user.name "${U_NAME}"
  - git config user.email "${U_EMAIL}"
  - git add -A .
  - git commit -m ":construction_worker:- Build & Deploy by Travis CI"
  - git push origin gh-pages
  - echo "DONE, Bye~"
  - exit 0
Travis CI project construction background:
Turn on build compression
Install related plug-ins.
# gzip webpack 4.x corresponds to version 6.x
npm i compression-webpack-plugin@6.1.1 -D

# Code compression
npm i uglifyjs-webpack-plugin -D
Configure vue.config.js and open the plug-in.
...
const IS_PROD = ["production", "prod"].includes(process.env.NODE_ENV);
// gzip compression webpack 4.x corresponds to version 6.x cnpm I compression webpack- plugin@6.1.1  --save-dev
const CompressionWebpackPlugin = require("compression-webpack-plugin");
const productionGzipExtensions = /\.(js|css|json|txt|html|ico|svg)(\?.*)?$/i;
// Code compression
const UglifyJsPlugin = require("uglifyjs-webpack-plugin");

module.exports = {
  ...
  configureWebpack: (config) => {
    const plugins = [];
    // Configuration related to production environment
    if (IS_PROD && process.env.VUE_APP_ENV === "pub") {
      plugins.push(
        new CompressionWebpackPlugin({
          filename: "[path][base].gz",
          algorithm: "gzip",
          minRatio: 0.99,
          test: productionGzipExtensions,
          deleteOriginalAssets: false,
        })
      );
      plugins.push(
        new UglifyJsPlugin({
          uglifyOptions: {
            // Delete Note
            output: {
              comments: false,
            },
            // Remove console debugger
            compress: {
              drop_debugger: true,
              drop_console: true, // console
              pure_funcs: ["console.log"], // Remove console
            },
            // Delete warning
            warnings: false,
          },
          sourceMap: false,
          parallel: true, //Use multiple processes running in parallel to improve build speed. Default number of concurrent runs: os.cpus().length - 1.
        })
      );
    }
    config.plugins = [...config.plugins, ...plugins];
  },
};
Component documentation
Refer to the implementation of element 2 for customization Build / MD Loder parses and renders the Markdown file examples\docs\zh-CN\example.md Compile to HTML. Already mentioned above 04. Package components and prepare instruction documents It will not be described in detail.
Configure vue.config.js and add a custom Markdown Loader for the. md document.
module.exports = {
  ...
  configureWebpack: (config) => {
    config.resolveLoader.modules = ["node_modules", "./build/"]; // Custom loader
  },
  chainWebpack: (config) => {
    // Markdown Loader
    config.module
      .rule("md")
      .test(/\.md/)
      .use("vue-loader")
      .loader("vue-loader")
      .end()
      // Custom loader
      .use("md-loader")
      .loader("md-loader")
      .end();
  },
};
examples\router\index.js configure Routing:
const routes = [
  {
    path: "/md",
    name: "Markdown",
    component: (r) =>
      require.ensure([], () => r(require("../docs/zh-CN/example.md"))),
  },
];
0x03 end
This chapter mainly explains the operation items and detailed configuration step by step according to the sequence of the project from simple to complex. The principle of component implementation will be explained in detail below.
Unfinished to be continued~