title: building a unified development environment based on Docker
slug: build-development-environment-with-docker
date: 2021-06-27 18:56:23
thumbnail: ./images/cover/build-development-environment-with-docker.png
categories:
- Coding
tags: - Docker
- development environment
- Docker-Compose
preface
Most people may have encountered such a problem. After the functions are developed locally, when they are deployed to the server, or when others pull them locally and then develop, the functions will not work.
Most of the time, it is caused by different systems and dependencies. Therefore, in order to solve this problem, the need to build a unified development environment based on Docker arises.
Benefits of using Docker
- Easy deployment: it usually takes several hours to build the environment. Moreover, for team cooperation, every new person comes in, it needs to waste this avoidable time. Moreover, various problems often occur when building the environment, resulting in abnormal operation of the project code. If Docker is used, only the first person needs to write the development container, and others only need to pull it down to complete the construction of the project environment, which can effectively avoid meaningless waste of time.
- Isolation: we often deploy multiple project environments on one computer. If they are installed directly, they may interfere with each other. For example, a project needs node JS 14, and some require node JS 12, if it is deployed directly on the local machine, it can not coexist. If it is docker, this problem can be avoided. Docker also ensures that each application uses only the resources allocated to it (including CPU, memory, and disk space). A special software will not use all your available resources, otherwise it will reduce performance and even stop other applications completely.
realization
Install Docker
Linux
I use Arch Linux, so the following installation method is based on Arch Linux, and other distributions are similar, just replace it with its package management tool.
# Set the domestic mirror station, which is used for domestic speed-up. Optional operation
$ sudo pacman-mirrors -i -c China -m rank

# Installing Docker using Pacman
$ sudo pacman -S docker

# Establish docker user group. By default, the docker command uses Unix socket to communicate with the docker engine. Only root users and docker group users can access the Unix socket of docker engine. For security reasons, the root user is not directly used on Linux systems. Therefore, it is better to add users who need to use docker to the docker user group.
$ sudo groupadd docker

# Add the current user to the docker group, exit the current terminal and log in again
$ sudo usermod -aG docker $USER

# Test for successful installation
$ docker run --rm hello-world
Windows 10
It is easy to install docker under Windows 10. There are several ways:
Manual download and installation
Click the link below to download Docker Desktop for Windows.
After downloading, double-click docker desktop installer Exe starts the installation.
use winget install
$ winget install Docker.DockerDesktop
function
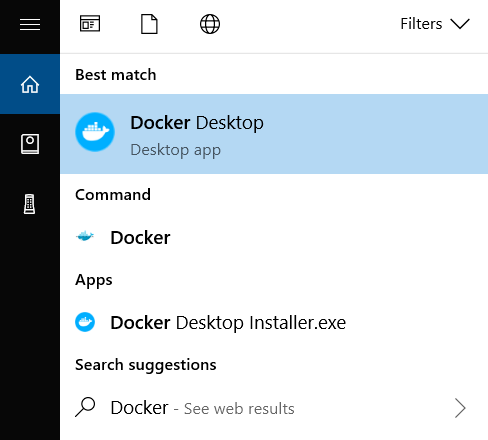
Enter Docker in the Windows search bar and click Docker Desktop to start running.
After Docker starts, a whale icon will appear in the Windows taskbar.

Wait for a moment. When the whale icon is still, it indicates that Docker is started successfully. Then you can open PowerShell/CMD/ Windows Terminal Use Docker.
macOS
Installing using Homebrew
Homebrew of Cask Docker Desktop for Mac is supported, so you can easily use Homebrew Cask for installation:
$ brew install --cask docker
Manual download and installation
If you need to download manually, please click below link Download Docker Desktop for Mac.
Please note that the software corresponding to the chip type is downloaded. The versions corresponding to M1 and Intel chips are not common.
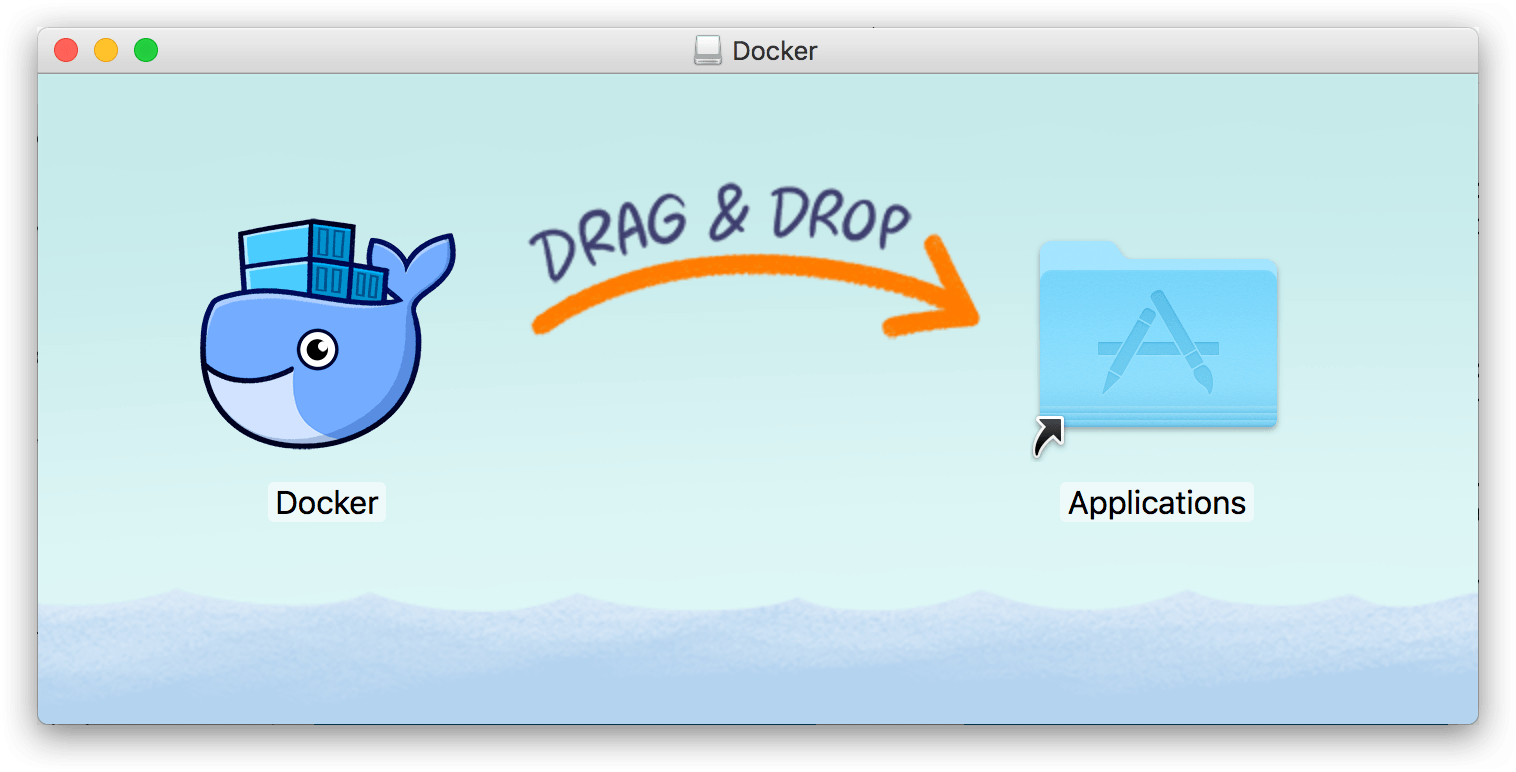
Like other Mac OS software, the installation is also very simple. Double click to download dmg file, and then drag the whale icon named Moby to the Application folder (you need to enter the user password).
function
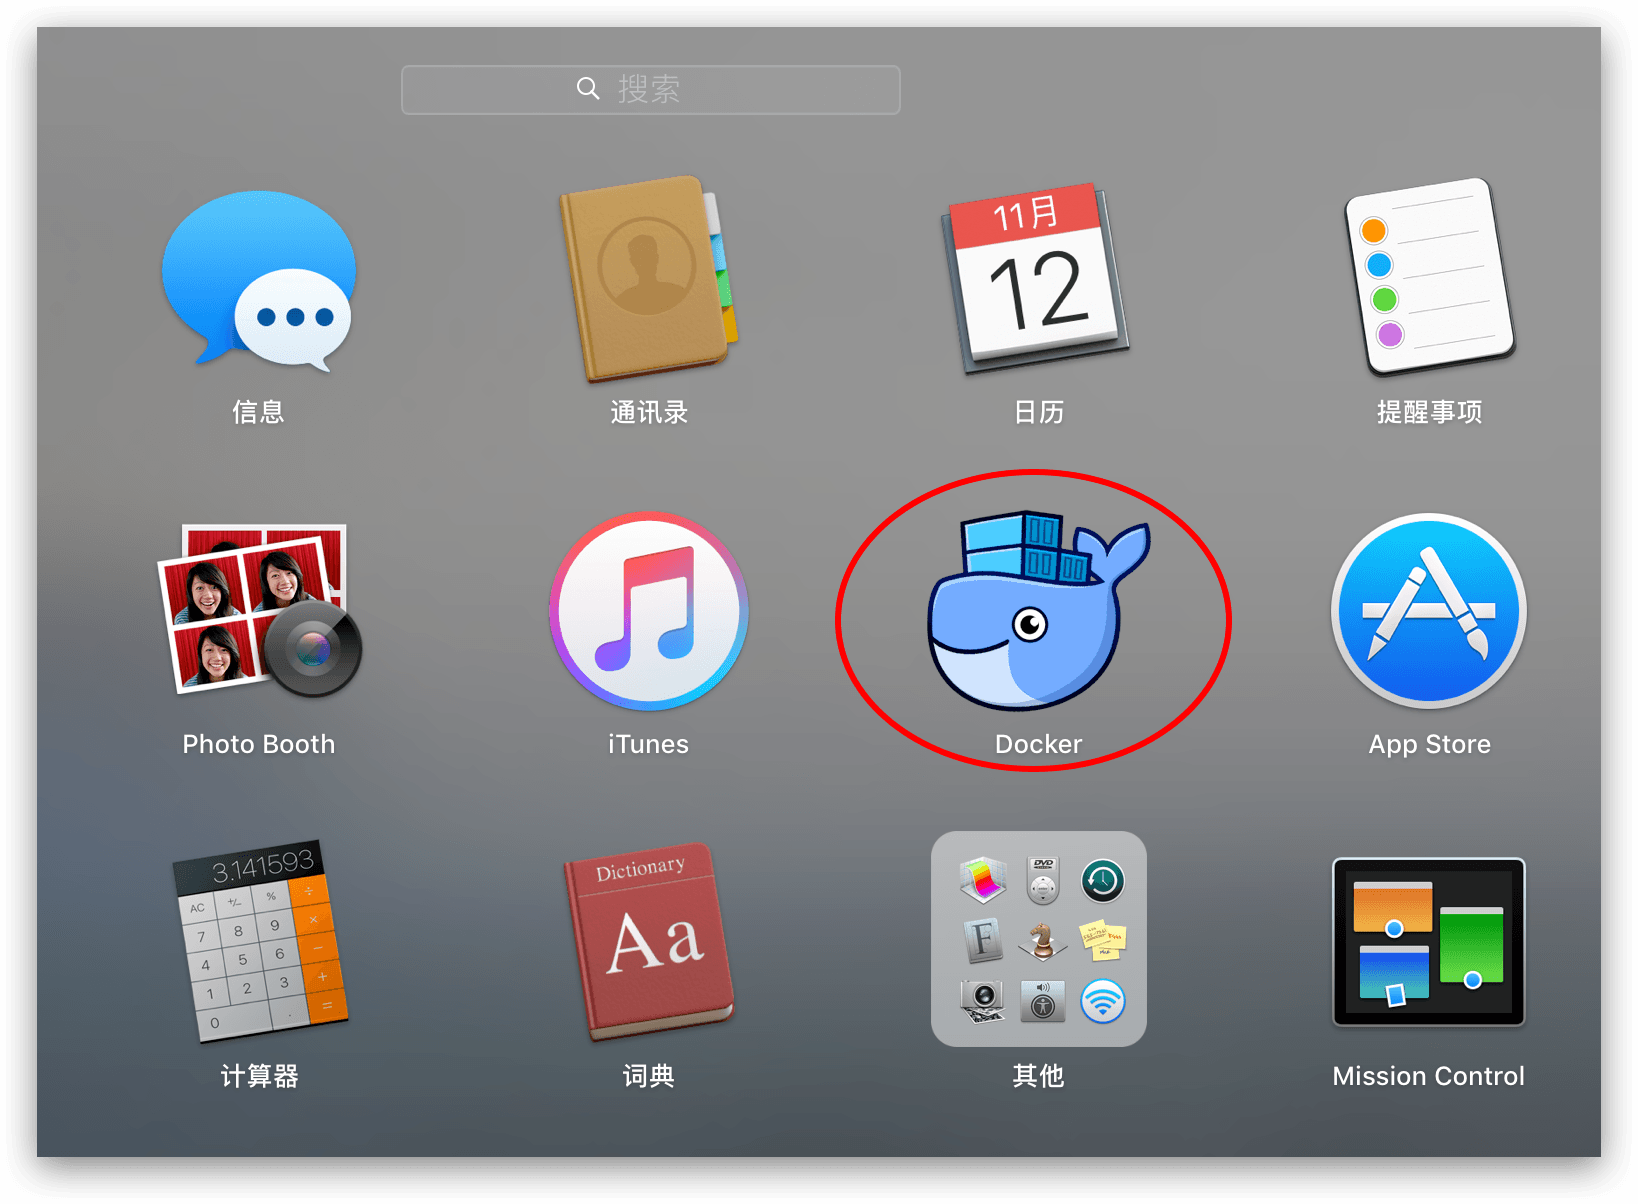
Find the Docker icon in the application and click Run.
After running, you will see an additional whale icon in the menu bar in the upper right corner, which indicates the running status of Docker.
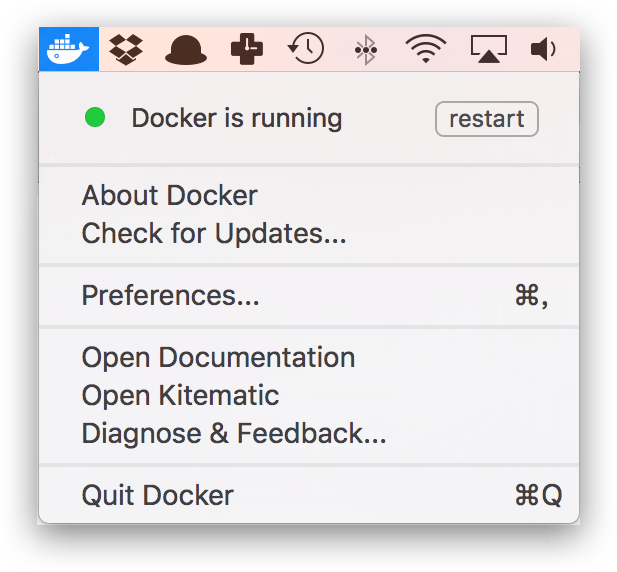
Each time you click the whale icon, the operation menu will pop up.

After that, you can check the installed Docker version through the command on the terminal.
$ docker --version
Write Dockerfile
After installing Docker, we can then write our own project development environment. This paper will take the front-end development environment as an example to build Dockerfile.
Include environment:
node.js 14.17
npm 6.14
yarn 1.22
# In front-end development, it is often necessary to use shell commands, and it is important to have a relatively complete environment. Therefore, ubuntu is selected as the basis. If you care about the container size, you can choose the applicable basic image
FROM ubuntu
MAINTAINER Caster "moecasts.caster@gmail.com"

# Setting environment variables
ENV DEBIAN_FRONTEND noninteractive

# Set time zone
ARG TZ=Asia/Shanghai
ENV TZ ${TZ}

RUN ln -snf /usr/share/zoneinfo/$TZ /etc/localtime && echo $TZ > /etc/timezone

# Operate with root user
USER root

# Replacing alicloud source can speed up the speed in China
RUN sed -i "s/security.ubuntu.com/mirrors.aliyun.com/" /etc/apt/sources.list && \
    sed -i "s/archive.ubuntu.com/mirrors.aliyun.com/" /etc/apt/sources.list && \
    sed -i "s/security-cdn.ubuntu.com/mirrors.aliyun.com/" /etc/apt/sources.list
RUN  apt-get clean

# Update the source and install the corresponding tools
RUN apt-get update && apt-get install -y \
    zsh \
    vim \
    wget \
    curl \
    python \
    git-core

#  Installing zsh makes it easier to use the shell later when entering the container
RUN git clone https://github.com/robbyrussell/oh-my-zsh.git ~/.oh-my-zsh \
    && cp ~/.oh-my-zsh/templates/zshrc.zsh-template ~/.zshrc \
    && git clone https://github.com/zsh-users/zsh-autosuggestions ${ZSH_CUSTOM:-~/.oh-my-zsh/custom}/plugins/zsh-autosuggestions \
    && git clone https://github.com/zsh-users/zsh-syntax-highlighting.git ${ZSH_CUSTOM:-~/.oh-my-zsh/custom}/plugins/zsh-syntax-highlighting \
    && sed -i 's/^plugins=(/plugins=(zsh-autosuggestions zsh-syntax-highlighting z /' ~/.zshrc \
    && chsh -s /bin/zsh

# Create me user
RUN useradd --create-home --no-log-init --shell /bin/zsh -G sudo me
RUN adduser me sudo
RUN echo 'me:password' | chpasswd

# Install omz for me
USER me
RUN git clone https://github.com/robbyrussell/oh-my-zsh.git ~/.oh-my-zsh \
    && cp ~/.oh-my-zsh/templates/zshrc.zsh-template ~/.zshrc \
    && git clone https://github.com/zsh-users/zsh-autosuggestions ${ZSH_CUSTOM:-~/.oh-my-zsh/custom}/plugins/zsh-autosuggestions \
    && git clone https://github.com/zsh-users/zsh-syntax-highlighting.git ${ZSH_CUSTOM:-~/.oh-my-zsh/custom}/plugins/zsh-syntax-highlighting \
    && sed -i 's/^plugins=(/plugins=(zsh-autosuggestions zsh-syntax-highlighting z /' ~/.zshrc

# Install nvm and node
ENV NVM_DIR /home/me/.nvm
ENV NODE_VERSION v14
RUN mkdir -p $NVM_DIR && \
    curl -o- https://gitee.com/mirrors/nvm/raw/master/install.sh | bash \
        && . $NVM_DIR/nvm.sh \
        && nvm install ${NODE_VERSION} \
        && nvm use ${NODE_VERSION} \
        && nvm alias ${NODE_VERSION} \
        && ln -s `npm bin --global` /home/me/.node-bin \
        && npm install --global nrm \
        && nrm use taobao

USER me
RUN echo '' >> ~/.zshrc \
    && echo 'export NVM_DIR="$HOME/.nvm"' >> ~/.zshrc \
    && echo '[ -s "$NVM_DIR/nvm.sh" ] && . "$NVM_DIR/nvm.sh"  # This loads nvm' >> ~/.zshrc

# Install yarn
RUN curl -o- -L https://yarnpkg.com/install.sh | bash; \
    echo '' >> ~/.zshrc && \
    echo 'export PATH="$HOME/.yarn/bin:$PATH"' >> ~/.zshrc

# Add NVM binaries to root's .bashrc
USER root

RUN echo '' >> ~/.zshrc \
    && echo 'export NVM_DIR="/home/me/.nvm"' >> ~/.zshrc \
    && echo '[ -s "$NVM_DIR/nvm.sh" ] && . "$NVM_DIR/nvm.sh"  # This loads nvm' >> ~/.zshrc

USER root

RUN echo '' >> ~/.zshrc \
    && echo 'export YARN_DIR="/home/me/.yarn"' >> ~/.zshrc \
    && echo 'export PATH="$YARN_DIR/bin:$PATH"' >> ~/.zshrc

# Add PATH for node
ENV PATH $PATH:/home/me/.node-bin

# Add PATH for YARN
ENV PATH $PATH:/home/me/.yarn/bin

# delete apt/lists,You can reduce the size of the final image. For details, see: https://docs.docker.com/develop/develop-images/dockerfile_best-practices/#general-guidelines-and-recommendations
USER root
RUN rm -rf /var/lib/apt/lists/*

WORKDIR /var/www
After writing the Dockerfile, you can build it:
docker build -t frontend/react:v1 .
After construction, you can run directly:
# Run as me, recommended method
docker run --user=me -it frontend/react:v1 /bin/zsh

# Run as root
docker run -it frontend/react:v1 /bin/zsh
Write docker compose yml
During development, we usually need multiple containers to work together. For example, when we need to work with mysql or other containers, we use docker - compose YML can better organize them.
version: '2'
services:
  react:
    build:
      context: .
      dockerfile: react/Dockerfile
    tty: true
    ports:
      - 30000:3000
    volumes:
      - ./react/www:/var/www
    networks:
      - frontend
  mysql:
    image: mysql:5.7
    ports:
      - 33060:3306
    volumes:
      - ./mysql/data:/var/lib/mysql
      - ./mysql/docker-entrypoint-initdb.d:/docker-entrypoint-initdb.d
    environment:
      - MYSQL_ROOT_PASSWORD=password
    networks:
      - frontend

# By placing the container on the same network, you can access it directly through the container name
networks:
  frontend:
    driver: bridge
Start container
Write and play the Dockerfile and docker compose After YML, you can start development happily!
# Enter docker compose Directory of YML
cd frontend

# Start docker compose in the background All containers in YML. If the container is not built, it will be built first
docker compose up -d

# Enter the react container for command line interaction
docker compose exec --user=me react /bin/zsh
In order to test whether containers can access each other, you can write the following files using. The database needs to be created by yourself:
// index.js
const mysql = require('mysql')
const connection = mysql.createConnection({
    host: 'mysql',
    user: 'root',
    password: 'password',
  database: 'test',
})

connection.connect();

connection.query(`SELECT * FROM users`, function (error, results, fields) {
  if (error) throw error;
  console.log(results)
})

connection.end();
After running, you can see the results:
$ node index.js
[ RowDataPacket { id: 1, name: 'Caster' } ]
summary
It is very convenient to use Docker to build a development environment. Once built, it can be used many times on many machines. Even if you want to reinstall the system, you don't have to configure it repeatedly.
If you don't like to write Dockerfile, you can also directly open a container, enter the container configuration, and then use docker save/export to export.
Source code: github.com/MoeCasts/dockerfile-fro...
This article was first published in Personal blog