Article catalogue
Installing the graphics card driver on Linux
Install NVIDIA Container Toolkit
Docker image and container startup, packaging and export

Take OpenPCdet as an example
reference resources: [Docker] image packaging trained model_ Emery_learning blog - CSDN blog
Installation of docker (gpu)
reference resources: Docker deploys deep learning server, CUDA+cudnn+ssh_ Causeway burning Anan's blog - CSDN blog
Here are the steps to install:
Installing the graphics card driver on Linux
reference resources: Three methods of installing graphics card driver in ubuntu_ u014682691 column - CSDN blog_ ubuntu installing the graphics card driver
The first method with good network speed is recommended. After the installation is completed, enter NVIDIA SMI, and you will be prompted with a problem. Restart the computer to restore normal
You can also consider not updating your own driver
Install docker
1. If an old version of docker is installed, you need to uninstall it first!
sudo apt-get remove docker docker-engine docker.io containerd runc
2. Update apt package index and install the package to allow apt to use the repository via HTTPS
sudo apt-get update
sudo apt-get install \
    ca-certificates \
    curl \
    gnupg \
    lsb-release
3. Add Docker's official GPG key:
curl -fsSL https://download.docker.com/linux/ubuntu/gpg | sudo gpg --dearmor -o /usr/share/keyrings/docker-archive-keyring.gpg
4. Use the following command to set up the stable repository.
echo \
  "deb [arch=$(dpkg --print-architecture) signed-by=/usr/share/keyrings/docker-archive-keyring.gpg] https://download.docker.com/linux/ubuntu \
  $(lsb_release -cs) stable" | sudo tee /etc/apt/sources.list.d/docker.list > /dev/null
5. Install Docker engine
sudo apt-get update
sudo apt-get install docker-ce docker-ce-cli containerd.io
6. At this time, docker has been installed. Run the following command to test it
sudo docker run hello-world
Install NVIDIA Container Toolkit
reference resources: Installation Guide — NVIDIA Cloud Native Technologies documentation
1. Set the repository and GPG key of the stable version
distribution=$(. /etc/os-release;echo $ID$VERSION_ID) \
   && curl -s -L https://nvidia.github.io/nvidia-docker/gpgkey | sudo apt-key add - \
   && curl -s -L https://nvidia.github.io/nvidia-docker/$distribution/nvidia-docker.list | sudo tee /etc/apt/sources.list.d/nvidia-docker.list
2. Update the source and install NVIDIA container toolkit
sudo apt-get update && sudo apt-get install -y nvidia-container-toolkit
sudo systemctl restart docker
3. After setting the default operation, restart the Docker daemon to complete the installation
sudo systemctl restart docker
4. At this time, you can test the working settings by running the basic CUDA container
sudo docker run --rm --gpus all nvidia/cuda:11.0-base nvidia-smi
ps: the above is where I often make mistakes. The previous installation may have made mistakes without strictly following the steps. (sometimes it's normal the day before, but it's wrong to turn off the computer the next day)
could not select device driver "" with capabilities: [[gpu]].

If the above problems occur, uninstall the docker and follow the previous steps again. Or wait, restart the computer
If normal, the installation of docker (gpu) is successful. The following are the key steps to build images, containers and environments based on Dockerfile.
Write dockerfile
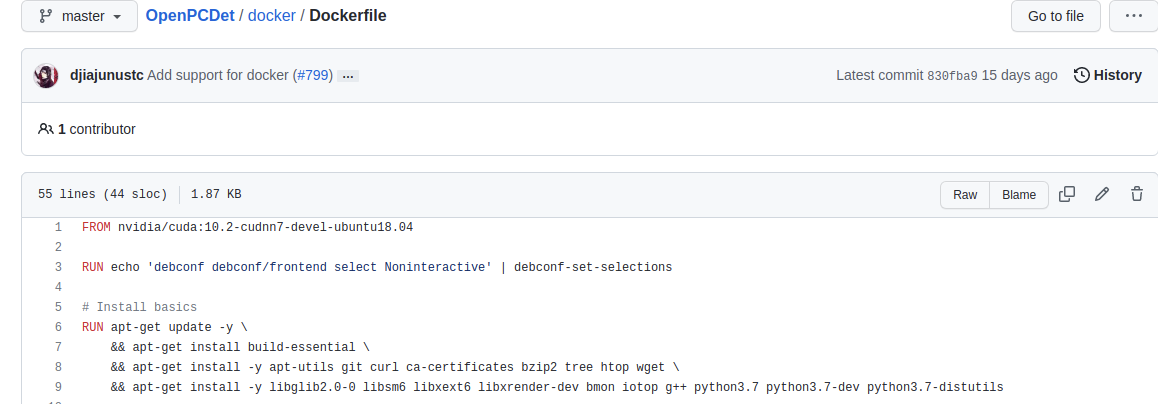
Select a basic dockerfile (take OpenPCdet as an example)
Just a few days ago, the author of Openpcdet provided a dockerfile, based on which I modified it to suit my own environment
OpenPCDet docker address: https://github.com/open-mmlab/OpenPCDet/tree/master/docker
dockerfile address: https://github.com/open-mmlab/OpenPCDet/blob/master/docker/Dockerfile
There are many contents, including some contents related to the installation environment. We can create a folder locally and then create a Dockerfile
touch Dockerfile
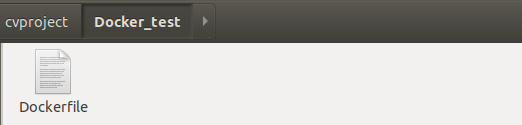
Copy the above content into it, refer to some writing methods in it, and modify it according to your own environment.
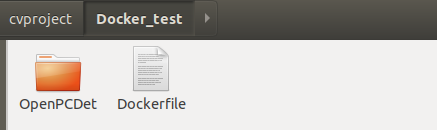
For example, my local environment is RTX3090. Generally, the cuda environment installed is 11.1 with cudnn8 version. Then we need to change the basic image, and then install the corresponding pytorch 1.8. Then I also want to replace the source in the docker image with Tsinghua source, and directly put the next good OpenPCDet directory into this directory.
The revised key parts are as follows:
FROM nvidia/cuda:11.1.1-cudnn8-devel-ubuntu18.04
MAINTAINER Wjh<xxx@xxx.mail.com>
RUN echo 'debconf debconf/frontend select Noninteractive' | debconf-set-selections

RUN echo "export LANG=C.UTF-8" >>/etc/profile \
&& mkdir -p /.script \
&& cp /etc/apt/sources.list /etc/apt/sources.list.bak \
&& echo "deb https://mirrors.tuna.tsinghua.edu.cn/ubuntu/ bionic main restricted universe multiverse\n\
deb https://mirrors.tuna.tsinghua.edu.cn/ubuntu/ bionic-updates main restricted universe multiverse\n\
deb https://mirrors.tuna.tsinghua.edu.cn/ubuntu/ bionic-backports main restricted universe multiverse\n\
deb https://mirrors.tuna.tsinghua.edu.cn/ubuntu/ bionic-security main restricted universe multiverse" >/etc/apt/sources.list

# Install basics

RUN apt-get update -y \
    && apt-get install build-essential \
    && apt-get install -y apt-utils git curl ca-certificates bzip2 tree htop wget \
    && apt-get install -y libglib2.0-0 libsm6 libxext6 libxrender-dev bmon iotop g++ python3.7 python3.7-dev python3.7-distutils
...

# Install torch and torchvision
# See https://pytorch.org/ for other options if you use a different version of CUDA
RUN pip install torch==1.8.0+cu111 torchvision==0.9.0+cu111 torchaudio==0.8.0 -f https://download.pytorch.org/whl/torch_stable.html

WORKDIR /root
COPY . /root
...

RUN pip install spconv-cu111
Explain the core content:
FROM nvidia/cuda:11.1.1-cudnn8-devel-ubuntu18.04 stands for NVIDIA / CUDA: 11.1.1-cudnn8-devel-ubuntu 18 04 as the base image (understood as the parent image)
MAINTAINER sets the author of the image, which can be any string
RUN xxx is followed by the command running in this image
WORKDIR: set the working directory. The above example is set to root. We can also set it to other names ourselves
COPY: the usage is COPY [src] [dest], and the src above is ".", It means to COPY all files in the current directory to DeST (image directory)
The above basic image needs to go to the online docker to find a suitable one. You can search cuda first, find the official image, and then find the cuda version you need
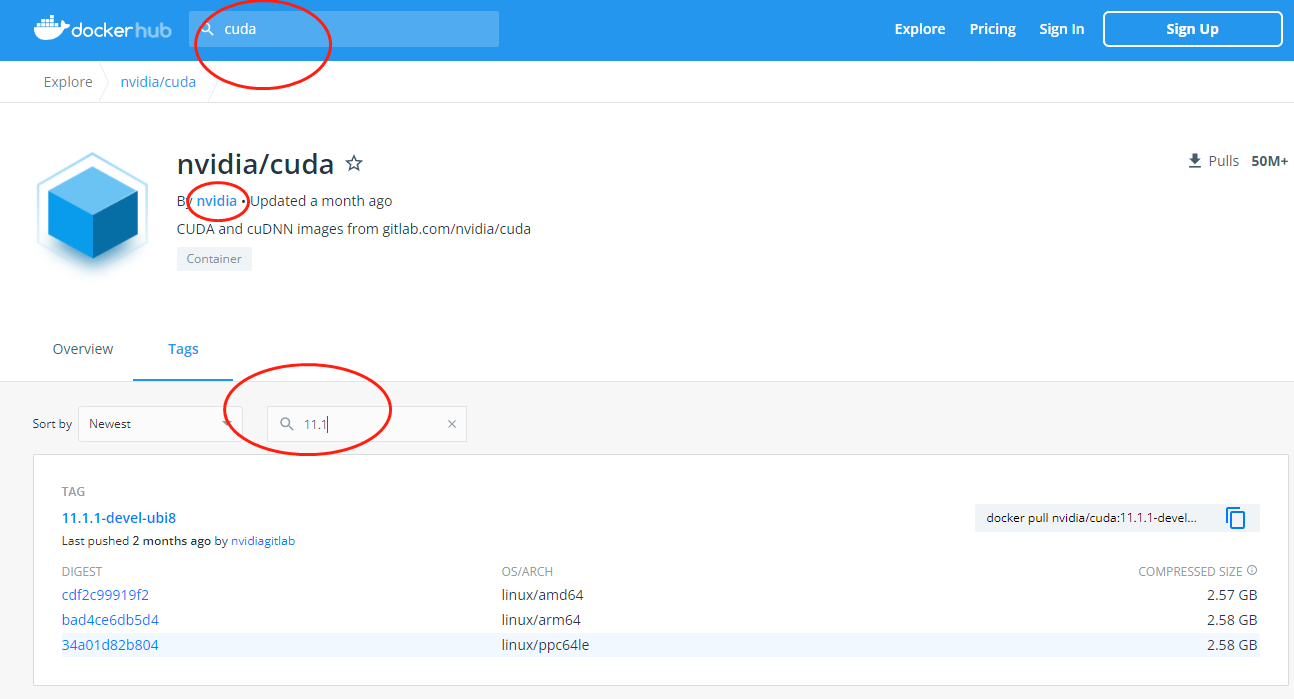
For example, according to the environment I need, I chose the following one
(attach link: Docker Hub)
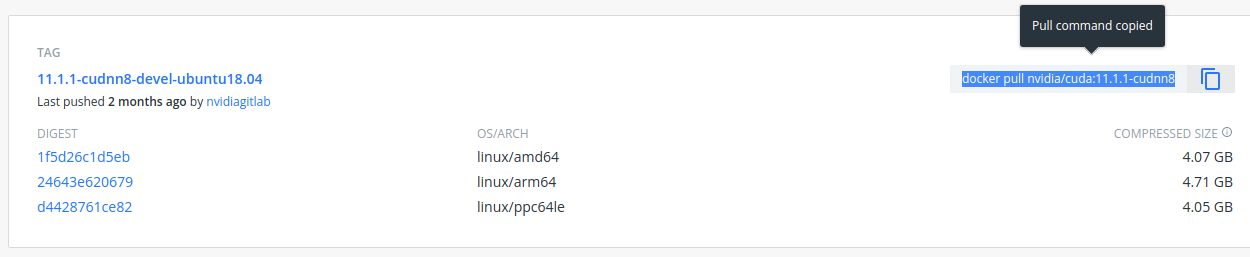
It is recommended to install the devel version on the Internet. It runs completely. Copy the pull indicated in the figure above and put it in the first line From xxx in the Dockerfile according to the rules
Execute the build command in the current directory to build the docker image
docker build ./ -t xxx #xxx is your own name
ps:dockerfile basic syntax reference: How to make container image_ Container mirroring service SWR_ Frequently asked questions_ Shared version_ General class_ Hua Weiyun
Docker image and container startup, packaging and export
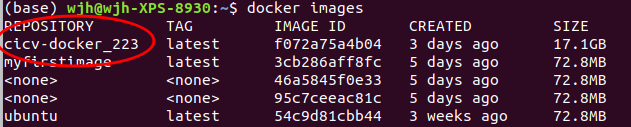
View existing images
docker images
After creation, create a container from the image and enter the built image container
docker run -it --name xxx --gpus all xxxx
#(the name in the front will be taken by yourself, if not, the system will take it randomly, and the xxx in the back is the container id or name)
ctrl + d can exit the current container
Note that if you want to enter the newly created image container again, you can't use the above command. A name will fix a container. If you want to enter the container, check the container id first
View the generated container ID(CONTAINER ID)
docker ps -a
Run the container and enter the bash interface
docker start container_ID  #If the prompt is not running, enter this command to start the container
docker exec -it container_ID /bin/bash #Enter bash interface
The trained model files and related codes can be copied locally into the container
docker cp local_path container_ID:container:path
It is equivalent to a virtual environment with a configured environment, where you can run code and test.
Generate a new image of the container
docker commit container_ID your_image_name #Like your_image_name = my/image:v1
#Or just enter image_name
Get new image id:
docker images
Package the new image and generate a tar file
docker save image_ID > XXX.tar
## docker save -o my_example.tar my_image_name:latest (latest is the image container version set by default)

Import the above image on another host (or locally)
docker load -i my_example.tar
Then execute docker images to see the imported image
Then run the container according to the above steps.
Some problems encountered:
no module name 'pcdet'
After compiling in the container, the above prompt appears when running the code. Therefore, it is necessary to explain it in the container and execute the following commands:
export PYTHONPATH=$HOME/Cicv_task1_223/:$PYTHONPATH
It can operate normally
libGL.so.1
Tip: LIBGL so. 1: cannot open shared object file: No such file or directory
Within the mirror environment
apt update
apt install libgl1-mesa-glx