Use vue 2 The simple vue background project built by version x and other technologies can realize the basic functions of the background.
If you are still learning, you will inevitably make mistakes. If you have any problems, please give more advice.
1, Infrastructure configuration
View vue cli version:
vue --version
Create a project:
vue create xxx
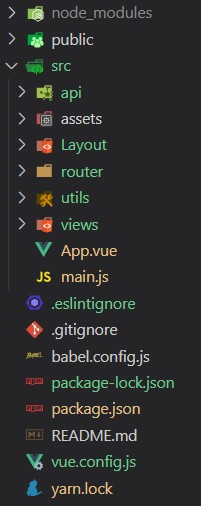
| catalogue | brief introduction |
|---|---|
| api | Storage api |
| assets | Storing static resources |
| Layout | Store common components |
| router | route |
| utils | Global common method |
| views | page |
| App.vue | Entry page |
| main.js | Entry, loading components, initialization, etc |
If you want to adjust the webpack configuration, you can use Vue config. JS. Official documents: https://cli.vuejs.org/zh/guide/webpack.html
(1) Encapsulating axios
Request. In the utils folder JS, and finally export the configuration to facilitate the packaging request in the next step.
Knowledge points involved here
- axios instance: official document: Axios instance
- Interceptor: Official Documents: Interceptor
// Encapsulating axios
import axios from "axios";

// Create an axios instance
const service = axios.create({
  timeout: 120000,
});

// Add request interceptor
service.interceptors.request.use((config) => {
  // What to do before sending a request
  // For example, put the token into the request header
  // The token has been saved in the cookie when logging in
  // const token = cookie.get("token");
  // if (token) {
  //   config.headers.authorization = token;
  // }
  return config;
}, (error) => {
  // What to do about request errors
  console.log(error);
  return Promise.reject(error);
});


// Add response interceptor
service.interceptors.response.use((response) => {
  // The function is triggered by status codes in the range of 2xx
  // Do something about the response data
  return response;
}, (error) => {
  // The function is triggered by status codes that are outside the 2xx range
  // Do something about response errors
  console.log(error);
  if (error && error.response) {
    switch (error.response.status) {
      case 302: this.$message('Interface redirection!'); break;
      case 400: this.$message('Incorrect parameter!'); break;
      case 401:
        this.$message({
          message: 'Login expired, please login again',
          type: 'warning'
        });
        break;
      case 403: this.$message('You do not have permission to operate!'); break;
      case 404: this.$message('Error requesting address!'); break; // Under the correct domain name
      case 408: this.$message('Request timed out!'); break;
      case 409: this.$message('The same data already exists in the system!'); break;
      case 500: this.$message('Server internal error!'); break;
      case 501: this.$message('Service not implemented!'); break;
      case 502: this.$message('Gateway error!'); break;
      case 503: this.$message('Service unavailable!'); break;
      case 504: this.$message('The service is temporarily inaccessible. Please try again later!'); break;
      case 505: this.$message('HTTP Version not supported!'); break;
      default: this.$message('Abnormal problem, please contact the administrator!'); break
    }
  }
  return Promise.reject(error);
})

export default service;
(2) Encapsulation request
In the utils folder, http JS file, make the encapsulation request.
Installation required qs Library, qs is a library that adds some security to query string parsing and serializing strings. Official documents:
import service from './request';
import qs from 'qs';

const _post = (api, data, headers = {}) => {
  return new Promise((resolve, reject) => {
    service.post(api, data, { headers })
      .then(res => { resolve(res) })
      .catch(error => { reject(error) })
  })
}

const post = (api, data, headers = {}) => {
  headers['Content-Type'] = 'application/x-www-form-urlencoded'
  // qs.stringify() is used to serialize objects or arrays into URL format
  return _post(api, qs.stringify(data), headers);
}

const postJson = (api, data, headers = {}) => {
  headers['Content-Type'] = 'application/json;charset=utf-8'
  return _post(api, JSON.stringify(data), headers)
}

const postFormData = (api, data, headers = {}) => {
  headers['Content-Type'] = 'multipart/form-data'
  return _post(api, data, headers)
}

const get = (api, params = {}, headers = {}) => {
  return new Promise((resolve, reject) => {
    service.get(api, { params, headers })
      .then(res => {
        resolve(res)
      })
      .catch(error => {
        reject(error)
      })
  })
}

export default { post, postJson, postFormData, get }
(3) Agents: solving cross domain problems
reference resources: Vue Cli official document - devServer.proxy
Modify Vue config. JS file
module.exports = {
  devServer: {
    proxy: {
      '^/api': {
        target: 'http://xxx.xxx.x.xx:xx / ', / / prefix of interface
        ws: true,//Proxy websocked
        changeOrigin: true,//Virtual sites need to manage origin more
        pathRewrite: {
          '^/api': ''//Rewrite path
        }
      }
    }
  }
}
2, Using Elementui
(1) Installation
npm i element-ui -S
(2) Introducing Element
Complete introduction, main js
import Vue from 'vue';
import ElementUI from 'element-ui';
import 'element-ui/lib/theme-chalk/index.css';
import App from './App.vue';

Vue.use(ElementUI);

new Vue({
  el: '#app',
  render: h => h(App)
});
3, Login permission
Install Vue router (version 3.x I use). There are two ways:
- install https://router.vuejs.org/zh/installation.html
npm install vue-router
- Because I have one in use Vue CLI (opens new window) I can add Vue Router as a project plug-in.
vue add router
Note: if it is added, the following changes will occur.
-
Add router folder, including index js;
-
Add views folder, including about Vue and home Vue documents;
-
App.vue file is modified;
-
main.js file is modified;
(1) Public layout
Before configuring routing, build a public layout.
Under the components folder, create a new index JS file, which is used to export multiple components together:
export {default as HeadBar} from './header.vue';
export {default as SiderBar} from './SideBar/index.vue';
export {default as AppMain} from './main.vue';
Under the Layout folder, create a new Layout Vue file, import various components, such as upper navigation bar, side bar and content area.
<template>
  <el-container>
    <el-aside width="210px" style="background-color:#304156;">
      <SiderBar />
    </el-aside>
    <el-container>
      <el-header>
        <HeadBar />
      </el-header>
      <el-main>
        <AppMain />
      </el-main>
    </el-container>
  </el-container>
</template>

<script>
import { HeadBar, SiderBar, AppMain } from "./components";

export default {
  components: {
    HeadBar,
    SiderBar,
    AppMain
  }
}
</script>

<style>
.el-header {
  border-bottom: 1px solid #f3f4f5;
}

.el-aside {
  text-align: center;
}

.el-main {
  color: #333;
}

body > .el-container {
  margin-bottom: 40px;
}
</style>
(2) . configure routing
Step 1: define route
explain:
- The lazy loading of the route is configured in the route: when the application is packaged and built, the JavaScript package will become very large and affect the page loading. If we can divide the components corresponding to different routes into different code blocks, and then load the corresponding components when the route is accessed, it will be more efficient.
- The in Vue router is used Named view , use the public layout, which will be described later.
// router.js
import Vue from 'vue'
import VueRouter from 'vue-router'
import Layout from '../Layout/layout.vue';

// Lazy loading
const Login = () => import('../views/Login/index.vue');

//Using routing plug-ins
Vue.use(VueRouter)

// Static routing table that must be displayed
const routes = [
  {
    path: '/login',
    component: Login,
    hidden: true
  },
  // Routing with only one level menu
  {
    path: '',
    // Named views are used here
    component: Layout,  // Globally unified layout file
    children: [{
      path: '',
      name: 'home',
      // Lazy loading
      component: () => import('../views/Home.vue'),
      meta: { title: 'home page' }
    }]
  },
  // Route with secondary menu
  {
    path: '/user',
    component: Layout,
    name: 'user',
    meta: { title: 'user management ' },
    children: [
      {
        path: 'list',
        name: 'list',
        component: () => import('../views/About.vue'),
        meta: { title: 'User list' }
      },
      {
        path: 'test1',
        name: 'test1',
        component: () => import('../views/About.vue'),
        meta: { title: 'User test 1' }
      }
    ]
  },
]

// instantiation
const router = new VueRouter({
  mode: 'history',
  base: process.env.BASE_URL,
  routes
})

export default router
Step 2: mount the root instance
In main JS,
import Vue from 'vue';
import App from './App.vue'
import router from './router'

new Vue({
  // mount
  router,
  render: h => h(App)
}).$mount('#app')
Step 3: configure app vue
<template>
  <div id="app">
    <!-- Here's the point -->
    <router-view />
  </div>
</template>

<script>

export default {
  name: 'App',
}
</script>

<style>
body {
  margin: 0;
  padding: 0;
}
#app {
  font-family: Avenir, Helvetica, Arial, sans-serif;
  -webkit-font-smoothing: antialiased;
  -moz-osx-font-smoothing: grayscale;
  color: #2c3e50;
}
</style>
(3) , login
The login interface is omitted here and only the key steps are recorded.
After successful login, store information and jump.
......
if(res.data.code === 200){
	localStorage.setItem('userInfo', res.data.userInfo);
	this.$router.push({ path: '/' });
}
......
(4) Routing guard (authentication)
[navigation Guard] in Vue router is used here( Navigation guard | Vue Router (vuejs.org)) .
In the case of no login, you can't access other pages by entering the address in the address bar. Therefore, route authentication must be added. You can only release after obtaining the data in the cookie for verification.
Use router Before each registers a global front guard:
// router.js

......
// instantiation
const router = new VueRouter({
......
})

router.beforeEach((to, from, next) => {
  // To: the target routing object to be entered (current page)
  // from: the route that the current navigation is about to leave (the page in the previous step)
  // next:
  if (localStorage.getItem('userInfo')) {
    next();
  } else {
    if (to.path === '/login') {
      next();
    } else {
      next('/login');
    }
  }
})

export default router
(5) , sidebar
Sidebar: dynamically display the sidebar according to the route.
Mainly through this$ router. options. Routes get the route through this$ route. Path gets the current route.
// Layout/components/SideBar/index.vue

<template>
  <div>
    <h1 style="color: white;">Logo</h1>
    <el-menu
      mode="vertical"
      :unique-opened="true"
      :collapse-transition="false"
      background-color="#304156"
      :default-active="activeMenu"
      text-color="#bfcbd9"
      active-text-color="#409EFF"
    >
      <sidebar-item :routes="routes" />
    </el-menu>
  </div>
</template>

<script>
import SidebarItem from './sidebarItem.vue'
export default {
  components: {
    SidebarItem
  },
  computed: {
    activeMenu() {
      return this.$route.path
    },
    routes() {
      return this.$router.options.routes
    }
  }
}
</script>

<style scoped>
.el-menu {
  border-right: none;
}
</style>
// sidebarItem.vue
<template>
  <div class="menu-wrapper">
    <template v-for="item in routes" v-if="!item.hidden && item.children">
      <!-- hold user Filtered -->
      <router-link
        v-if="hasOneShowingChildren(item.children) && !item.children[0].children"
        :to="item.path + '/' + item.children[0].path"
        :key="item.children[0].name"
      >
        <el-menu-item
          :index="item.path + '/' + item.children[0].path"
        >
          <!-- <svg-icon
            v-if="item.children[0].meta && item.children[0].meta.icon"
            :icon-class="item.children[0].meta.icon"
          ></svg-icon>-->
          <span
            v-if="item.children[0].meta && item.children[0].meta.title"
            slot="title"
          >{{ item.children[0].meta.title }}</span>
        </el-menu-item>
      </router-link>

      <el-submenu v-else :index="item.name || item.path" :key="item.name">
        <!-- Show first level menu -->
        <template slot="title">
          <!-- <svg-icon v-if="item.meta && item.meta.icon" :icon-class="item.meta.icon"></svg-icon> -->
          <span v-if="item.meta && item.meta.title" slot="title">{{ item.meta.title }}</span>
        </template>

        <template v-for="child in item.children" v-if="!child.hidden">
          <!-- Determine whether there is a three-level menu -->
          <sidebar-item
            :is-nest="true"
            class="nest-menu"
            v-if="child.children && child.children.length > 0"
            :routes="[child]"
            :key="child.path"
          ></sidebar-item>

          <router-link v-else :to="item.path + '/' + child.path" :key="child.name">
            <el-menu-item :index="item.path + '/' + child.path" class="test">
              <!-- <svg-icon v-if="child.meta && child.meta.icon" :icon-class="hild.meta.icon"></svg-icon> -->
              <span v-if="child.meta && child.meta.title" slot="title">{{ child.meta.title }}</span>
            </el-menu-item>
          </router-link>
        </template>
      </el-submenu>
    </template>
  </div>
</template>

<script>
export default {
  name: 'SidebarItem',
  data() {
    return {
      console: window.console
    }

  },
  props: {
    routes: {
      type: Array
    }
  },
  methods: {
    hasOneShowingChildren(children) {
      const showingChildren = children.filter(item => {
        return !item.hidden
      })
      // If the length is one, there is no secondary route
      if (showingChildren.length === 1) {
        return true
      }
      return false
    }
  }
}
</script>

<style scoped>
.menu-wrapper a {
  text-decoration: none;
}
</style>

<style>
.test  {
  padding-left: 60px !important;
  background-color: #1f2d3d !important;
}

.el-menu-item.is-active { color: #6681FA !important; background-color: #EAEEFF !important; }
</style>
4, Optimize
(1) Simplified reference path:
Create a new Vue from the root directory config. JS file
const path = require('path');

const resolve = (dir) => {
  return path.join(__dirname, dir);
}

module.exports = {
  // Allows finer grained modifications to the internal webpack configuration
  chainWebpack: (config) => {
    config.resolve.alias
      .set('@', resolve('src'))
      .set('components', resolve('src/components'));
  }
}
(2) Close vue code check
New root directory eslintignore file
src
(3) Problems encountered in the project
1,Invalid Host header in vue project
2. Layout with spacing
Solution: in app In Vue
<style>
body {
  margin: 0;
  padding: 0;
}
</style>
5, Reference
2,<Vue router official document>
3,<Elementui official documentation>
4,<Touch your hand and take you to the backstage with vue (basic chapter)>
6. And the official website of each plug-in has been distributed in the article.