Google test (also known as gtest) is a testing framework developed by Google testing technology team. It provides a set of excellent unit testing solutions for c/c + + code. This paper introduces how to use Google test to build your own unit test project from zero under windows.
0. Environmental preparation
System: Windows10
vscode: https://code.visualstudio.com/
mingw-64: https://www.mingw-w64.org/downloads/
cmake: https://cmake.org/download/
googletest: https://github.com/google/googletest
The code editor uses visual studio code to download c/c + + related plug-ins.
Download mingw-64 and cmake compilation tools, and add the tool file path to the system environment variable
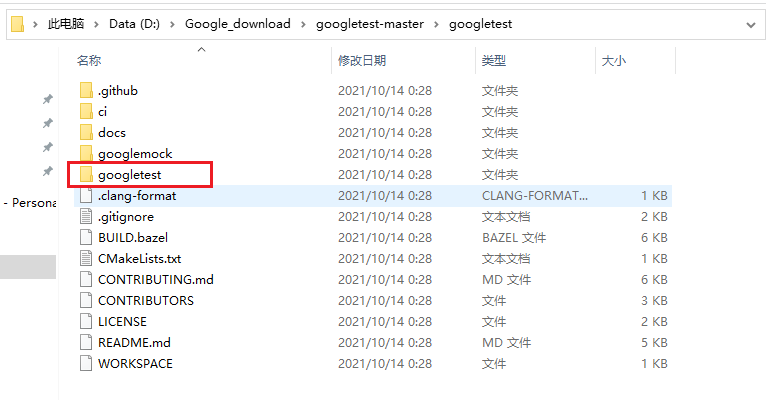
Download the Google test open source project
1. Compile gtest dynamic link library
To build a gtest test project, you only need to link the dynamic library of Google test with your own unit test program.
From the command line, enter the Google test folder directory of the Google test project

Modify CMakeLists.txt in this directory and set the option of compiling dll Dynamic Library
(if an error is reported and Google test_version is not defined, add a line set at the top (Google test_version 1.11.0))

cmake compilation under Windows Environment:
cmake -G "MinGW Makefiles"
// If you have previously executed cmake and have not compiled the desired library, you need to delete CMakeCache.txt first and then execute it again
After generating the MakeFile, execute the mingw32 make command of mingw32
mingw32-make
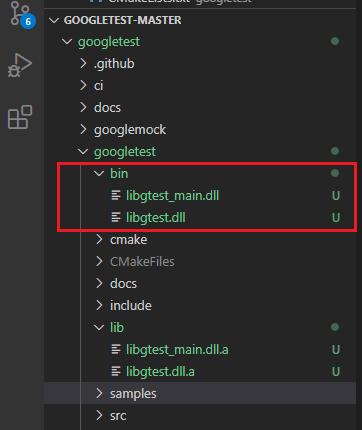
After the compilation is successful, a new bin folder will be generated under the Google test folder to save libgtest.dll and libgtest_main.dll. These two dynamic link libraries are what we need to build our own unit test project.

2. Build unit test project
The whole project directory structure is as follows.
include and src are used to write their own source code and unit test cases.
Create a new gtest folder and copy the include and src under the Google test folder directly; libgtest.dll and libgtest_ Copy main.dll to lib folder
D:.
├─gtest
│  ├─include
│  ├─lib
│  └─src
├─include
├─src
|-CMakeLists.txt
Here I use the sample1 unit test source code demonstration in the Google test project (sample1.h, sample1.cc, sample1_unitest.cc).
Write CMakeLists.txt in the root directory.
# Specifies the minimum required version for CMake compilation
cmake_minimum_required(VERSION 3.14)
# Name the project
project(sample1)

# Collect c/c + + files and assign them to the variable SRC_LIST_C
# ${CMAKE_CURRENT_SOURCE_DIR} represents the current item directory of CMakeLists.txt
file(GLOB
    SRC_LIST_C
    ${CMAKE_CURRENT_SOURCE_DIR}/src/*.cc
)

# Specify the. h header file directory
include_directories(${CMAKE_CURRENT_SOURCE_DIR}/include
                    ${CMAKE_CURRENT_SOURCE_DIR}/gtest/include
)

# Specify the. dll link library file directory
link_directories(${CMAKE_CURRENT_SOURCE_DIR}/gtest/lib)

# Generate the c file into the executable sample1.exe
add_executable(sample1 ${SRC_LIST_C})

# Specify the sample1 link library libgtest.dll and libgtest_main.dll
target_link_libraries(sample1
                      libgtest
                      libgtest_main
)
Execute the compile command from the root directory
cmake -G "MinGW Makefiles"
// Failed to delete CMakeCache.txt
mingw32-make
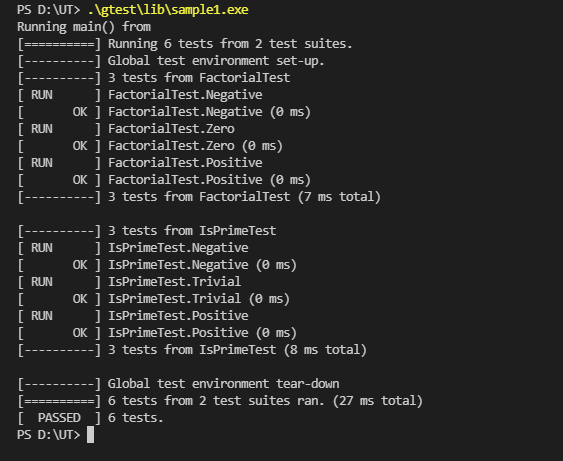
Run the generated sample1.exe test program, and the results are shown in the figure

The. exe executable file needs to be run in the same directory as the. dll library for link loading; Or add the. dll path to the system environment variable path (equivalent to Linux LD_PRELOAD)
summary
There are several steps to build c/c + + unit test project (under windows)
- Download Google test open source testing framework and compile libgtest.dll and libgtest_main.dll
- Copy the include, src and lib of Google test to your own code project
- Write cmake to link two gtest libraries
- run the test
The gtest test framework can be retrieved using tutorials. The main function is to call RUN_ in the main function of the test code. ALL_ Tests executes the gtest test macro function
int main() {
    testing::InitGoogleTest();
    return RUN_ALL_TESTS();
}