1, Foreword
Using MVVM pattern development in WPF has the following advantages:
1. The structure is clear and clear, and the starting cost is low. A newcomer can quickly locate the position where he needs to change the code.
2. Low coupling, changing WPF control does not affect data structure, and the cost of changing code is low.
3. High reusability. For example, if a processing logic is placed in the ViewModel module and other interfaces are to be used, it can be called directly.
Of course, not all projects are developed using MVVM. Some simple projects can also be developed according to normal.
This example refers to the WPF video tutorial of Teacher Liu tiemeng. If you are interested, you can watch it.
Don't say much, start writing Demo.
2, Need to achieve purpose
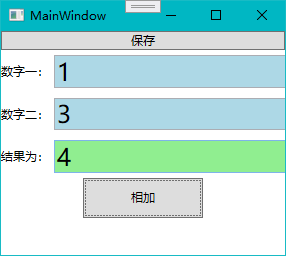
- Click the Add button to add the number one and number two:
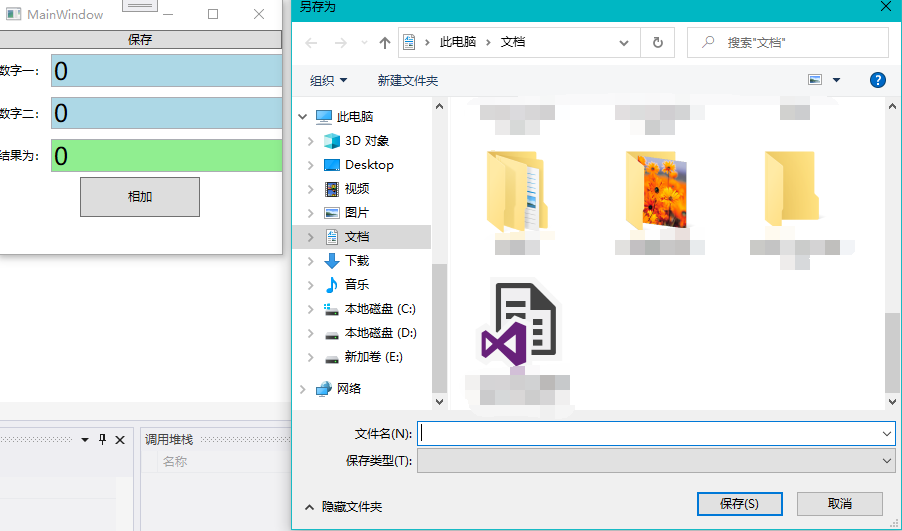
- Click the Save button to pop up the file saving window (it is just a simple pop-up window, not realizing the saving)
3, Write SampleMvvmDemo
① Realization idea
This is a very simple Demo. Our first reaction is that there are two Button buttons on an interface.
One is called "save" and the other is called "add". Then add two Click events to the two buttons.
Click Save to open the file save box:
SaveFileDialog dlg = new SaveFileDialog();
dlg.ShowDialog();
When clicking the Add button, calculate the desired result of the values entered by textbox1 (number one) and textbox2 (number two), and then assign it to textbox3 (the result is):
textBox3.Text = (double.Parse(textBox1.Text)+ double.Parse(textBox2.Text)).ToString();
In fact, that's right, but now I've changed the interface, changed the Save button to the save menu, changed the three textboxes to three sliders, and the results of the first two sliders will be displayed on the third Slider. For example:

At this time, we need to modify the code in the previous Click event in the background. With the continuous change of requirements, the development cost is still relatively high. We use MVVM mode to achieve these effects.
② MVVM implementation
First, we create a WPF application project for SampleMvvmDemo, and then add two folders to the project
A Command that is used to trigger the space
One is ViewModels, which is used to process data or control logic on the page.
This is the project structure, a simple MVVM framework

Then we add two classes in ViewModels
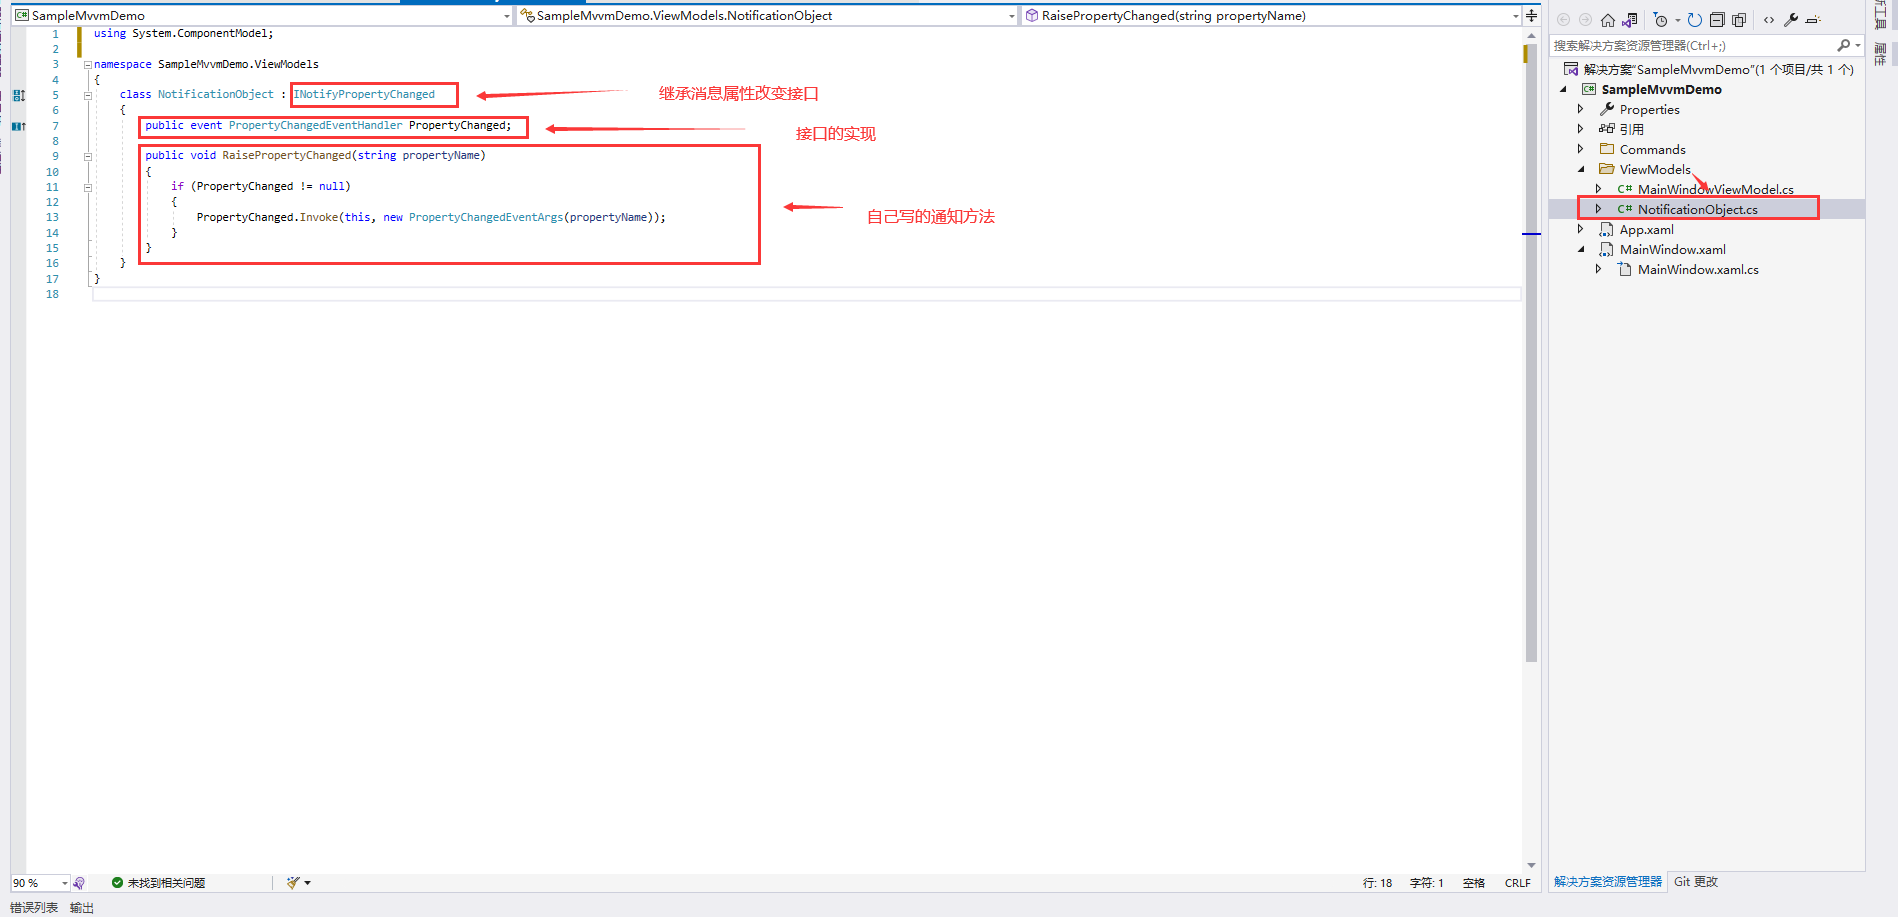
The first is the message notification class (NotificationObject.cs), which is used to tell that the page value has changed and the logic needs to be triggered
using System.ComponentModel;

namespace SampleMvvmDemo.ViewModels
{
    class NotificationObject : INotifyPropertyChanged
    {
        public event PropertyChangedEventHandler PropertyChanged;

        public void RaisePropertyChanged(string propertyName)
        {
            if (PropertyChanged != null)
            {
                PropertyChanged.Invoke(this, new PropertyChangedEventArgs(propertyName));
            }
        }
    }
}
The second is the interactive logic class of the form (MainWindowViewModel.cs). You can see from the name that this is the place where the interface and data interact logically.
using Microsoft.Win32;
using SampleMvvmDemo.Commands;
using System;


namespace SampleMvvmDemo.ViewModels
{
    class MainWindowViewModel : NotificationObject
    {
        public MainWindowViewModel()
        {
            AddCommand = new DelegateCommand();
            AddCommand.ExecuteAction = new Action<object>(Add);
            SaveCommand = new DelegateCommand();
            SaveCommand.ExecuteAction = new Action<object>(Save);
        }

        private double input1;

        public double Input1
        {
            get { return input1; }
            set
            {
                input1 = value;
                RaisePropertyChanged("Input1");
            }
        }
        private double input2;

        public double Input2
        {
            get { return input2; }
            set
            {
                input2 = value;
                RaisePropertyChanged("Input2");
            }
        }
        private double resulte;

        public double Result
        {
            get { return resulte; }
            set
            {
                resulte = value;
                RaisePropertyChanged("Result");
            }
        }
        public DelegateCommand AddCommand { get; set; }
        public DelegateCommand SaveCommand { get; set; }
        private void Save(object parameter)
        {
            SaveFileDialog dlg = new SaveFileDialog();
            dlg.ShowDialog();
        }
        private void Add(object parameter)
        {
            Result = input1 + input2;
        }


    }
}
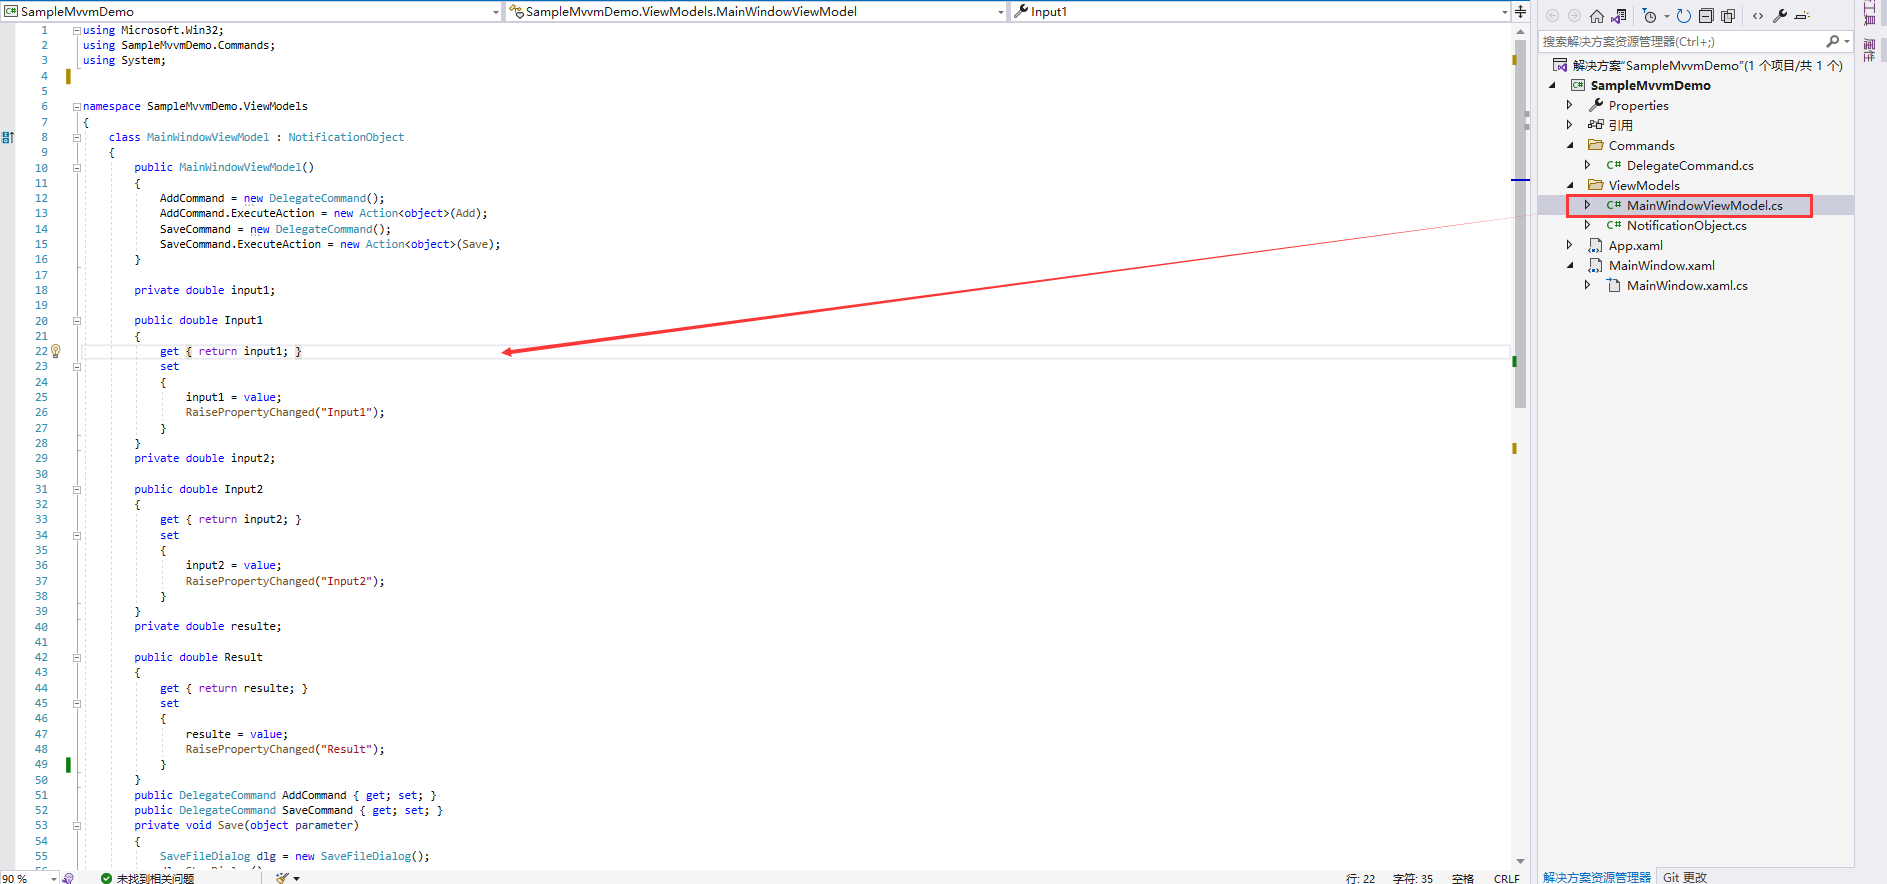
When writing here, we will report errors in some places because we have no writing method
We add a delegatecommand in the Command folder Class CS, the code is as follows:
using System;
using System.Windows.Input;

namespace SampleMvvmDemo.Commands
{
    class DelegateCommand : ICommand
    {
        public event EventHandler CanExecuteChanged;

        public bool CanExecute(object parameter)
        {
            if (CanExcuteFunc == null)
            {
                return true;
            }
            return CanExcuteFunc(parameter);
        }

        public void Execute(object parameter)
        {
            if (ExecuteAction == null)
            {
                return;
            }
            ExecuteAction(parameter);
        }

        public Action<object> ExecuteAction { get; set; }
        public Func<object, bool> CanExcuteFunc { get; set; }
    }
}
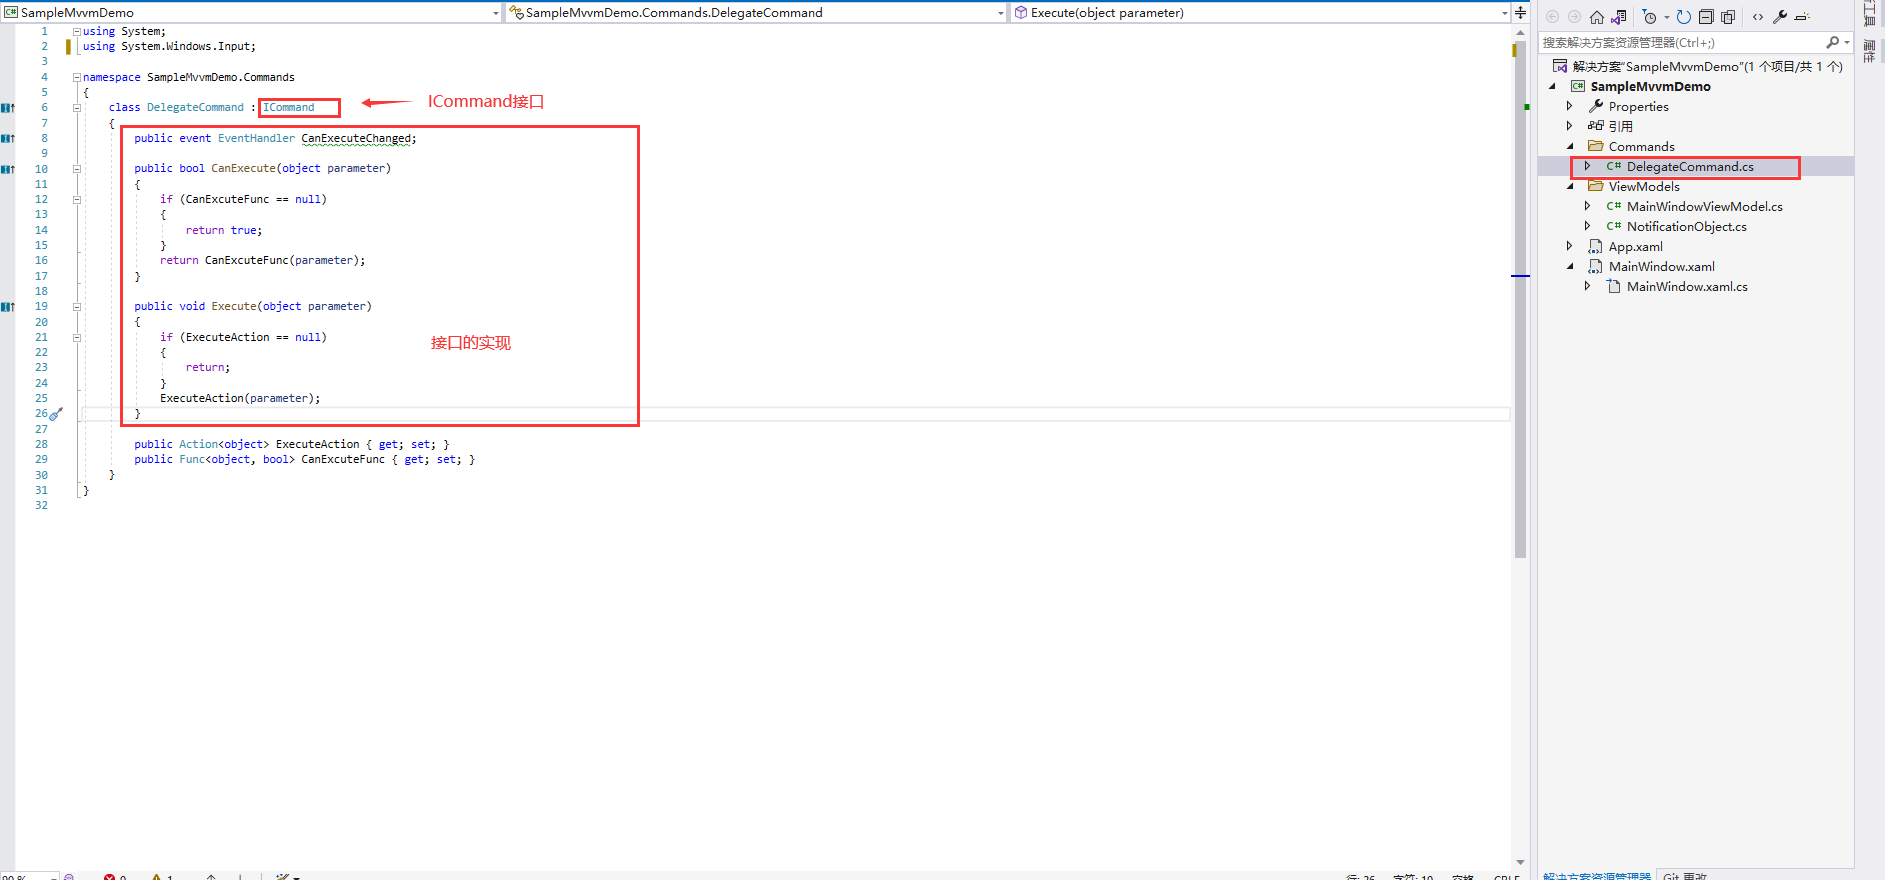
So far, we have implemented the VM in MVVM.
Next, we design the interface, that is, V in MVVM.
Interface code:
<Window x:Class="SampleMvvmDemo.MainWindow"
        xmlns="http://schemas.microsoft.com/winfx/2006/xaml/presentation"
        xmlns:x="http://schemas.microsoft.com/winfx/2006/xaml"
        xmlns:d="http://schemas.microsoft.com/expression/blend/2008"
        xmlns:mc="http://schemas.openxmlformats.org/markup-compatibility/2006"
        xmlns:local="clr-namespace:SampleMvvmDemo"
        mc:Ignorable="d"
        Title="MainWindow" Height="263" Width="300" WindowStartupLocation="CenterScreen">
    <Grid>
        <Grid.RowDefinitions>
            <RowDefinition Height="Auto"/>
            <RowDefinition Height="Auto"/>
        </Grid.RowDefinitions>
        <Button Content="preservation" Command="{Binding SaveCommand}"/>
        <Grid Grid.Row="1">
            <Grid.RowDefinitions>
                <RowDefinition Height="Auto"/>
                <RowDefinition Height="Auto"/>
                <RowDefinition Height="Auto"/>
                <RowDefinition Height="*"/>
            </Grid.RowDefinitions>
            <StackPanel Grid.Row="0" Orientation="Horizontal" >
                <TextBlock Text="Digit one:" VerticalAlignment="Center"/>
                <TextBox x:Name="textBox1"  Width="242" Background="LightBlue" FontSize="24" Margin="5" Text="{Binding Input1}"/>
            </StackPanel>
            <StackPanel Grid.Row="1" Orientation="Horizontal">
                <TextBlock Text="Number two:" VerticalAlignment="Center"/>
                <TextBox x:Name="textBox2" Width="242" Background="LightBlue" FontSize="24" Margin="5" Text="{Binding Input2}"/>
            </StackPanel>
            <StackPanel Grid.Row="2" Orientation="Horizontal">
                <TextBlock Text="The result is:" VerticalAlignment="Center"/>
                <TextBox x:Name="textBox3" Width="242" Background="LightGreen" FontSize="24" Margin="5" Text="{Binding Result}"/>
            </StackPanel>
            <Button x:Name="btnAdd" Content="Add" Grid.Row="3" Width="120" Height="40" Command="{Binding AddCommand}"/>
        </Grid>
    </Grid>
</Window>
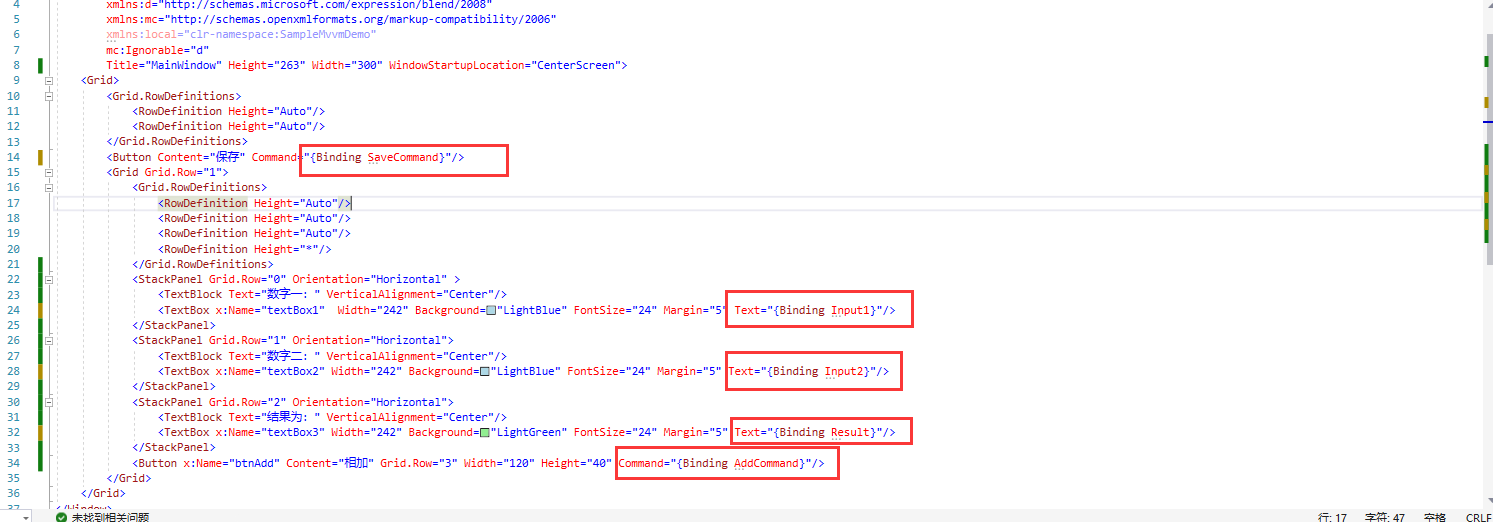
Interface background code:
using SampleMvvmDemo.ViewModels;
using System;
using System.Collections.Generic;
using System.Linq;
using System.Text;
using System.Windows;
using System.Windows.Controls;
using System.Windows.Data;
using System.Windows.Documents;
using System.Windows.Input;
using System.Windows.Media;
using System.Windows.Media.Imaging;
using System.Windows.Navigation;
using System.Windows.Shapes;

namespace SampleMvvmDemo
{
    /// <summary>
    /// MainWindow. Interaction logic of Xaml
    /// </summary>
    public partial class MainWindow : Window
    {
        public MainWindow()
        {
            InitializeComponent();
            DataContext = new MainWindowViewModel();

        }
    }
}
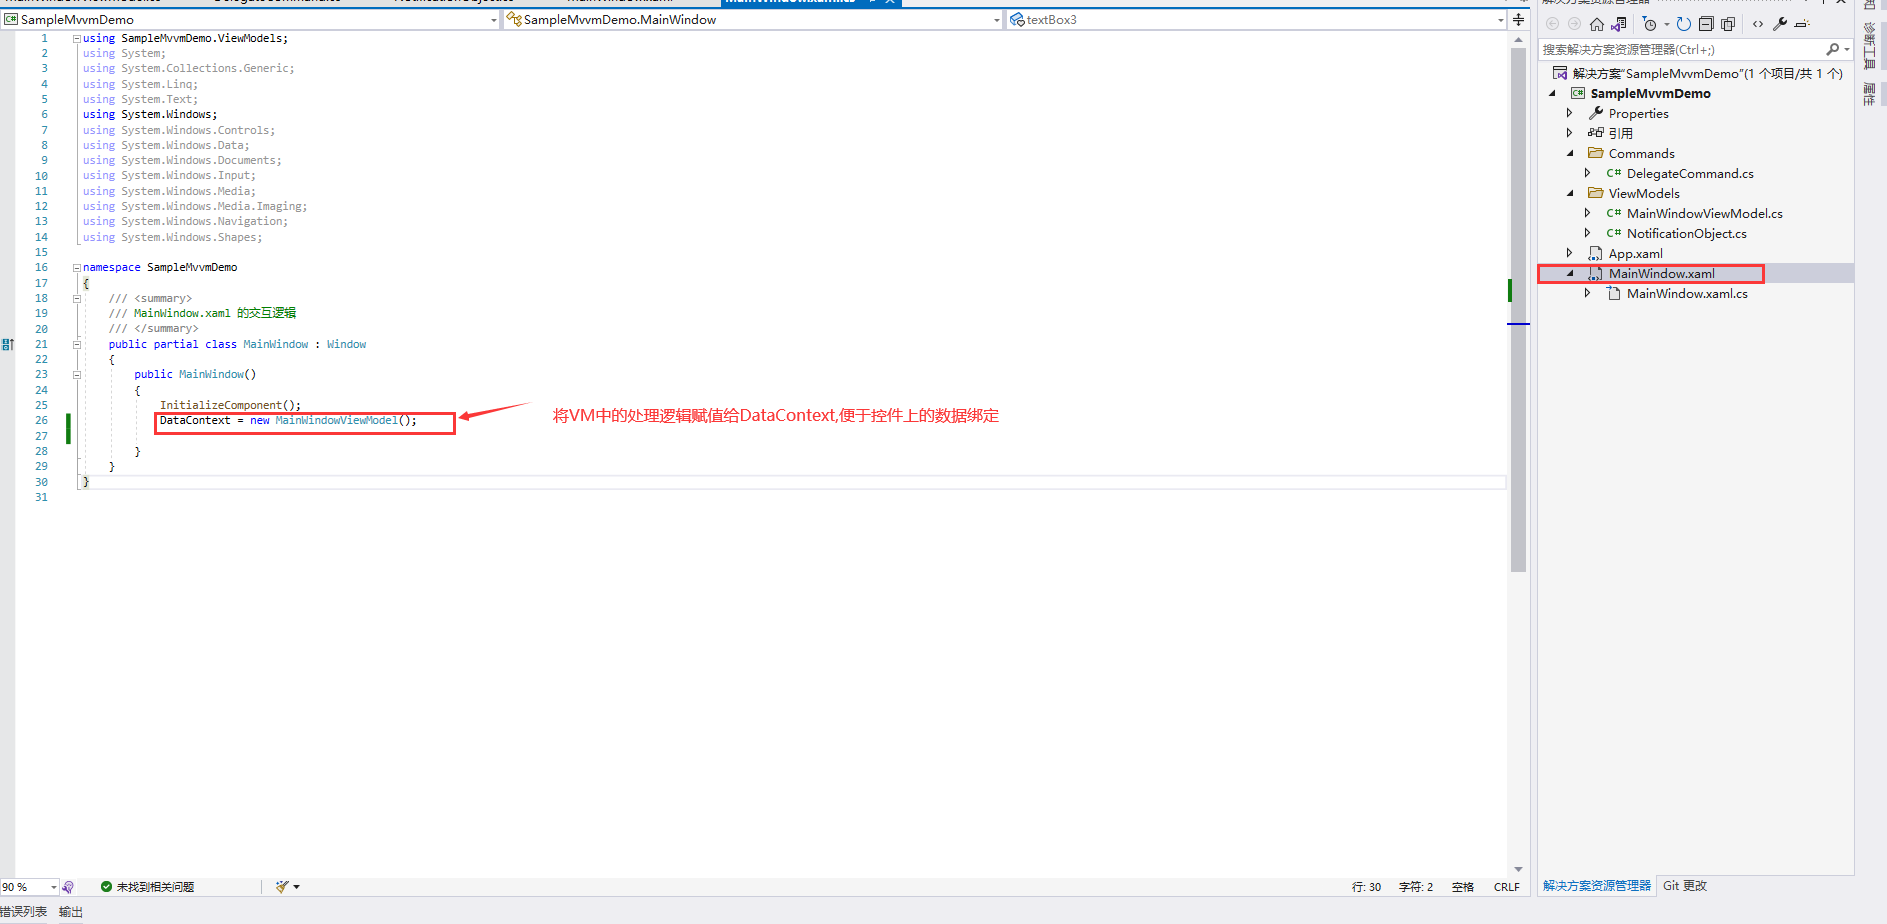
We can see that the background code of View is very concise.
Even if we need to change the control just mentioned, we don't need to move the background code. We just need to change the control and rebind it.
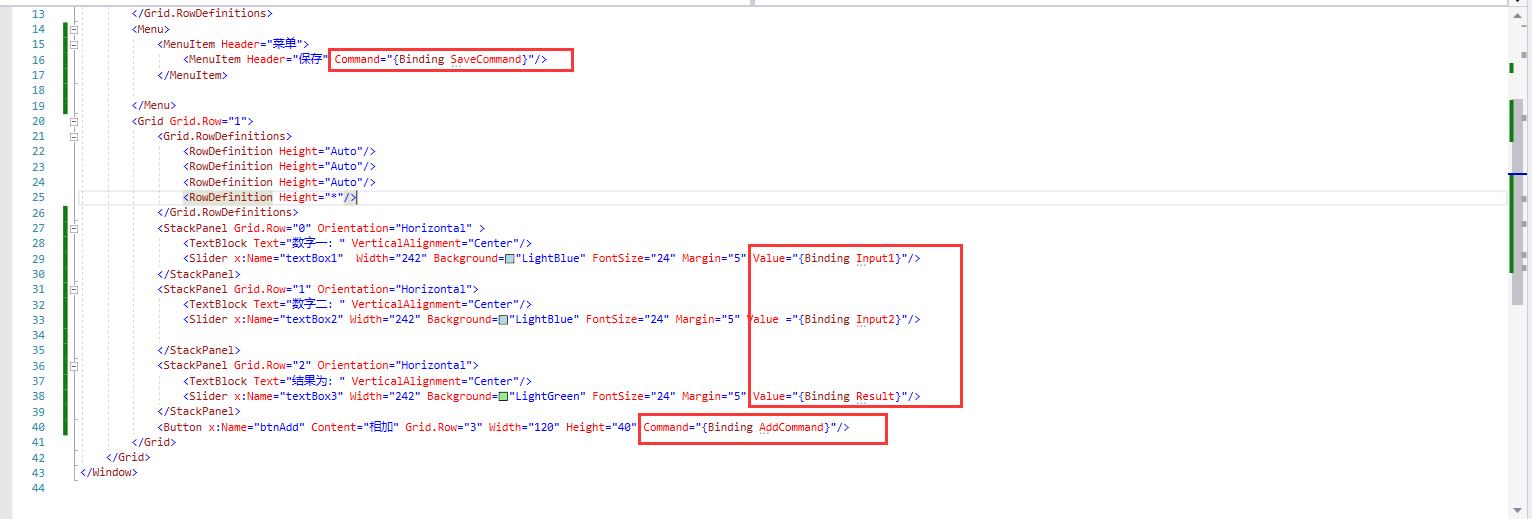
For example, change to the Slider and save the menu
<Window x:Class="SampleMvvmDemo.MainWindow"
        xmlns="http://schemas.microsoft.com/winfx/2006/xaml/presentation"
        xmlns:x="http://schemas.microsoft.com/winfx/2006/xaml"
        xmlns:d="http://schemas.microsoft.com/expression/blend/2008"
        xmlns:mc="http://schemas.openxmlformats.org/markup-compatibility/2006"
        xmlns:local="clr-namespace:SampleMvvmDemo"
        mc:Ignorable="d"
        Title="MainWindow" Height="263" Width="300" WindowStartupLocation="CenterScreen">
    <Grid>
        <Grid.RowDefinitions>
            <RowDefinition Height="Auto"/>
            <RowDefinition Height="Auto"/>
        </Grid.RowDefinitions>
        <Menu>
            <MenuItem Header="menu">
                <MenuItem Header="preservation" Command="{Binding SaveCommand}"/>
            </MenuItem>

        </Menu>
        <Grid Grid.Row="1">
            <Grid.RowDefinitions>
                <RowDefinition Height="Auto"/>
                <RowDefinition Height="Auto"/>
                <RowDefinition Height="Auto"/>
                <RowDefinition Height="*"/>
            </Grid.RowDefinitions>
            <StackPanel Grid.Row="0" Orientation="Horizontal" >
                <TextBlock Text="Digit one:" VerticalAlignment="Center"/>
                <Slider x:Name="textBox1"  Width="242" Background="LightBlue" FontSize="24" Margin="5" Value="{Binding Input1}"/>
            </StackPanel>
            <StackPanel Grid.Row="1" Orientation="Horizontal">
                <TextBlock Text="Number two:" VerticalAlignment="Center"/>
                <Slider x:Name="textBox2" Width="242" Background="LightBlue" FontSize="24" Margin="5" Value ="{Binding Input2}"/>

            </StackPanel>
            <StackPanel Grid.Row="2" Orientation="Horizontal">
                <TextBlock Text="The result is:" VerticalAlignment="Center"/>
                <Slider x:Name="textBox3" Width="242" Background="LightGreen" FontSize="24" Margin="5" Value="{Binding Result}"/>
            </StackPanel>
            <Button x:Name="btnAdd" Content="Add" Grid.Row="3" Width="120" Height="40" Command="{Binding AddCommand}"/>
        </Grid>
    </Grid>
</Window>
