Foreword: Recently, I have some interest in canvas. I was naturally curious about this kind of visual thing, so I invested some time to play. I realized a canvas-based graphics dragging effect by imitating a case on the Internet. I mainly learned their ideas, the code is partly self-implemented, so I walked some pits of canvas.
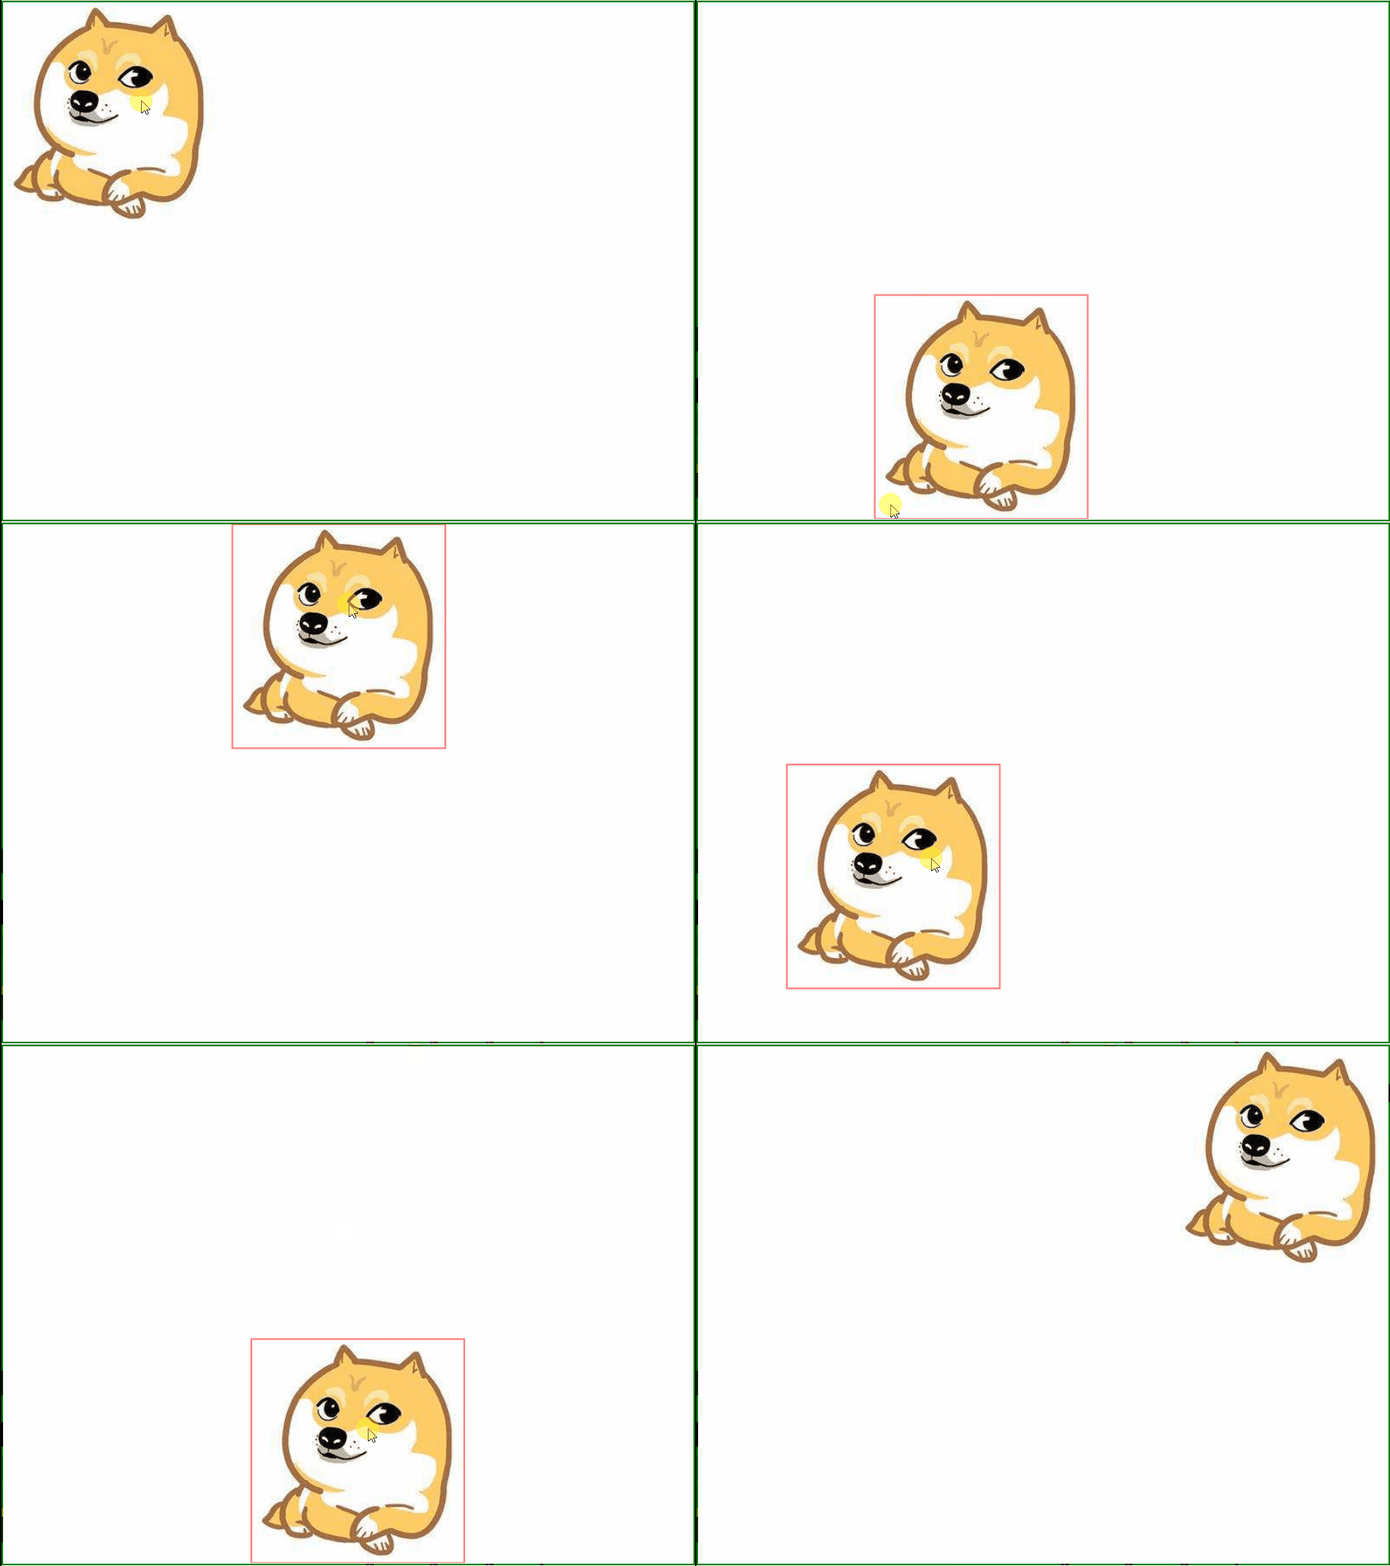
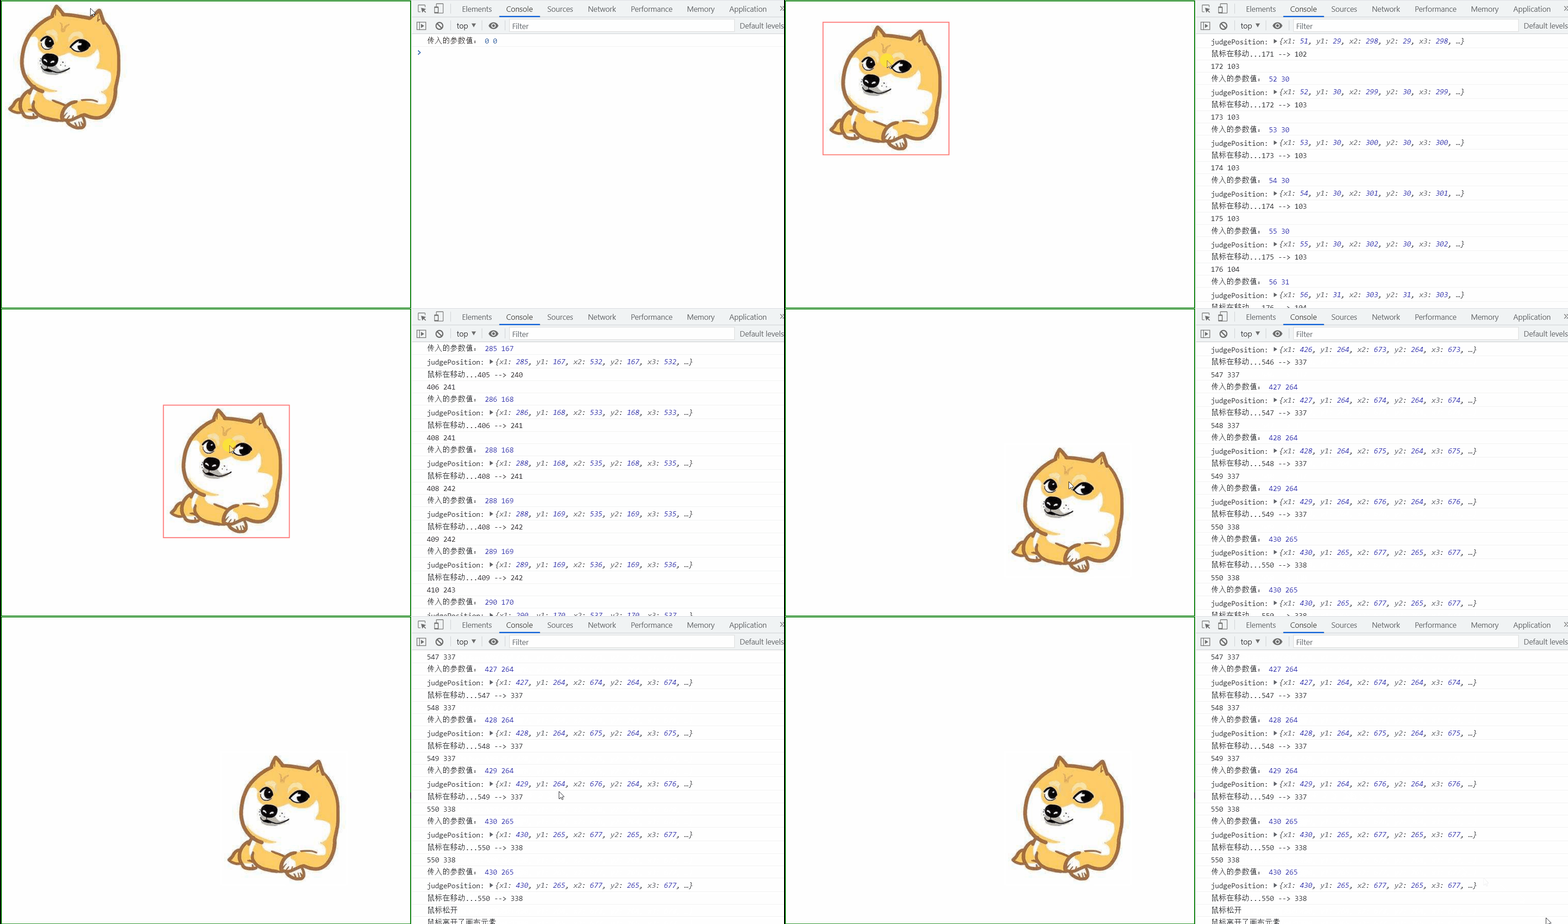
Canvas Graphics Drag Effect Display
The main functions implemented are:
- When the mouse clicks, a red checkbox appears, and when the mouse releases the checkbox, it disappears.
- When the mouse moves, the picture moves with it.
- Pictures can only move within a limited amount of space and cannot move out of boundaries.

Implementation logic
Mouse Drag Logic
A little personal understanding: mouse events or other browser events are independent, but in development users are usually a combination of multiple events.
It is necessary to combine events to filter out some invalid operations by using the appropriate variables.
For example, the user executes on a page
Drawing operation: This process must include: mouse press, mouse move, mouse release, these three complete things, and they are all in order.
Any other combination of these three operations is considered invalid and should not be responded to, filtered in the program's execution logic.
Calls made during program execution are as follows: the mouse is pressed to execute once, the mouse is moved to execute once, and the mouse is released to execute once.
The mouse release event does not trigger when the element that added the mouse event is moved out during the mouse press and move process and then released.
That is to say, the previous restriction failed, so you need to add an additional mouse-out event with the same logic as the mouse-release event.
Picture Moving Effect Logic
The effect of picture moving is actually very simple. When the mouse moves, it empties the last graphic and redraws the graphic in a new location. Through this continuous emptying and drawing process, the effect that the picture can be moved on canvas is formed. The principle of graphic transformation is very simple, that is, the knowledge of junior middle school mathematics.
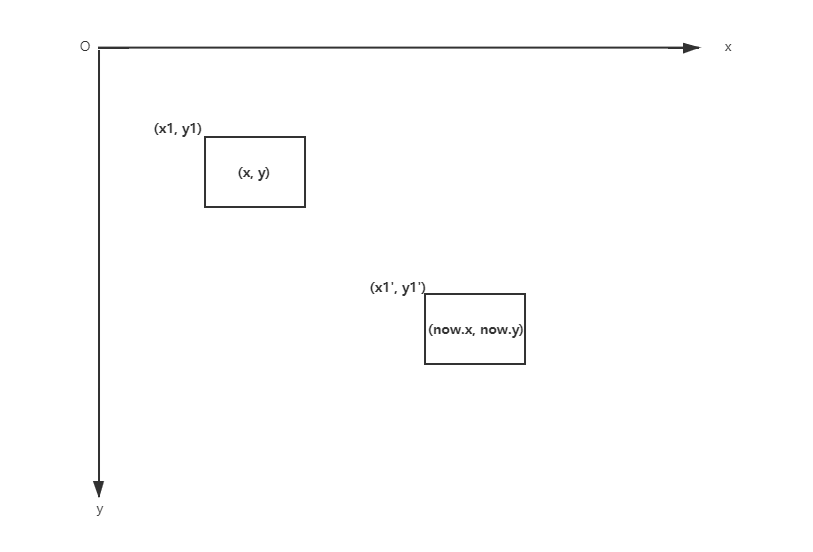
See the following illustration for details:
The upper left is the initial position of the graphic, the lower right is the moving position of the graphic; the coordinates (x1, y1) are the initial left vertex, the coordinates (x1', y1') are the moved left vertex (we don't know its value); the coordinates (x, y) are the location of the initial mouse click, and the coordinates (now.x, now.y) are the location of the mouse click after the move.
Considering that the mouse moves from (x, y) to (now.x, now.y), its offset in the X direction is: now.x-x, and similarly its offset on the Y position is: now.y-y. Therefore, the position of the left vertex (x1', y1') after the mouse moves can be derived from this, which is:
x1' = x1 + (now.x-x)
y1' = y1 + (now.y-y)
Note: My code contains x-now.x, which is not an error, because I used now.x to record the location of the last point, x is the current point, where the logic is unchanged.


Red checkbox
Here, the implementation of the red checkbox is also simple. When the mouse is selected, a red checkbox is drawn; when the mouse releases or leaves the canvas element, the graphic is redrawn, and a white checkbox is drawn. (The background of the whole canvas is white, so it feels like the checkbox has disappeared.)
Graphic Move Boundary Limit
Because the graphics are ugly to move outside the boundary and can be a bit cumbersome to move back, there is a special restriction here that restricts vertices in the four directions from moving out of the canvas boundary. However, it was later discovered that all you need to do is to restrict the upper left vertex and the lower right vertex to a total of four points.However, I have not simplified the code, I hope you can see my thinking process. Specific logic, just refer to my code, here is just a simple statement.
Full implementation code (not optimized)
This is the original code, because after writing, I found many places are actually unnecessary, some judgment logic is redundant, but I will not delete it, the code is redundant, it is also easy for you to understand my implementation process.
<!DOCTYPE html>
<html>
	<head>
		<meta charset="utf-8">
		<title>mouse event</title>
		<style>
			body, div {
				margin: 0;
                padding: 0;
			}
		</style>
	</head>
	<body>
		<div id="cas">
			<canvas id="cs" width="800" height="600" style="border: 2px solid green"></canvas>
		</div>

		<script type="text/javascript">
			let canvas = document.getElementById("cs");
			// Get width and height of canvas
			let width = canvas.width;
			let height = canvas.height;

			let ctx = canvas.getContext("2d");
			let now = {x: 0, y: 0};  // Mouse position
			let pos = {x1: 0, y1: 0, x2: 0, y2: 0, x3: 0, y3: 0, x4: 0, y4: 0};  // The location of the starting point of the picture, where the default (x1, y1) is (0, 0)
			// Mouse press, mouse move and mouse release are two separate actions. Now you want to take the intersection of the two actions in order.
			// That is, when the mouse is pressed, moved and released, it is considered an action.

			let isDown = false;

			// Create img element
			let img = document.createElement("img")
			// Set its src so the picture will be loaded
			img.src = "./test.png";
			img.style.position = "absolute"
			// When the picture is loaded, draw it on canvas
			// Without this, picture drawing may not occur because the picture is empty when it is not loaded.
			img.onload = () => {
				drawCanvas(img, "#FFFFFF");
				// Starting point for updating pictures
				updatePos(pos.x1, pos.y1);
			};

			// Add mouse things to achieve drag-and-drop of pictures.
			// Get the current coordinates when the mouse is pressed
			canvas.onmousedown = e => {
				isDown = true;     // When the mouse is pressed, isDown is set to true, and moving the mouse is considered valid.
				console.log("mousedown")
				let x = e.pageX-canvas.offsetLeft;     // The latter one is the offset, but here it is 0
				let y = e.pageY-canvas.offsetTop;
				now.x = x;
				now.y = y;
				console.log(x + " -> " + y);

				if (!ctx.isPointInPath(x, y)) {
					console.log("Mouse not in path");
					return;
				}

				drawCanvas(img, "red");
			};

			// Continuously redraw the entire canvas as the mouse moves
			canvas.onmousemove = e => {
				if (!isDown) {  // If the mouse is not pressed, it returns directly without responding to the event.
					return;
				}

				// Getting the coordinates of a point can be encapsulated as a function
				let x = e.pageX;
				let y = e.pageY;

				console.log(x + " " + y);
				if (!ctx.isPointInPath(x, y)) {
					console.log("Mouse not in path");
					return;
				}
				// There's a problem with restricting the mouse from crossing the border. Pictures that move outside the interface don't work well.

				// Clear the current canvas graphic
				ctx.clearRect(0, 0, canvas.width, canvas.height);

				// Calculate the changing position of the drawing starting point of the picture
				pos.x1 = pos.x1 + (x-now.x);
				pos.y1 = pos.y1 + (y-now.y);
				// Update the location of other points
				updatePos(pos.x1, pos.y1);
				// Judges the position of four points, cannot cross the boundary
				judgePosition();

				// canvas after redrawing offset
				ctx.drawImage(img, pos.x1, pos.y1);

				ctx.beginPath();
				ctx.strokeStyle="red";
				ctx.rect(pos.x1, pos.y1, img.width, img.height);
				ctx.stroke();

				now.x = x; now.y = y;
				console.log("Mouse is moving..." + x + " --> " + y);
			}

			canvas.onmouseup = e => {
				isDown = false;  // When the mouse is released, the above encapsulated action ends.
				console.log("MouseUp");
				drawCanvas(img, "#FFFFFF");
			}

			// If the mouse is pressed and moved away from the current element and then released, but the mouse release event cannot be triggered.
			// So when you listen for the mouse to move out of an element, you must also set isDown to false.
			canvas.onmouseout = e => {
				isDown = false;
				console.log("The mouse left the canvas element");
				drawCanvas(img, "#FFFFFF");
				// Judges the position of four points, cannot cross the boundary
				judgePosition();
				// canvas after redrawing offset
				ctx.drawImage(img, pos.x1, pos.y1);
			}

			function drawCanvas(img, color) {
				ctx.clearRect(0, 0, canvas.width, canvas.height);   // Clear the current canvas graphic
			    ctx.drawImage(img, pos.x1, pos.y1);   // Global variables should not be used to pass parameters here.
				ctx.beginPath();
				ctx.strokeStyle=color;
				ctx.rect(pos.x1, pos.y1, img.width, img.height);
				ctx.stroke();
			}

			// Because the picture is rectangular, you can determine the remaining four points by knowing only one point.
			// Here we take (x1,y1), the point on the upper left corner, which is more convenient.
			// Because x1 and y1 are changing, you need to update x1 and y1 first.
			function updatePos(x, y) {
			console.log("Incoming parameter values:", x, y);
			    pos.x1 = x;
				pos.y1 = y;
				pos.x2 = x + img.width;
				pos.y2 = y;
				pos.x3 = x + img.width;
				pos.y3 = y + img.height;
				pos.x4 = x;
				pos.y4 = y + img.height;
			}

			// Determine the location and process when the point crosses the boundary
			function judgePosition() {
				// First look at the rules for points
				console.log("judgePosition:", pos);

				// There are three cases for one-sided and two-sided boundaries
				// As long as the upper left corner and the lower right corner are not out of bounds, all cases will not be out of bounds.
				if (pos.x1 < 0 && pos.y1 > 0) {
					updatePos(0, pos.y1);
				} else if (pos.x1 > 0 && pos.y1 < 0) {
					updatePos(pos.x1, 0);
				} else if (pos.x1 < 0 && pos.y1 < 0) {
					updatePos(0, 0)
				} else if (pos.x3 > width && pos.y3 < height) {
					updatePos(width-img.width, pos.y3-img.height);
				} else if (pos.x3 < width && pos.y3 > height) {
					updatePos(pos.x3-img.width, height-img.height);
				} else if (pos.x3 > width && pos.y3 > height) {
					updatePos(width-img.width, height-img.height);
				}
			}
		</script>
	</body>
</html>
Points of Attention
The use of the isPointInPath(x, y) function is conditionally limited. Some functions draw graphs that do not support this function, so if used incorrectly, it can be confusing and not what you expect. Especially for me, it has been a long time.