Preface
The official Android description of Canvas is that the Canvas class holds all Draw-related methods. To get to Draw, you need four elements: 1 Bitmap for carrying pixel information, 2 Canvas for managing Draw related methods, 3 drawing primitives (e.g., Rect, Path, text, Bitmap), and 4 a brush (for describing the color and style of an image).
Previous articles on Paint
Paint, an indispensable brush for drawing
Paint-Rendering Chapter, an Indispensable Paint for Drawing
Paint-Filter Chapter: An Indispensable Brush for Drawing
Part 1, Canvas Basic Explanation
Effectiveness~
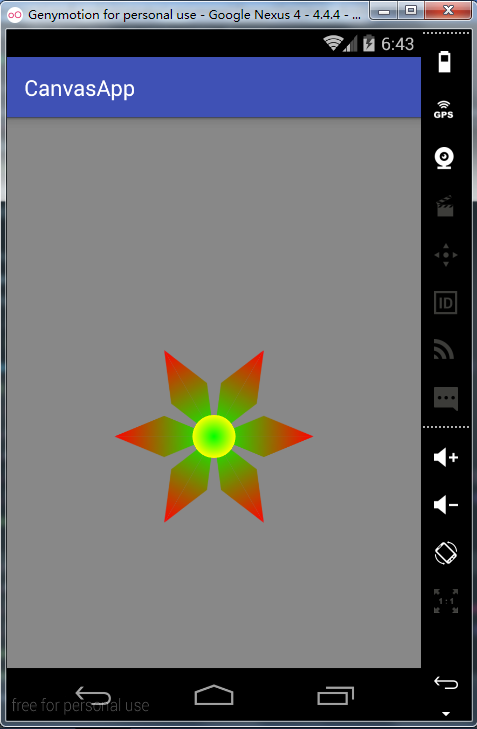
We might as well analyze the above figure. First, we need to draw a flat diamond at the origin.
            LinearGradient lg = new LinearGradient(0f, 0f, (float) (2 * (Math.cos(angle) * LONG_SIZE)), 0f, Color.GREEN, Color.RED, Shader.TileMode.REPEAT);
            paint.setShader(lg);
            path = new Path();
            path.reset();
            path.moveTo(0, 0);
            path.lineTo((float) (Math.cos(angle) * LONG_SIZE), (float) (Math.sin(angle) * LONG_SIZE));
            path.lineTo((float) (2 * (Math.cos(angle) * LONG_SIZE)), 0);
            canvas.drawPath(path, paint);
            path.reset();
            path.moveTo(0, 0);
            path.lineTo((float) (Math.cos(angle) * LONG_SIZE), -(float) (Math.sin(angle) * LONG_SIZE));
            path.lineTo((float) (2 * (Math.cos(angle) * LONG_SIZE)), 0);
canvas.drawPath(path, paint); for (int i = 1; i <= 6; i++) {
......
canvas.rotate(60, 0, 0);
}Finally, when drawing the center circle, there is a problem that the original canvas location can not be found. Here we need to use canvas.save(), canvas.restore() to save and restore the canvas. Save the canvas before drawing, and restore it before drawing the center circle.canvas.translate(centerX, centerY);
tips:
1. canvas.save(): Each save pushes the corresponding canvas state into the stack
2. canvas.restore(): Remove the state of the top of the stack
3. Every draw ing process of canvas will create a new layer to facilitate the operation of restoring a certain state later.
Part 2. Use Canvas tailoring to achieve disclosure effect
Effectiveness~

Clipping code
                canvas.clipRect(outRect);
unSelected.draw(canvas);Then there's a design. Outside is a Horizontal ScrollView which dynamically changes the clipping area of the image by monitoring its sliding. In fact, the idea is very simple, but it can't avoid some pits.
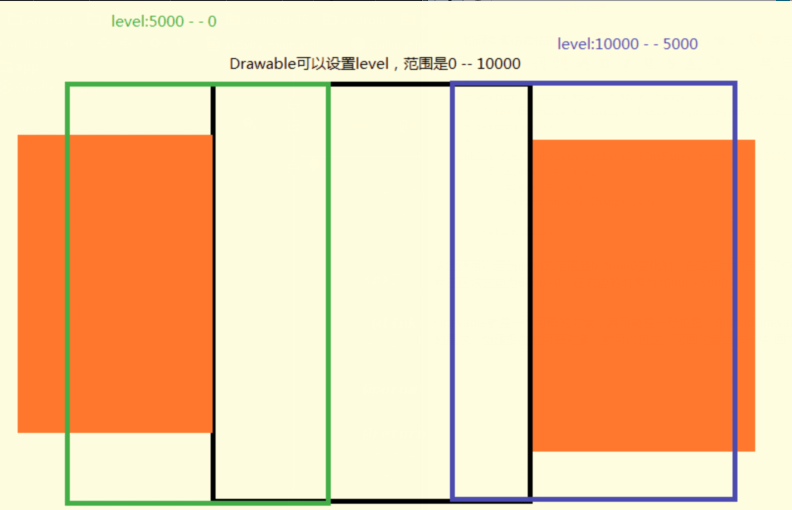
Now that Horizontal ScrollView can get changed values, how do you give Drawable, or ImageView? Here we use a level field in it. Let's start with Drawable.
Drawable is a drawing object. It may be a bitmap, a Shape Drawable, or a Layer Drawable. If we create a corresponding drawing object according to the drawing requirements, we can regard this drawing object as a Canvas. It is similar to "memory Canvas" in that it operates on a paintable object and eventually displays the paintable object on the Canvas.
    /**
     * Specify the level for the drawable.  This allows a drawable to vary its
     * imagery based on a continuous controller, for example to show progress
     * or volume level.
     *
     * <p>If the new level you are supplying causes the appearance of the
     * Drawable to change, then it is responsible for calling
     * {@link #invalidateSelf} in order to have itself redrawn, <em>and</em>
     * true will be returned from this function.
     *
     * @param level The new level, from 0 (minimum) to 10000 (maximum).
     *
     * @return Returns true if this change in level has caused the appearance
     * of the Drawable to change (hence requiring an invalidate), otherwise
     * returns false.
     */
    public final boolean setLevel(@IntRange(from=0,to=10000) int level) {
        if (mLevel != level) {
            mLevel = level;
            return onLevelChange(level);
        }
        return false;
} 
Set up an OnTouch event for Horizontal ScrollView
        int scrollX = getScrollX();//Get the sliding distance of the current ScrollView
        int index_left = scrollX / icon_width;//That's the index of the green picture above.
        int index_right = index_left + 1;
        for (int i = 0; i < container.getChildCount(); i++) {
            if (i == index_left || i == index_right) {//Choose the right and left index
                ImageView iv_left = (ImageView) container.getChildAt(index_left);
                float rate = 5000f / icon_width;//0 -- 1
                iv_left.setImageLevel((int) (5000 - scrollX % icon_width * rate));//5000 -- 0
                if (index_right < container.getChildCount()) {
                    ImageView iv_right = (ImageView) container.getChildAt(index_right);
                    iv_right.setImageLevel(
                            (int) (10000 - scrollX % icon_width * rate));//10000 -- 5000
                }
            } else {
                ((ImageView) container.getChildAt(i)).setImageLevel(0);//Set Level to 0, grey when it is not a left-right index
            }
        }
In this touch monitoring event, we set the level for each Image View, so we set the level for our Drawable. Next, we need to customize a Drawable to control the display area of the selected and unselected pictures.
            Rect outRect = mTmpRect;
            float ratio = (level / 5000f) - 1f;//Left area 0-1 right area 1-0
            Rect bounds = getBounds();//Get your own Drawable area
            {
                int w = bounds.width();
                w = (int) (w * Math.abs(ratio));
                int h = bounds.height();
                int gravity = (ratio < 0 ? Gravity.LEFT : Gravity.RIGHT);
                Gravity.apply(gravity, w, h, bounds, outRect);
                canvas.save();
                canvas.clipRect(outRect);
                unSelected.draw(canvas);
                canvas.restore();
            }
            {
                int w = bounds.width();
                w -= (int) (w * Math.abs(ratio));
                int h = bounds.height();
                int gravity = (ratio < 0 ? Gravity.RIGHT : Gravity.LEFT);
                Gravity.apply(gravity, w, h, bounds, outRect);
                canvas.save();
                canvas.clipRect(outRect);
                selected.draw(canvas);
                canvas.restore();
            }
}1. Gravity.apply(): To clip bounds, gravity can set the direction of clipping.
This implements the sliding logic we want, but when you run it, you will see nothing, what, because we customize Drawable without defining a border for it, so we can't see anything.
    @Override
    protected void onBoundsChange(Rect bounds) {
        super.onBoundsChange(bounds);
        selected.setBounds(bounds);
        unSelected.setBounds(bounds);
} @Override
protected void onLayout(boolean changed, int l, int t, int r, int b) {
super.onLayout(changed, l, t, r, b);
icon_width = container.getChildAt(0).getWidth();
int centerX = this.getWidth() / 2;
centerX = centerX - icon_width / 2;
container.setPadding(centerX, 0, centerX, 0);
}