YAML and Kubernetes
Understand existing YAML description files
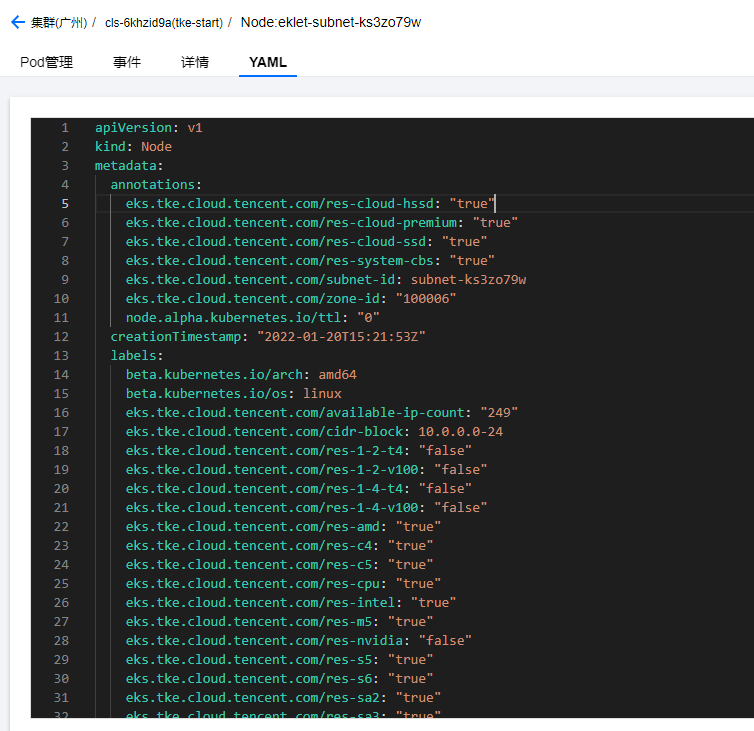
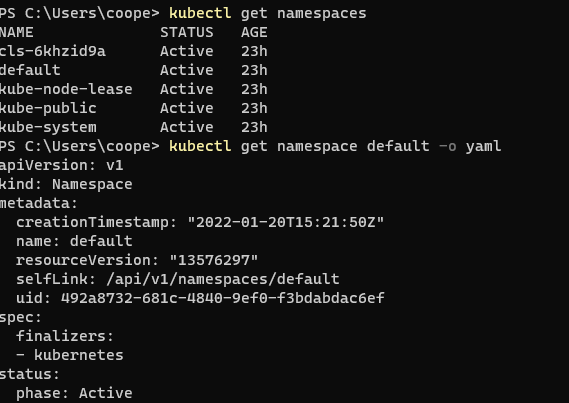
The terminal inputs the following command to obtain the YAML configuration file of each instance
kubectl get namespaces
kubectl get namespace <namespace Name of> -o yaml
kubectl get nodes
kubectl get node <node Name of> -o yaml
kubectl get pods
kubectl get pod <pod Name of> -o yaml
kubectl get deployments
kubectl get deployment <deployment Name of> -o yaml
kubectl get services
kubectl get service <service Name of> -o yaml
Query the API versions and resource objects supported by Kubernetes API through kubectl API versions and kubectl API resources.
kubectl api-versions
kubectl api-resources
kubectl api-resources -o wide   #You can understand the API versions, kind types, abbreviations of resource objects, etc. of different resource objects
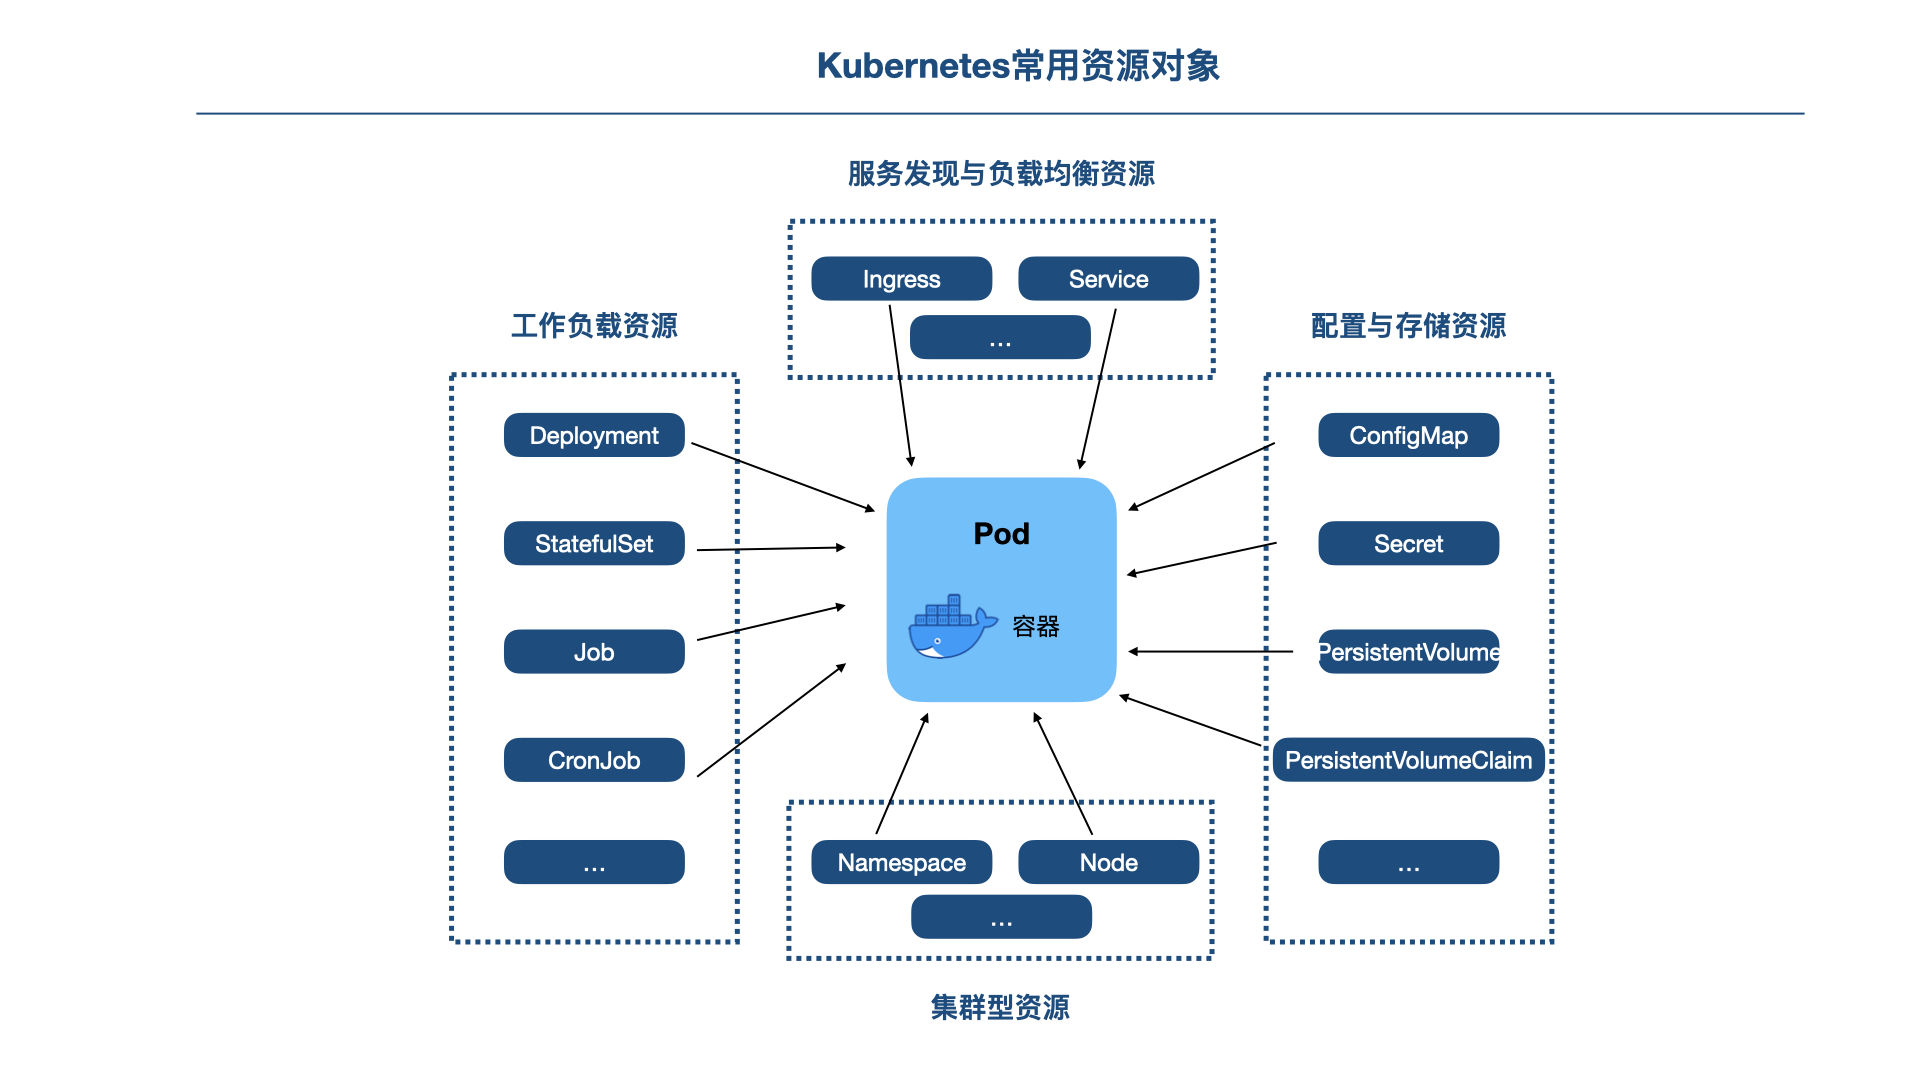
Kubernetes object and YAML
Use the kubectl explain command to understand the attributes of API objects
kubectl explain deployments
kubectl explain pods
kubectl explain pods.spec
kubectl explain pods.spec.containers
YAML syntax quick start
YAML syntax
- Case sensitive;
- Use indentation to represent hierarchical relationships;
- When indenting, you can only use spaces, not Tab;
- The number of indented spaces is not important, as long as the elements of the same level are aligned to the left;
- #Represents an annotation, which will be ignored by the parser from this character to the end of the line;
Deploy nginx using YAML configuration file
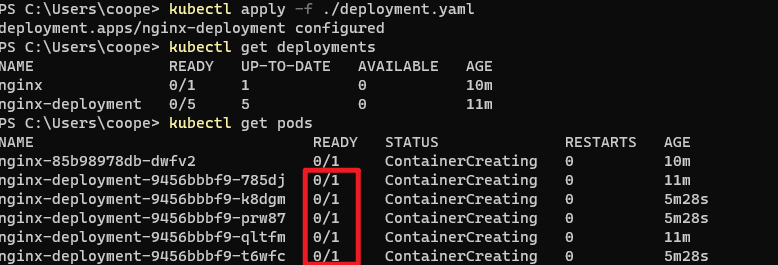
kubectl config get-contexts #Show all clusters kubectl config use-context minikube #Switch to local cluster kubectl apply -f ./deployment.yaml #Create Deployment for local cluster
In Windows, start Yes, open the current directory, deployment Yaml needs to be copied to the current directory of the command line.

After execution:
kubectl get deployments #Learn about Creation

kubectl apply command
Three methods of object management (the first two are skipped because they already exist)
#Directive commands. Common commands include run, create, scale, edit, patch, expose, etc
kubectl create deployment nginx --image nginx
#Directive object configuration. The general format is kubectl create | delete | replace | get - f < filename | URL >
kubectl create -f nginx.yaml
#Declarative object configuration, creation, deletion and modification of resource objects are implemented through kubectl apply, which updates the current status and configuration information of active objects by comparison
kubectl apply -f configs/nginx.yaml
Put the above deployment If you change the value of replicas in yaml from 2 to 5 and then deploy, you will find that the number of replicas has also increased to 5:
kubectl apply -f supports single file, multiple files and external links
# Create resource objects from a single file
kubectl apply -f ./my-manifest.yaml
# Creating resource objects from multiple files
kubectl apply -f ./my1.yaml -f ./my2.yaml
# Create resource objects from folders
kubectl apply -f ./dir
# Creating resource objects through external links
kubectl apply -f https://k8s.io/examples/controllers/nginx-deployment.yaml
Network, service and load balancing
Application of port forwarding in access cluster
kubectl port-forward <Resource type/Resource name> [Local port]:<pod Port>
Take nginx as an example:
kubectl get deployments     #Gets a list of names for deployment
kubectl port-forward deployment/nginx-deployment 5001:80
If an error is reported:
error: unable to forward port because pod is not running. Current status=Pending
Search the keyword [pod not ready] to find this article:
A visual guide on troubleshooting Kubernetes deployments
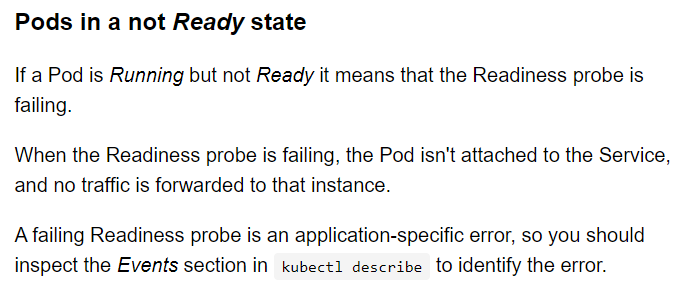
Then you can use the command kubectl describe to view the log. The result shows that there is a minimum replicas unavailable in Reason. Search and find this article:
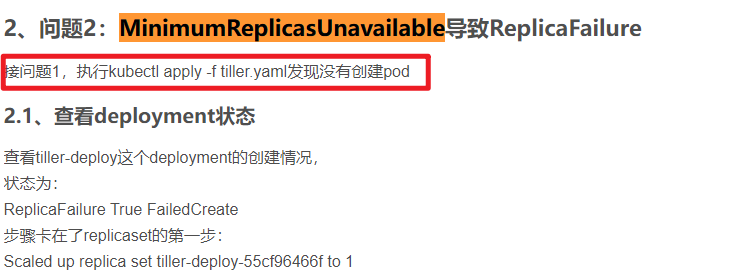
Just apply again and change the status to READY.
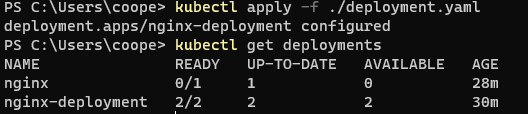
The normal prompt should be as follows:

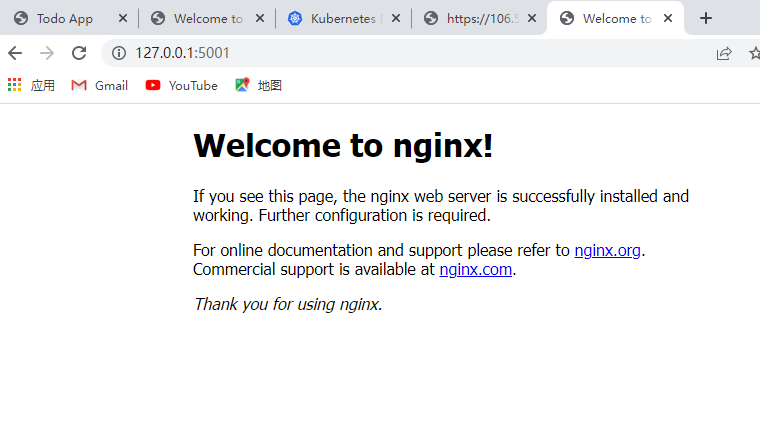
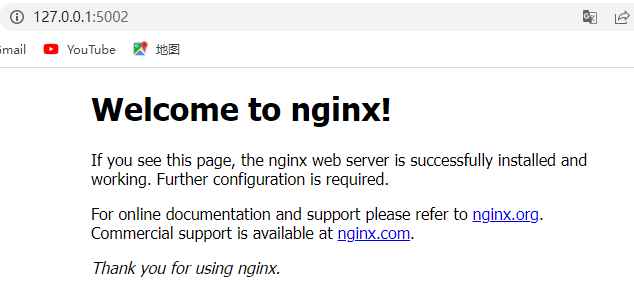
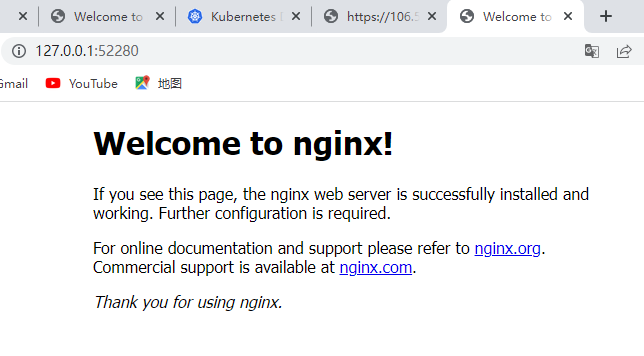
Enter 127.0.0.1:5001 in the browser to access the nginx page.
Interrupt service, execute:
kubectl get pods    #Get pod list
kubectl port-forward pod/nginx-deployment-66b6c48dd5-glhqb 5002:80 #Change to your pod name
You can access nginx at localhost:5002.
Create Service
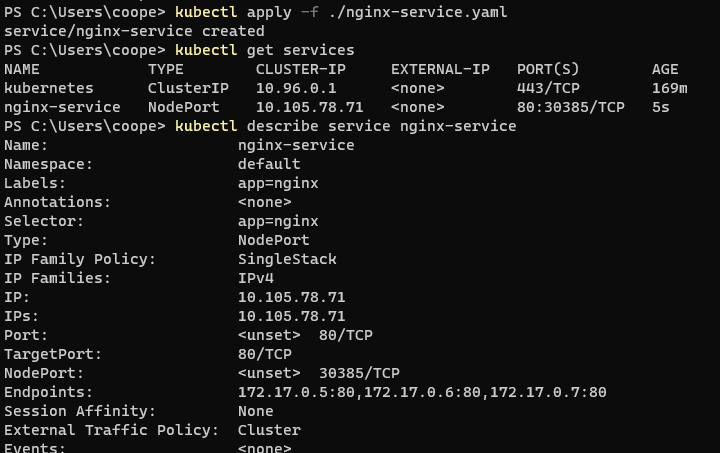
In Windows system, create the file nginx service in the user directory Yaml, and then open the terminal in the current directory:
kubectl apply -f ./nginx-service.yaml #Create a service
kubectl get services
kubectl describe service nginx-service
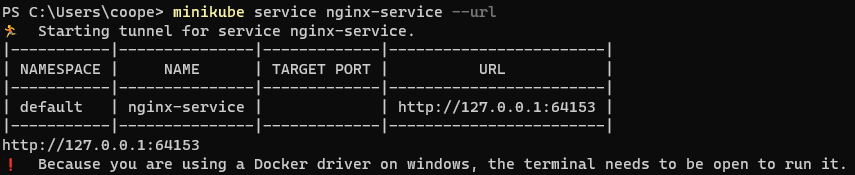
Minicube service returns a URL to access the service.
minikube service nginx-service --url
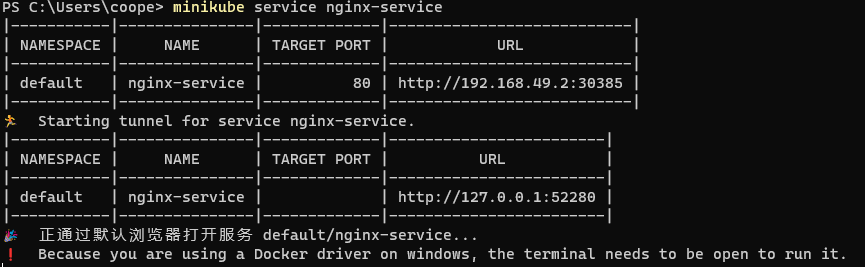
Remove the - url parameter, and the browser opens for access
Make the public network accessible
The load balancer LoadBalancer is required for public network access.
Create a new nginx-lb.yaml file and copy it to the current user directory of user.
apiVersion: v1
kind: Service
metadata:
   name: nginx-lb
   namespace: default
spec:
   ports:
   - name: tcp-80-80
     port: 80
     protocol: TCP
     targetPort: 80
   selector:
     app: nginx
   type: LoadBalancer
Commands in current directory:
kubectl config get-contexts           #Display the cluster list and find your EKS cluster
kubectl config use-context cls-********-context-default         #Replace with your EKS cluster ID
kubectl apply -f ./deployment.yaml   #Use the previous deployment Yaml creates an nginx reference
kubectl apply -f ./nginx-lb.yaml     #Create LB
Kubernetes storage
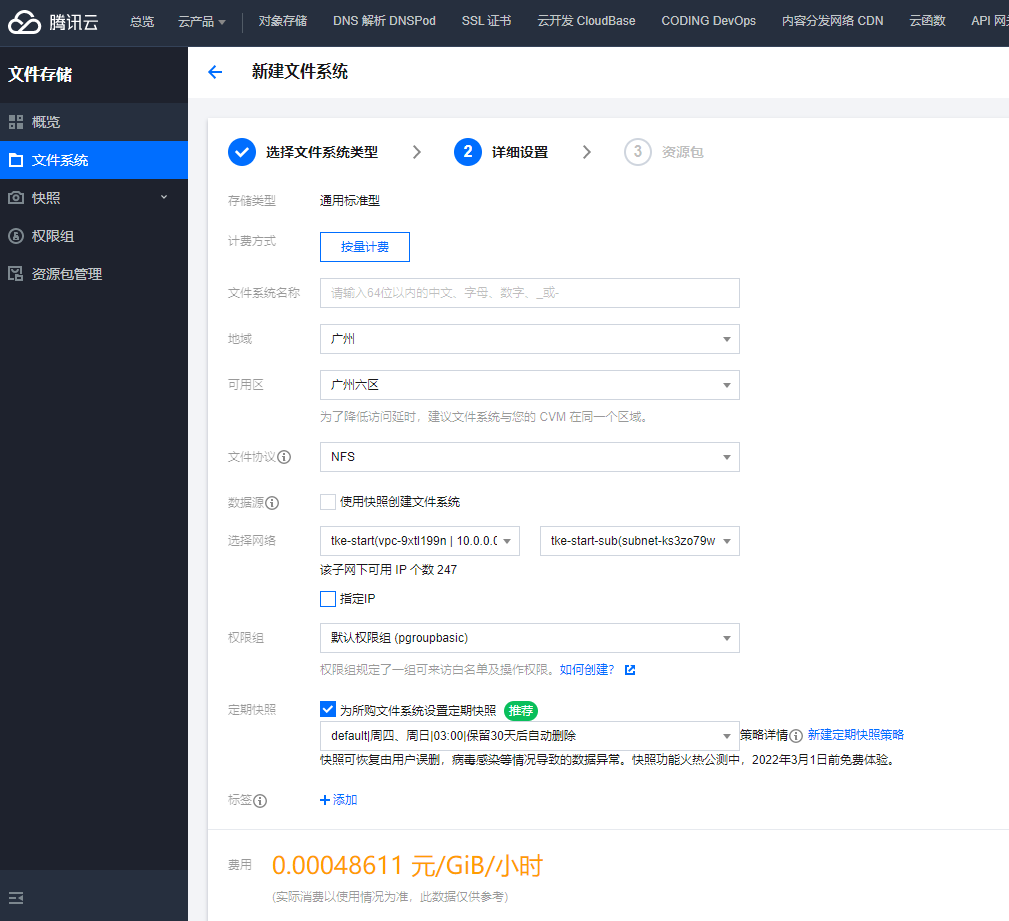
Create Tencent cloud CFS
Select the same region and zone as the private network you created earlier. (I created the Sixth District of Guangzhou before, which remains the same here.)
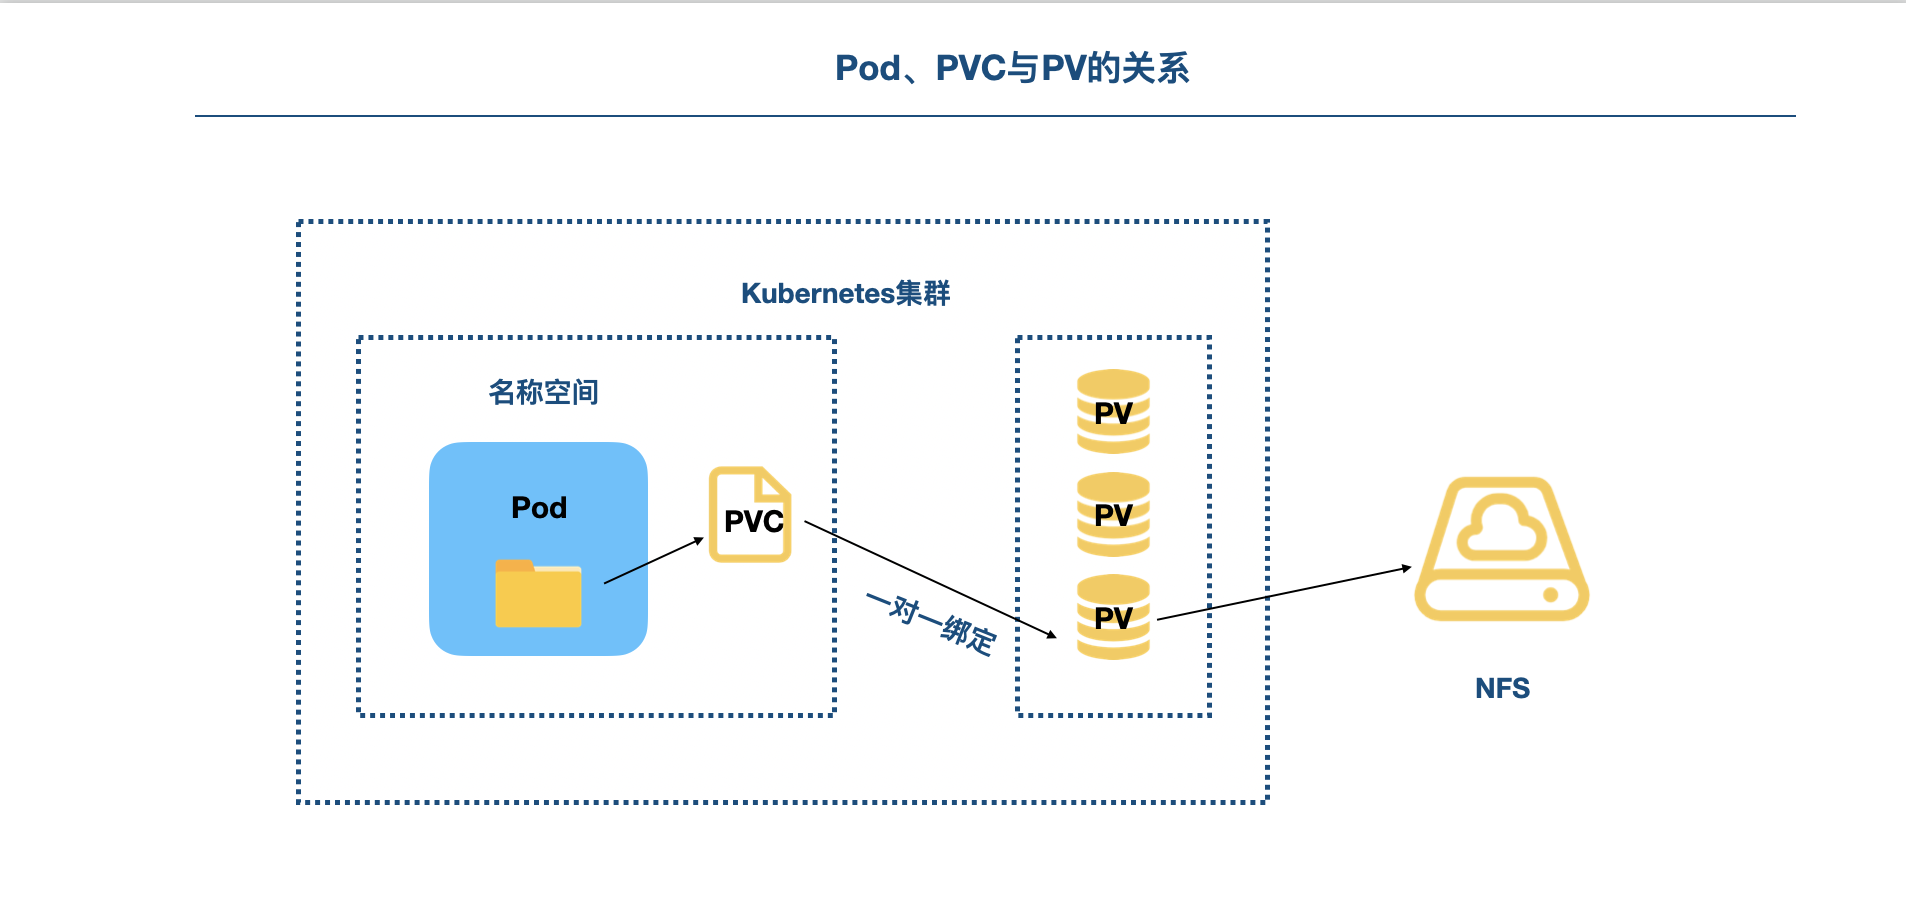
Create PV and PVC
New CFS Yaml file to create a persistent volume
apiVersion: v1
kind: PersistentVolume
metadata:
  name: cfs
spec:
  capacity:
    storage: 10Gi
  volumeMode: Filesystem
  accessModes:
    - ReadWriteMany
  persistentVolumeReclaimPolicy: Retain
  mountOptions:
    - hard
    - nfsvers=4
  nfs:
    path: /
    server: 10.0.0.11   #Change the IP address of your file storage CFS
Execute under current directory:
kubectl apply -f ./cfs.yaml
kubectl get pv      #Get the list of persistent volumes. Note the status of cfs persistent volumes at this time

Create a new cfsclaim Yaml file, create a persistent volume, apply for PVC, and let PVC bind the PV created before:
kind: PersistentVolumeClaim
apiVersion: v1
metadata:
  name: cfsclaim
spec:
  accessModes:
    - ReadWriteMany
  volumeMode: Filesystem
  storageClassName: ""
  resources:
    requests:
      storage: 10Gi
Execute under current directory
kubectl apply -f ./cfsclaim.yaml
kubectl get pv      #Get the list of persistent volumes. Note the status of cfs persistent volumes at this time


If the following information is returned, the STATUS is bound and the claim is default/cfsclaim, it means that PVC and PV are bound one by one.
Mount storage and access applications
Create a tke todo Yaml file, CCR ccs. tencentyun. COM / tkegroup / tke start: 1.0.1 replace with your own.
Image warehouse - container image service - console

apiVersion: apps/v1
kind: Deployment
metadata:
  name: tke-todo-deployment
  labels:
    k8s-app: tke-todo
    qcloud-app: tke-todo
spec:
  selector:
    matchLabels:
      k8s-app: tke-todo
      qcloud-app: tke-todo
  replicas: 1
  template:
    metadata:
      labels:
        k8s-app: tke-todo
        qcloud-app: tke-todo
    spec:
      containers:
      - name: tketodo
        image: ccr.ccs.tencentyun.com/tkegroup/tke-start:1.0.1
        ports:
        - containerPort: 3000
        volumeMounts:
        - mountPath: "/etc/todos"
          name: mypd
      volumes:
      - name: mypd
        persistentVolumeClaim:
          claimName: cfsclaim
      imagePullSecrets:
      - name: qcloudregistrykey
Execute in the current directory:
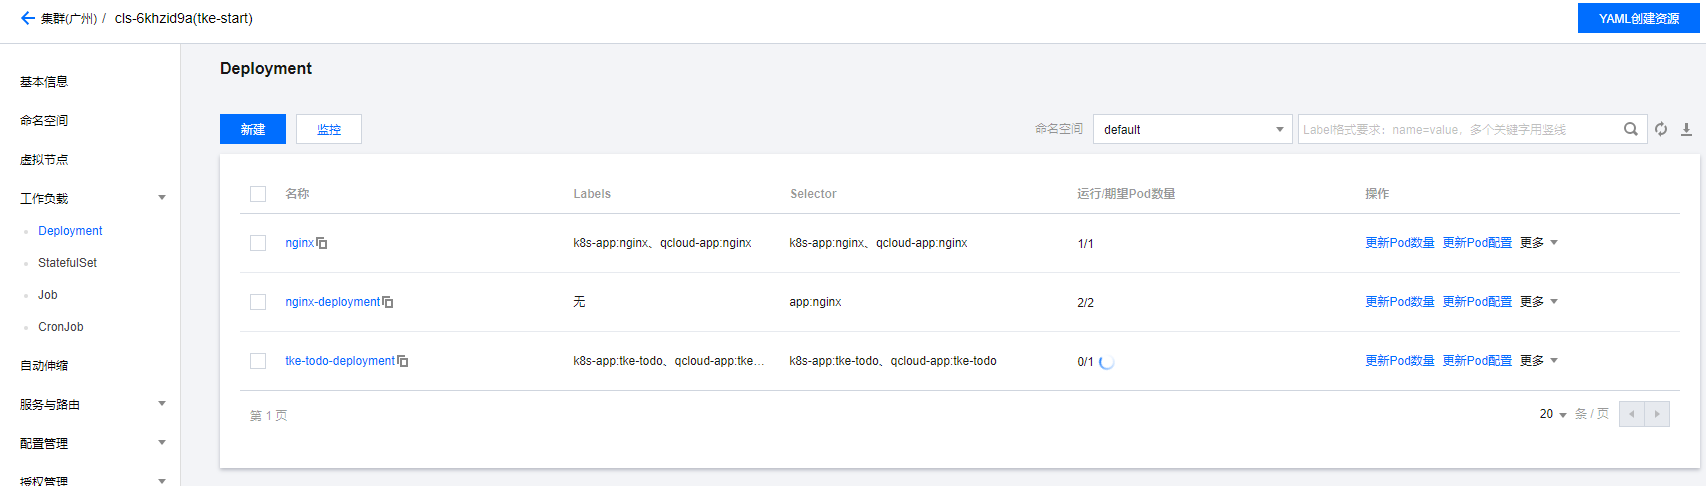
kubectl apply -f ./tke-todo.yaml
After tke todo deployment, create a load balancing CLB and create a new file tke todo CLB yaml
apiVersion: v1
kind: Service
metadata:
   name: tke-todo-clb
   namespace: default
spec:
   ports:
   - name: tcp-3000-80
     port: 80
     protocol: TCP
     targetPort: 3000
   selector:
     k8s-app: tke-todo
     qcloud-app: tke-todo
   type: LoadBalancer
Execution:
kubectl apply -f ./tke-todo-clb.yaml
After the CLB is created, you can view the public IP on the EKS console or use the command kubectl get services to access the service.

The console shows that tke todo CLB is still being created, which makes it impossible to access todo web pages through ip.
Because of the cost, I'll delete all these first and study them later.
summary
The content of this chapter is a little cumbersome, but many steps are almost the same, creating files and then applying configuration. We will study how to deploy wordpress later.