This series of articles:
Chapter 1: helm explodes easily in a minute
Chapter II: helm Easy to Explode Public Warehouse
Chapter III: helm Easy to Explode Private Warehouses
Chapter IV: helm Easily Burst chart
Chapter V: helm Blast release Easy
Chapter VI: Nine analysis takes you through helm gitlab easily
Chapter VII: Nine analysis takes you through helm nginx-ingress easily
Chapter VIII: Nine analysis takes you through helm gitlab nfs easily
Chapter IX: Nine analysis takes you through helm nexus easily
Chapter 10: Nine analysis takes you through helm3 heapster easily
Chapter 11: Nine analysis takes you through helm3 kubernetes-dashboard easily
Catalog
1 Preface
2 Add harbor warehouse
3 Download harbor
4 Unzip harbor
5 Edit values.yaml
6 Write pv
7 Create nginx-ingress
8 Create nfs
9 Create a harbor namespace
10 Install harbor
11 Create pv
12 Check pvc
13 View nginx-ingress service port
14 Edit dns
15 Access harbor
16 Notes
1 Preface
This paper uses helm v3.0.0; k8s v1.16.3.
2 Add harbor warehouse
helm repo add harbor https://helm.goharbor.io
3 Download harbor
helm pull harbor/harbor
4 Unzip harbor
tar -zxvf harbor-1.2.3.tgz
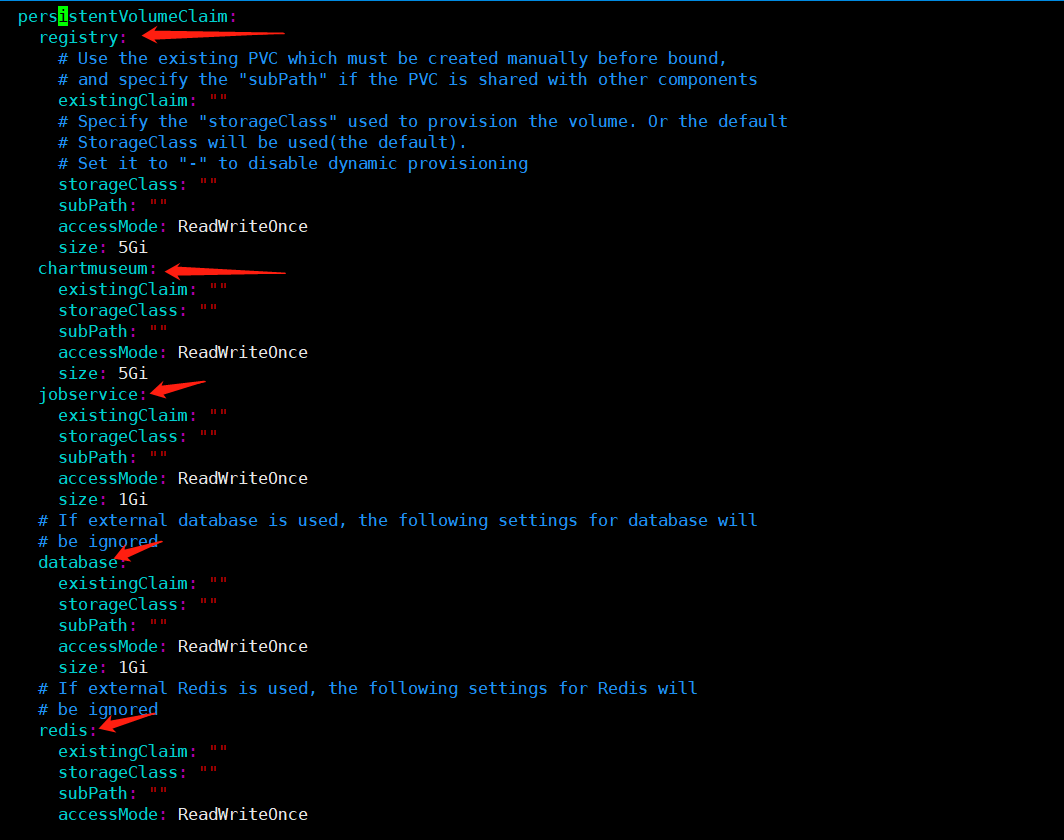
5 Edit values.yaml
Edit as follows:
expose:
tls:
commonName: "jiuxi.harbor.org"
ingress:
hosts:
core: jiuxi.harbor.org
externalURL: https://jiuxi.harbor.org
harborAdminPassword: "hellojiuxi"
6 Write pv
This article does not cover pv and pvc. I believe you should not be a novice if you dare to play helm.If you really don't know that PVs and PVCs don't matter either; you can think of them as a couple relationship, that is, PVCs have to have PVS to be willing to work, and of course they can't be white c. To give "money", pv receives money and saves it somewhere, such as a shoebox.Did you understand?You're welcome.
Looking at the values.yaml file, there are five PVCs in total.And there are two specifications: A cup (1Gi), C cup (5Gi)

Create a new resource file, pv-harbor-1g.yaml.Do not execute.Remember.
apiVersion: v1
kind: PersistentVolume
metadata:
name: pv-harbor-1g-1
spec:
capacity:
storage: 1Gi
volumeMode: Filesystem
accessModes:
- ReadWriteOnce
persistentVolumeReclaimPolicy: Retain
nfs:
server: 10.110.101.106
path: /data/nfs/harbor
---
apiVersion: v1
kind: PersistentVolume
metadata:
name: pv-harbor-1g-2
spec:
capacity:
storage: 1Gi
volumeMode: Filesystem
accessModes:
- ReadWriteOnce
persistentVolumeReclaimPolicy: Retain
nfs:
server: 10.110.101.106
path: /data/nfs/harbor
---
apiVersion: v1
kind: PersistentVolume
metadata:
name: pv-harbor-1g-3
spec:
capacity:
storage: 1Gi
volumeMode: Filesystem
accessModes:
- ReadWriteOnce
persistentVolumeReclaimPolicy: Retain
nfs:
server: 10.110.101.106
path: /data/nfs/harbor
Create a new resource file, pv-harbor-5g.yaml.Do not execute.Remember.
apiVersion: v1
kind: PersistentVolume
metadata:
name: pv-harbor-5g-1
spec:
capacity:
storage: 5Gi
volumeMode: Filesystem
accessModes:
- ReadWriteOnce
persistentVolumeReclaimPolicy: Retain
nfs:
server: 10.110.101.106
path: /data/nfs/harbor
---
apiVersion: v1
kind: PersistentVolume
metadata:
name: pv-harbor-5g-2
spec:
capacity:
storage: 5Gi
volumeMode: Filesystem
accessModes:
- ReadWriteOnce
persistentVolumeReclaimPolicy: Retain
nfs:
server: 10.110.101.106
path: /data/nfs/harbor
7 Create nginx-ingress
) To create nginx-ingress, refer to the Chapter VII "."Don't be nervous. Explode in minutes.
8 Create nfs
(See "Creating nfs" Chapter VIII "."Don't be nervous, it's easy to make you scream.
9 Create a harbor namespace
kubectl create ns harbor
10 Install harbor
## The first harbor is release; the second is namespace; and the third is the root directory after unzipping
helm install harbor -n harbor harbor
11 Create pv
After a successful harbor installation, the pvc will be in pending state.Because the actual pv was not created.

Be careful in the order in which you create them, and keep the specifications small to large.Why?Think about it. Think about it.
Create small size pv:
kubectl apply -f pv-harbor-1g.yaml
After the creation of the small size pv, take a look at the creation status and wait until the status is Bound before creating the large size pv:
kubectl apply -f pv-harbor-5g.yaml
12 Check pvc
kubectl get pvc -n harbor

13 View nginx-ingress service port
Note that port is not 443.Remember.I am 32734.Each according to his own actual situation.
kubectl get svc -n kube-system


14 Edit dns
The domain name jiuxi.harbor.org was used when creating ingress.So edit the hosts file on the host of the browser.


15 Access harbor
Open your browser and enter https://jiuxi.harbor.org:32734.
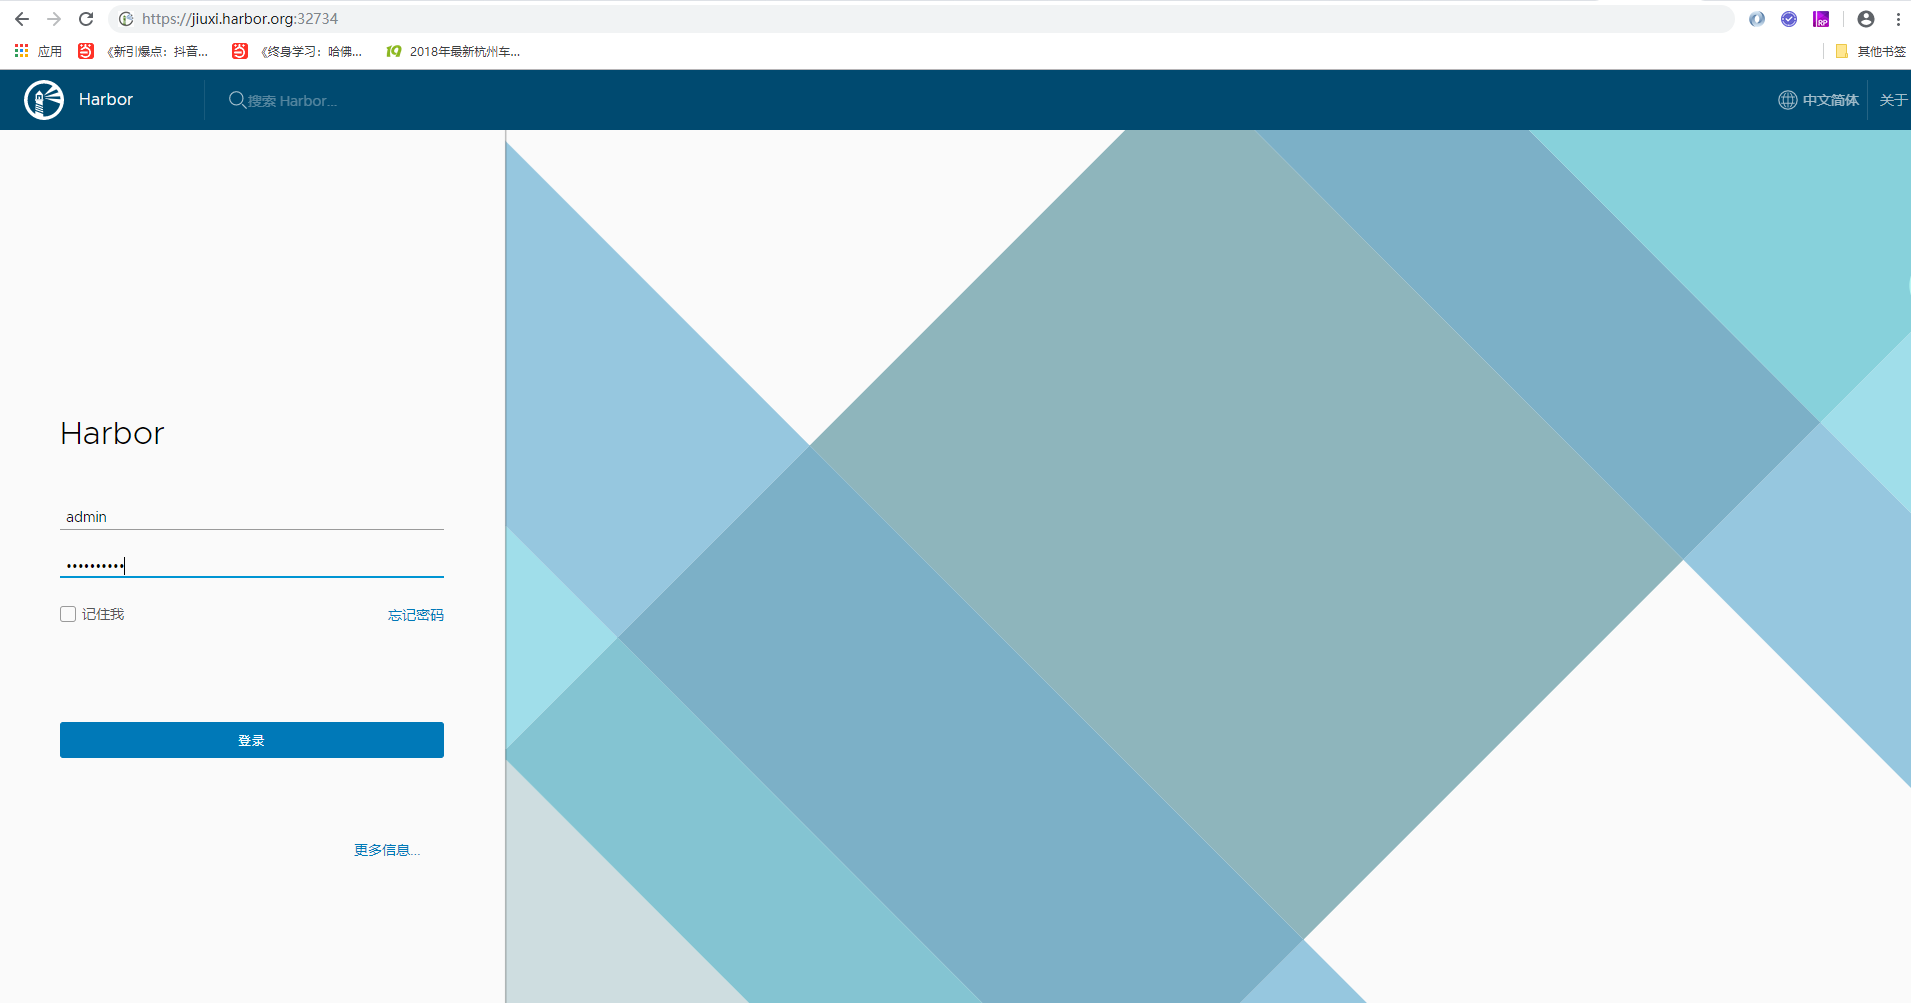
User name/password: admin/hellojiuxi.
16 Notes
Sometimes you enter your username and password correctly but can't log in because the pods aren't all running successfully and you have to make sure that all the pods are running successfully and log in again.