Overview of this article
- As the third part of the actual combat of DL4J, the goal is to create a classic LeNet-5 convolutional neural network model under the DL4J framework to train and test MNIST data sets. This part consists of the following contents:
- Introduction to LeNet-5
- Introduction to MNIST
- Data set introduction
- About version and environment
- code
- verification
Introduction to LeNet-5
- It is a convolutional neural network designed by Yann LeCun in 1998 for handwritten numeral recognition. For example, many banks in the United States used it to recognize handwritten numerals on cheques. LeNet-5 is one of the most representative experimental systems of early convolutional neural network
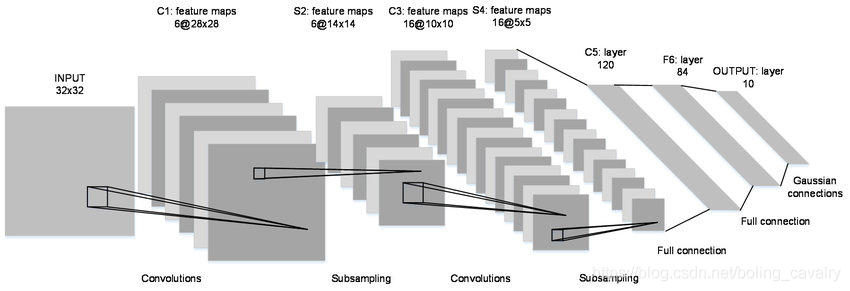
- The network structure of LeNet-5 is shown in the figure below. There are seven layers in total: C1 - > S2 - > C3 - > S4 - > C5 - > F6 - > output
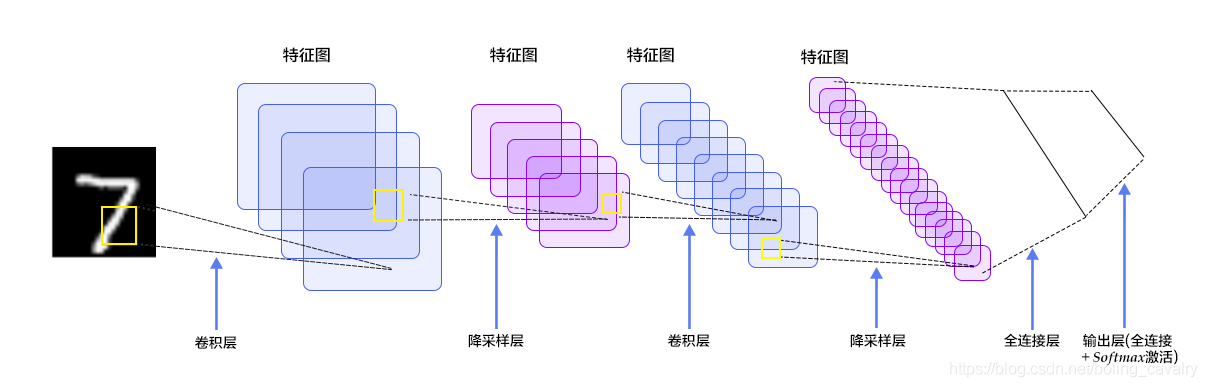
- This picture is clearer
- A brief analysis based on the above figure is used to guide the next development:
- Each picture is a 28 * 28 single channel, and the matrix should be [1, 28, 28]
- C1 is the convolution layer. The convolution core size is 5 * 5, the sliding step size is 1, and the number of convolution cores is 20. Therefore, the size change is: 28-5 + 1 = 24 (imagine how many times a window with width of 5 can slide in a window with width of 28), and the output matrix is [20,24,24]
- S2 is the pool layer, the core size is 2 * 2, the step size is 2, and the type is MAX. after the pool operation, the size is halved to [20,12,12]
- C3 is the convolution layer. The convolution kernel size is 5 * 5, the sliding step size is 1, and the number of convolution kernels is 50. Therefore, the size change is: 12-5 + 1 = 8, and the output matrix [50,8,8]
- S4 is the pool layer, the core size is 2 * 2, the step size is 2, and the type is MAX. after the pool operation, the size is halved to [50,4,4]
- C5 is the full connectivity layer (FC), with 500 neurons connected to the relu activation function
- Finally, the full connection layer Output has 10 nodes, representing numbers 0 to 9, and the activation function is softmax
Introduction to MNIST
- MNIST is a classic computer vision data set, sourced from the National Institute of Standards and Technology (NIST), which contains various handwritten digital images, including 60000 training sets and 10000 test sets,
- MNIST comes from the handwriting of 250 different people, of which 50% are high school students and 50% are from the staff of the Census Bureau. The test set also has the same proportion of handwritten digital data
- MNIST official website: http://yann.lecun.com/exdb/mnist/
Data set introduction
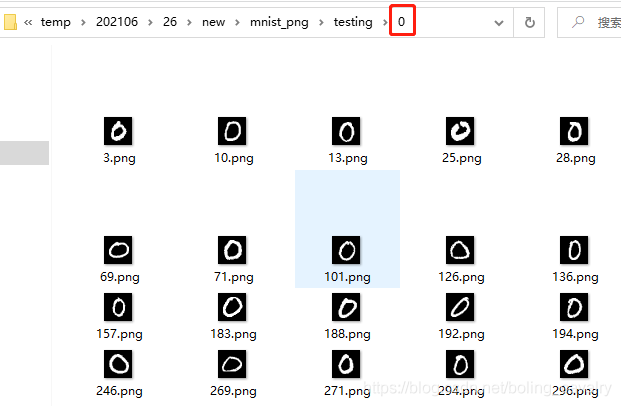
- The original data downloaded from the official website of MNIST is not a picture file. It needs to be parsed according to the format instructions given by the official before it can be converted into pictures. These things are obviously not the subject of this article. Therefore, we can directly use the data set prepared by DL4J for us (the download address will be given later). The data set is an independent picture, The name of the directory where these pictures are located is the specific number of the picture, as shown below. Directory 0 is full of pictures with the number 0:
- There are two download addresses for the above data sets:
- Can be downloaded at CSDN (0 points): https://download.csdn.net/download/boling_cavalry/19846603
- github: https://raw.githubusercontent.com/zq2599/blog_download_files/master/files/mnist_png.tar.gz
- After downloading, unzip it. It is called mnist_png folder, we will use it later in the actual combat
About DL4J version
- The source code of DL4J practical combat series adopts maven's parent-child project structure. The version of DL4J is defined as 1.0.0-beta7 in the parent project dlfj tutorials
- Although the code in this article is still a sub project of dlfj tutorials, the DL4J version uses a lower 1.0.0-beta6. The reason for this is that in the next article, we will entrust the training and testing of this article to the GPU, while the corresponding CUDA library is only 1.0.0-beta6
- After all this, you can start coding
Source download
- The complete source code in this actual combat can be downloaded from GitHub. The address and link information are shown in the table below( https://github.com/zq2599/blog_demos):
name | link | remarks |
|---|---|---|
Project Home | https://github.com/zq2599/blog_demos | The project is on the GitHub home page |
git warehouse address (https) | https://github.com/zq2599/blog_demos.git | The warehouse address of the source code of the project, https protocol |
git warehouse address (ssh) | git@github.com:zq2599/blog_demos.git | The project source code warehouse address, ssh protocol |
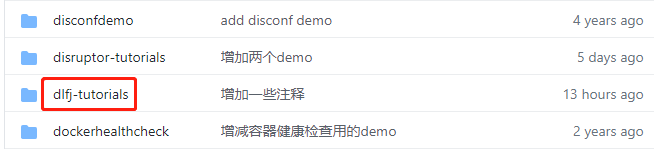
- There are multiple folders in this git project. The source code of DL4J practical combat series is in the DL4J tutorials folder, as shown in the red box below:
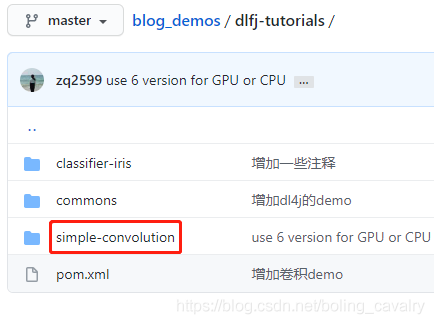
- There are several sub projects under dl4j tutorials folder. The actual combat code is in the simple revolution directory, as shown in the red box below:
code
- Create a new sub project named simple revolution under the parent project dl4j tutorials. Its pom.xml is as follows. It can be seen that the dl4j version here is specified as 1.0.0-beta6:
<?xml version="1.0" encoding="UTF-8"?>
<project xmlns="http://maven.apache.org/POM/4.0.0"
         xmlns:xsi="http://www.w3.org/2001/XMLSchema-instance"
         xsi:schemaLocation="http://maven.apache.org/POM/4.0.0 http://maven.apache.org/xsd/maven-4.0.0.xsd">
    <parent>
        <artifactId>dlfj-tutorials</artifactId>
        <groupId>com.bolingcavalry</groupId>
        <version>1.0-SNAPSHOT</version>
    </parent>
    <modelVersion>4.0.0</modelVersion>

    <artifactId>simple-convolution</artifactId>

    <properties>
        <dl4j-master.version>1.0.0-beta6</dl4j-master.version>
    </properties>

    <dependencies>
        <dependency>
            <groupId>org.projectlombok</groupId>
            <artifactId>lombok</artifactId>
        </dependency>

        <dependency>
            <groupId>ch.qos.logback</groupId>
            <artifactId>logback-classic</artifactId>
        </dependency>

        <dependency>
            <groupId>org.deeplearning4j</groupId>
            <artifactId>deeplearning4j-core</artifactId>
            <version>${dl4j-master.version}</version>
        </dependency>

        <dependency>
            <groupId>org.nd4j</groupId>
            <artifactId>${nd4j.backend}</artifactId>
            <version>${dl4j-master.version}</version>
        </dependency>
    </dependencies>
</project>- Next, according to the previous analysis and implementation code, detailed comments have been added and will not be repeated:
package com.bolingcavalry.convolution;

import lombok.extern.slf4j.Slf4j;
import org.datavec.api.io.labels.ParentPathLabelGenerator;
import org.datavec.api.split.FileSplit;
import org.datavec.image.loader.NativeImageLoader;
import org.datavec.image.recordreader.ImageRecordReader;
import org.deeplearning4j.datasets.datavec.RecordReaderDataSetIterator;
import org.deeplearning4j.nn.conf.MultiLayerConfiguration;
import org.deeplearning4j.nn.conf.NeuralNetConfiguration;
import org.deeplearning4j.nn.conf.inputs.InputType;
import org.deeplearning4j.nn.conf.layers.ConvolutionLayer;
import org.deeplearning4j.nn.conf.layers.DenseLayer;
import org.deeplearning4j.nn.conf.layers.OutputLayer;
import org.deeplearning4j.nn.conf.layers.SubsamplingLayer;
import org.deeplearning4j.nn.multilayer.MultiLayerNetwork;
import org.deeplearning4j.nn.weights.WeightInit;
import org.deeplearning4j.optimize.listeners.ScoreIterationListener;
import org.deeplearning4j.util.ModelSerializer;
import org.nd4j.evaluation.classification.Evaluation;
import org.nd4j.linalg.activations.Activation;
import org.nd4j.linalg.dataset.api.iterator.DataSetIterator;
import org.nd4j.linalg.dataset.api.preprocessor.DataNormalization;
import org.nd4j.linalg.dataset.api.preprocessor.ImagePreProcessingScaler;
import org.nd4j.linalg.learning.config.Nesterovs;
import org.nd4j.linalg.lossfunctions.LossFunctions;
import org.nd4j.linalg.schedule.MapSchedule;
import org.nd4j.linalg.schedule.ScheduleType;
import java.io.File;
import java.util.HashMap;
import java.util.Map;
import java.util.Random;

@Slf4j
public class LeNetMNISTReLu {

    // Please modify the address where the documents are stored
//    private static final String BASE_PATH = System.getProperty("java.io.tmpdir") + "/mnist";

    private static final String BASE_PATH = "E:\\temp\\202106\\26";

    public static void main(String[] args) throws Exception {
        // Picture pixel height
        int height = 28;
        // Picture pixel width
        int width = 28;
        // Because it is a black-and-white image, there is only one color channel
        int channels = 1;
        // Classification results, 0-9, ten numbers in total
        int outputNum = 10;
        // Batch size
        int batchSize = 54;
        // Number of cycles
        int nEpochs = 1;
        // Seed initializing pseudo-random numbers
        int seed = 1234;

        // Random number tool
        Random randNumGen = new Random(seed);

        log.info("Check whether the dataset folder exists:{}", BASE_PATH + "/mnist_png");

        if (!new File(BASE_PATH + "/mnist_png").exists()) {
            log.info("The dataset file does not exist. Please download the compressed package and extract it to:{}", BASE_PATH);
            return;
        }

        // Label generator, which takes the parent directory of the specified file as the label
        ParentPathLabelGenerator labelMaker = new ParentPathLabelGenerator();
        // Normalized configuration (pixel value changes from 0-255 to 0-1)
        DataNormalization imageScaler = new ImagePreProcessingScaler();

        // Whether the training set or the test set, the initialization operation is the same routine:
        // 1. Read the picture, and the data format is NCHW
        // 2. Iterators created based on batch size
        // 3. Use the normalizer as the preprocessor

        log.info("Vectorization operation of training set...");
        // Initialize training set
        File trainData = new File(BASE_PATH + "/mnist_png/training");
        FileSplit trainSplit = new FileSplit(trainData, NativeImageLoader.ALLOWED_FORMATS, randNumGen);
        ImageRecordReader trainRR = new ImageRecordReader(height, width, channels, labelMaker);
        trainRR.initialize(trainSplit);
        DataSetIterator trainIter = new RecordReaderDataSetIterator(trainRR, batchSize, 1, outputNum);
        // Fitting data (nothing is actually done in the implementation class)
        imageScaler.fit(trainIter);
        trainIter.setPreProcessor(imageScaler);

        log.info("Vectorization of test sets...");
        // Initialize the test set, similar to the previous training set operation
        File testData = new File(BASE_PATH + "/mnist_png/testing");
        FileSplit testSplit = new FileSplit(testData, NativeImageLoader.ALLOWED_FORMATS, randNumGen);
        ImageRecordReader testRR = new ImageRecordReader(height, width, channels, labelMaker);
        testRR.initialize(testSplit);
        DataSetIterator testIter = new RecordReaderDataSetIterator(testRR, batchSize, 1, outputNum);
        testIter.setPreProcessor(imageScaler); // same normalization for better results

        log.info("Configuration neural network");

        // In training, the learning rate is configured to decrease step by step with the iteration
        Map<Integer, Double> learningRateSchedule = new HashMap<>();
        learningRateSchedule.put(0, 0.06);
        learningRateSchedule.put(200, 0.05);
        learningRateSchedule.put(600, 0.028);
        learningRateSchedule.put(800, 0.0060);
        learningRateSchedule.put(1000, 0.001);

        // Super parameter
        MultiLayerConfiguration conf = new NeuralNetConfiguration.Builder()
            .seed(seed)
            // L2 regularization coefficient
            .l2(0.0005)
            // Gradient descent learning rate setting
            .updater(new Nesterovs(new MapSchedule(ScheduleType.ITERATION, learningRateSchedule)))
            // Weight initialization
            .weightInit(WeightInit.XAVIER)
            // Prepare for layering
            .list()
            // Convolution layer
            .layer(new ConvolutionLayer.Builder(5, 5)
                .nIn(channels)
                .stride(1, 1)
                .nOut(20)
                .activation(Activation.IDENTITY)
                .build())
            // Down sampling, i.e. pooling
            .layer(new SubsamplingLayer.Builder(SubsamplingLayer.PoolingType.MAX)
                .kernelSize(2, 2)
                .stride(2, 2)
                .build())
            // Convolution layer
            .layer(new ConvolutionLayer.Builder(5, 5)
                .stride(1, 1) // nIn need not specified in later layers
                .nOut(50)
                .activation(Activation.IDENTITY)
                .build())
            // Down sampling, i.e. pooling
            .layer(new SubsamplingLayer.Builder(SubsamplingLayer.PoolingType.MAX)
                .kernelSize(2, 2)
                .stride(2, 2)
                .build())
            // Dense layer, i.e. full connection
            .layer(new DenseLayer.Builder().activation(Activation.RELU)
                .nOut(500)
                .build())
            // output
            .layer(new OutputLayer.Builder(LossFunctions.LossFunction.NEGATIVELOGLIKELIHOOD)
                .nOut(outputNum)
                .activation(Activation.SOFTMAX)
                .build())
            .setInputType(InputType.convolutionalFlat(height, width, channels)) // InputType.convolutional for normal image
            .build();

        MultiLayerNetwork net = new MultiLayerNetwork(conf);
        net.init();

        // Print the loss function value every ten iterations
        net.setListeners(new ScoreIterationListener(10));

        log.info("Neural Network Co[{}]Parameters", net.numParams());

        long startTime = System.currentTimeMillis();
        // Cyclic operation
        for (int i = 0; i < nEpochs; i++) {
            log.info("The first[{}]Cycles", i);
            net.fit(trainIter);
            Evaluation eval = net.evaluate(testIter);
            log.info(eval.stats());
            trainIter.reset();
            testIter.reset();
        }
        log.info("Time consuming training and testing[{}]millisecond", System.currentTimeMillis()-startTime);

        // Save model
        File ministModelPath = new File(BASE_PATH + "/minist-model.zip");
        ModelSerializer.writeModel(net, ministModelPath, true);
        log.info("abreast of the times MINIST Model saved in[{}]", ministModelPath.getPath());
    }
}- Execute the above code, the log output is as follows, the training and testing are completed successfully, and the accuracy rate reaches 0.9886:
21:19:15.355 [main] INFO org.deeplearning4j.optimize.listeners.ScoreIterationListener - Score at iteration 1110 is 0.18300625613640034
21:19:15.365 [main] DEBUG org.nd4j.linalg.dataset.AsyncDataSetIterator - Manually destroying ADSI workspace
21:19:16.632 [main] DEBUG org.nd4j.linalg.dataset.AsyncDataSetIterator - Manually destroying ADSI workspace
21:19:16.642 [main] INFO com.bolingcavalry.convolution.LeNetMNISTReLu -

========================Evaluation Metrics========================
 # of classes:    10
 Accuracy:        0.9886
 Precision:       0.9885
 Recall:          0.9886
 F1 Score:        0.9885
Precision, recall & F1: macro-averaged (equally weighted avg. of 10 classes)


=========================Confusion Matrix=========================
    0    1    2    3    4    5    6    7    8    9
---------------------------------------------------
  972    0    0    0    0    0    2    2    2    2 | 0 = 0
    0 1126    0    3    0    2    1    1    2    0 | 1 = 1
    1    1 1019    2    0    0    0    6    3    0 | 2 = 2
    0    0    1 1002    0    5    0    1    1    0 | 3 = 3
    0    0    2    0  971    0    3    2    1    3 | 4 = 4
    0    0    0    3    0  886    2    1    0    0 | 5 = 5
    6    2    0    1    1    5  942    0    1    0 | 6 = 6
    0    1    6    0    0    0    0 1015    1    5 | 7 = 7
    1    0    1    1    0    2    0    2  962    5 | 8 = 8
    1    2    1    3    5    3    0    2    1  991 | 9 = 9

Confusion matrix format: Actual (rowClass) predicted as (columnClass) N times
==================================================================
21:19:16.643 [main] INFO com.bolingcavalry.convolution.LeNetMNISTReLu - Time consuming training and testing[27467]millisecond
21:19:17.019 [main] INFO com.bolingcavalry.convolution.LeNetMNISTReLu - abreast of the times MINIST Model saved in[E:\temp\202106\26\minist-model.zip]

Process finished with exit code 0
About accuracy
- The previous test results show that the accuracy rate is 0.9886, which is the training result of DL4J version 1.0.0-beta 6. If you change to 1.0.0-beta 7, the accuracy rate can reach more than 0.99. You can try it;
- So far, the classic convolution practice under the DL4J framework has been completed. Up to now, our training and testing work are completed by CPU, and the increase in CPU utilization is very obvious. In the next article, let's give today's work to GPU to try and see if we can speed up training and testing with CUDA;