CocosCreator3D wechat game introduction: running ball (3)
CharactorCamera
We have finished the basic operation and the judgment of the game, but when we play, our camera can only stop there. We want the camera to move with the ball's Charactor node.
Here we adjust the Camera node and create a new empty node named CameraArm. Move the Camera node Camera under the original Scene to the Camera arm, and make it a child node of the Camera arm node.
Next, we create a new script named CharactorCamera.ts, script code:
export class CharactorCamera extends Component {

    //Ball node
    @property(Node)
    charactor: Node = null;

	//Whether to follow the X-axis coordinate of the ball
    @property
    XAxisFollow: boolean = true;

	//Follow the Y-axis coordinate of the ball or not
    @property
    YAxisFollow: boolean = false;

	//Follow the Z-axis coordinate of the ball or not
    @property
    ZAxisFollow: boolean = false;

    update (deltaTime: number) {
        var pos: Vec3 = this.node.position;
        if (this.XAxisFollow) {
            pos.x = this.charactor.position.x;
        }
        if (this.XAxisFollow) {
            pos.y = this.charactor.position.y;
        }
        if (this.XAxisFollow) {
            pos.z = this.charactor.position.z;
        }
        this.node.position = pos;
    }
}
The simple logic is to update the node location according to our configuration in the update method.
After writing the script, mount it to the camerarm node, so that the core part of the whole game is basically completed.
Enrich our level elements
Next, we make some level elements to enrich our game and make it more challenging.
SpeedUpPlane
This is an acceleration mechanism. When the small ball collides with it, it will give the small ball an acceleration to accelerate the movement of the small ball.
First of all, let's start with a Plane model, create a new shader, and replace it with a map.

Then add the RigidBodyComponent component and boxcolladercomponent to it
Note here that we need to mark the IsTrigger property of boxcolladercomponent as true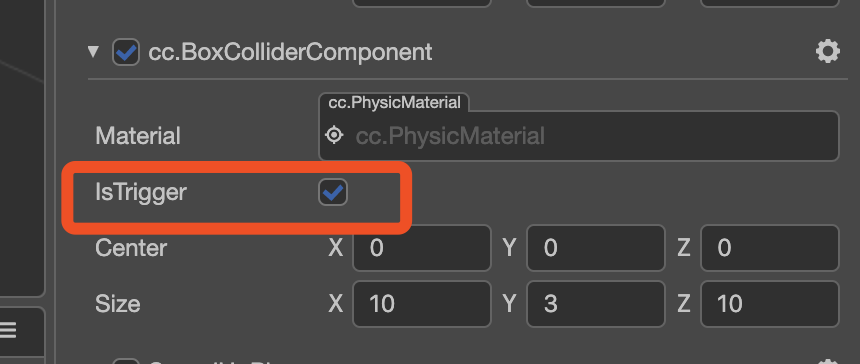
In this way, the collision component will only generate collision events, but will not affect the motion state of the rigid body with which it collides. Similar to a trigger
Adjust the size of the node. Here I use the following scaling values:
Next, we write the corresponding logic script (SpeedUpPlane.ts)
export class SpeedUpPlane extends Component {

	//The momentum given to the ball when acceleration occurs
    @property
    SpeedUpPower: number = 0;

	//Has it accelerated?
    private _isSpeedUpped: boolean = false;

    start () {
        var collider = this.node.getComponent(BoxColliderComponent);
        //Note that since our IsTrigger property is true, we are no longer listening for onCollisionEnter events.
        //It's the onTriggerEnter event. Similarly, the property of the callback parameter is ITriggerEvent, not ICollisionEvent.
        collider.on("onTriggerEnter", (event: ITriggerEvent) => {
            var otherCollider = event.otherCollider;
            var ball = otherCollider.node;
            if (ball.name == "Charactor" && !this._isSpeedUpped) {
                var movement = ball.getComponent(CharactorMovement);
                //After triggering, give the ball forward momentum to accelerate the ball's movement
                movement.addFrontImpluse(this.SpeedUpPower);
                this._isSpeedUpped = true;
            }
        });
    }
}
After completion, mount the script to the node and configure the properties
Finally, we also drag it to the resource manager to generate Prefab for subsequent level editing.
JumpPlane
This level element is that when the ball triggers it, it will give the ball an upward impulse to jump up.
The code is similar to SpeedUpPlane, except that SpeedUpPlane calls the addfrontimpact method of CharactorMovement, and what we need to call for this organ now is the addtopimpact method of CharactorMovement.
Related code:
export class JumpPlane extends Component {
    @property
    JumpPower: number = 0;

    private _isJumped: boolean = false;

    start () {
        // Your initialization goes here.
        var collider = this.node.getComponent(BoxColliderComponent);
        collider.on("onTriggerEnter", (event: ITriggerEvent) => {
            var otherCollider = event.otherCollider;
            var ball = otherCollider.node;
            if (ball.name == "Charactor" && !this._isJumped) {
                var movement = ball.getComponent(CharactorMovement);
                movement.addTopImpluse(this.JumpPower);
                this._isJumped = true;
            }
        });
    }
}
Finally, we also drag it to the resource manager to generate Prefab for subsequent level editing.
MovePlane
When the ball enters its trigger range, it will rise as an obstacle.
Let's create a Cube model first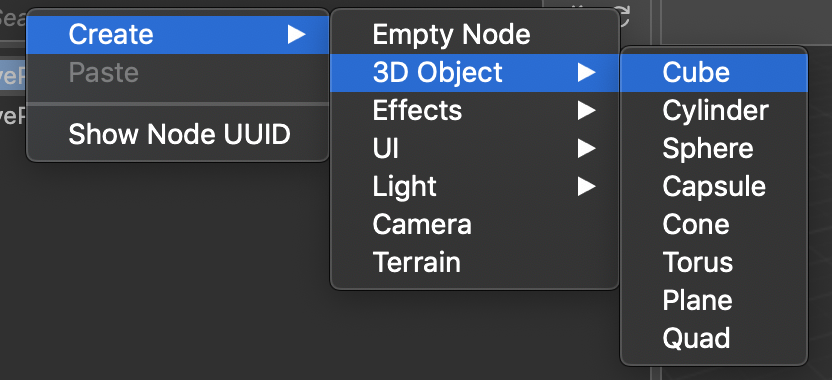
Add rigid body componentrigidbodycomponent
Then add a BoxColliderComponent as its collision component
Add a sphere collidercomponent as its trigger collision component. The IsTrigger of this Collider component should be checked, because we only use it as a trigger.
Adjust the Radius attribute of spherecllidercomponent and its size. You can also adjust it in the scene editor.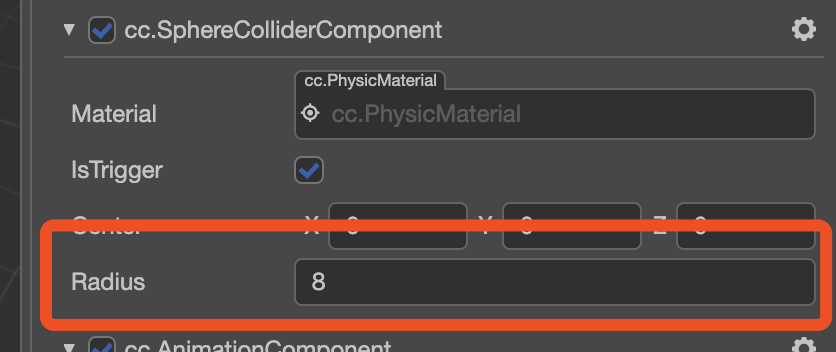

Create a new empty node, and drag the Cube node to the empty node as its child node.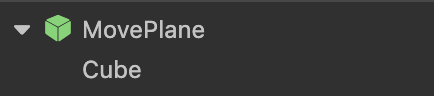
Back to the Cube model node, we add an Animation component to it.
Open the Animation editing window in the top menu
Click the Create a new AnimationClip file button to create an AnimationClip resource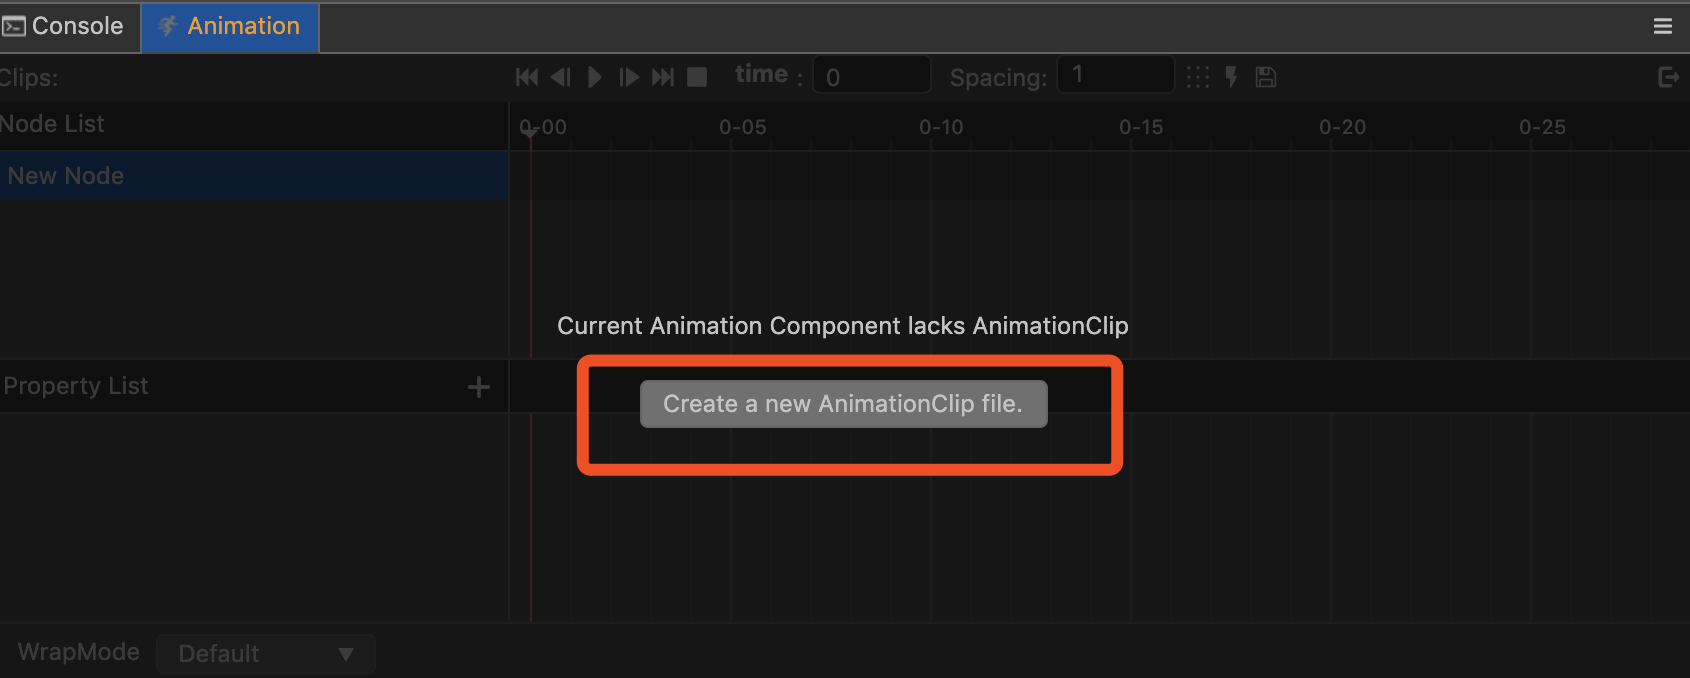
We can also create this resource by right clicking in Explorer and selecting create AnimationClip.

After creation, assign this resource to Clips array of Animation component and to DefaultClip attribute.

Click the Enter animation editing mode button in the animation editor to enter the editor to edit the animation.
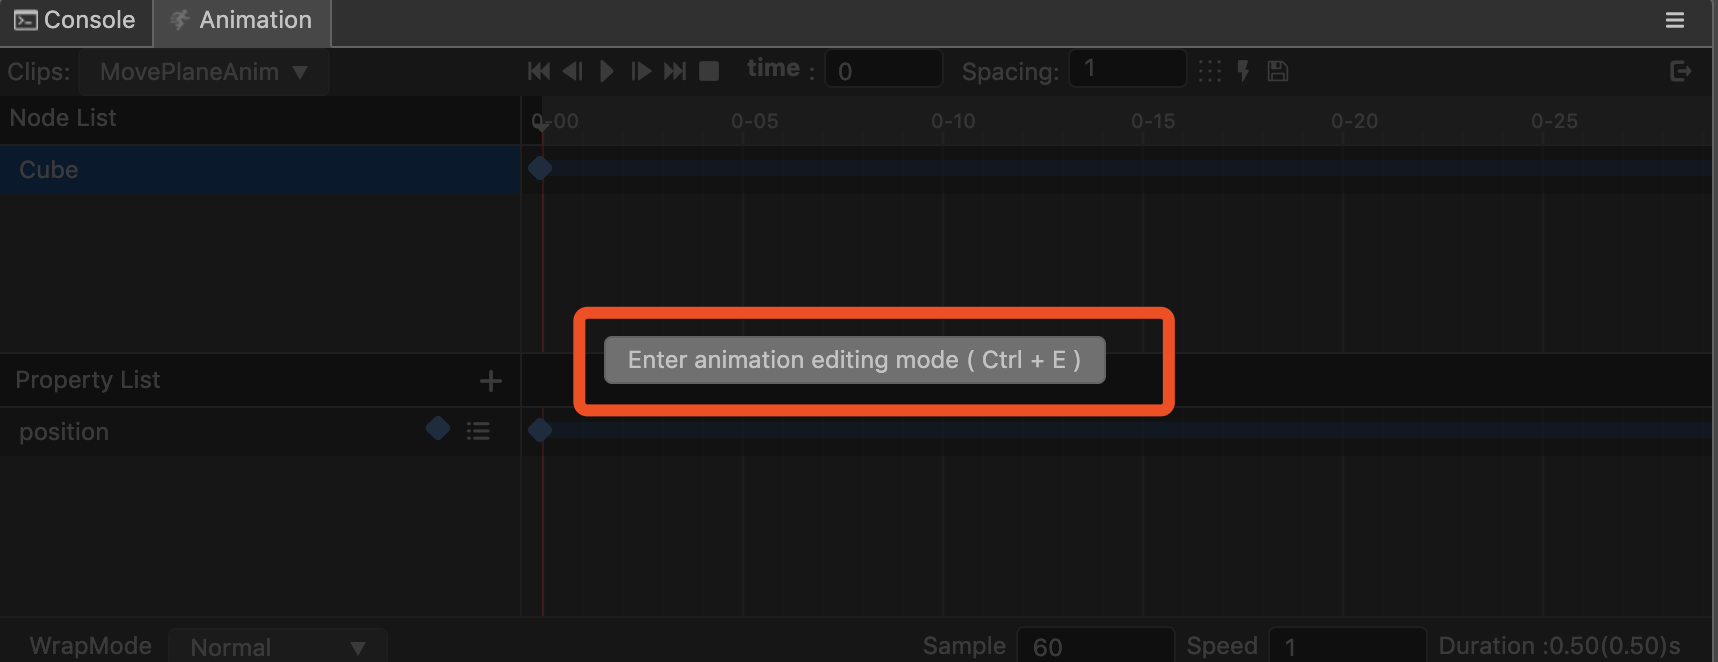
The operation of the whole animation editor is consistent with that of CocosCreator2D, but there will be some changes on the interface.
For example, key frame attributes are set here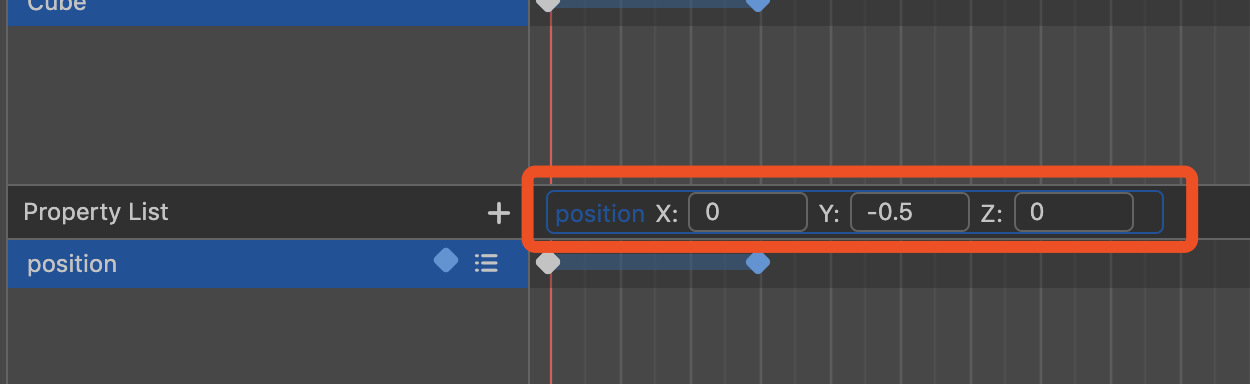
First click the key frame, then click the attribute tab on the left, and the setting box will be displayed.
In addition to the basic attributes that can be edited in the animation editor, the node's shader attributes can also be edited in the animation editor.
For example, the MainTexture property of a material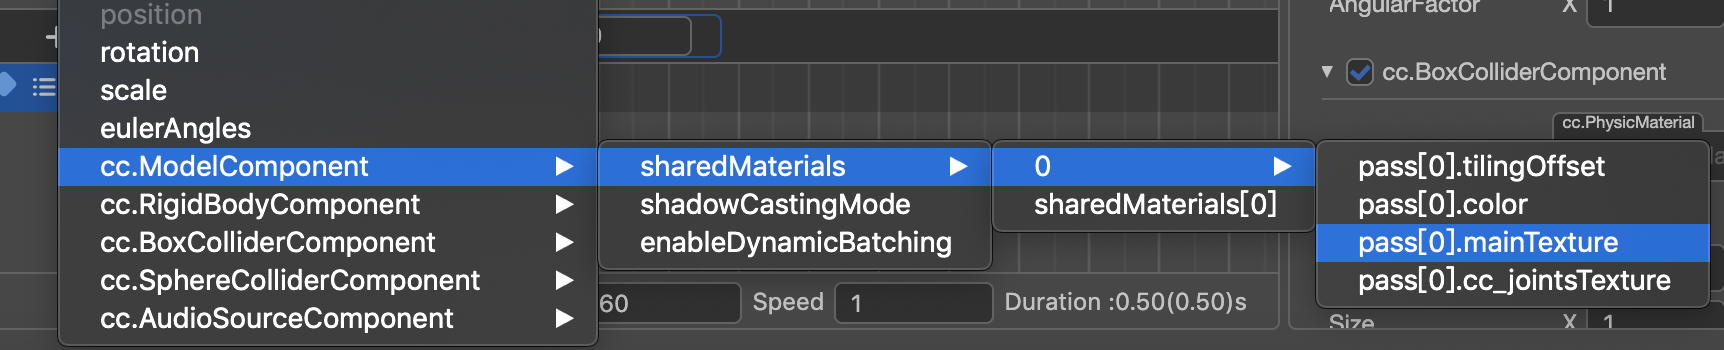
We can use the animation editor to change the texture resources used by MainTexture during the animation process, and drag the resources to this setting box.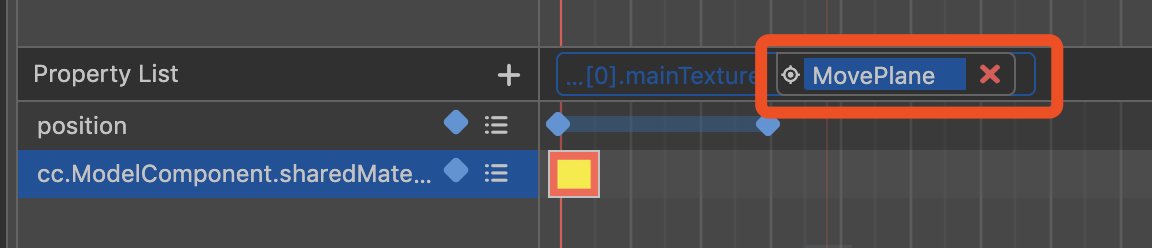
ps: at present, some attribute settings of material animation are invalid and not perfect. The next version is basically OK.
The use of animation editor can refer to Official documents , I don't want to elaborate here. I believe that you can quickly complete the small animation of this displacement after reading the document.
Finally, we write a script for it. The new script is named MovePlane.ts, which is attached to the Cube node.
The code is as follows:
export class MovePlane extends Component {

	//Has it been triggered?
    private _isMoved: boolean = false;
    //Animation component
    private _animation: AnimationComponent = null;

    start () {
        // Your initialization goes here.
        this._animation = this.node.getComponent(AnimationComponent);
        var collider = this.node.getComponent(SphereColliderComponent);
        //Listen for the triggering event of the sphere collision topic. Note that the property of getComponent here is spherecloidercomponent.
        //If you are writing the colledercomponent, it is possible to get the boxcolledercomponent from the node.
        collider.on("onTriggerEnter", (event: ITriggerEvent) => {
            var otherCollider = event.otherCollider;
            var ball = otherCollider.node;
            if (ball.name == "Charactor" && !this._isMoved) {
            		//If it is triggered by a small ball, play the raised animation
                this._animation.play();
                this._isMoved = true;
            }
        });
    }

    // update (deltaTime: number) {
    //     // Your update function goes here.
    // }
}
After completion, we will make this level element into Prefab, which is convenient for us to reuse when editing the level later.
Other level elements
I believe that you can easily and quickly make many interesting level elements by yourself through the previous level elements. Let's not talk about it here. I also made some other level elements myself. See demo project for details.
After completing a series of level elements, we can quickly build a variety of levels.