preface
Recently, when the front-end team submitted the code, it was found that the commit was really messy and varied. In order to eliminate this chaos, it thought of git's hook mechanism and wrote shell scripts to implement it. Of course, JavaScript has a good tool to implement this template, which is commitlint.
Next, we will explain how to use commitlint step by step.
Pre commit and husky are both good tools, but husky users say more and earlier. Here we only talk about husky. Let's introduce the Vue cli fast integration commitlint specification.
How commitlint works
In order to quickly use the commitlint specification, we simply took a look at the Vue cli integration plug-in source code and husky and commitlint related materials. The general implementation process is as follows, as shown in the figure:
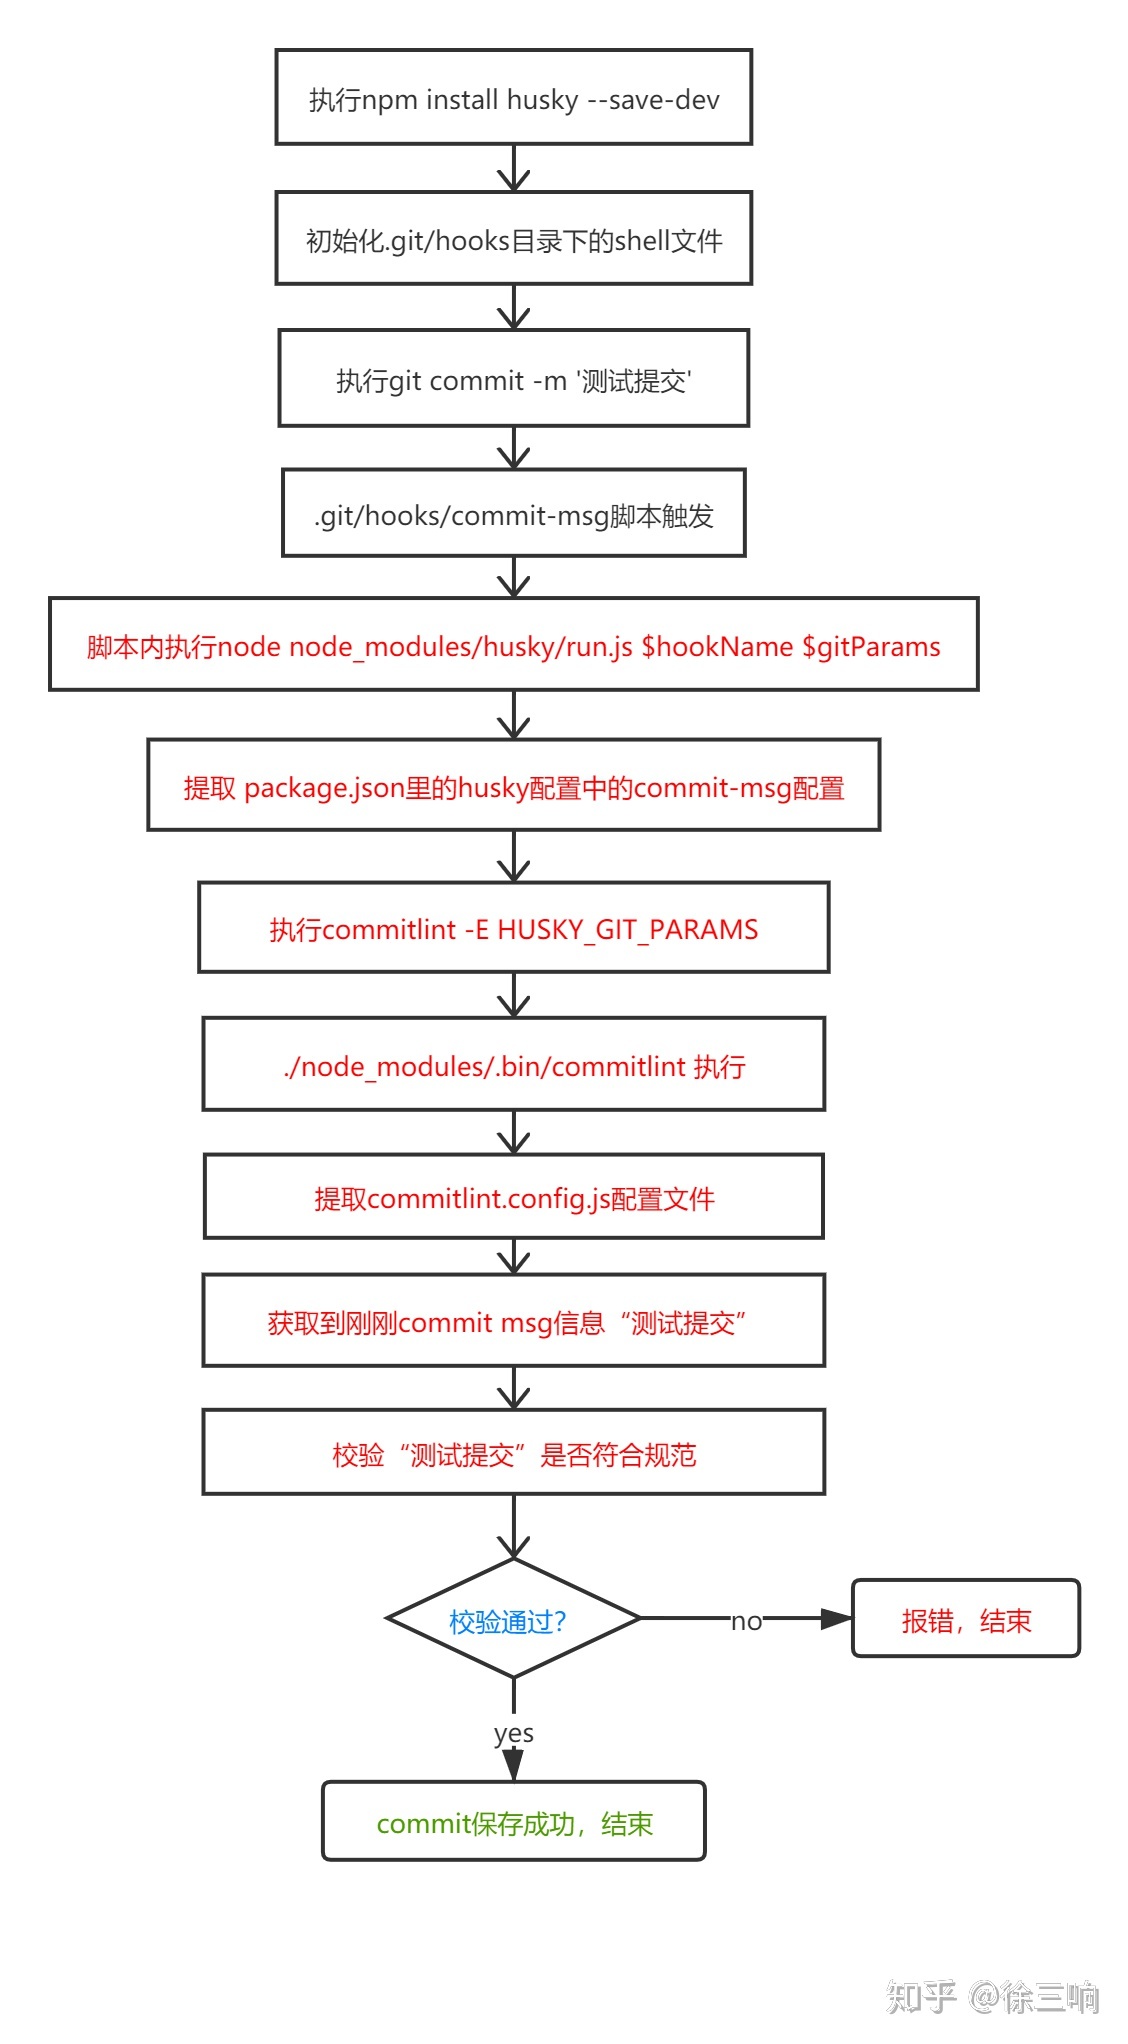
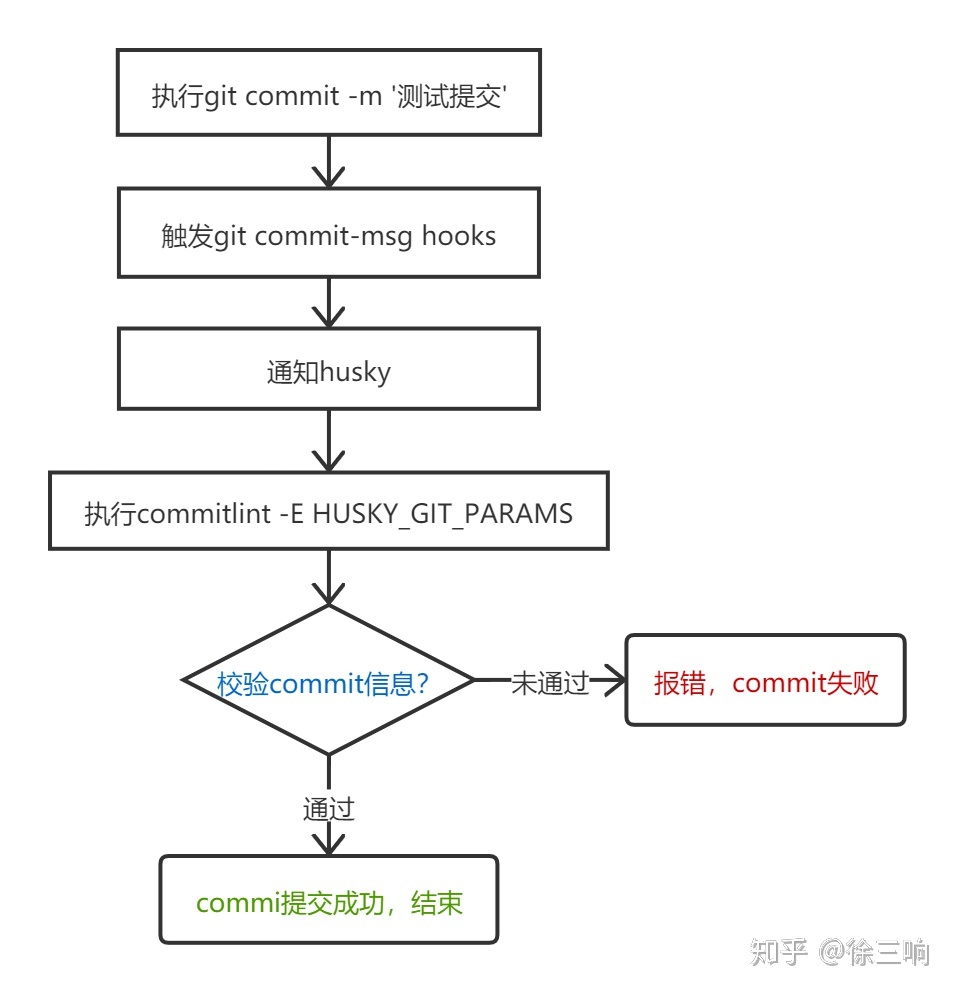
If you don't understand the above picture, it doesn't matter, but you should at least understand the following picture:
Installation method
1. Vue cli project configuration
VUE is installed with built-in plug-ins. Press enter when selecting;
#Install dependent plug-ins
vue-add-commitlint

#Some Vue cli versions may lack right pad dependency and need to be installed manually

npm install right-pad

#There cannot be a yarn in the project The lock file, if any, needs to be temporarily removed;
commitlint installation is considered successful if the following contents appear in the project:
-
Generate configuration file commitlint config. JS, of course commitlintrc.js
-
package. The following code appears in the JSON file
// package.json
  ...
   "scripts": {
    "serve": "vue-cli-service serve",
    "build": "vue-cli-service build",
    "lint": "vue-cli-service lint",
    "cz": "npm run log && git add . && git cz",
    "log": "conventional-changelog --config ./node_modules/vue-cli-plugin-commitlint/lib/log -i CHANGELOG.md -s -r 0"
  },
  ....

  "config": {
    "commitizen": {
      "path": "./node_modules/vue-cli-plugin-commitlint/lib/cz"
    }
  },
  "husky": {
    "hooks": {
      "commit-msg": "commitlint -E HUSKY_GIT_PARAMS"
    }
  }
2. Non Vue cli project configuration
commitlint: install and formulate submission specifications (default)
npm install --save-dev @commitlint/config-conventional @commitlint/cli
Manually generate the configuration file commitlint config. JS, of course commitlintrc.js
// commitlint.config.js
module.exports = {
  extends: [ "@commitlint/config-conventional"],
  rules: {
    "type-enum": [
      2,
      "always",
      ["upd", "feat", "fix", "refactor", "docs", "chore", "style", "revert"],
    ],
    "type-case": [0],
    "type-empty": [0],
    "scope-empty": [0],
    "scope-case": [0],
    "subject-full-stop": [0, "never"],
    "subject-case": [0, "never"],
    "header-max-length": [0, "always", 72],
  },
};
- Husky: also configure husky for Git to verify Git's commit operation. Husky inherits all hooks under Git. When triggering hooks, husky can prevent illegal commit, push, etc.
If husky is not used in the project, it needs to be installed manually:
npm install husky --save-dev
In package Introducing husky related dependency configuration into JSON
// package.json
{
  ...
    "scripts": {
    "serve": "vue-cli-service serve",
    "build": "vue-cli-service build",
    "lint": "vue-cli-service lint",
    "cz": "npm run log && git add . && git cz",
    "log": "conventional-changelog --config ./node_modules/vue-cli-plugin-commitlint/lib/log -i CHANGELOG.md -s -r 0"
  },
  ...
  "husky": {
    "hooks": {
      "commit-msg": "commitlint -E HUSKY_GIT_PARAMS"
    }
  }
}
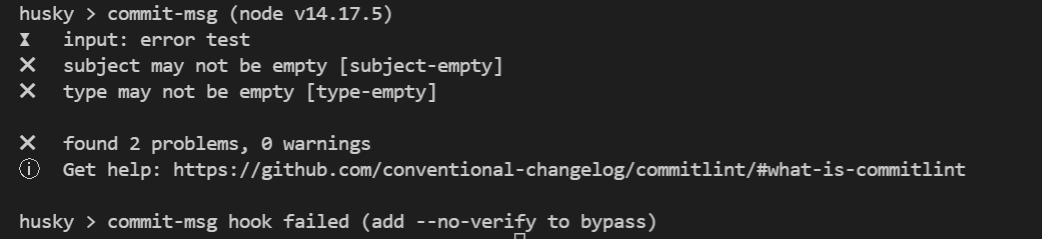
This configuration tells git hooks that when we execute git commit -m 'test submit' in the current project, the commit MSG event hook will be triggered and husky will be notified, so as to execute commitlint -E HUSKY_GIT_PARAMS command, which we just started to install/ node_modules/.bin/commitlint, which will read commitlint config. JS configures the rules and verifies the string of text submitted by the test we just submitted. If the verification fails, an error is output at the terminal and the commit is terminated.
Commitlint submission specification
commitlint recommends that we use the config conventional configuration to write the commit;
- Submission format (note that there is a space after the colon)
git commit -m <type>[optional scope]: <description>
type : Used to indicate the type of change we submitted this time. Is it a new function? Or did you modify the test code? Or has the document been updated?

optional scope: An optional modification range. It is used to identify which module in the code is mainly involved in this submission.

description: Describe the main contents of this submission in one sentence and be concise and comprehensive.
- Common type
| type | describe |
|---|---|
| build | Compilation related changes, such as release versions, changes to project builds or dependencies |
| chore | Other modifications, such as changing the construction process, or adding dependent libraries and tools |
| ci | Continuous integration modification |
| docs | Document modification |
| feat | New features and functions |
| fix | Modify bug |
| perf | Optimize related, such as improving performance and experience |
| refactor | code refactoring |
| revert | Rollback to previous version |
| style | Modify the code format. Note that it is not css modification |
| test | Test case modification |
example
General Git command line submission method
Correct method:
git commit -m 'fix(account): repair xxx of bug'
git commit -m 'refactor: Refactor the entire project'
Error method:
You need to prompt the submission method
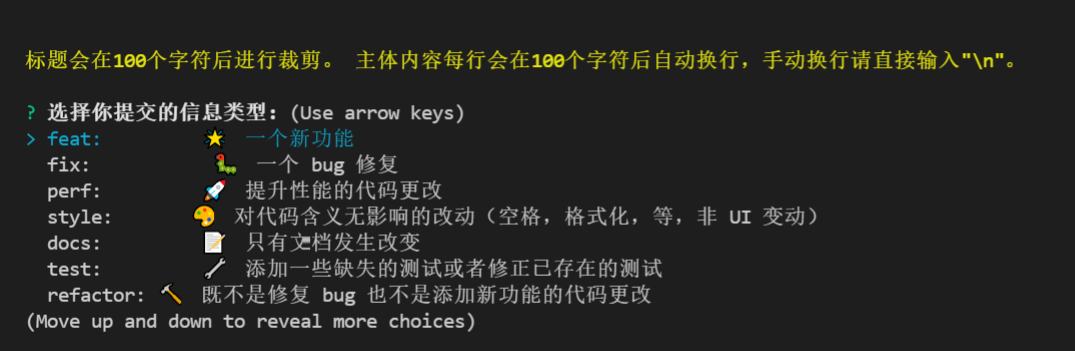
This method is a fool submission, and there will be no commit fail. Just follow the prompts:
npm run cz
summary
Using commitlint can standardize our every commit. We can use it to automatically generate files such as changeLog to facilitate code management.