When creating Maven project or SpringBoot project, you need to configure Maven plug-in. It can automatically provide dependencies for us. It only needs a few lines of code to provide the coordinates of the jar package, instead of madly guiding the package and consuming excess memory as before.
There is a compatibility problem between maven version and idea version. If the version is incompatible, the maven project cannot be imported.
Unable to import maven project: See logs for details
IDEA 2018 version is only compatible with Maven 3 Versions before 6.1 are incompatible with later versions.
The official website address of maven download is: https://maven.apache.org/download.cgi
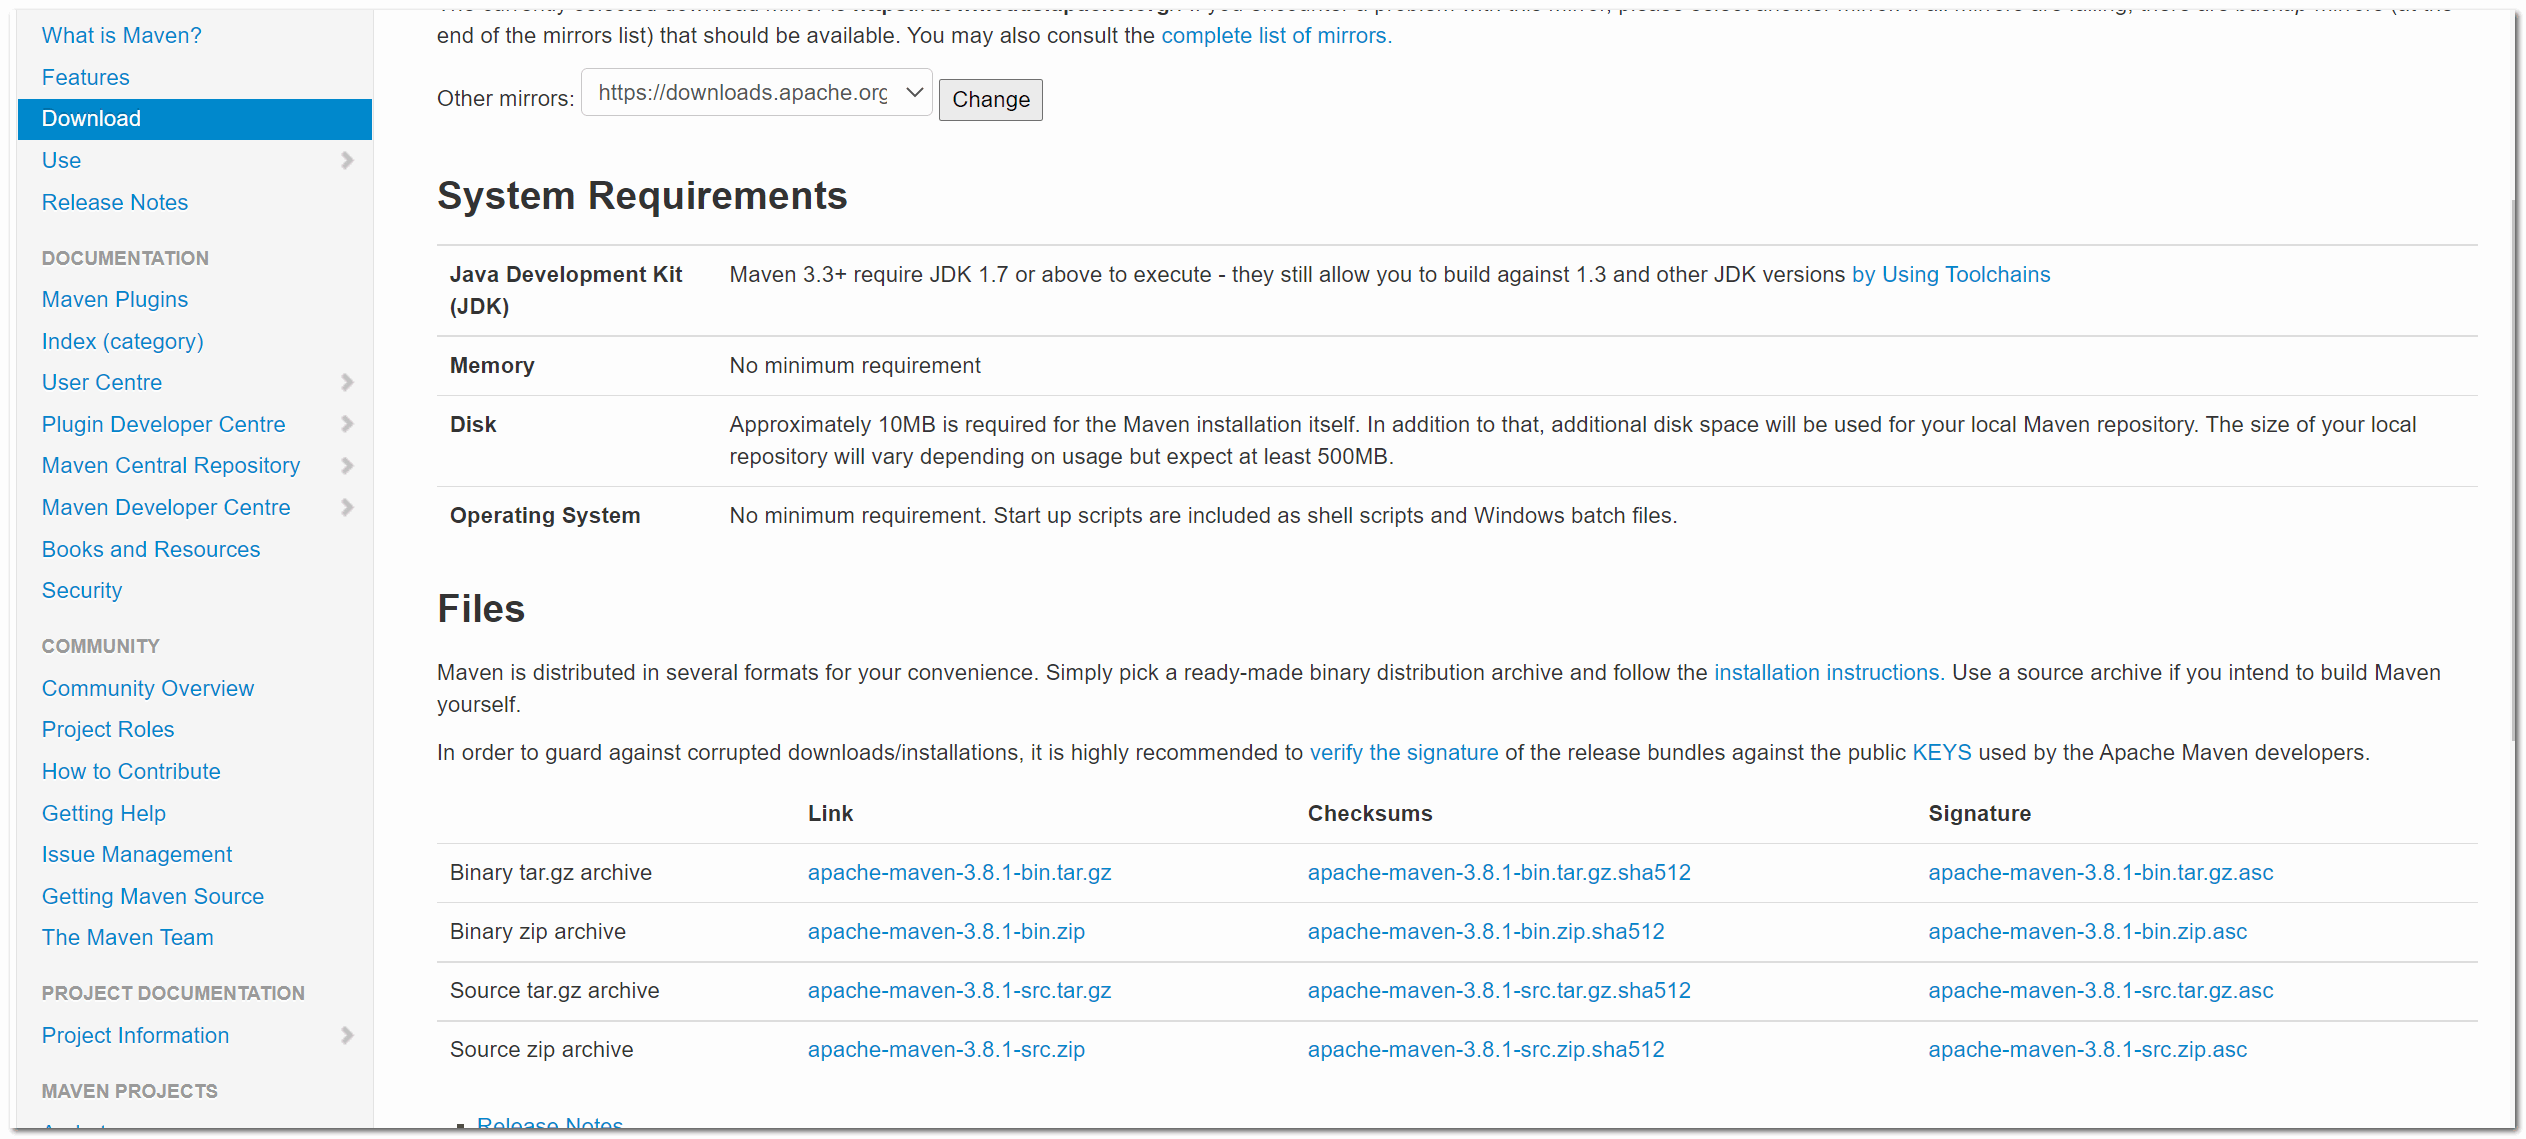
After entering the official website, you can see that the current version of maven has been updated to 3.8 1. The compatible IDEA version of this version is 2021. Download maven 3 The steps of 6.1 are as follows:
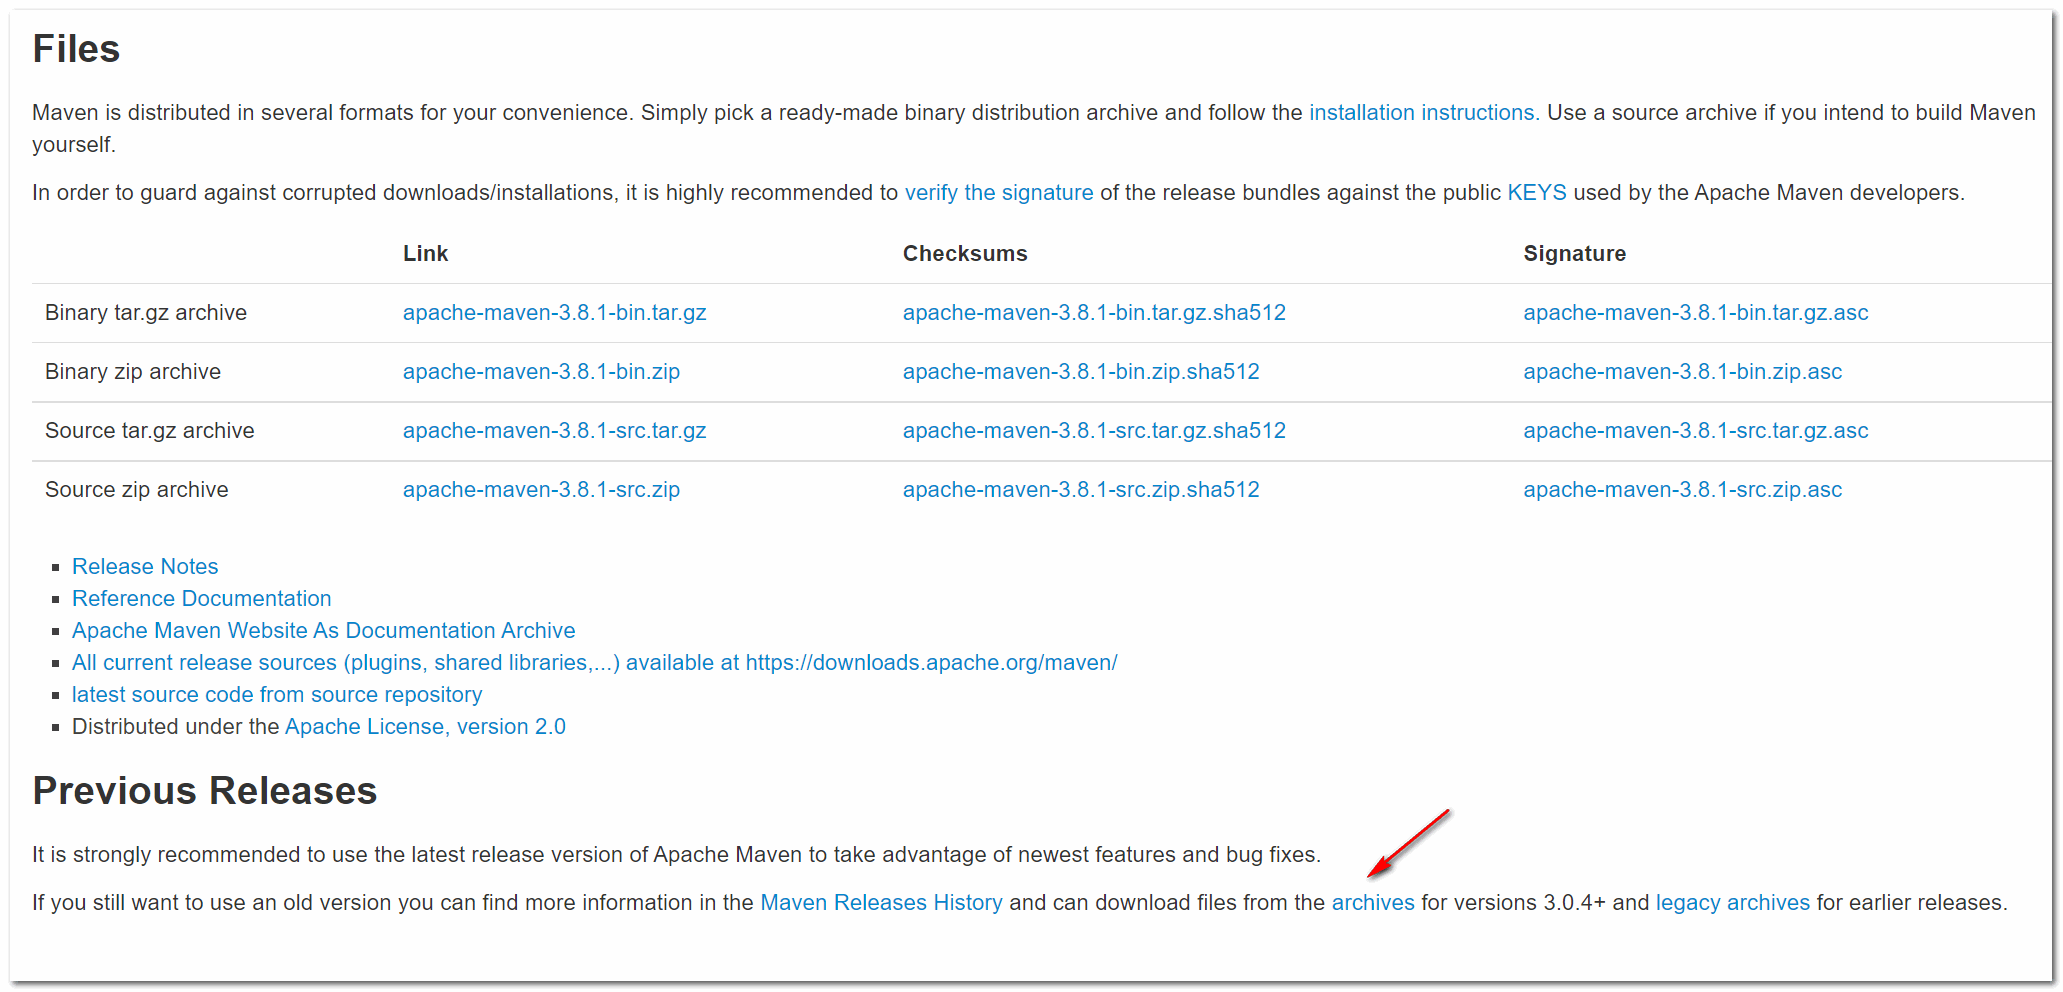
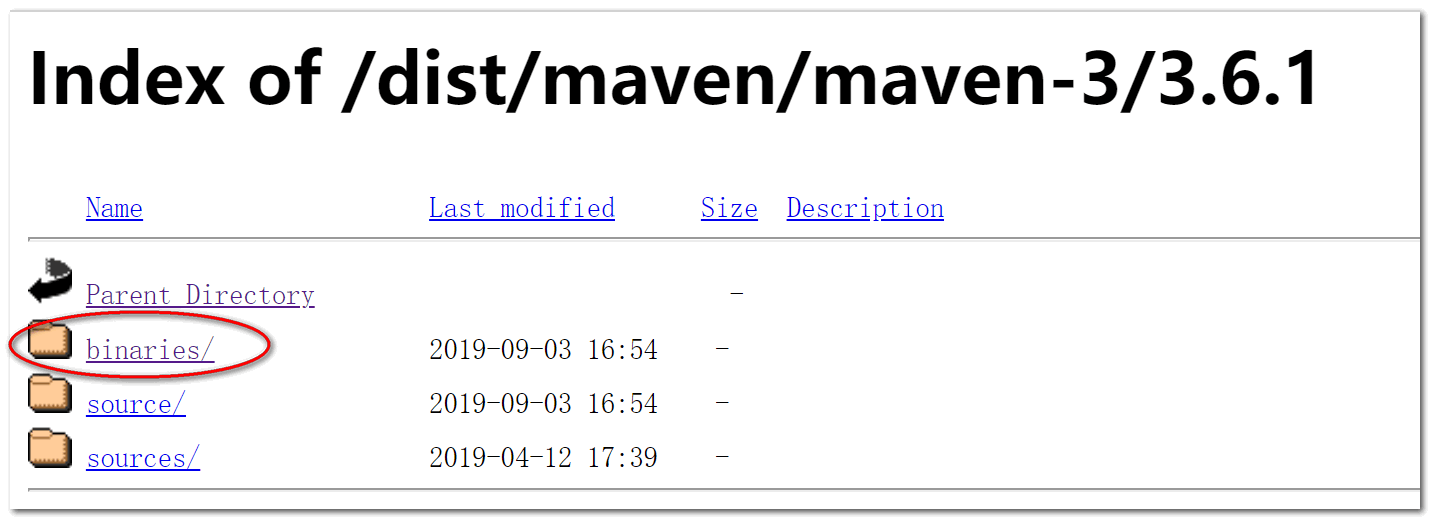
First, click the archives tab in Previous Releases to enter the index page of Maven 3
Then click 3.6 Version 1, enter 3.6 Index page for 1.
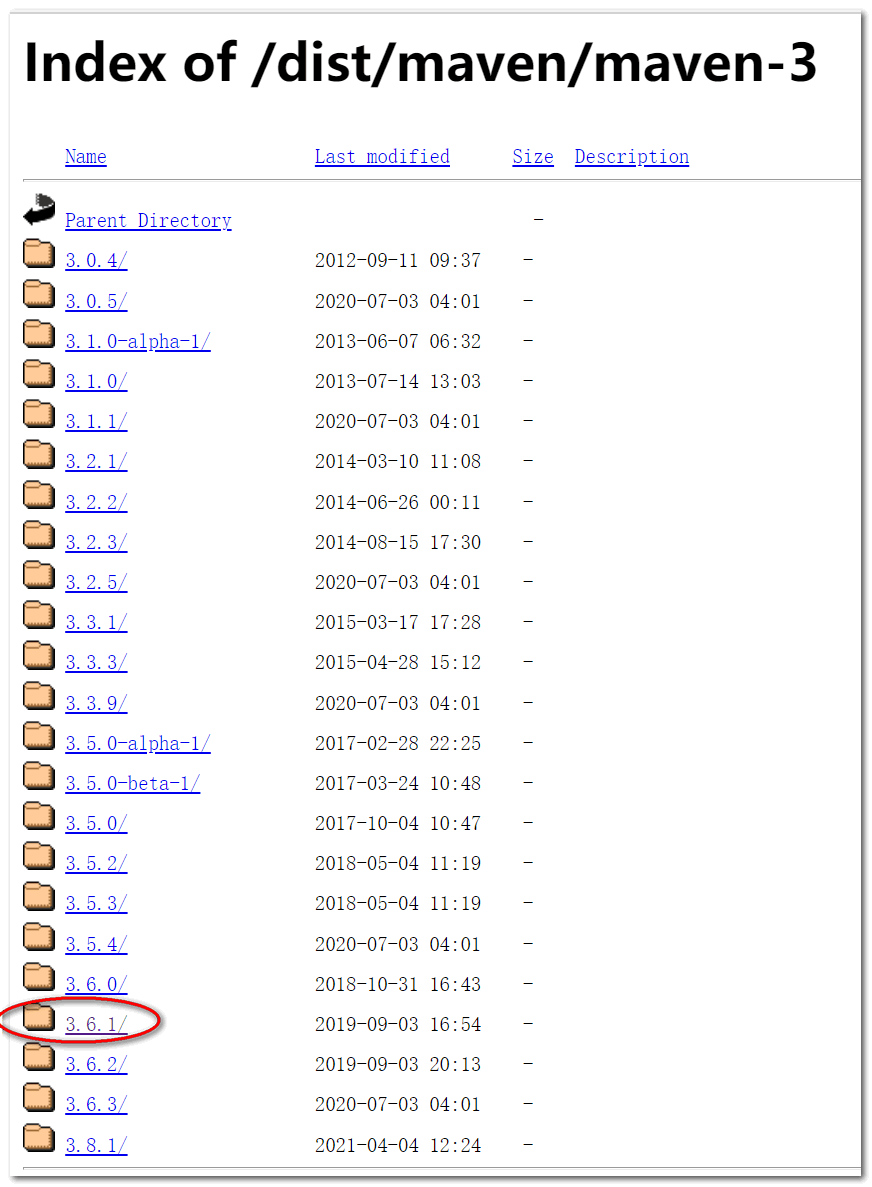
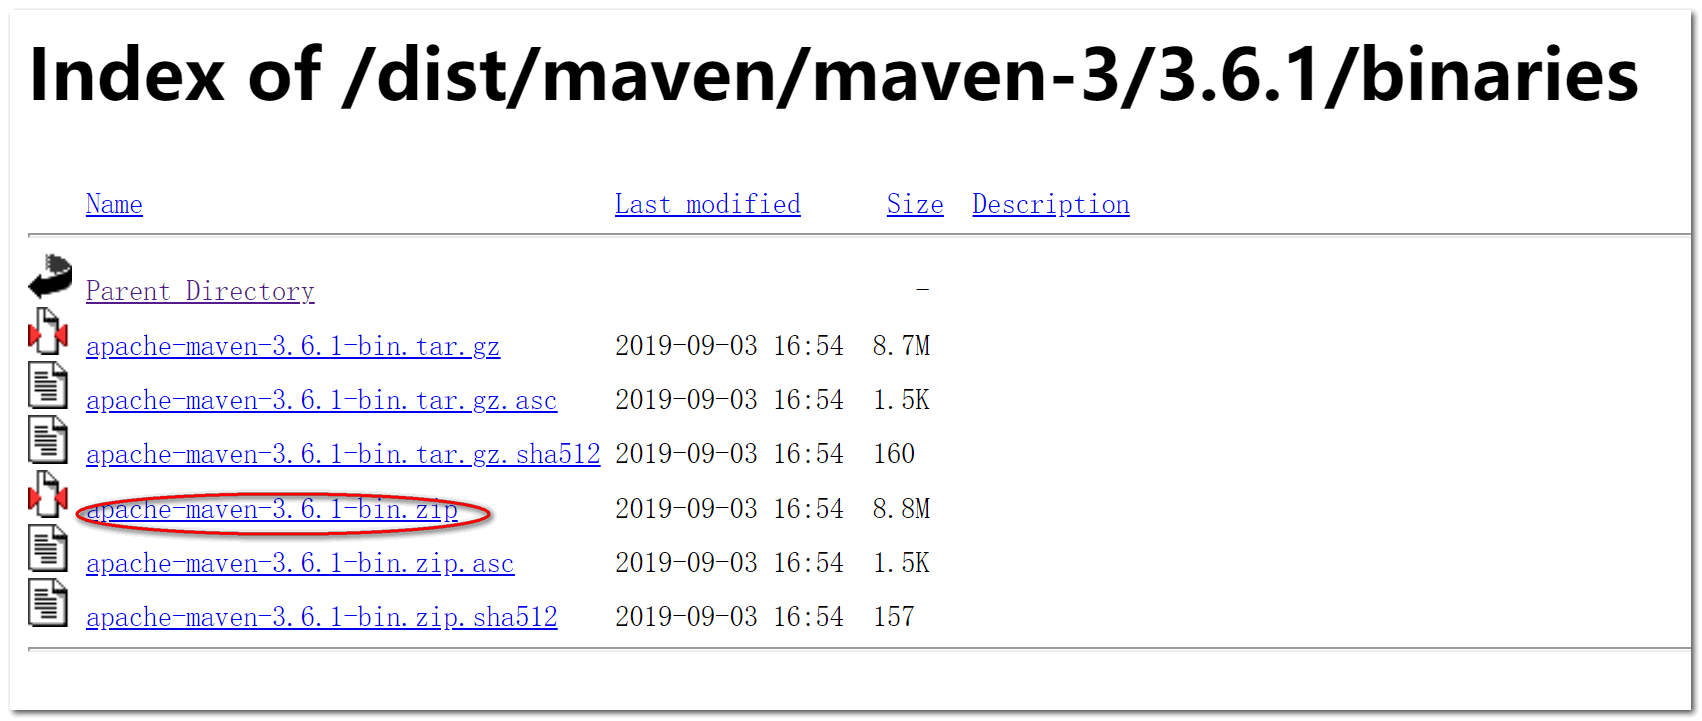
Then click binaries to enter the binaries directory. Finally, click apache-maven-3.6 1-bin. Zip to start downloading Maven 3 6.1.
After downloading, unzip the compressed package to the directory where the software development tools are stored on the computer. Then configure the environment variables of maven plug-in.
Create two user variables:
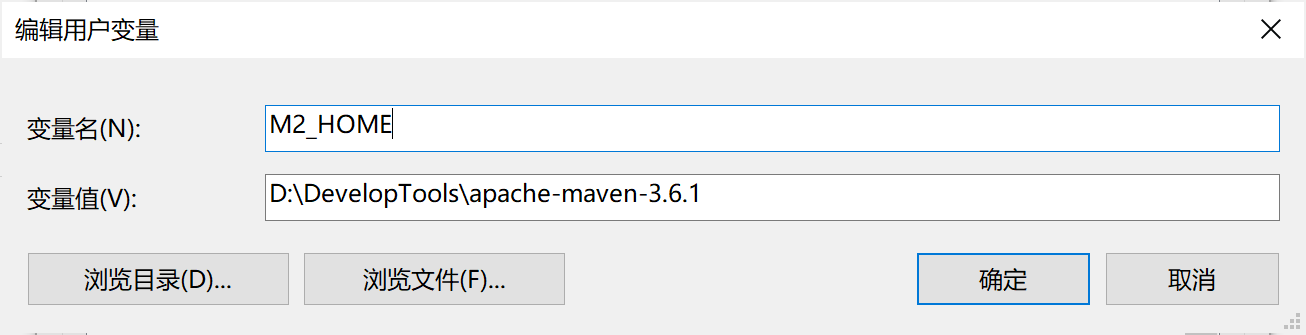

Click OK. Open the command prompt: enter mvn -v to check whether the maven environment variable is successfully configured.
Apache Maven 3.6.1 (d66c9c0b3152b2e69ee9bac180bb8fcc8e6af555; 2019-04-05T03:00:29+08:00)
Maven home: D:\DevelopTools\apache-maven-3.6.1\bin\..
Java version: 1.8.0_131, vendor: Oracle Corporation, runtime: D:\DevelopTools\jdk-1.8.0\jre
Default locale: zh_CN, platform encoding: GBK
OS name: "windows 10", version: "10.0", arch: "amd64", family: "windows"
After the environment variable configuration is completed, set the maven configuration file settings XML configuration.
Step 1: open D: \ developer tools \ apache-maven-3.6. In the Maven decompression directory 1\conf\settings. XML file. In <--< Configure the address of the local warehouse under the localrepository > < / localrepository > -- > tab. It is recommended to create a new local warehouse directory for configuration.
<settings xmlns="http://maven.apache.org/SETTINGS/1.0.0"
          xmlns:xsi="http://www.w3.org/2001/XMLSchema-instance"
          xsi:schemaLocation="http://maven.apache.org/SETTINGS/1.0.0 http://maven.apache.org/xsd/settings-1.0.0.xsd">
  <!-- localRepository
   | The path to the local repository maven will use to store artifacts.
   |
   | Default: ${user.home}/.m2/repository
  -->
  <localRepository>D:\DevelopTools\LocalRepository</localRepository>
Step 2: in order to enable maven to automatically download the required jar packages from the central warehouse, we need to configure the alicloud image warehouse for maven: at {settings The following tags are configured in the < mirrors > < / mirrors > tag of the XML file:
<mirrors>
    <!-- mirror
     | Specifies a repository mirror site to use instead of a given repository. The repository that
     | this mirror serves has an ID that matches the mirrorOf element of this mirror. IDs are used
     | for inheritance and direct lookup purposes, and must be unique across the set of mirrors.
     |
    <mirror>
      <id>mirrorId</id>
      <mirrorOf>repositoryId</mirrorOf>
      <name>Human Readable Name for this Mirror.</name>
      <url>http://my.repository.com/repo/path</url>
    </mirror>
     -->
<mirrors>
      <mirror>
        <id>nexus-aliyun</id>
        <mirrorOf>central</mirrorOf>
        <name>Nexus aliyun</name>
        <url>http://maven.aliyun.com/nexus/content/groups/public</url>
      </mirror>
  </mirrors>

  </mirrors>
Step 3: change the default dependent JDK version created by maven project to 1.8
<profiles>
    <!-- profile
     | Specifies a set of introductions to the build process, to be activated using one or more of the
     | mechanisms described above. For inheritance purposes, and to activate profiles via <activatedProfiles/>
     | or the command line, profiles have to have an ID that is unique.
     |
     | An encouraged best practice for profile identification is to use a consistent naming convention
     | for profiles, such as 'env-dev', 'env-test', 'env-production', 'user-jdcasey', 'user-brett', etc.
     | This will make it more intuitive to understand what the set of introduced profiles is attempting
     | to accomplish, particularly when you only have a list of profile id's for debug.
     |
     | This profile example uses the JDK version to trigger activation, and provides a JDK-specific repo.
    <profile>
      <id>jdk-1.4</id>

      <activation>
        <jdk>1.4</jdk>
      </activation>

      <repositories>
        <repository>
          <id>jdk14</id>
          <name>Repository for JDK 1.4 builds</name>
          <url>http://www.myhost.com/maven/jdk14</url>
          <layout>default</layout>
          <snapshotPolicy>always</snapshotPolicy>
        </repository>
      </repositories>
    </profile>
    -->
<profiles>
         <profile>
              <id>jdk-1.8</id>
              <activation>
                <activeByDefault>true</activeByDefault>
                <jdk>1.8</jdk>
              </activation>
              <properties>
                <maven.compiler.source>1.8</maven.compiler.source>
                <maven.compiler.target>1.8</maven.compiler.target>
                <maven.compiler.compilerVersion>1.8</maven.compiler.compilerVersion>
              </properties>
         </profile>
  </profiles>
Finally, modify the settings of maven plug-in, select the maven you installed, and do not use the maven plug-in provided by IDEA. The version in the figure should be 3.6 1.
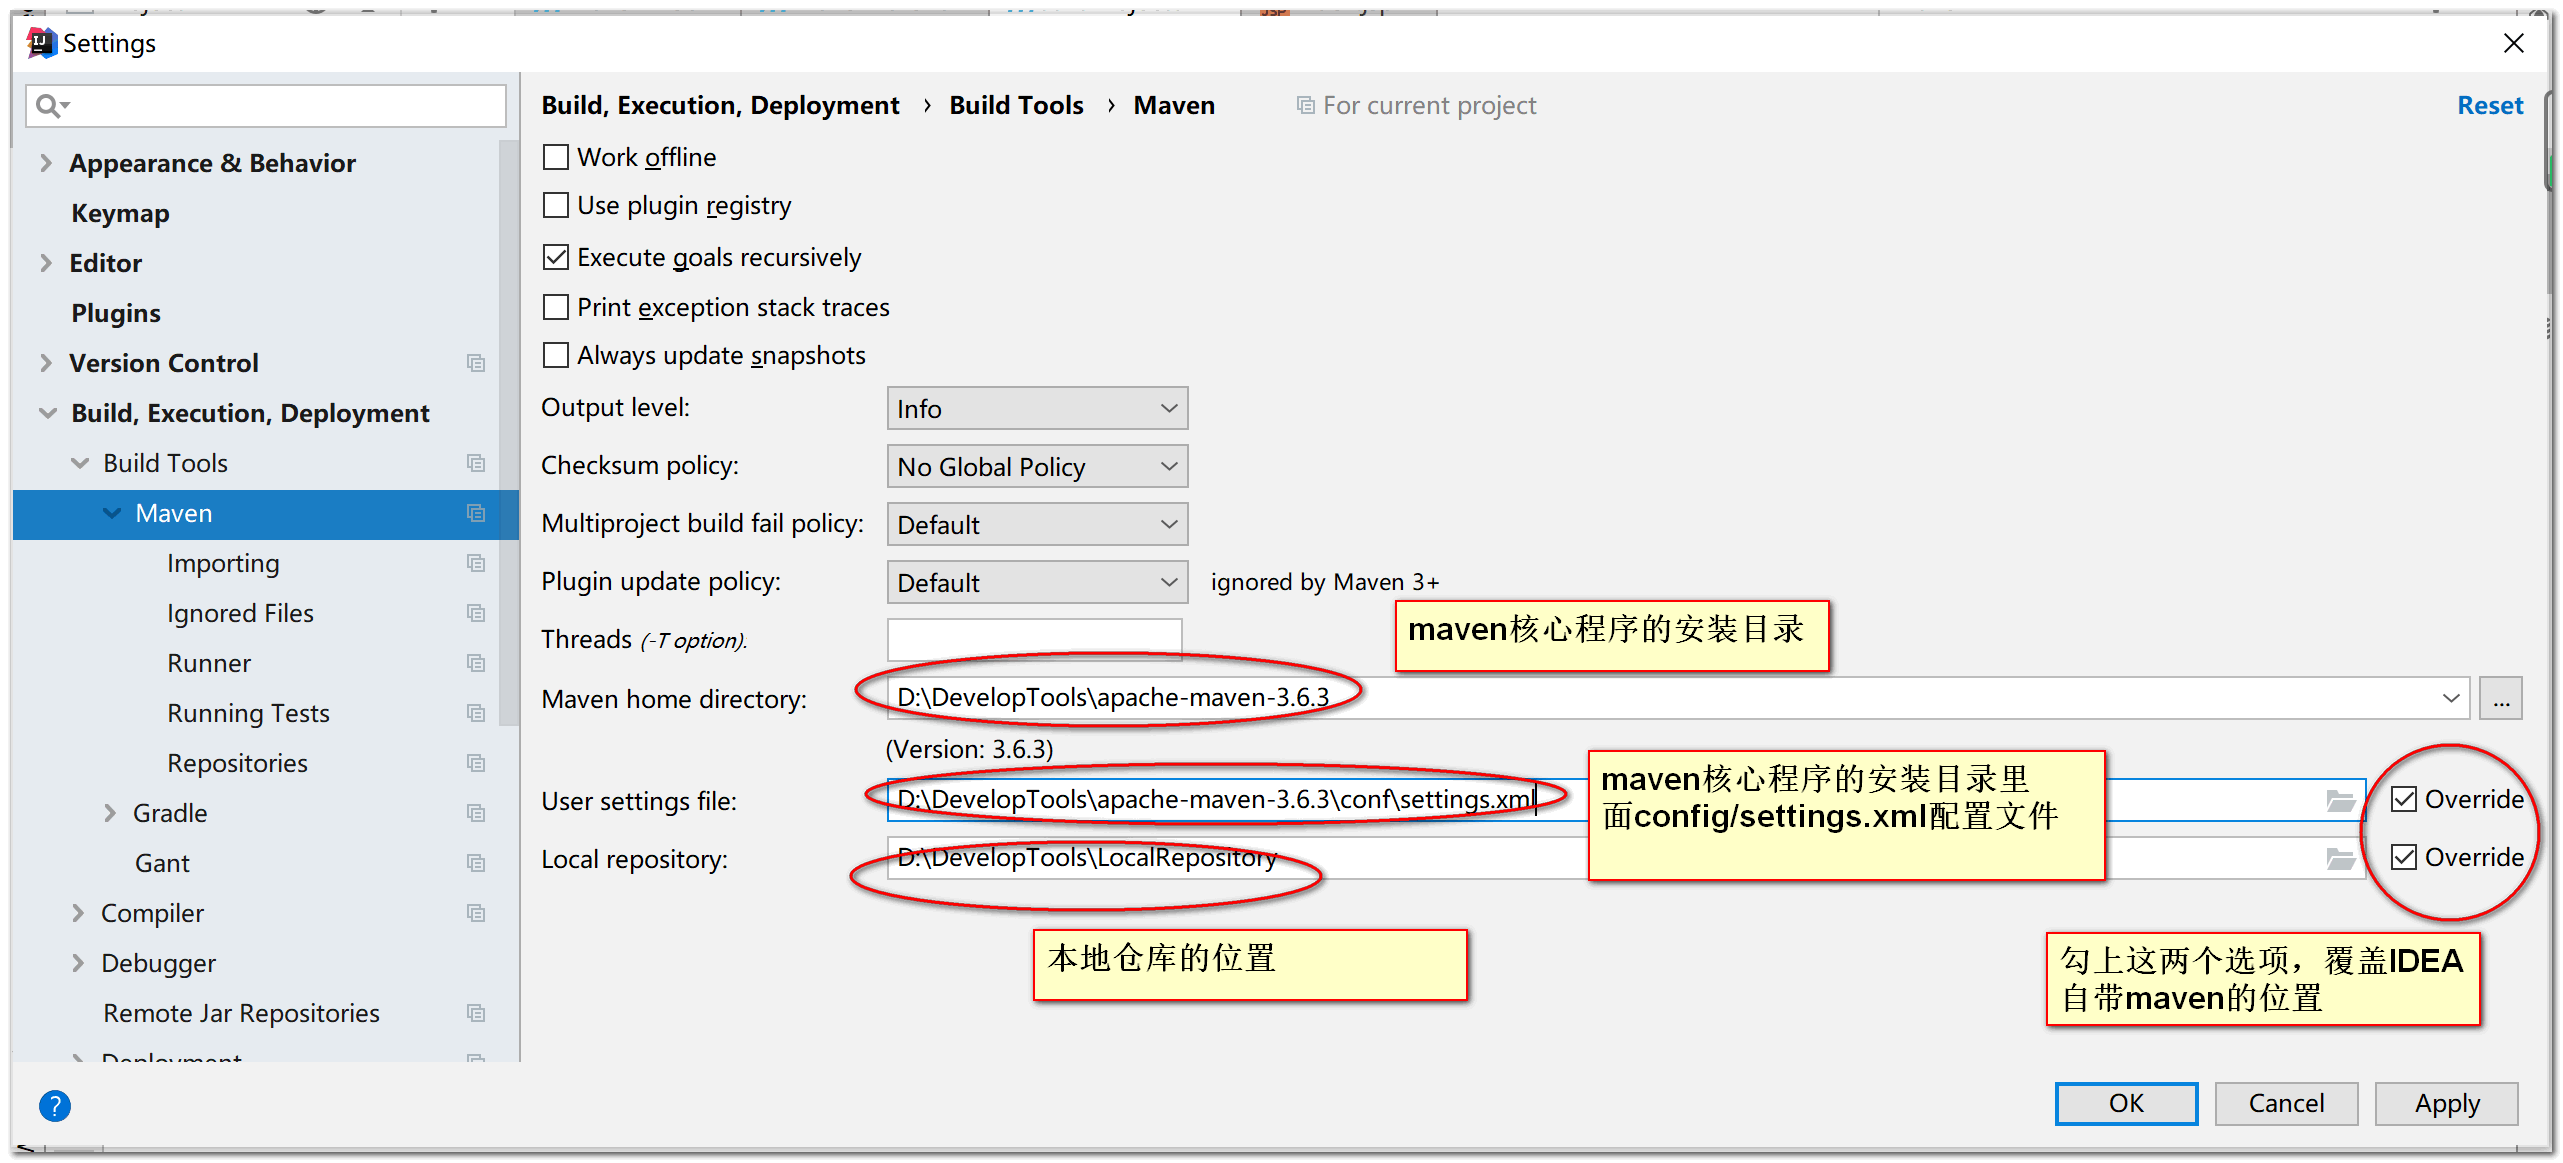
Click OK.
Then create a maven project of HelloWorld, enter the GroupId and ArtifactId of the project, and complete the project creation.
Then, in the porm Configure the dependent coordinates in the XML file. When importing some dependent coordinates, the import may not succeed, which is reflected in that the written coordinates are all red. At this time, you only need to write the dependent coordinates completely and right-click porm XML, select reimport under maven. You need to wait for dependency Download for a while. After downloading, the whole maven project of HelloWorld will be established.
 <parent>
        <groupId>org.springframework.boot</groupId>
        <artifactId>spring-boot-starter-parent</artifactId>
        <version>2.3.4.RELEASE</version>
    </parent>


    <dependencies>
        <dependency>
            <groupId>org.springframework.boot</groupId>
            <artifactId>spring-boot-starter-web</artifactId>
        </dependency>
    </dependencies>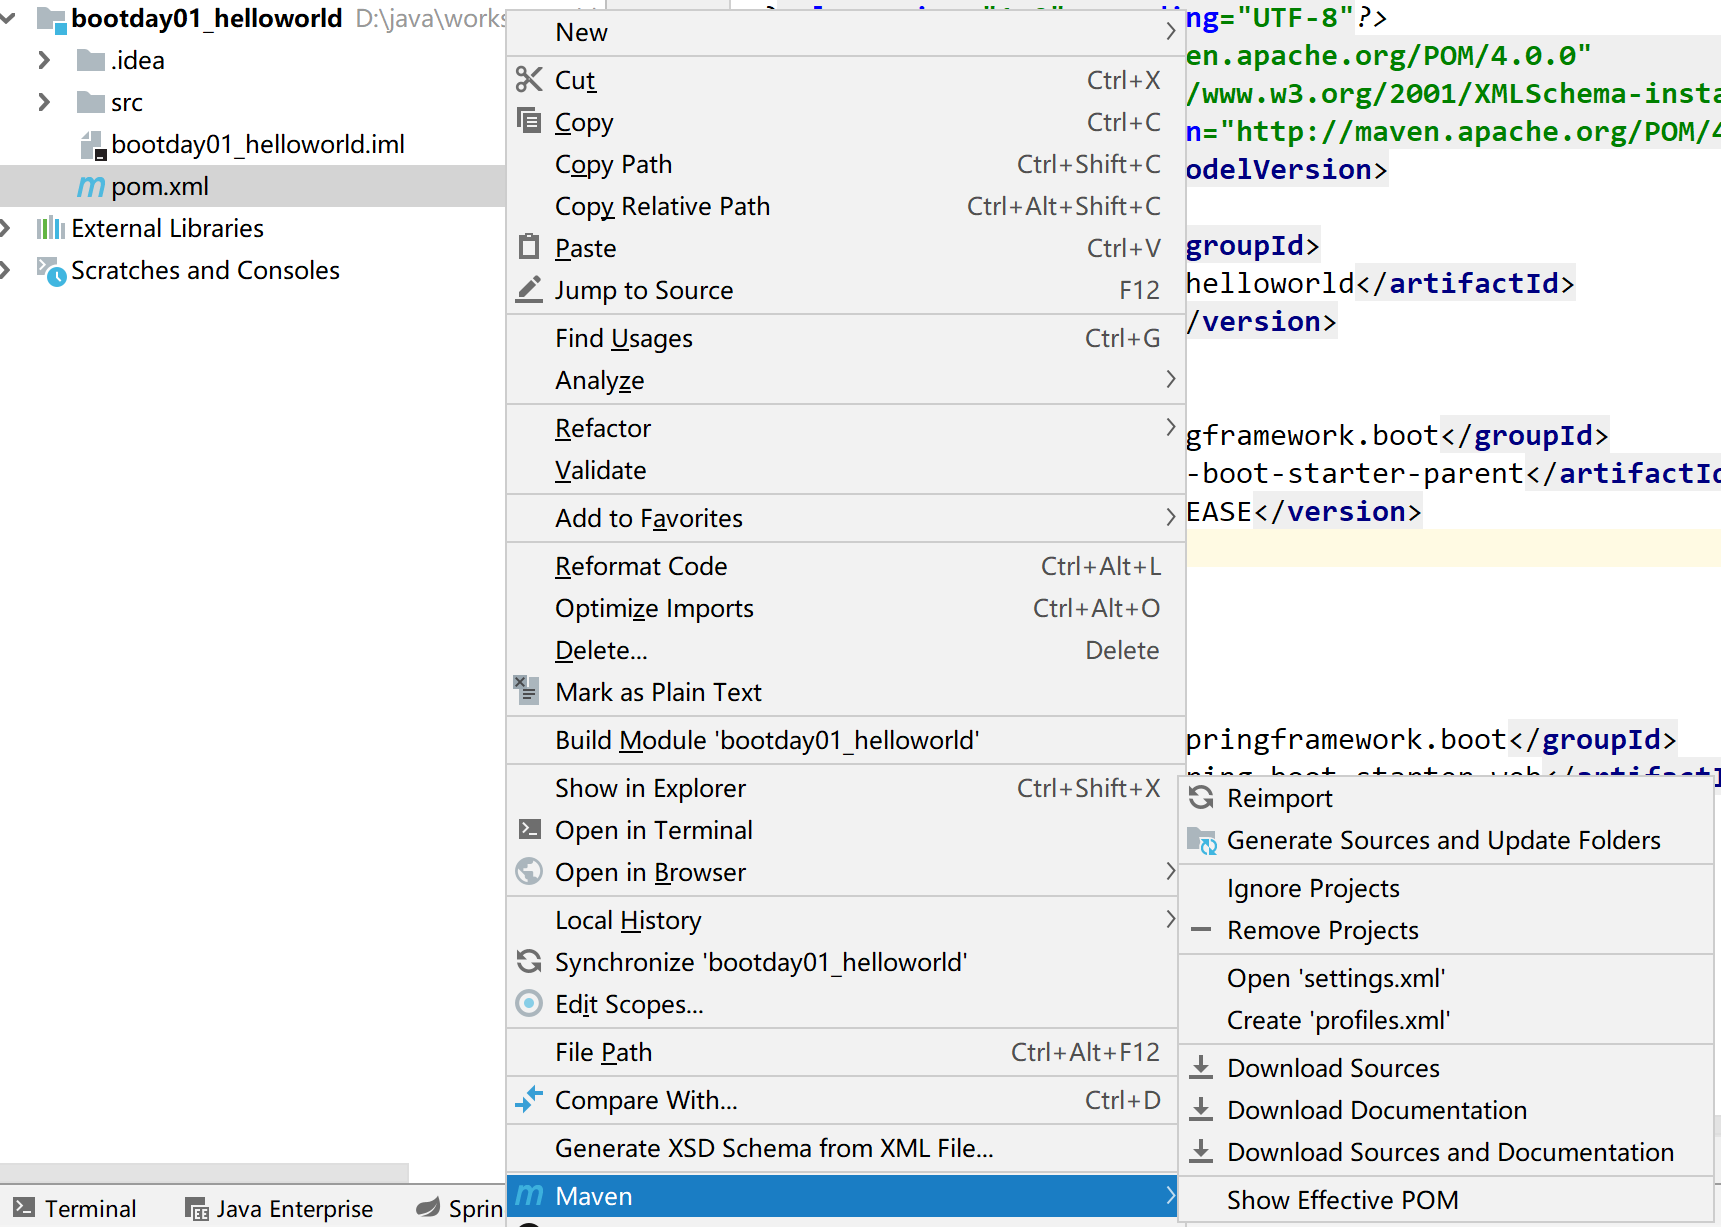
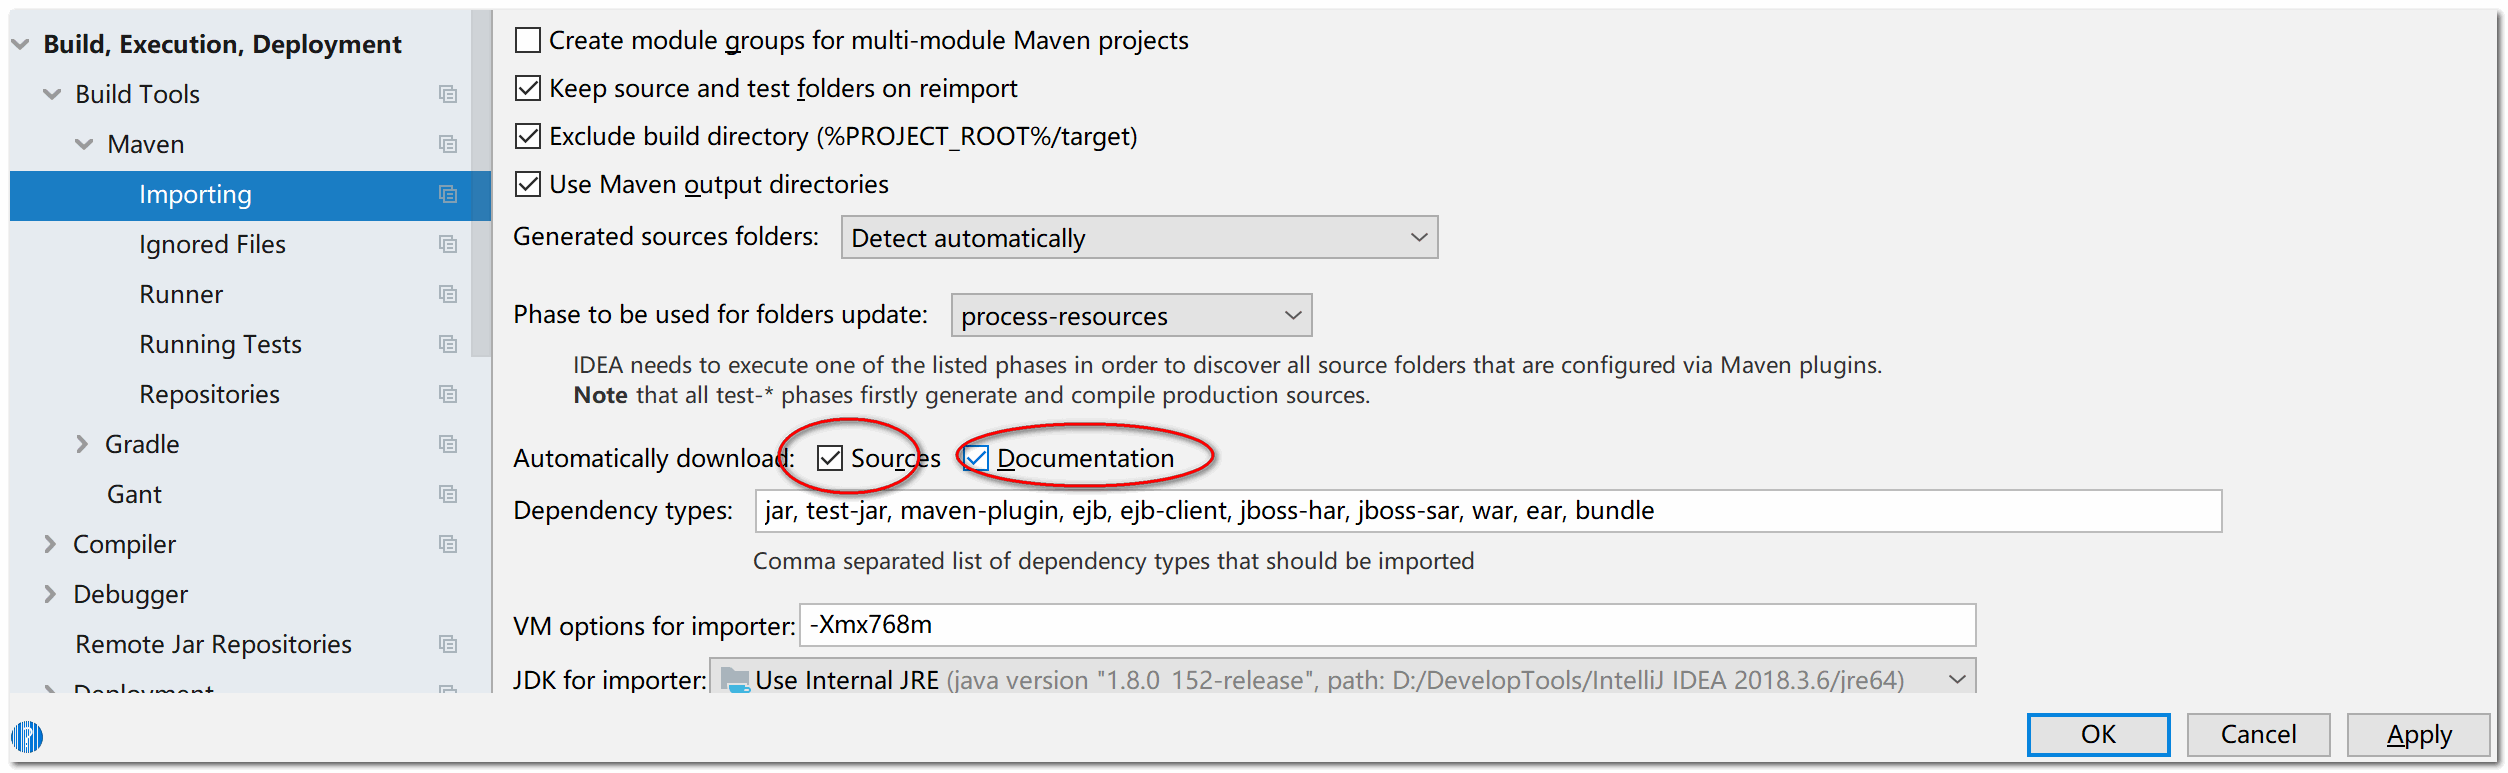
In addition, you can check the automatic download options of sources and Documentation in maven/importing settings, so that you can set the function of automatically downloading related packages for the current project.