I specially publish a blog to record my first project. Here I summarize some problems during my project. The whole project takes about 5 days. I don't talk much nonsense and get to the point.
The project content is roughly divided into the following parts
1, Import project
Open IDEA, click Maven on the right, and import the Maven project travel.

Select the POM of the travel project XML file, click ok to complete the project import. You need to wait a little while for the project initialization to complete.

2, Start project
You can double-click "tomcat7:run" under the plug-in of travel
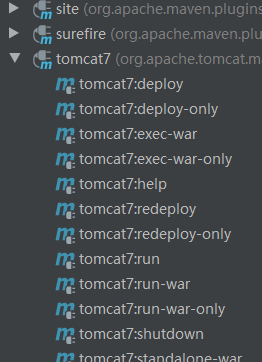
You can also configure maven shortcut key startup (recommended)

III. related technologies
3.1 Web layer
Servlet: front end controller
html: View
Filter: filter
BeanUtils: data encapsulation
Jackson: json serialization tool
3.2 Service layer
javamail: java mail sending tool
Redis: nosql database
Jedis: redis client of java
3.3 Dao layer
Mysql: Database
Druid: database connection pool
JedisTemplate: a tool for jdbc
That's about it

The original code files are placed under the corresponding package and do not need to be changed
Next, you need to open your database
4, Create database
--Create database
CREATE DATABASE travel;
--Use database
USE travel;
--Create table
Copy the provided sql. There are in the file. Enter the above two commands
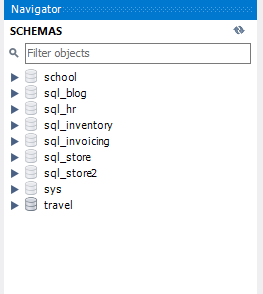
The created travel is as shown in the figure above
5, Complete the registration function
5.1 complete the registration function
functional analysis
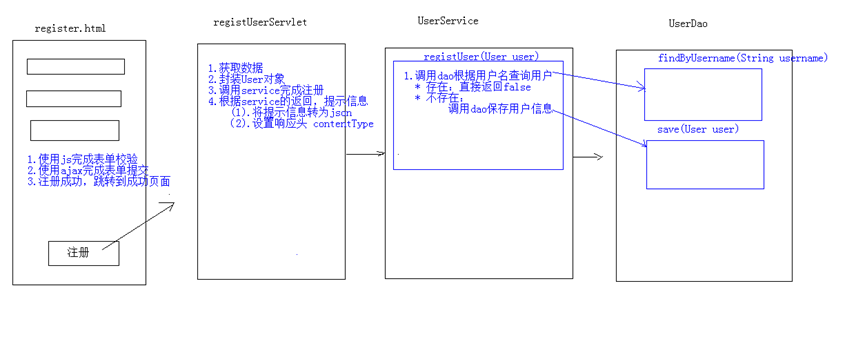
Complete code editing at the back end and front end
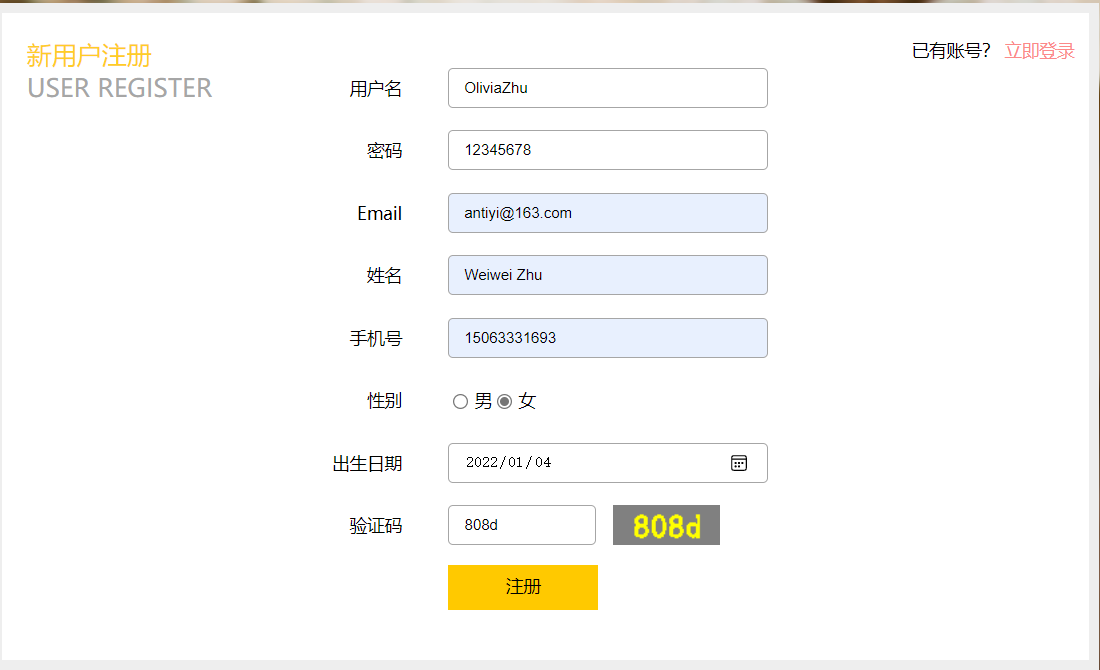
Packet capture view
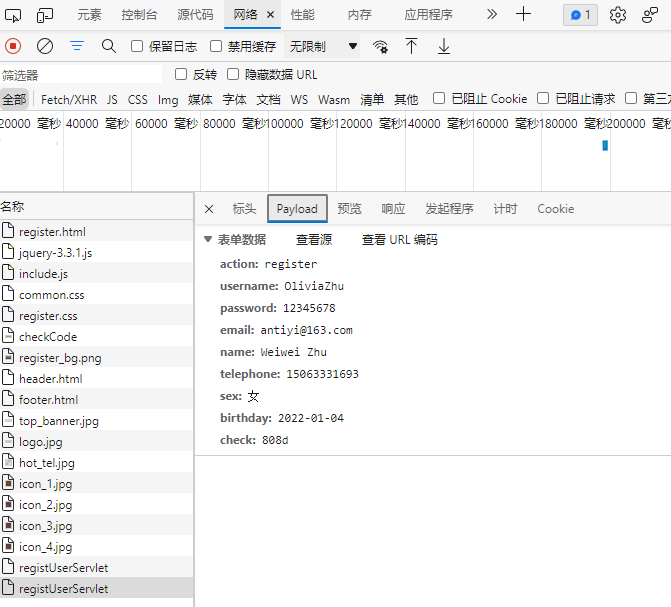
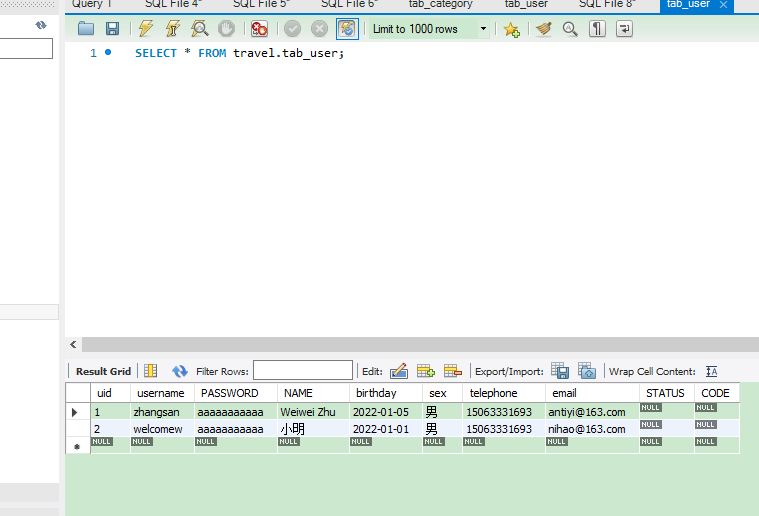
Refresh the travel of the database at this time_ User table, the registered user information will appear
After successful registration, the success interface will pop up, and then go on

5.2 problems encountered during preliminary startup
1. Let me mention the problem I encountered here. When I finished the registration function, an error was reported at the beginning. Later, I checked the file he gave. In the loaded file data, there should be no "/" in front of "druid.properties"! This mistake is very persuasive
// Load data in configuration file
		InputStream is = JDBCUtils.class.getClassLoader().getResourceAsStream("druid.properties");
		Properties pp = new Properties();

2. The database version is too high
You need to be in your Druid Properti file to change the driver, and note that!!! This file exists in both the target directory and the resources directory. You must change both!!!!

Add "cj" to "com.mysql.jdbc.Driver" of the source file
driverClassName=com.mysql.cj.jdbc.Driver
url=jdbc:mysql:///travel
username=root
password=123
initialSize=5
maxActive=10
maxWait=3000
I would also like to add here that when you connect to the database, you must check whether the username and password in this file belong to your local database. My didn't check this at that time. As a result, you can't connect. Dizzy, you must be careful. And be sure to change the files in both packages.
3.java.sql.SQLIntegrityConstraintViolationException
I wondered what was wrong with this error. Later, I checked and said that there was a duplicate key value. Maybe you inserted two data with the same primary key. The primary key in the database cannot be duplicate
Maybe when I registered, some attributes were "UQ", but when I tested, I entered the same data, dizzy
Go to the database for modification
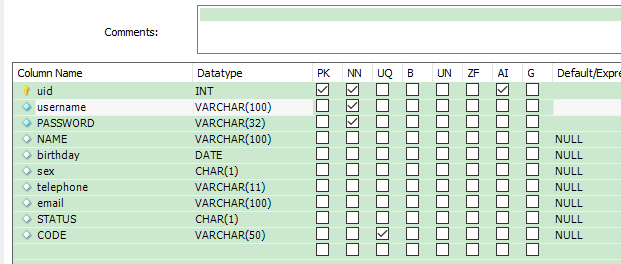
Uncheck the UQ (unique attribute) of username. If a duplicate username is added, no error will be reported, or you can delete the previously saved data
6, Mail activation
analysis
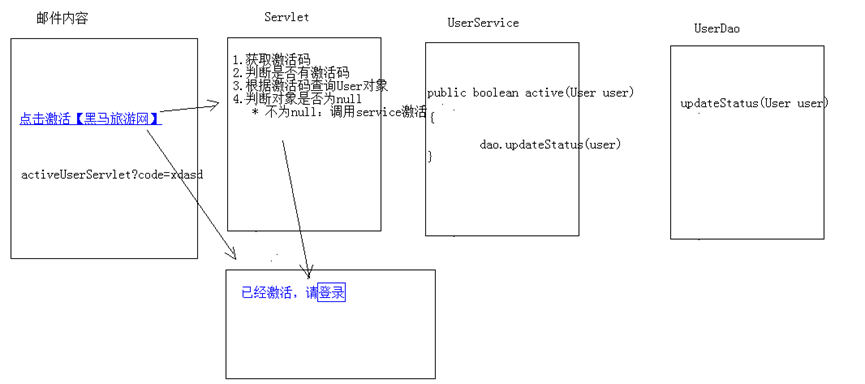
New users need to complete the mail activation problem and open mailutils Java, to enable the authorization code function in Netease mailbox and QQ mailbox, I take the sender's use of QQ mailbox as an example and change it as follows:
import javax.mail.*;
import javax.mail.internet.InternetAddress;
import javax.mail.internet.MimeMessage;
import java.util.Properties;

/**
 * Email tool class
 */
public final class MailUtils {
    private static final String USER = "XXXXXXXX@qq.com"; // Sender's title, same as email address
    private static final String PASSWORD = "Here is qq Authorization code of mailbox"; // If it is a qq mailbox, you can use the client authorization code or login password

    /**
     *
     * @param to Recipient mailbox
     * @param text Message body
     * @param title title
     */
    /* Send verification message */
    public static boolean sendMail(String to, String text, String title){
        try {
            final Properties props = new Properties();
            props.put("mail.smtp.auth", "true");
            props.put("mail.smtp.host", "smtp.qq.com");

            // Sender's account number
            props.put("mail.user", USER);
            //Sender's password
            props.put("mail.password", PASSWORD);

            // Build authorization information for SMTP authentication
            Authenticator authenticator = new Authenticator() {
                @Override
                protected PasswordAuthentication getPasswordAuthentication() {
                    // User name and password
                    String userName = props.getProperty("mail.user");
                    String password = props.getProperty("mail.password");
                    return new PasswordAuthentication(userName, password);
                }
            };
            // Create a mail session using environment properties and authorization information
            Session mailSession = Session.getInstance(props, authenticator);
            // Create mail message
            MimeMessage message = new MimeMessage(mailSession);
            // Set sender
            String username = props.getProperty("mail.user");
            InternetAddress form = new InternetAddress(username);
            message.setFrom(form);

            // Set recipient
            InternetAddress toAddress = new InternetAddress(to);
            message.setRecipient(Message.RecipientType.TO, toAddress);

            // Set message header
            message.setSubject(title);

            // Set the content body of the message
            message.setContent(text, "text/html;charset=UTF-8");
            // Send mail
            Transport.send(message);
            return true;
        }catch (Exception e){
            e.printStackTrace();
        }
        return false;
    }

    public static void main(String[] args) throws Exception { // For testing
        MailUtils.sendMail("Enter Netease email address here","Hello, this is a test email. There is no need to reply.","Test mail");
        System.out.println("Sent successfully");
    }


}
After modification, you can receive the test email, and the function is completed
Click the link and an activation code will be generated, like

The specific modification process will not be put here
Open the email and click the link

At this time, refresh the database, and the status code becomes "Y"

VII. Login
Click login to successfully jump to the login page

8, Exit
"Welcome back XX" will appear on the login interface, followed by exit. This function is completed

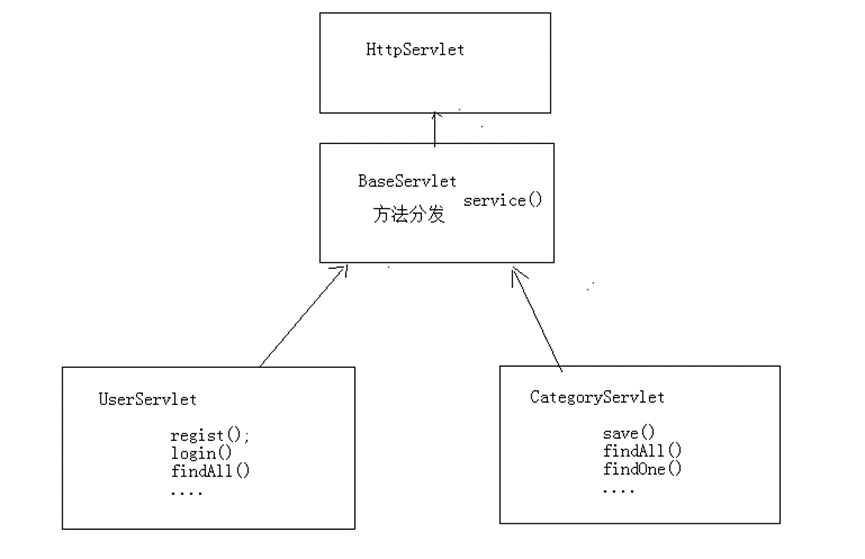
9, The Servlet will be optimized
Reducing the number of servlets is now a function. One Servlet is optimized into one module and one Servlet, which is equivalent to one Servlet corresponding to a table in the database. Different methods are provided in the Servlet to complete the user's request.
X. display of classified data
analysis

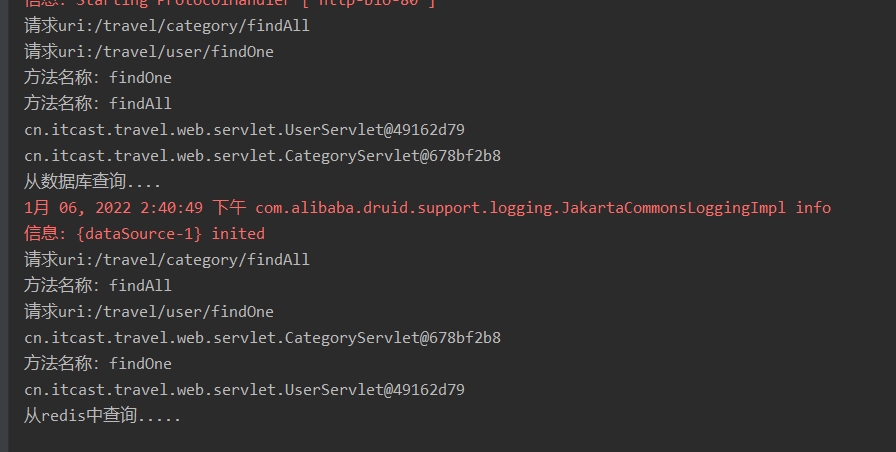
Note: when using cache optimization in this step, redis should remember to open it, otherwise an error will be reported. Querying from the cache is much faster than directly in the database.

11, Pagination display
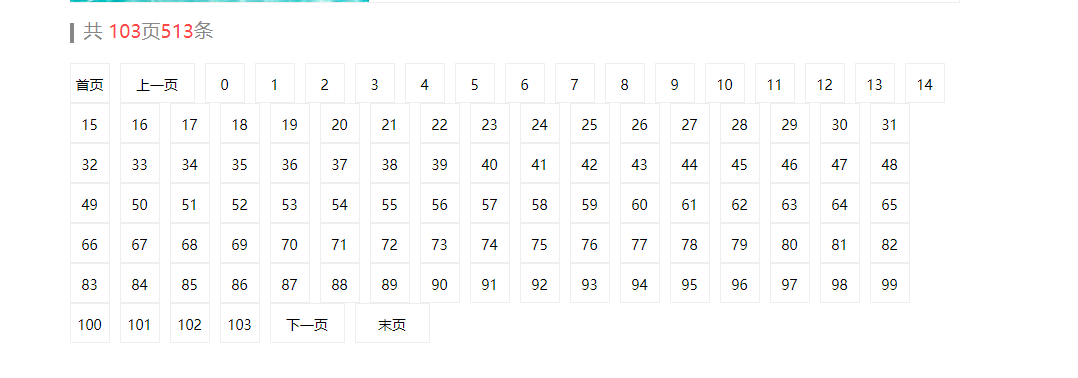
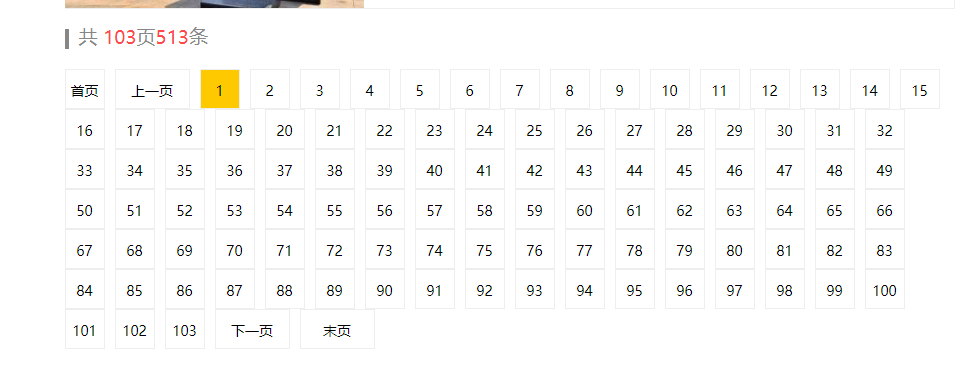

Optimize step by step. At the beginning, display the number of pages, add highlights to the number of pages, and complete the switching between the first page and the last page, as well as the switching between the previous page and the next page.
Complete the tourism route name query

13, Tour route details display
analysis


14, Tourist route collection
analysis

Complete the collection function and display the collection times

So far, all the functions of the project have been realized
get!!