preparation
To use the C + + development environment in VSCode, you need to download and install:
- VSCode , just like installing other applications, select the installation path and add environment variable option to continue to the next step until the installation is completed.
- MinGW , pay attention to x86 during installation_ 64 architecture. After installation, you need to configure environment variables in the system. After completing the above steps, use the win+R shortcut key to open cmd and enter gcc test in the command line. If the prompt of fatal error: no input files appears, the installation is completed.
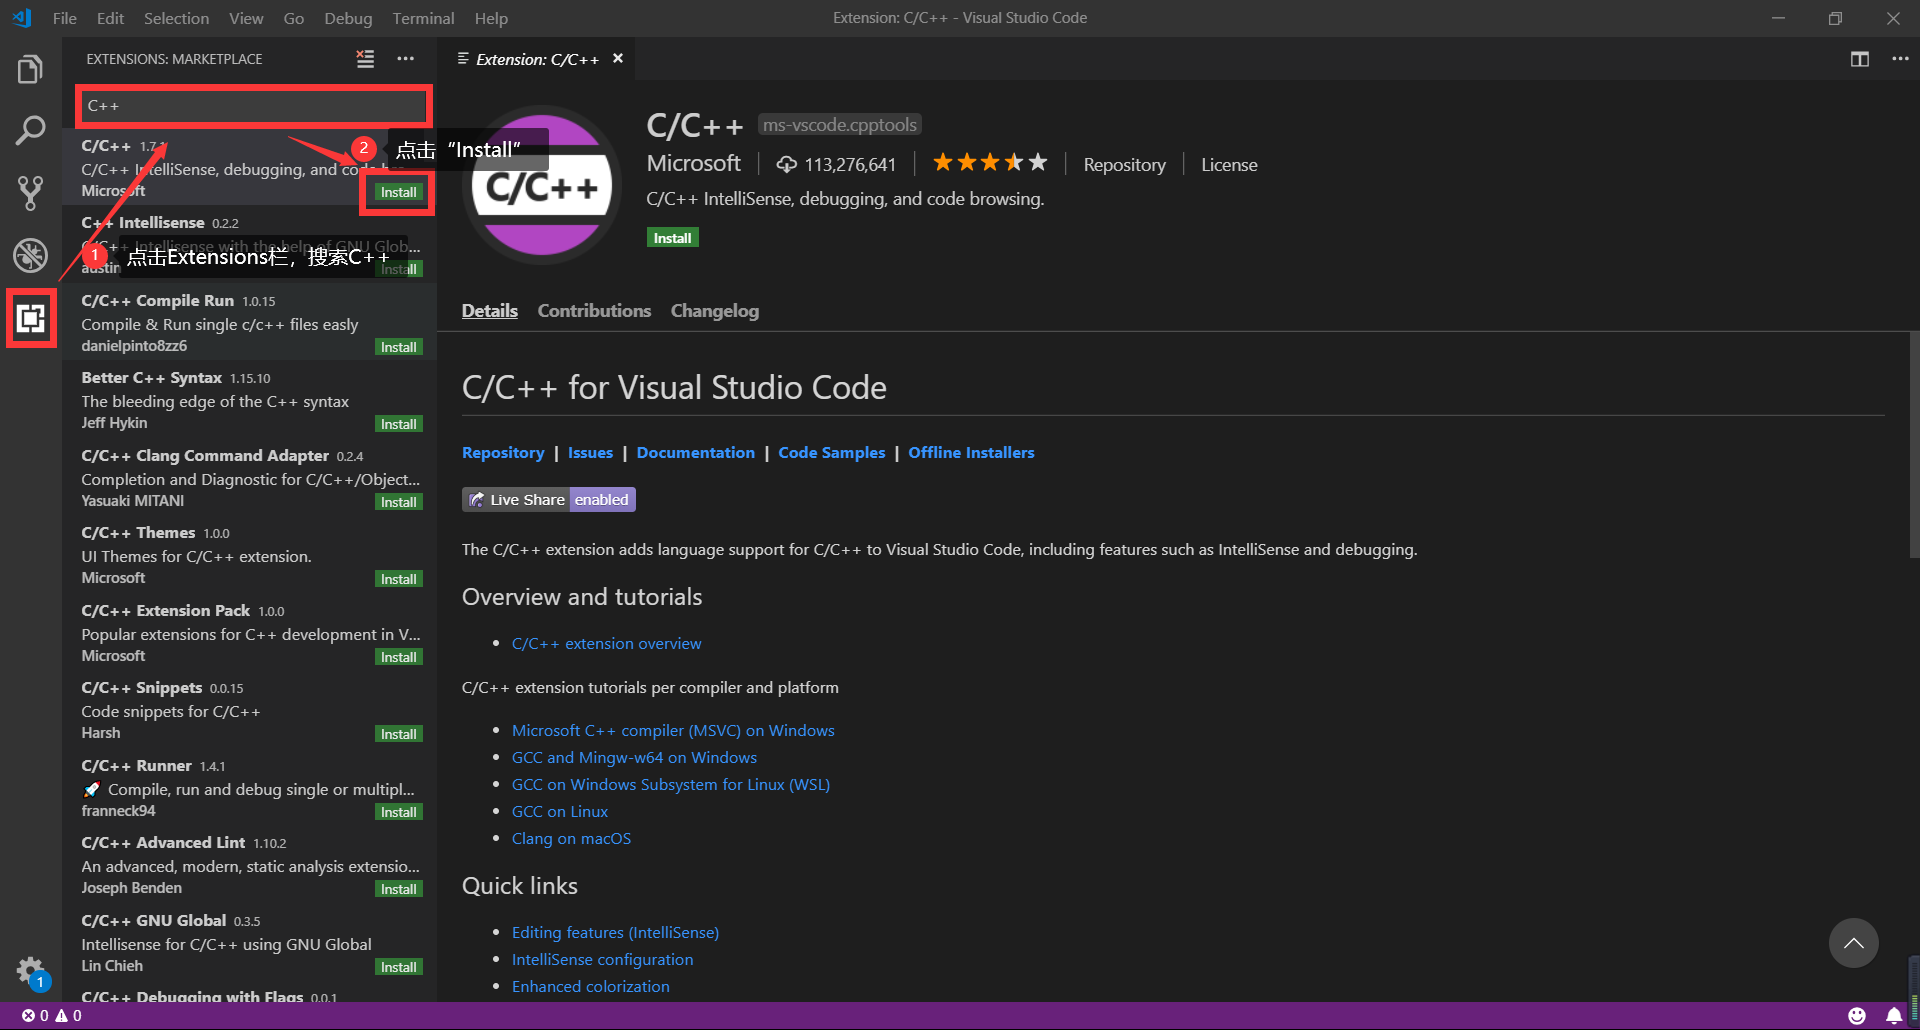
- The C + + extension in VSCode (installed in VSCode Extensions) is shown in the following figure.
Configure the C + + running and debugging environment under VSCode
Create test code
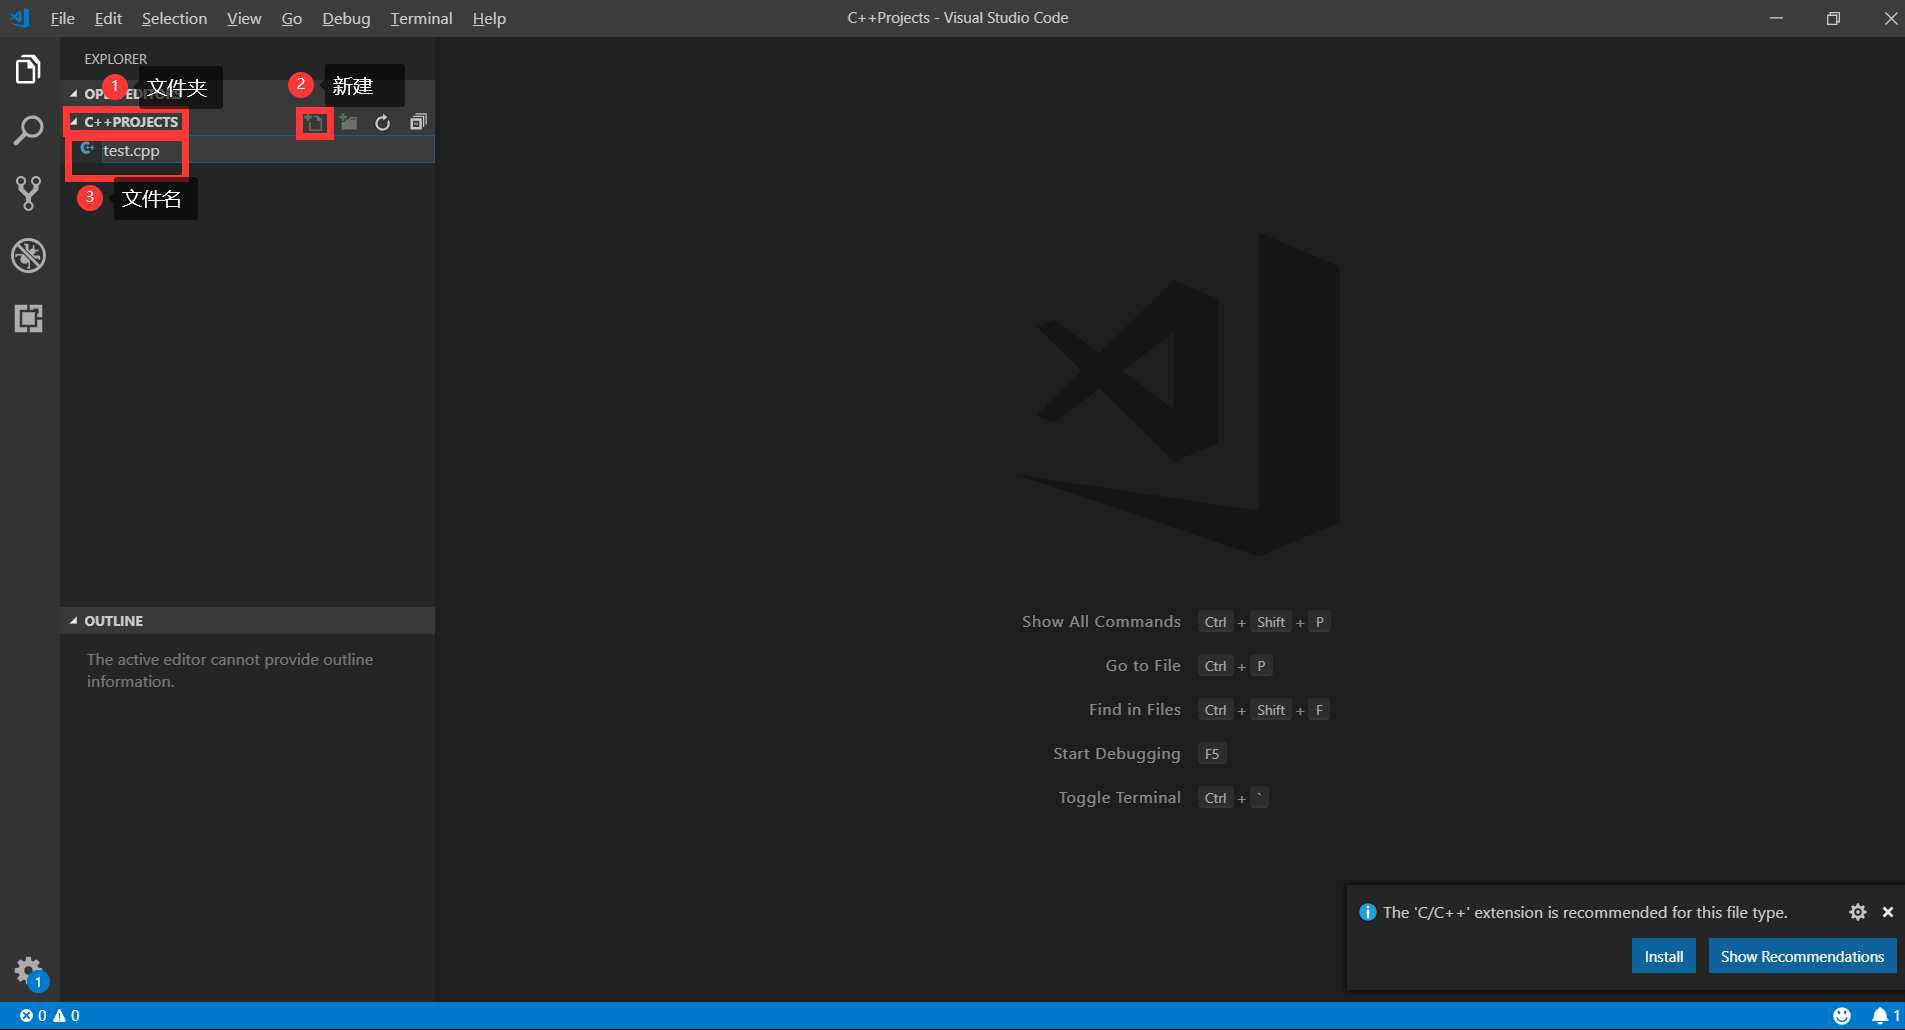
Select / create a new folder to store C + + code. Then open this folder in VSCode through file - > open folder. Finally, in the open explorer interface, click the folder just opened to create a new file test.cpp, as shown in the following figure.
Enter the following test code in the new file and save it:
#include<iostream>
using namespace std;
int main(){
    cout<<"Hello World!"<<endl;
    return 0;
}
Configuring the compilation environment
In the vscode environment, use the shortcut key Ctrl+Shift+P to open the command interface, enter C + +, and select "C/C++: Edit Configurations (JSON)". This operation will create a new. vscode folder under the current working directory and generate c_cpp_properties.json file, change the "compilerPath" in this file to the path of g++.exe under the mingw installation directory, and modify the "intelliSenseMode" to "gcc-x64". The code snippet is as follows:
{
    "configurations": [
        {
            "name": "Custom name",
            "includePath": [
                "${workspaceFolder}/**"
            ],
            "defines": [
                "_DEBUG",
                "UNICODE",
                "_UNICODE"
            ],
            //This should be changed to the g++.exe location on your computer
            "compilerPath": "D:/MinGW/mingw64/bin/g++.exe",
            "cStandard": "c11",
            "cppStandard": "c++17",
            "intelliSenseMode": "gcc-x64"
        }
    ],
    "version": 4
}
After saving the modified json file, select the newly created test.cpp file in the left explorer, and right-click to select "Open In Integrated Terminal".
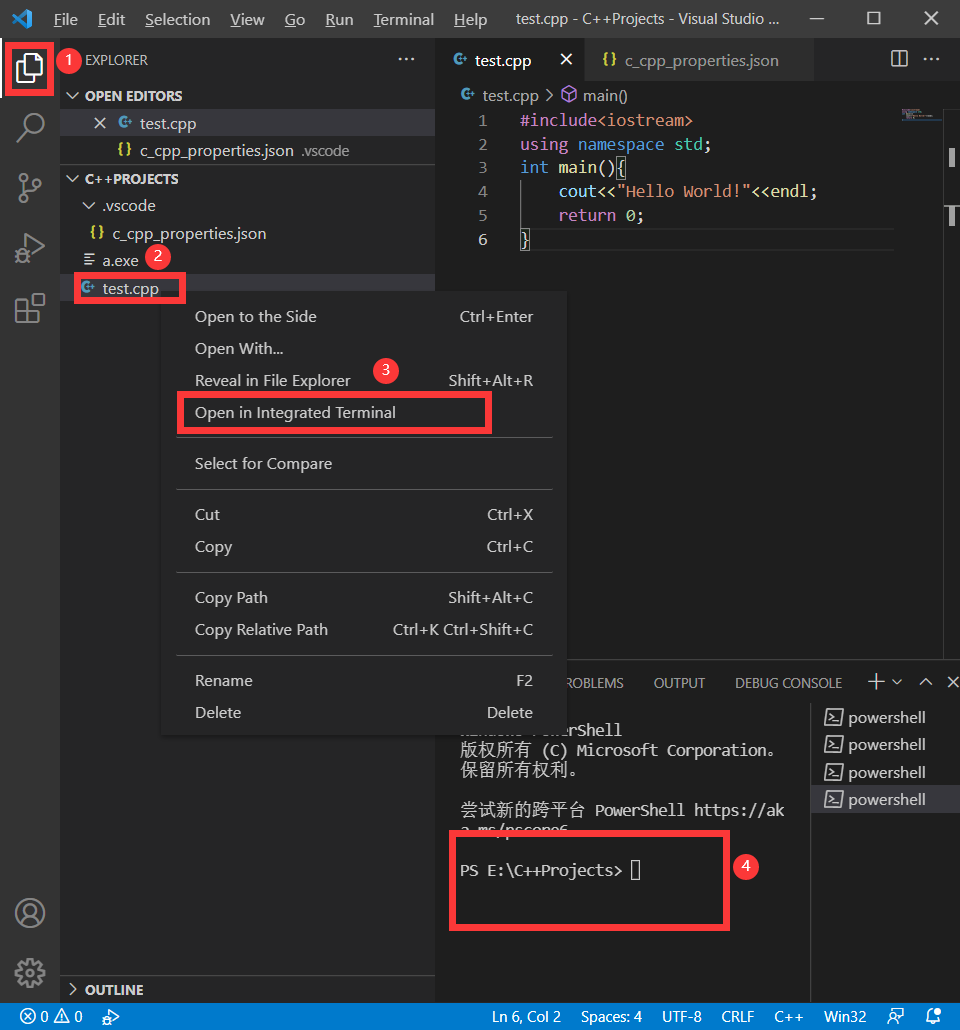
Then enter in the terminal
g++ test.cpp
.\a
You can output "Hello World!". If the g + + command is not recognized, you can first check whether the environment variable is set (whether the g + + command under win+R is available). If it is available, restart VSCode; Otherwise, you need to reset the environment variable.
Configure running and debugging environment
Select the debugging option in the VSCode sidebar, and then click the "Run and Debug" button

In the pop-up selection box, select C++ (GDB/LLDB).

In the newly pop-up selection box, select g++.exe to generate and debug the active file.

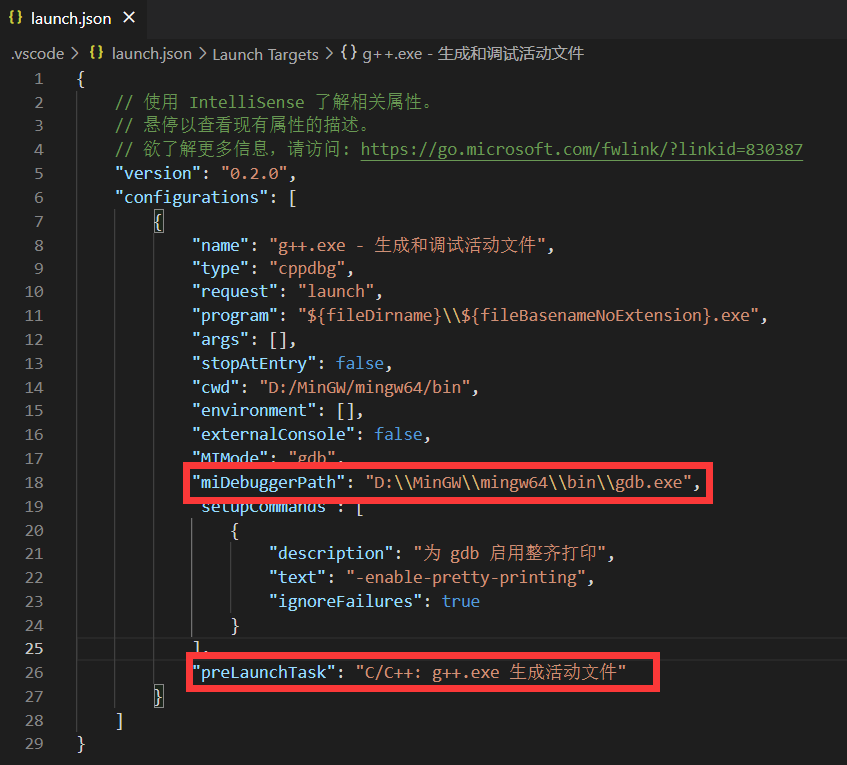
This operation will generate launch.json and task.json files under the. vscode folder. First, ensure that the "miDebuggerPath" attribute in launch.json is bin/gdb.exe under the installation directory of MinGW on the computer, for example: "miDebuggerPath": "D:\MinGW\mingw64\bin\gdb.exe"; Secondly, you need to ensure that the "preLaunchTask" attribute in launch.json is consistent with the "label" attribute in the tasks.json file.

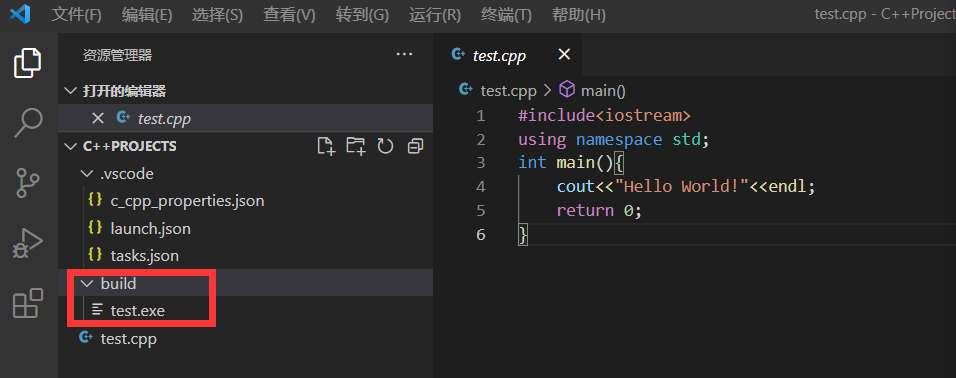
After completing the above configuration, you can select the test.cpp file in the resource manager and press F5 to execute the debugging run. This operation will generate a test.exe file in the path of test.cpp.
Modification of storage location of compilation intermediate file
After the compilation process, an. exe file will be generated in the source code directory. If you want to store this intermediate file in a custom directory, you can modify the path options in launch.json and tasks.json.
- Modify the launch.json file as follows
{
    // Use IntelliSense to understand related properties.
    // Hover to view the description of an existing property.
    // For more information, visit: https://go.microsoft.com/fwlink/?linkid=830387
    "version": "0.2.0",
    "configurations": [
        {
            "name": "g++.exe - Generate and debug activity files",
            "type": "cppdbg",
            "request": "launch",
            // fileDirname indicates the directory of the currently opened file, such as D:/C++Projects/
            // fileBasenameNoExtension indicates the name of the currently open file (excluding the extension), such as test
            "program": "${fileDirname}\\build\\${fileBasenameNoExtension}.exe",
            "args": [],
            "stopAtEntry": false,
            "cwd": "D:/MinGW/mingw64/bin",
            "environment": [],
            "externalConsole": false,
            "MIMode": "gdb",
            "miDebuggerPath": "D:\\MinGW\\mingw64\\bin\\gdb.exe",
            "setupCommands": [
                {
                    "description": "by gdb Enable neat printing",
                    "text": "-enable-pretty-printing",
                    "ignoreFailures": true
                }
            ],
            "preLaunchTask": "C/C++: g++.exe Generate active file"
        }
    ]
}
fileDirname in the "program" attribute of the code indicates the directory of the currently opened file, such as D:/C++Projects /; fileBasenameNoExtension indicates the name of the currently open file (excluding the extension), such as test. We can f i l e D i r n a m e of after , After {fileDirname} \ \, After fileDirname and before {fileBasenameNoExtension}.exe, insert a new folder, for example:
${fileDirname}\\build\\${fileBasenameNoExtension}.exe
This sentence indicates that we want to store the generated. exe file in the build folder in the current directory and name it ${fileBasenameNoExtension}.exe.
(Note: the build folder must exist in the current directory. If it does not exist, you need to create a new one)
2. Modify the tasks.json file as follows
{
    "tasks": [
        {
            "type": "cppbuild",
            "label": "C/C++: g++.exe Generate active file",
            "command": "D:/MinGW/mingw64/bin/g++.exe",
            "args": [
                "-fdiagnostics-color=always",
                "-g",
                "${file}",
                "-o",
                "${fileDirname}\\build\\${fileBasenameNoExtension}.exe"
            ],
            "options": {
                "cwd": "D:/MinGW/mingw64/bin"
            },
            "problemMatcher": [
                "$gcc"
            ],
            "group": {
                "kind": "build",
                "isDefault": true
            },
            "detail": "Debugger generated tasks."
        }
    ],
    "version": "2.0.0"
}
Set "${fileDirname}" in args attribute\ f i l e B a s e n a m e N o E x t e n s i o n . e x e " change by " {fileBasenameNoExtension}.exe "changed to" fileBasenameNoExtension.exe "change to" {filediname} \ build \ ${filebasenamenoextension}. Exe ", and save.
After completing the above steps, select the test.cpp file, press F5 to run debugging, and the generated test.exe file will be stored in the build folder.
At this point, the C + + environment in VSCode is configured.