Source of article: Configure Nginx with a self-signed SL certificate
HTTPS is almost the only option for secure Web browser-to-server connections.HTTPS is actually HTTP over SSL, which means that HTTP connections are built on top of secure SSL connections.
SSL uses certificates to create secure connections.There are two authentication modes:
-
Only the client validates the server's certificate, and the client itself does not provide the certificate.
-
Clients and servers verify each other's certificates.
Obviously, the second way is more secure, which is usually done with online banking, but ordinary Web sites can only use the first way.
How do clients verify the server's certificate?The server's own certificate must be signed by an "authoritative" certificate, which in turn may be signed by a more authoritative certificate. At this level, the most authoritative certificate at the top is called the root certificate.The root certificate is built directly into the browser so that the browser can use its own root certificate to verify that a server's certificate is valid.
If you want to provide a valid certificate, the server's certificate must be signed from a certification authority such as VeriSign so that the browser can verify that it has passed, or the browser will warn you that the certificate is invalid.
Requesting a certificate for signature can cost anywhere from a few decades to hundreds of dollars, so if it's just for administrative purposes, you can create a self-signed certificate that ensures administrators can connect to the server securely through their browsers.
The following is a brief description of how to create a self-signed SL certificate.
To create a self-signed certificate, you need to install openssl using the following steps:
-
Create Key;
-
Create a signature request;
-
Remove Key's password;
-
Sign the certificate with Key.
Certificates prepared for HTTPS need to be aware that the CN s created for signature requests must be identical to the domain name or cannot be verified by the browser.
The above step commands are tedious, so I made a shell script to get the certificate done at once.Download the script from here:
https://github.com/michaelliao/itranswarp.js/blob/master/conf/ssl/gencert.sh
Run the script, assuming your domain name is www.test.com, and type as prompted:
$ ./gencert.sh
Enter your domain [www.example.com]: www.test.com
Create server key...
Generating RSA private key, 1024 bit long modulus
.................++++++
.....++++++
e is 65537 (0x10001)
Enter pass phrase for www.test.com.key:enter your password
Verifying - Enter pass phrase for www.test.com.key:enter your password
Create server certificate signing request...
Enter pass phrase for www.test.com.key:enter your password
Remove password...
Enter pass phrase for www.test.com.origin.key:enter your password
writing RSA key
Sign SSL certificate...
Signature ok
subject=/C=US/ST=Mars/L=iTranswarp/O=iTranswarp/OU=iTranswarp/CN=www.test.com
Getting Private key
TODO:
Copy www.test.com.crt to /etc/nginx/ssl/www.test.com.crt
Copy www.test.com.key to /etc/nginx/ssl/www.test.com.key
Add configuration in nginx:
server {
    ...
    ssl on;
    ssl_certificate     /etc/nginx/ssl/www.test.com.crt;
    ssl_certificate_key /etc/nginx/ssl/www.test.com.key;
}
The red part is the input, note that the passwords entered four times are the same.
Four files are created in the current directory:
- www.test.com.crt: Self-signed certificate
- www.test.com.csr: Certificate Request
- www.test.com.key: Key without password
- www.test.com.origin.key: Key with password
The Web server needs to send www.test.com.crt to the browser for verification, then decrypt the data sent by the browser using www.test.com.key. The remaining two files do not need to be uploaded to the Web server.
For example, with Nginx, you need to configure it in server {...}:
server {
    ...
    ssl on;
    ssl_certificate     /etc/nginx/ssl/www.test.com.crt;
    ssl_certificate_key /etc/nginx/ssl/www.test.com.key;
}
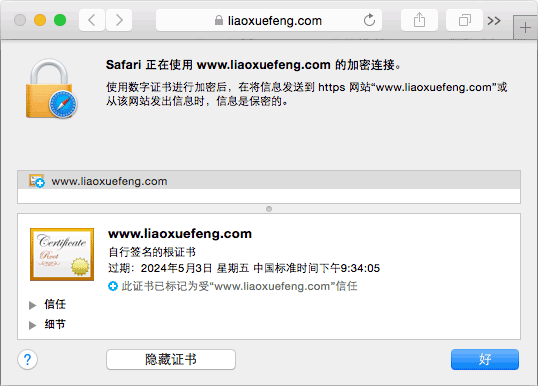
If everything goes well, open your browser and you can access the website through HTTPS.Warnings will appear on the first visit (because our self-signed certificates are not trusted by the browser), import the certificate into the system through the browser (Windows uses IE import, Mac uses Safari import) and set it to Trusted, after which the computer can safely connect to the Web server by visiting the Web site:
How do I configure certificates in the application server?Examples include Tomcat, gunicorn, and so on.The correct approach is not to configure Nginx to process HTTPS, then connect the back-end application server via proxy, which is equivalent to using Nginx as a security proxy for HTTPS to HTTP. This takes advantage of Nginx's HTTPS/HTTPS processing power and avoids the disadvantage that the application server is not good at HTTPS.
Script code:
#!/bin/sh

# create self-signed server certificate:

read -p "Enter your domain [www.example.com]: " DOMAIN

echo "Create server key..."

openssl genrsa -des3 -out $DOMAIN.key 1024

echo "Create server certificate signing request..."

SUBJECT="/C=US/ST=Mars/L=iTranswarp/O=iTranswarp/OU=iTranswarp/CN=$DOMAIN"

openssl req -new -subj $SUBJECT -key $DOMAIN.key -out $DOMAIN.csr

echo "Remove password..."

mv $DOMAIN.key $DOMAIN.origin.key
openssl rsa -in $DOMAIN.origin.key -out $DOMAIN.key

echo "Sign SSL certificate..."

openssl x509 -req -days 3650 -in $DOMAIN.csr -signkey $DOMAIN.key -out $DOMAIN.crt

echo "TODO:"
echo "Copy $DOMAIN.crt to /etc/nginx/ssl/$DOMAIN.crt"
echo "Copy $DOMAIN.key to /etc/nginx/ssl/$DOMAIN.key"
echo "Add configuration in nginx:"
echo "server {"
echo "    ..."
echo "    listen 443 ssl;"
echo "    ssl_certificate     /etc/nginx/ssl/$DOMAIN.crt;"
echo "    ssl_certificate_key /etc/nginx/ssl/$DOMAIN.key;"
echo "}"