Construction of Jenkins sequel platform based on kubernetes/k8s (Part 2)
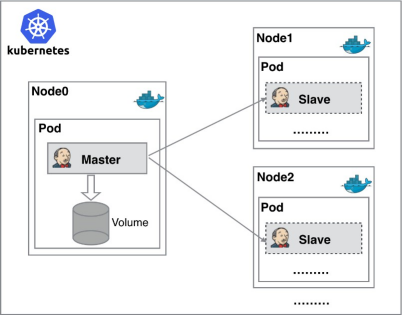
Jenkins master slave architecture
Installing and configuring NFS
Introduction to NFS
NFS (Network File System), its biggest function is to enable different machines and different operating systems to share files with each other through the network. We can use NFS to share Jenkins running configuration files, Maven's warehouse dependency files, etc
NFS mount
We install the NFS server on the master machine
Install services for NFS (all k8s the nodes need to be installed)
yum -y install nfs-utils
Create shared directory on master
Create a shared directory to store Jenkins' configuration files
mkdir -p /opt/nfs/jenkins

cat >> /etc/exports << 'EOF'
/opt/nfs/jenkins *(rw,no_root_squash)
EOF
Start the service and view the NFS shared directory
Start service
systemctl enable nfs --now
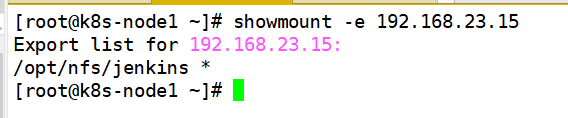
On three k8s machines, view the shared directory
showmount -e 192.168.23.15


Install Jenkins master in Kubernetes
Create NFS client provisioner
NFS client provisioner is a simple NFS external provisioner of Kubernetes. It does not provide NFS itself and requires existing NFS servers to provide storage.
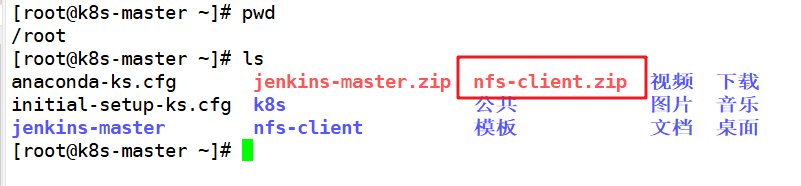
Upload NFS client provider build file
Link: https://pan.baidu.com/s/1GIH18-iNF0m8TMiQNAxVeA?pwd=mpcw
Extraction code: mpcw
ls
unzip nfs-client.zip
cd nfs-client
sed -i '/192.*/ s/192.*/192.168.23.15/g'  deployment.yaml

Build pod resources of NFS client provider
cd nfs-client
kubectl apply -f .


Check whether the pod is installed successfully
kubectl get pods

Install Jenkins master
Upload Jenkins master build file
Link: https://pan.baidu.com/s/1RwioaFdgCk-tB4cEWF5ovQ?pwd=52d5
Extraction code: D525
unzip jenkins-master.zip
cd jenkins-master/
ls


There are two points to note:
First, in statefulset Yaml file, which declares the Jenkins master file storage using NFS client provider
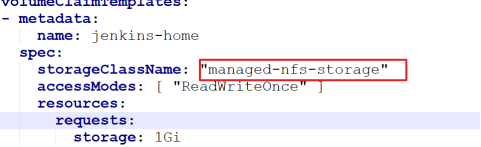
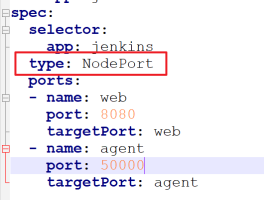
Second, the Service publishing method adopts NodePort, which will randomly generate node access ports
Create a namespace for Kube Ops
Because we put Jenkins master's pod under Kube ops
kubectl create namespace kube-ops
kubectl get ns

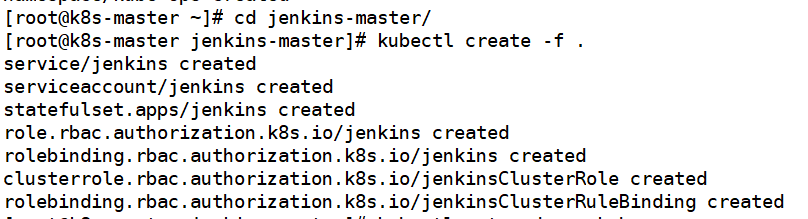
Build pod resources of Jenkins master
cd jenkins-master
kubectl create -f .
View the status of the pod and the scheduling node and port
kubectl get pods -n kube-ops -o wide
kubectl  get service  -n kube-ops


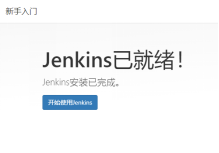
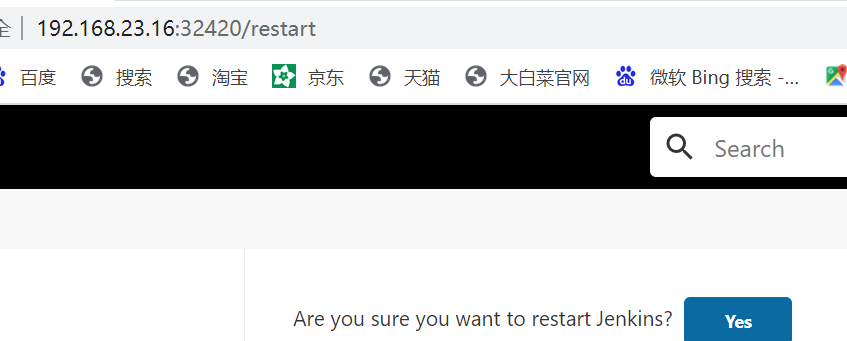
Visit jenkins
Use Jenkins browser to access address
ip of the node where Jenkins is located: mapped port
192.168.23.15:32420

Get the initial password. The initial password is in the data volume directory and stored in initialAdminPassword


Set the plugin download address of Jenkins and download the plugin
cd /opt/nfs/jenkins/kube-ops-jenkins-home-jenkins-0-pvc-28d3fcd1-0a47-4da9-b93d-a9a34fa152fa/updates/

sed -i 's/http:\/\/updates.jenkins- ci.org\/download/https:\/\/mirrors.tuna.tsinghua.edu.cn\/jenkins/g' default.json && sed -i 's/http:\/\/www.google.com/https:\/\/www.baidu.com/g' default.json

Manage Plugins click Advanced and change the Update Site to the download address of domestic plug-ins
https://mirrors.tuna.tsinghua.edu.cn/jenkins/updates/update-center.json

Restart Jenkins
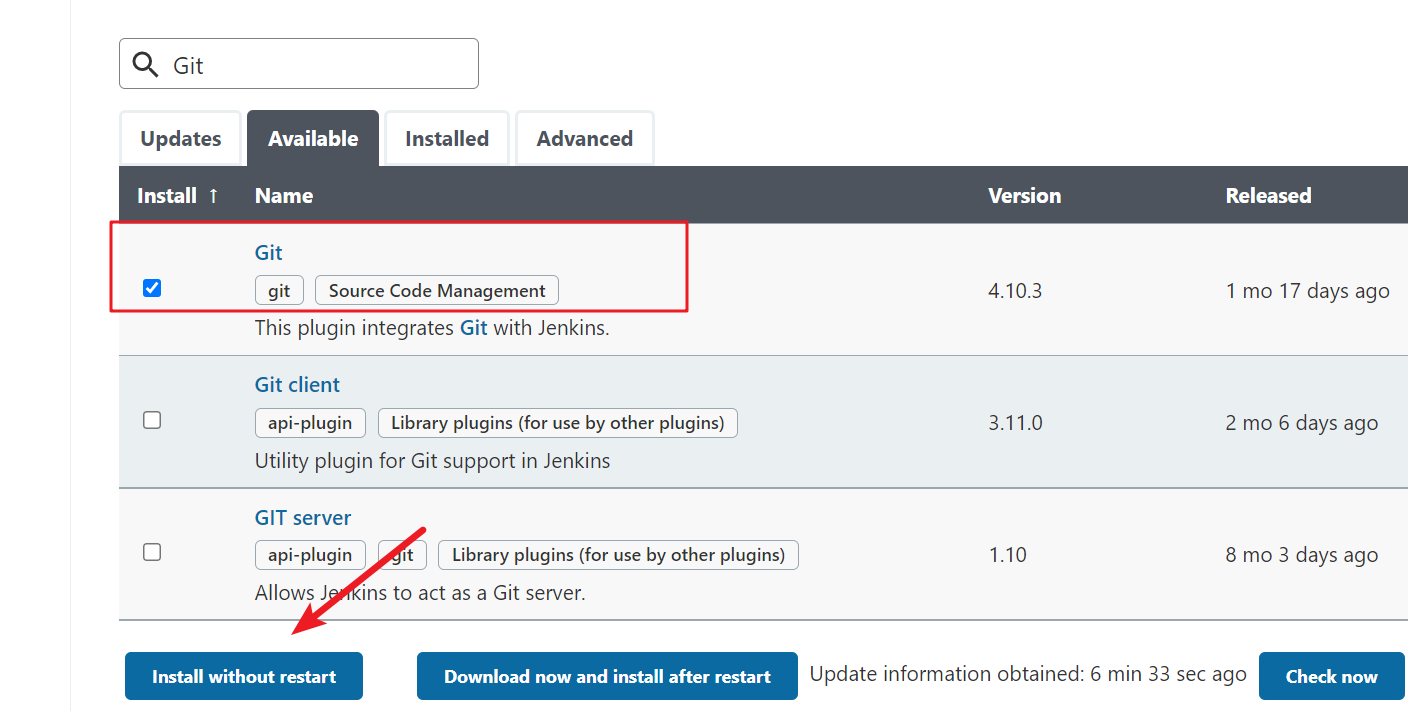
Install the basic plug-in first
Localization:Chinese
Git
Pipeline
Extended Choice Parameter
After installation, restart Jenkins


Integration of jenins and kubernetes
Install kubernetes plug-in
System management -- > plug-in management -- > optional plug-ins -- > kubernetes

Integration of Jenkins and Kubernetes
System management -- > system configuration -- > cloud -- > new cloud -- > kubernetes

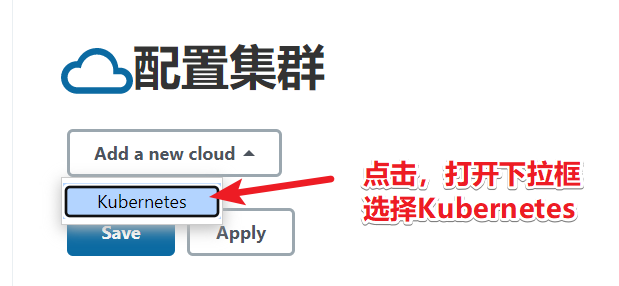
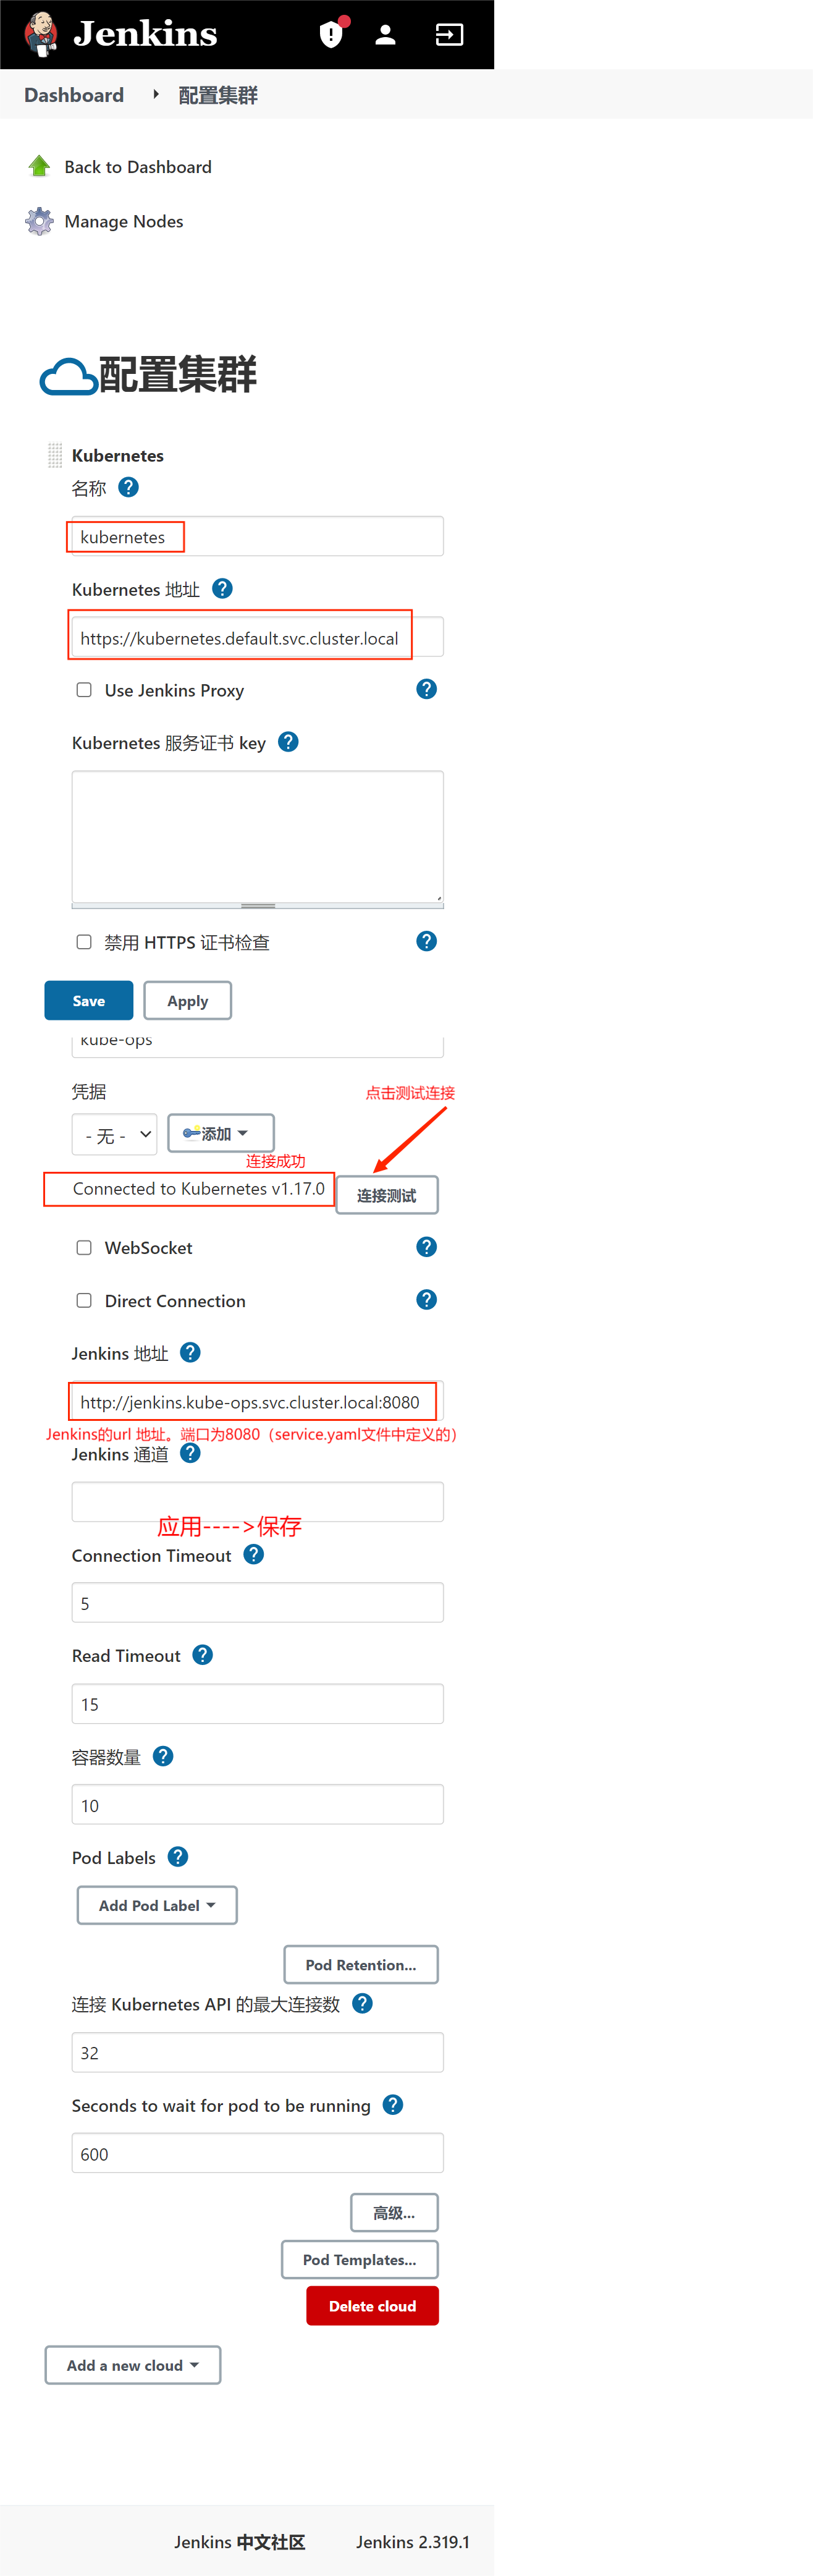
Configure cluster information
kubernetes address adopts kube's server discovery: https://kubernetes.default.svc.cluster.local
The namespace is filled with Kube OPS, and our services are placed in this self built namespace
Then click Test Connection to test the connection
Jenkins URL: http://jenkins.kube-ops.svc.cluster.local:8080 Port 8080 comes from service Yaml file definition
Build Jenkins slave custom image
When Jenkins master builds a Job, Kubernetes will create a Pod of Jenkins slave to complete the construction of the Job. We choose the image running Jenkins slave as the official recommended image: Jenkins / JNLP Slave: latest, but there is no Maven environment in this image. For convenience, we need to customize a new image:
Copy maven package, settings configuration file and Dockerfile file to the master host
Link: https://pan.baidu.com/s/1EZ0yopDHMoaw5UHXbM1qmg?pwd=uyw2
Extraction code: uyw2
ls jenkins-slave.zip
unzip jenkins-slave.zip
cd jenkins-slave/

Dockerfile file contents are as follows:
#Based on the official image
FROM jenkins/jnlp-slave:latest

MAINTAINER itcast

# Switch to root account for operation
USER root

# Install maven
COPY apache-maven-3.6.2-bin.tar.gz .

RUN tar -zxf apache-maven-3.6.2-bin.tar.gz && \
    mv apache-maven-3.6.2 /usr/local && \
    rm -f apache-maven-3.6.2-bin.tar.gz && \
    ln -s /usr/local/apache-maven-3.6.2/bin/mvn /usr/bin/mvn && \
    ln -s /usr/local/apache-maven-3.6.2 /usr/local/apache-maven && \
    mkdir -p /usr/local/apache-maven/repo

COPY settings.xml /usr/local/apache-maven/conf/settings.xml

USER jenkins
Build an image and upload it to the image warehouse
docker build -t jenkins-slave-maven:latest .
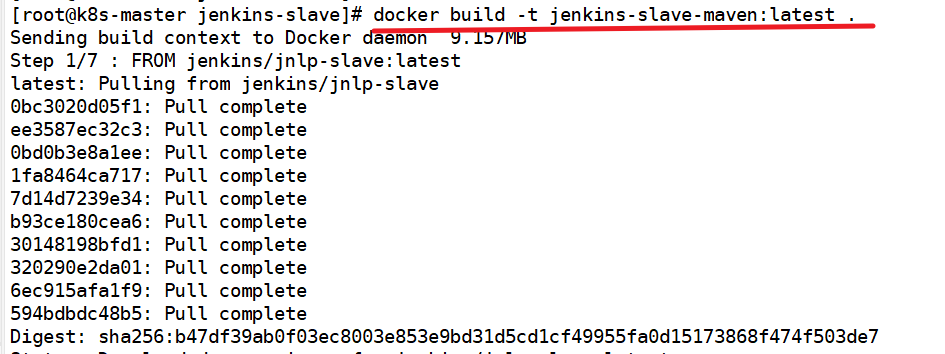

After successful construction, a new image Jenkins slave Maven: latest is generated
docker images

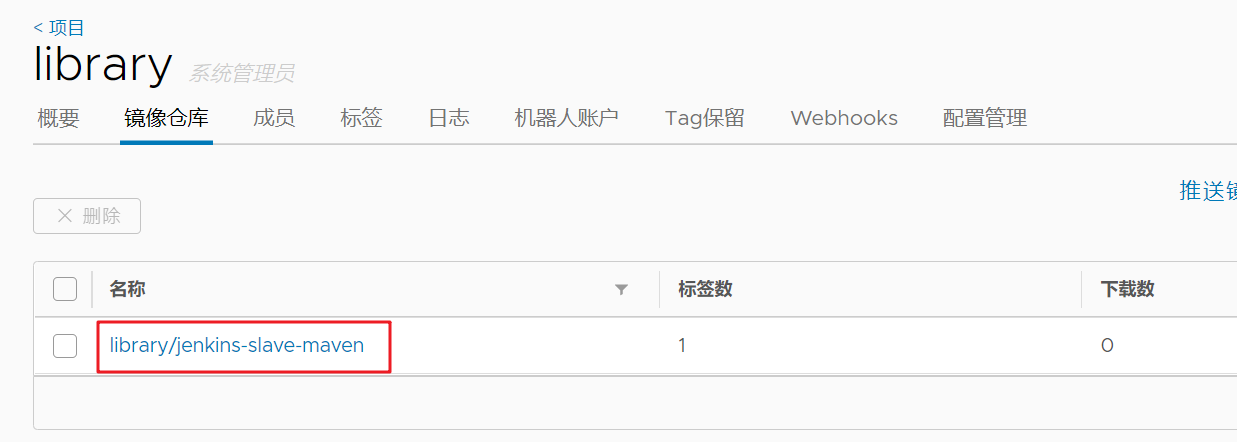
Label the image and upload it to the library project of the warehouse
#First configure the address of the registered image warehouse (please restart docker)
cat /etc/docker/daemon.json

#Log in to the warehouse on the mster host first, and log in as an administrator
docker login -u admin -p Harbor12345 192.168.23.13:85

#Label the image warehouse address / project name / image name: Label
docker tag jenkins-slave-maven:latest 192.168.23.13:85/library/jenkins-slave-maven:latest

#Push to image warehouse
docker push  192.168.23.13:85/library/jenkins-slave-maven


After the push is successful, go to the library project of the image warehouse to view it
Test whether Jenkins slave can be created
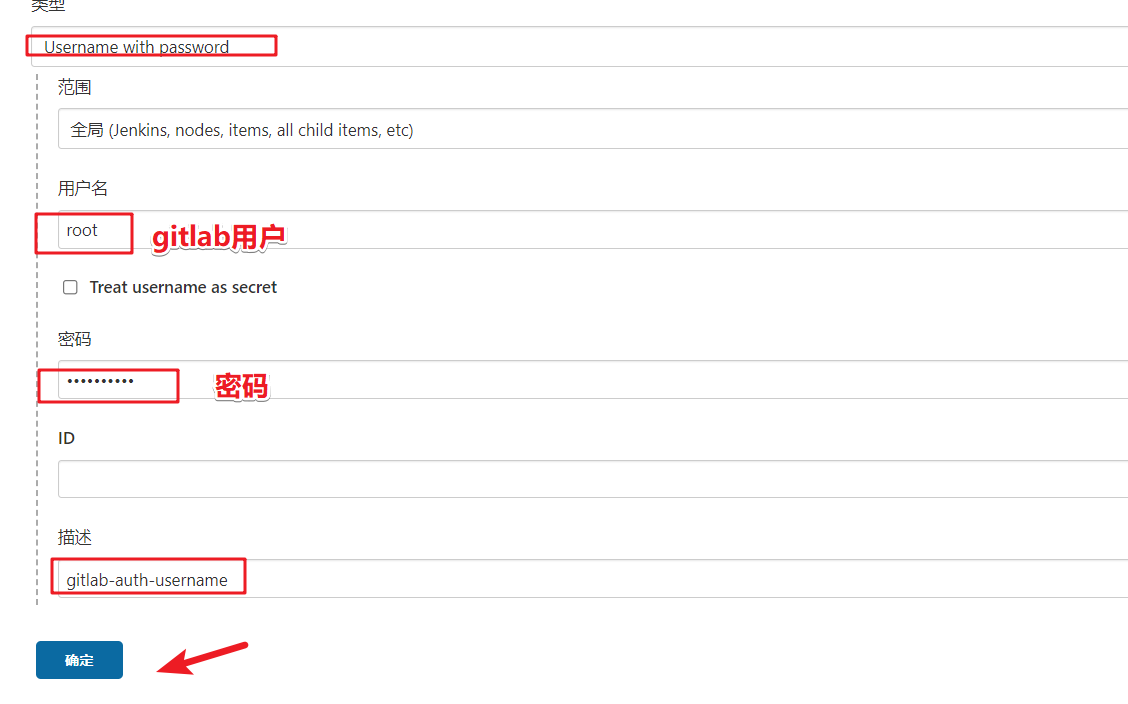
Add voucher
Add the certificate of gitlab by using the user name and password
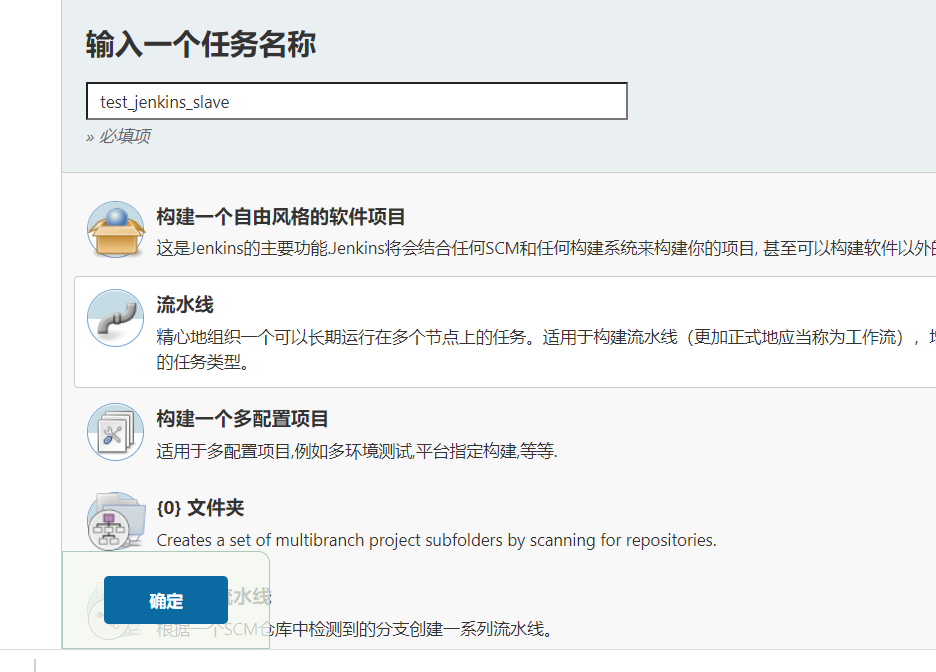
Create a new Jenkins pipeline project
Pipeline:
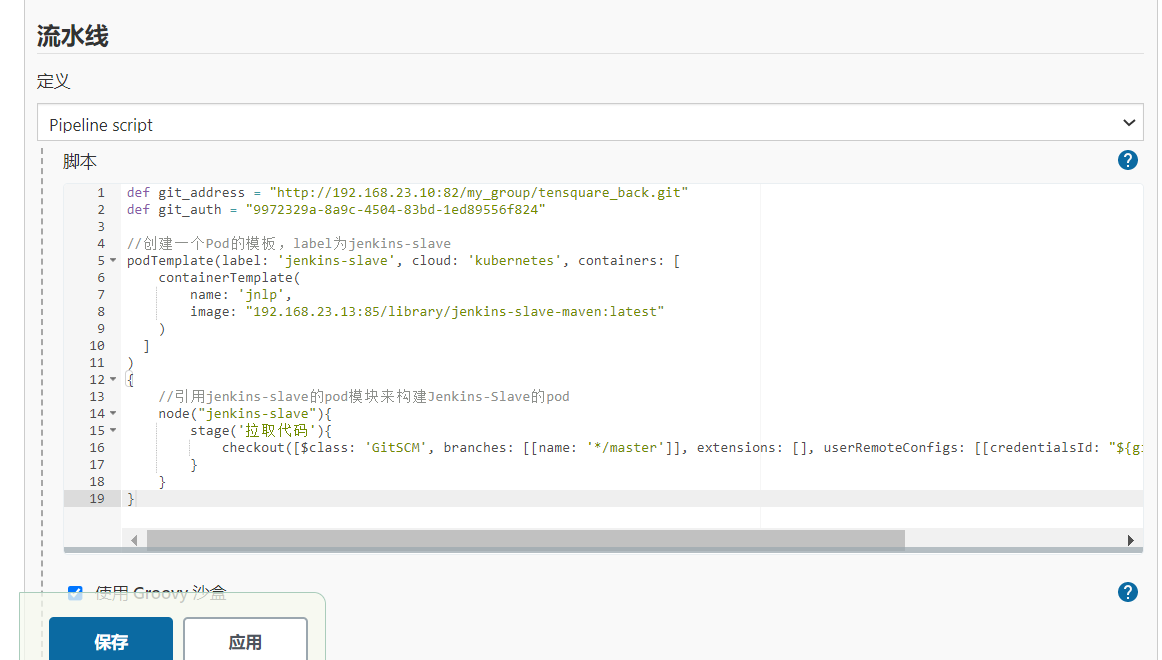
def git_address = "http://192.168.23.10:82/my_group/tensquare_back.git"
def git_auth = "9972329a-8a9c-4504-83bd-1ed89556f824"

//Create a Pod template with the label Jenkins slave
podTemplate(label: 'jenkins-slave', cloud: 'kubernetes', containers: [
    containerTemplate(
        name: 'jnlp',
        image: "192.168.23.13:85/library/jenkins-slave-maven:latest"
    )
  ]
)
{
    //Reference the pod module of Jenkins slave to build the pod of Jenkins slave
    node("jenkins-slave"){
        stage('Pull code'){
            checkout([$class: 'GitSCM', branches: [[name: '*/master']], extensions: [], userRemoteConfigs: [[credentialsId: "${git_auth}", url: "${git_address}"]]])
        }
    }
}
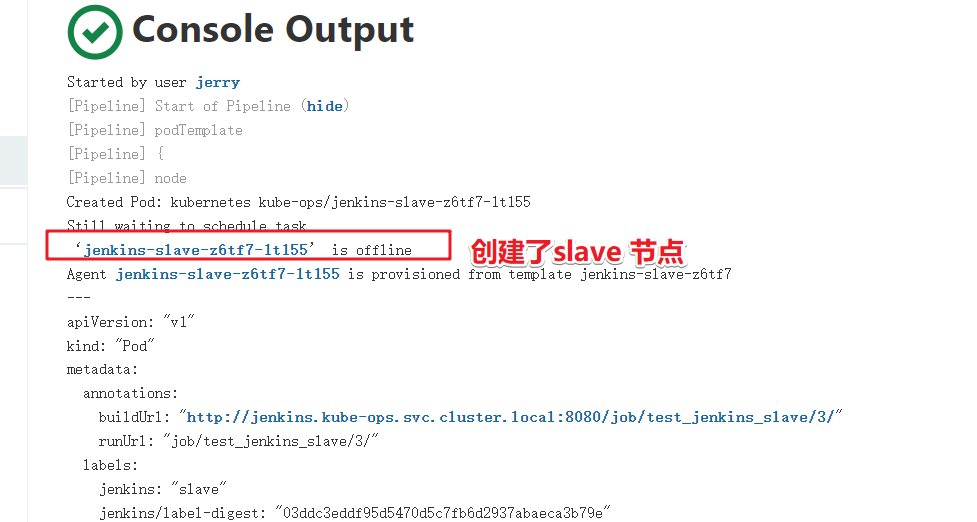
Open a new Jenkins window and enter node management.
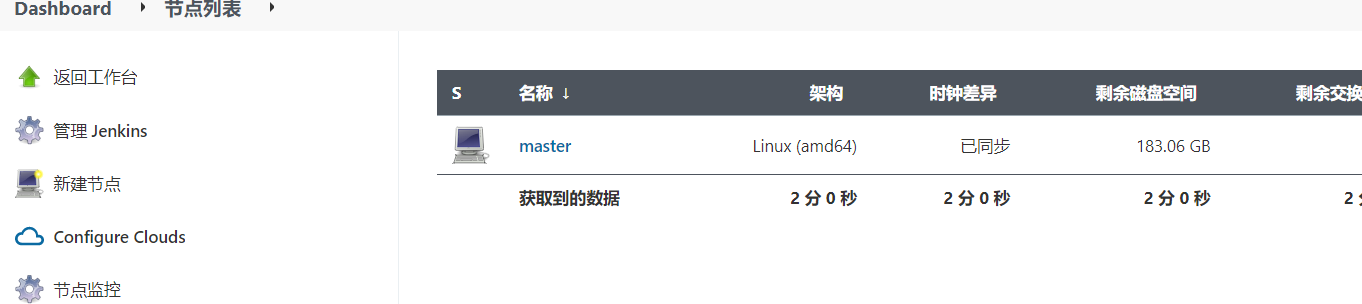
Then, click build in another window. Refresh the node management window and observe the changes
It can be seen that during the architecture period, Jenkins opened a new connection node and used the new node to build the project. After the construction, the node is deleted


On the output information of the project, you can also see that the slave node has been created