I Spring and the construction of Spring MVC
1. Transform Maven project into web project
First, we create a maven project
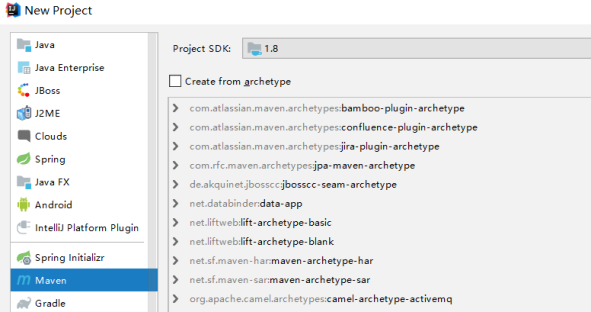
This creates a maven project:
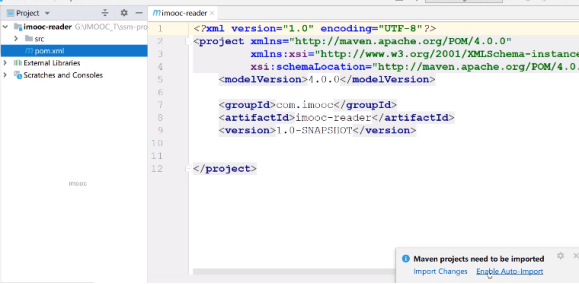
As the current project, it is a java web application, so we need to transform a web application based on maven
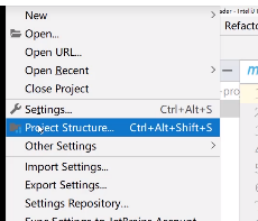
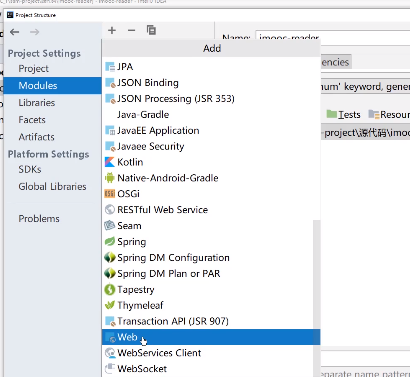
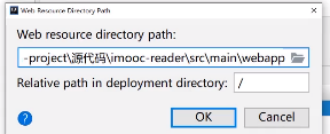
On the right side, configure three places:
The first is to describe our web Which path is the XML file saved to

The second is about the resources of our web application. Where is it stored
Just locate the directory of webapp we just created
Next, we will create a new artifact, that is, how to run it

Enter the startup configuration interface
At present, it adds all resources to the published list on the left by default. We don't need to make additional adjustments
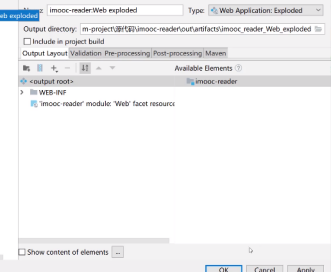
Just click ok
At this moment, we will transform the current project into a web application
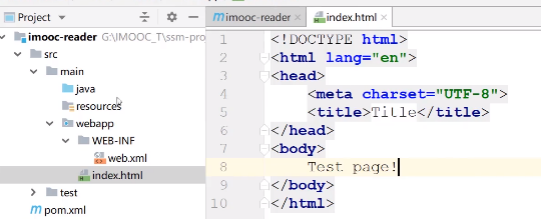
You can create a new HTML page for testing under the directory of webapp, such as index HTML (at this time, the name must be index.html. For others, such as test.html, we can't find it when we publish it to Tomcat later)
Then verify whether the current configuration is effective. Here we want to publish the project under tomcat. Click here for details

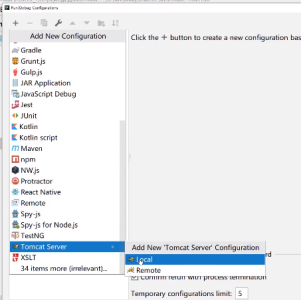
Deployment Directory:

The following context can only be reserved / which is the default setting of most of our web applications:

Then go back to the server directory:
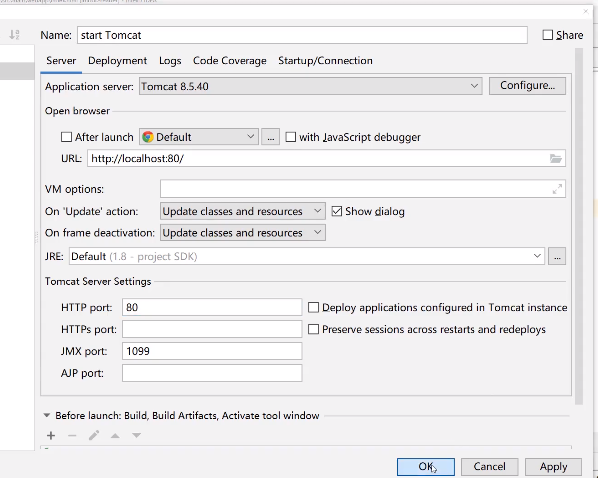
That's it. Let's choose start tomcat
When it starts successfully, we open the browser
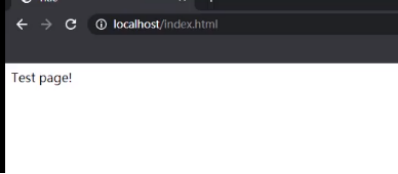
This means that the release of the web application just now is successful. We can configure spring and spring mvc on this basis
2. Steps to build spring and Spring MVC
(1) Rely on spring webmvc
There is no problem with the test release just now. First, we locate our imooc reader POM XML file
<?xml version="1.0" encoding="UTF-8"?>
<project xmlns="http://maven.apache.org/POM/4.0.0"
         xmlns:xsi="http://www.w3.org/2001/XMLSchema-instance"
         xsi:schemaLocation="http://maven.apache.org/POM/4.0.0 http://maven.apache.org/xsd/maven-4.0.0.xsd">
    <modelVersion>4.0.0</modelVersion>

    <groupId>org.example</groupId>
    <artifactId>bishe</artifactId>
    <version>1.0-SNAPSHOT</version>

    <properties>
        <project.build.sourceEncoding>UTF-8</project.build.sourceEncoding>
        <maven.compiler.source>8</maven.compiler.source>
        <maven.compiler.target>8</maven.compiler.target>
    </properties>

    <!--aliyun maven image-->
    <repositories>
        <repository>
            <id>ayilun</id>
            <name>ayiyun</name>
            <url>https://maven.aliyun.com/repository/public</url>
        </repository>
    </repositories>

    <dependencies>
        <dependency>
            <groupId>org.springframework</groupId>
            <artifactId>spring-webmvc</artifactId>
            <version>5.2.6.RELEASE</version>
        </dependency>

        <dependency>
            <groupId>org.freemarker</groupId>
            <artifactId>freemarker</artifactId>
            <version>2.3.30</version>
        </dependency>

        <!--spring Provide a let springMVC support freemarker Components of -->
        <dependency>
            <groupId>org.springframework</groupId>
            <artifactId>spring-context-support</artifactId>
            <version>5.2.6.RELEASE</version>
        </dependency>

        <!--A large number of projects are involved in the project ajax  Before and after json interactive  json We also need a serialized toolkit-->
        <dependency>
            <groupId>com.fasterxml.jackson.core</groupId>
            <artifactId>jackson-core</artifactId>
            <version>2.11.0</version>
        </dependency>

        <dependency>
            <groupId>com.fasterxml.jackson.core</groupId>
            <artifactId>jackson-annotations</artifactId>
            <version>2.11.0</version>
        </dependency>

        <dependency>
            <groupId>com.fasterxml.jackson.core</groupId>
            <artifactId>jackson-databind</artifactId>
            <version>2.11.0</version>
        </dependency>
        </dependencies>
After adding these dependencies, don't forget this important thing: as mentioned before, all new dependencies will not be automatically released to our tomcat application by default
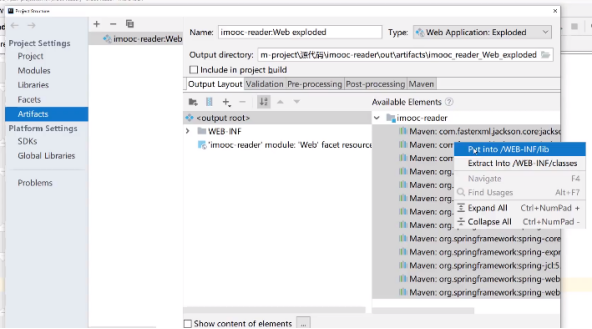
So far, the POM in the first step We have completed the configuration of XML
(2) Configure DispatcherServlet
<?xml version="1.0" encoding="UTF-8"?>
<web-app xmlns="http://xmlns.jcp.org/xml/ns/javaee"
         xmlns:xsi="http://www.w3.org/2001/XMLSchema-instance"
         xsi:schemaLocation="http://xmlns.jcp.org/xml/ns/javaee http://xmlns.jcp.org/xml/ns/javaee/web-app_3_1.xsd"
         version="3.1">

    <servlet>
        <servlet-name>springmvc</servlet-name>
        <servlet-class>org.springframework.web.servlet.DispatcherServlet</servlet-class>
        <init-param>
            <param-name>contextConfigLocation</param-name>
            <param-value>classpath:applicationContext*.xml</param-value>
        </init-param>
        <load-on-startup>0</load-on-startup><!--Representative in web Initialize this when the project starts servlet-->
    </servlet>
    </web-app>
(3) Start spring MVC annotation mode
In ApplicationContext XML core configuration file
<?xml version="1.0" encoding="UTF-8"?>
<beans xmlns="http://www.springframework.org/schema/beans"
       xmlns:mvc="http://www.springframework.org/schema/mvc"
       xmlns:context="http://www.springframework.org/schema/context"
       xmlns:xsi="http://www.w3.org/2001/XMLSchema-instance"
       xmlns:task="http://www.springframework.org/schema/task"
       xmlns:tx="http://www.springframework.org/schema/tx"
       xsi:schemaLocation="
            http://www.springframework.org/schema/beans
            http://www.springframework.org/schema/beans/spring-beans.xsd
            http://www.springframework.org/schema/context
            http://www.springframework.org/schema/context/spring-context.xsd
            http://www.springframework.org/schema/task
            http://www.springframework.org/schema/task/spring-task.xsd
            http://www.springframework.org/schema/mvc
            http://www.springframework.org/schema/mvc/spring-mvc.xsd
            http://www.springframework.org/schema/tx
            http://www.springframework.org/schema/tx/spring-tx.xsd">
    <!--  3.open springMVC Annotation mode for-->
    <context:component-scan base-package="com.puj"/><!--This is spring Frame open annotation mode-->
    <!-- Real start MVC Annotation mode is this sentence-->
     <mvc:annotation-driven/>
    <mvc:default-servlet-handler/><!--The purpose of this configuration is to make us like css js The static resources of pictures are excluded, which improves our efficiency spring mvc yes url Processing efficiency-->
(4) Configure the character set of requests and responses
1. In the request, the post request is through the web XML is implemented by configuring a filter filter. The get request is in tomcat8 After 0, the default format is utf-8. Do not configure it.
 <!-- Solve the problem of Chinese garbled code and write a filter Mainly right post request-->
<filter>
    <filter-name>characterFilter</filter-name>
    <filter-class>org.springframework.web.filter.CharacterEncodingFilter</filter-class>
    <init-param>
        <param-name>encoding</param-name>
        <param-value>UTF-8</param-value>
    </init-param>
</filter>
    <filter-mapping>
        <filter-name>characterFilter</filter-name>
        <url-pattern>/*</url-pattern>
    </filter-mapping>
2. For the response, you are in ApplicationContext XML to configure an MVC: Message converters message converter
 <!--3 open MVC Annotation mode and 4.Solve the problem of Chinese garbled code in response-->
    <mvc:annotation-driven>
        <mvc:message-converters>
            <!--This class is used to process the output in our response...And character set-->
            <bean class="org.springframework.http.converter.StringHttpMessageConverter">
                <property name="supportedMediaTypes">
                    <list>
                        <value>text/html;charset=utf-8</value>
                    </list>
                </property>
            </bean>
        </mvc:message-converters>
    </mvc:annotation-driven>
(5) Configure FreeMarker template engine
1. Introduce dependency
 <dependency>
            <groupId>org.freemarker</groupId>
            <artifactId>freemarker</artifactId>
            <version>2.3.30</version>
        </dependency>

        <!--spring Provide a let springMVC support freemarker Components of -->
        <dependency>
            <groupId>org.springframework</groupId>
            <artifactId>spring-context-support</artifactId>
            <version>5.2.6.RELEASE</version>
        </dependency>
2. In ApplicationContext Configure FreeMarker in XML
 <!--5.to configure freemarker The template engine should be equipped with two bean-->
    <!--This class is used to notify us springMVC Which directory to load us freemarker script-->
    <bean id="freemarkerConfig" class="org.springframework.web.servlet.view.freemarker.FreeMarkerConfigurer">
        <property name="templateLoaderPath" value="/WEB-INF/ftl"/>
        <property name="freemarkerSettings"><!--This is for freemarker Parameters to be set-->
            <props>
                <prop key="defaultEncoding">UTF-8</prop>
            </props>
        </property>
    </bean>

    <bean id="ViewResolver" class="org.springframework.web.servlet.view.freemarker.FreeMarkerViewResolver">
        <property name="contentType" value="text/html;charset=utf-8"/>
        <property name="suffix" value=".ftl"/>
    </bean>
(6) Configure Json serialization component
In ApplicationContext Add value > Application / JSON to XML; charset=utf-8
 <mvc:annotation-driven>
        <mvc:message-converters>
            <!--This class is used to process the output in our response...And character set-->
            <bean class="org.springframework.http.converter.StringHttpMessageConverter">
                <property name="supportedMediaTypes">
                    <list>
                        <value>text/html;charset=utf-8</value>
                        <value>application/json;charset=utf-8</value>
                    </list>
                </property>
            </bean>
        </mvc:message-converters>
    </mvc:annotation-driven>
3. Test
Create a TestController
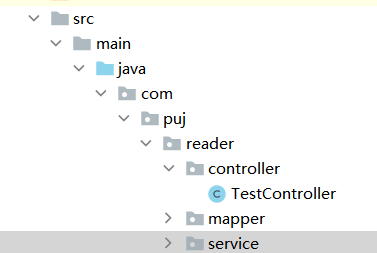
(1) The first part tests whether freemaker can be used normally?

<!DOCTYPE html>
<html lang="en">
<head>
    <meta charset="UTF-8">
    <title>Title</title>
</head>
<body>
Test page
</body>
</html>
@Controller
public class TestController {
    /*Test whether freemaker can be used normally*/
    @GetMapping("/test/t1")
    public ModelAndView test1(){
        return new ModelAndView("/test");
    }
(2) The second part tests json serialized output
    /*Test json*/
    @GetMapping("/test/t2")
    @ResponseBody
public Map test2(){
        Map result = new HashMap();
        result.put("test","Test text");
        return result;
    }
Start tomcat:
Enter the URL to see if it can be output normally

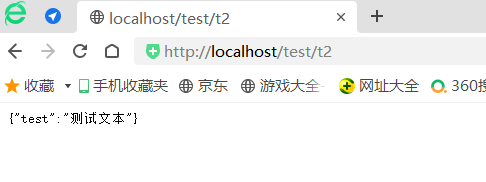
If we can successfully jump to the above page, it means that we have successfully built spring and spring mvc.