Container data volume
What is a container data volume
Review of docker concept
Package the application and environment into one image
data If the data is in the container, we will delete the container and lose the data! Requirement: data can be persistent
Mysql, delete the container, delete the database and run! Requirement: MySQL data can be stored locally
There can be a data sharing technology between containers! Synchronize the data generated in Docker container to the local!
This is volume technology! To mount the directory, mount the directory in our container to Linux.
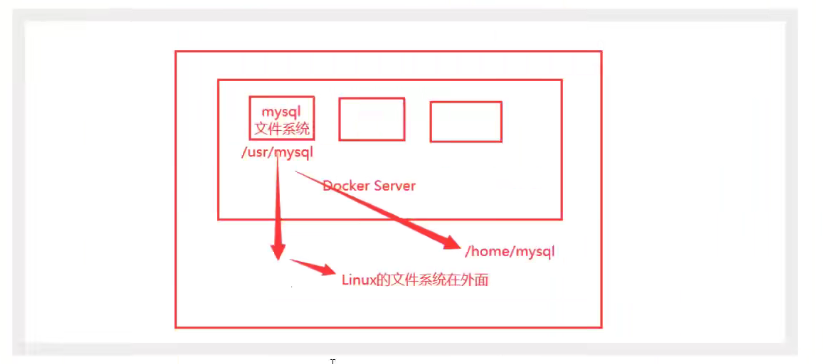
To sum up: container persistence and synchronization! Data can also be shared between containers
Using data volumes
Method 1: directly use the command to mount - v
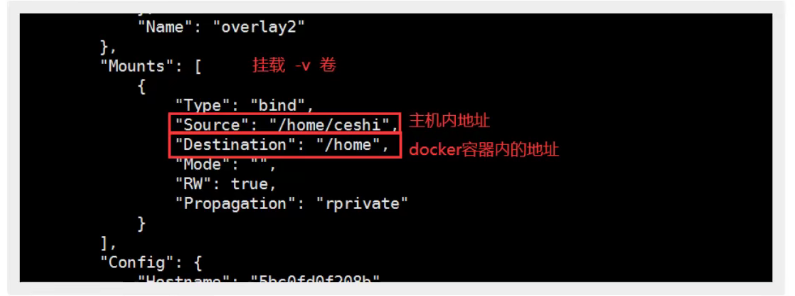
docker run -it -v Host Directory: directory in container
# test
docker run -it -v /home/ceshi:/home centos /bin/bash
# When starting up, we can inspect the container id through docker
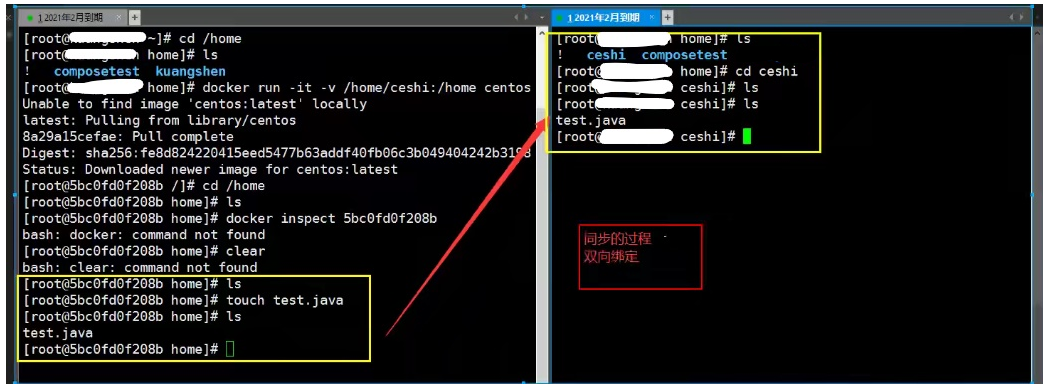
Synchronization of test files
Test again
1. Stop container
2. Modify files on host
3. Start container
4. The data in the container is still synchronized
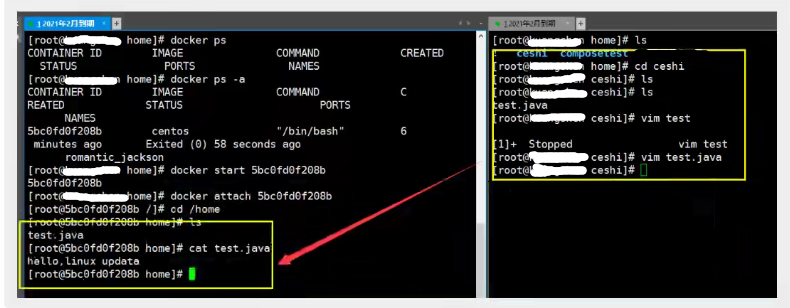
Benefits: we only need to modify locally in the future, and the container will be automatically synchronized!
Actual combat: install MySQL
Thinking: MySQL persistence
docker search mysql
# Get image
docker pull mysql:5.7

# To run the container, you need to mount the data!
# To install and start mysql, you need to configure the password. Just pay attention
# Official website test: docker run -- name some MySQL - e MySQL_ ROOT_ PASSWORD=my-secret-pw -d mysql:tag
# startup parameter
# -d background operation
# -p port mapping
# -v volume mount
# -e environment configuration
# --Name container name
docker run -d -p 3310:3306 -v /home/mysql/conf:/etc/mysql/conf.d -v /home/mysql/data:/var/lib/mysql -e MYSQL_ROOT_PASSWORD=123456 --name mysql01
mysql:5.7

# After successful startup, let's test the connection in the local sqlyog
# sqlyog connects to 3310 -- 3310 of the server and 3306 mapping in the container. At this time, we can connect
# Create a database in the local test and check whether the mapped path is Ok
Suppose we delete the container and find that the data volume we mounted locally is still not lost, which realizes the container persistence function

Named and anonymous mount
Anonymous mount
# Anonymous mount
-v Road strength in container:
docker run -d -P --name nginx01 -v /etc/nginx nginx

# View all volume s
docker volume ls
# It is found here that this is anonymous mount. In -v, we only write the path inside the container, not the path outside the container

Named mount
# Pass -v volume name: path in container
docker run -d -P --name nginx02 -v juming-nginx:/ect/nginx nginx
# Take a look at this volume
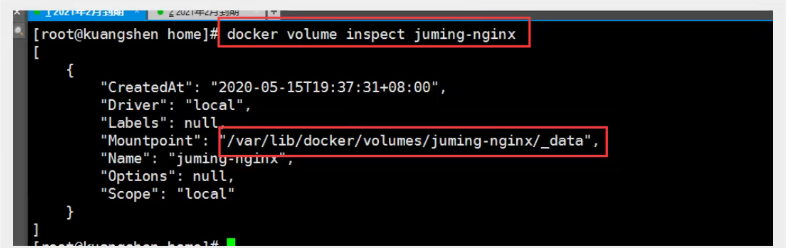
All volumes in the docker container are in / var / lib / docker / volumes / xxx without a specified directory/_ data
We can easily find one of our volumes through named mount, which is used in most cases
How to determine whether it is a named mount or an anonymous mount or a specified path mount
-v path # anonymous mounting in container
-v volume name # named mount
-v / host path: the path # specified in the container is mounted
expand
# Change the read and write permissions through - v path in container: ro rw
ro   readonly    # read-only
rw   readwrite   # Readable and writable

# Once the container permission is set, the container will limit the content we mount
docker run -d -P --name nginx02 -v juming-nginx:/etc/nginx:ro nginx
docker run -d -P --name nginx02 -v juming-nginx:/etc/nginx:rw nginx

# As long as ro sees ro, it means that this path can only be operated by the host, and it cannot be operated inside the container
First acquaintance with Dockerfile
Dockerfile is the build file and command script used to build the docker image
Through this script, you can generate an image. The image is layer by layer. The script commands one by one, and each command is a layer
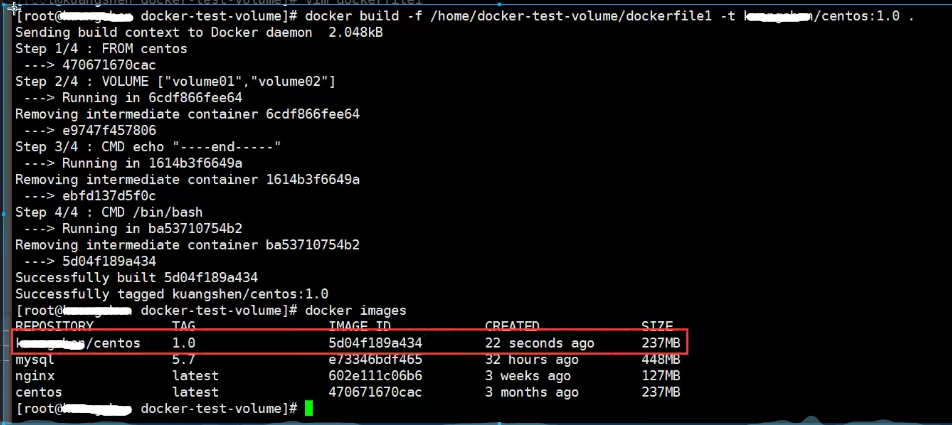
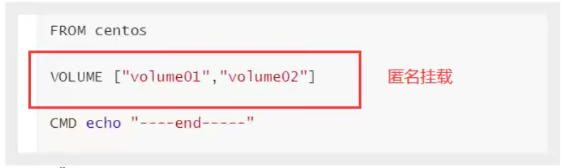
# Create a Dockerfile file whose name can be randomly suggested
# Content instruction (uppercase) parameter in file
FROM centos

VOLUME ["volume01","volume02"]

CMD echo "-----end-----"

CMD /bin/bash
# Each command here is a layer of image
docker build -f /home/docker-test-volume/dockerfile1 -t test/centos:1.0 .
# Start your own container
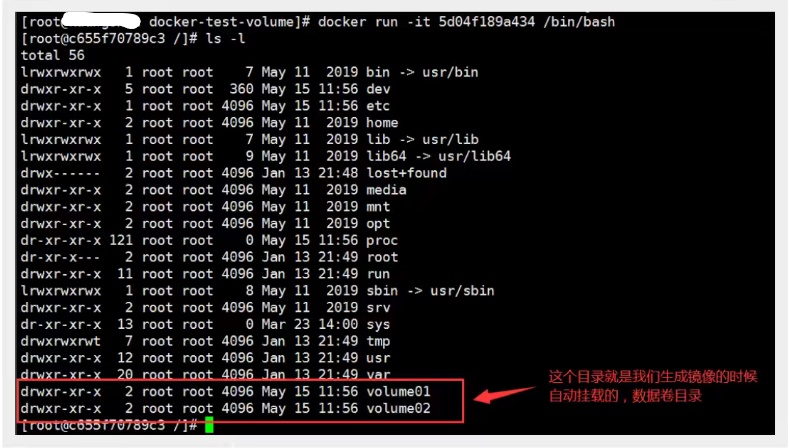
This volume must have a synchronized directory with the outside
Check the path of the volume mount
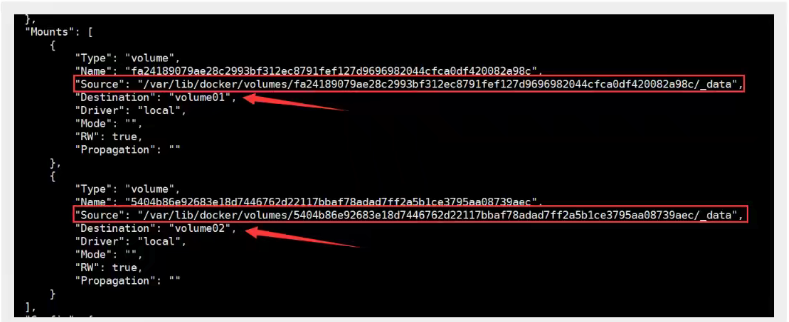
Test whether the files just synced out
We will use this method a lot in the future, because we usually build our own images
Assuming that there is no mounted volume when building the image, manually mount -v volume name: path in container
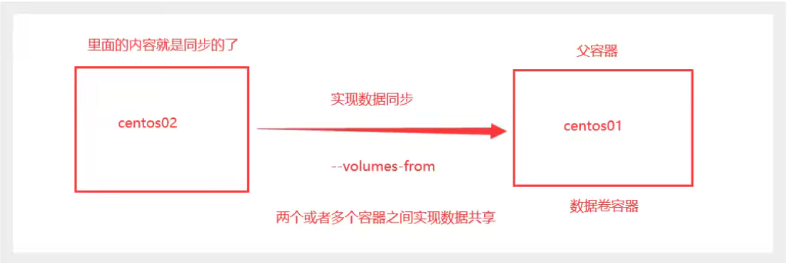
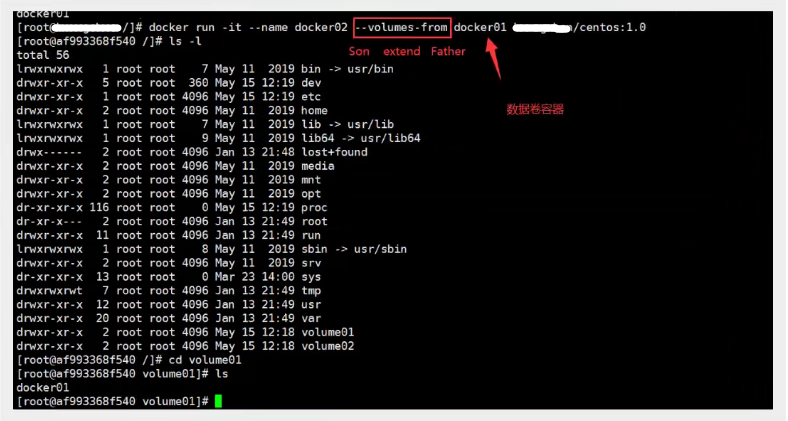
Data volume container
Multiple mysql synchronization data
# Start three containers and start through the image we just wrote

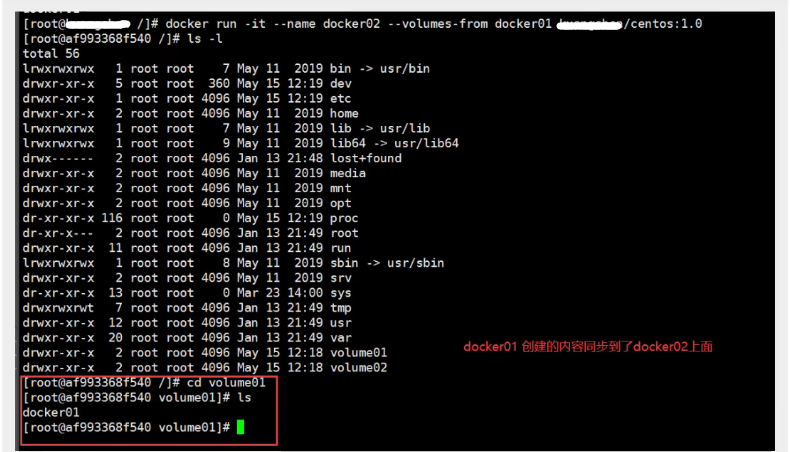
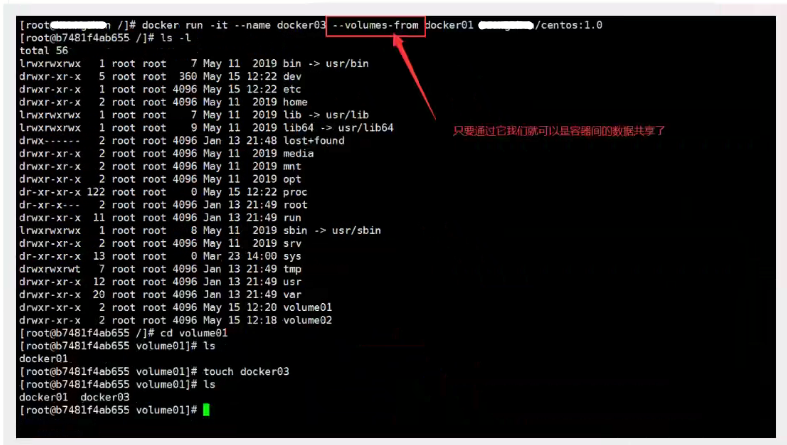
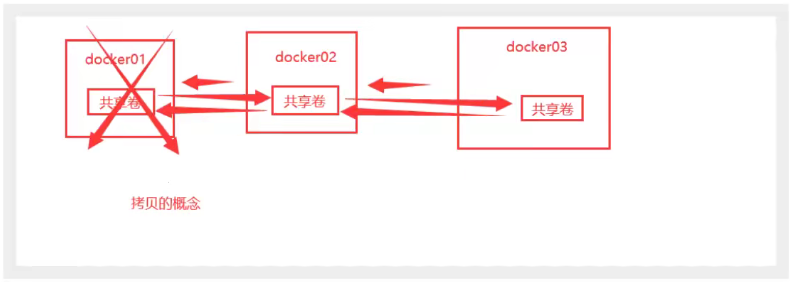
# After testing, you can delete docker01 and check whether docker02 and docker03 can still access this file
# The test is still accessible
Data sharing with multiple mysql
# At this time, the data synchronization between the two containers can be realized
docker run -d -p 3310:3306 -v /etc/mysql/conf.d -v /var/lib/mysql -e MYSQL_ROOT_PASSWORD=123456 --name mysql01 mysql:5.7

docker run -d -p 3310:3306 -e MYSQL_ROOT_PASSWORD=123456 --name mysql02 --volumes-form mysql01 mysql:5.7
Conclusion:
For the transfer of configuration information between containers, the life cycle of data volume containers continues until no containers are used.
But once you persist to the local, the local data will not be deleted at this time.