By Stack Thomas
Translator: Crescent Moon
Produced by | CSDN (ID: CSDNnews)
Note: home network security is not considered in this project. You should use a password and make sure the network is inaccessible.
I don't have any experience in IT, but after studying for some time, I successfully completed the project, which is due to several open source projects mentioned in this article.
Hardware required for the project:
- Raspberry pie, this is a small computer (I use Zero V2, but any raspberry pie that supports WiFi can)
- WS2812 full color LED light strip (I use 5 light strips with 50 light beads in series)
- 5V power adapter (ensure that the power adapter can provide enough power for the LED light band, I used multiple USB chargers)
- Green electrical tape (used to hide the red, green and white wires on the light strip)
- A box for these devices
Step 1: set up raspberry pie
Install the raspberry pie system and install node red and the necessary software packages.
Install the raspberry pie system. If you use headless settings, make sure SSH or VNC is enabled.
You can enter raspberry pie in any way (SSH is the easiest way for headless settings)
Make sure the raspberry pie system is the latest version.
Install node red using the following command:
bash <(curl -sLhttps://raw.githubusercontent.com/node-red/linux-installers/master/deb/update-nodejs-and-nodered)
Set node red to run automatically when the computer starts:
sudo systemctl enable nodered.service
If you want to use LED HAT to control the light, you need to install a PiCube 4x4x4 LEDcube HAT dedicated to raspberry pie, which is a monochrome (red, blue and green) led device that can control 64 light beads.
Install the PiCube onto the 40 pin GPIO pin of raspberry pie.
Open the Git Bash console and download the code base using the following command:
git clone https://github.com/sbcshop/PiCube.git
The code will be downloaded to the home/pi directory. Use the ls command to view the directory list, and then use the cd command to enter the directory:
cd PiCube
demo.py is the sample code for PiCube. Run the following command to test and try PiCube.
python3 demo.py
This code will display different light effects on the PiCube. You can also modify the code to create your own effects.
Step 2: set node red
We can use the raspberry pie where node red is located( http://localhost:1880 )Or any computer on the local network. If accessed from another computer, you should use the host name or IP address of the raspberry pie, i.e http://hostname >:1880. Execute hostname -i on raspberry pie to see the IP address.
We need to add two other modules to control the LED. We need to add:
- node-red-dashboard
- node-red-node-pi-neopixel
If you want to use the command line to add, just find the command through the link and make sure it is placed in the correct directory so that node red can find it. Alternatively, you can add through the UI: - Click the Menu button in the upper right corner
- Select Manage palette from the drop-down menu
- Select the Install tab
- Enter node red dashboard in the search box
- Click install
- When finished, enter node red node PI neopixel
- Click install
- Finally, click Close
Now node red should have all the modules required to light up the light band. next: - Click Menu in the upper right corner
- Select Import from the drop-down menu
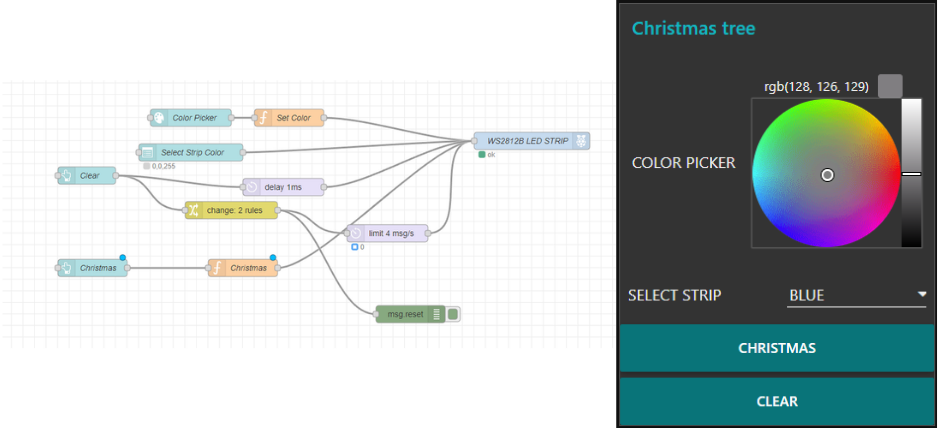
Enter the following code:
[{"id":"85fce9c6579baaa0","type":"tab","label":"ChristmasLightsSimple","disabled":false,"info":"","env":[]},{"id":"cc28a93a30fc342a","type":"ui_colour_picker","z":"85fce9c6579baaa0","name":"ColorPicker","label":"COLORPICKER","group":"d2ace9cc.9f3998","format":"rgb","outformat":"string","showSwatch":true,"showPicker":true,"showValue":true,"showHue":false,"showAlpha":false,"showLightness":true,"square":"false","order":1,"width":0,"height":0,"passthru":true,"topic":"","x":370,"y":360,"wires":[["024561a721d6f79c"]]},{"id":"024561a721d6f79c","type":"function","z":"85fce9c6579baaa0","name":"SetColor","func":"var count = global.get('count')||0;\nmsg.payload= msg.payload.replace(/[rgb()\\s]/g,\"\");\nif(count===0){\n msg.payload = msg.payload;\n}\nelse{\n msg.payload = (count-1) + \",\" +msg.payload;\n}\n\nreturnmsg;","outputs":1,"noerr":0,"x":540,"y":360,"wires":[["c0297b03d780b3ae"]]},{"id":"693df877b38a2cf1","type":"ui_button","z":"85fce9c6579baaa0","name":"Clear","group":"d2ace9cc.9f3998","order":6,"width":0,"height":0,"passthru":false,"label":"CLEAR","tooltip":"","color":"","bgcolor":"","icon":"","payload":"0,0,0","payloadType":"str","topic":"","x":190,"y":460,"wires":[["a96f4433de81777e","663a12cf6cede0ef"]]},{"id":"206d8115b7db9943","type":"ui_dropdown","z":"85fce9c6579baaa0","name":"SelectStrip Color","label":"SELECT STRIPCOLOR","tooltip":"","place":"SELECTSTRIP COLOR","group":"d2ace9cc.9f3998","order":4,"width":0,"height":0,"passthru":true,"multiple":false,"options":[{"label":"RED","value":"255,0,0","type":"str"},{"label":"GREEN","value":"0,255,0","type":"str"},{"label":"BLUE","value":"0,0,255","type":"str"},{"label":"WHITE","value":"255,255,255","type":"str"},{"label":"PURPLE","value":"255,0,255","type":"str"},{"label":"CYAN","value":"0,255,255","type":"str"},{"label":"YELLOW","value":"255,255,0","type":"str"}],"payload":"","topic":"","topicType":"str","className":"","x":370,"y":420,"wires":[["c0297b03d780b3ae"]]},{"id":"9d8f5d23eeba3096","type":"delay","z":"85fce9c6579baaa0","name":"","pauseType":"rate","timeout":"1","timeoutUnits":"seconds","rate":"4","nbRateUnits":"0.0101","rateUnits":"second","randomFirst":"1","randomLast":"5","randomUnits":"seconds","drop":false,"outputs":1,"x":710,"y":560,"wires":[["c0297b03d780b3ae"]]},{"id":"c0297b03d780b3ae","type":"rpi-neopixels","z":"85fce9c6579baaa0","name":"WS2812BLEDSTRIP","pixels":"250","bgnd":"","fgnd":"","wipe":"0","mode":"pixels","rgb":"grb","brightness":"40","gamma":true,"x":960,"y":400,"wires":[]},{"id":"40080ab07f9975a1","type":"ui_button","z":"85fce9c6579baaa0","name":"Christmas","group":"d2ace9cc.9f3998","order":5,"width":0,"height":0,"passthru":true,"label":"Christmas","tooltip":"","color":"","bgcolor":"","icon":"","payload":"true","payloadType":"bool","topic":"","x":200,"y":620,"wires":[["5db1f6bc1f363b40"]]},{"id":"34273e36c70ad99f","type":"debug","z":"85fce9c6579baaa0","name":"","active":true,"tosidebar":true,"console":false,"tostatus":false,"complete":"reset","targetType":"msg","x":750,"y":700,"wires":[]},{"id":"5db1f6bc1f363b40","type":"function","z":"85fce9c6579baaa0","name":"Christmas","func":"varnumberOfLEDs = 250;\n\nvar j = 0\n\nwhile (j<numberOfLEDs+1){\n var setColor = j+','+ 255 +','+ 0 +','+0;\n node.send({payload:setColor});\n j++;\n var setColor =j+','+ 0 +','+ 255 +','+ 0;\n node.send({payload:setColor});\n j++;\n var setColor =j+','+ 0 +','+ 0 +','+ 255;\n node.send({payload:setColor});\n j++;\n}","outputs":1,"noerr":0,"initialize":"","finalize":"","libs":[],"x":460,"y":620,"wires":[["c0297b03d780b3ae"]]},{"id":"a96f4433de81777e","type":"change","z":"85fce9c6579baaa0","name":"","rules":[{"t":"set","p":"reset","pt":"msg","to":"payload","tot":"msg"},{"t":"delete","p":"payload","pt":"msg"}],"action":"","property":"","from":"","to":"","reg":false,"x":440,"y":520,"wires":[["9d8f5d23eeba3096","34273e36c70ad99f"]]},{"id":"663a12cf6cede0ef","type":"delay","z":"85fce9c6579baaa0","name":"","pauseType":"delay","timeout":"1","timeoutUnits":"milliseconds","rate":"1","nbRateUnits":"1","rateUnits":"second","randomFirst":"1","randomLast":"5","randomUnits":"seconds","drop":false,"outputs":1,"x":530,"y":480,"wires":[["c0297b03d780b3ae"]]},{"id":"d2ace9cc.9f3998","type":"ui_group","name":"Christmastree","tab":"14b7bf29.77ead1","order":1,"disp":true,"width":"6","collapse":false},{"id":"14b7bf29.77ead1","type":"ui_tab","name":"Lights","icon":"dashboard","order":1,"disabled":false,"hidden":false}]
- Click Import
- You should now be able to see the flow in the figure
- Click Deploy in the upper right corner
Open a new browser window to access http://hostname >: 1880 / UI (change hostname > to the IP address of raspberry pie). You should now see the user interface.
Note: in this code, the light intensity is set to 40%, which can limit the power of the power supply and the brightness is good. If you want to change this value, double-click the RPI neopixels node at the end of the process and modify it in the input box.
Step 3: Connect
Make sure to turn off raspberry pie before connecting any wires! The connection of LED is very simple. You only need to connect the ground wire and signal wire of LED. But make sure the connection is correct. My connection method is as follows:
- Power supply - red
- 6 feet of raspberry pie - ground wire - white
- 12 pins of raspberry pie (GPIO 18) - signal line - green (this is why audio can only be output through HDMI, because audio also uses the same pin)
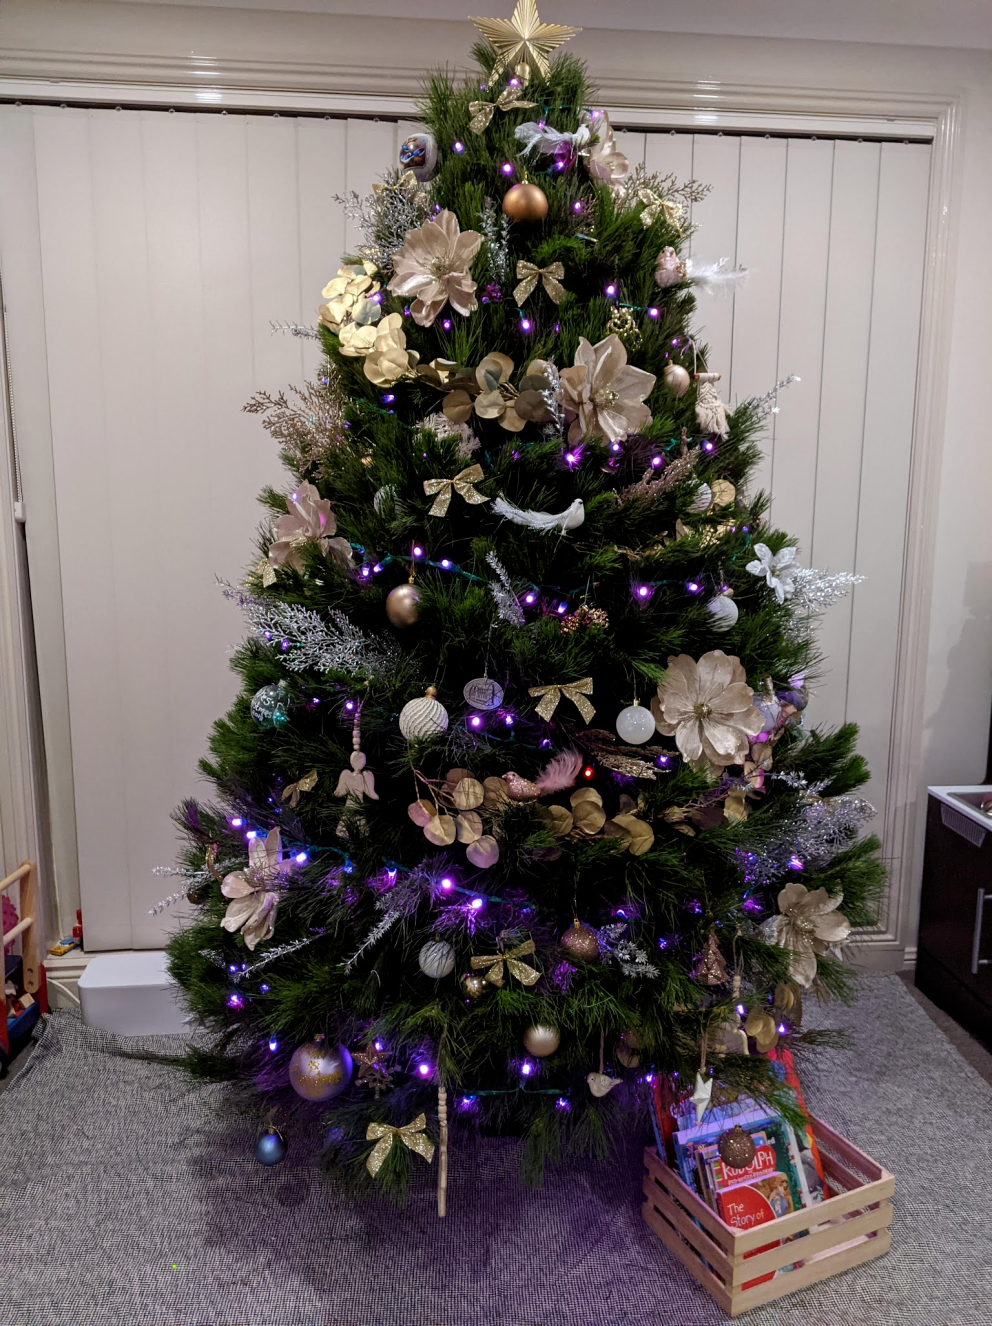
Now you can connect the power to the LED strip. Depending on the length of the light strip, you may need to connect multiple power supplies at multiple points of the light strip (just hide behind the Christmas tree).
Any exposed wires shall be insulated with electrical tape, and any equipment shall be inaccessible to children.
After setting, start raspberry pie and light belt. visit http://hostname?:1880/ui (change the hostname > to the IP address of your raspberry pie). Click anywhere in the color ring to change the light color.
Reference link:
- https://shopmakergenix.blogspot.com/2021/12/neopixel-christmas-tree-lights.html