Create a comfortable writing environment (Hexo)
use Hexo Toss and run the static website for a long time. I haven't sorted out the construction experience in this regard. Recently, I'll write about the construction process of this website and the way of updating articles. Well, the main thing is to record the white whoring posture of various resources.
Original intention of the station
The original intention of building the station is to record the technology, knowledge or pits you have learned, so as to deepen your impression.
At the same time, we will also reprint the good articles we see to avoid looking everywhere when we use them again later.
The content is mainly technology accumulation, and it does not rule out writing some content about life or other topics.
survey
This site is used Hexo Build a pure static website.
demand
- Free (i.e. white whoring). At present, all resources such as drawing bed, hosting service and SSL Certificate (except the purchase of domain name) are free programs.
- Need to meet Blog and special column In order to meet this demand, these two contents have been selected hexo-theme-stellar Theme.
- Need to be able to support the idea of publishing fragmentation( dynamic).
- Automatic publishing only needs to care about the process of writing, submitting, constructing and publishing the article content GitHub Action Do it.
Adopt the scheme of two-line deployment
- Use of foreign routes vercel Free, you can customize the domain name. The global CDN speeds up domestic access, and the SSL certificate is automatically generated. Now it's covered by a wall.
- Use of foreign lines Netlify It's free. It hasn't been built yet.
- Use of foreign lines cloudflare This should be the best solution at present. For various reasons, this site does not use this one.
- Domestic route use Cloud development CloudBase Each Tencent cloud account can open a volume based cloud development environment( Cost related FAQ s,Free Quota ), the small station is enough. The most important thing is that CloudBase also supports filing. After the free quota is used up, it is charged according to the amount. A few cents a day is enough for a small station.
While the above scheme is free, it also maintains a fairly good access speed. There is no need to purchase servers to reduce unnecessary operation and maintenance work.
White whoring drawing bed
There are many white whoring beds, such as:
- GitHub drawing bed
- Gitee drawing bed
- SMMS
- Do you want to go to the drawing bed
- Micro Tumi
- ...
In order to facilitate the management of picture resources, this site selects GitHub picture bed and cooperates with jsdelivr for CDN acceleration.
Specific white whoring posture: Using GitHub as a drawing bed.
Add a dynamic page
WeChat's circle of friends has been flooded with advertising information such as micro business, real estate agents, headhunting consultants, etc., and has gradually left the social attributes of acquaintances. It needs to find a clean place to release fragmented ideas. So it is reformed according to this theme, adding dynamic pages to send dynamic to static blog through official account or IOS shortcut.
For the specific posture of building dynamic pages, please refer to this article: Use "official account" or "IOS" to send "dynamic" to hexo blog. , this method requires a Cloud development environment
stay Stellar Adding dynamic pages to a theme
The premise of this method is that the bber cloud function has been successfully deployed in cloud development. For details, please refer to Use "official account" or "IOS" to send "dynamic" to hexo blog..

Step 1: add dynamic Rendering script for page
Create a new talking. In the themes/stellar/layout folder EJS file.
Check talking EJS content
code0
Step 2: configure cloud development parameters in the topic configuration file
In the theme configuration file themes / stellar/_ config. Configure cloud development parameters for dynamic pages in YML. Please refer to Cloud development related documents.
The specific configuration contents are as follows:
code1
Step 3 configuration menu
Configure the dynamic page to your favorite place in the theme configuration file, such as:
code2
GitHub warehouse management
How to manage article source files and topic files?
Currently, three warehouses are used to save source files:
- The article markdown source file is saved to GitHub's private warehouse because it doesn't want to be disclosed directly
- Theme, from hexo-theme-stellar fork to his warehouse
- Hexo, related documents, kept in a public warehouse
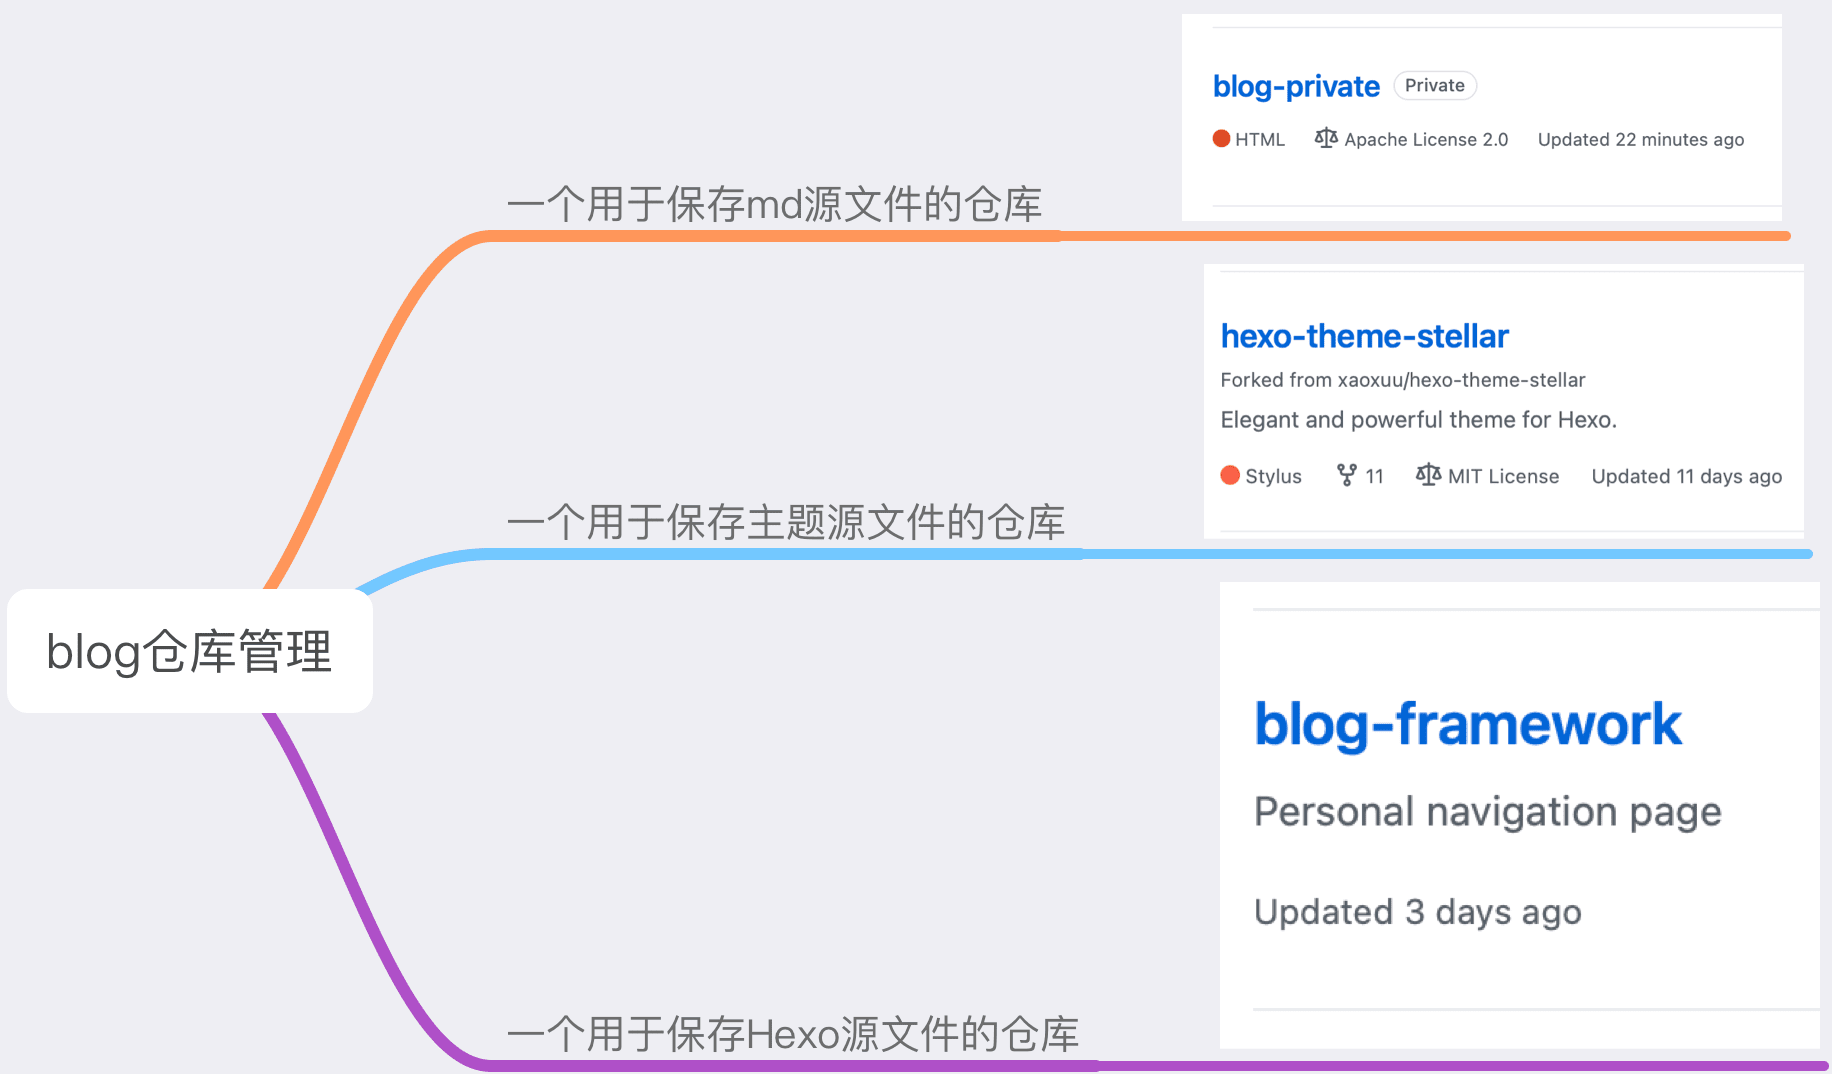
File management in Idea:
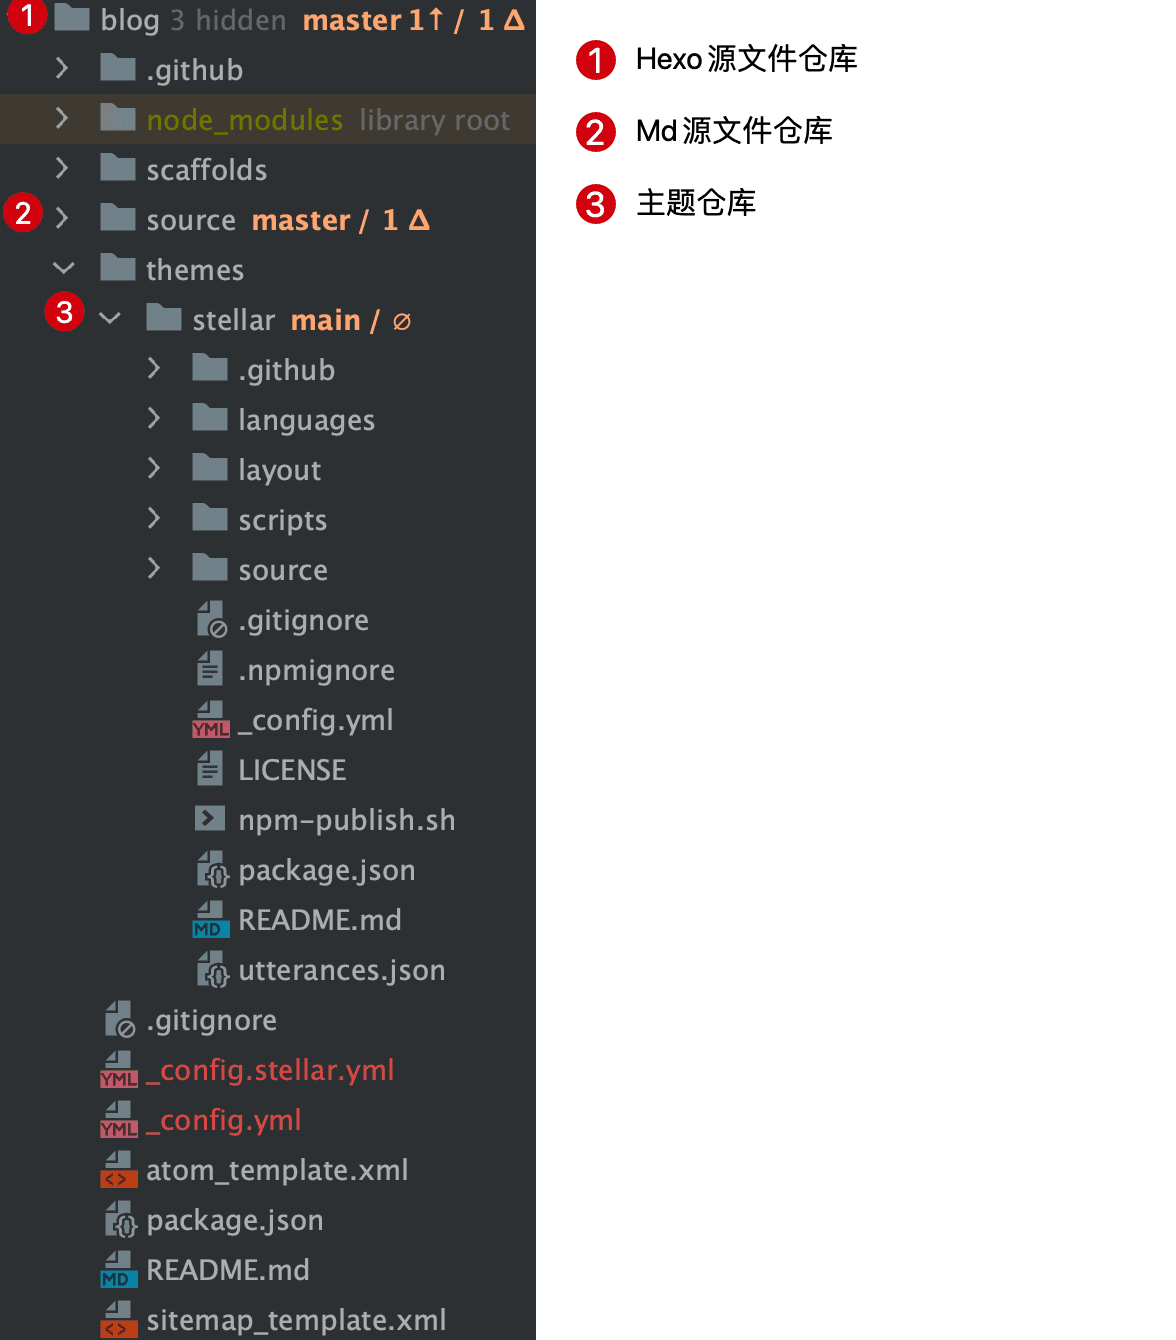
The advantage of this is that the markdown source files and some configuration information that should not be disclosed are stored in the private warehouse and will not be disclosed directly. fork, a theme warehouse, can also obtain the latest official features while secondary development. Of course, the drawing bed is also kept in a separate warehouse.
After tossing about the topic in the follow-up, with GitHub Action, you only need to check out the markdown warehouse locally and write & submit it.
Publish to Vercel
Using the vercel scheme, it seems that it will be blocked by the wall due to force majeure.
Why Vercel
CloudFlare's domestic delay and speed of accelerating Github Pages are not optimal. It happens that Vercel can also accelerate Github Pages. Moreover, CloudFlare needs to change the DNS service provider of the domain name, which can't be accepted by OCD (well, I haven't studied this carefully).
Compared with Netlify, Vercel CDN is widely distributed and free of charge. The free Vercel provides free traffic for users, which is the same as Github Pages per month. Chinese mainland access sites are fast in Taiwan and have command line CLI. But there are many disadvantages: we can't insert code into Netlify like that.
Accelerating GitHub page with Vercel
prepare
- A GitHub Pages blog
- domain name
Register a Vercel account
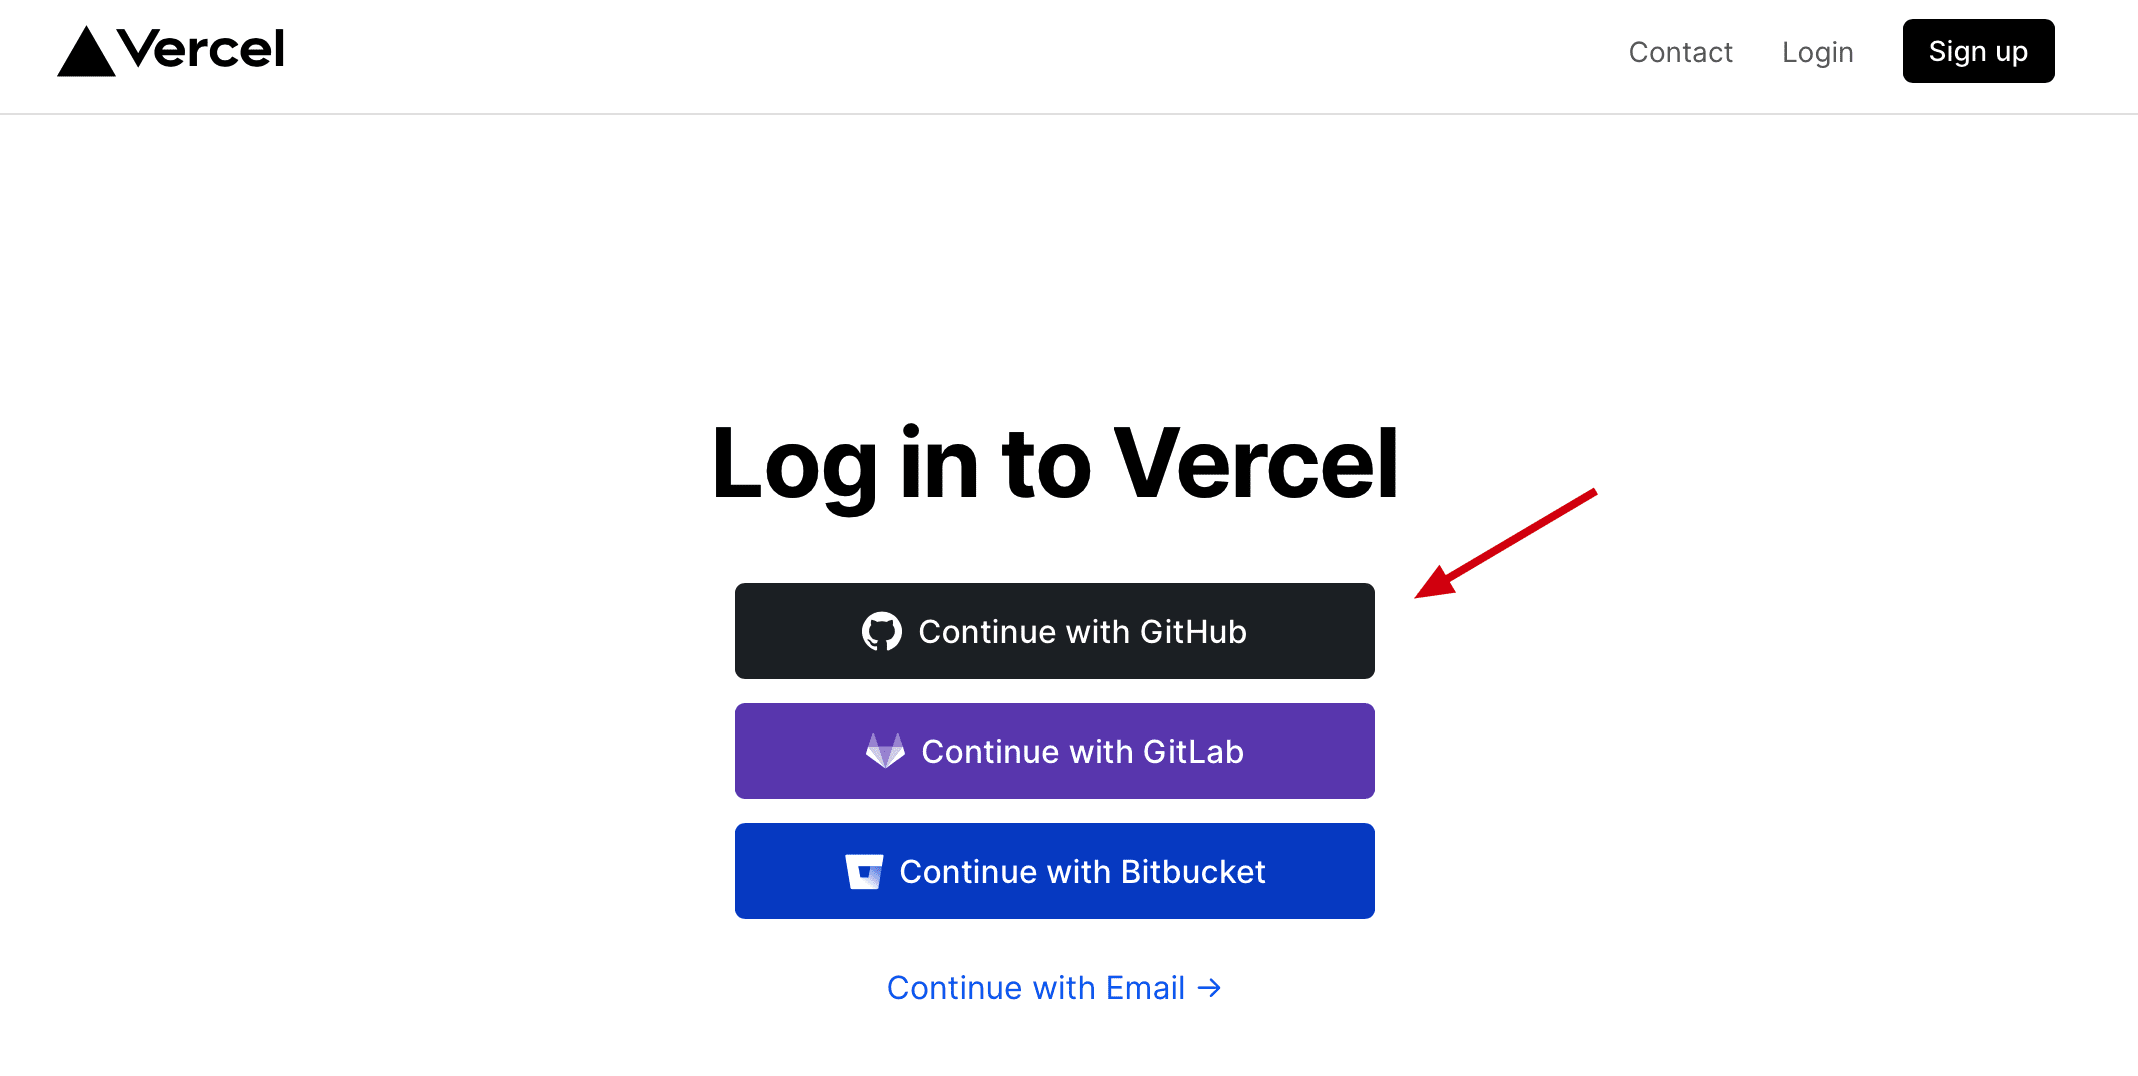
Here, I directly log in with GitHub and select the warehouse that needs authorization. If you need to provide email after logging in, you'd better provide gmail email (as the online Posts say).
Push the Hexo generated file to a GitHub repository
Prepare a warehouse for storing static files. Execute hexo clean & & hexo G & & hexo d to push the static site files generated by hexo to this warehouse.
Why not use the branch corresponding to github pages directly?
At the beginning, it was the same way to directly use the GH pages branch, but it seems that vercel will redeploy regardless of new submissions on each branch (without in-depth research), and directly use a separate warehouse due to obsessive-compulsive disorder.
Import static website warehouse in Vercel
The specific operation will not be repeated, There are a lot of online tutorials.
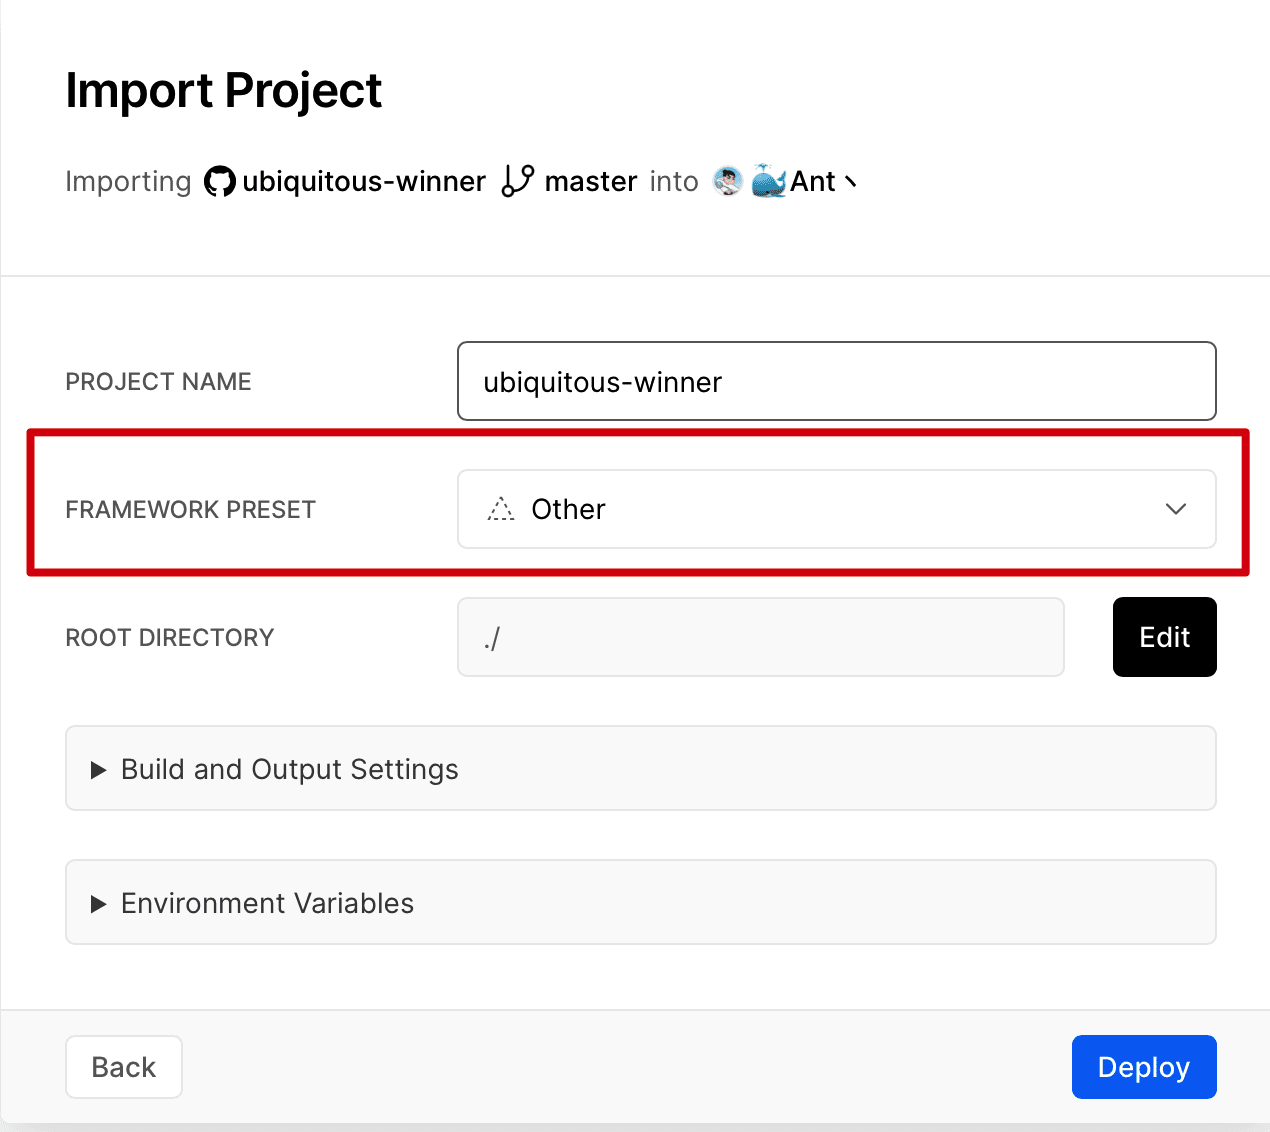
A little different is that because I use multiple warehouses to save the source files here, I choose Other when selecting the template.
In this way, the static website generated by Hexo can be directly deployed without executing the relevant scripts of Hexo.
After completion, you can directly pass through similar XXXX without accident vercel. App address to visit the website.
Custom domain name
Set custom domain name in Project Settings:
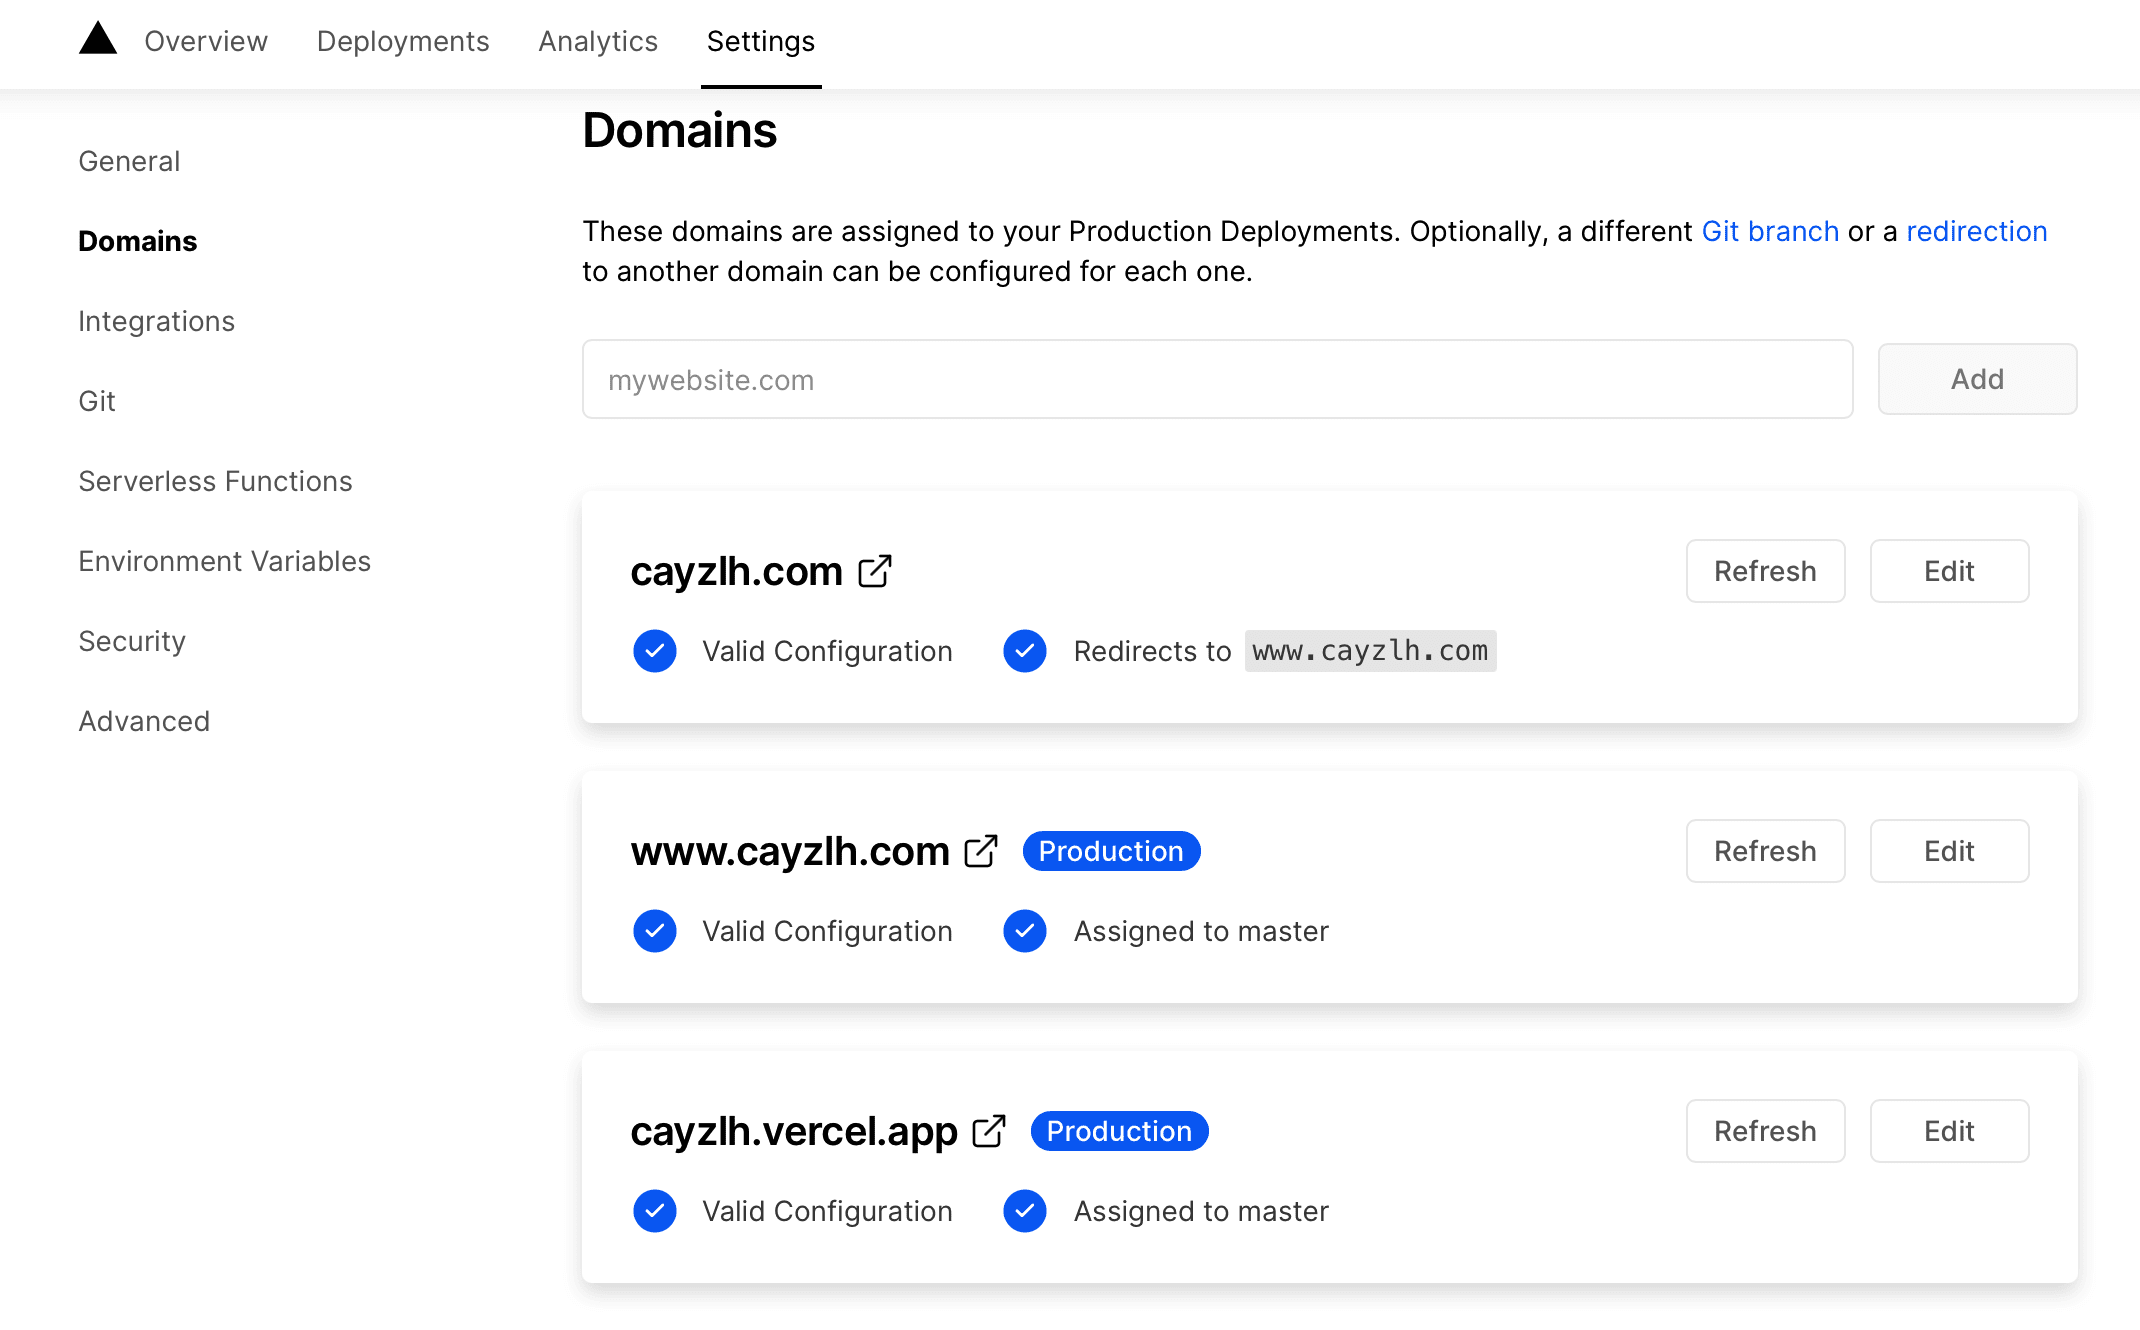
Follow the tips on the Vercel website to add relevant resolution records in the domain name resolution, and Vercel will automatically generate a free SSL certificate.
Publish to cloud development static website hosting
Through the CLI tool provided by cloud development, you can directly push the generated static website file from the command line to the static website hosting.
Preferred API key required
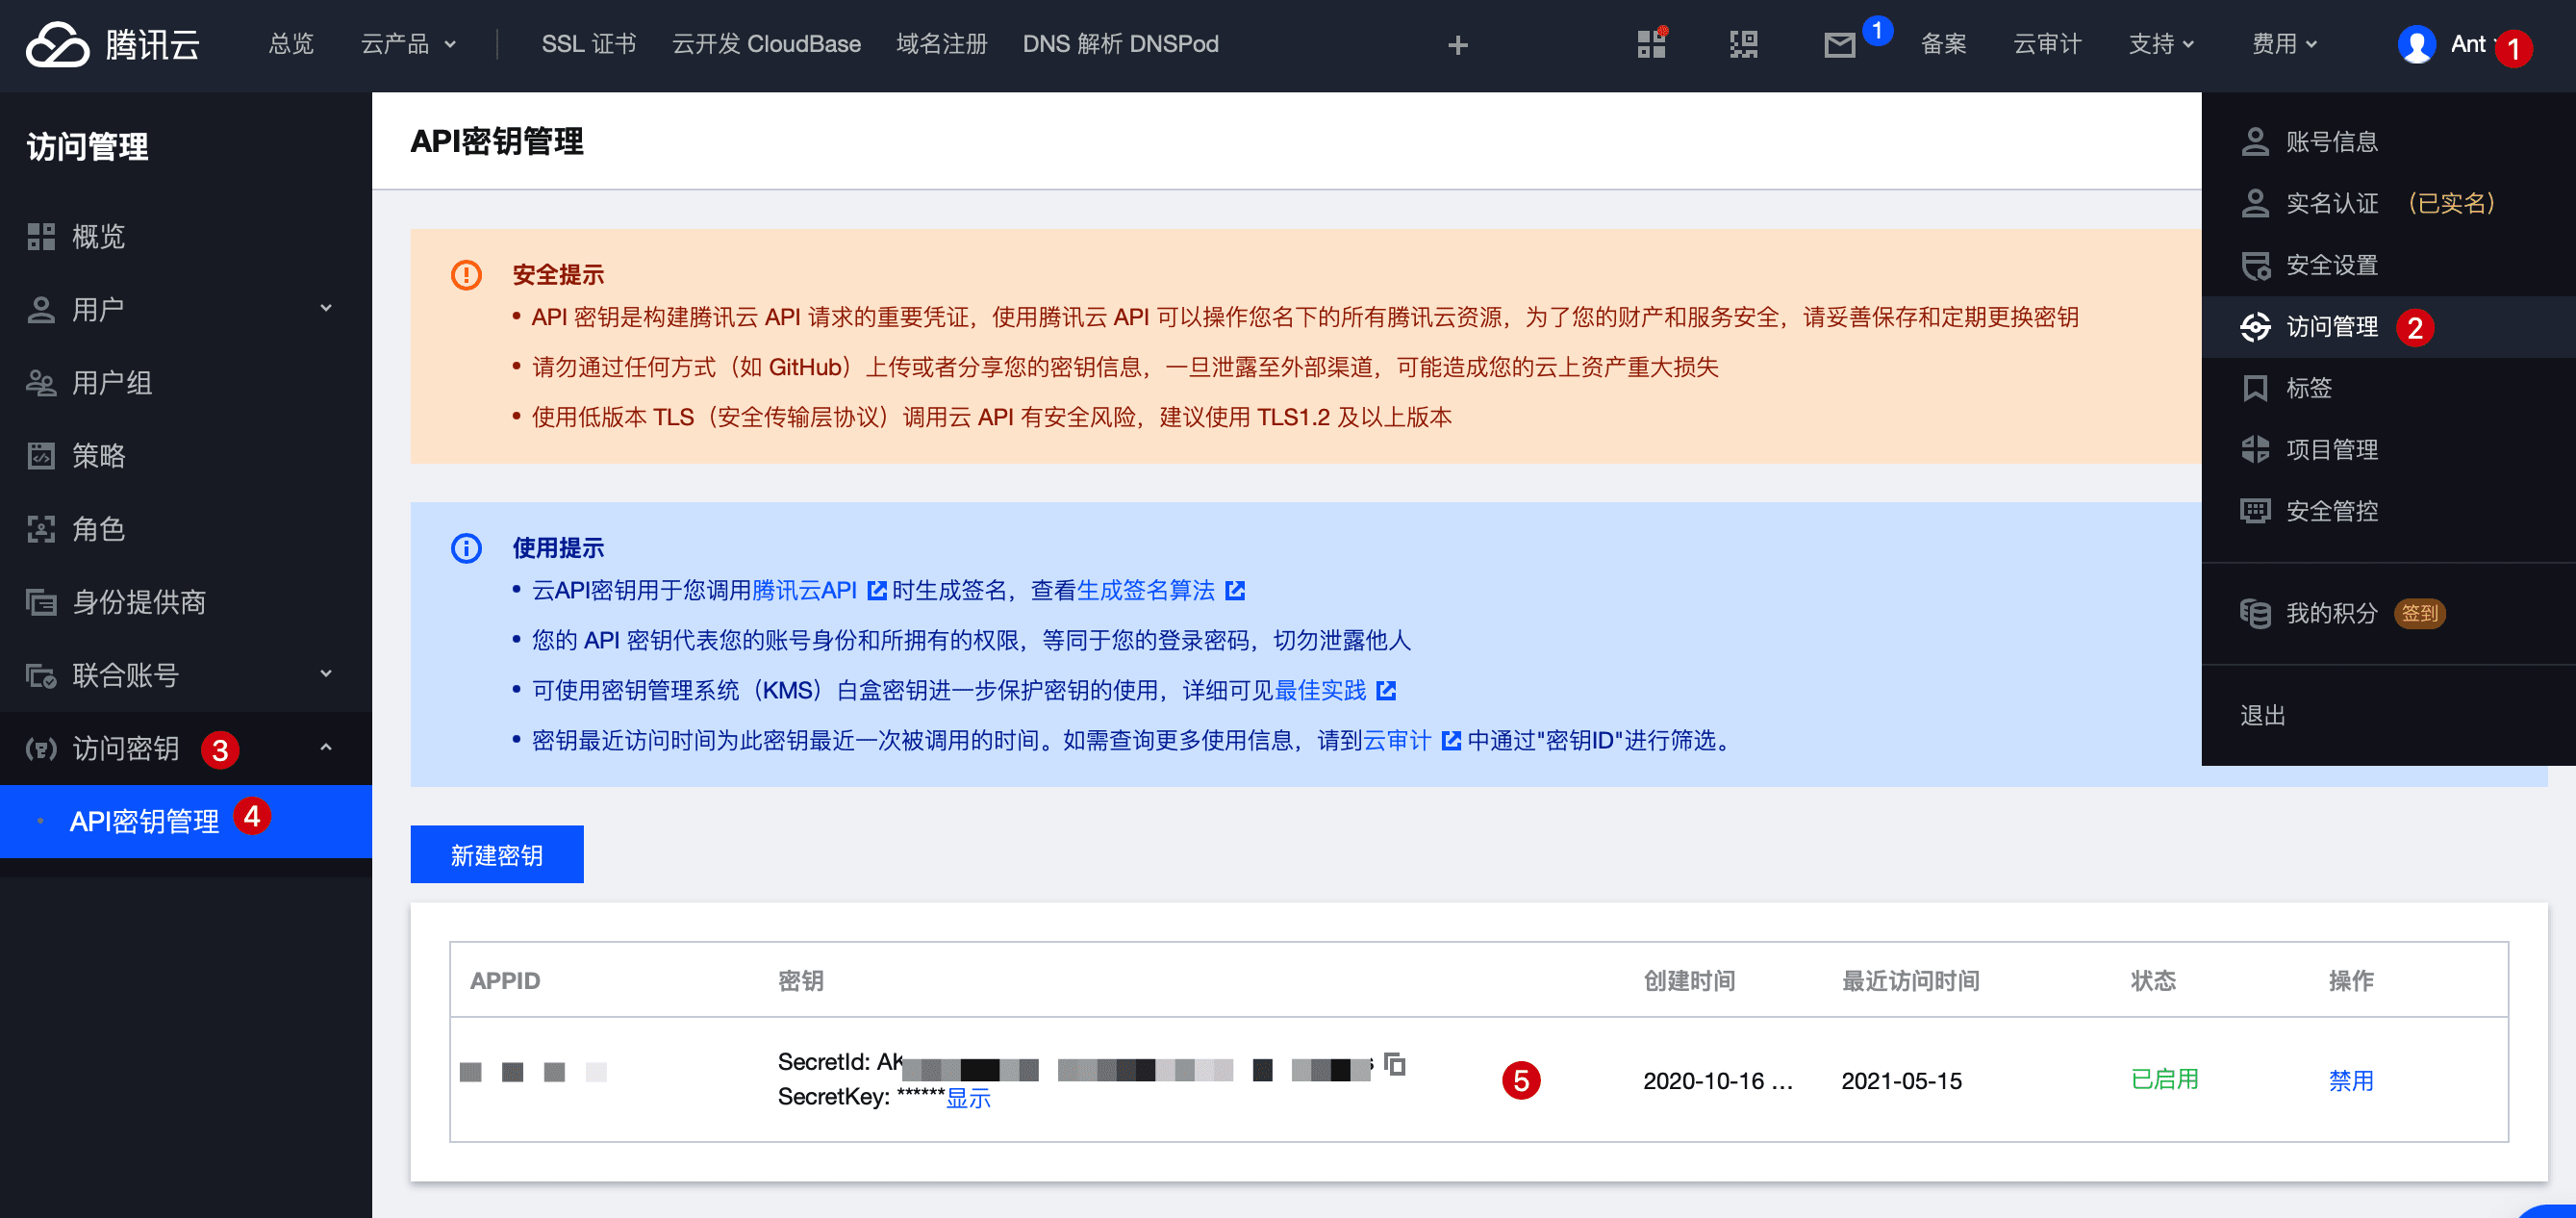
Get cloud development environment ID

Push to static website hosting
Log in to tcb at the terminal
tcb login --apiKeyId ${{secrets.SECRET_ID}} --apiKey ${{secrets.SECRET_KEY}}Generally, the login status can be saved for a long time after logging in once.
Execute the push instruction in the public folder generated by hexo
tcb hosting deploy ./public -r gz -e ${{secrets.ENV_ID}}After that, you can see the generated hexo static website resources in the static website hosting.
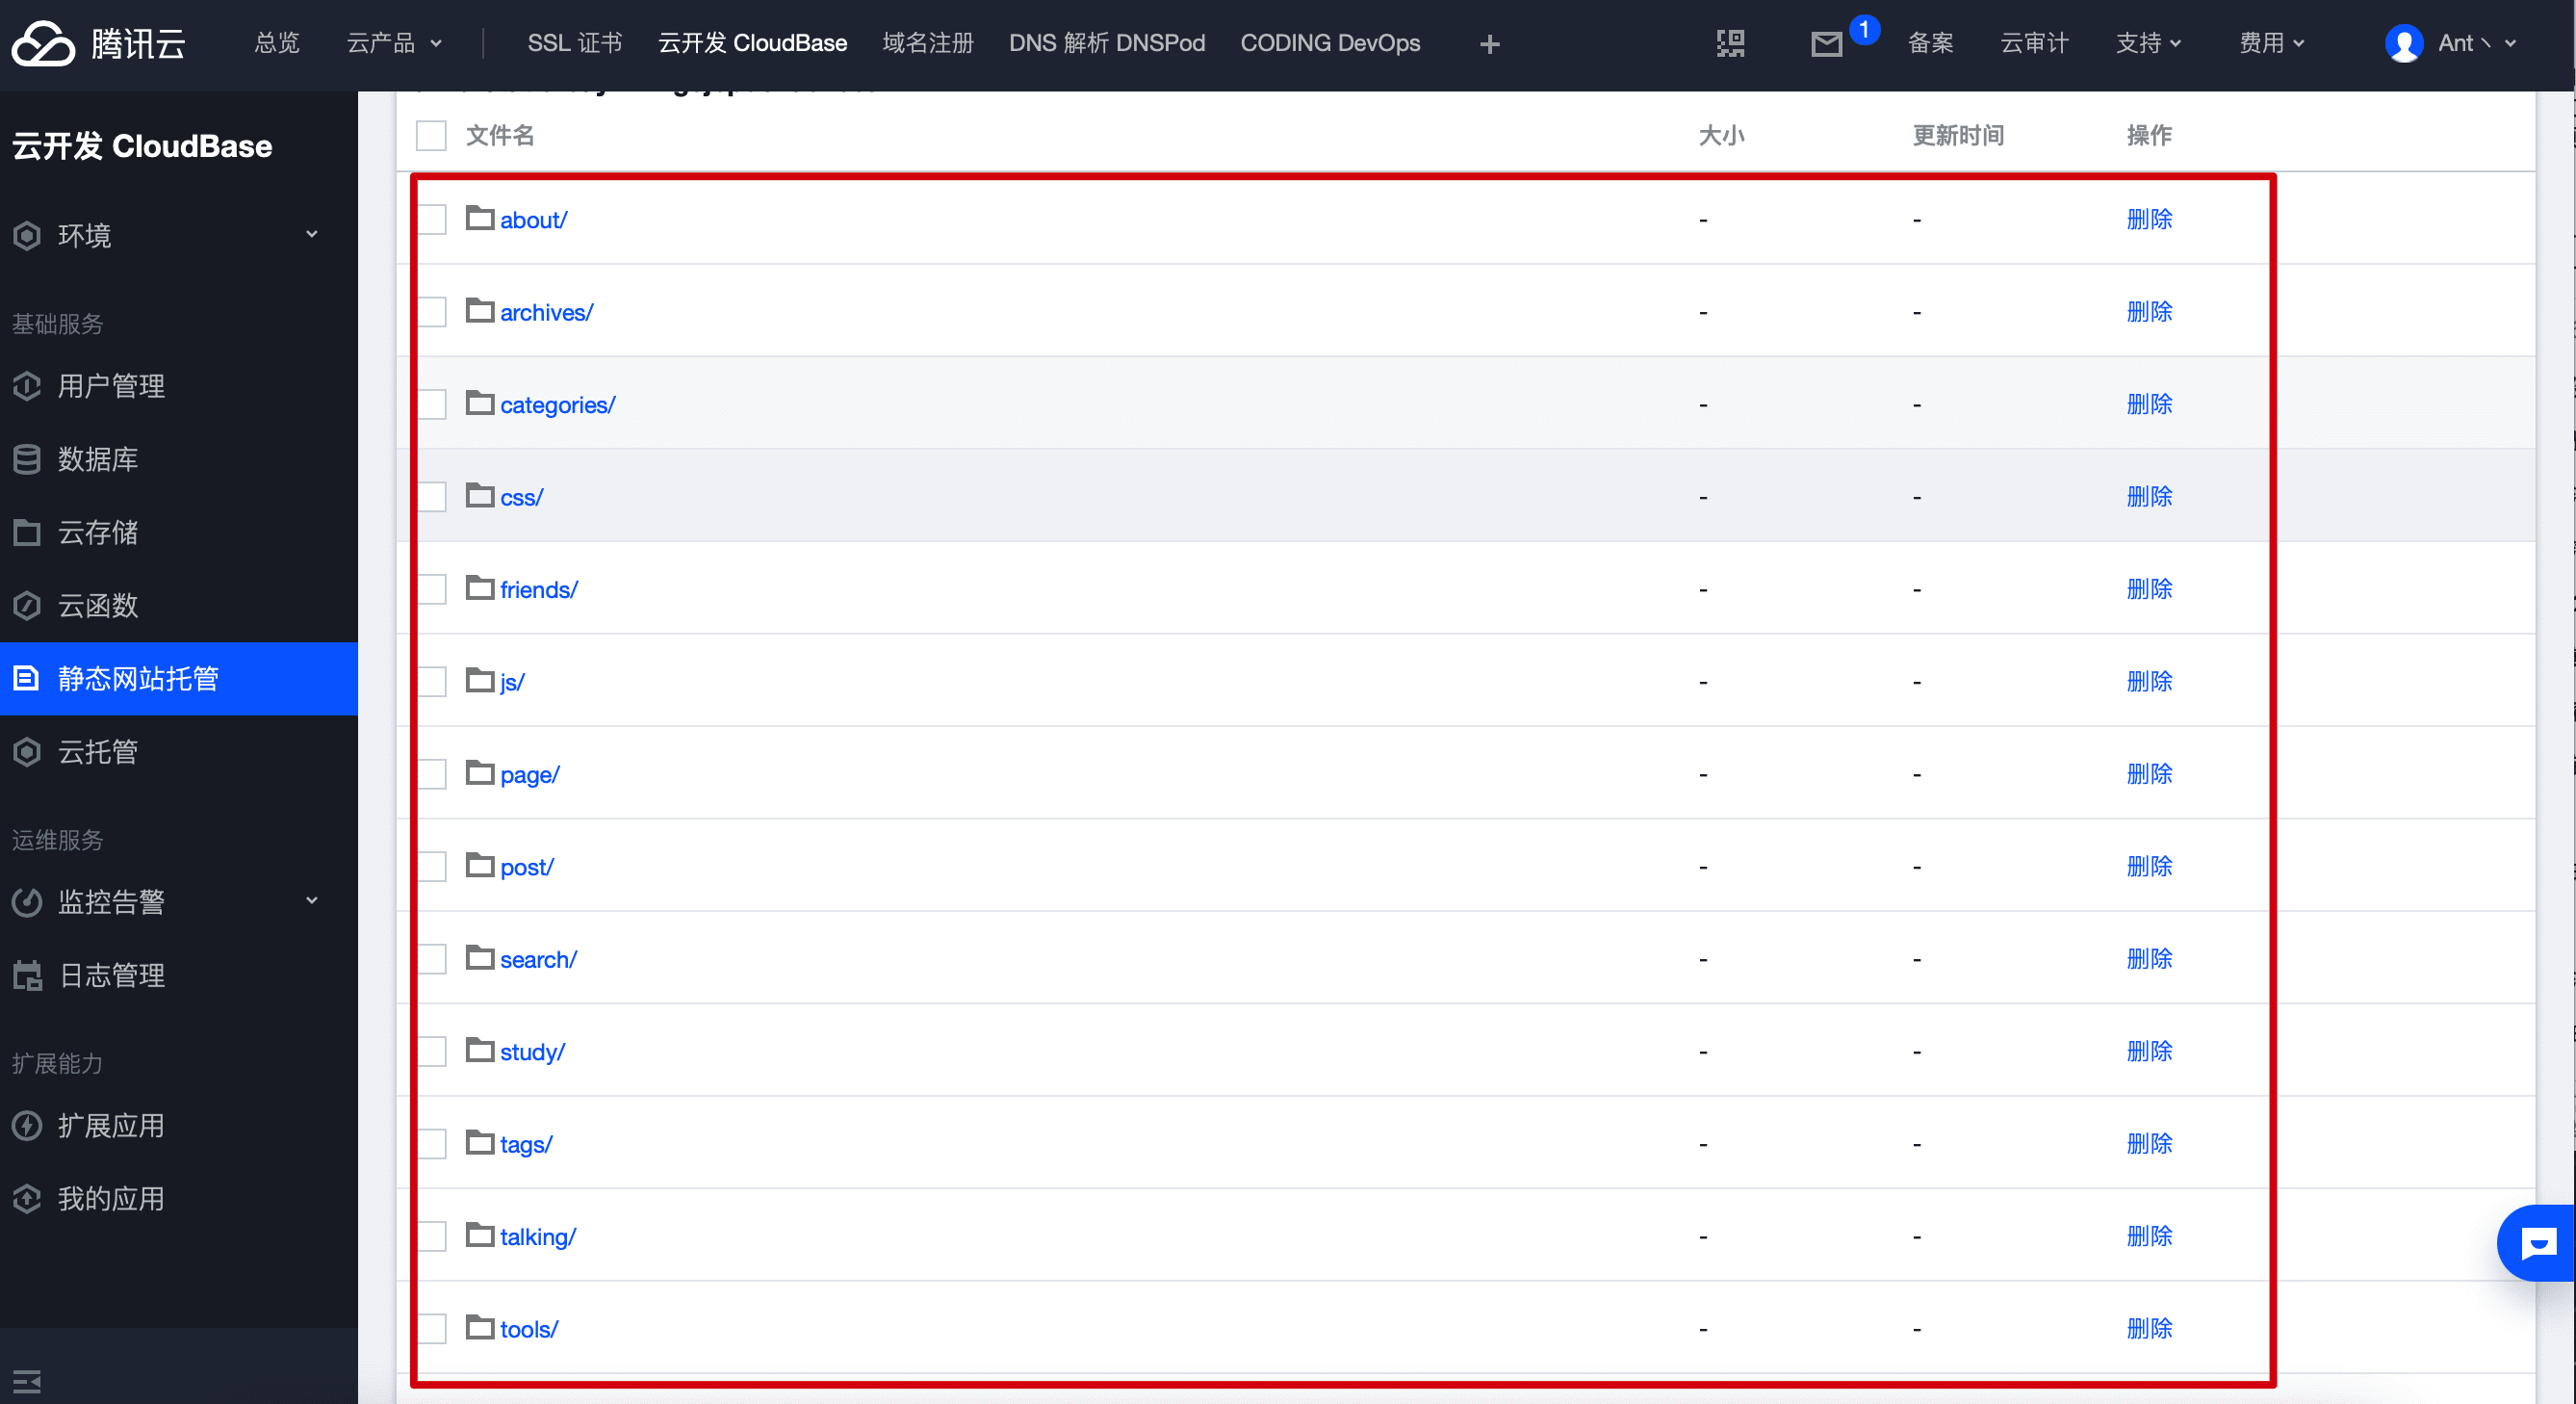
Turn Hexo's three combos into four combos
Modify package JSON file, add at scripts:
"scripts": {
  "build": "hexo generate",
  "clean": "hexo clean",
  "deploy": "hexo deploy",
  "server": "hexo server",
  "push": "tcb hosting deploy ./public -r gz -e YourDevID"
}
In this way, Hexo three company deployment can become four company deployment:
hexo clean && hexo g && hexo d && npm run push
After completion, the generated public files will be pushed to the github warehouse and static website hosting.
Static website hosting custom domain name
Configure a custom domain name in the basic configuration for domestic hosting. The premise is that the domain name should be filed and supported by cloud development Domain name filing service.
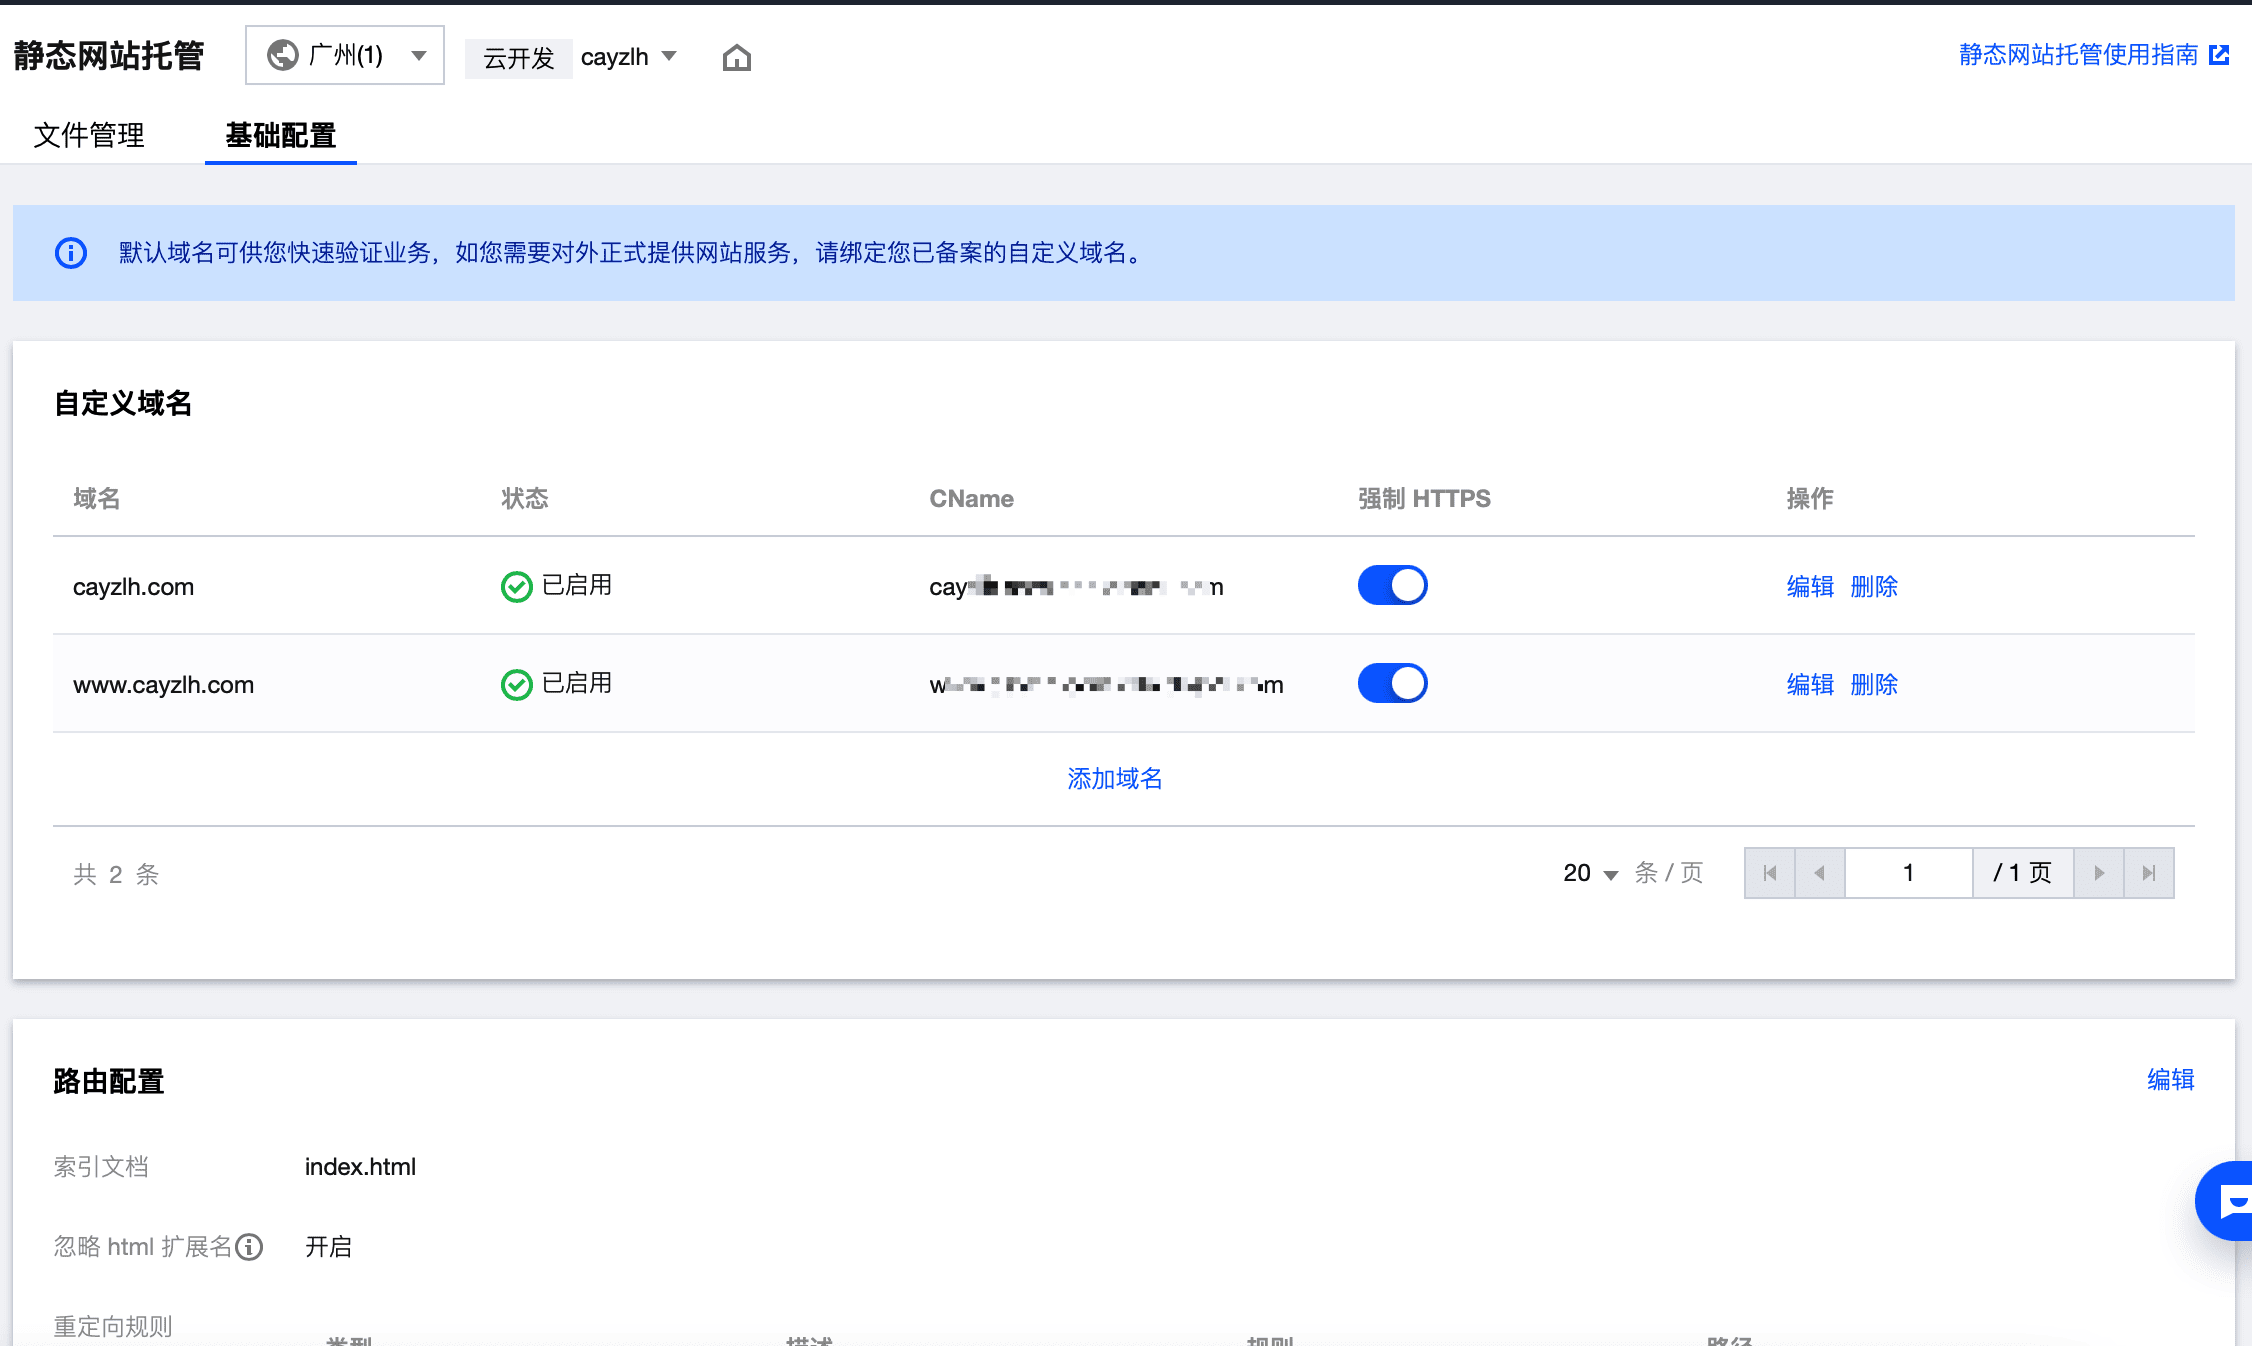
Other contents can be configured on this page, such as node cache configuration, browser cache configuration and access configuration (anti-theft chain configuration, IP black-and-white list configuration and IP access frequency limiting configuration).
Document reference:
GitHub Actions
About GitHub Actions
GitHub Actions It's GitHub's Continuous integration services , October 2018 introduction.
These days, I've been trying it. I think it's very powerful, creative and better than others Travis CI Play more.
Continuous integration consists of many operations, such as capturing code, running tests, logging in to remote servers, publishing to third-party services, and so on. GitHub calls these operations actions.
Many operations are similar in different projects and can be shared. GitHub noticed this and came up with a wonderful idea to allow developers to write each operation into a separate script file and store it in the code warehouse so that other developers can reference it.
If you need an action, you don't have to write a complex script by yourself. You can directly reference the actions written by others. The whole continuous integration process becomes a combination of actions. This is what makes GitHub Actions special.
For the above two deployment schemes, you need to manually execute Hexo Sanlian and cloud development CLI commands, and also need to install nodejs environment and cloud development tcb client locally. It is troublesome to publish after writing the article.
GitHub Actions solves this problem very well. Here is a record of how GitHub Actions on this site are configured.
How to use GitHub Actions to deploy hexo blog, there are a lot of questions on the Internet course , here we mainly record the separation of multiple folders GitHub warehouse management How to configure GitHub Actions in this scenario.
At present, there are three warehouses to manage my site:
- Blog private: a private warehouse used to store markdown source files, configuration files, etc
- Blog framework: a shared repository used to store files generated by hexo init
- Hexo theme stellar: theme file, fork from the original theme warehouse
How to publish
Since GitHub uses GitHub Actions for the private warehouse of white whoring users, there is a time limit every month. Therefore, the general idea is that when the blog private and Hexo theme stellar warehouses receive push, they notify the blog framework warehouse through Webhook to execute Hexo construction and deployment.
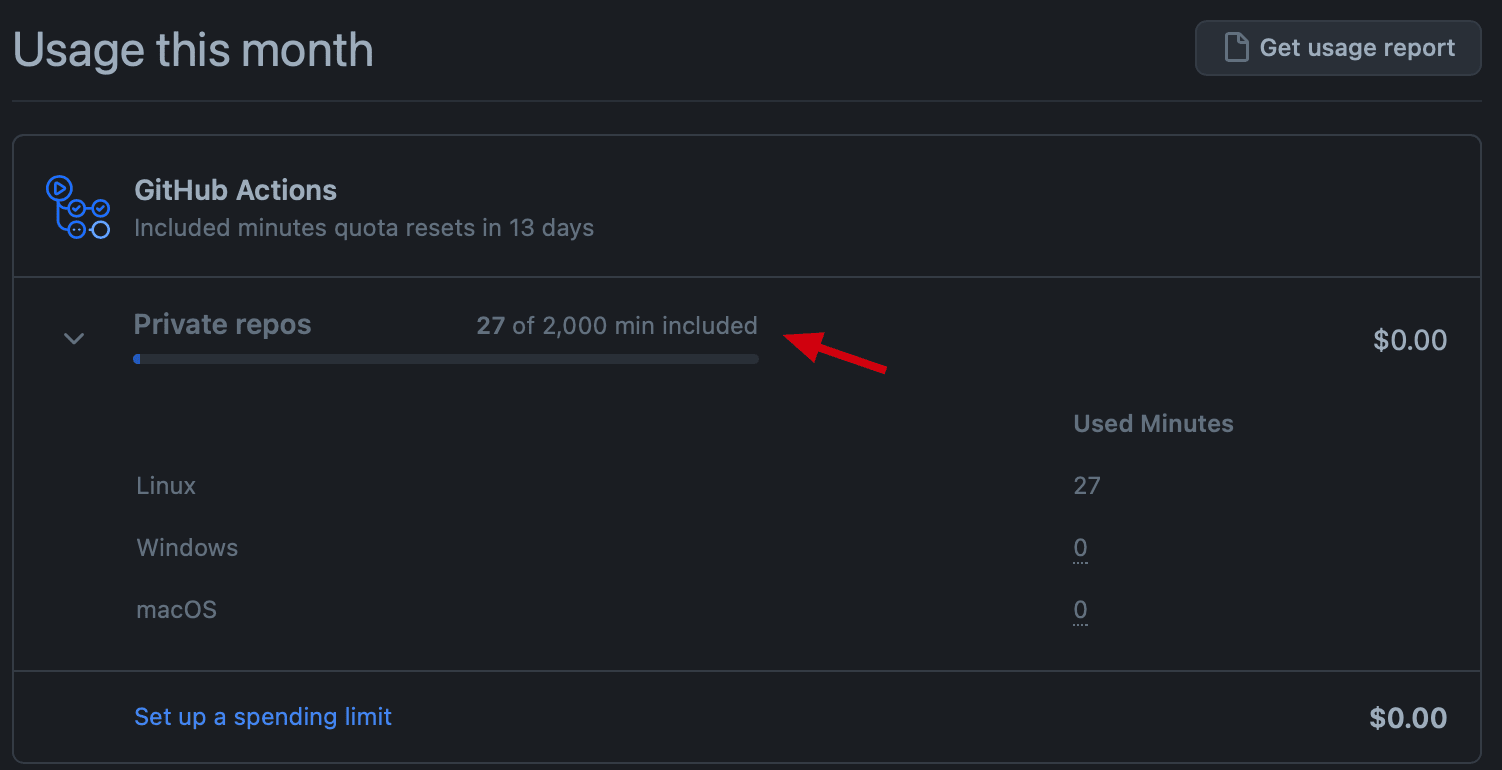
(private warehouse 2000 minutes per month, duration of GitHub actions)
Flow diagram:
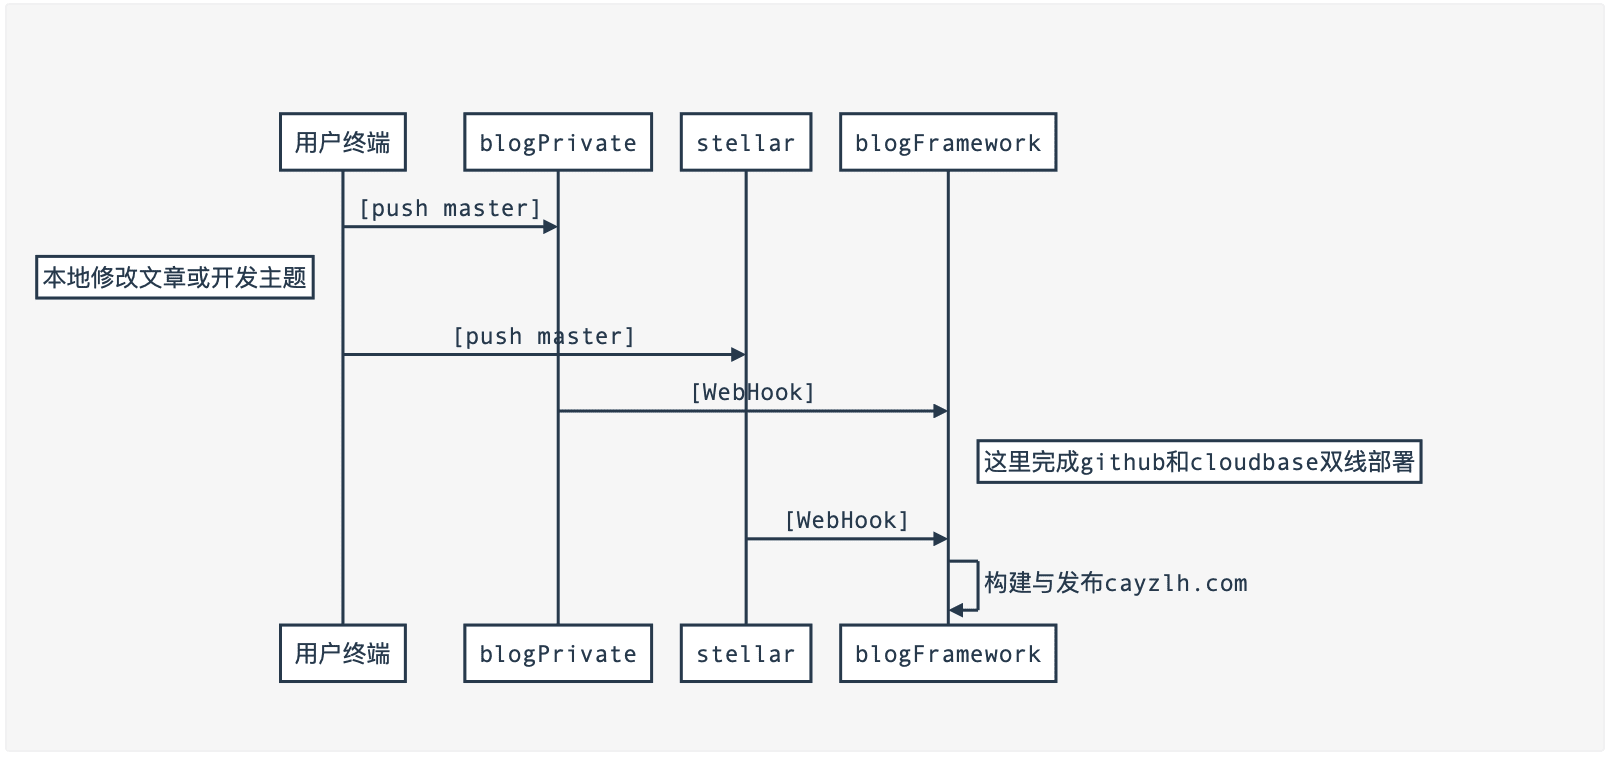
workflows
Record the specific workflow configuration.
Click to view GitHub Actions configuration of blog private
name: cayzlh.com

on:
  push:
    branches:
      - master

jobs:
  build:
    name: Deploy cayzlh.com.
    runs-on: ubuntu-latest
    strategy:
      matrix:
        os: [ubuntu-latest]
        node_version: [13.x]

    steps:
      - name: start post notification.
        run: |
          curl https://qmsg.zendee.cn/send/${{secrets.QMSG_KEY}} -X POST -d 'msg = article update found, ready to deploy cayzlh com '

      - name: request github action api.
        run: |
          curl -X POST https://api.github.com/repos/cayzlh/blog-framework/dispatches \
              -H "Accept: application/vnd.github.everest-preview+json" \
              -H "Authorization: token ${{secrets.ACTIONS_TRIGGER_TOKEN}}" \
              --data '{"event_type": "Hexo"}'

      - name: end post notification.
        run: |
          curl https://qmsg.zendee.cn/send/${{secrets.QMSG_KEY}} -X POST -d 'msg = sending webhook request GitHub Action...'
The key content is to send a request through curl to notify the blog framework warehouse:
url -X POST https://api.github.com/repos/cayzlh/blog-framework/dispatches \
              -H "Accept: application/vnd.github.everest-preview+json" \
              -H "Authorization: token ${{secrets.ACTIONS_TRIGGER_TOKEN}}" \
              --data '{"event_type": "Hexo"}'
Click to view the GitHub Actions configuration of hexo theme stellar
The content is similar to the above, except that the content of QMSG notice is different.
name: cayzlh.com

on:
  push:
    branches:
      - main

jobs:
  build:
    name: Deploy cayzlh.com.
    runs-on: ubuntu-latest
    strategy:
      matrix:
        os: [ubuntu-latest]
        node_version: [13.x]

    steps:
      - name: start post notification.
        run: |
          curl https://qmsg.zendee.cn/send/${{secrets.QMSG_KEY}} -X POST -d 'msg = subject update found, ready to deploy cayzlh com '

      - name: request github action api.
        run: |
          curl -X POST https://api.github.com/repos/cayzlh/blog-framework/dispatches \
              -H "Accept: application/vnd.github.everest-preview+json" \
              -H "Authorization: token ${{secrets.ACTIONS_TRIGGER_TOKEN}}" \
              --data '{"event_type": "Hexo"}'

      - name: end post notification.
        run: |
          curl https://qmsg.zendee.cn/send/${{secrets.QMSG_KEY}} -X POST -d 'msg = sending webhook request GitHub Action...'
Click to view GitHub Actions configuration of blog framework
The workflow configuration of this warehouse is responsible for the whole process of construction. The contents are as follows:
name: cayzlh.com

on:
  push:
    branches:
      - master
  repository_dispatch:
    types: Hexo

jobs:
  build:
    name: Deploy cayzlh.com
    runs-on: ubuntu-latest
    strategy:
      matrix:
        os: [ubuntu-latest]
        node_version: [13.x]

    steps:
      - name: start notification
        run: |
          curl https://qmsg.zendee.cn/send/${{secrets.QMSG_KEY}} -X POST -d 'msg = start deployment cayzlh com '

      - name: Checkout self
        uses: actions/checkout@v2

      - name: Use Node.js ${{ matrix.node_version }}
        uses: actions/setup-node@v1
        with:
          node-version: ${{ matrix.node_version }}

      - name: Configuration environment
        env:
          HEXO_DEPLOY_PRI: ${{secrets.HEXO_DEPLOY_PRI}}
          GIT_USER: 'GitHub Action CI'
          GIT_EMAIL: 'ant.chenanyu@gmail.com'
        run: |
          sudo timedatectl set-timezone "Asia/Shanghai"
          mkdir -p ~/.ssh/
          echo "$HEXO_DEPLOY_PRI" > ~/.ssh/id_rsa
          chmod 600 ~/.ssh/id_rsa
          ssh-keyscan github.com >> ~/.ssh/known_hosts
          git config --global user.name "$GIT_USER"
          git config --global user.email "$GIT_EMAIL"

      - name: Checkout source
        run: |
          rm -rf source
          git clone git@github.com:cayzlh/blog-private.git source
          rm -rf ./source/.git
          rm -rf ./source/.github
          rm -rf ./_config.yml
          mv ./source/_config.stellar.yml ./
          mv ./source/_config.site.yml ./_config.yml

      - name: Checkout theme
        run: |
          git clone git@github.com:cayzlh/hexo-theme-stellar.git themes/stellar
          rm -rf ./themes/stellar/_config.yml

      - name: Cache Node Dependencies
        id: cache
        uses: actions/cache@v1
        with:
          path: node_modules
          key: ${{runner.OS}}-npm-caches-${{ hashFiles('package-lock.json') }}

      - name: Install dependencies.
        run: |
          npm i -g @cloudbase/cli
          npm install hexo-cli -g
          npm install

      - name: login to cloudbase
        run: |
          tcb login --apiKeyId ${{secrets.SECRET_ID}} --apiKey ${{secrets.SECRET_KEY}}

      - name: Deploy Github page.
        run: |
          hexo clean
          hexo g
          hexo d

      - name: Deploy cloudbase.
        run: |
          tcb hosting deploy ./public -r gz -e ${{secrets.ENV_ID}}

      - name: notification
        run: |
          curl https://qmsg.zendee.cn/send/${{secrets.QMSG_KEY}} -X POST -d 'msg = deployment completed, please visit https://www.cayzlh.com/ 'confirm'
Add on node:
repository_dispatch:
  types: Hexo
It indicates that the warehouse allows the action to be triggered through webhook, and the specified type is Hexo (reflected in the curl request parameters of the other two warehouses).
Reading the script content is actually relatively simple, that is, checking out various warehouses, configuring the environment, executing construction scripts, etc
- webhook request received
- Check out self
- Configure environment variables
- Check out the soup folder (i.e. blog private warehouse)
- Check out the theme folder (i.e. hexo theme stellar warehouse)
- Install the required dependencies through npm (tcb, hexo dependencies, etc.)
- Login to CloudBase
- hexo Sanlian
- deploy to CloudBase static website hosting
The above configuration content only provides one idea. GitHub Actions can still have many ways to play.
In addition to the above configuration, you also need to configure relevant Repository secrets in warehouse Settings according to the actual situation:
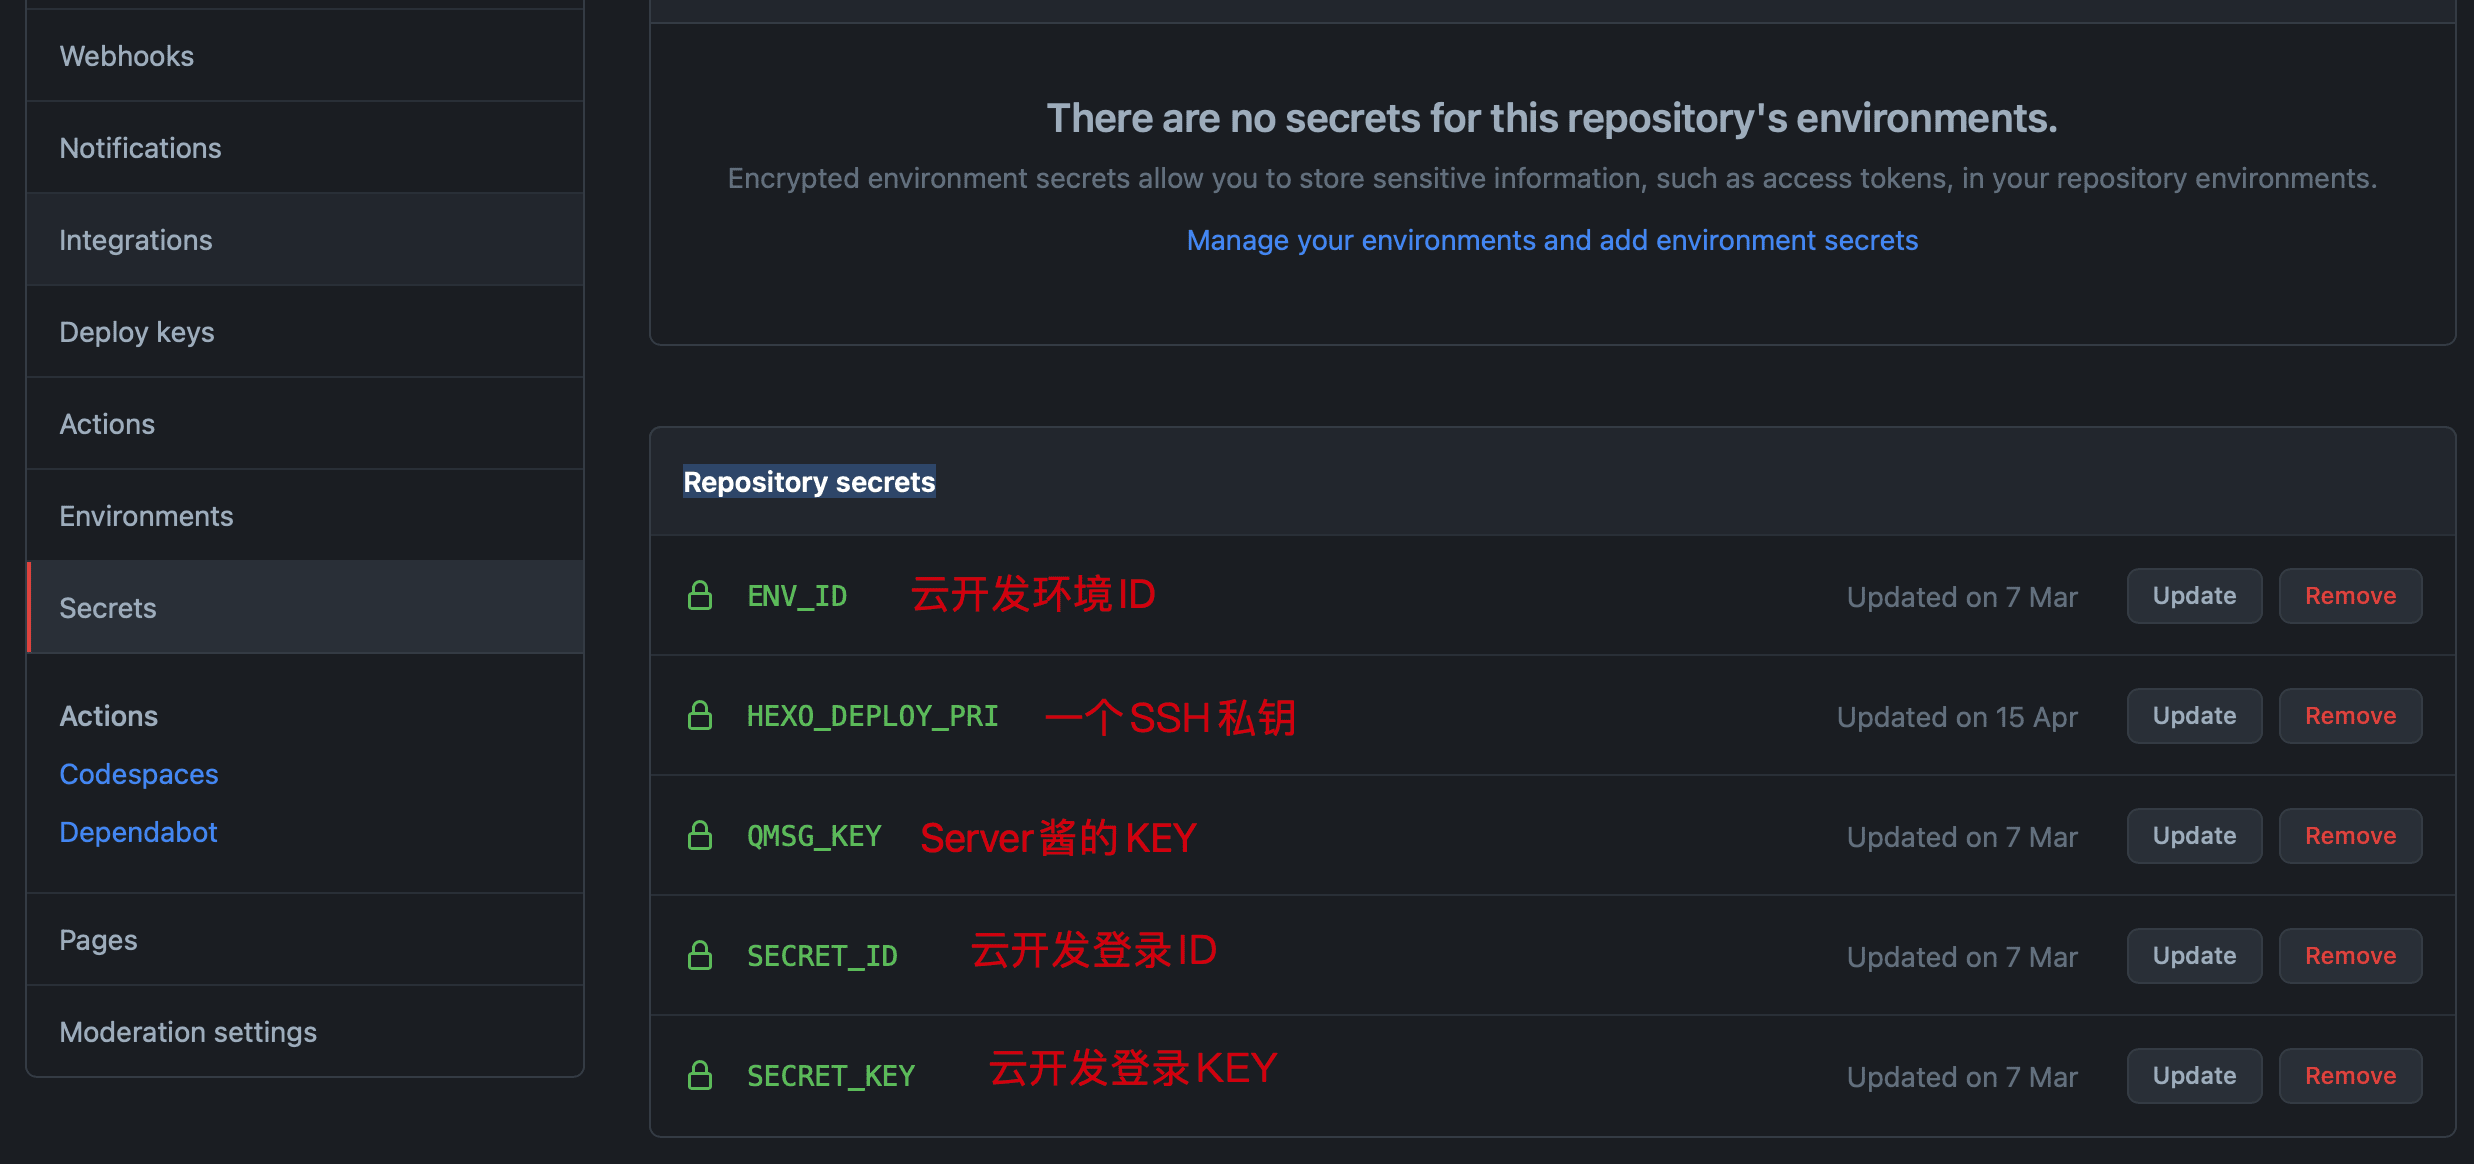
After the three warehouses are configured, the private warehouse is only responsible for sending one request, which takes very little time. The time-consuming operations are put into the public warehouse that can be used for whoring. In this way, even if the website is updated frequently, it will not use much free construction time of GitHub actions.
notice
Server sauce
Call api in action and send QQ notification, which is embodied in the script.
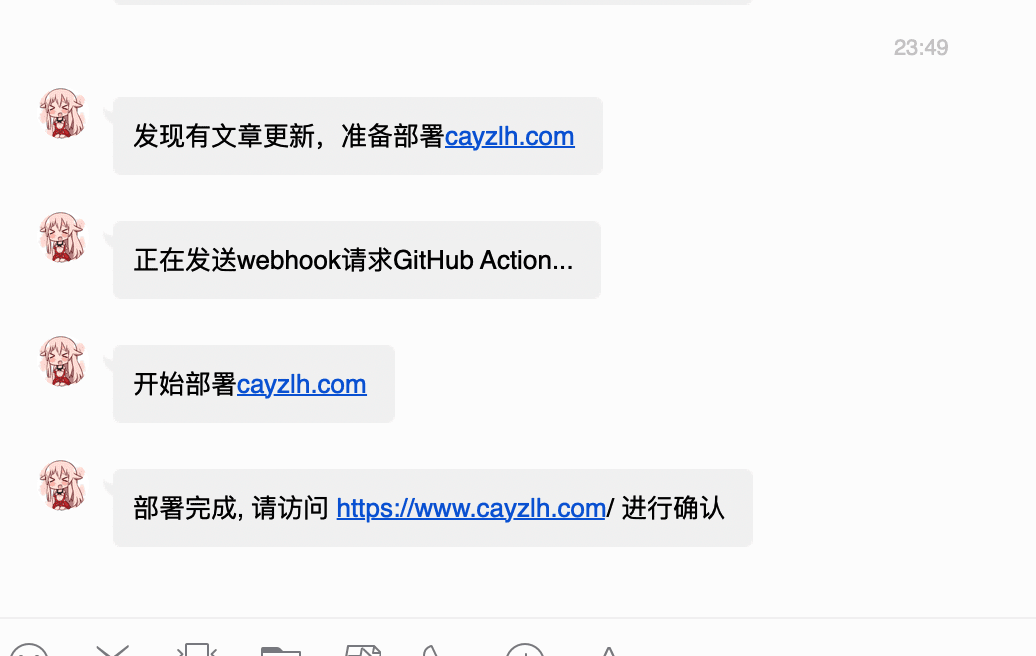
Email notification
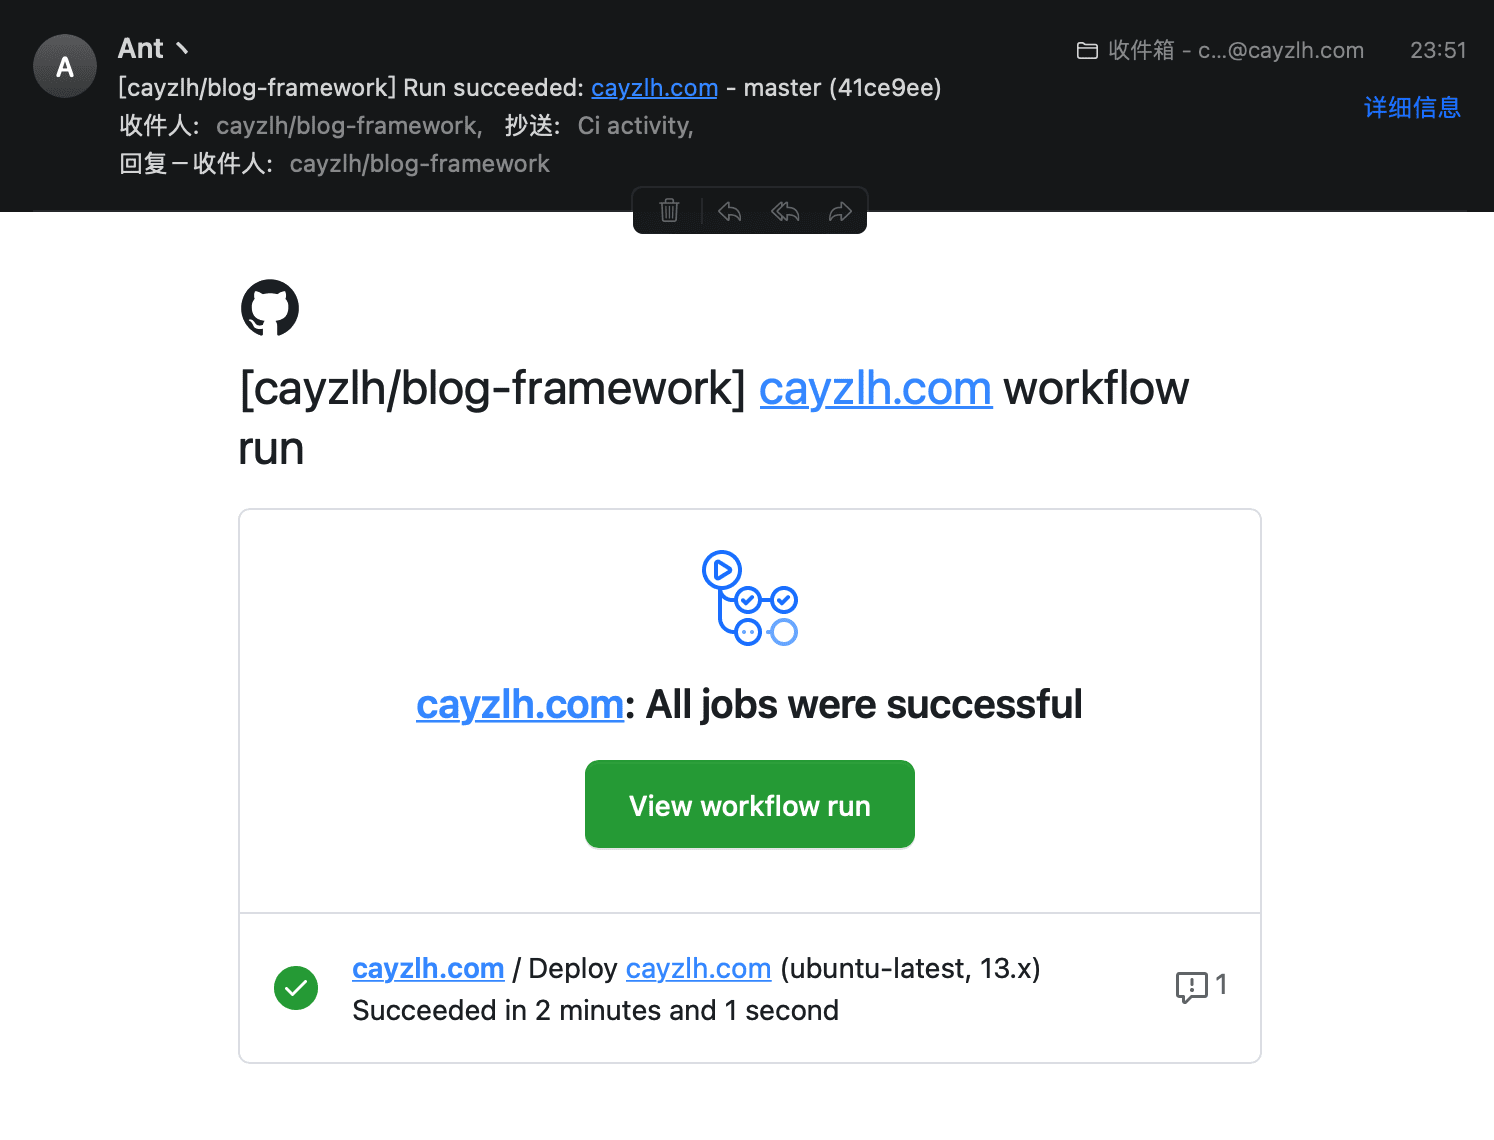
Simply and rudely set email notification in personal settings - Notifications and GitHub Actions column. Uncheck to notify only when failure occurs:

In this way, you can receive an email notification after the action is successfully executed:
About keys
In the whole workflow process, the ssh key is required to check out the warehouse and execute hexo d. here, the configuration method is also briefly recorded.
The idea is to simulate the idea of Using SSH key to use GitHub on the local computer:
Generate key locally
ssh-keygen -f github-deploy-key -C "youremail@xxx.com"

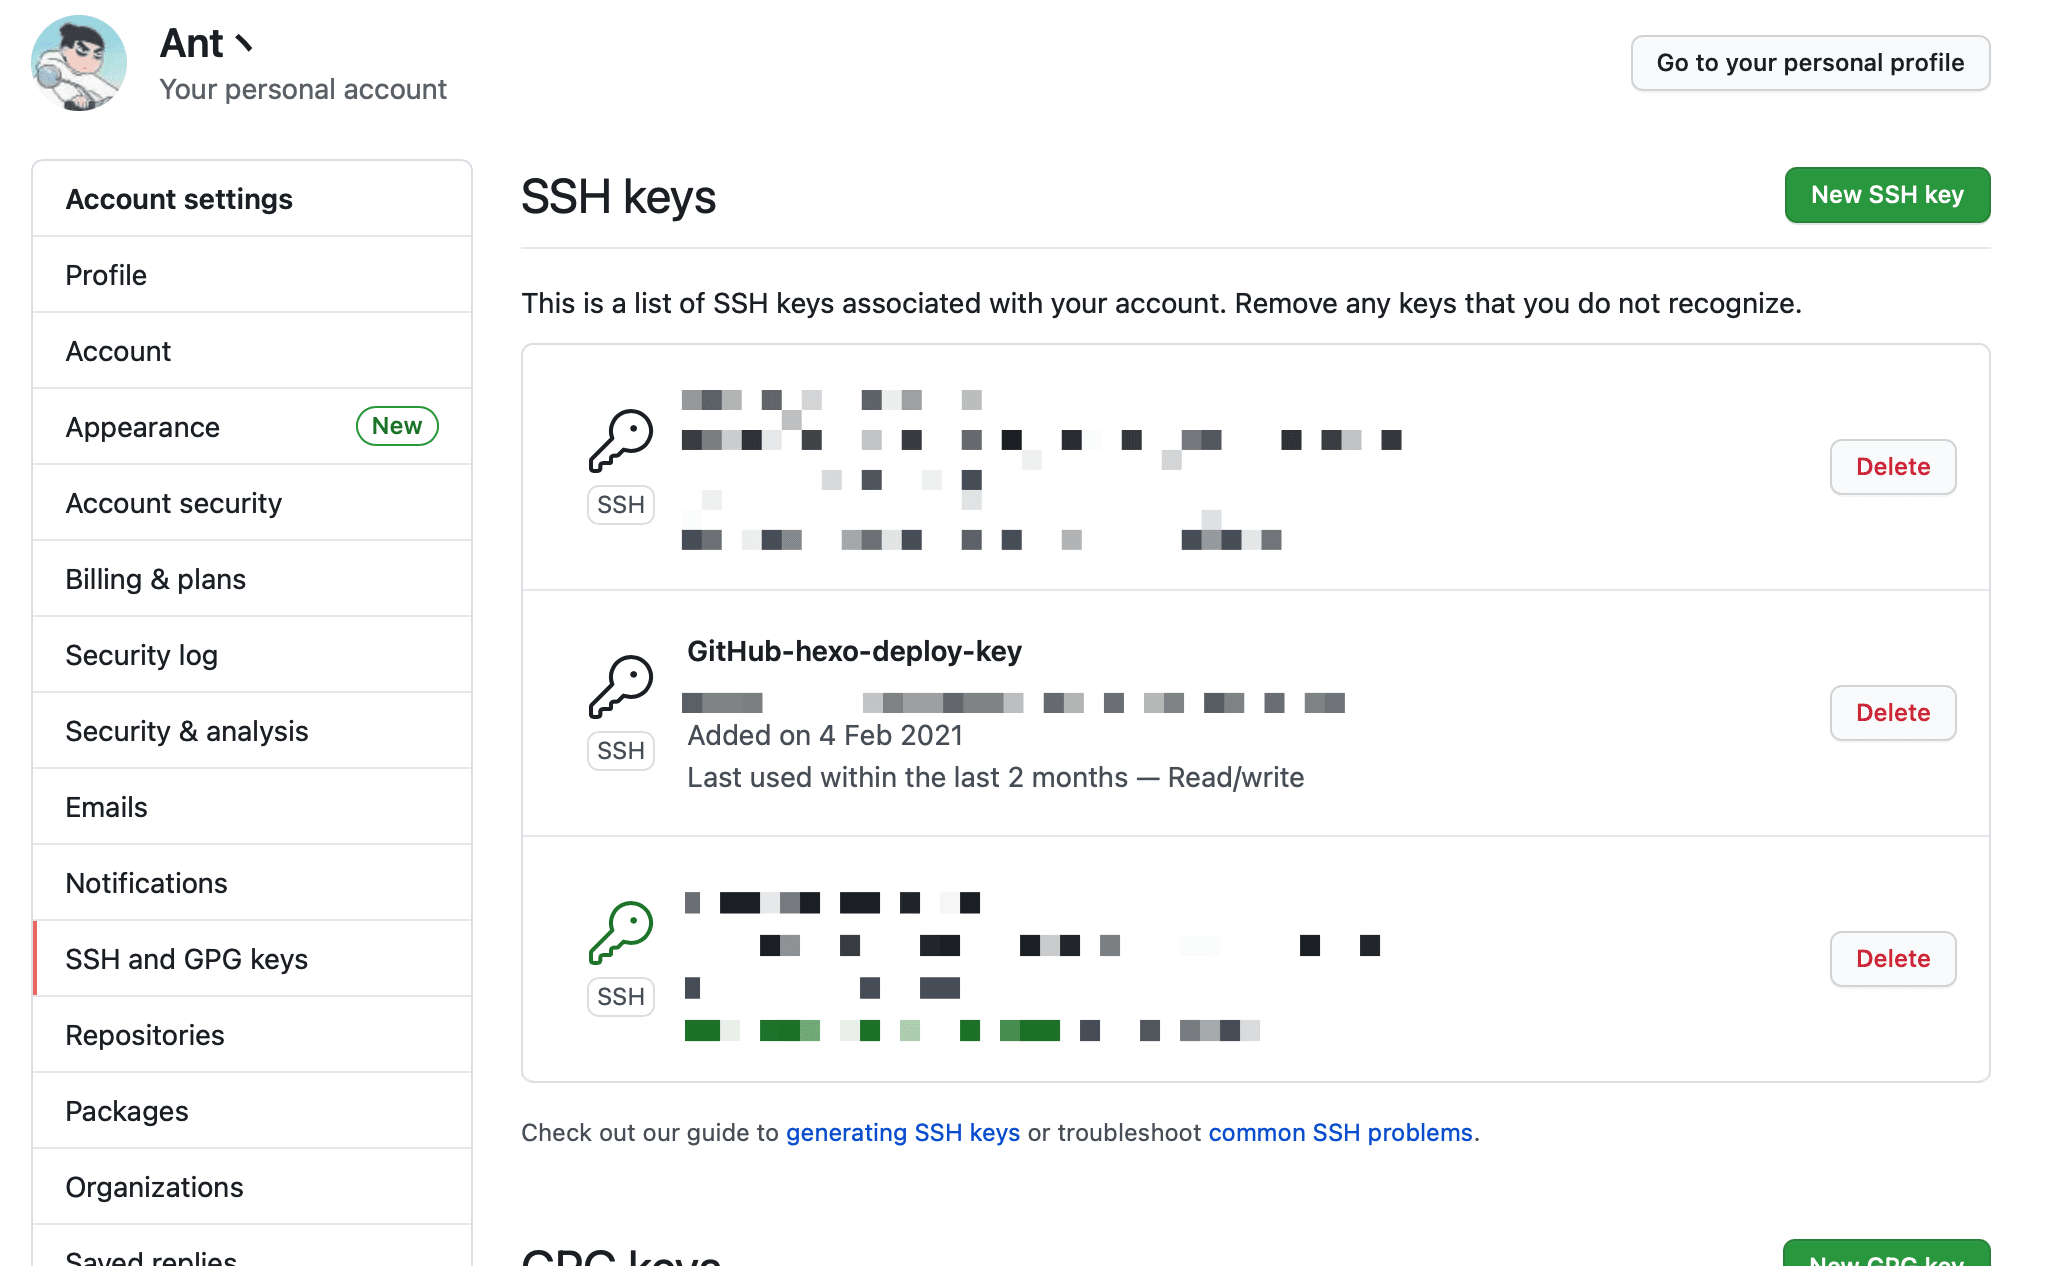
On a GitHub personal settings page - SSH and GPG keys - SSH Keys column
Add hexo deployment private public key
Add a key in the settings - Secrets column of the corresponding warehouse
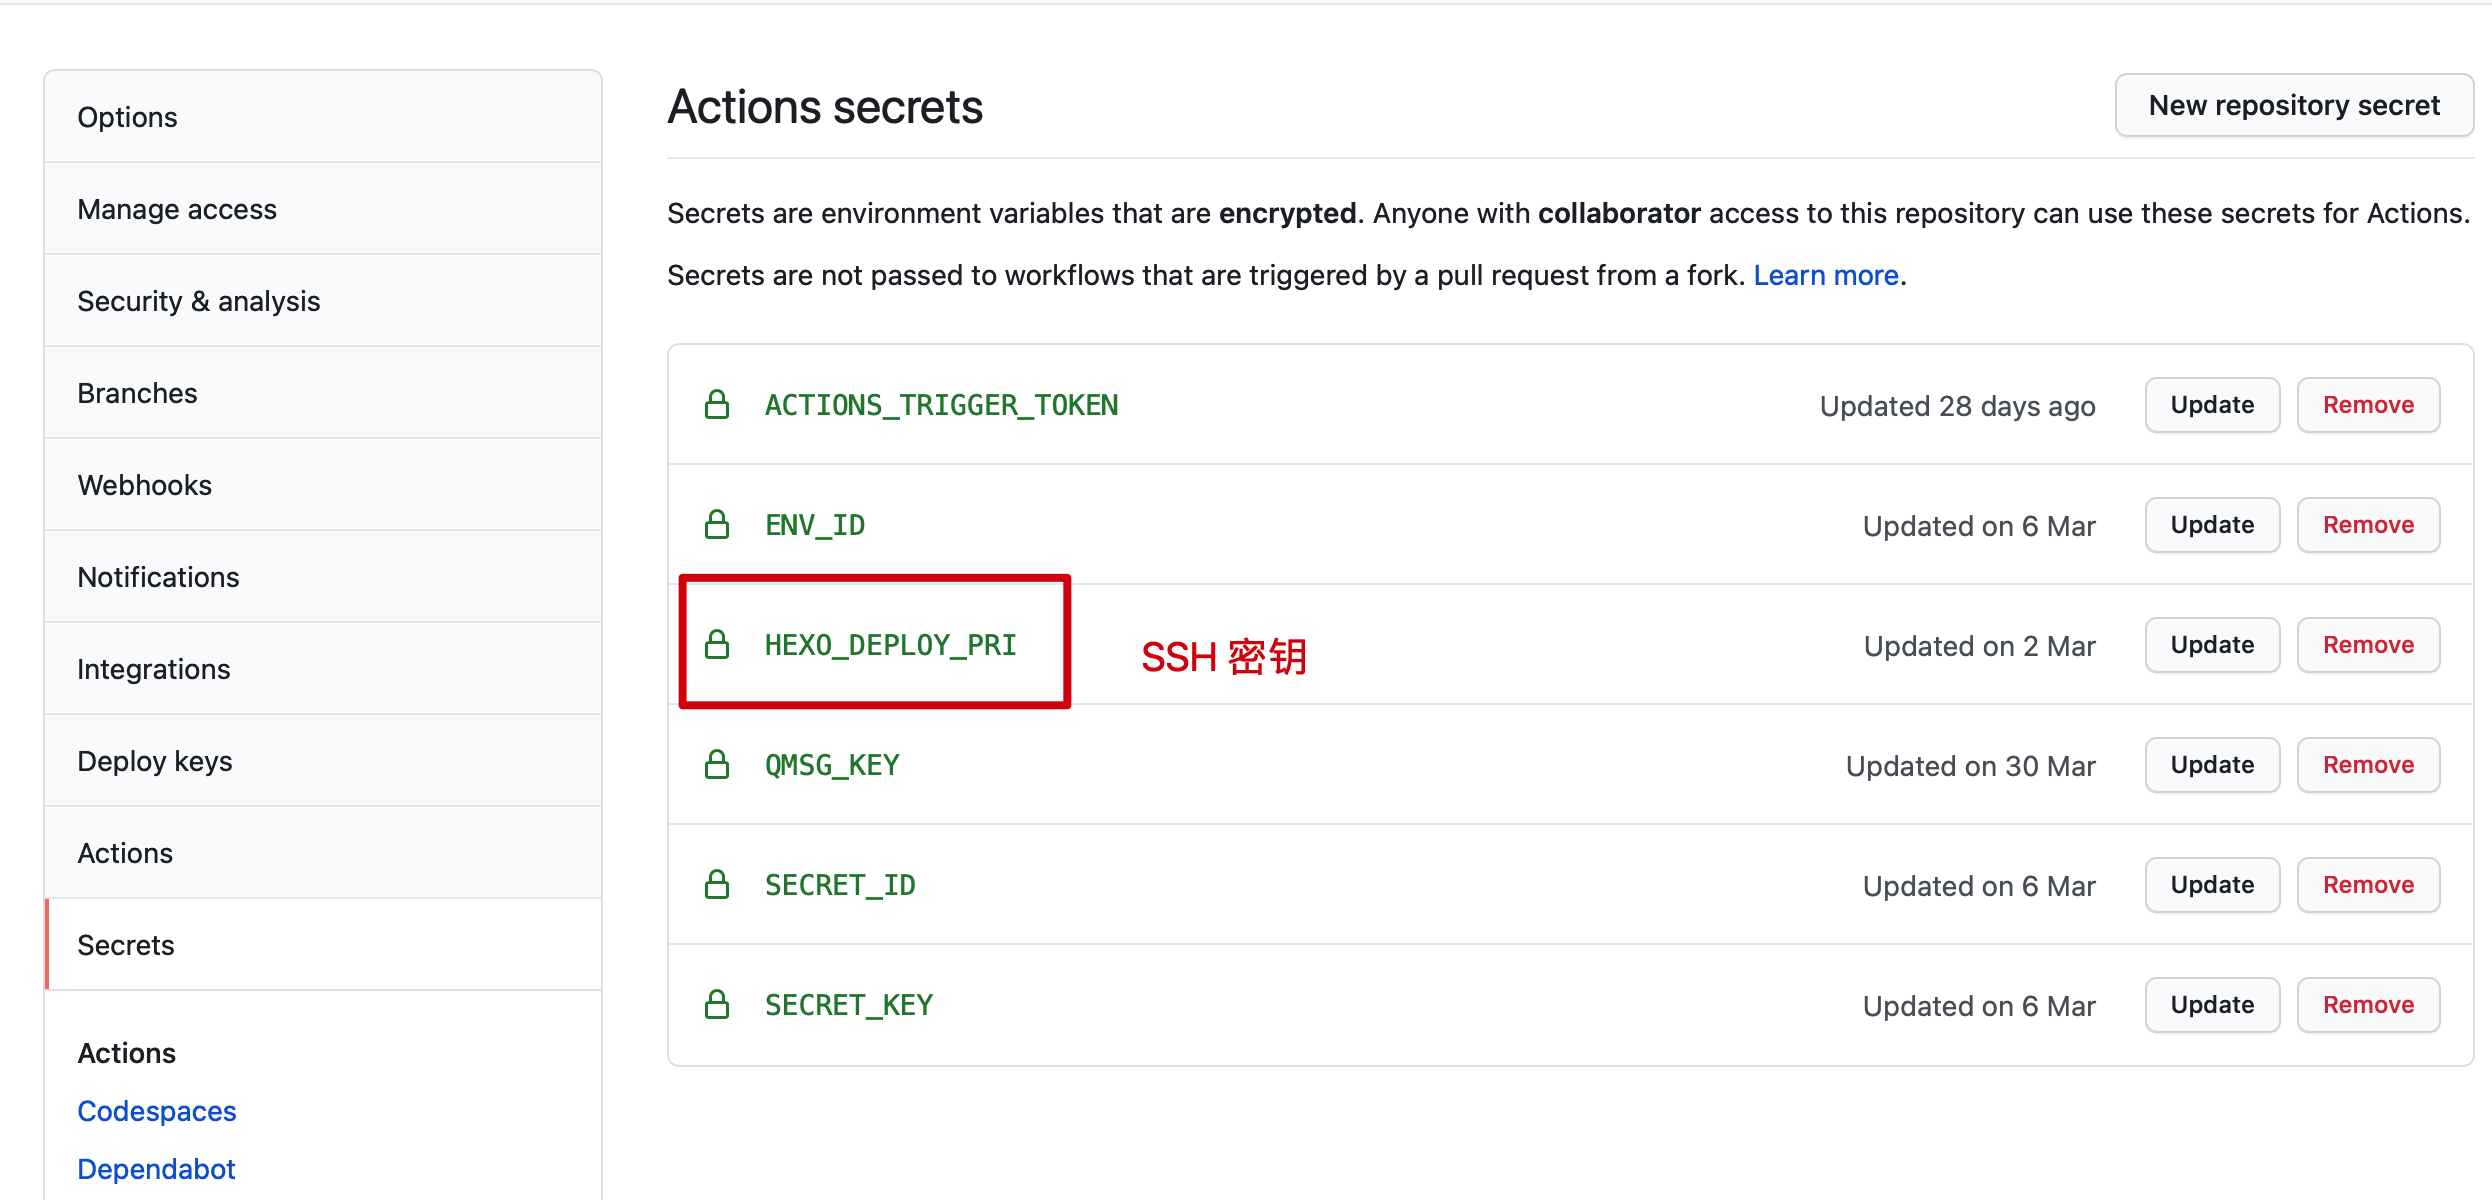
After setting SSH key, refer to the deployment script above for related usage.
Theme secondary development
Although Stellar has provided powerful Wiki system and other functions, it is inevitable that some customization needs.
Personal dynamic page
This part refers to Add a dynamic page
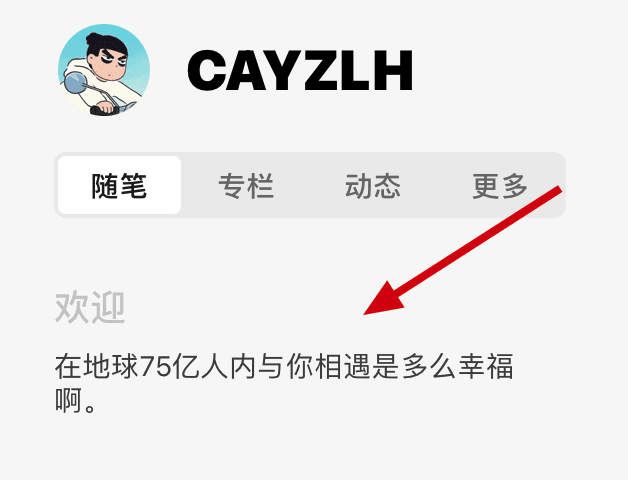
Use "one word" as a welcome
Use one word API to randomly obtain a line as a welcome message:
Click to view the operation steps
Step 1: modify the theme markdown EJS file
File path: stellar/layout/_partial/sidebar/widgets/markdown.ejs
The revised content is as follows:
code13
Step 2: modify the theme configuration file_ config.yml
Add the following in sidebar configuration item
- Add whether to turn on the one word API switch
- Configuration item add or modify the configuration of the original [welcome] section
code14
The principle is very simple. In one word, the api will change the content of the p tag with id hitokoto to a random line.
Personalized footer
At first, it was because the domestic filing needed to hang the filing number in the footer, so I studied the code of the footer and found it very simple. By the way, I added some other things, such as website running time.

Relatively simple, directly paste the code.
Click to view footer EJS source code
<%
const author = '[@' + config.author + '](' + config.url + config.root + ')';
const using = '[' + stellar_info('name') + '](' + stellar_info('tree') + ')';
const source = theme.footer.source;
const icp = theme.footer.icp;
const server = theme.footer.server;

function layoutDiv() {
  var wrapper = '';
  wrapper += '<footer class="page-footer fs12"><hr><div>';
  if (theme.footer.license) {
    wrapper += markdown(__('footer.license', theme.footer.license));
  }
  // if (theme.footer.using) {
  //   if (source) {
  //     wrapper += markdown(__('footer.info_open_source', author, using, source));
  //   } else {
  //     wrapper += markdown(__('footer.info_not_open_source', author, using));
  //   }
  // }
  if (icp) {
    wrapper += markdown(__('footer.server_icp', author, server, icp));
  } else {
    wrapper += markdown(__('footer.server_not_icp', author, server));
  }

  if (theme.footer.up_time) {
    wrapper += '<div><span id="timeDate">Loading days...</span><span id="times">Loading hours, minutes and seconds...</span>';
    // if (theme.footer.busuanzi.enable) {
    //   wrapper + = ', < span id = "busuanzi_container_site_pv" > total visits: < span id = "busuanzi_value_site_pv" > < / span > times < / span >';
    //   wrapper + = ', < span id = "busuanzi_container_site_uv" > number of visitors: < span id = "busuanzi_value_site_uv" > < / span > people < / span >';
    // }
    wrapper += '</div>'
  }
  if (theme.footer.travelling) {
    wrapper += markdown(theme.footer.travelling);
  }

  wrapper += '</div></footer>';
  return wrapper;
}
%>
<%- layoutDiv() %>
<script async src="//busuanzi.ibruce.info/busuanzi/2.3/busuanzi.pure.mini.js"></script>
<script>
  function createtime() {
    var now = new Date();
    var grt= new Date("05/26/2019 04:40:00");
    now.setTime(now.getTime()+250);
    days = (now - grt ) / 1000 / 60 / 60 / 24; dnum = Math.floor(days);
    hours = (now - grt ) / 1000 / 60 / 60 - (24 * dnum); hnum = Math.floor(hours);
    if(String(hnum).length ==1 ){hnum = "0" + hnum;} minutes = (now - grt ) / 1000 /60 - (24 * 60 * dnum) - (60 * hnum);
    mnum = Math.floor(minutes); if(String(mnum).length ==1 ){mnum = "0" + mnum;}
    seconds = (now - grt ) / 1000 - (24 * 60 * 60 * dnum) - (60 * 60 * hnum) - (60 * mnum);
    snum = Math.round(seconds); if(String(snum).length ==1 ){snum = "0" + snum;}
    document.getElementById("timeDate").innerHTML = "This station is in operation "+dnum+" day ";
    document.getElementById("times").innerHTML = hnum + " hour " + mnum + " branch " + snum + " second";
  };
  setInterval("createtime()",250);
</script>
Click to view the theme profile
######## Footer ########
footer:
  social:
    - icon: '<img src="https://cdn.jsdelivr.net/gh/cdn-x/placeholder@1.0.1/social/08a41b181ce68.svg"/>'
      url: https://github.com/cayzlh
    #    - icon: '<img src="https://cdn.jsdelivr.net/gh/cayzlh/psychic-potato@master/image/guanyuwomen.svg"/>'
    #      url: https://telegram.me/Q2F5emxo
    - icon: '<img src="https://cdn.jsdelivr.net/gh/cdn-x/placeholder@1.0.1/social/942ebbf1a4b91.svg"/>'
      url: https://telegram.me/Q2F5emxo
  license: '[CC BY-NC-SA 4.0](https://creativecommons.org/licenses/by-nc-sa/4.0/)'
  using: true # Displays the topic information used
  source: # '[GitHub](https://github.com/cayzlh/blog-framework)'
  server: '[Cloud development CloudBase](https://cloudbase.net) & [Vercel](https://vercel.com/cayzlh/cayzlh/settings/domains)'
  icp: 'Guangdong ICP prepare[20058712](https://beian.miit.gov.cn/) No. '
  travelling: '[<img src="https://travellings. link/assets/logo. Gif "ALT =" bound - friend chain relay "width =" 100 ">]( https://travellings.link )'
  up_time:
    enable: true
  busuanzi:
    enable: true
Multilingual packages have also been changed
The footer part of the language pack needs to be changed:
chinese:
footer:
  license: 'Unless otherwise stated, all articles on this site adopt %s License agreement, please indicate the source for reprint'
  info_not_open_source: 'This site is composed of %s Create, use %s As a theme'
  info_open_source: 'This site is composed of %s Create, use %s As a theme, you can %s Find the source code of this site'
  server_not_icp: 'This site is composed of %s Created, hosted on %s'
  server_icp: 'This site is composed of %s Created, hosted on %s,%s'
english:
footer:
  license: 'All articles in this blog are licensed under %s unless stating additionally.'
  info_not_open_source: 'This site was deployed by %s using %s.'
  info_open_source: 'This site was deployed by %s using %s. You can find the source code in %s.'
  server_not_icp: 'This site was created by %s and hosted by %s, %s'
  server_icp: 'This site was created by %s and hosted by %s'
traditional Chinese character:
footer:
  license: 'Unless otherwise stated, all articles in this blog adopt %s License agreement, please indicate the source for reprint.'
  info_not_open_source: 'This site is composed of %s Create, use %s As a theme.'
  info_open_source: 'This site is composed of %s Create, use %s As a theme, you can %s Find the source code of this site.'
  server_not_icp: 'This site is composed of %s Created, hosted on %s'
  server_icp: 'This site is composed of %s Created, hosted on %s,%s'
Well, it's best to modify them to prevent construction errors.
Summary
Daily writing process:
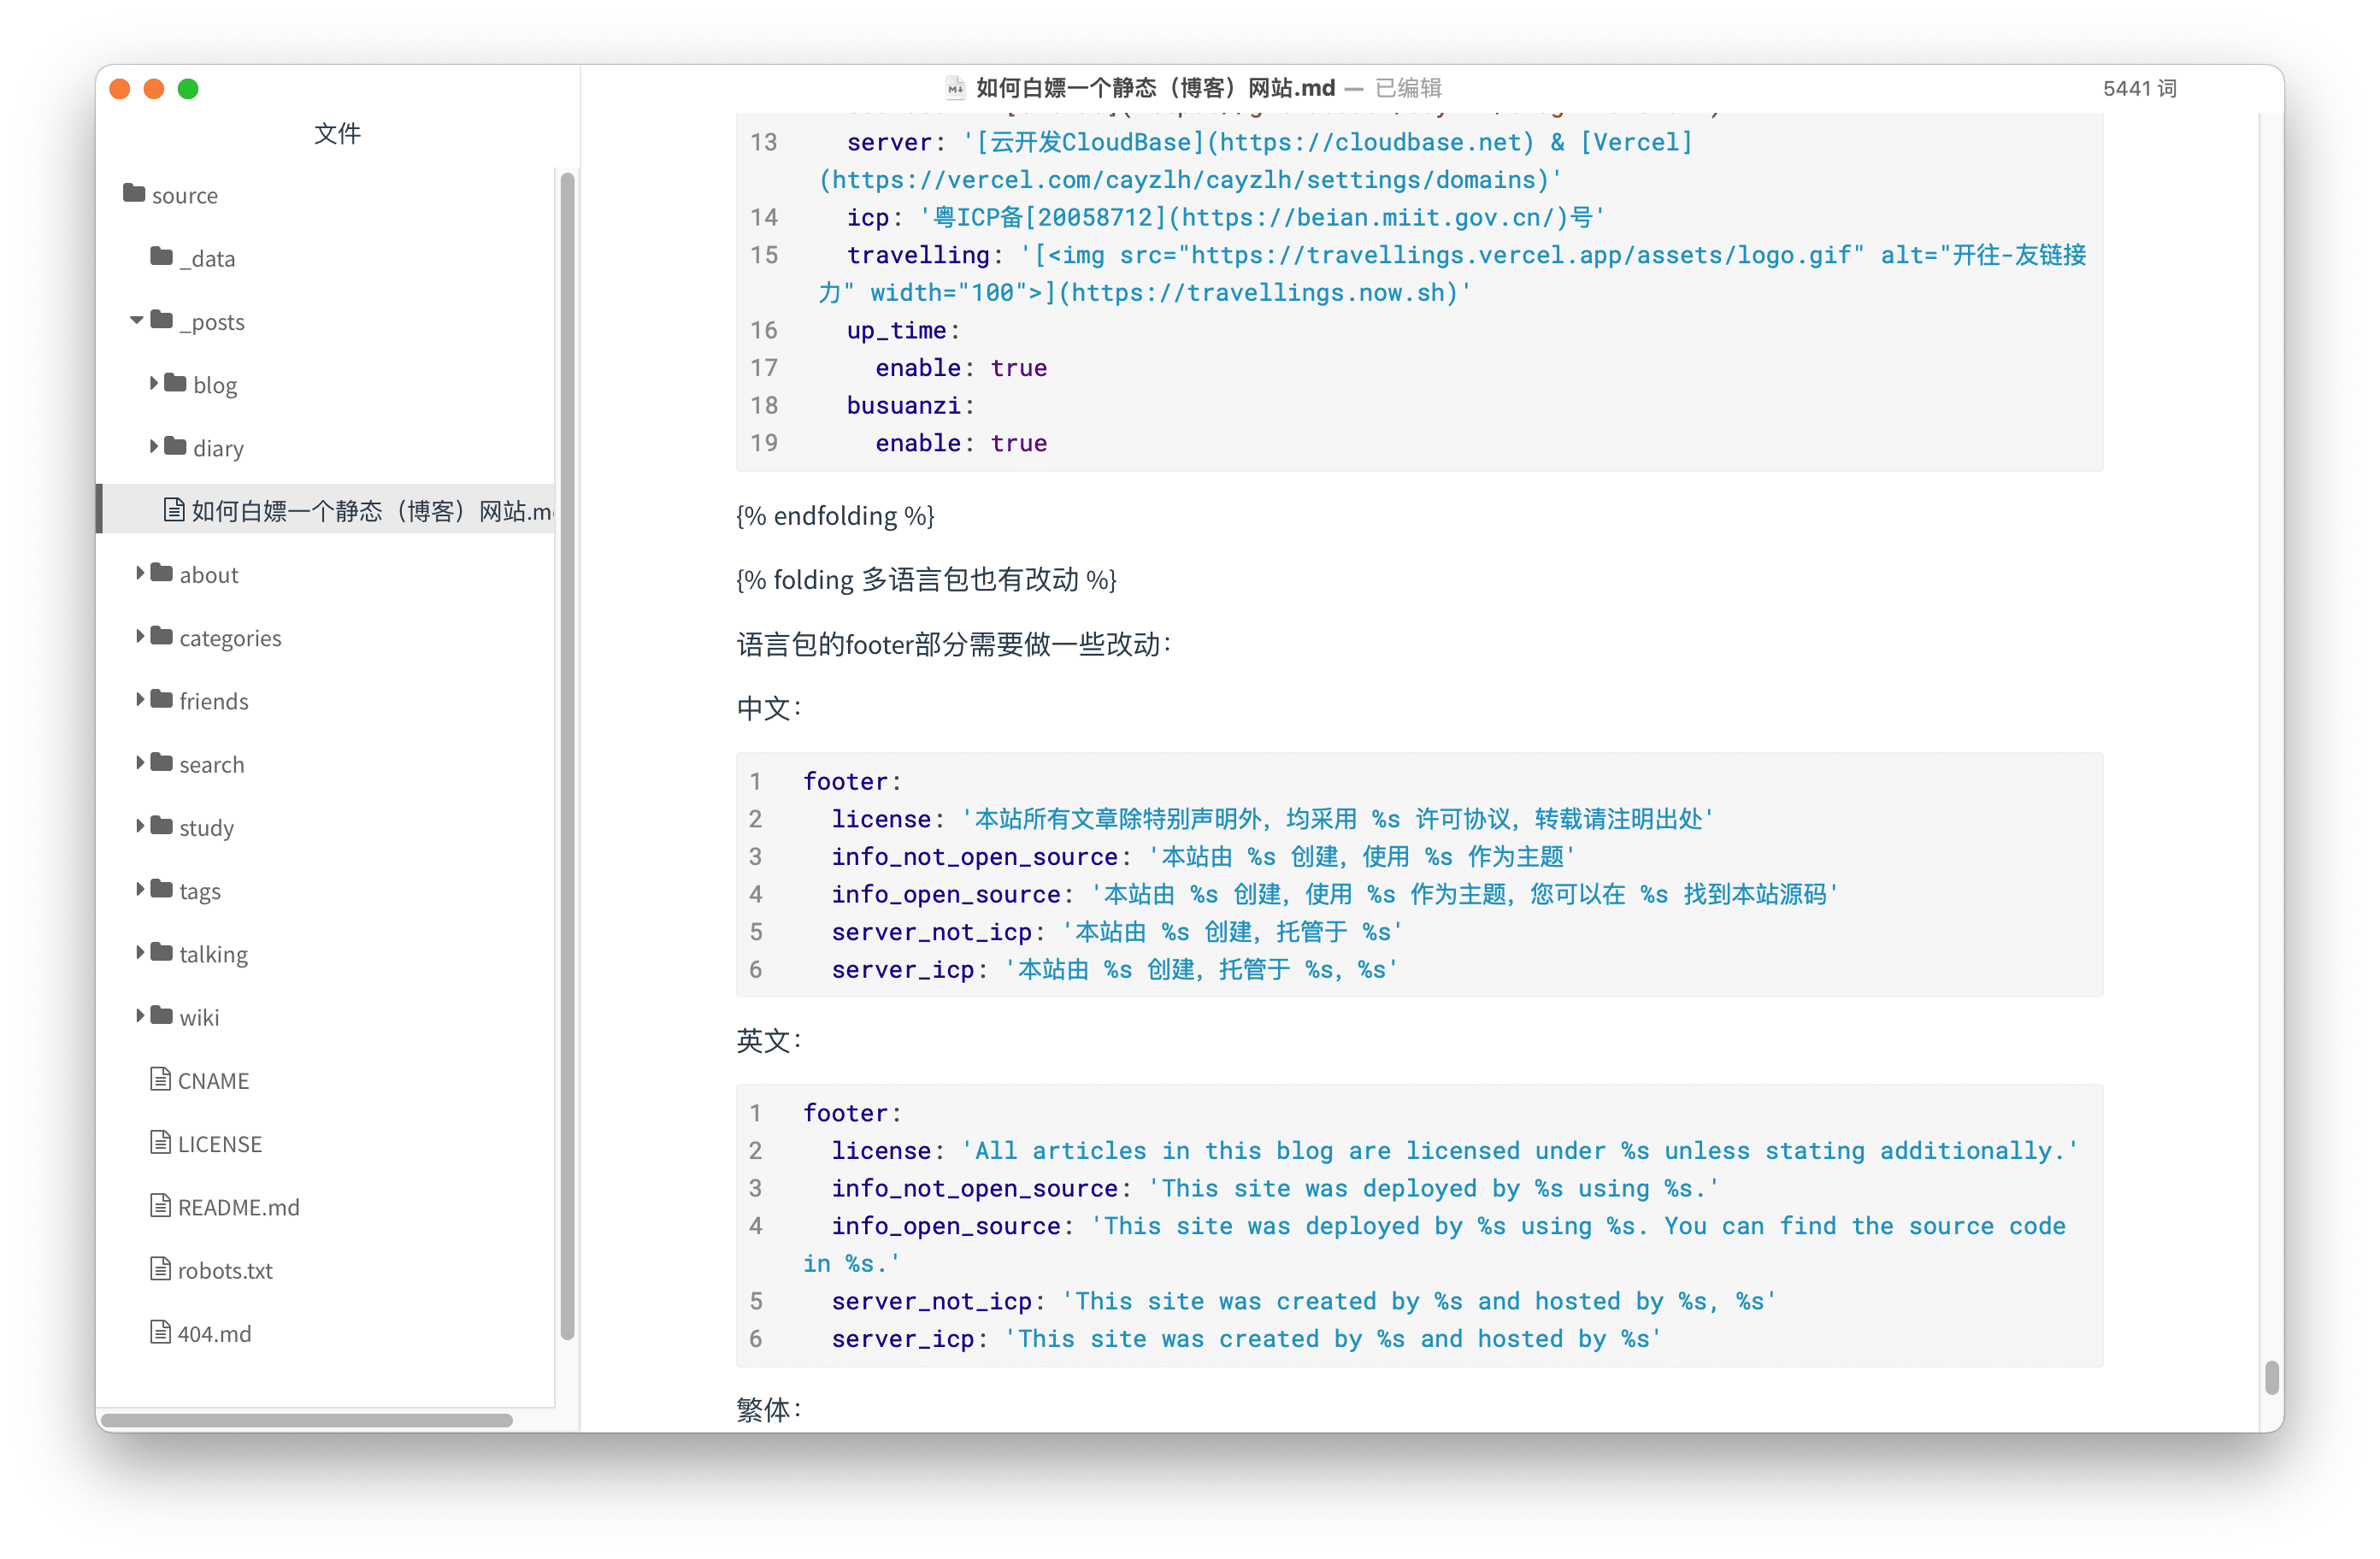
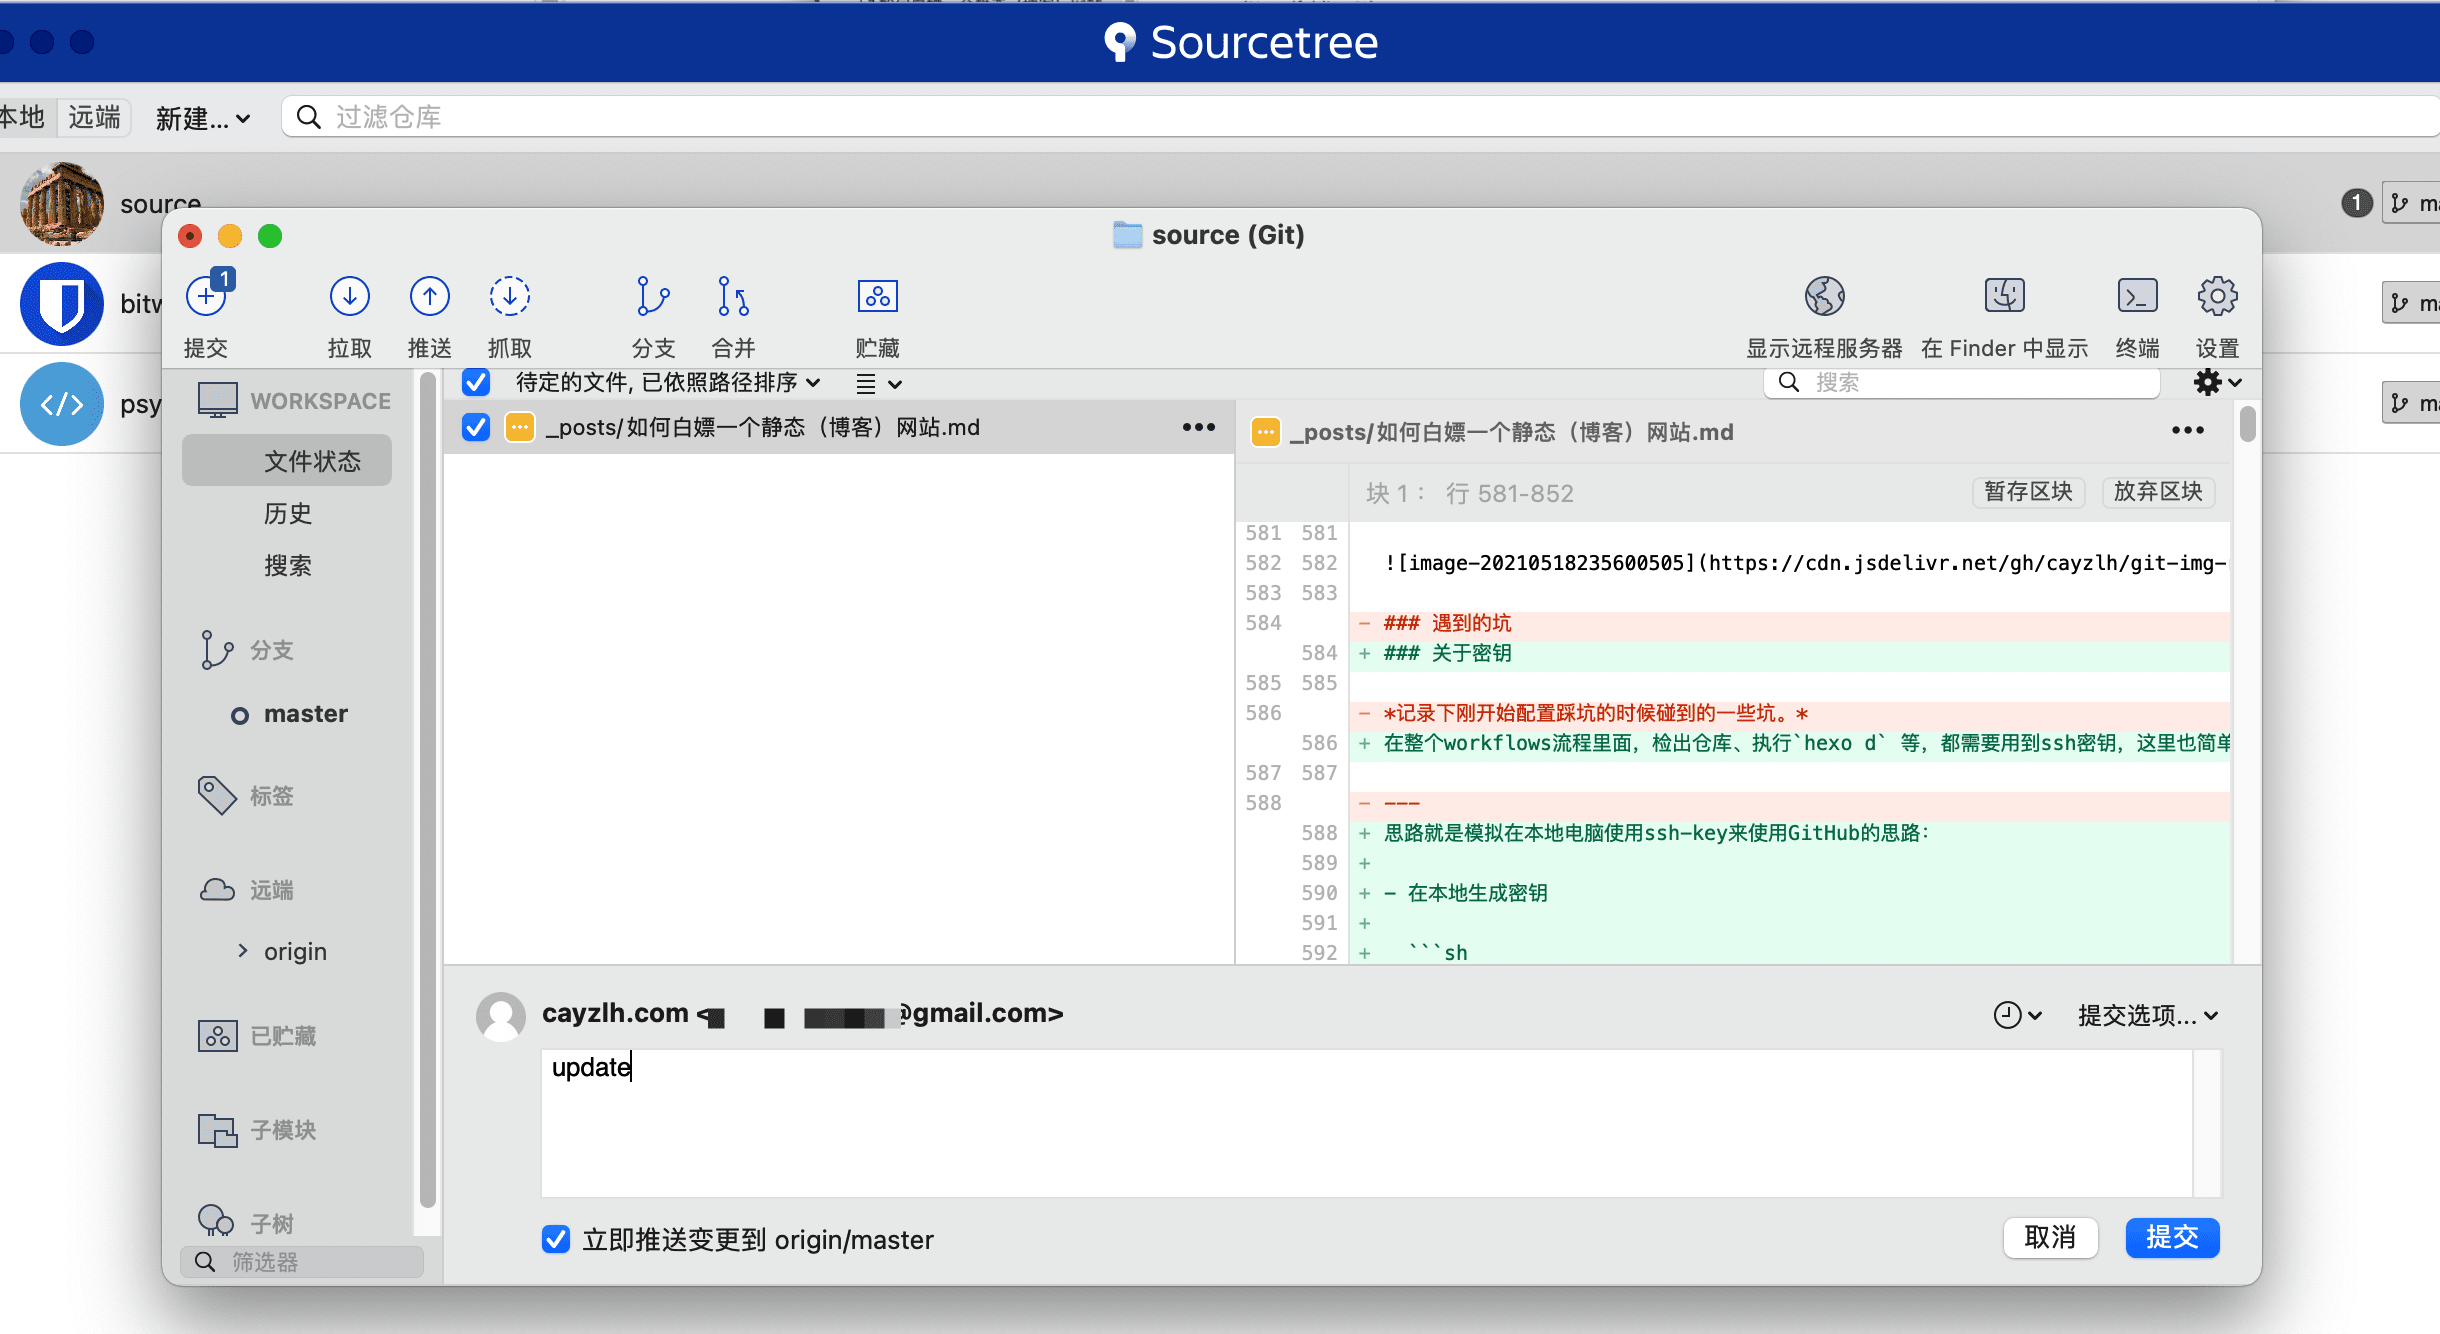
Open the source directory through typera - > write text - > push the word to GitHub with sourcetree after coding - > GitHub actions is deployed automatically
Codeword
push
Through the above operation, in addition to the domain name, other resources are basically whoring in vain.
PS:
Stellar is a topic that suits me very well. I use it to manage technology blogs and record life trivia. The built-in WIKI system is used to manage reading notes, code fragments, open source documents, technical columns, etc. There are other contents that you want to record later, and then continue to update.
Sharing plan
Blog content will be synchronized to Tencent cloud + community , we invite you to join us: https://cloud.tencent.com/
license agreement
This paper adopts Signature - non commercial use - share 4.0 international in the same way License agreement, please indicate the source for reprint.