[the external chain image transfer fails. The source station may have an anti-theft chain mechanism. It is recommended to save the image and upload it directly (img-bkqsqvki-164263681111)( https://ducafecat.tech/2022/01/21/2022/create-an-animation-screen-in-flutter/2022-01-20-07-40-53.png )]
original text
https://medium.com/@baran.aslankan4/create-an-animation-screen-in-flutter-683d9a534d67
code
https://github.com/ducafecat/getx_quick_start
reference resources
- https://pub.flutter-io.cn/packages/animated_text_kit
- https://pub.flutter-io.cn/packages/simple_animations
- https://pub.flutter-io.cn/packages/google_fonts
text
Hello everyone, today I want to show you how to create an animation screen in fluent, like this;
Install dependencies
You can pub.dev Get dependencies
These are the versions I use in my project:
animated_text_kit: ^4.2.1
simple_animations: ^3.1.1
google_fonts: ^2.1.0
After obtaining the dependencies, we have another step before coding.
An application called Liquid Studio was created by Felix Blaschke. This application generates dart code to make some animation.
https://felixblaschke.github.io/liquid-studio/#/
Now is the design part:

There are many options and color choices, for which I use the default settings and colors.
Now, in order to animate it, we need to add another layer called Plasma.
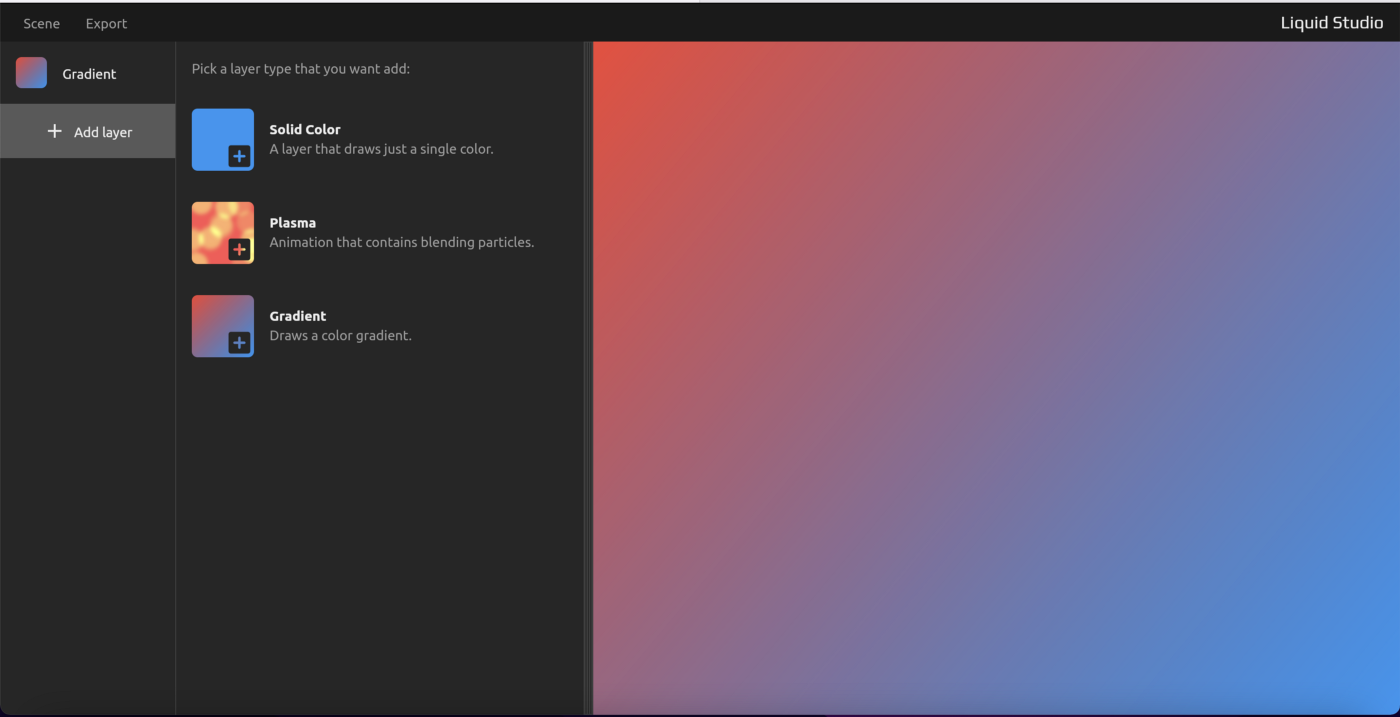
Click the add layer button and select Plasma.
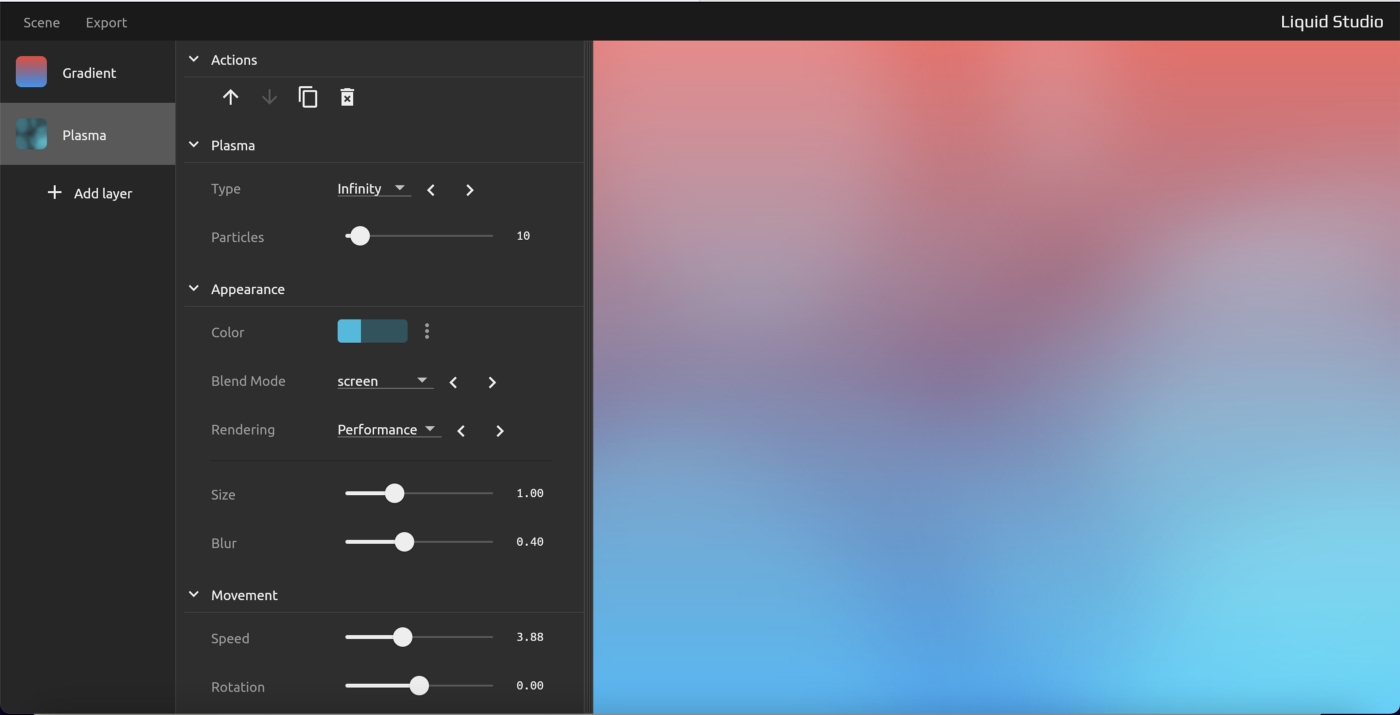
Now you can customize gradient layers and plasma layers. I have made some customizations for myself.
To export now, click the Export button in the upper left corner.
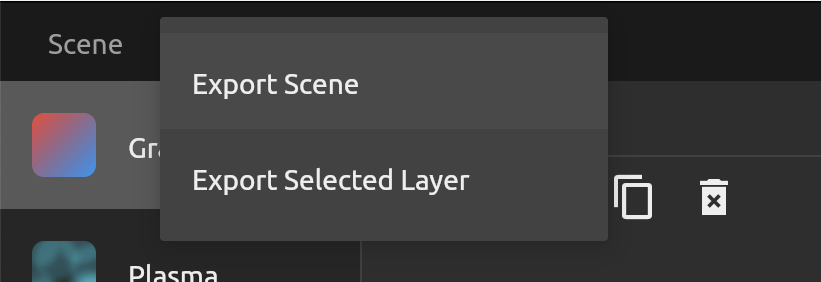
Click export scene to export all layers.
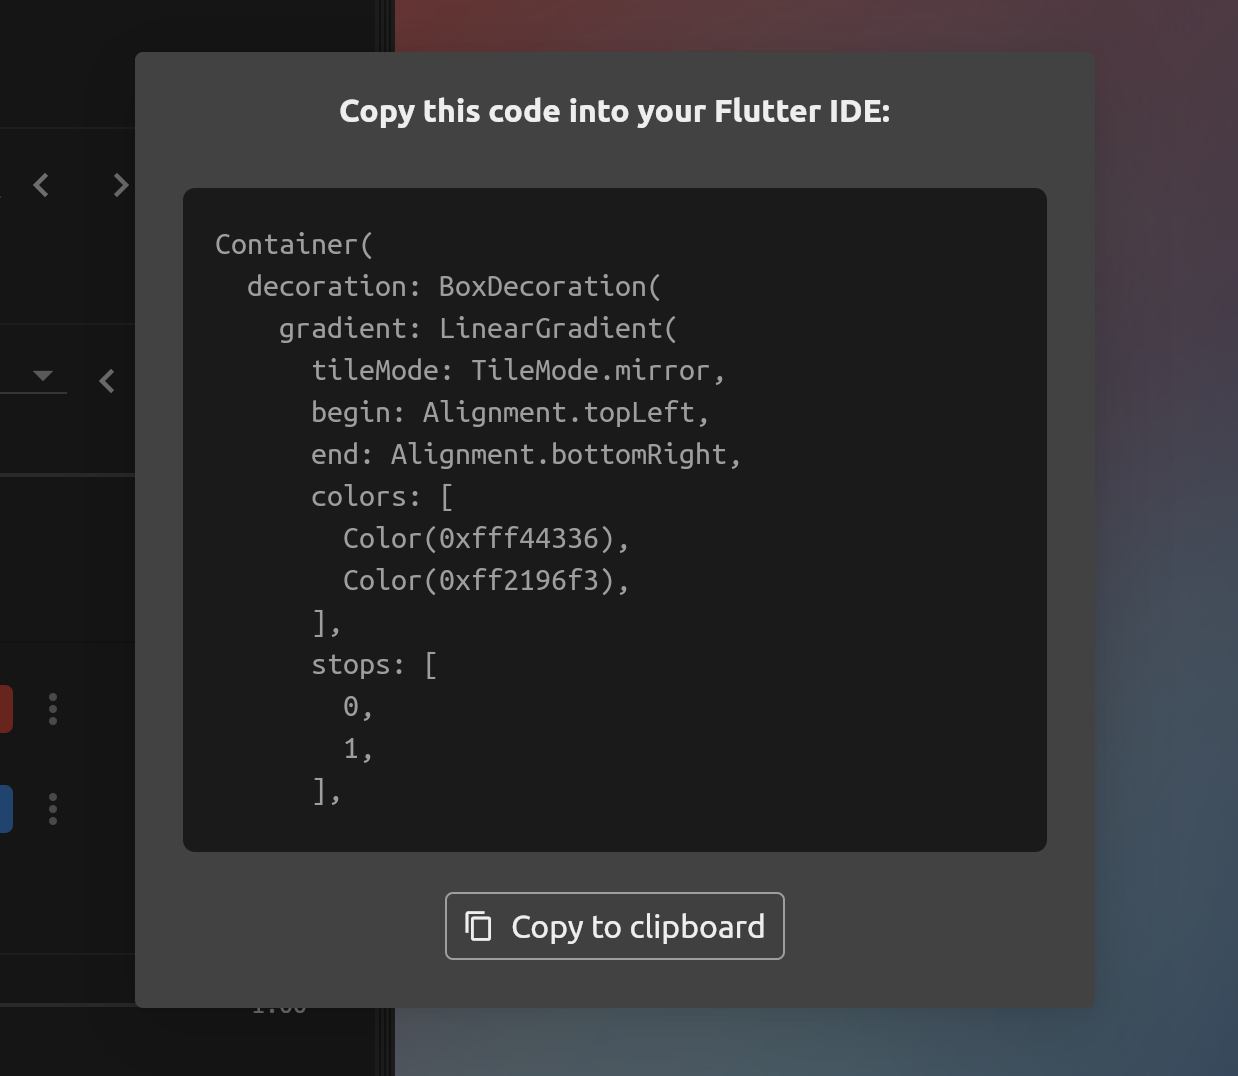
Now that we have the code for color animation, we will use this code in the IDE, but before that, let's create a class structure.
Let's create a stateful widget and first return a Scaffold.
Now, we want to skip the animation page when we click on the screen. To do this, we can use the GestureDetector widget.
@override
  Widget build(BuildContext context) {
    return Scaffold(
      body: GestureDetector(

      ),
    );
  }
Now paste the code we exported in liquid studio as a subassembly of the GestureDetector widget.
@override
  Widget build(BuildContext context) {
    return Scaffold(
      body: GestureDetector(
        child: Container(
          decoration: BoxDecoration(
            gradient: LinearGradient(
              tileMode: TileMode.mirror,
              begin: Alignment.topRight,
              end: Alignment.bottomRight,
              colors: [
                Color(0xfff44336),
                Color(0xff2196f3),
              ],
              stops: [
                0,
                1,
              ],
            ),
            backgroundBlendMode: BlendMode.srcOver,
          ),
         PlasmaRenderer(
              type: PlasmaType.infinity,
              particles: 10,
              color: Color(0x442eaeaa),
              blur: 0.31,
              size: 1,
              speed: 1.86,
              offset: 0,
              blendMode: BlendMode.plus,
              particleType: ParticleType.atlas,
              variation1: 0,
              variation2: 0,
              variation3: 0,
              rotation: 0,
            ),
        ),
      ),
    );
  }
It should look like this. Now you will have an error because we haven't imported simple animation yet.
Import the simple animation library at the top of the class.
import 'package:simple_animations/simple_animations.dart';
Now that our animation color is ready, you can click to navigate to another page. We will use the click method of the GestureDetector widget.
Under the Container Widget, create on tap method and navigate to the desired page.
onTap: (){
          Navigator.of(context).pushReplacementNamed('/home');
        },
Now, when we test the code, it should be like this:
There is only one thing left to do now, that is the animated text part.
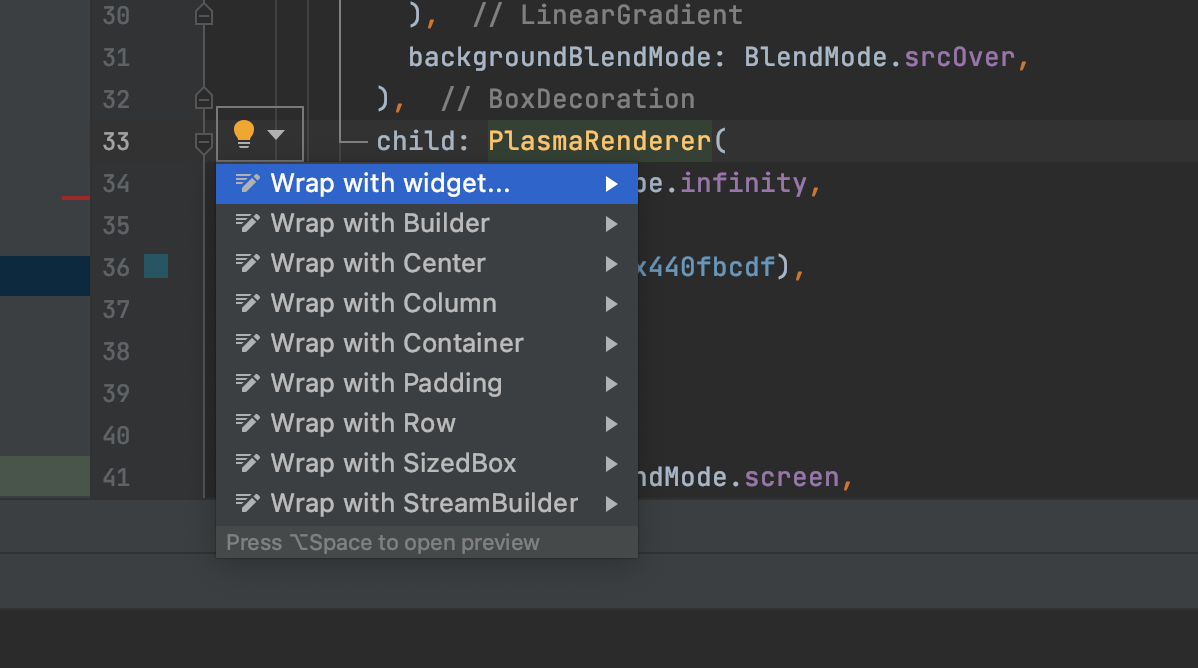
In this code, the Container Widget has a child element, which is the plasma renderer, which can help us create color animation. Now, in order to add text to the screen, we need to add another child element to the Container Widget. To add child elements, we need to overwrite all child elements with Stack Widget.
Click the PlasmaRenderer Widget, and then click the light bulb that appears after clicking the Widget.
Select the wrap with Column option.
Now we have to stop here!
Let me tell you why I choose to use column selection. It can also be row.
We will use the Stack Widget, which can help us put widgets on top of each other, basically superimposing widgets.
But why should I choose a column?
Because stack, column and row widgets have no child windows, they have child windows. If I choose widgets instead of columns, I will have to create parentheses and change child widgets, so the reason why I choose columns is basically to encode faster. It's not important at all, but I just want to mention it
So we have created our stack widget, one of which is PlasmaRenderer. Now we want to add animated text as a widget, but before creating the central widget, let's display the text in the center of the screen.
In order to get animated text, we need to use the AnimatedTextKit widget, so we must import it into the library.
import 'package:animated_text_kit/animated_text_kit.dart';Center(
          child: AnimatedTextKit( ),
              ),
Add this code after PlasmaRenderer.
We get a list called animatedTexts, which will contain all the text we want to display on the screen.
In pub In dev, there are many text animations in the AnimatedTextKit package. I chose to rotate the text, but you can try different animations.
animatedTexts: [
                    RotateAnimatedText('Hello',textStyle: const TextStyle(fontSize: 32,fontWeight: FontWeight.bold,color: Colors.white)),
                    RotateAnimatedText('Animation screen',textStyle: const TextStyle(fontSize: 32,fontWeight: FontWeight.bold,color: Colors.white)),
                    RotateAnimatedText('Click to get started',textStyle: const TextStyle(fontSize: 32,fontWeight: FontWeight.bold,color: Colors.white)),
                  ],
Here, RotateAnimatedText adopts our string. You can add styles to change the font size and bold. In addition, you can import Google fonts and add some custom fonts. For the color part, I chose white. You can choose any color you want.
Now the text has been completed, but we need some animation time customization.
We can use some methods to help us customize our animation.
- totalRepeatCount: you can write the number of times you want the animation to repeat
- Pause: pause time between animated text
totalRepeatCount: 1,
pause: const Duration(milliseconds: 3000),
Write this to the AnimatedTextKit widget.
I want it to execute only once, so I set the repeat count to 1.
Pause uses the Duration method, which I set to 3000 milliseconds, that is, 3 seconds.
The whole code should look like this:
@override
  Widget build(BuildContext context) {
    return Scaffold(
      body: GestureDetector(
        child: Container(
          decoration: BoxDecoration(
            gradient: LinearGradient(
              tileMode: TileMode.mirror,
              begin: Alignment.topLeft,
              end: Alignment.bottomRight,
              colors: [
                Color(0xffff1100),
                Color(0xff008eff),
              ],
              stops: [
                0,
                1,
              ],
            ),
            backgroundBlendMode: BlendMode.srcOver,
          ),
          child: Stack(
            children:[
               PlasmaRenderer(
              type: PlasmaType.infinity,
              particles: 10,
              color: Color(0x442eaeaa),
              blur: 0.31,
              size: 1,
              speed: 1.86,
              offset: 0,
              blendMode: BlendMode.plus,
              particleType: ParticleType.atlas,
              variation1: 0,
              variation2: 0,
              variation3: 0,
              rotation: 0,
            ),
              Center(
                child: AnimatedTextKit(
                  animatedTexts: [
                    RotateAnimatedText('Hello',textStyle: const TextStyle(fontSize: 32,fontWeight: FontWeight.bold,color: Colors.white)),
                    RotateAnimatedText('Animation screen',textStyle: const TextStyle(fontSize: 32,fontWeight: FontWeight.bold,color: Colors.white)),
                    RotateAnimatedText('Click to get started',textStyle: const TextStyle(fontSize: 32,fontWeight: FontWeight.bold,color: Colors.white)),
                  ],
                      totalRepeatCount: 1,
                      pause: const Duration(milliseconds: 3000),
                ),
              ),],
          ),
        ),
          onTap: (){
            Navigator.of(context).pushReplacementNamed('/home'); }
      ),
    );
  }
You can customize your animation and use more methods or more animated text according to your taste.
This is all my content today. Thank you for reading. I hope you like it. See you next time when you write. I wish you a happy day;
© Cat brother
-
Wechat ducafecat