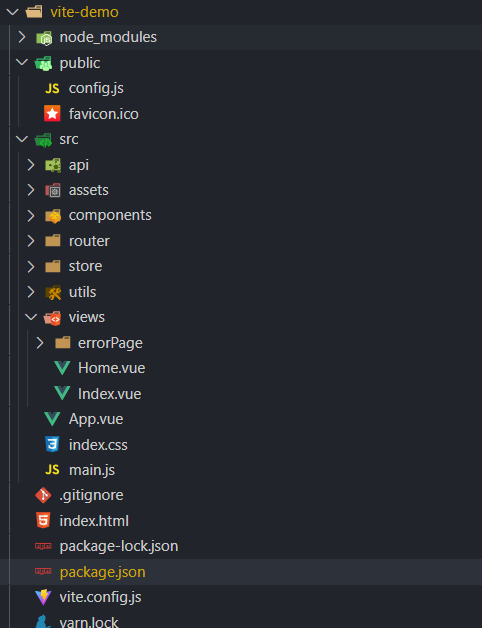
When you want to create a vue project independently and have no way to start, such a project can solve this problem. It contains the basic project directory, classified by folder and improve efficiency.
So start creating our project!
We use vite to create projects, which is faster
npm install -g create-vite-app //Install global create vite app
create-vite-app vue3-vite   //Use the tool create vite app to create a vue3 project named vue3 vite
cd vue3-vite             //Enter project folder
npm install                 //Initialize project
npm run dev                 //Run project
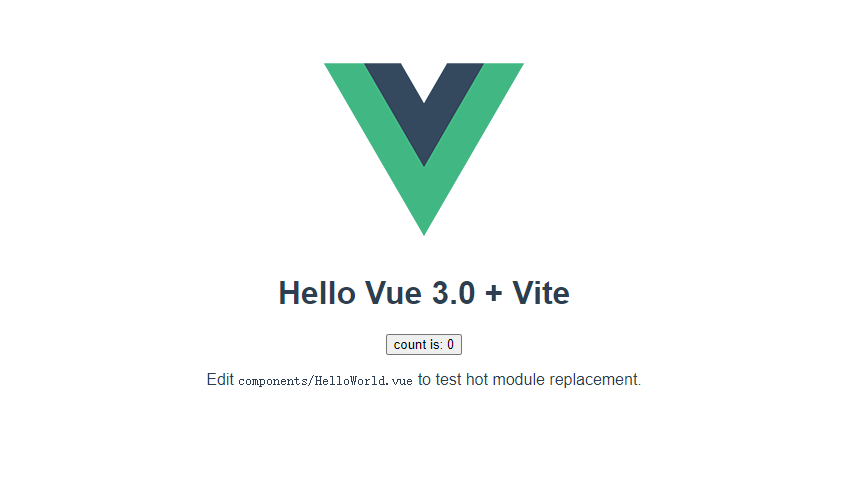
At this time, it is just a vue3 project. If other projects need to be downloaded and configured by themselves, the project at this time has no soul. We need to configure some things

Next, we need to download the components
- Installing Vue router
yarn add vue-router@4.0.0-beta.6
- Configure Vue router
Create a router directory under the project src directory, and then add index JS file, add the following
import { createRouter, createWebHashHistory } from "vue-router";
import Home from '../views/Home.vue'

/* async */
export const constantRouterMap = [
  { path: '/:catchAll(.*)', redirect: '/404' },
  {
    path: '/404', name: 'error404',
    meta: {
      title: 'Error 404'
    },
    component: () => import( /* webpackChunkName: "error404" */ "../views/errorPage/404.vue")
  },
]

const routes = [
  {
    path: "/",
    name: "Home",
    component: Home,
    children:[
      {
        path: "/Index",
        name: "index",
        component: () => import('../views/Index.vue')
      },
    ]
  },

  ...constantRouterMap
]
const router = createRouter({
  history: createWebHashHistory(),
  routes
});
export default router;
//In main JS, mount it and register it on the global
We can test whether to jump the route, vue routing tutorial
Next, let's continue to install vuex
       yarn add vuex@4.0.0-beta.4
       //perhaps
       yarn add vuex@next
Configure vuex
Create a new store directory under the project src directory and add index TS file, add the following
Installing axios
yarn add axios
Configure axios
import { createStore } from 'vuex'

export default createStore({
  state: {
    examine: null,
  },
  mutations: {
  },
  actions: {},
  modules: {}
})
After configuring the file, if you want to learn to use vuex, there are tutorials here Tutorial on using vuex
If you want to use the interface, we continue to install axios
yard add axios
We need the full version of the embryo axios project. It is very convenient to call the interface with various interfaces, which benefits from modular development,
We need to configure the request and call interfaces in these three places
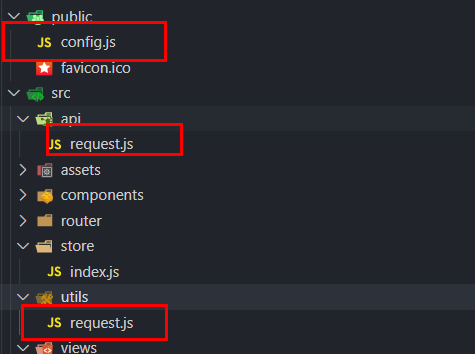
The first is config. JS is configured to write the interface directly in the later stage without worrying about interface switching
window.configs={
  'baseApi':"xxx",
}
Next is request JS, which handles request response and request interception globally
import axios from 'axios'

const service = axios({
  baseURL:window.configs.baseApi,
  timeout:5000*60
})
service.interceptors.request.use(
  config => {
    config.headers['chainType'] = getChainType();

    config.headers['address'] = localStorage.getItem('connected_account');
    return config;
  },
  error => {
    return Promise.reject();
  }
);

service.interceptors.response.use(
  response => {
    if (response.status === 200) {
      let { data } = response;
      if (data.code === 500) {

      }
      return response.data;
    } else {
      Promise.reject();
    }
  },
  error => {
    if (error.code == 4001) {

    }
    return Promise.reject();
  }
);

export default service;
Finally, API / request JS after the first two files are configured, we can use interfaces, and each interface is called separately
import axios from 'axios'
import request from 'utils/request';
axios.defaults.timeout = 20000;

// Custom method
const doPost= (data) => {
  return request({
    url:"bbb",
    method:'post',
    data
  })
}
const doGet= (params) => {
  return request({
    url:"bbb",
    method:'get',
    params
  })
}
// Upload file
const doImg = (data) => {
  return request({
    url: 'file/cccc',
    method: 'post',
    headers: { 'Content-Type': 'multipart/form-data' },
    data
  });
};

export {
  doGet,doPost,doImg
}
At this point, our AIX OS configuration ends,
Finally, configure our vite config. js
import vue from '@vitejs/plugin-vue'
const path = require('path')

// vite.config.js # or vite.config.ts
console.log(path.resolve(__dirname, './src'))
module.exports = {
  plugins: [vue()],
  "resolve.alias": {
    // The key must start and end with a slash
    '/@/': path.resolve(__dirname, './src'),
    "/@utils/": path.resolve(__dirname, "src/utils"),
    "/@api/": path.resolve(__dirname, "src/api"),
    "/@components/": path.resolve(__dirname, "src/components"),
  },

  // After packaging, the static resources are stored in js/css/image directory, @ default '_assets'
  assetsDir: '',

  //Used to place the generated static resources (js, css, img, fonts); (after the project is packaged, the static resources will be placed in this folder)
  assetsDir: "assets",
  //By default, the generated static resources include a hash in their file names for better cache control. You can turn off file name hashing by setting this option to false. (false is to keep the original file name unchanged)
  filenameHashing: false,

  // Introducing third-party configuration
  /* optimizeDeps: {
    include: ['moment', 'axios'],
  }, */
  hostname: '127.0.0.1',
  port: 3000,
  // Automatically open in browser
  open: true,
  // Enable https
  https: false,
  // Server side rendering
  ssr: false,
  /**
   * The basic common path when serving in production.
   * @default '/'
   */
  base: './',
  /**
   * The directory associated with the "root" where the build output will be placed. If the directory exists, it will be deleted before building.
   * @default 'dist'
   */
  outDir: 'dist',
  // For reverse proxy, you should pay special attention here. Many online tutorials directly set proxy instead of adding server to the official website, which may lead to failure. vite official website: https://vitejs.dev/guide/features.html#async-chunk-loading-optimization
  server: {
    proxy: {
      '/api': {
        target: 'xxx',
        ws: true, // Enable websockets
        //Start agent: a virtual server will be created locally, and then the requested data will be sent and received at the same time. In this way, the data interaction between the server and the server will not have cross domain problems
        changeOrigin: true,
        rewrite: path => path.replace(/^\/api/, '')
      }
    }
  }

}