Before Docker (V): how should containers communicate? In, we talked about the network communication mode when running multiple containers, but those containers are running on the same physical machine
In actual projects, we often need to deploy multiple sets of software. For example, components need to be deployed in clusters, or a project program itself depends on many components. Cross host deployment is often required for storage and operation efficiency. So, how to realize the network communication between cross host containers?
Hey, you think of it, Docker} also thinks of it, or there is a general scheme
1, Theory: how does Docker implement cross host network?
1. Know Docker Overlay
Overlay network is a logical network created above the physical (underlying) network for a specific purpose. Docker # can create an overlay network between containers, so as to realize the communication between containers across hosts
In other words, as long as several physical machines can communicate, as long as an Overlay network is established on these machines and containers that need to communicate with each other are directly deployed on this network, the final effect is similar to deploying these containers on the same physical machine for arbitrary communication
For example, if we need to implement an elastic search cluster, we only need to deploy each node on a pre created Overlay network to realize communication
2. Be a little more specific
You may wonder why the Overlay network can realize the network interworking between multiple physical machines? In fact, it adds a layer of virtual network between the {Docker} cluster nodes, which has independent virtual network segments. The request sent by the Docker} container will be sent to the virtual subnet first, and then packaged by the virtual subnet as the real web address of the host
3. What is Swarm?
The Docker Swarm to be introduced today is a simple implementation of the Docker Overlay network. It is a container cluster management tool developed by Docker and has good compatibility with the Docker API
In addition, Linux # Docker is installed, and # Swarm is also installed by default. Therefore, here, we use Swarm to realize the network communication between clusters
Next, let's really understand how to realize cross host communication of Docker container using Docker Swarm
2, Practice 1: realize communication between clusters
Let's take that old example
In the article Docker (V): how should containers communicate? In, we will add the Spring Boot backend program to druid_demo , and , mariadb , run in different containers respectively, and successfully realize the communication between them
Then, next, we will deploy them on two machines respectively
The machine configuration is as follows:
| Serial number | Node role | ip address | Container name |
|---|---|---|---|
| 1 | manager | 10.10.10.100 | druid_demo |
| 2 | worker | 10.10.10.88 | mariadb |
Note: establishing a cross host network using Swarm is actually divided into the following steps:
-
Create a Swarm cluster in the cluster manager
-
Add other clusters separately
-
Create an Overlay network in manager
-
Specify this {Overlay} network when starting each container
Specifically, look down
1. Create a Swarm cluster on the manager node
Execute command:
docker swarm init --advertise-addr=10.10.10.100
The effects are as follows:
docker swarm init --advertise-addr=10.10.10.100

[root@localhost ~]# docker swarm init --advertise-addr=10.10.10.100
Swarm initialized: current node (maw28ll7mlxuwp47z5c5vo2v1) is now a manager.


To add a worker to this swarm, run the following command:

docker swarm join --token SWMTKN-1-2bdwwlo8xvdskil05itg66l63dpi931oqnt5gvehlnf1it1auo-2uvypbiu0hpcn1e06hrhctbe8 10.10.10.100:2377

To add a manager to this swarm, run 'docker swarm join-token manager' and follow the instructions.
Shows the command that the worker node joins the cluster. You only need to execute it
docker swarm join --token SWMTKN-1-2bdwwlo8xvdskil05itg66l63dpi931oqnt5gvehlnf1it1auo-2uvypbiu0hpcn1e06hrhctbe8 10.10.10.100:2377
that will do
2. Execute the command on the worker node to join the cluster
docker swarm join --token SWMTKN-1-2bdwwlo8xvdskil05itg66l63dpi931oqnt5gvehlnf1it1auo-2uvypbiu0hpcn1e06hrhctbe8 10.10.10.100:2377

image.png
3. At the manager node, view the node status of the current network cluster
Execute} docker node ls

image.png
4. On the manager node, create an overlay network
docker network create -d overlay --attachable demo
explain:
--attachable: declares that the currently created network is a network that other nodes can access
5. Is there more network in the network list of the worker node
docker network ls
Note: normally, after step 4, there will be an "demo" network based on the original one
6. Start the mariadb container on the worker node and specify the overlay network
sudo docker run -itd -v /usr/local/mysqldata:/var/lib/mysql -h mariadb --name=mariadb --net=demo --privileged=true mariadb:latest /sbin/init
Description: - net=demo: Specifies the network overlay between the clusters
7. On the manager node, start durid_demo program
Next, on the manager node, start the Spring Boot backend program druid_demo , and specify the , demo , network
docker run -it  -p 8888:8080
-h druid_demo
--name druid_demo
--net=demo
--privileged=true druid_demo:0.0.1-SNAPSHOT /sbin/init
At this time, request the interface to verify whether the network is interworking

image.png
The interface returns normally, which indicates that we have implemented {druid_demo communication between application container and mariadb container
8. Exit cluster
Execute} docker swarm leave to exit the cluster network
So, now you know the steps of {Docker} to realize cross host communication
Next, strike while the iron is hot. Let's build an elastic search (hereinafter referred to as ES) cluster and really practice it
be careful:
If you haven't used} ES much before, it doesn't matter. I'll launch corresponding articles to introduce it. Here, you only need to master how Docker deploys projects on multiple machines and the idea of cross host communication, and our goal will be achieved
3, Practice 2: Elasticsearch cluster construction
Before entering the cluster setup, let's take a look at how to start a stand-alone ES
1. Stand alone mode
docker run -itd --name elastic -v /usr/local/es/data:/var/lib/elasticsearch -v /usr/local/es/logs:/var/log/elasticsearch -p 9200:9200 -p 9300:9300 -e "discovery.type=single-node" --restart=always elasticsearch:v7.9.1
explain:
1) - v: specify the mount directory (map the data directory and log directory of {ES} to the host machine respectively, so that even if the container is hung and restarted, the log will not be lost)
Where, / etc / elasticsearch / elasticsearch. In the container directory YML , path is configured in YML , respectively Data and path logs . Respectively
/var/lib/elasticsearch

/usr/local/es/logs
2) - p: specify the mapping port (the port in the container is mapped to the host)
3) - e: specify the configuration (specify that es is currently started as a single node)
4) -- restart = always: always restart automatically
After startup, log in to {es head and find that it can be connected, which indicates that the startup is successful
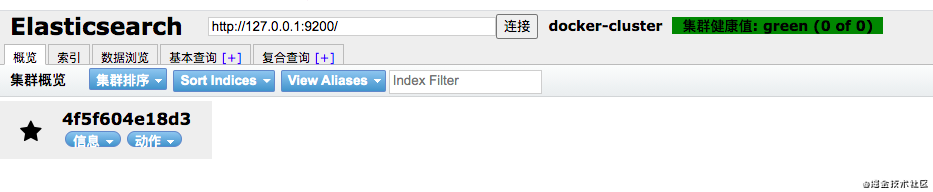
image.png
The stand-alone mode is very simple, as long as the mount directory path is configured separately Data and path Logs. Just specify it as stand-alone mode
The cluster mode is not complex, and the configuration is basically the same as that of the single machine mode. In addition to deploying multiple physical machines, it's good to pay attention to the correlation between nodes. The interrelated methods include: network interworking # and # determining the node members of the cluster
2. Cluster mode
Let's set up a cluster mode of {1 master + 3 data} nodes, and the machine allocation is:
| Serial number | Node role | ip address |
|---|---|---|
| 1 | elastic-master | 10.10.10.88 |
| 2 | elastic-data01 | 10.10.10.76 |
| 3 | elastic-data02 | 10.10.10.77 |
| 4 | elastic-data03 | 10.10.10.78 |
1) Configure cluster network demo
Yes, refer to the first step to configure the cluster network for three machines
The roles of network nodes are as follows:
| Serial number | Node role | ip address |
|---|---|---|
| 1 | manager | 10.10.10.88 |
| 2 | worker | 10.10.10.76 |
| 3 | worker | 10.10.10.77 |
| 4 | worker | 10.10.10.78 |
2) Modify the configuration file of each node # elasticsearch yml
a. elastic-master
vi /usr/local/es/config/elastic-master/elasticsearch.yml
# ======================== Elasticsearch Configuration =========================
#
# NOTE: Elasticsearch comes with reasonable defaults for most settings.
# Before you set out to tweak and tune the configuration, make sure you
# understand what are you trying to accomplish and the consequences.
#
# The primary way of configuring a node is via this file. This template lists
# the most important settings you may want to configure for a production cluster.
#
# Please consult the documentation for further information on configuration options:
# https://www.elastic.co/guide/en/elasticsearch/reference/index.html
#
# ---------------------------------- Cluster -----------------------------------
#
# Use a descriptive name for your cluster:
#
cluster.name: my-application
#
# ------------------------------------ Node ------------------------------------
#
# Use a descriptive name for the node:
#
node.name: elastic-master
node.master: true
node.data: fasle
#
# Add custom attributes to the node:
#
#node.attr.rack: r1
#
# ----------------------------------- Paths ------------------------------------
#
# Path to directory where to store the data (separate multiple locations by comma):
#
path.data: /var/lib/elasticsearch
#
# Path to log files:
#
path.logs: /var/log/elasticsearch
#
# ----------------------------------- Memory -----------------------------------
#
# Lock the memory on startup:
#
#bootstrap.memory_lock: true
#
# Make sure that the heap size is set to about half the memory available
# on the system and that the owner of the process is allowed to use this
# limit.
#
# Elasticsearch performs poorly when the system is swapping the memory.
#
# ---------------------------------- Network -----------------------------------
#
# Set the bind address to a specific IP (IPv4 or IPv6):
#
network.host: 0.0.0.0
#
# Set a custom port for HTTP:
#
#http.port: 9200
#
# For more information, consult the network module documentation.
#
# --------------------------------- Discovery ----------------------------------
#
# Pass an initial list of hosts to perform discovery when this node is started:
# The default list of hosts is ["127.0.0.1", "[::1]"]
#
discovery.seed_hosts: ["elastic-master", "elastic-data01","elastic-data02","elastic-data03"]
#
# Bootstrap the cluster using an initial set of master-eligible nodes:
#
cluster.initial_master_nodes: ["elastic-master"]
#
# For more information, consult the discovery and cluster formation module documentation.
#
# ---------------------------------- Gateway -----------------------------------
#
# Block initial recovery after a full cluster restart until N nodes are started:
#
#gateway.recover_after_nodes: 3
#
# For more information, consult the gateway module documentation.
#
# ---------------------------------- Various -----------------------------------
#
# Require explicit names when deleting indices:
#
#action.destructive_requi
http.cors.enabled: true
http.cors.allow-origin: "*"
explain:
-
cluster.name: name of my application # cluster. Each node should be consistent
-
node.name: elastic master # node name. Each node must be unique
-
node.master: demo # is the master node
-
node.data: demo # is not a data node
-
path.data: / var/lib/elasticsearch #data storage directory (the default directory can be used directly without special requirements)
-
path.logs: / var/log/elasticsearch # log storage directory (the default directory can be used directly without special requirements)
-
discovery.seed_hosts: ["elastic-master", "elastic-data01","elastic-data02","elastic-data03"]
#Discoverable nodes (just configure the host name or ip of four nodes, docker deployment, it is recommended to configure the host name directly)
-
cluster. initial_ master_ Nodes: [elastic master] # initialize the cluster node and directly configure the host name of the master node
b.elastic-data01
vi /usr/local/es/config/elastic-data01/elasticsearch.yml
# ======================== Elasticsearch Configuration =========================
#
# NOTE: Elasticsearch comes with reasonable defaults for most settings.
# Before you set out to tweak and tune the configuration, make sure you
# understand what are you trying to accomplish and the consequences.
#
# The primary way of configuring a node is via this file. This template lists
# the most important settings you may want to configure for a production cluster.
#
# Please consult the documentation for further information on configuration options:
# https://www.elastic.co/guide/en/elasticsearch/reference/index.html
#
# ---------------------------------- Cluster -----------------------------------
#
# Use a descriptive name for your cluster:
#
cluster.name: my-application
#
# ------------------------------------ Node ------------------------------------
#
# Use a descriptive name for the node:
#
node.name: elastic-data01
node.master: false
node.data: true
#
# Add custom attributes to the node:
#
#node.attr.rack: r1
#
# ----------------------------------- Paths ------------------------------------
#
# Path to directory where to store the data (separate multiple locations by comma):
#
path.data: /var/lib/elasticsearch
#
# Path to log files:
#
path.logs: /var/log/elasticsearch
#
# ----------------------------------- Memory -----------------------------------
#
# Lock the memory on startup:
#
#bootstrap.memory_lock: true
#
# Make sure that the heap size is set to about half the memory available
# on the system and that the owner of the process is allowed to use this
# limit.
#
# Elasticsearch performs poorly when the system is swapping the memory.
#
# ---------------------------------- Network -----------------------------------
#
# Set the bind address to a specific IP (IPv4 or IPv6):
#
network.host: 0.0.0.0
#
# Set a custom port for HTTP:
#
#http.port: 9200
#
# For more information, consult the network module documentation.
#
# --------------------------------- Discovery ----------------------------------
#
# Pass an initial list of hosts to perform discovery when this node is started:
# The default list of hosts is ["127.0.0.1", "[::1]"]
#
discovery.seed_hosts: ["elastic-master", "elastic-data01","elastic-data02","elastic-data03"]
#
# Bootstrap the cluster using an initial set of master-eligible nodes:
#
cluster.initial_master_nodes: ["elastic-master"]
#
# For more information, consult the discovery and cluster formation module documentation.
#
# ---------------------------------- Gateway -----------------------------------
#
# Block initial recovery after a full cluster restart until N nodes are started:
#
#gateway.recover_after_nodes: 3
#
# For more information, consult the gateway module documentation.
#
# ---------------------------------- Various -----------------------------------
#
# Require explicit names when deleting indices:
#
#action.destructive_requi
http.cors.enabled: true
http.cors.allow-origin: "*"
explain:
a. In the configuration file of elastic-data01 , and elastic master , only the following three items are different, and the rest are the same
node.name: elastic-data01 # node name. Each node must be unique
node.master: false # is not a master node
node.data: true # is the data node
b. The configuration of elastic-data02 and elastic-data03 , is the same as that of , elastic-data01 , except , node Except that the values of name , are inconsistent, the others are the same
3) Start
Execute the "docker" startup command on each host to start each node
docker run -itd --name elastic-master -h elastic-master --net=demo -v /usr/local/es/data:/var/lib/elasticsearch -v /usr/local/es/logs:/var/log/elasticsearch -v /usr/local/es/plugins:/usr/share/elasticsearch/plugins -v /usr/local/es/config/elastic-master/elasticsearch.yml:/etc/elasticsearch/elasticsearch.yml:ro -p 9200:9200 -p 9300:9300 -e cluster.initial_master_nodes=elastic-master --restart=always elasticsearch:v7.9.1 /sbin/init
docker run -itd --name elastic-data01 -h elastic-data01 --net=demo -v /usr/local/es/data:/var/lib/elasticsearch -v /usr/local/es/logs:/var/log/elasticsearch -v /usr/local/es/plugins:/usr/share/elasticsearch/plugins -v /usr/local/es/config/elastic-data01/elasticsearch.yml:/etc/elasticsearch/elasticsearch.yml:ro -p 9200:9200 -p 9300:9300 -e cluster.initial_master_nodes=elastic-master --restart=always elasticsearch:v7.9.1 /sbin/init
docker run -itd --name elastic-data02 -h elastic-data02 --net=demo -v /usr/local/es/data:/var/lib/elasticsearch -v /usr/local/es/logs:/var/log/elasticsearch -v /usr/local/es/plugins:/usr/share/elasticsearch/plugins -v /usr/local/es/config/elastic-data02/elasticsearch.yml:/etc/elasticsearch/elasticsearch.yml:ro -p 9200:9200 -p 9300:9300 -e cluster.initial_master_nodes=elastic-master --restart=always elasticsearch:v7.9.1 /sbin/init
docker run -itd --name elastic-data03 -h elastic-data03 --net=demo -v /usr/local/es/data:/var/lib/elasticsearch -v /usr/local/es/logs:/var/log/elasticsearch -v /usr/local/es/plugins:/usr/share/elasticsearch/plugins -v /usr/local/es/config/elastic-data03/elasticsearch.yml:/etc/elasticsearch/elasticsearch.yml:ro -p 9200:9200 -p 9300:9300 -e cluster.initial_master_nodes=elastic-master --restart=always relasticsearch:v7.9.1 /sbin/init
4) Verify
Request address: http://10.10.10.88:9200/_cat/nodes View node list

image.png
It can be seen that in the cluster, there are # 4 # nodes as scheduled, including # 1 # master # node and # 3 # data # node (those marked with * are # master # nodes)
The cluster is successfully built! Congratulations!
5) Integrated ES configuration in project
After testing, you only need to configure the address of a master node
spring.elasticsearch.rest.uris=http://10.10.10.88:9200
Note: this only explains how to build an ES} cluster to realize network communication between clusters. There will be a special article later to introduce the theoretical knowledge and specific practical knowledge of ES. Please look forward to it
4, Summary
Well, generally speaking, Docker , implements cross host communication of , Docker , containers by building an , Overlay , bridge and then uniformly placing the containers of each host on this bridge
Congratulations on mastering a new skill. Of course, if you want to really master it, you are also recommended to practice it once. After all, practice and understanding are at different stages, and the degree of mastery of knowledge is also at different levels