If you are Xiaobai, this set of information can help you become a big bull. If you have rich development experience, this set of information can help you break through the bottleneck
2022web full set of video tutorial front-end architecture H5 vue node applet Video + data + code + interview questions.
Introduction to CSS
1, CSS introduction
1. What is CSS
CSS: Cascading Style Sheet
Is a set of style setting rules that control the appearance style of a page
2. Why CSS
Realize the separation of content and style, which is convenient for team development
Style reuse is convenient for the later maintenance of the website
The precise control of the page makes the page more exquisite
3. CSS function
Page beautification
Layout and positioning
2, Basic usage
1. CSS syntax
<head>
	<style>
		selector{
			Attribute name: attribute value;
			Attribute name: attribute value;
		}
	</style>
</head>
-
Selector: object (thing) to decorate
-
Attribute name: which attribute (style) decorates the object
-
Attribute value: the value of the style
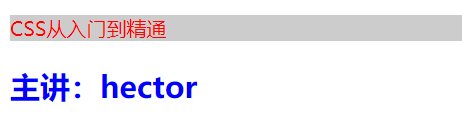
DocumentCSS from entry to mastery
Speaker: hector
Example:
2. CSS application mode
Also known as CSS reference method, there are three methods: internal style, inline style and external style
2.1 internal style
Also known as inline style, it is defined in the page header by the style tag
Works on all labels in the current page that match the style selector
2.2 inline style
Also known as embedded style, it is defined using the style attribute of HTML tags
Works only on labels that set the style attribute
2.3 external style
Use a separate CSS file definition, and then use the link tag or @ import instruction to introduce it in the page
-
Use the link tag to link external style files
<link rel="stylesheet" type="text/css" href="CSS Path to the style file">
Tip: the type attribute can be omitted
-
@The import directive imports an external style file
Document<style> @import "CSS Style file path"; @import url(CSS Style file path); </style>
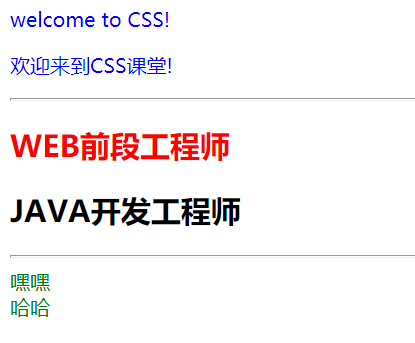
welcome to CSS!
Welcome to CSS class!
WEB front Engineer
JAVA Development Engineer
heyha-ha
Example:
3, Selector
1. Base selector
1.1 label selector
Also known as an element selector, it uses an HTML tag as the name of the selector
The label name is used as the basis for style application
Type 1.2 selector
Use a custom name to Number as the prefix, and then call the class selector through the class attribute of the HTML tag
The class attribute of the label is used as the basis for style application
matters needing attention:
- Cannot add when calling number
- When multiple class selectors are called at the same time, they are separated by spaces
- Class selector names cannot begin with a number
1.3 ID selector
Use a custom name with # as the prefix, and then match the name through the id attribute of the HTML tag
The id attribute of the tag is used as the basis for style application, which is a one-to-one relationship
<!DOCTYPE html>
<html lang="en">
<head>
<meta charset="UTF-8">
<title>Document</title>
<style>
p{
color:red;
font-size:20px;
}
h2{
color:yellow;
}
.hello{
background: #cccccc;
}
.world{
font-weight:bold;
}
#haha{
color:blue;
}
</style>
</head>
<body>
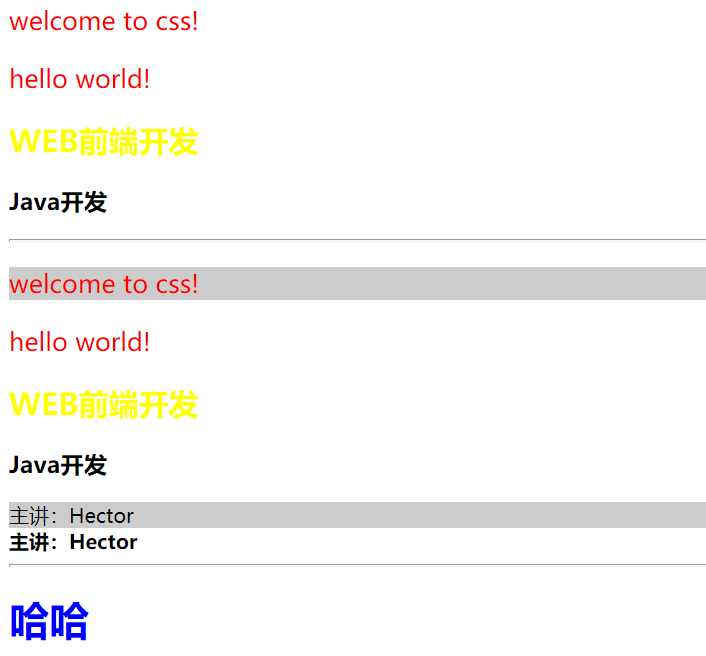
<p>welcome to css!</p>
<p>hello world!</p>
<h2>WEB Front end development</h2>
<h3>Java development</h3>
<hr>
<p class="hello">welcome to css!</p>
<p>hello world!</p>
<h2>WEB Front end development</h2>
<h3>Java development</h3>
<div class="hello">be the speaker: Hector</div>
<div class="world">be the speaker: Hector</div>
<hr>
<h1 id="haha">ha-ha</h1>
</body>
</html>
Example:
2. Complex selector
2.1 compound selector
Label selectors and class selectors, label selectors and ID selectors are used together
Two conditions must be met to apply a style
2.2 combined selector
Also known as collective declaration
Declare multiple selectors with the same style together, separated by commas
2.3 nested selectors
Set selectors inside a selector, separated by spaces
Only the label corresponding to the selector that meets the innermost level of the hierarchical relationship will be applied with the style
Note: when using spaces, it does not distinguish between father and son or offspring. When using > added in CSS3, it must be a parent-child relationship
<!DOCTYPE html>
<html lang="en">
<head>
	<meta charset="UTF-8">
	<title>Document</title>
	<style>
		/* 1.Label selector and class selector are used together -- compound selector */
		h1.aaa{
			color:red;
		}
		/* 1.Tag selector and ID selector are used together -- compound selector */
		p#bbb{
			color:blue;
		}
		/* 2.Combination selector */
		h1,p,div,span,.ccc{
			font-size:30px;
		}
		div{
			background:violet;
		}
		.ccc{
			font-weight:bold;
		}
		/* 3.Nested selector */
		/* div p{
			color:green;
			text-decoration:underline;
		} */
		div>p{
			color:green;
			text-decoration:underline;
		}
		div h3.ddd{
			color:red;
		}
	</style>
</head>
<body>
	<!-- Demand: just want to decorate class Attribute is aaa of h1 label -->
	<h1 class="aaa">welcome</h1>
	<h4 class="aaa">css</h4>
	<h1>hello</h1>
	<hr>
	<!-- I want to decorate ID Attribute is bbb of p label -->
	<p id="bbb">world</p >
	<p>html</p>
	<h1 id="bbb">Speaker: Jiji</h1>
	<hr>
	<!-- to h1,p,div,span Set the font size of the content in the label to 30 px -->
	<h1>hello</h1>
	<p>CSS</p>
	<div>WEB development</div>
	<span class="ccc">JAVA development</span>
	<hr>
	<!-- Requirements: modification div Internal p label -->
	<div>
		<p>div Internal p label</p>
		<h3>div Internal h3 label</h3>
	</div>
	<hr>
	<div>
		<h3>
			<p>div Internal h3 Internal p label</p>
		</h3>
	</div>
	<hr>
	<!-- Requirements: modification div Internal class by ddd Label of -->
	<div>
		<p>div Internal p</p>
		<h3 class="ddd">div Internal h3</h3>
		<p class="ddd">PPPP</p>
	</div>
	<h3 class="ddd">h3h3h3</h3>
</body>
</html>
Example:
2.4 pseudo class selector
Different styles are displayed according to different states, which are generally used for labels
Four states:
- : link links not visited
- : visited visited links
- : hover the mouse over the connection, that is, move it over the connection
- : active the selected link is activated
Note: the default hyperlink is blue and underlined
<!DOCTYPE html>
<html lang="en">
<head>
<meta charset="UTF-8">
<title>Pseudo class selector</title>
<style>
/*a:link{
font-size: 12px;
color:black;
text-decoration: none;
}
a:visited{
font-size: 15px;
color:;
}
a:hover{
font-size: 20px;
color:blue;
}
a:active{
font-size: 40px;
color:green;
}*/
a:link,a:visited{
color:#666666;
font-size: 13px;
text-decoration: none;
}
a:hover,a:active{
color:#ff7300;
text-decoration: underline;
}
/*Ordinary tags can also use pseudo class selectors*/
p:hover{
color:red;
}
p:active{
color:blue;
}
</style>
</head>
<body>
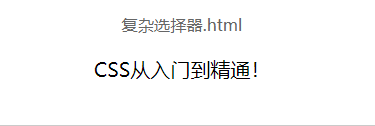
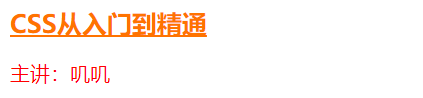
<a href="Complex selector.html">Complex selector.html</a>
<p>CSS From introduction to mastery!</p>
</body>
</html>
Example:
2.5 pseudo element selector
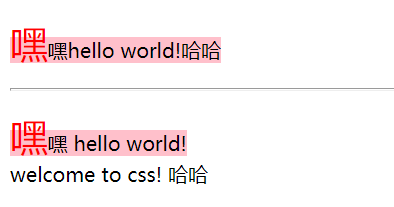
-
: first letter is the style of the first character
-
: first line adds a style to the first line
-
: before the content added at the front of the element content needs to be used in conjunction with the content attribute
-
: after: the content added on the last side of the element content needs to be used in conjunction with the content attribute
Documenthello world!
hello world!
welcome to css!
Example:
3. Selector priority
3.1 priority
Inline style > ID selector > class selector > label selector
Reason: first load the label selector, then the class selector, then the ID selector, and finally the inline style
Later loading overwrites the style with the same name that was loaded first
3.2 loading order of internal and external styles
Proximity principle
Reason: it is loaded in sequence according to the writing order. On the premise of the same priority, the later loaded will overwrite the style with the same name loaded first, so the closer it is
More priority
3.3 !important
Can use! important gives a style the highest priority
<!DOCTYPE html>
<html lang="en">
<head>
	<meta charset="UTF-8">
	<title>Document</title>
	<link rel="stylesheet" type="text/css" href="style/world.css">

	<style>
		div{
			font-size:20px;
		}
		.hello{
			font-weight:bold;
			color:blue;
		}
		#world{
			text-decoration: underline;
			color:green;
		}
		p{
			color:red;
		}
	</style>
</head>
<body>
	<div class="hello" id="world" style="color:#Ff7300 "> CSS from getting started to mastering < / div >
<p>Speaker: Jiji</p>
</body>
</html>
Example:
4, Common CSS properties
1. Font attribute
Set font related styles
attribute
meaning
explain
font-size
Size, size
Multiple units can be used
font-weight
thickness
font-family
typeface
font-style
style
font
Abbreviation
1.1 font-size
Value:
- Inherited. The font size (default value) is inherited from the parent tag by default. The default value of all CSS properties is inherited
- px pixel
- %Percentage, relative to the font size of the parent label
- em multiple, a multiple of the font size of the parent label
The root font size of HTML elements is also called the default font size of PX
1.2 font-weight
Value:
- Normal normal (default)
- Bold bold
- Customize 400 normal 700 bold
1.3 font-family
The specified font is required to be installed in the system
It is generally recommended to write three fonts: preferred, secondary and standby. Separated by commas
1.4 font-style
Value:
- Normal normal
- italic Italic
1.5 font
Abbreviated attribute: font: font style|font weight|font size|font family
It must be written in this order
<!DOCTYPE html>
<html lang="en">
<head>
	<meta charset="UTF-8">
	<title>Document</title>
	<style>
		div{
			font-size: 30px;
		}
		p{
			/*font-size: 20px;*/
			font-size: 80%;
		}
		.hello{
			font-size: 2em;
		}
		body{
			font-size: 62.5%;
		}
		ul li{
			/*font-size: 30px;
			font-weight: bold;
			font-family: Chinese Xingkai, Song typeface, boldface;
			font-style: italic;*/
			font: italic bold 30px Microsoft YaHei ;
		}
	</style>
</head>
<body>
	<p>
		CSS From introduction to mastery!
		<span>Speaker: Jiji</span>
	</p>
	<span>Speaker: Jiji</span>
	<hr>

	<div>
		my DIV
		<p>
			CSS From introduction to mastery
			<span>Speaker: Jiji</span>
		</p>
	</div>
	<hr>

	<span class="hello">Speaker: Jiji</span>
	<hr>

	<ul>
		<li>
			hey
		</li>
	</ul>
</body>
</html>
Example:
2. Text attributes
attribute
meaning
explain
color
colour
line-height
Row height
Height between rows
text-align
Horizontal alignment
Values: left, center, right
vertical-align
Vertical alignment
Values: top, middle and bottom can be used for image and text alignment
text-indent
text-indent
text-decoration
Text modification
Values: under line, over line, line through
text-transform
Letter case conversion
Values: lowercase, uppercase, capitalize
letter-spacing
Character spacing
word-spacing
Word spacing
Valid for English only
white-space
Processing method of blank
Whether to wrap the text after it exceeds the value: nowrap
2.1 color
Value, written in four ways:
-
Color name: use English words
-
RGB value in hexadecimal: #RRGGBB
-
Abbreviations can be used in specific cases
#FFFFFF--->#FFF white
#000000--->#000 black
#FF0000--->#F00 red
#00FF00--->#0F0 green
#0000FF--->#00F blue
#CCCCCC--->#CCC grey
#Ff7300 --- > cannot be abbreviated
Note: case insensitive
-
RGB function: rgb(red,green,blue)
Value range of each color, [0255]
rgb(255,0,0)----->red
rgb(0,255,0)----->green
rgb(0,0,255)----->blue
-
rgba function: rbga(red,green,blue,alpha)
Transparency can be set. alpha value range: [0,1] 0 means fully transparent and 1 means fully opaque
Documentrgba(255,0,0,1)----->Pure red rgba(255,0,0,0.5)---->Red translucent
welcome to css!
welcome to css!
welcome to css!
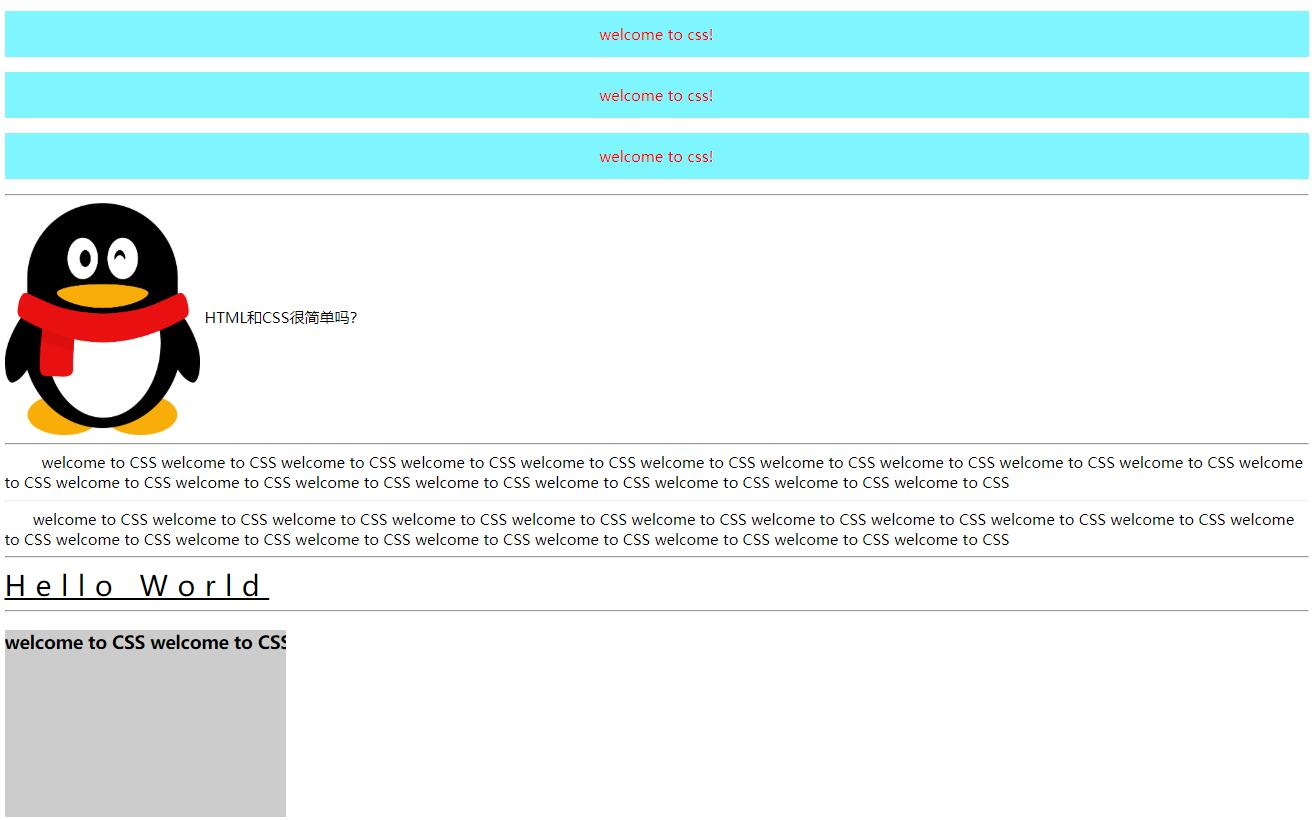
<img src="../qq.png" alt="" width="15%"> HTML and CSS Is it simple? <hr> <div> welcome to CSS welcome to CSS welcome to CSS welcome to CSS welcome to CSS welcome to CSS welcome to CSS welcome to CSS welcome to CSS welcome to CSS welcome to CSS welcome to CSS welcome to CSS welcome to CSS welcome to CSS welcome to CSS welcome to CSS welcome to CSS welcome to CSS</div> <hr> <div>welcome to CSS welcome to CSS welcome to CSS welcome to CSS welcome to CSS welcome to CSS welcome to CSS welcome to CSS welcome to CSS welcome to CSS welcome to CSS welcome to CSS welcome to CSS welcome to CSS welcome to CSS welcome to CSS welcome to CSS welcome to CSS welcome to CSS</div> <hr> <span>hello world</span> <hr> <h3>welcome to CSS welcome to CSS welcome to CSS welcome to CSS welcome to CSS welcome to CSS welcome to CSS welcome to CSS welcome to CSS welcome to CSS welcome to CSS welcome to CSS welcome to CSS welcome to CSS welcome to CSS welcome to CSS welcome to CSS welcome to CSS welcome to CSS</h3> <hr>
Example:
3. Background attribute
attribute
meaning
explain
background-color
background color
background-image
Background picture
background-repeat
Repetition mode of background picture
background-position
Display position of background picture
background-attachment
Whether the background picture follows the scroll
background
Abbreviation
3.1 background-color
Value: transparent
3.2 background-image
- The path of the picture must be specified by url()
- If relative paths are used in css style files, they are relative to css files, not html files
3.3 background-repeat
Values: repeat (default), repeat-x, repeat-y, no repeat
3.4 background-position
The default background image is displayed in the upper left corner
Value:
- Keywords: top, bottom, left, right, center
- Coordinates: the upper left corner is the (0,0) coordinate, the right is the x positive direction, and the down is the y positive direction
CSS Sprite, or CSS Sprites, also known as CSS Sprites, is a CSS image merging technology
Meaning: integrate many very small icons / pictures in the web page into a large picture. When visiting the page, you only need to download them once, which can reduce the number of visits
Number of servers to improve performance
Principle: use background position to locate the background, and use coordinates to accurately locate the position of the background picture
3.5 background-attachment
Values: scroll (default), fixed
3.6 background
Abbreviated attribute: BACKGROUND: background color | background image | background repeat | background position
Separated by spaces, there is no requirement for writing order
4. List properties
attribute
meaning
explain
list-style-type
Set tag before list
list-style-image
Use the image as a marker before the list
list-style-position
Set the location of the marker
Values: outside (default), inside
list-style
Abbreviation
4.1 list-style-type
Values: none, disc, circle, square, decimal
At this time, it is no longer necessary to distinguish between sequential list and unordered list. Just set the mark in front of the list
4.2 list-style
Abbreviated attribute: list style: list style type|list style image|list style position
The writing order is not required
<!DOCTYPE html>
<html lang="en">
<head>
<meta charset="UTF-8">
<title>Document</title>
<style>
/* li{
list-style-type:decimal;
} */
.first{
list-style-type:circle;
}
.second{
list-style-image:url(../images/male.gif);
}
.third{
list-style-type:circle;
list-style-position:inside;
}
.fourth{
list-style:circle url(../images/female.gif)inside;
/* list-style:none; */
}
.nav{
/* list-style:none;
float:left; */
}
.nav li{
list-style:none;
float:left;
width:70px;
}
</style>
</head>
<body>
<ul>
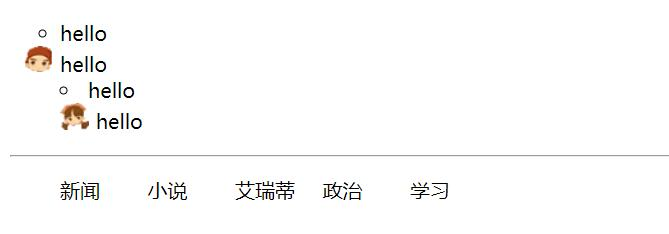
<li class="first">hello</li>
<li class="second">hello</li>
<li class="third">hello</li>
<li class="fourth">hello</li>
</ul>
<hr>
<nav>
<ul class="nav">
<li>Journalism</li>
<li>novel</li>
<li>Eretti</li>
<li>Politics</li>
<li>study</li>
</ul>
</nav>
</body>
</html>
Example:
5. Table attributes
Border collapse: whether adjacent borders in the table are merged (collapsed) into a single border
Value: separated (default) collapse
<!DOCTYPE html>
<html lang="en">
<head>
	<meta charset="UTF-8">
	<title>Document</title>
	<style>
		table{
			width:500px;
			border:1px solid blue;
			border-collapse:collapse;
		}
		td{
			border:1px solid blue;
		}
	</style>
</head>
<body>
	<!-- table>(tr>td{td$}*5)*4 -->
	<table cellspacing="0px"cellpadding="0px">
		<tr>
			<td>bbb</td>
			<td>aaa</td>
			<td>aaa</td>
			<td>td4</td>
			<td>td5</td>
		</tr>
		<tr>
			<td>aaa</td>
			<td>aaa</td>
			<td>bbb</td>
			<td>td4</td>
			<td>td5</td>
		</tr>
		<tr>
			<td>td1</td>
			<td>td2</td>
			<td>td3</td>
			<td>td4</td>
			<td>td5</td>
		</tr>
		<tr>
			<td>td1</td>
			<td>td2</td>
			<td>td3</td>
			<td>td4</td>
			<td>td5</td>
		</tr>
	</table>
</body>
</html>
Example:

6. Use LiveReload
It can refresh the browser in real time when saving the page file
Steps:
-
Installing the LiveReload extension in Chrome
Unzip livereload – > Chrome browser select "..." – > more tools – > extensions – > open "developer mode" – > load the unzipped extensions – > select the folder name livereload
Tip: "allow" to read and change retained information on all websites
-
Install the livereload plug-in in sublime
Unzip "livereload. Rar ----- used in sublime" into the plug-in directory packages / in sublime
-
Configure the LiveReload plug-in in Sublime
preference–>packages settings–>livereload–>settings-default
{ "enabled_plugins": [ "SimpleReloadPlugin" "SimpleRefresh" ] } -
Enable LiveReload in browser
First open the page to be accessed by the browser, and then click the black circle on the right side of the browser address bar. When the small circle in the center changes to a solid circle, it indicates that it is enabled
-
Enable liveReload in sublime
Press ctrl+shift+P – > search for livereload and select enable – > search for simple reload: select enable
5, Box model
1. Introduction
The box model is the basis of web page layout. All elements in the page are regarded as a box. The box contains the following attributes:
- width
- Height height
- Border border
- padding inner margin
- Margin margin
2. Box model
2.1 border
Represents the border of the box
It is divided into four directions:
- top, right, bottom, left
- border-top,border-right,border-bottom,border-left
Each border contains three styles:
- border-top-color,border-top-width,border-top-style
- border-right-color,border-right-width,border-right-style
- border-bottom-color,border-bottom-width,border-bottom-style
- border-left-color,border-left-width,border-left-style
Value of style:
Solid solid line, dashed dotted line, dotted dotted line, double double double line, inset embedded 3D line, outlet embedded 3D line
Abbreviation, three ways:
-
Abbreviation by direction:
border-top,border-right,border-bottom,border-left
Writing order:
border order: width style color
-
By style:
border-color,border-width,border-style
Writing order:
border style: top right bottom left
It must be written clockwise and can be abbreviated:
- border-width:2px;---------> The width of the four borders is 2px
- border-width:1px 2px;
- border-width:1px 2px 4px;
Rule: if omitted, it is considered that the top and bottom are the same and the left and right are the same
-
Final abbreviation:
If the four border styles are exactly the same, border:width style color;
2.2 padding
Represents the inner margin of the box, that is, the distance between the content and the border
It can also be divided into four directions, which can also be abbreviated (clockwise, the default is the same up and down, the same left and right)
Note: in case of conflict between top and bottom, the above shall prevail; in case of conflict between left and right, the left shall prevail
2.3 margin
Represents the outer distance of the box, that is, the distance between the box and the box
It can also be divided into four directions, which can also be abbreviated (clockwise, the default is the same up and down, the same left and right)
Center alignment:
/* Horizontal center of element */
/* 1.Horizontal centering of block level elements */
margin:0 auto;
/* Tip: block level elements must have a width specified */
/* 2.Horizontal center of text */
text-align:center;
/* 3.Center vertically and set the height and line height to the same */
height:100px;
line-height:100px;
<!DOCTYPE html>
<html lang="en">
<head>
<meta charset="UTF-8">
<title>Document</title>
<style>
p{
width:250px;
background:#ccc;
}
.first{
/* border-top-color:red;
border-top-width:1px;
border-top-style:solid;
border-right-color:blue;
border-right-width:2px;
border-right-style:dotted;
border-bottom-color:green;
border-bottom-width:4px;
border-bottom-style:dashed;
border-left-color:gray;
border-left-width:6px;
border-left-style:double; */
/* border-top:1px solid red;
border-bottom:2px dashed blue; */
/* border-color:red yellow green;
border-width:1px 2px 4px 6px;
border-style:solid dashed dotted solid; */
border:1px solid red;
padding:20px;
margin:10px;
}
.second{
/* padding-top:5px;
padding-left:3px;
padding-bottom:10px;
padding-right:8px; */
/* padding:1px 2px 4px 6px; */
padding:5px;
}
.third{
/* margin-top:50px;
margin-left:30px; */
/* margin:10px 20px; */
/* Centering of elements */
/* 1.Block level elements are horizontally centered */
margin:auto;
/* 2.Text centered horizontally */
text-align:center;
/* 3.Center the text vertically and set the height and line height to be the same */
height:100px;
line-height:100px;
}
</style>
</head>
<body>
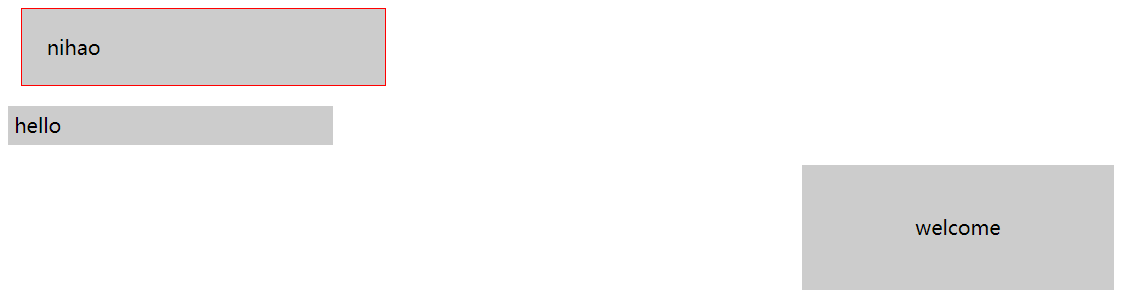
<p class="first">nihao</p>
<p class="second">hello</p>
<p class="third">welcome</p>
</body>
</html>
Example:
3. Others
3.1 space occupied by elements
The actual space occupied by the elements in the page
- Width = width + padding + border + margin
- Height = height + padding + border + margin
3.2 box attribute default value
The default values of box attributes of different labels may be different and need to be set by yourself
body,ul,ol,dl,li,p,h1,h2,h3,h4,h5,h6,form{
margin:0;
padding:0;
}
<!DOCTYPE html>
<html lang="en">
<head>
<meta charset="UTF-8">
<title>Document</title>
<style>
/* body The default margin is not 0 */
body{
margin:0;
padding:0;
}
/* p The default margin is not 0 */
p{
margin:0;
}
ul{
list-style:none;
margin:0;
padding:0;
}
body,ul,ol,dl,li,p,h1,h2,h3,h4,h5,h6,form{
margin:0;
padding:0;
}
</style>
</head>
<body>
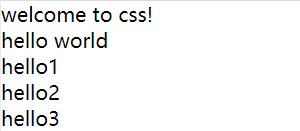
welcome to css!
<p>hello world</p>
<!-- ul>li{hello$}*3 -->
<ul>
<li>hello1</li>
<li>hello2</li>
<li>hello3</li>
</ul>
</body>
</html>
Example:
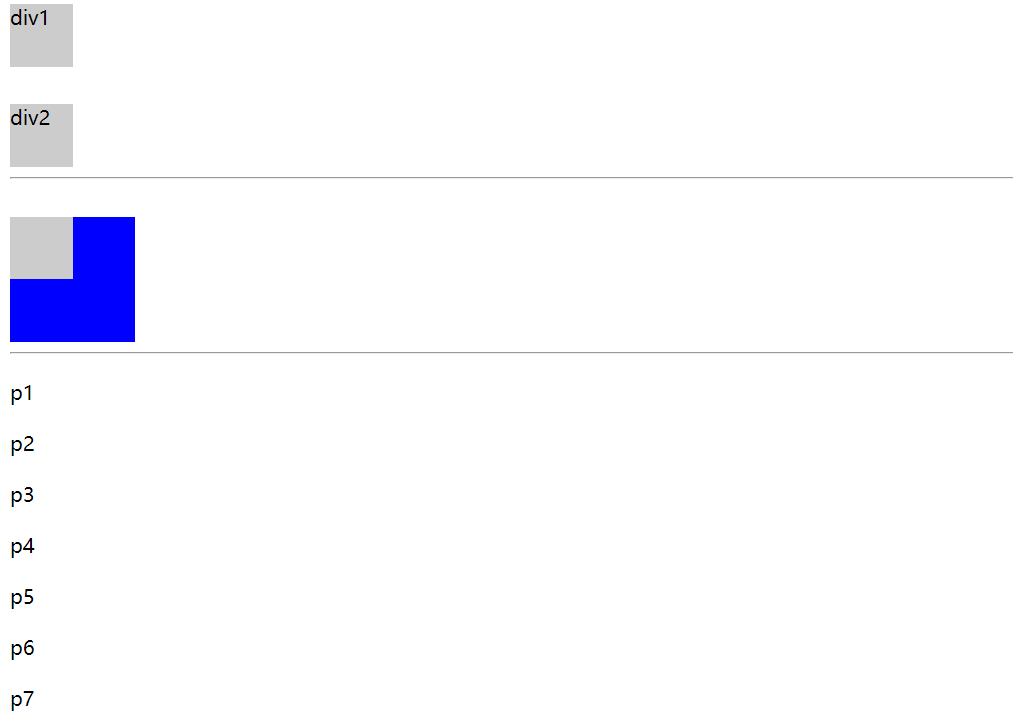
3.3 consolidation of outer margins
Also known as outer margin folding, it refers to that when two block level elements meet the vertical outer margin, they will be merged into one outer margin, and the merged outer margin
The outer margin value is the larger one
There are two situations:
- When an element appears on top of another element, the lower margin of the first element is merged with the upper margin of the second element
- When an element is contained in another element and there is no inner margin or border to separate the outer margin, the upper and outer margins of the two elements are merged
The advantages of the combination of outer margins make the typesetting look more beautiful visually
<!DOCTYPE html>
<html lang="en">
<head>
	<meta charset="UTF-8">
	<title>Document</title>
	<style>
		div{
			width:50px;
			height:50px;
			background:#cccccc;
		}
		.div1{
			margin-bottom:20px;
		}
		.div2{
			margin-top:30px;
		}
		.div3{
			width:100px;
			height:100px;
			background:blue;
			margin-top:20px;
			/* padding:2px;
 */			/* border:1px solid red; */
		}
		.div4{
			margin-top:30px;
		}
		p{
			margin:20px 0;
		}
	</style>
</head>
<body>
	<div class="div1">div1</div>
	<div class="div2">div2</div>
	<hr>

	<div class="div3">
		<div class="div4"></div>
	</div>
	<hr>
	<p>p1</p>
	<p>p2</p>
	<p>p3</p>
	<p>p4</p>
	<p>p5</p>
	<p>p6</p>
	<p>p7</p>
</body>
</html>
Example:
6, Positioning mode
1. Introduction
There are four ways to locate elements through the position attribute
Common values:
Value
meaning
explain
static
Default value
Display according to regular document flow
relative
Relative positioning
Positioning relative to the original position of the label
absolute
Absolute positioning
Positioning of the parent tag relative to the first non static positioning
fixed
Fixed positioning
Positioning relative to browser window
After setting the positioning method, set the positioning attributes (offset): top, bottom, left, right
2. Relative positioning
First set the position attribute of the element to relative, and then set the offset
3. Absolute positioning
First set the parent tag to non static positioning, then set the position attribute of the element to absolute, and finally set the offset
be careful:
- In general, the parent tag is set to non static positioning
- If the parent tag is not non static, it is positioned relative to the browser window
- When the element is set to absolute positioning, the element will float to the top of the page
4. Fixed positioning
First set the position attribute of the element to fixed, and then set the offset
When the element is set to fixed positioning, the element will float above the face
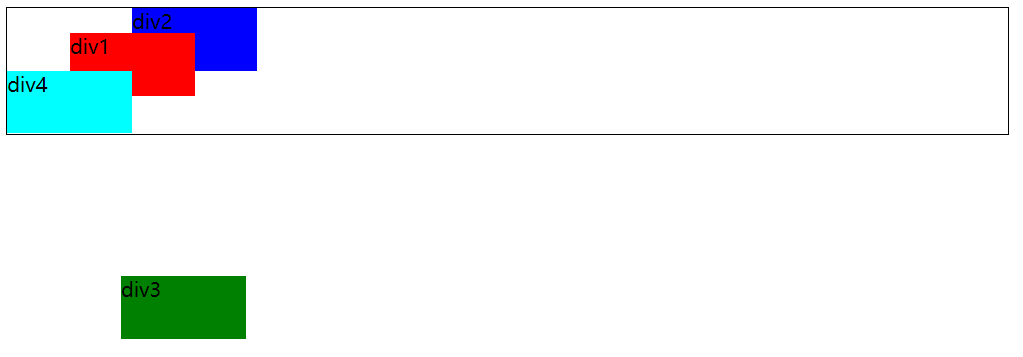
5.z-index
After setting the element positioning method, the element will float at the top of the page. At this time, you can set the priority through the z-index attribute to control the stacking order of elements
The value is a number. The higher the value, the higher the priority. The default is auto(0 for most browsers)
Note: the z-index attribute can only be set for non static elements
<!DOCTYPE html>
<html lang="en">
<head>
	<meta charset="UTF-8">
	<title>Document</title>
	<style>
		#container{
			width:800px;
			border:1px solid #000000;
			position:relative;
		}
		.div1,.div2,.div3,.div4{
			width:100px;
			height:50px;
		}
		.div1{
			background:red;
			position:relative;/* Relative positioning */
			top:20px;
			left:50px;
			z-index:-5;
		}
		.div2{
			background:blue;
			position:absolute;
			left:100px;
			bottom:50px;
			z-index:-8;
		}
		.div3{
			background:green;
			position:fixed;
			bottom:50px;
			left:100px;
		}
		.div4{
			background:cyan;
		}
	</style>
</head>
<body>
	<div id="container">
		<div class="div1">div1</div>
		<div class="div2">div2</div>
		<div class="div3">div3</div>
		<div class="div4">div4</div>
	</div>
</body>
</html>
Example:
7, Other CSS properties
1. Floating and clearing
1.1 floating attributes
The floating of elements is realized through the float attribute, which can make the block level elements break away from the regular document flow, move left or right, and display on the same line,
If one line cannot be displayed, it will be wrapped
Common values:
- left float
- Right float right
- none does not float, default
After setting the float attribute, the element will float on the upper layer of the page. At this time, the parent container cannot calculate its own size. If we still want to display the parent container, we usually add an empty div with the float attribute cleared at the end
<!DOCTYPE html>
<html lang="en">
<head>
	<meta charset="UTF-8">
	<title>Document</title>
	<style>
		#container{
			/* width:800px; */
			border:1px solid #000000;
		}
		.div1,.div2,.div3,.div4{
			width:100px;
			height:50px;
		}
		.div1{
			background:red;
			float:left;
		}
		.div2{
			background:blue;
			float:left;
		}
		.div3{
			background:green;
			float:left;
		}
		.div4{
			background:cyan;
			float:left;
		}
		.clr{
			clear:left;
		}
	</style>
</head>
<body>
	<div id="container">
		<div class="div1">div1</div>
		<div class="div2">div2</div>
		<div class="div3">div3</div>
		<div class="div4">div4</div>
		<div class="clr"></div>
	</div>
	aaa
</body>
</html>
Example:

1.2 clear attributes
Clear is achieved through the clear attribute, which side of the element is not allowed to have floating elements
Common values:
- Floating elements are not allowed on the left
- Floating elements are not allowed on the right
- Floating elements are not allowed on both sides of the both
- none allows floating elements on both sides, default value
Conclusion:
-
For non floating elements, clear can be set on both sides (common)
-
For floating elements, you can only set which side to clear
Document


welcome to css
Example:
2. Display and hiding of elements
2.1 display
Set whether the element is displayed and whether a row is exclusive through the display attribute
Common values:
Value
meaning
explain
none
Do not show
inline
Displayed as inline elements, the default value of row level elements
Change a block level element into a row level element and no longer monopolize a row
block
Displayed as a block level element, the default value of the block level element
Change row level elements into block level elements and monopolize one row
inline-block
Displays as inline elements, but width and height can be set
Width and height can be set on the basis of inline
be careful:
The width and height of row level elements cannot be set. You can set display: inline block for row level elements, and then you can set the width and height
2.2 visibility
You can also set the display and hiding of elements through the visibility attribute
Common attributes:
Value
meaning
explain
visible
display
hidden
hide
2.3 differences
-
When display is hidden, it no longer occupies the space in the page, and the subsequent elements will occupy their positions
-
When visibility is hidden, it will occupy the space in the page, and the position will remain in the page, but it will not be displayed
Documentdiv1span1 hehehello
world
Example:
3. Profile attributes
3.1 introduction
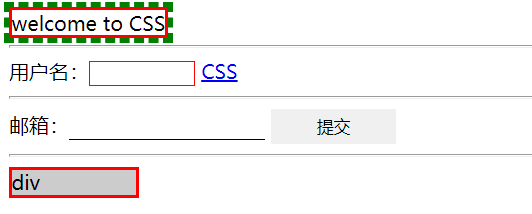
Outline is used to draw an outline around the element, which is located on the periphery of the border and can highlight the element
3.2 basic usage
Common attributes:
- Outline width: outline width
- Outline color: outline color
- Outline style: outline style
- outline abbreviation
In the browser, when you click the mouse or use the TAB key to focus a form or link, the element will have an outline
Advantages: it can improve the user experience of using forms
Disadvantages: sometimes it will affect the appearance
3.3 difference between outline and border
-
border can be applied to all html elements, while outline is mainly used for form elements and hyperlink elements
-
When the element gets focus, the outline effect will appear automatically, and when it loses focus, it will disappear automatically, which is the default behavior of the browser
-
outline does not affect the size and position of elements, while border does
Document welcome to CSS user name: CSS Email:div
Example:
4. Other attributes
4.1 width height correlation
- Max width: sets the maximum width of the element
- Max height: sets the maximum height of the element
- Min width sets the minimum width of the element
- Min height sets the minimum height of the element
4.2 overflow attribute
How to deal with the overflow of element content
Common values:
- Visible overflow is visible. It is displayed outside the element. The default value is
- hidden overflow part is not visible (common)
- scroll always appears regardless of overflow
- The scroll bar appears automatically when auto overflows
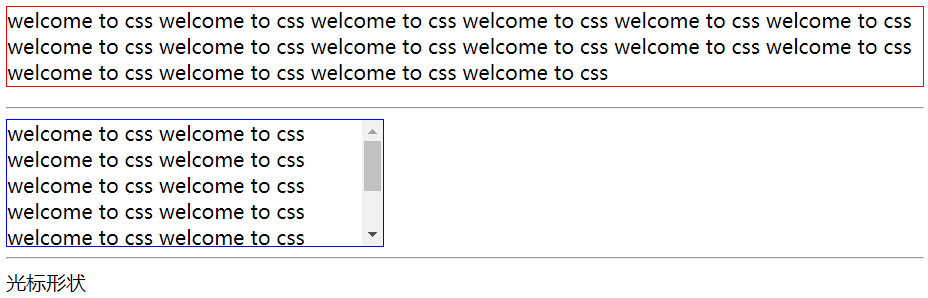
4.3 cursor attribute
Used to set the shape of the cursor
Common attributes:
-
Default is the default cursor, usually an arrow
-
When the cursor is in the shape of hand, the hyperlink is generally displayed in the shape of hand
-
move means movable
-
Text indicates text
-
Wait indicates that the program is busy and needs to wait
-
hep means help
Documentwelcome to css welcome to css welcome to css welcome to css welcome to css welcome to css welcome to css welcome to css welcome to css welcome to css welcome to css welcome to css welcome to css welcome to css welcome to css welcome to css
welcome to css welcome to css welcome to css welcome to css welcome to css welcome to css welcome to css welcome to css welcome to css welcome to css welcome to css welcome to css welcome to css welcome to css welcome to css welcome to cssCursor shape
Example:
8, Page layout
1. Introduction
Common page layouts:
- Table layout
- div layout
2. Table layout
2.1 introduction
It is not suitable for complex layout, but only for simple and regular structure
The positioning is relatively accurate and has nothing to do with the browser. It is suitable for simple separation
2.2 usage
table common style properties
- Border sets the border around the table
- Border spacing sets the distance between cells (equivalent to the cellspacing attribute in the table label, i.e. spacing)
- Whether the adjacent borders in the border collapse table are merged. The values are seprate and collapse
th/td common style attributes:
-
Border sets the border for the cell
-
padding sets the inner margin of the cell (equivalent to the cellpadding attribute in the table tag, margin)
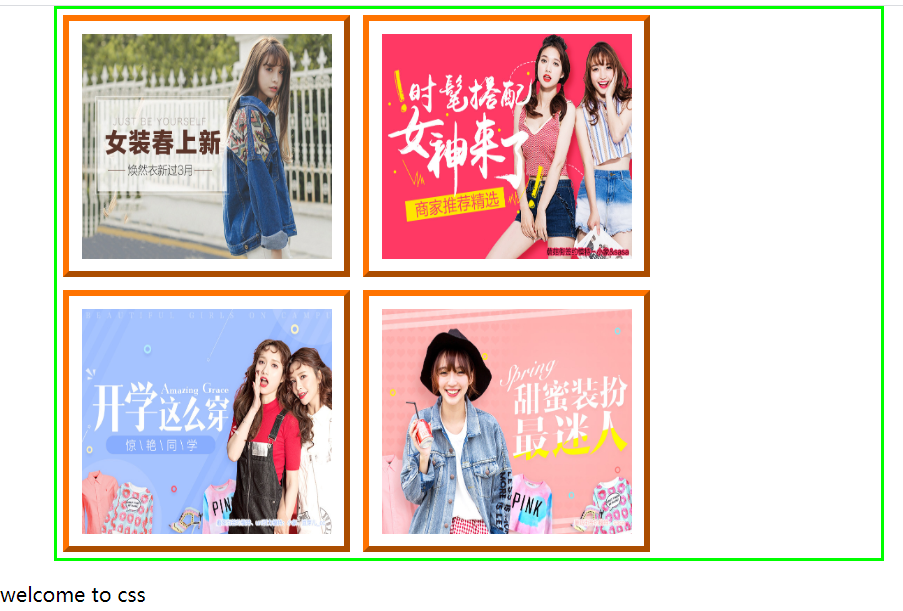
Documentth1 th2 th3 th4 td1 td2 td3 td4 td1 td2 td3 td4 td1 td2 td3 td4 td1 td2 td3 td4 td1 td2 td3 td4 td1 td2 td3 td4
Example:

3.div layout
The positioning is absolutely accurate and flexible, which is suitable for complex layout
3.1 simple layout
Two forms:
-
1-1-1 layout
<!DOCTYPE html>
<html lang="en">
<head>
	<meta charset="UTF-8">
	<title>Document</title>
	<link rel="stylesheet" href="css/style1.css">
</head>
<body>
	<div id="container">
		<header class="header">
			header
		</header>
		<article class="main">
			main
		</article>
		<footer class="footer">
			footer
		</footer>
	</div>
</body>
</html>
Example:

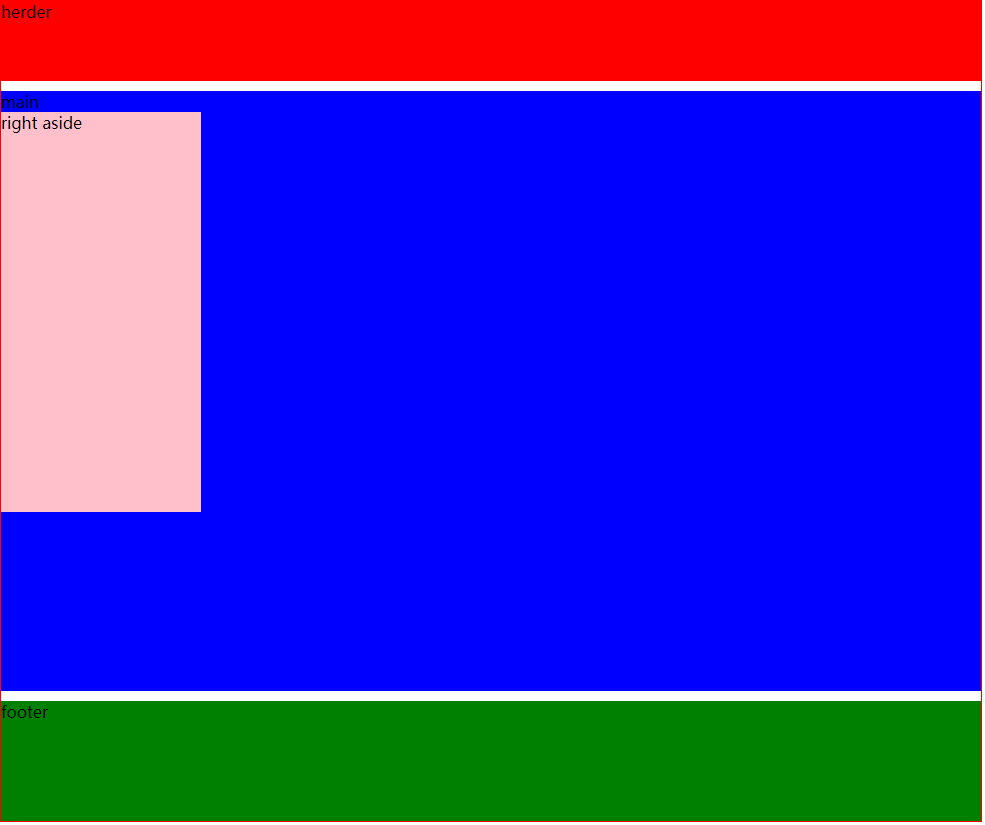
-
1-2 / 3-1 layout
<!DOCTYPE html>
<html lang="en">
<head>
	<meta charset="UTF-8">
	<title>Document</title>
	 <link rel="stylesheet" href="css/style2.css">
</head>
<body>
	<div id="container">
		<header class="header">
			herder
		</header>
		<article class="wrapper">
			<section>
				main
			</section>
			<aside>
				right aside
			</aside>
		</article>
		<footer class="footer">
			footer
		</footer>
	</div>
</body>
</html>
Example:
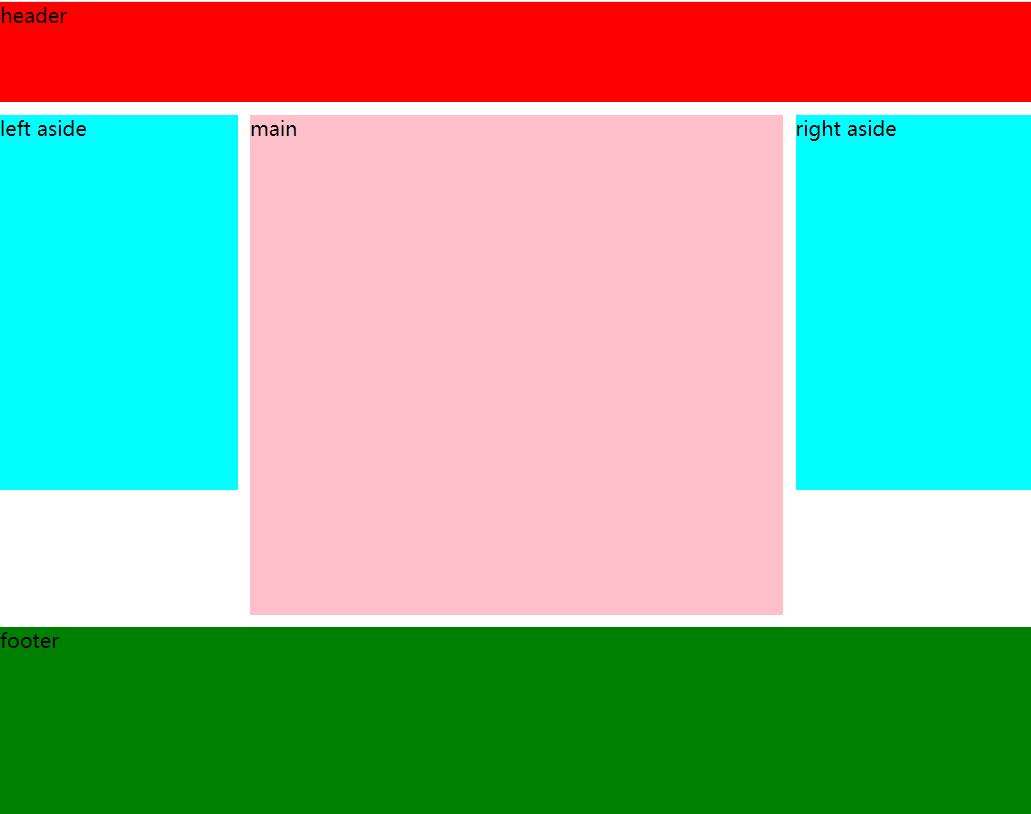
3.2 grail layout
Page structure, the width of sidebars on both sides is fixed, the middle subject can be adaptive within a certain range, and the subject is loaded first
In general, to prevent page scaling from affecting browsing, a minimum width will be set for the page
<!DOCTYPE html>
<html lang="en">
<head>
	<meta charset="UTF-8">
	<title>Document</title>
	<link rel="stylesheet" href="css/style4.css">
</head>
<body>
	<div id="container">
		<header class="header">
            header
        </header>
		<article class="wrapper">
			<section class="main">
				main
			</section>
			<aside class="left">
				left
			</aside>
			<aside class="right">
				right
			</aside>
		</article>
		<footer class="footer">
            footer
        </footer>
    </div>
</body>
</html>
Example:
3.3 double wing layout
UED (user experience design) team from taobao
The effect of the double wing layout and the Holy Grail layout is the same, but the ideas are different
The difference between the Grail layout and the twin wing layout
The twin wing layout creates one div more than the Grail layout
The double flying wing layout does not need to set the inner margin, relative positioning, or offset
The double wing layout uses margin and the Holy Grail layout uses padding
In the actual development, it is recommended to use the flex elastic box layout newly added in CSS3 to simplify the layout
<!DOCTYPE html>
<html lang="en">
<head>
	<meta charset="UTF-8">
    <title>Document</title>
    <link rel="stylesheet" href="css/style5.css">
</head>
<body>
    <div id="container">
        <header class="header">
            header
        </header>
        <article class="wrapper">
            <section class="main">
                <div class="main-wrapper">
                    main
                </div>
            </section>
            <aside class="left">
                left aside
            </aside>
            <aside class="right">
                right aside
            </aside>
        </article>
        <footer class="footer">
            footer
        </footer>
    </div>
    </body>
</html>
Example:
enclosure: https://share.weiyun.com/6GKjzjpt