1. Open the new CubeMX file and select the MCU chip.
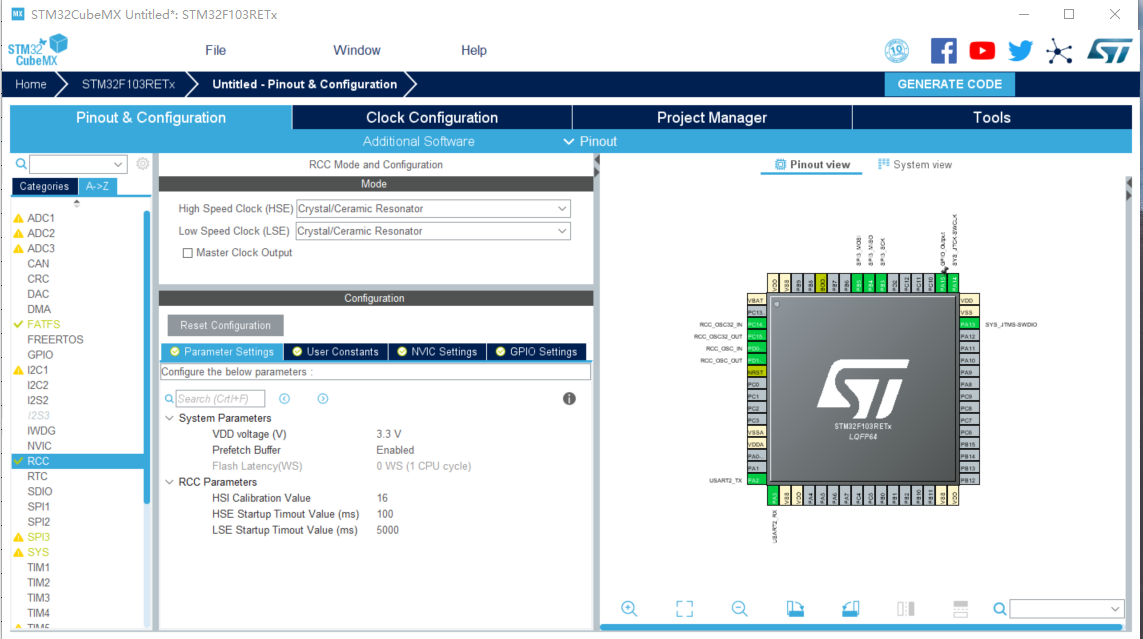
2. Setting system frequency: see figure below
3. Set SPI3, select host mode, other defaults will do.

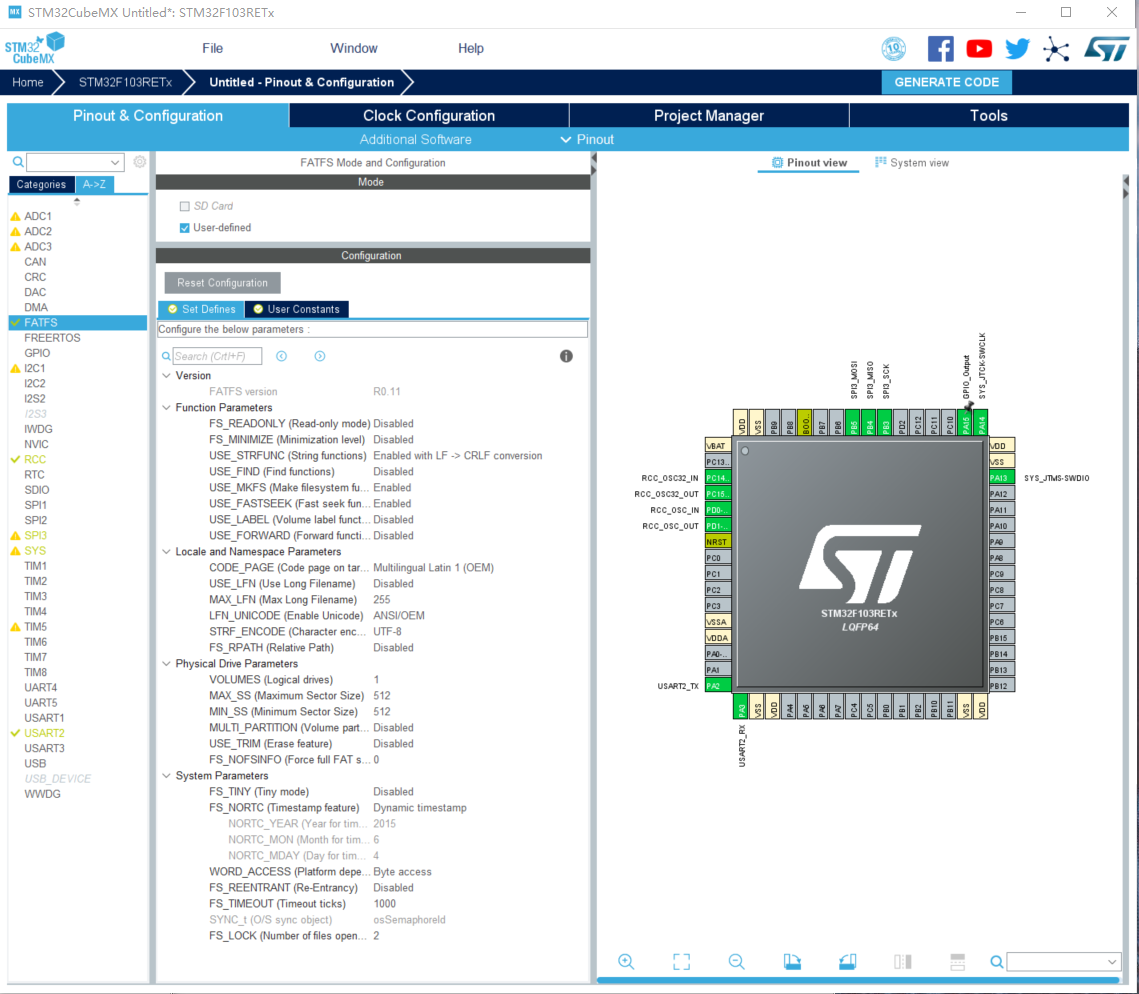
4. Select FATFS and check User-defined. Other default settings will do. (Note that the maximum and minimum partitions are 512.)
5. The above configuration is basically completed, and now the final configuration of the Generation Project is completed:
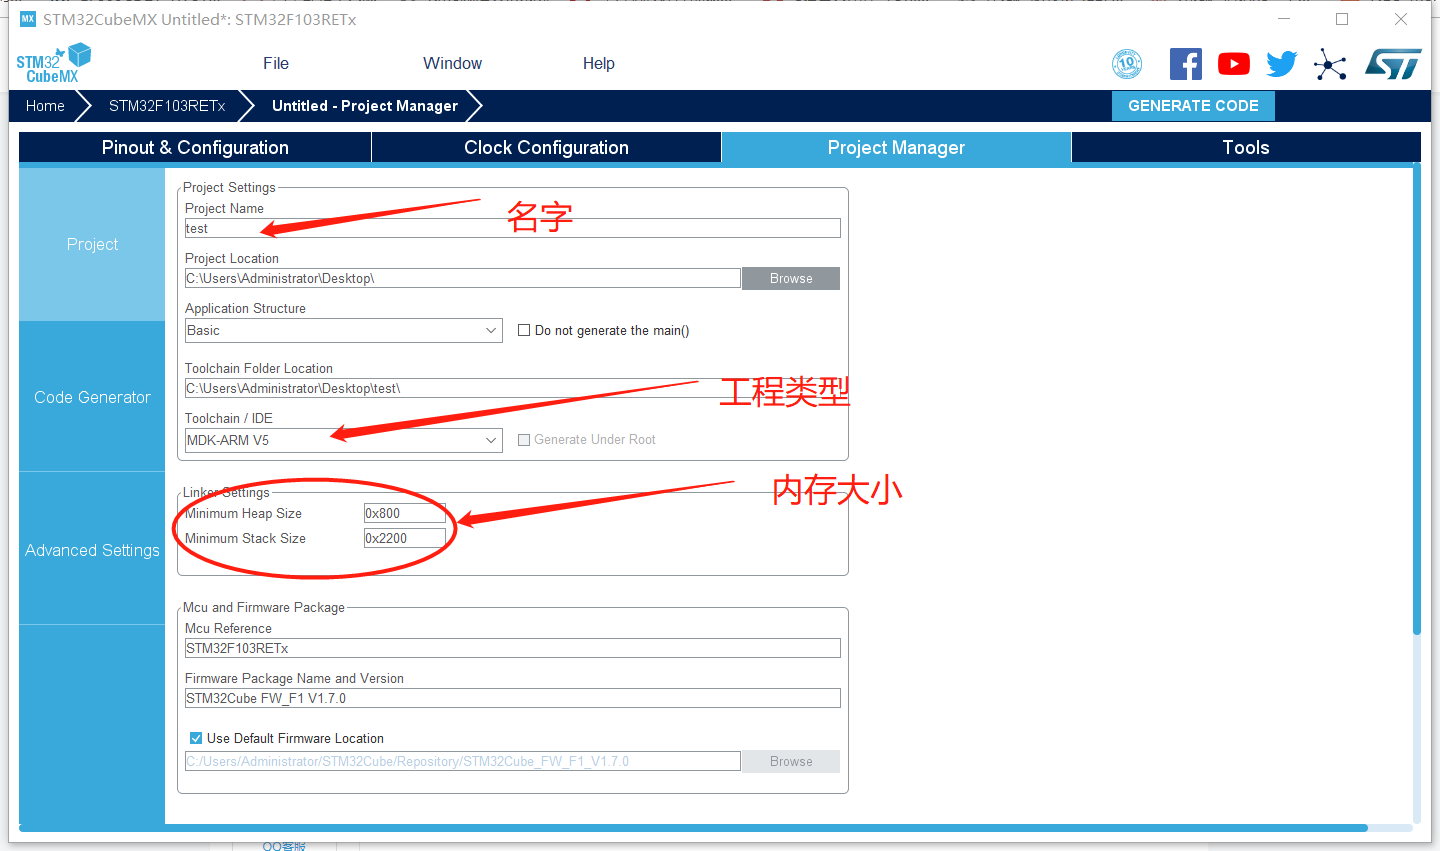
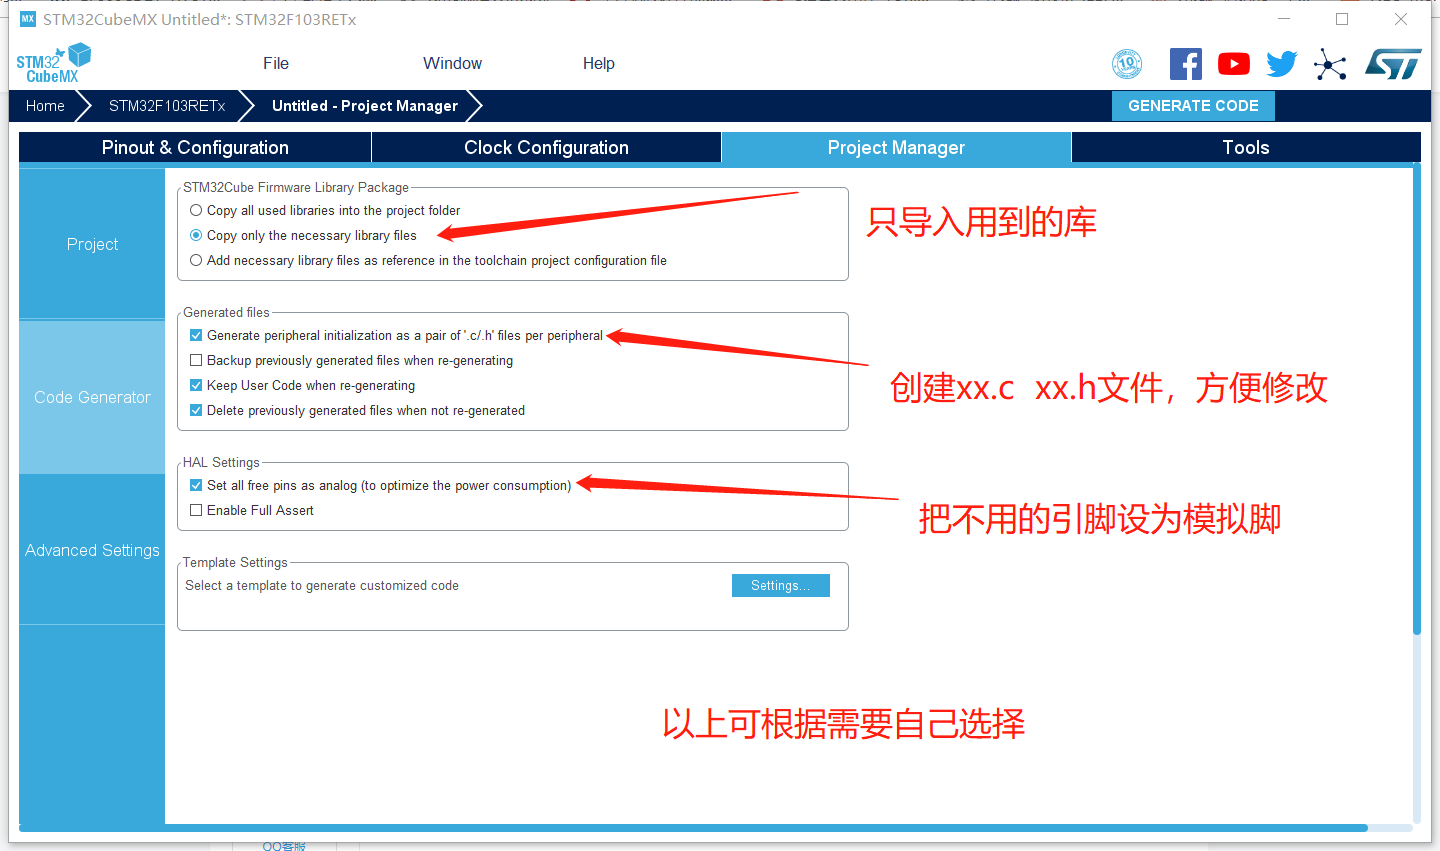
Complete the above settings by clicking on "GENERATE COOD" to generate the project.
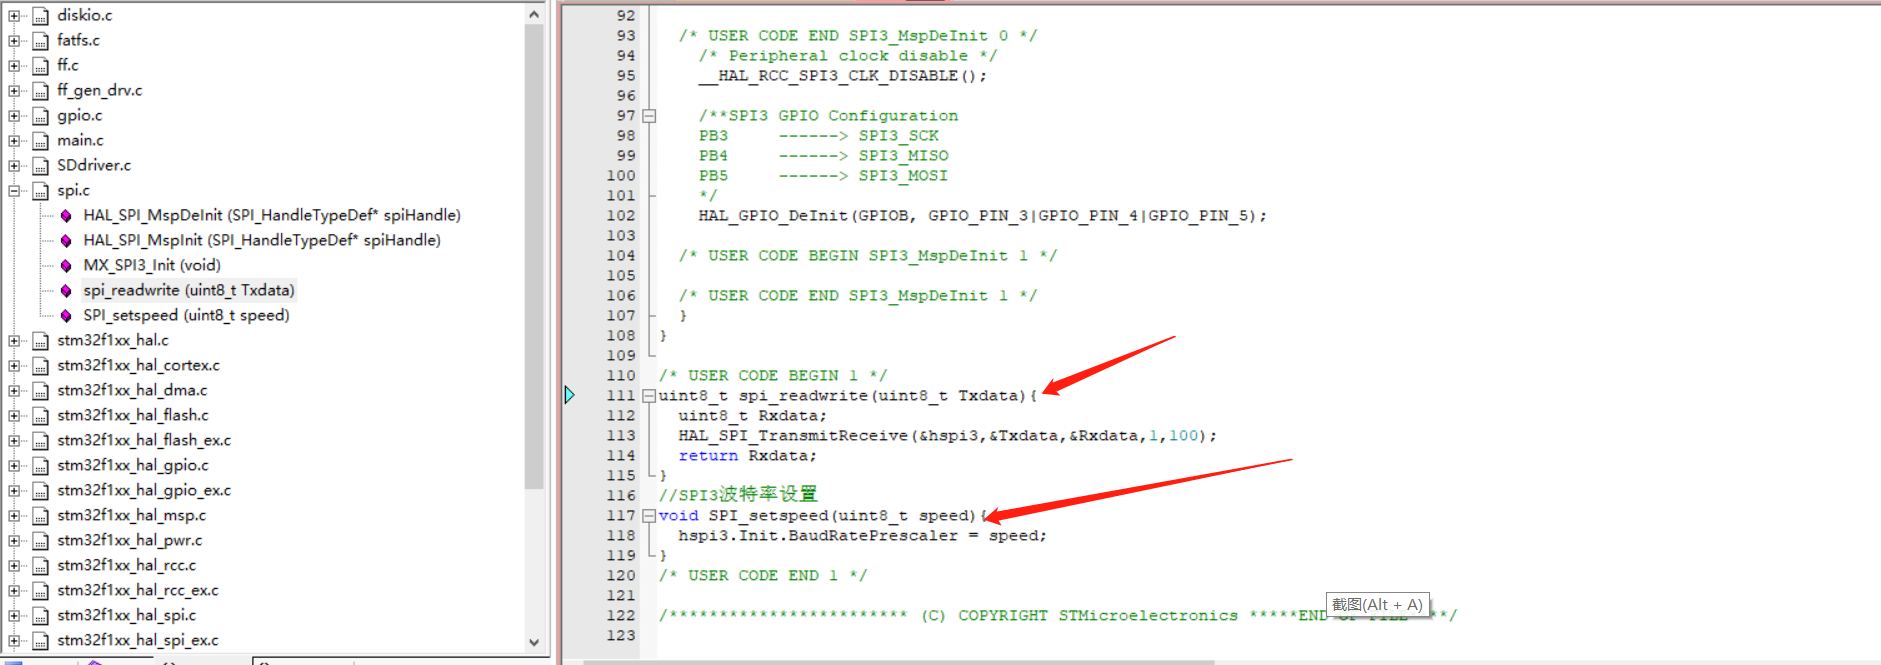
6. Firstly, SD card driver is set up, and two functions are added in spi.c file: (name the function name according to need)
Note: Remember to declare functions in the spi.h file. SPI configuration and pin initialization are automatically completed without reconfiguration.
7. Create a new SD_Driver.c and SD_Driver.h file (to drive the SD card).
It mainly includes:
void SD_CS(uint8_t p)   //SPI3 pin selection control

uint8_t SD_GETCID(uint8_t *cid_data)  //Read ID information of SD card

uint8_t SD_GETCSD(uint8_t *cid_data)  //Read ID information of SD card

uint32_t SD_GetSectorCount(void) //Number of sectors read from SD card

uint8_t SD_init(void)   //SD Card Initialization Function

uint8_t SD_ReadDisk(uint8_t*buf,uint32_t sector,uint8_t cnt) //Reading SD Card Data

uint8_t SD_ReceiveData(uint8_t *data, uint16_t len) //Read data of specified length in SD card

uint8_t SD_SendBlock(uint8_t*buf,uint8_t cmd) //Write 512 bytes of data to SD card

int SD_sendcmd(uint8_t cmd,uint32_t arg,uint8_t crc) //Send commands to SD card through SPI

uint8_t SD_WriteDisk(uint8_t*buf,uint32_t sector,uint8_t cnt)  //Write data to SD card
See the source code at the end for details.
8. Fill the following five functions in the "user_diskio.c" file to realize the association between file system and SD.
USER_initialize(); USER_ioctl(); USER_read(); USER_status(); USER_write();
For details, see the source code.
Fill get_fattime() in fatfs.c if necessary; function sets date
DWORD get_fattime (void)
{
    return ((2010UL-1980) << 25) /* Year = 2010 */
    | (11UL << 21) /* Month = 11 */
    | (2UL << 16) /* Day = 2 */
    | (15U << 11) /* Hour = 15 */
    | (0U << 5) /* Min = 0 */
    | (0U >> 1) /* Sec = 0 */
    ;
}
9. This is basically the end of the configuration! The following is the main function to achieve SD card reading and writing;
//Define some variables

FATFS fs;
FIL file;
uint8_t res=0;
UINT Br,Bw;
char path[4]="0:";
uint8_t testBuffer[]="SD¿¨Ð´ÈëÖÐÓ¢ÎIJâÊÔ,SD card Chinese and English reading and writing test!! \r\n";
uint8_t ReadBuffer[512];
char success[]="Data writing Ok!\r\n";
char error[]="error!\r\n";
char mount[]="File system mounted successfully! \r\n";
char open[]="Îfile already open! \r\n";


int main(){
    /***All kinds of initialization no longer write ***/

    res=f_mount(&fs,"0:",0);  //Mount file system
	if(res!=FR_OK){
		HAL_UART_Transmit(&huart2,(uint8_t *) &error,sizeof(error),100);
	}else{
		HAL_UART_Transmit(&huart2,(uint8_t *) &mount,sizeof(mount),100);
	}

    while(1{
        if(f_open(&file,"hello.txt",FA_OPEN_ALWAYS|FA_WRITE)==FR_OK){
			HAL_UART_Transmit(&huart2,(uint8_t *) &open,sizeof(open),100);
			f_lseek(&file, f_size(&file)); //Then write the data that won't erase it.
            if(f_write(&file,testBuffer,sizeof(testBuffer),&Bw)==FR_OK){
			    HAL_UART_Transmit(&huart2,(uint8_t *) &success,sizeof(success),100);
			    f_close(&file); //Be sure to close the file
              }
           }
    }


}
10. Additional information on more FATFS filesystem applications can be consulted: http://elm-chan.org/fsw/ff/doc/open.html
It's very detailed.