1, DOM
01DOM introduction
1.1 what is DOM

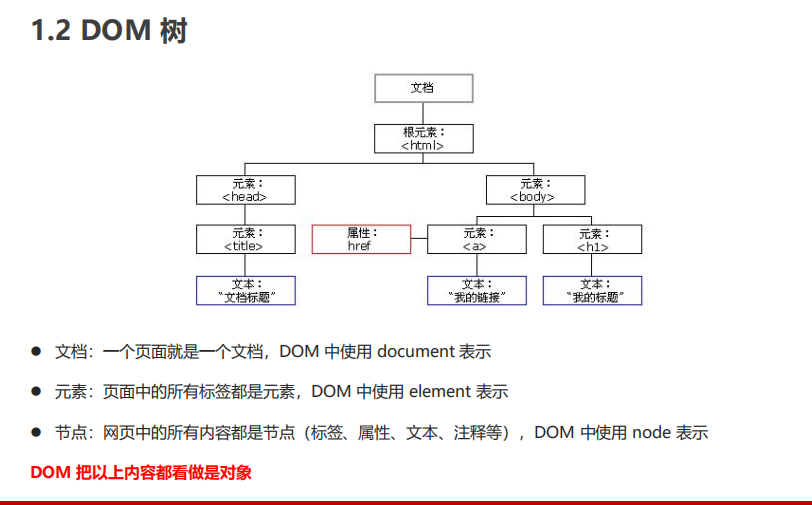
1.2 DOM tree
02 get element
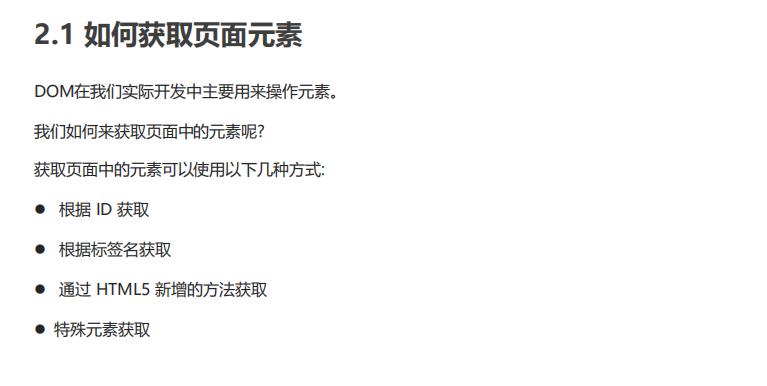
2.1 how to get page elements
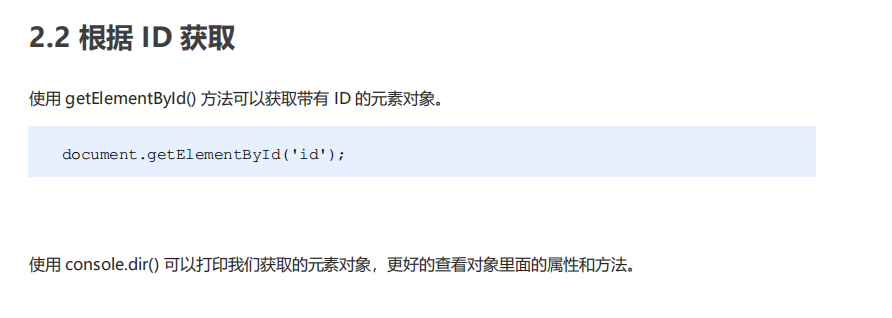
2.2 get by ID
<body>
    <div id="time">2019-9-9</div>
    <script>
        // 1. Because our document page is loaded from top to bottom, there must be a label first, so we write the script below the label
        // 2. get the element by through the hump naming method
        // 3. The parameter id is a case sensitive string
        // 4. An element object is returned
        var timer = document.getElementById('time');
        console.log(timer);
        console.log(typeof timer);
        // 5. console.dir prints the element object we returned to better view the properties and methods inside
        console.dir(timer);
    </script>
</body>
2.3 get by tag name
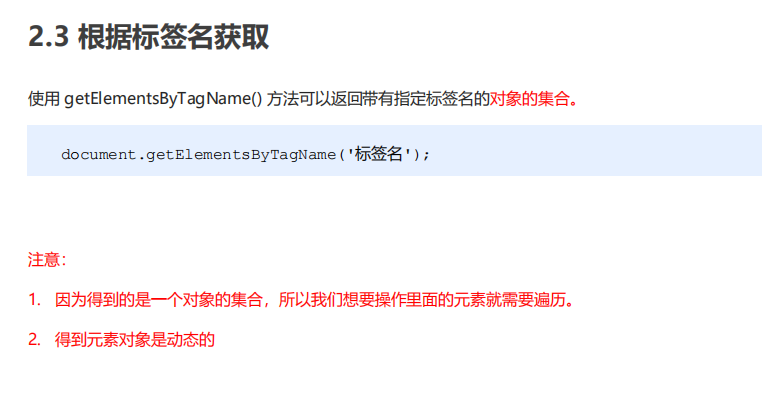
<body>
    <ul>
        <li>Know or not know or not, should be waiting for you for a long time 11</li>
        <li>Know or not know or not, should be waiting for you for a long time 11</li>
        <li>Know or not know or not, should be waiting for you for a long time 11</li>
        <li>Know or not know or not, should be waiting for you for a long time 11</li>

    </ul>
    <ol id="ol">
        <li>Rare words</li>
        <li>Rare words</li>
        <li>Rare words</li>
        <li>Rare words</li>

    </ol>

    <script>
        // 1. The returned is the collection of obtained element objects stored in the form of pseudo array
        var lis = document.getElementsByTagName('li');
        console.log(lis);
        console.log(lis[0]);
        // 2. We want to print the element objects in turn. We can take the way of traversal
        for (var i = 0; i < lis.length; i++) {
            console.log(lis[i]);

        }
        // 3. If there is only one li in the page, the return is still in the form of pseudo array
        // 4. If there is no such element in the page, the form of empty pseudo array is returned
        // 5. element.getElementsByTagName('tag name '); The parent element must be a single element specified
        // var ol = document.getElementsByTagName('ol'); // [ol]
        // console.log(ol[0].getElementsByTagName('li'));
        var ol = document.getElementById('ol');
        console.log(ol.getElementsByTagName('li'));
    </script>
</body>
2.4 new HTML method acquisition
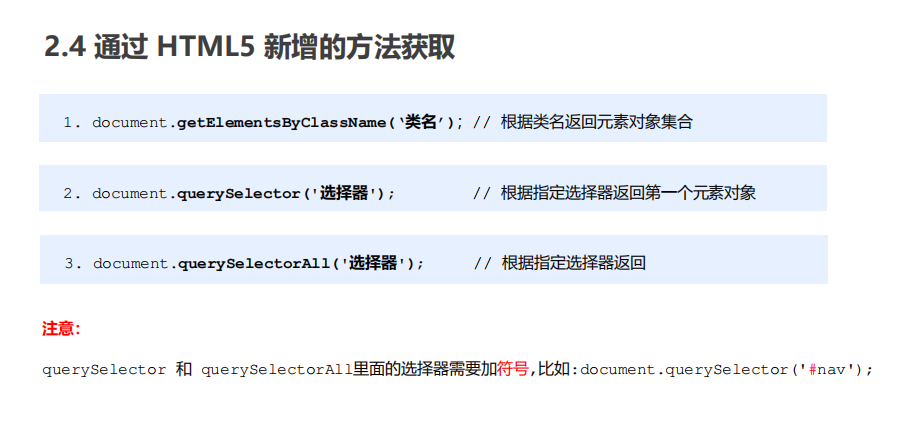
<body>
    <div class="box">Box 1</div>
    <div class="box">Box 2</div>
    <div id="nav">
        <ul>
            <li>home page</li>
            <li>product</li>
        </ul>
    </div>
    <script>
        // 1. getElementsByClassName obtains some element collections according to the class name
        var boxs = document.getElementsByClassName('box');
        console.log(boxs);
        // 2. querySelector returns the first element object of the specified selector. Remember that the selector in it needs to be signed box  #nav
        var firstBox = document.querySelector('.box');
        console.log(firstBox);
        var nav = document.querySelector('#nav');
        console.log(nav);
        var li = document.querySelector('li');
        console.log(li);
        // 3. querySelectorAll() returns the collection of all element objects of the specified selector
        var allBox = document.querySelectorAll('.box');
        console.log(allBox);
        var lis = document.querySelectorAll('li');
        console.log(lis);
    </script>
</body>
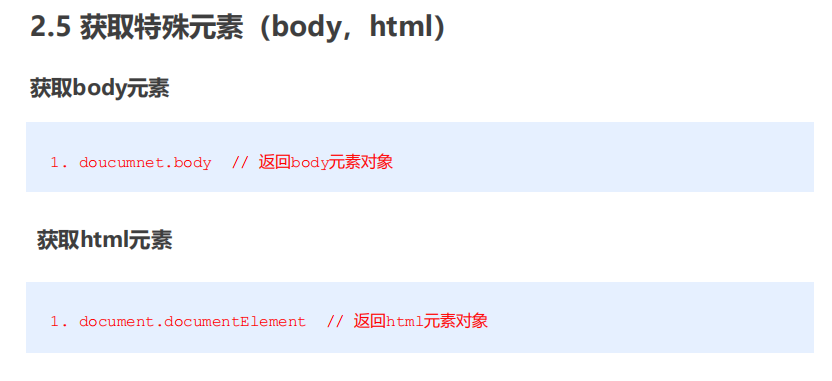
2.5 get special elements (body, html)
03 event basis
3.1 event overview

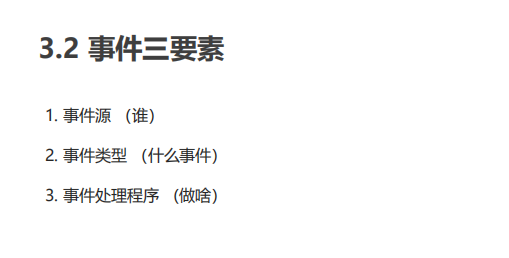
3.2 three elements of event
<body>
    <button id="btn">Tang Bohu</button>
    <script>
        // Click a button to pop up a dialog box
        // 1. An event is an event handler that consists of three parts: event source, event type, and we also call it event three elements
        //(1) Event source: the object whose button the event is triggered
        var btn = document.getElementById('btn');
        //(2) How do event types trigger what events, such as onclick, mouse over or keyboard down
        //(3) The event handler is completed by assigning a value to a function
        btn.onclick = function() {
            alert('Some autumn fragrance');
        }
    </script>
</body>
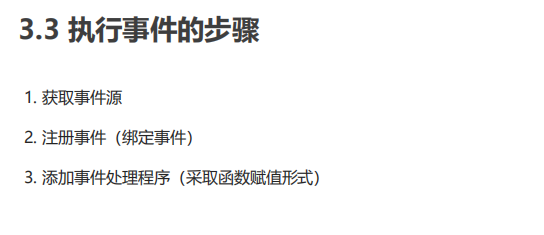
3.3 steps to execute the event
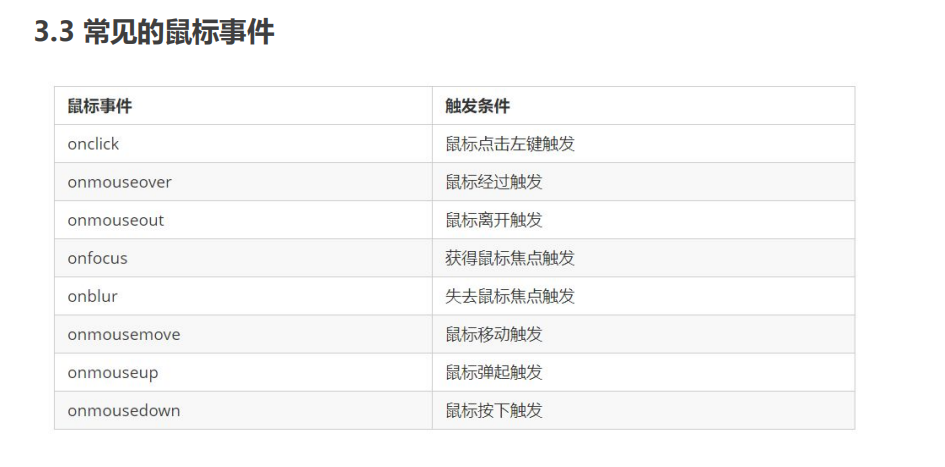
3.3 common mouse events
04 operation element
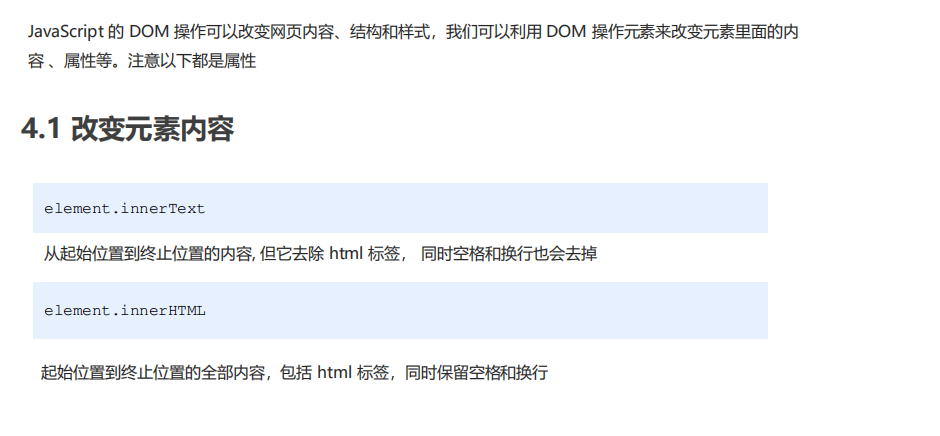
4.1 change element content
<body>
    <button>Displays the current system time</button>
    <div>At a certain time</div>
    <p>1123</p>
    <script>
        // When we click the button, the text in div will change
        // 1. Get element
        var btn = document.querySelector('button');
        var div = document.querySelector('div');
        // 2. Registration event
        btn.onclick = function() {
            // div.innerText = '2019-6-6';
            div.innerHTML = getDate();
        }

        function getDate() {
            var date = new Date();
            // Let's write a Wednesday, May 1, 2019
            var year = date.getFullYear();
            var month = date.getMonth() + 1;
            var dates = date.getDate();
            var arr = ['Sunday', 'Monday', 'Tuesday', 'Wednesday', 'Thursday', 'Friday', 'Saturday'];
            var day = date.getDay();
            return 'Today is:' + year + 'year' + month + 'month' + dates + 'day ' + arr[day];
        }
        // We don't need to add events to the element
        var p = document.querySelector('p');
        p.innerHTML = getDate();
    </script>
</body>
<body>
    <div></div>
    <p>
        I am writing
        <span>123</span>
    </p>
    <script>
        // The difference between innerText and innerHTML
        / 1. innerText Unrecognized html Label non-standard, remove spaces and line breaks
        var div = document.querySelector('div');
        // Div.innertext = '< strong > today is: < / strong > 2019';
        / 2. innerHTML distinguish html label W3C Standard reserved spaces and line breaks
        div.innerHTML = '<strong>Today is:</strong> 2019';
        / These two attributes are readable and writable, and you can get the contents of the element
        var p = document.querySelector('p');
        console.log(p.innerText);
        console.log(p.innerHTML);
    </script>
</body>
4.2 attribute operation of common elements

<body>
    <button id="ldh">Lau Andy</button>
    <button id="zxy">Xue You Zhang</button> <br>
    <img src="images/ldh.jpg" alt="" title="Lau Andy">

    <script>
        // Modify element attribute src
        // 1. Get element
        var ldh = document.getElementById('ldh');
        var zxy = document.getElementById('zxy');
        var img = document.querySelector('img');
        // 2. Register event handlers
        zxy.onclick = function() {
            img.src = 'images/zxy.jpg';
            img.title = 'Zhang Xueyou Smecta';
        }
        ldh.onclick = function() {
            img.src = 'images/ldh.jpg';
            img.title = 'Lau Andy';
        }
    </script>
</body>
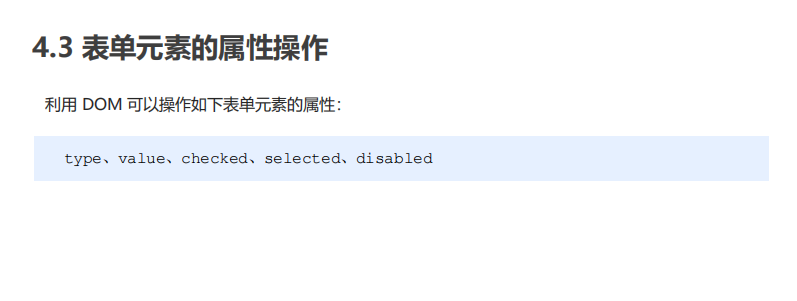
4.3 attribute operation of form elements
<body>
    <button>Button</button>
    <input type="text" value="Input content">
    <script>
        // 1. Get element
        var btn = document.querySelector('button');
        var input = document.querySelector('input');
        // 2. Register event handlers
        btn.onclick = function() {
            // input.innerHTML = 'clicked'; This is an ordinary box, such as the contents in the div tag
            // The value text content in the form is modified through value
            input.value = 'It was clicked';
            // If you want a form to be disabled, you can no longer click disabled. We want this button to be disabled
            // btn.disabled = true;
            this.disabled = true;
            // this refers to the caller btn of the event function
        }
    </script>
</body>
Imitation Jingdong hidden password box case
<body>
    <div class="box">
        <label for="">
            <img src="images/close.png" alt="" id="eye">
        </label>
        <input type="password" name="" id="pwd">
    </div>
    <script>
        // 1. Get element
        var eye = document.getElementById('eye');
        var pwd = document.getElementById('pwd');
        // 2. Register event handlers
        var flag = 0;
        eye.onclick = function() {
            // After one click, the flag must change
            if (flag == 0) {
                pwd.type = 'text';
                eye.src = 'images/open.png';
                flag = 1; // Assignment operation
            } else {
                pwd.type = 'password';
                eye.src = 'images/close.png';
                flag = 0;
            }

        }
    </script>
</body>
4.4 style attribute operation
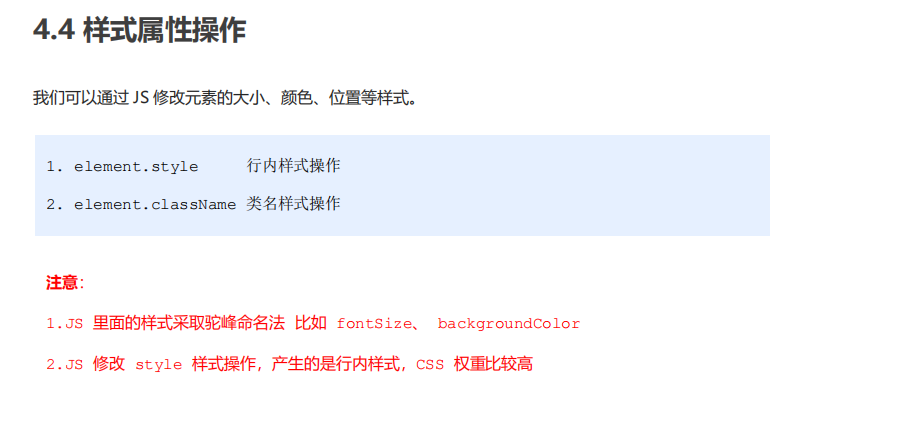
    <style>
        div {
            width: 200px;
            height: 200px;
            background-color: pink;
        }
    </style>
</head>

<body>
    <div></div>
    <script>
        // 1. Get element
        var div = document.querySelector('div');
        // 2. Register event handlers
        div.onclick = function() {
            // The attributes in div.style adopt hump naming method
            this.style.backgroundColor = 'purple';
            this.style.width = '250px';
        }
    </script>
</body>
Imitation Taobao hidden QR code case
<body>
    <div class="box">
        Taobao QR code
        <img src="images/tao.png" alt="">
        <i class="close-btn">×</i>
    </div>
    <script>
        // 1. Get element
        var btn = document.querySelector('.close-btn');
        var box = document.querySelector('.box');
        // 2. Register event handler
        btn.onclick = function() {
            box.style.display = 'none';
        }
    </script>
</body>
Circular sprite diagram case
<body>
    <div class="box">
        <ul>
            <li></li>
            <li></li>
            <li></li>
            <li></li>
            <li></li>
            <li></li>
            <li></li>
            <li></li>
            <li></li>
            <li></li>
            <li></li>
            <li></li>
        </ul>
    </div>
    <script>
        // 1. Get all the small li of the element
        var lis = document.querySelectorAll('li');
        for (var i = 0; i < lis.length; i++) {
            // Multiplying the index number by 44 is the background y coordinate of each li, and index is our y coordinate
            var index = i * 44;
            lis[i].style.backgroundPosition = '0 -' + index + 'px';
        }
    </script>
</body>
Show or hide text box content cases
<body>
    <input type="text" value="mobile phone">
    <script>
        // 1. Get element
        var text = document.querySelector('input');
        // 2. Register the event to get the focus event onfocus
        text.onfocus = function() {
                // console.log('got focus');
                if (this.value === 'mobile phone') {
                    this.value = '';
                }
                // To get focus, you need to turn the text color in the text box black
                this.style.color = '#333';
            }
            // Lose focus event
        text.onblur = function() {
            // console.log('lost focus');
            if (this.value === '') {
                this.value = 'mobile phone';
            }
            // To lose focus, you need to lighten the text color in the text box
            this.style.color = '#999';
        }
    </script>

</body>
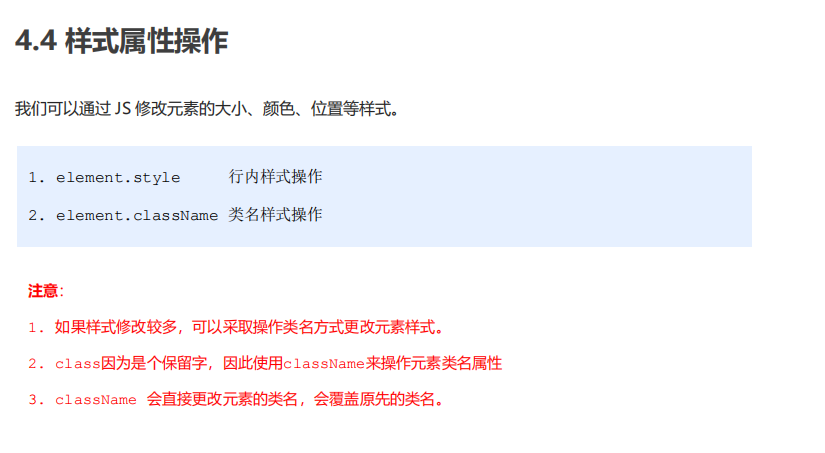
<body>
    <div class="first">text</div>
    <script>
        // 1. Use element Style gets and modifies the element style. It is used when there are few styles or simple functions
        var test = document.querySelector('div');
        test.onclick = function() {
            // this.style.backgroundColor = 'purple';
            // this.style.color = '#fff';
            // this.style.fontSize = '25px';
            // this.style.marginTop = '100px';
            // Let's change the class name of the current element to change

            // 2. We can change the style of the element by modifying the className of the element, which is suitable for situations with many styles or complex functions
            // 3. If we want to keep the original class name, we can do so
            // this.className = 'change';
            this.className = 'first change';
        }
    </script>
</body>
Case of imitating Sina registration page
<body>
    <div class="register">
        <input type="password" class="ipt">
        <p class="message">Please enter 6~16 Bit cipher</p>
    </div>
    <script>
        // The first event to judge is that the form loses focus onblur
        // If the input is correct, the correct information will be prompted. The color is green and the small icon changes
        // If the input is not 6 to 16 bits, the error message color will be red and the small icon will change
        // Because there are many styles changing inside, we adopt className to modify the style
        // 1. Get element
        var ipt = document.querySelector('.ipt');
        var message = document.querySelector('.message');
        //2. Registration events lose focus
        ipt.onblur = function() {
            // According to the length of the value in the form, IPT value. length
            if (this.value.length < 6 || this.value.length > 16) {
                // console.log('error ');
                message.className = 'message wrong';
                message.innerHTML = 'The number of digits you entered is not 6~16 position';
            } else {
                message.className = 'message right';
                message.innerHTML = 'Your input is correct';
            }
        }
    </script>
</body>
4.5 summary of operation elements
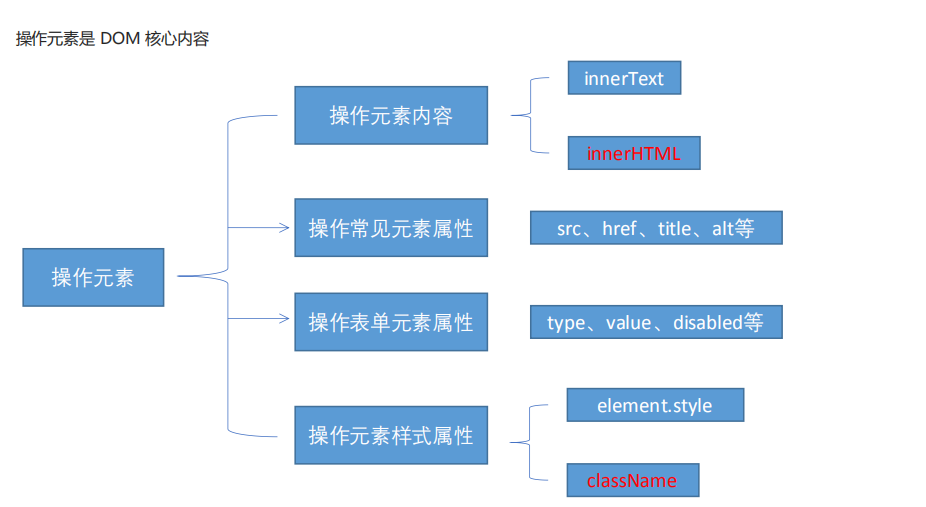
Switch light case
<body>
    <button>Switch light</button>
    <script>
        var btn=document.querySelector('button');
        var flag=0;
        btn.onclick=function(){
            if(flag===0){
                document.body.style.backgroundColor='black';
                flag=1;
            }else{
                document.body.style.backgroundColor='#fff';
                flag=0;
            }
        }
    </script>
</body>
4.5 exclusivity
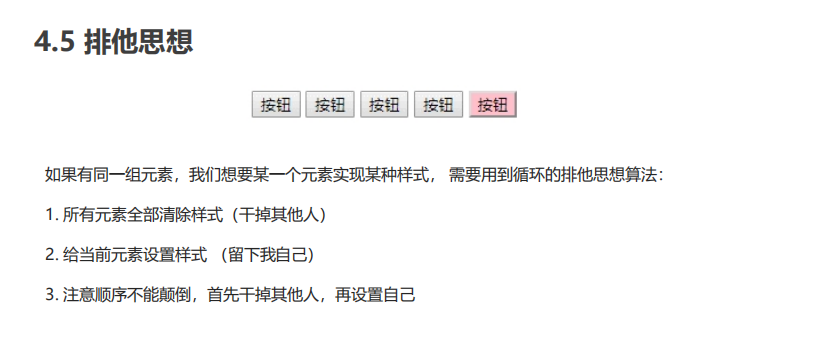
<body>
    <button>Button 1</button>
    <button>Button 2</button>
    <button>Button 3</button>
    <button>Button 4</button>
    <button>Button 5</button>
    <script>
        // 1. Get all button elements
        var btns = document.getElementsByTagName('button');
        // btns gets every element in the pseudo array btns[i]
        for (var i = 0; i < btns.length; i++) {
            btns[i].onclick = function() {
                // (1) Let's remove all the button background colors and kill everyone first
                for (var i = 0; i < btns.length; i++) {
                    btns[i].style.backgroundColor = '';
                }
                // (2) Then let the current element background color be pink, leaving me
                this.style.backgroundColor = 'pink';

            }
        }
        //2. First exclude others, and then set your own style. This idea of excluding others becomes exclusive
    </script>
</body>
Baidu Skin Case
<body>
    <ul class="baidu">
        <li><img src="images/1.jpg"></li>
        <li><img src="images/2.jpg"></li>
        <li><img src="images/3.jpg"></li>
        <li><img src="images/4.jpg"></li>
    </ul>
    <script>
        // 1. Get element
        var imgs = document.querySelector('.baidu').querySelectorAll('img');
        // console.log(imgs);
        // 2. Circular registration event
        for (var i = 0; i < imgs.length; i++) {
            imgs[i].onclick = function() {
                // this.src is the path where we click images / 2 jpg
                // console.log(this.src);
                // Put this path this Just give SRC to the body
                document.body.style.backgroundImage = 'url(' + this.src + ')';
            }
        }
    </script>
</body>
Table interlaced discoloration case
    <script>
        // 1. Get elements get all the lines in tbody
        var trs = document.querySelector('tbody').querySelectorAll('tr');
        // 2. Register events with circular binding
        for (var i = 0; i < trs.length; i++) {
            // 3. Mouse over event onmouseover
            trs[i].onmouseover = function() {
                    // console.log(11);
                    this.className = 'bg';
                }
                // 4. Mouse leaving event onmouseout
            trs[i].onmouseout = function() {
                this.className = '';
            }
        }
    </script>
Cases of selecting and deselecting all forms
    <script>
        // 1. Select all and deselect all: let the checked attribute (selected status) of all the check boxes below follow the select all button
        // Get element
        var j_cbAll = document.getElementById('j_cbAll'); // Select all button
        var j_tbs = document.getElementById('j_tb').getElementsByTagName('input'); // All check boxes below
        // Registration event
        j_cbAll.onclick = function() {
                // this.checked it can get the selected status of the current check box. If it is true, it is selected; if it is false, it is not selected
                console.log(this.checked);
                for (var i = 0; i < j_tbs.length; i++) {
                    j_tbs[i].checked = this.checked;
                }
            }
            // 2. All the check boxes below need to be selected, and all the check boxes above can be selected. Practice: bind click events to all the check boxes below. Each time you click, you should cycle to check whether all the check boxes below are selected. If one is not selected, select all the check boxes above will not be selected.
        for (var i = 0; i < j_tbs.length; i++) {
            j_tbs[i].onclick = function() {
                // flag controls whether the select all button is selected
                var flag = true;
                // Each time you click the check box below, you will cycle to check whether all four small buttons are selected
                for (var i = 0; i < j_tbs.length; i++) {
                    if (!j_tbs[i].checked) {
                        flag = false;
                        break; // Exiting the for loop can improve the execution efficiency, because as long as one is not selected, there is no need to judge the rest of the loop
                    }
                }
                j_cbAll.checked = flag;
            }
        }
    </script>
4.6 operation of custom attributes
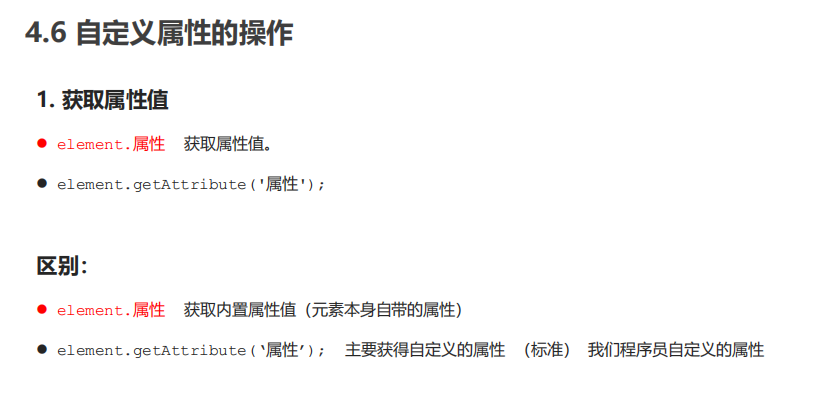
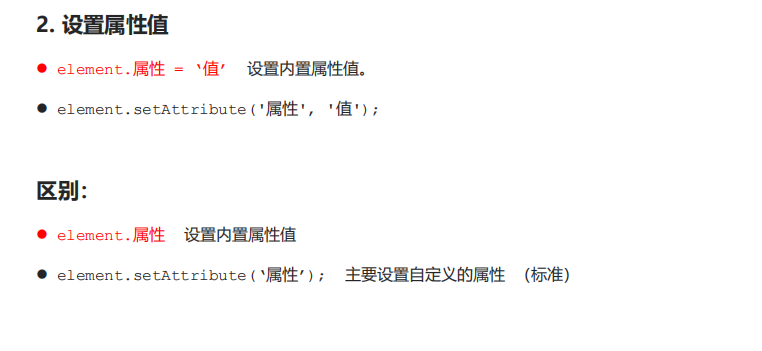

<body>
    <div id="demo" index="1" class="nav"></div>
    <script>
        var div = document.querySelector('div');
        // 1. Get the attribute value of the element
        // (1) element. attribute
        console.log(div.id);
        //(2) element.getAttribute('attribute ') get the meaning of getting attribute attribute. The attribute added by our programmers is called user-defined attribute index
        console.log(div.getAttribute('id'));
        console.log(div.getAttribute('index'));
        // 2. Set element attribute value
        // (1) element. Attribute = 'value'
        div.id = 'test';
        div.className = 'navs';
        // (2) element.setAttribute('attribute ',' value '); Mainly for custom attributes
        div.setAttribute('index', 2);
        div.setAttribute('class', 'footer'); // Class is special. It says class, not className
        // 3 remove attribute removeattribute
        div.removeAttribute('index');
    </script>
</body>
tab bar Toggle
<script>
        // Get element
        var tab_list = document.querySelector('.tab_list');
        var lis = tab_list.querySelectorAll('li');
        var items = document.querySelectorAll('.item');
        // for loop binding click event
        for (var i = 0; i < lis.length; i++) {
            // Start setting index numbers for the five small li
            lis[i].setAttribute('index', i);
            lis[i].onclick = function() {
                // 1. Click a module on the module tab, the current background color will be red, and the rest will remain unchanged (exclusive thinking) the way to modify the class name

                // Kill everyone else and clear the class
                for (var i = 0; i < lis.length; i++) {
                    lis[i].className = '';
                }
                // Leave me alone
                this.className = 'current';
                // 2. The following display content module
                var index = this.getAttribute('index');
                console.log(index);
                // Kill everyone and let the rest of the item s hide these div s
                for (var i = 0; i < items.length; i++) {
                    items[i].style.display = 'none';
                }
                // Leave me to display the corresponding item
                items[index].style.display = 'block';
            }
        }
    </script>
4.7H5 custom attributes
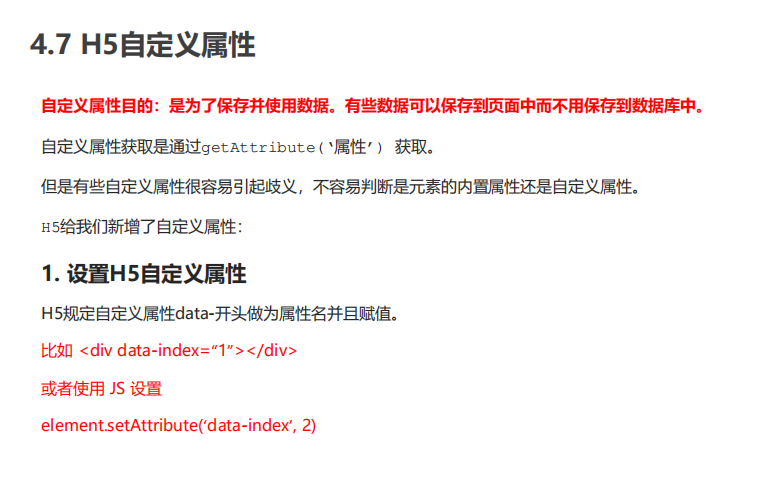

<body>
    <div getTime="20" data-index="2" data-list-name="andy"></div>
    <script>
        var div = document.querySelector('div');
        // console.log(div.getTime);
        console.log(div.getAttribute('getTime'));
        div.setAttribute('data-time', 20);
        console.log(div.getAttribute('data-index'));
        console.log(div.getAttribute('data-list-name'));
        // h5 is a new method to get custom attributes. It can only get those starting with data -
        // dataset is a collection containing all custom attributes starting with data
        console.log(div.dataset);
        console.log(div.dataset.index);
        console.log(div.dataset['index']);
        // If there are multiple - linked words in the custom attribute, we use the hump naming method when obtaining them
        console.log(div.dataset.listName);
        console.log(div.dataset['listName']);
    </script>
</body>
05 node operation
5.1 why learn node operation
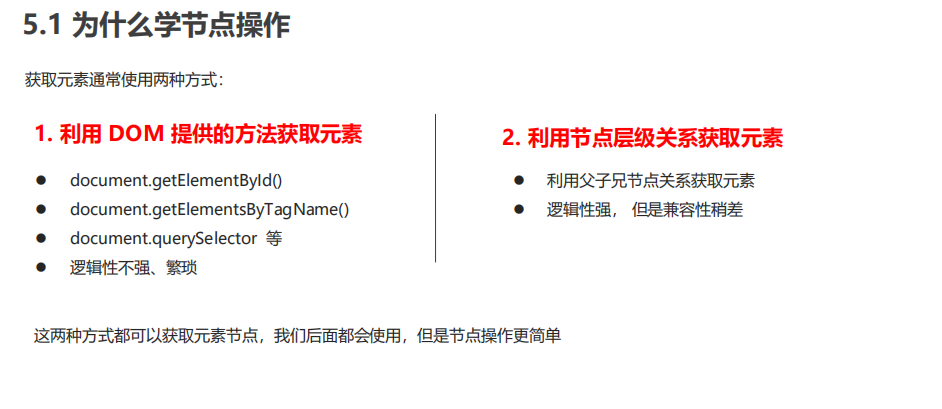
5.2 node overview
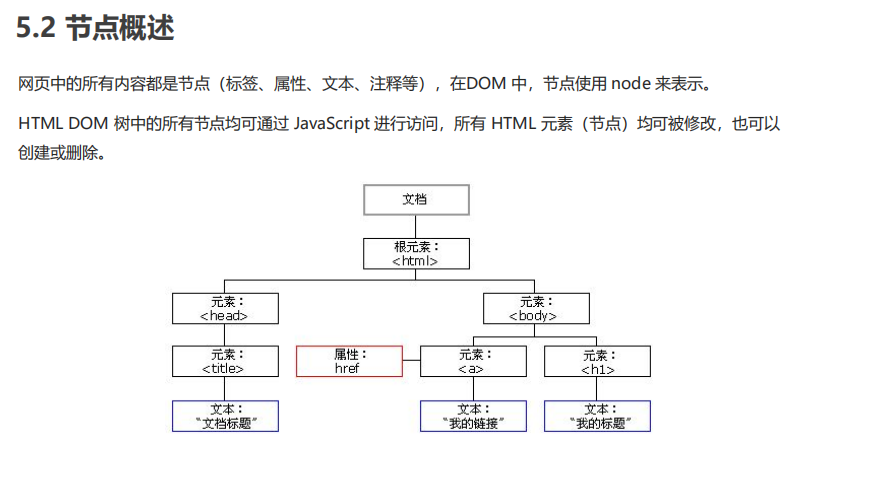

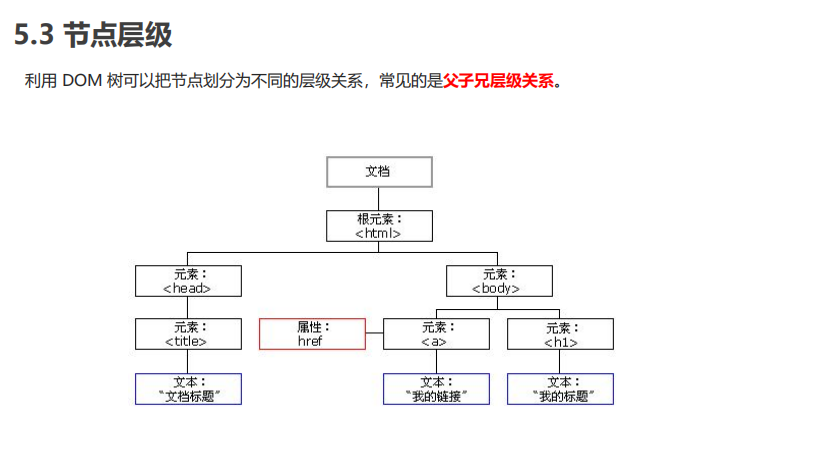
5.3 node hierarchy

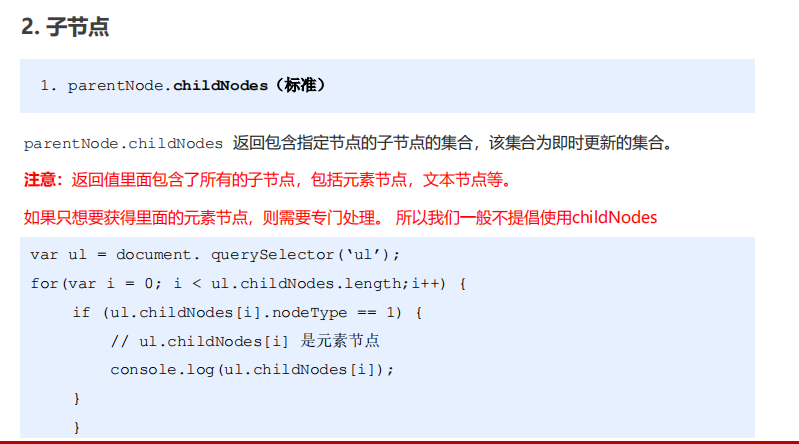
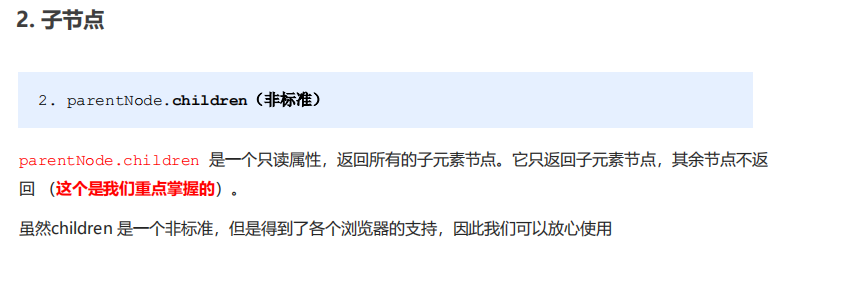


Sina drop-down menu case
<body>
    <ul class="nav">
        <li>
            <a href="#"> Weibo</a>
            <ul>
                <li>
                    <a href="">private letter</a>
                </li>
                <li>
                    <a href="">comment</a>
                </li>
                <li>
                    <a href="">@I</a>
                </li>
            </ul>
        </li>
        <li>
            <a href="#"> Weibo</a>
            <ul>
                <li>
                    <a href="">private letter</a>
                </li>
                <li>
                    <a href="">comment</a>
                </li>
                <li>
                    <a href="">@I</a>
                </li>
            </ul>
        </li>
        <li>
            <a href="#"> Weibo</a>
            <ul>
                <li>
                    <a href="">private letter</a>
                </li>
                <li>
                    <a href="">comment</a>
                </li>
                <li>
                    <a href="">@I</a>
                </li>
            </ul>
        </li>
        <li>
            <a href="#"> Weibo</a>
            <ul>
                <li>
                    <a href="">private letter</a>
                </li>
                <li>
                    <a href="">comment</a>
                </li>
                <li>
                    <a href="">@I</a>
                </li>
            </ul>
        </li>
    </ul>
    <script>
        // 1. Get element
        var nav = document.querySelector('.nav');
        var lis = nav.children; // Get 4 small li
        // 2. Circular registration event
        for (var i = 0; i < lis.length; i++) {
            lis[i].onmouseover = function() {
                this.children[1].style.display = 'block';
            }
            lis[i].onmouseout = function() {
                this.children[1].style.display = 'none';
            }
        }
    </script>
</body>
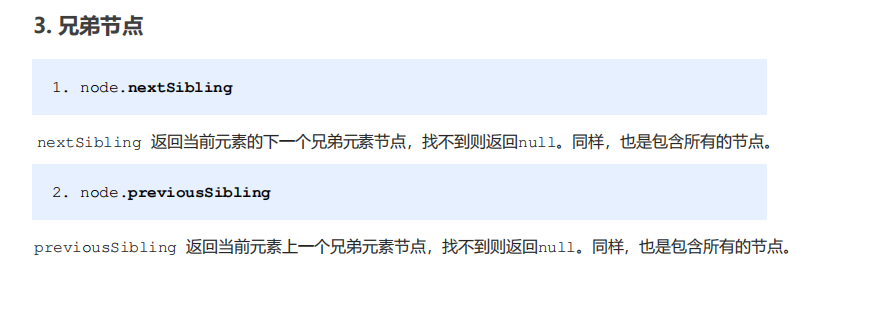
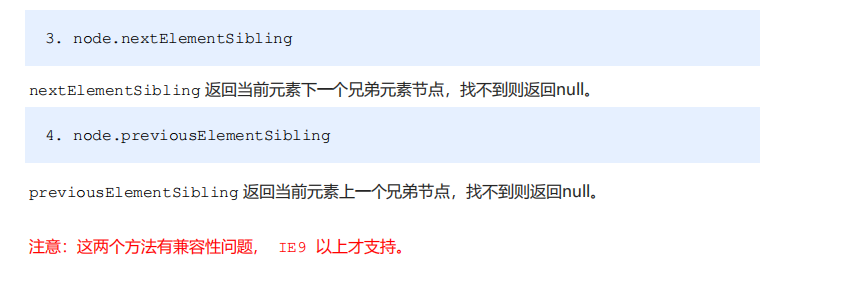
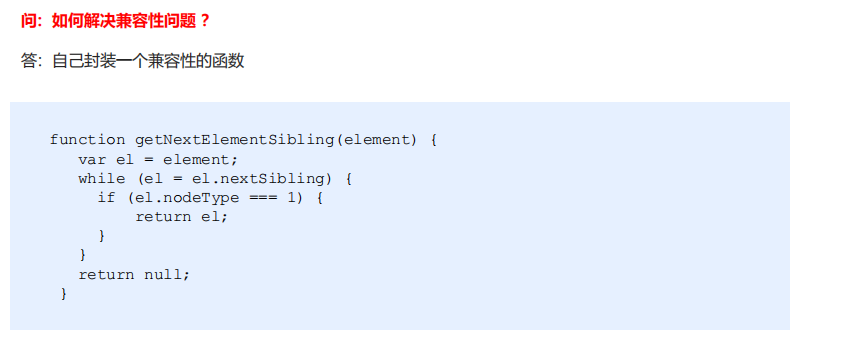
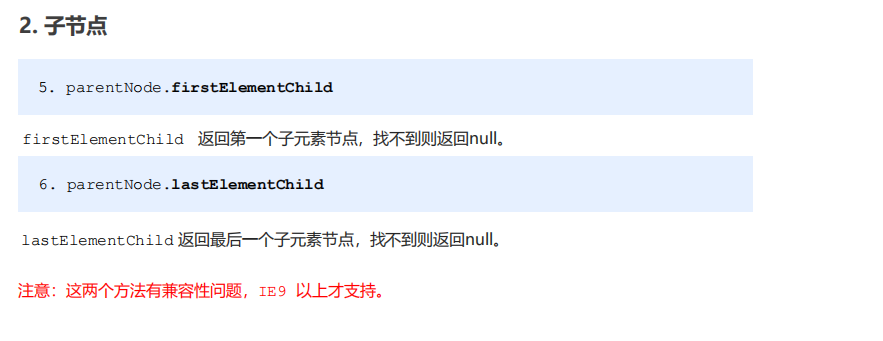
5.4 creating and adding nodes

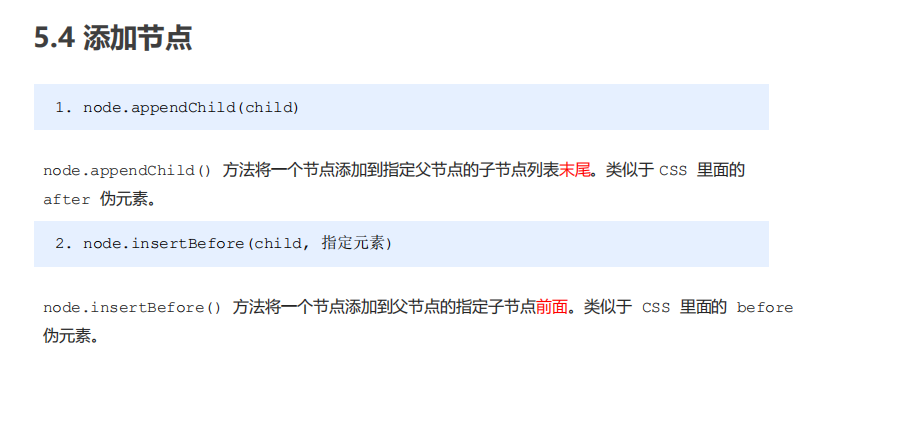
<body>
    <ul>
        <li>123</li>
    </ul>
    <script>
        // 1. Create node element node
        var li = document.createElement('li');
        // 2. Add node AppendChild (child) node the parent child is the child, followed by additional elements, similar to the push in the array
        var ul = document.querySelector('ul');
        ul.appendChild(li);
        // 3. Add node InsertBefore (child, specifies the element);
        var lili = document.createElement('li');
        ul.insertBefore(lili, ul.children[0]);
        // 4. We want to add a new element to the page: 1 Create element 2 Add element
    </script>
</body>
Simple version release message case
<body>
    <textarea name="" id=""></textarea>
    <button>release</button>
    <ul>

    </ul>
    <script>
        // 1. Get element
        var btn = document.querySelector('button');
        var text = document.querySelector('textarea');
        var ul = document.querySelector('ul');
        // 2. Registration event
        btn.onclick = function() {
            if (text.value == '') {
                alert('You have not entered anything');
                return false;
            } else {
                // console.log(text.value);
                // (1) Create element
                var li = document.createElement('li');
                // There must be li before assignment
                li.innerHTML = text.value;
                // (2) Add element
                // ul.appendChild(li);
                ul.insertBefore(li, ul.children[0]);
            }
        }
    </script>
</body>
5.5 deleting nodes

<body>
    <button>delete</button>
    <ul>
        <li>Xiong Da</li>
        <li>Xiong er</li>
        <li>Bald head strength</li>
    </ul>
    <script>
        // 1. Get element
        var ul = document.querySelector('ul');
        var btn = document.querySelector('button');
        // 2. Delete the element node removeChild(child)
        // ul.removeChild(ul.children[0]);
        // 3. Click the button to delete the children in turn
        btn.onclick = function() {
            if (ul.children.length == 0) {
                this.disabled = true; //This button is grayed out and can't be clicked any more
            } else {
                ul.removeChild(ul.children[0]);
            }
        }
    </script>
</body>
Delete message case
<body>
    <textarea name="" id=""></textarea>
    <button>release</button>
    <ul>

    </ul>
    <script>
        // 1. Get element
        var btn = document.querySelector('button');
        var text = document.querySelector('textarea');
        var ul = document.querySelector('ul');
        // 2. Registration event
        btn.onclick = function() {
            if (text.value == '') {
                alert('You have not entered anything');
                return false;
            } else {
                // console.log(text.value);
                // (1) Create element
                var li = document.createElement('li');
                // There must be li before assignment
                li.innerHTML = text.value + "<a href='javascript:;'>delete</a>";
                // (2) Add element
                // ul.appendChild(li);
                ul.insertBefore(li, ul.children[0]);
                // (3) Delete element deletes the currently linked li and its father
                var as = document.querySelectorAll('a');
                for (var i = 0; i < as.length; i++) {
                    as[i].onclick = function() {
                        // node.removeChild(child);  What is deleted is li this, where li is currently a parentNode;
                        ul.removeChild(this.parentNode);
                    }
                }
            }
        }
    </script>
</body>
5.6 replication node
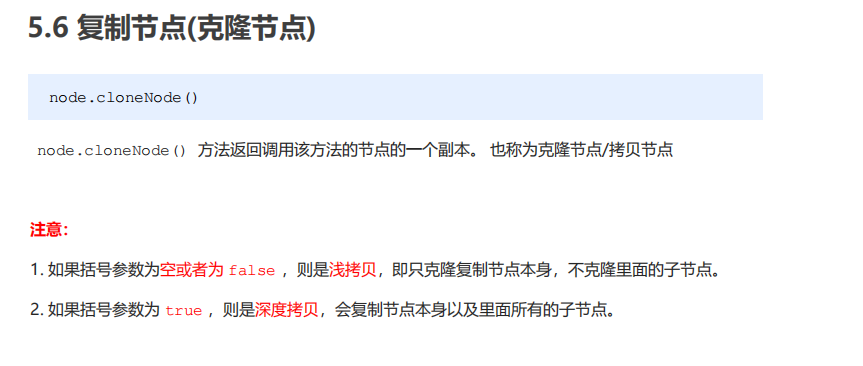
<body>
    <ul>
        <li>1111</li>
        <li>2</li>
        <li>3</li>
    </ul>
    <script>
        var ul = document.querySelector('ul');
        // 1. node.cloneNode();  If the bracket is empty or false inside, the shallow copy only copies the label and does not copy the content inside
        // 2. node.cloneNode(true);  The parenthesis is true. Copy the contents in the deep copy label
        var lili = ul.children[0].cloneNode(true);
        ul.appendChild(lili);
    </script>
</body>
Dynamically generate table cases
<body>
    <table cellspacing="0">
        <thead>
            <tr>
                <th>full name</th>
                <th>subject</th>
                <th>achievement</th>
                <th>operation</th>
            </tr>
        </thead>
        <tbody>

        </tbody>
    </table>
    <script>
        // 1. Prepare the students' data first
        var datas = [{
            name: 'Wei Yingluo',
            subject: 'JavaScript',
            score: 100
        }, {
            name: 'Hongli',
            subject: 'JavaScript',
            score: 98
        }, {
            name: 'Fu Heng',
            subject: 'JavaScript',
            score: 99
        }, {
            name: 'Mingyu',
            subject: 'JavaScript',
            score: 88
        }, {
            name: 'unfaithful man',
            subject: 'JavaScript',
            score: 0
        }];
        // 2. Create rows into tbody: we create rows for several people (through the length of the array)
        var tbody = document.querySelector('tbody');
        for (var i = 0; i < datas.length; i++) { // Outer for loop tube line tr
            // 1. Create tr line
            var tr = document.createElement('tr');
            tbody.appendChild(tr);
            // 2. Create cells in the row (three cells related to data). The number of td cells depends on the number of attributes in each object. for loop through object data [i]
            for (var k in datas[i]) { // Inside the for loop tube row td
                // Creating Cells
                var td = document.createElement('td');
                // Give the attribute value data [i] [k] in the object to td
                // console.log(datas[i][k]);
                td.innerHTML = datas[i][k];
                tr.appendChild(td);
            }
            // 3. Create a cell with 2 words deleted
            var td = document.createElement('td');
            td.innerHTML = '<a href="javascript:;">delete </a>';
            tr.appendChild(td);

        }
        // 4. Delete operation starts
        var as = document.querySelectorAll('a');
        for (var i = 0; i < as.length; i++) {
            as[i].onclick = function() {
                // Click a to delete the current a line (linked dad's dad) node removeChild(child)
                tbody.removeChild(this.parentNode.parentNode)
            }
        }
        // for(var k in obj) {
        //     k gets the attribute name
        //     obj[k] gets the attribute value
        // }
    </script>
</body>
5.8 differences of three dynamic creation elements
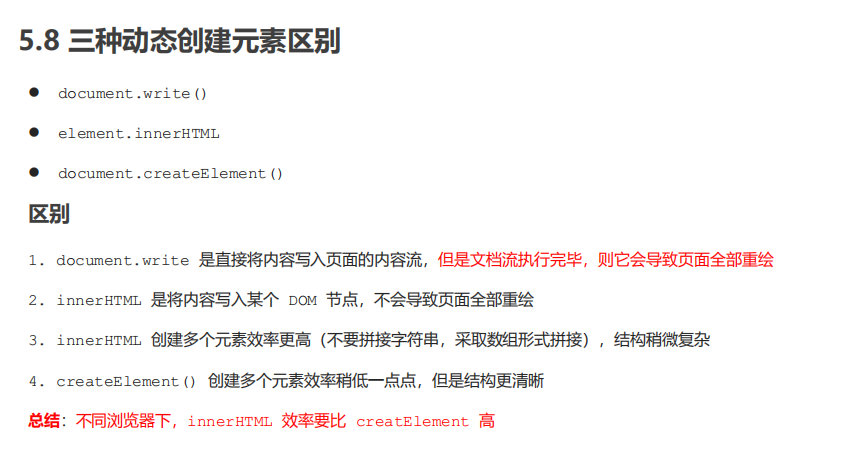
<body>
    <button>click</button>
    <p>abc</p>
    <div class="inner"></div>
    <div class="create"></div>
    <script>
        // window.onload = function() {
        //         document.write('<div>123</div>');

        //     }
        // Differences between the three ways of creating elements
        // 1. document.write() creates an element. If the page document stream is loaded, calling this sentence again will cause the page to be redrawn
        // var btn = document.querySelector('button');
        // btn.onclick = function() {
        //     document.write('<div>123</div>');
        // }

        // 2. innerHTML create element
        var inner = document.querySelector('.inner');
        // for (var i = 0; i <= 100; i++) {
        //     inner. InnerHTML + = '< a href = "#" > Baidu < / a >'
        // }
        var arr = [];
        for (var i = 0; i <= 100; i++) {
            arr.push('<a href="#"> Baidu < / a >);
        }
        inner.innerHTML = arr.join('');
        // 3. document.createElement() creates an element
        var create = document.querySelector('.create');
        for (var i = 0; i <= 100; i++) {
            var a = document.createElement('a');
            create.appendChild(a);
        }
    </script>
</body>
06DOM key core
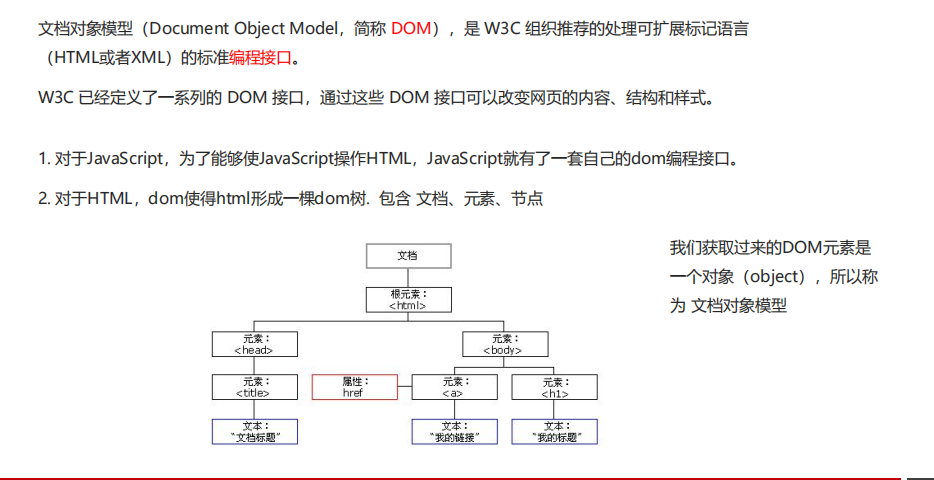
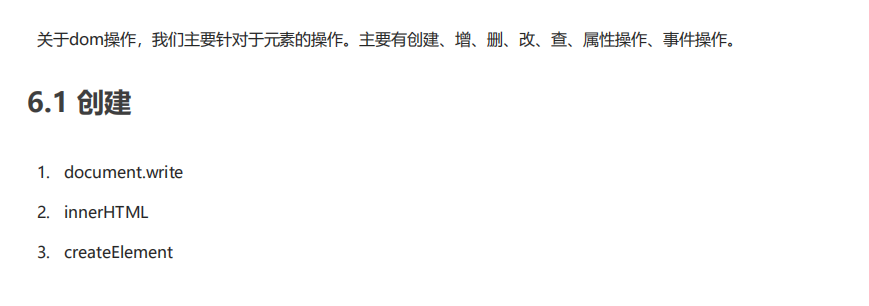
6.1 creating
6.2 add
1.appendChild
2.insertBefore
6.3 delete
1.removeChild
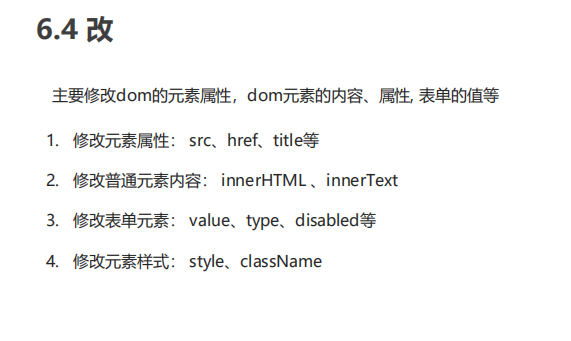
6.4 modification
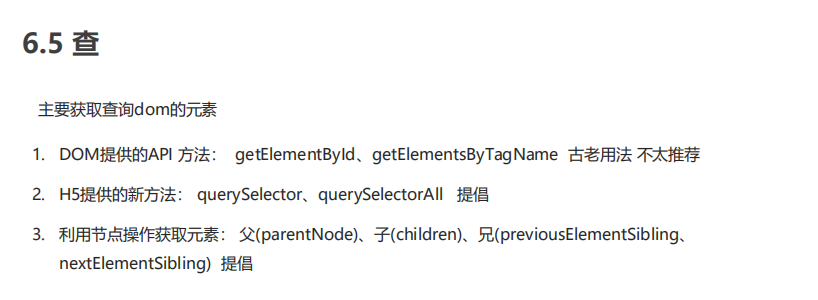
6.5 inspection
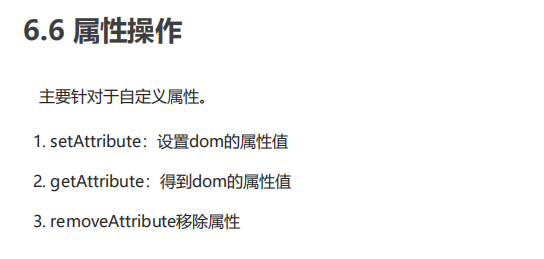
6.6 attribute operation
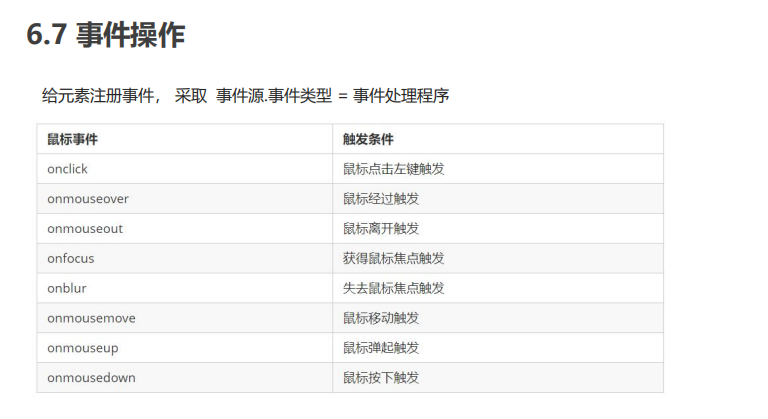
6.7 event operation
2, Event advanced
01 registration event (binding event)
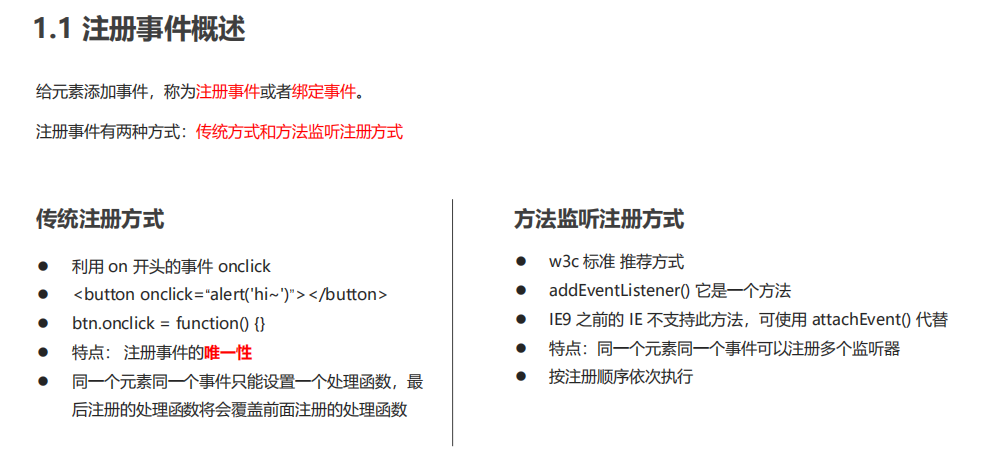
1.1 overview of registration events
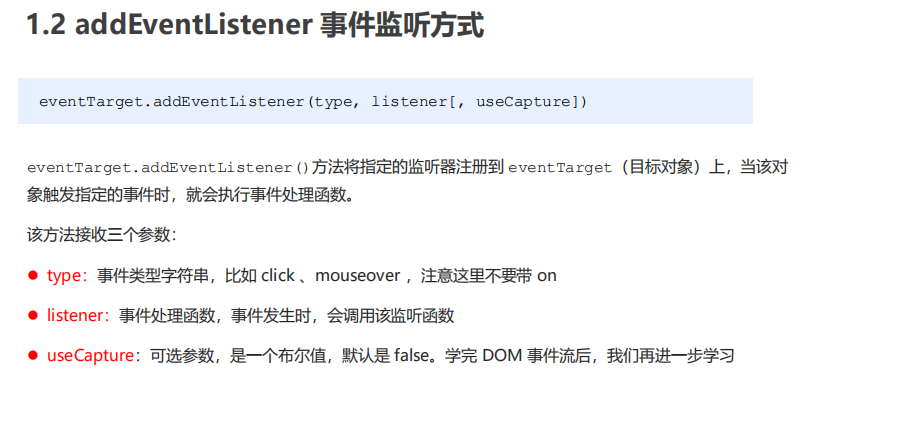
1.2addEventListener event listening method
<body>
    <button>Traditional registration event</button>
    <button>Register event monitoring method</button>
    <button>ie9 attachEvent</button>
    <script>
        var btns = document.querySelectorAll('button');
        // 1. Traditional registration events
        btns[0].onclick = function() {
            alert('hi');
        }
        btns[0].onclick = function() {
                alert('hao a u');
            }
            // 2. Event listener registers the event addEventListener
            // (1) The event type inside is a string. It must be quoted without on
            // (2) Multiple listeners (event handlers) can be added to the same element and the same event
        btns[1].addEventListener('click', function() {
            alert(22);
        })
        btns[1].addEventListener('click', function() {
                alert(33);
            })
            // 3. attachEvent ie9 previous versions support
        btns[2].attachEvent('onclick', function() {
            alert(11);
        })
    </script>
</body>
1.3attachEvent event listening method
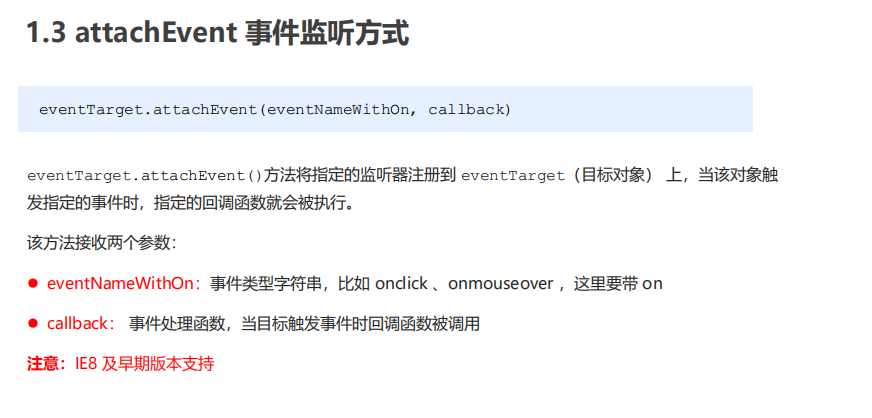
attachEvent ie9 previous versions support
02 delete event (unbind event)
2.1 method of deleting events
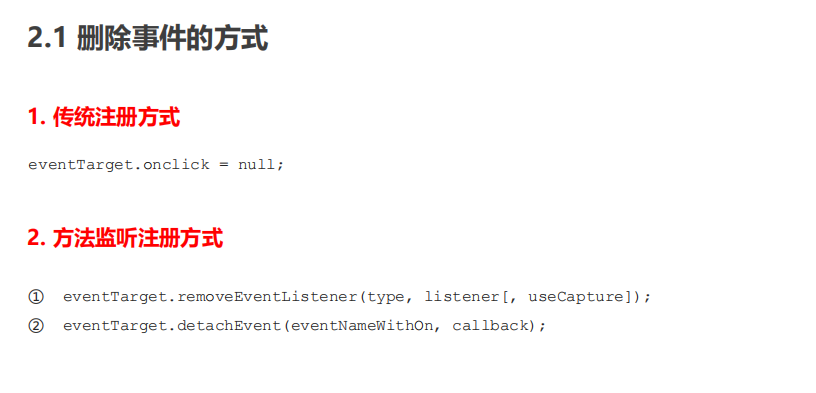
<body>
    <div>1</div>
    <div>2</div>
    <div>3</div>
    <script>
        var divs = document.querySelectorAll('div');
        divs[0].onclick = function() {
                alert(11);
                // 1. Delete events in traditional way
                divs[0].onclick = null;
            }
            // 2. removeEventListener delete event
        divs[1].addEventListener('click', fn) // fn inside does not need to be called with parentheses

        function fn() {
            alert(22);
            divs[1].removeEventListener('click', fn);
        }
        // 3. detachEvent
        divs[2].attachEvent('onclick', fn1);

        function fn1() {
            alert(33);
            divs[2].detachEvent('onclick', fn1);
        }
    </script>
</body>
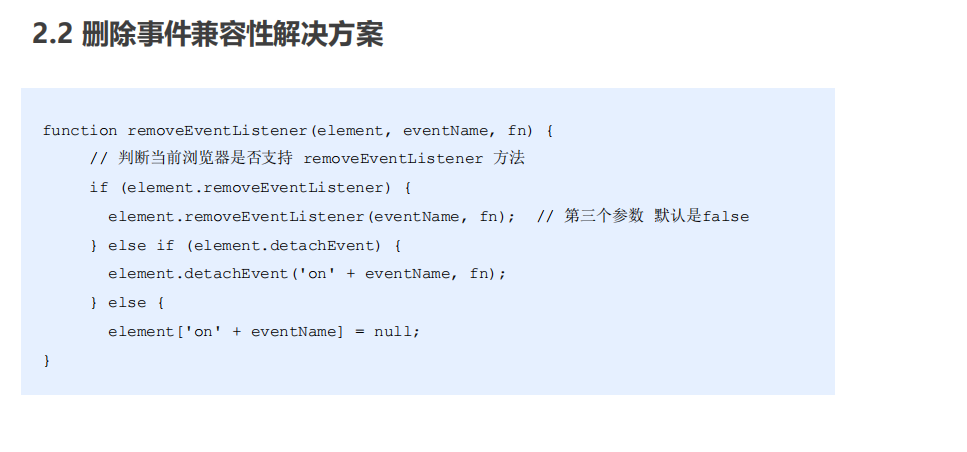
2.2 compatibility solutions
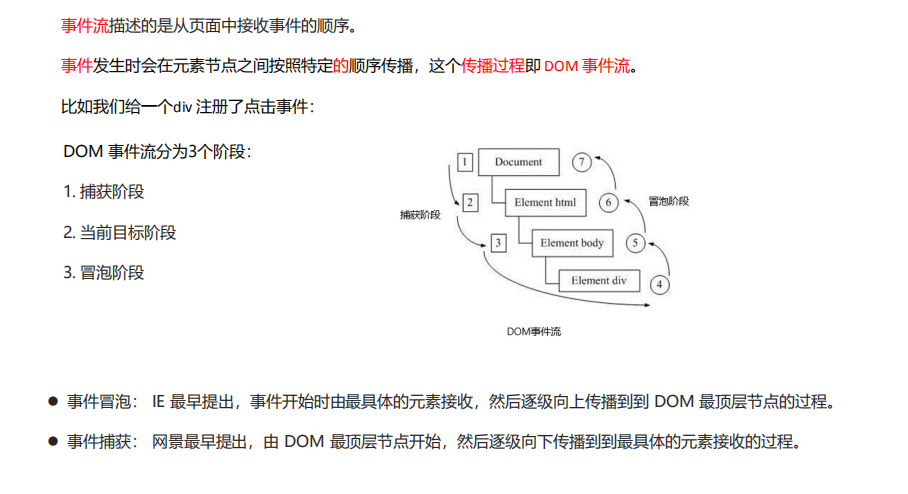
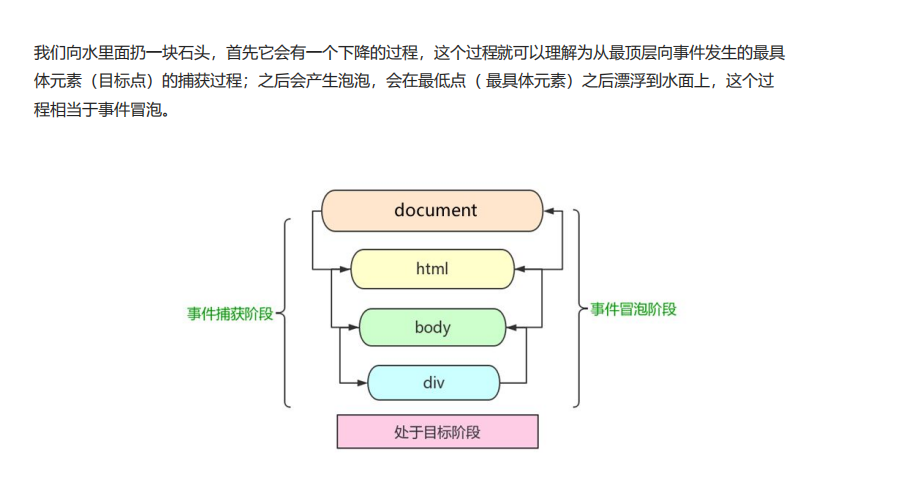
03DOM event flow
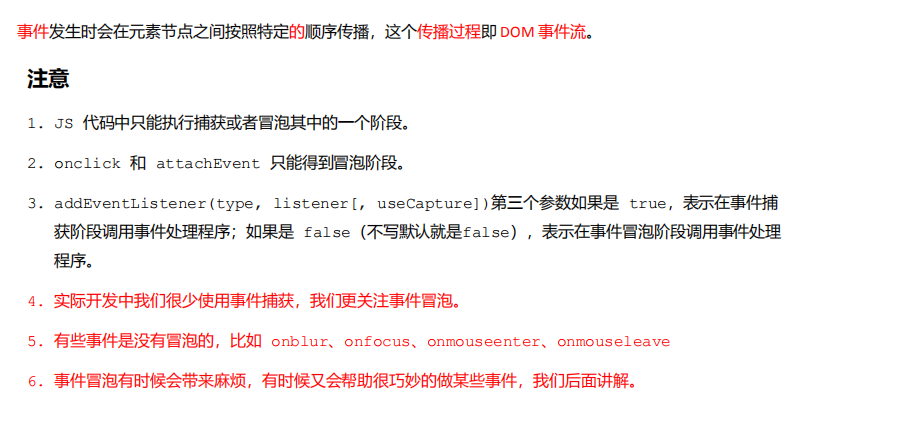
<body>
    <div class="father">
        <div class="son">son Box</div>
    </div>
    <script>
        // dom event flow has three stages
        // 1. Only one stage of capture or bubbling can be executed in JS code.
        // 2. onclick and attachEvent (ie) can only get the bubbling stage.
        // 3. In the capture phase, if the third parameter of addEventListener is true, it is in the capture phase document - > HTML - > body - > father - > son
        // var son = document.querySelector('.son');
        // son.addEventListener('click', function() {
        //     alert('son');
        // }, true);
        // var father = document.querySelector('.father');
        // father.addEventListener('click', function() {
        //     alert('father');
        // }, true);
        // 4. In the bubbling stage, if the third parameter of addEventListener is false or omitted, it is in the bubbling stage son - > father - > body - > HTML - > document
        var son = document.querySelector('.son');
        son.addEventListener('click', function() {
            alert('son');
        }, false);
        var father = document.querySelector('.father');
        father.addEventListener('click', function() {
            alert('father');
        }, false);
        document.addEventListener('click', function() {
            alert('document');
        })
    </script>
</body>
04 event object
4.1 what is the event object
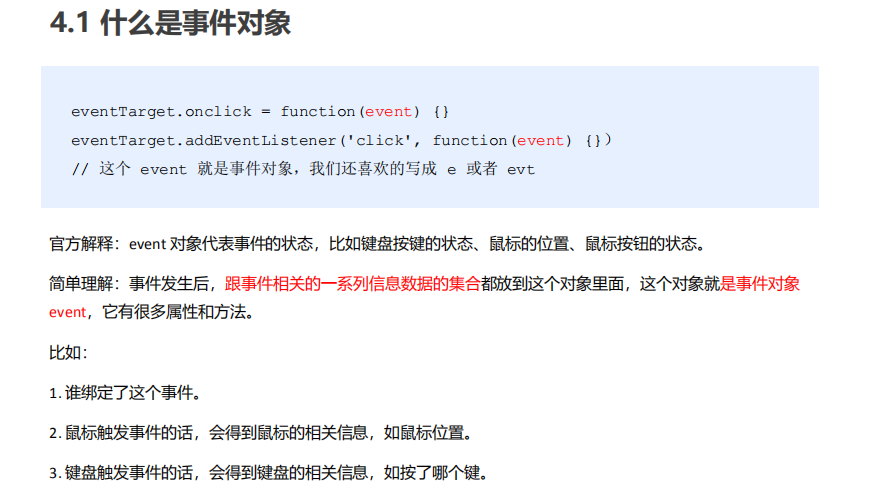
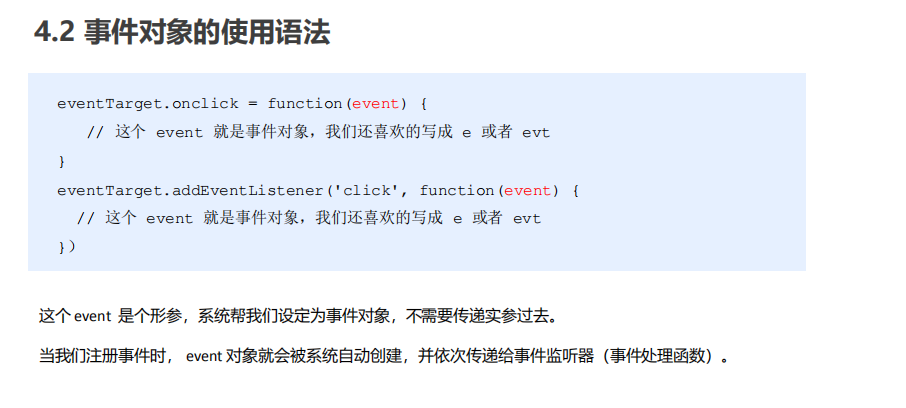
4.2 usage syntax of event object
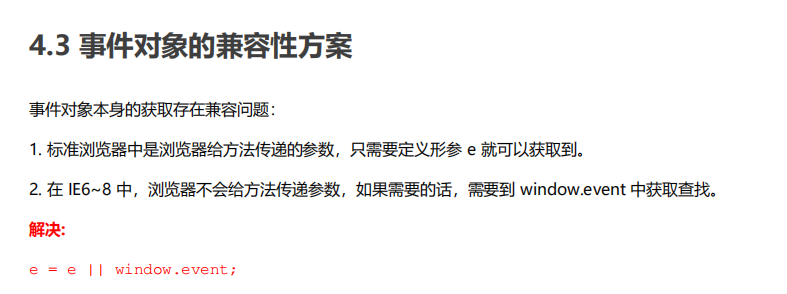
4.3 event object compatibility scheme
<body>
    <div>123</div>
    <script>
        // Event object
        var div = document.querySelector('div');
        div.onclick = function(e) {
                // console.log(e);
                // console.log(window.event);
                // e = e || window.event;
                console.log(e);


            }
            // div.addEventListener('click', function(e) {
            //         console.log(e);

        //     })
        // 1. event is an event object written into the parentheses of our listening function as a formal parameter
        // 2. The event object will exist only when there is an event. It is automatically created by the system and does not need us to pass parameters
        // 3. The event object is the collection of a series of relevant data of our events. For example, the mouse click contains the relevant information of the mouse, and the mouse coordinates. If it is a keyboard event, it contains the information of the keyboard event, such as judging that the user pressed the key
        // 4. The event object can be named by ourselves, such as event, evt and e
        // 5. The event object also has compatibility problems ie678 through window The writing method of event compatibility e = e | window event;
    </script>
</body>
4.4 common attributes and methods of event objects
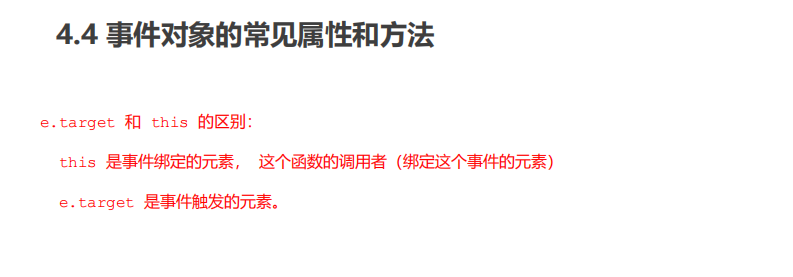
<body>
    <div>123</div>
    <ul>
        <li>abc</li>
        <li>abc</li>
        <li>abc</li>
    </ul>
    <script>
        // Properties and methods of common event objects
        // 1. e.target returns the object (element) that triggered the event. this returns the object (element) that bound the event
        // Difference: if e.target clicks the element, it will return the element. If this element is bound to the click event, then who will be returned
        var div = document.querySelector('div');
        div.addEventListener('click', function(e) {
            console.log(e.target);
            console.log(this);

        })
        var ul = document.querySelector('ul');
        ul.addEventListener('click', function(e) {
                // If we bind an event to ul, this points to ul
                console.log(this);
                console.log(e.currentTarget);

                // e.target points to the object we clicked. Who triggered this event? We clicked li e.target points to li
                console.log(e.target);

            })
            // Understanding compatibility
            // div.onclick = function(e) {
            //     e = e || window.event;
            //     var target = e.target || e.srcElement;
            //     console.log(target);

        // }
        // 2. Understand that there is a very similar attribute to this. Currenttarget ie678 doesn't know
    </script>
</body>
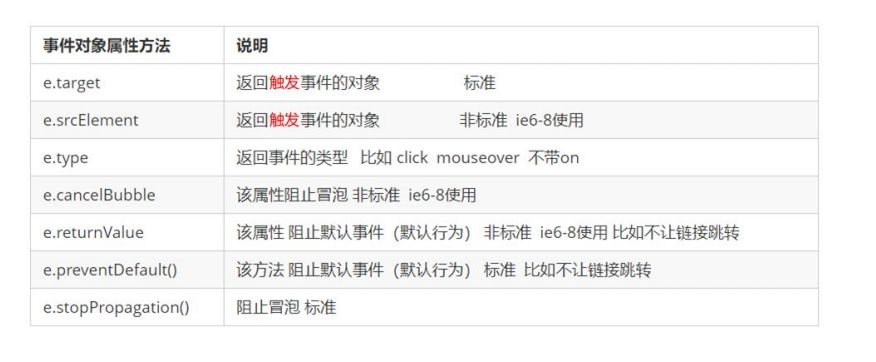
<body>
    <div>123</div>
    <a href="http://www.baidu. Com "> Baidu</a>
    <form action="http://www.baidu.com">
        <input type="submit" value="Submit" name="sub">
    </form>
    <script>
        // Properties and methods of common event objects
        // 1. Return event type
        var div = document.querySelector('div');
        div.addEventListener('click', fn);
        div.addEventListener('mouseover', fn);
        div.addEventListener('mouseout', fn);

        function fn(e) {
            console.log(e.type);

        }
        // 2. Block the default behavior (event) so that the link does not jump or the submit button does not submit
        var a = document.querySelector('a');
        a.addEventListener('click', function(e) {
                e.preventDefault(); //  dom standard writing
            })
            // 3. Traditional registration methods
        a.onclick = function(e) {
            // Ordinary browser e.preventDefault(); method
            // e.preventDefault();
            // Lower browser ie678 returnValue property
            // e.returnValue;
            // We can also use return false to prevent the default behavior. There is no compatibility problem: the code behind return is not executed, and it is only limited to the traditional registration method
            return false;
            alert(11);
        }
    </script>
</body>
05 prevent event bubbling
5.1 two ways to prevent event bubbling
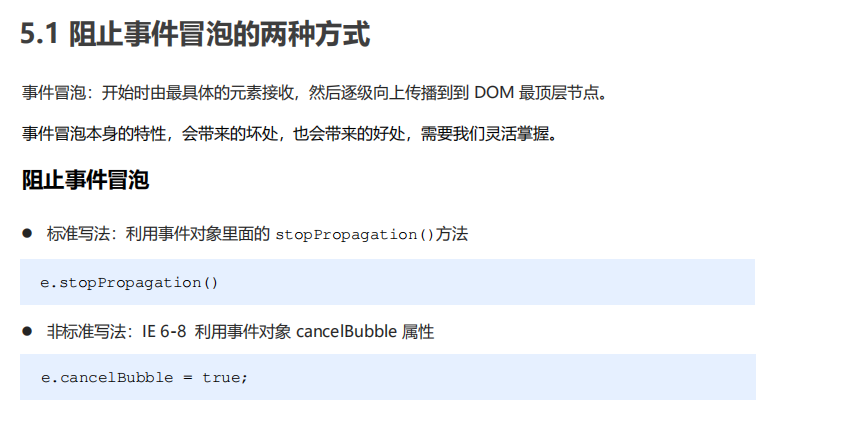
<body>
    <div class="father">
        <div class="son">son Son</div>
    </div>
    <script>
        // Properties and methods of common event objects
        // Stop bubbling dom recommended standard stopPropagation()
        var son = document.querySelector('.son');
        son.addEventListener('click', function(e) {
            alert('son');
            e.stopPropagation(); // Stop stop Propagation
            e.cancelBubble = true; // Non standard cancel bubble
        }, false);

        var father = document.querySelector('.father');
        father.addEventListener('click', function() {
            alert('father');
        }, false);
        document.addEventListener('click', function() {
            alert('document');
        })
    </script>
</body>
5.2 compatibility solutions
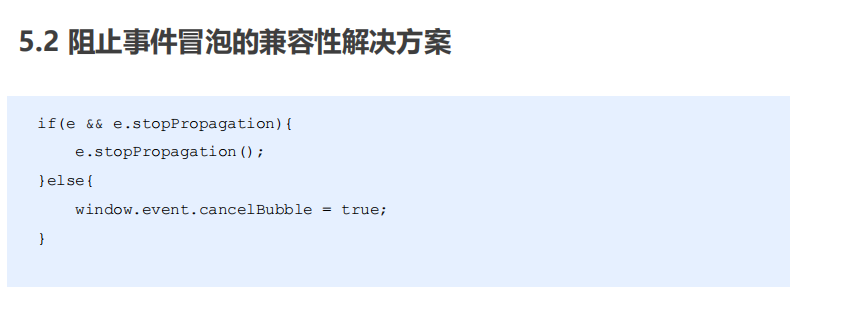
06 event entrustment (agency, delegation)
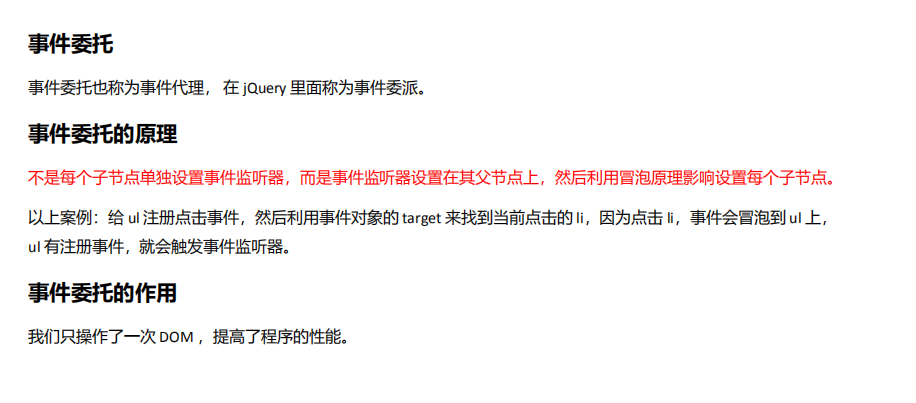
<body>
    <ul>
        <li>Do you know, I should have a bullet box in hand!</li>
        <li>Do you know, I should have a bullet box in hand!</li>
        <li>Do you know, I should have a bullet box in hand!</li>
        <li>Do you know, I should have a bullet box in hand!</li>
        <li>Do you know, I should have a bullet box in hand!</li>
    </ul>
    <script>
        // The core principle of event delegation: add a listener to the parent node and use event bubbling to affect each child node
        var ul = document.querySelector('ul');
        ul.addEventListener('click', function(e) {
            // alert('whether you know it or not, click I should have a bullet frame in hand! ');
            // e.target is the object we can click on
            e.target.style.backgroundColor = 'pink';


        })
    </script>
</body>
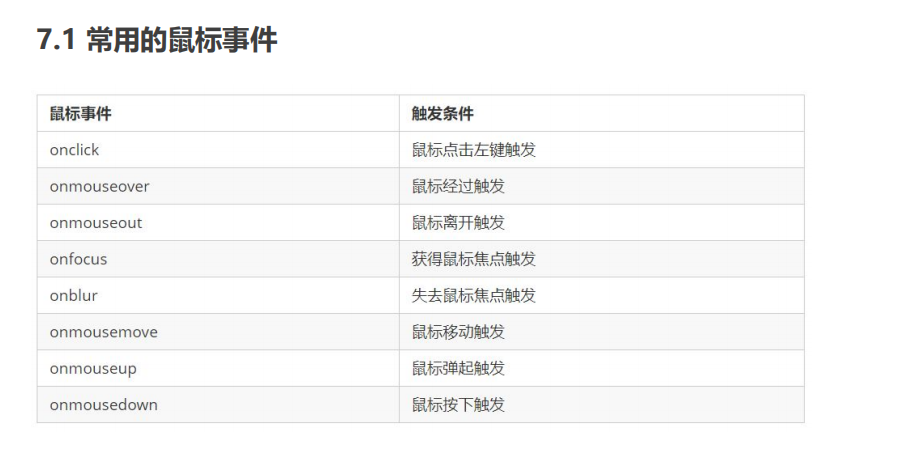
07 common mouse events
7.1 common mouse events
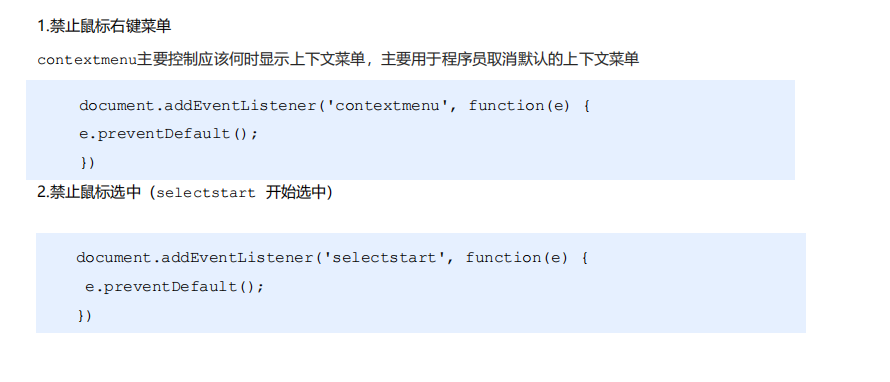
<body>
    I am a text that I don't want to share
    <script>
        // 1. contextmenu we can disable the right-click menu
        document.addEventListener('contextmenu', function(e) {
                e.preventDefault();
            })
            // 2. The text selectstart cannot be selected
        document.addEventListener('selectstart', function(e) {
            e.preventDefault();

        })
    </script>
</body>
7.2 mouse event object
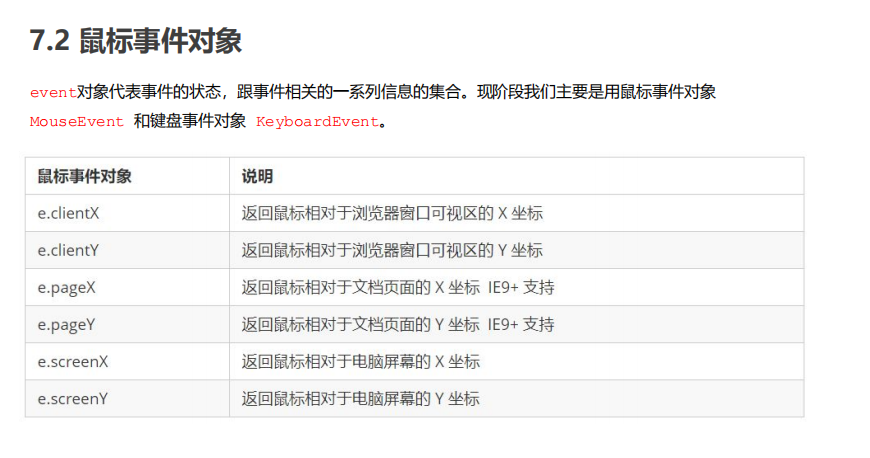
<body>
    <script>
        // Mouse event object MouseEvent
        document.addEventListener('click', function(e) {
            // 1. x and y coordinates of the client mouse in the visible area
            console.log(e.clientX);
            console.log(e.clientY);
            console.log('---------------------');

            // 2. The page mouse is on the x and y coordinates of the page document
            console.log(e.pageX);
            console.log(e.pageY);
            console.log('---------------------');

            // 3. screen the x and y coordinates of the mouse on the computer screen
            console.log(e.screenX);
            console.log(e.screenY);

        })
    </script>
</body>
Case of little angel following mouse
<body>
    <img src="images/angel.gif" alt="">
    <script>
        var pic = document.querySelector('img');
        document.addEventListener('mousemove', function(e) {
            // 1. mousemove this event will be triggered as long as we move 1px the mouse
            // console.log(1);
            // 2. Core principle: every time the mouse moves, we will get the latest mouse coordinates. Take the x and y coordinates as the top and left values of the picture to move the picture
            var x = e.pageX;
            var y = e.pageY;
            console.log('x The coordinates are' + x, 'y The coordinates are' + y);
            //3 .  Don't forget to add px units to left and top
            pic.style.left = x - 50 + 'px';
            pic.style.top = y - 40 + 'px';


        });
    </script>
</body>
08 common keyboard events
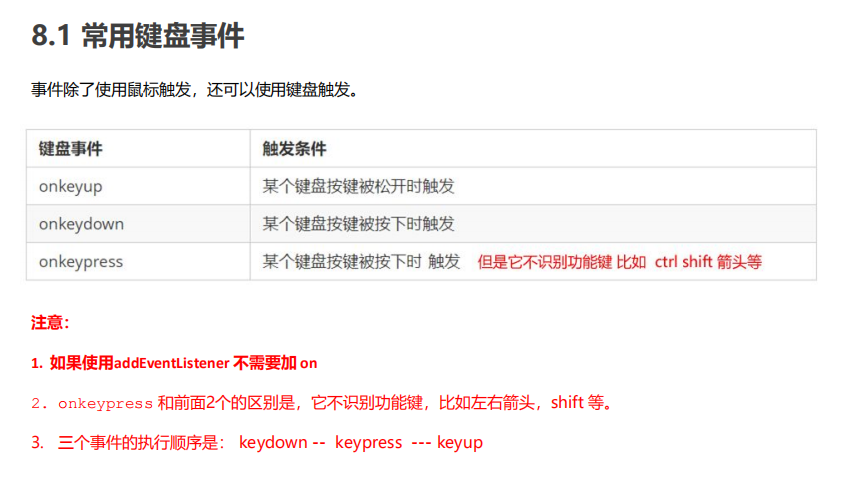
8.1 common keyboard events
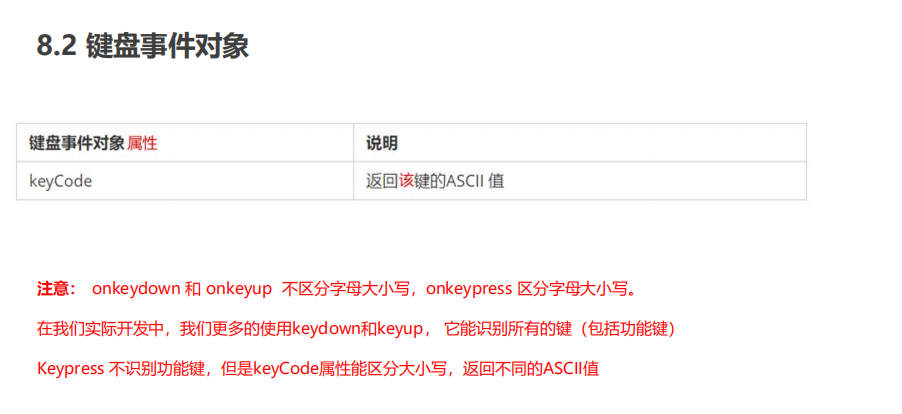
8.2 keyboard event object
Imitation Jingdong shortcut key search case
<body>
    <input type="text">
    <script>
        // Core idea: check whether the user has pressed the s key. If the user presses the s key, the cursor will be positioned in the search box
        // Use the keyCode in the keyboard event object to judge whether the user pressed the s key
        // Search box to get focus: use the focus() method in js
        var search = document.querySelector('input');
        document.addEventListener('keyup', function(e) {
            // console.log(e.keyCode);
            if (e.keyCode === 83) {
                search.focus();
            }
        })
    </script>
</body>
Simulate the case of jd.com querying express delivery order No
<body>
    <div class="search">
        <div class="con">123</div>
        <input type="text" placeholder="Please enter your courier number" class="jd">
    </div>
    <script>
        // When you enter the content of the express order number, the large font box (con) above will display (the font size inside is larger)
        // Form detection user input: add keyboard events to the form
        // At the same time, get the value in the express order number and assign it to the con box (innerText) as the content
        // If the content in the express order number is empty, the large font box (con) box will be hidden
        var con = document.querySelector('.con');
        var jd_input = document.querySelector('.jd');
        jd_input.addEventListener('keyup', function() {
                // console.log('input content ');
                if (this.value == '') {
                    con.style.display = 'none';
                } else {
                    con.style.display = 'block';
                    con.innerText = this.value;
                }
            })
            // When we lose focus, we hide the con box
        jd_input.addEventListener('blur', function() {
                con.style.display = 'none';
            })
            // When we get the focus, the con box is displayed
        jd_input.addEventListener('focus', function() {
            if (this.value !== '') {
                con.style.display = 'block';
            }
        })
    </script>
</body>
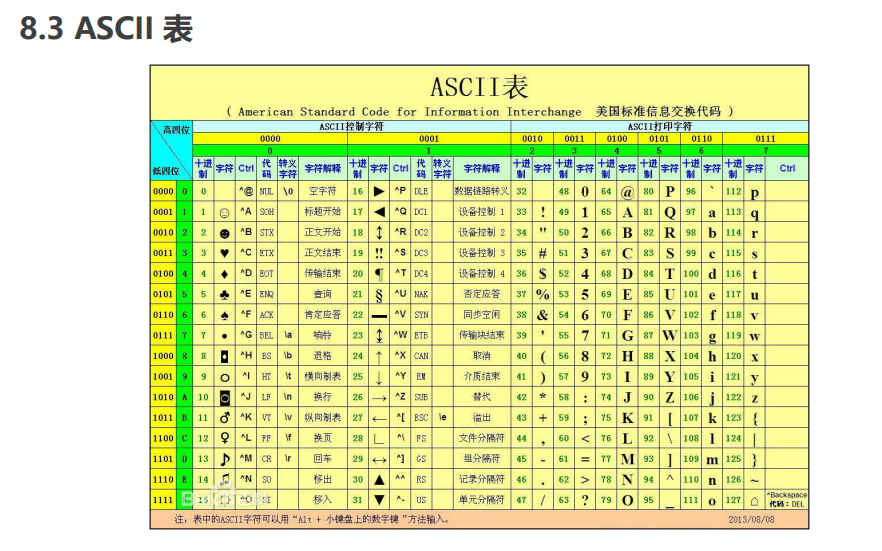
8.3 ASCII table
