1, Required components
1,IDK1.8
2. Mysql5.7 (this version is preferred. There are many pits in other versions of DATAX...)
3,DATAX
4,DATAX-WEB
5. Installation package Baidu network disk resource path: https://pan.baidu.com/s/1xRjxRGQbXWk4IYL2-NrQNQ Extraction code: 8z0x
2, Start installation
**
2.1 installation IDK1.8
**
be careful:
If the server has JDK installed, it is not necessary to install it. The verification method is as follows
Enter the command: java -version
If yes, the JDK version will be output to prove that the JDK has been installed, but note that it cannot be OPEN JDK
OpenJDK outputs information similar to the following

The JDK outputs information similar to the following:

For OPEN JDK, you need to uninstall and install JDK
Uninstall the OPEN JDK as follows
A) View java installation software
rpm -qa|grep java
The following similar installed software information appears

B) Uninstall OPEN JDK
Use the following command to uninstall all OPENJDK installation software
(all OPENJDK related software queried above shall be uninstalled)
rpm -e --nodeps Installed software
For example:
rpm -e --nodeps java-1.8.0-openjdk-headless-1.8.0.101-3.b13.el7_2.x86_64
1. Start installing JDK
Create installation directory
mkdir -p /usr/local/software
2. Upload installation package
Upload the installation package jdk-8u281-linux-x64.tar.gz to / usr/local/software
3. Decompress
cd  /usr/local/software
tar -zxvf jdk-8u281-linux-x64.tar.gz tar
4. Rename
mv jdk1.8.0_281 jdk1.8
5. Configure environment variables
vi /etc/profile
Shift+g to enter the last line, i edit and insert:
export JAVA_HOME=/module/jdk1.8
export PATH=$JAVA_HOME/bin:$PATH
export CLASSPATH=.:$JAVA_HOME/lib/dt.jar:$JAVA_HOME/lib/tools.jar
Save the configuration for it to take effect
source /etc/profile
6. Verify installation results
java -version
If the JDK version and other information are output, the installation is successful

2.2 installing MYSQL
View local installation:
rpm -qa|grep -i mysql
If yes, uninstall:
rpm -e --noscripts MySQL-client-5.5.25a-1.rhel5
Find the directory of the old version of mysql and delete the files and libraries of the old version of mysql
find / -name mysql
Delete the corresponding mysql directory and delete all files and libraries in the previous step
rm -rf /var/lib/mysql
Note: after uninstallation, / etc/my.cnf will not be deleted and needs to be deleted manually
rm -rf /etc/my.cnf
1. Create installation directory
mkdir -p /data/mysql
2. Upload the installation package and unzip it to the installation directory
tar -xf mysql-5.7.34-el7-x86_64.tar.gz -C /data/mysql
3. Rename
mv mysql-5.7.34-el7-x86_64 mysql
4. Create user
useradd -s /bin/false -d /usr/local/myql/ mysql
5. Create data directory
mkdir -p /usr/local/mysql/data
6. Modify owner
chown -R mysql.mysql /usr/local/mysql
7. Compile
cd /data/mysql/mysql/bin
./mysqld --user=mysql --basedir=/usr/local/mysql --datadir=/usr/local/mysql/data --initialize
Find the initial password similar to fiqdpqrtf < h in the output information and record it on the last line
8. Edit profile
vi /etc/my.cnf
Amend to read as follows:
[mysqld]
#skip-grant-tables
secure_file_priv="/usr/local/mysql"
port = 3306
basedir = /usr/local/mysql
datadir = /usr/local/mysql/data
socket=/tmp/mysql.sock
pid-file=/usr/local/mysql/data/mysql.pid
log-error=/usr/local/mysql/data/error.log
character_set_server=utf8
user=mysql
max_connections=1500
symbolic-links=0
!includedir /etc/my.cnf.d
9. Start preparation
mkdir /etc/my.cnf.d
mkdir /etc/my.cnf.
``

```powershell
cd /data/mysql/mysql
cp support-files/mysql.server /etc/init.d/mysqld
cp -r bin/ /usr/local/mysql/
chown -R mysql:mysql /usr/local/mysql/
10. Start mysql
cd /
/etc/init.d/mysqld restart
Note: the following errors are reported for the first startup, and there is no problem
ERROR! MySQL server PID file could not be found!
Starting MySQL.Logging to '/usr/local/mysql/data/error.log'.
. SUCCESS!
You can start a second time to verify:
/etc/init.d/mysqld restart
The second time, if the following information appears, it proves that there is no problem with the previous configuration
Shutting down MySQL.. SUCCESS!
Starting MySQL. SUCCESS!
11. Change password
cd /usr/local/mysql/bin/
./mysql -uroot -p
Enter the random password recorded above to enter mysql
Change Password:
mysql> set password for root@localhost = password('123456'); -- 123456 For new password
Query OK, 0 rows affected, 1 warning (0.00 sec)
Refresh permissions
mysql> flush privileges;
mysql> grant all privileges on *.* to root@'%' identified by "123456";
Authorizing.% for root means that any host remote connection is supported
Exit mysql
mysql> exit;
12. mysql full directory executable
ln -s /usr/local/mysql/bin/mysql /usr/bin/mysql
13. At this point, mysql installation is complete
2.3. Unzip and install DATAX
1. Create the installation package upload directory and upload the installation package datax.tar.gz to the installation directory
mkdir -p /software/DATAX
2. Unzip the installation package
tar -zxvf datax.tar.gz
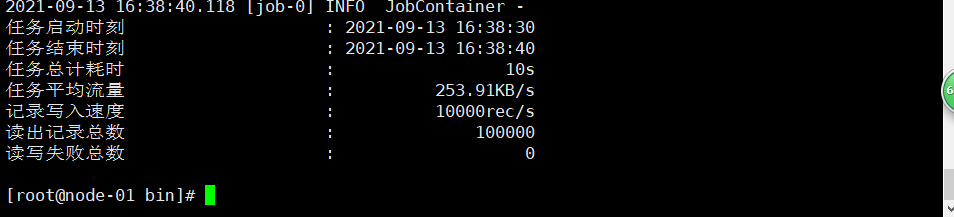
3. Self inspection
Self test script:
python /software/DATAX/datax/bin/datax.py /software/DATAX/datax/job/job.json
The script executes without error, and the installation is successful
2.4 installing DATAX-WEB
1. Create installation directory
mkdir -p /software/DATAX
cd /software/DATAX
Upload the installation package datax-web-2.1.2.zip to this directory
decompression
unzip datax-web-2.1.2.zip
mv datax-web-2.1.2  datax-web
Modify the execution permission of the file
cd /software/DATAX/datax-web
chmod -R 777 *
2. Execute installation script
cd /software/DATAX/datax-web/datax-web-2.1.2/bin
sh install.sh
Just follow the prompts
If there is no mysql command, you need to manually create a table, as follows:
(
++++++++++++++++++++++++++++++++++++++++++++++++++++++++
Log in to MYSQL database
MySQL -uroot -p
Build database
create database datax_web DEFAULT CHARACTER SET utf8;
use datax_web;
source /software/DATAX/datax-web/datax-web-2.1.2/bin/db/datax_web.sql;
Manually modify the dataX admin configuration file
Modify database connection
vi /software/DATAX/datax-web/datax-web-2.1.2/modules/datax-admin/conf/bootstrap.properties
#Database
DB_HOST=192.168.200.55
DB_PORT=3306
DB_USERNAME=root
DB_PASSWORD=Test_123456
DB_DATABASE=dataxweb
++++++++++++++++++++++++++++++++++++++++++++++++++++++++
)
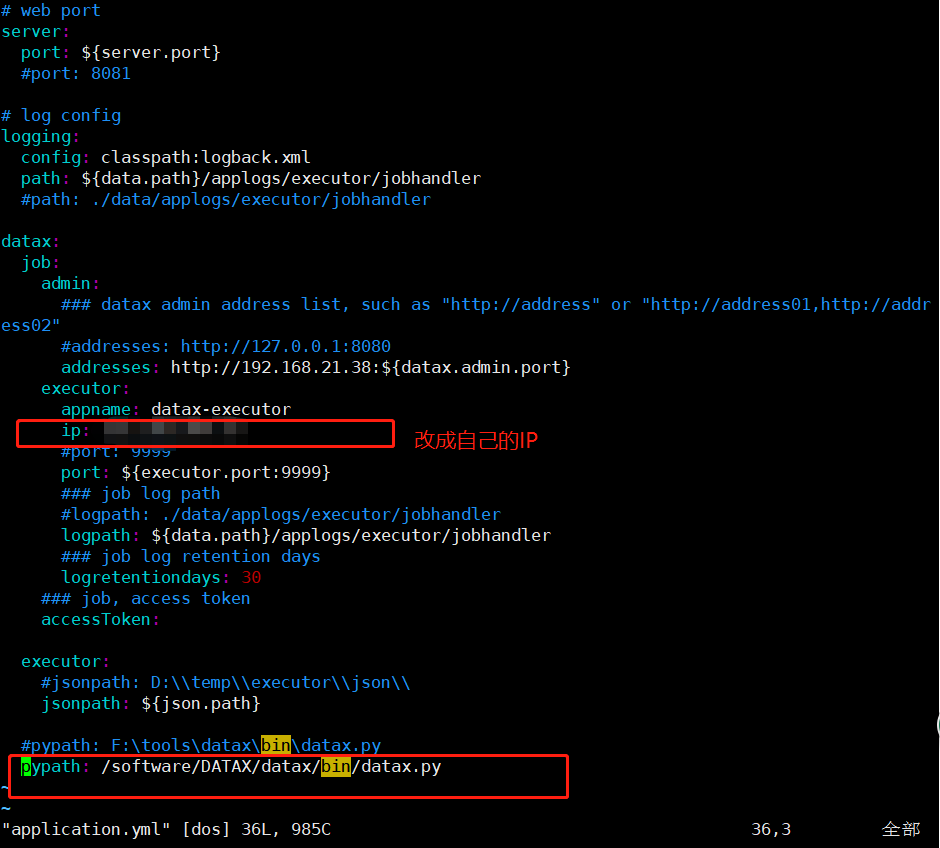
3. Modifying the dataX executor configuration file
vi /software/DATAX/datax-web/datax-web-2.1.2/modules/datax-executor/conf/application.yml
##Actuator IP configuration:
executor:
      appname: datax-executor
      ip:Change here to this machine IP              ## Configure as native IP
##Pytohon of application.yml_ The configuration address of path should be consistent with the datax directory we installed
PYTHON_PATH=/software/DATAX/datax/bin/datax.py
4. Start
cd /software/DATAX/datax-web/datax-web-2.1.2/bin
sh start-all.sh
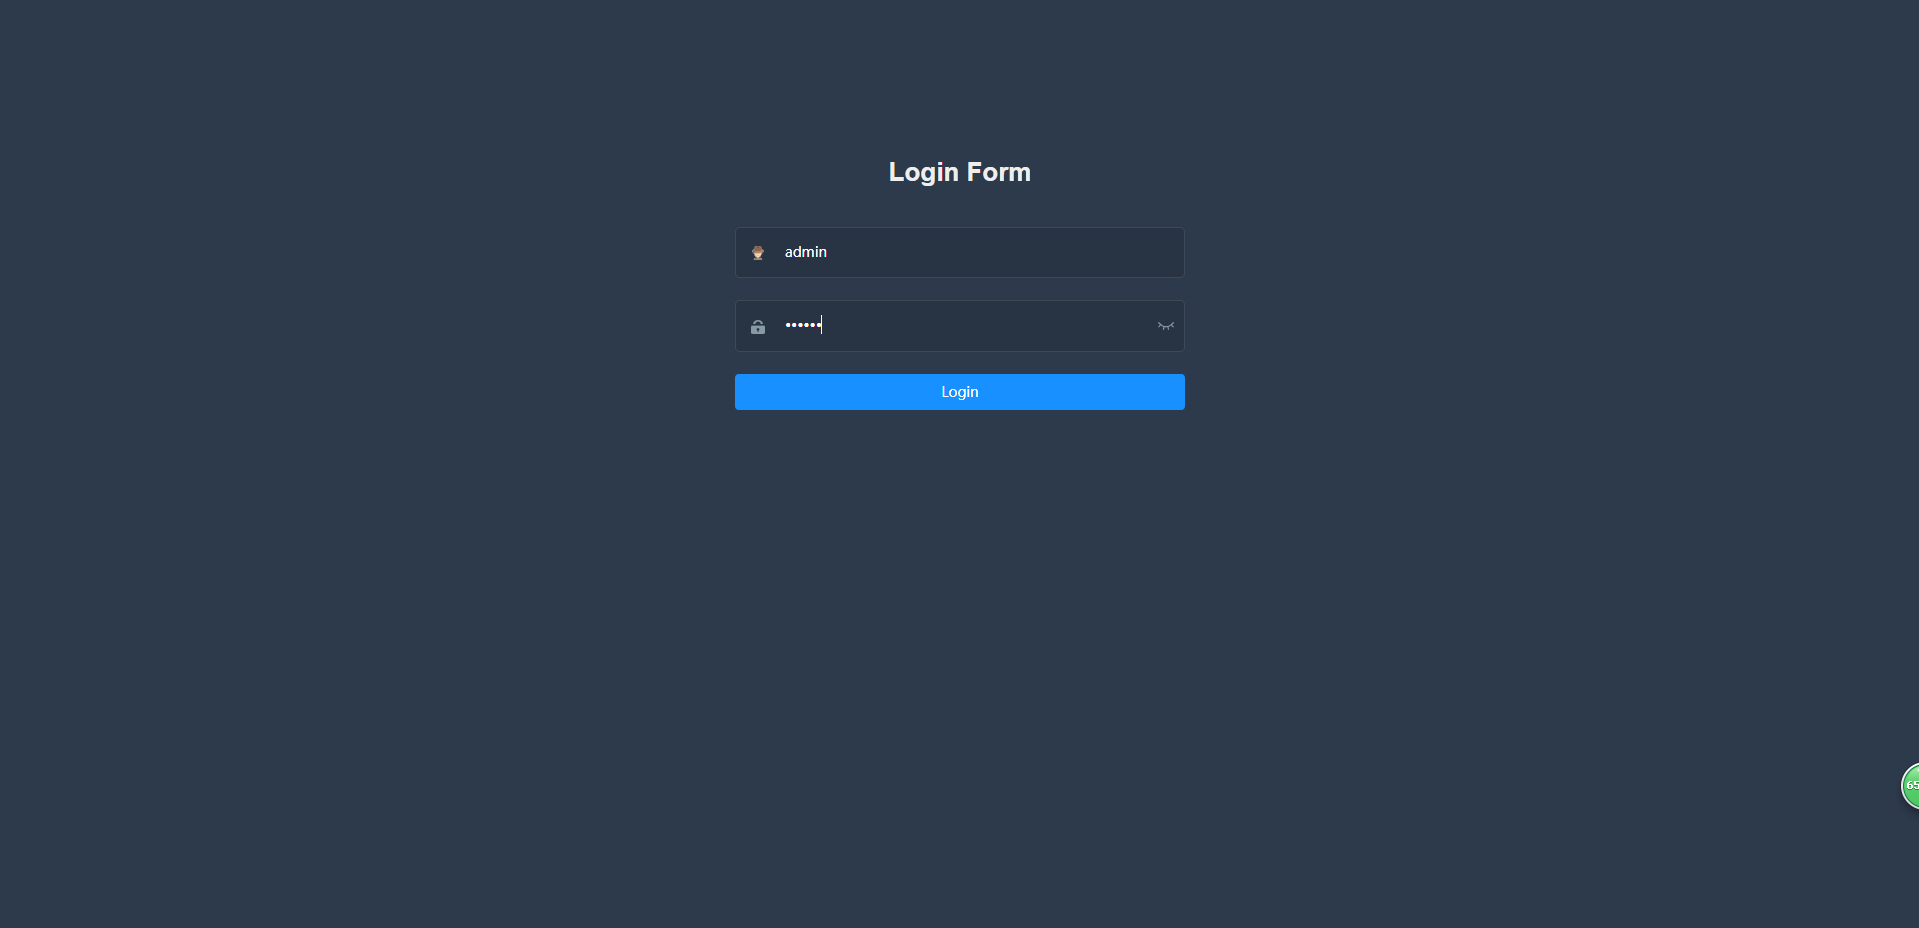
5. Visit
visit: http://Server IP:9527/index.html#/dashboard
 default admin/123456
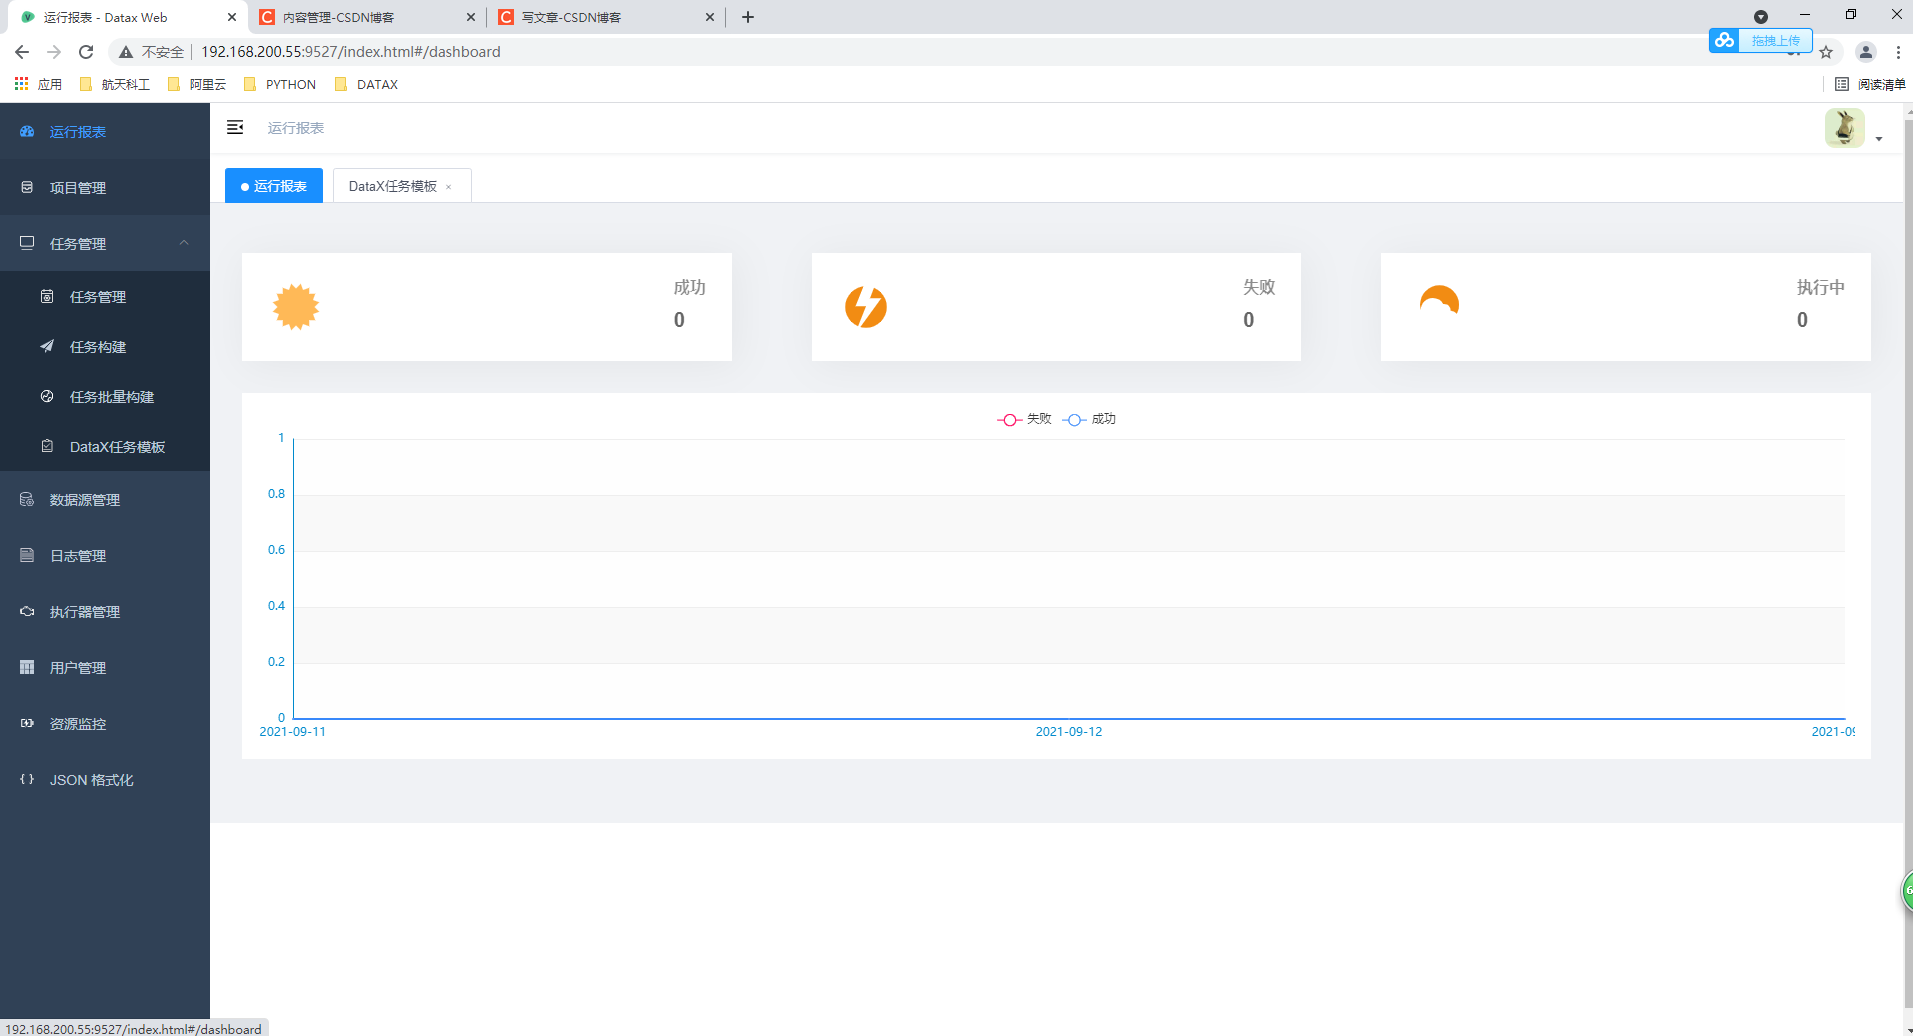
6. So far! to be finished!