1, Introduction to Harbor
1. What is Harbor?
Harbor is an open source enterprise Docker Registry project of VMware. Its goal is to help users quickly build an enterprise Docker Registry service.
Based on Docker's open source Registry, Harbor provides graphical management UI, role-based access control and AD/LDAP
Integrate functions required by enterprise users such as, and audit logging, and restore students to support Chinese.
Each component of Harbor is built in the form of Docker container, and Docker compose is used to deploy it. The docker-compose template for deploying Harbor is located in Harbor / docker-compose yml
2. What are the features of harbor
| characteristic | summary |
|---|---|
| Role based control | Users and warehouses are organized based on projects, and users can have different permissions in projects. (such as setting the user to be readable or writable) |
| Mirror based replication policy | Mirroring can be replicated (synchronized) between multiple Harbor instances. |
| Support LDAP/AD | Harbor can integrate the existing AD/LDAP (a table similar to the database) in the enterprise for authentication and management of existing users. |
| Image deletion and garbage collection | The image can be deleted or the space occupied by the image can be reclaimed. |
| Graphical user interface | Users can browse, search the image warehouse and manage the project through the browser. |
| Audit management | All operations on the mirror warehouse can be recorded and traced for audit management. |
| Support RESTful API | RESTful API provides administrators with more control over Harbor, making it easier to integrate with other management software. |
| Relationship between Harbor and docker registry | Harbor essentially encapsulates the docker registry and extends its own business template. |
3 Harbor components
In terms of architecture, Harbor mainly includes six components: Proxy, Registry, Core services, database (Harbor dB), log collector (Harbor log) and Job services.
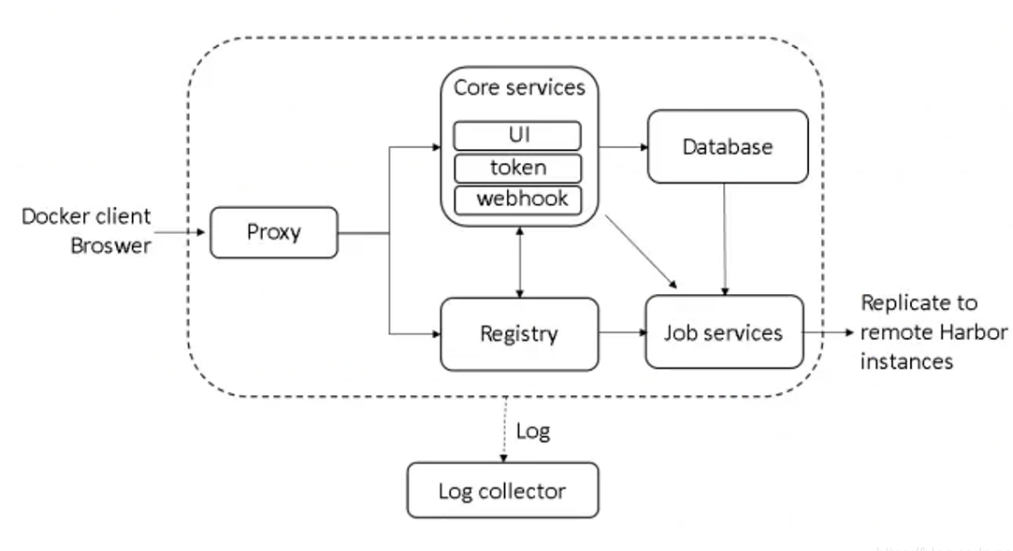
Each component of Harbor is built in the form of Docker container. Therefore, Docker Compose is used to deploy it.
It is divided into 7 containers to run through docker - compose Execute the docker compose PS command in the directory where YML is located to view. The names are nginx, harbor jobservice, harbor UI, harbor dB, harbor adminserver, registry and harbor log.
Among them, harbor admin server is mainly used as a back-end configuration data management, and does not have many other functions. All data to be operated by harbor UI is completed through a data configuration management center such as harbor adminserver.
2, Harbor deployment
Environmental preparation
| Server type | System and IP address | Components to be installed |
|---|---|---|
| Harbor server | CentOS7.4(64 bit) 192.168 eighty point two zero zero | docker-ce,docker-compose,harbor-offline-v1.2.2 |
| client server | CentOS7.4(64 bit) 192.168 eighty point one zero | docker-ce |
Turn off firewall and SElinux for all servers
1. Deploy docker compose service
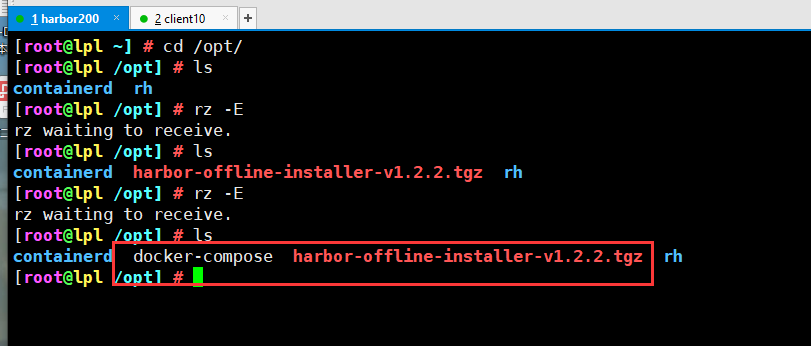
1. Download or upload docker compose and Harbor. Download them directly here
2. Give permission to view the version after moving
chmod +x docker-compose
mv docker-compose /usr/local/bin/
docker-compose -v

2. Deploy Harbor services
1 unzip the Harbor installer
tar zxvf harbor-offline-installer-v1.2.2.tgz -C /usr/local/

2. Modify the configuration file of harbor installation
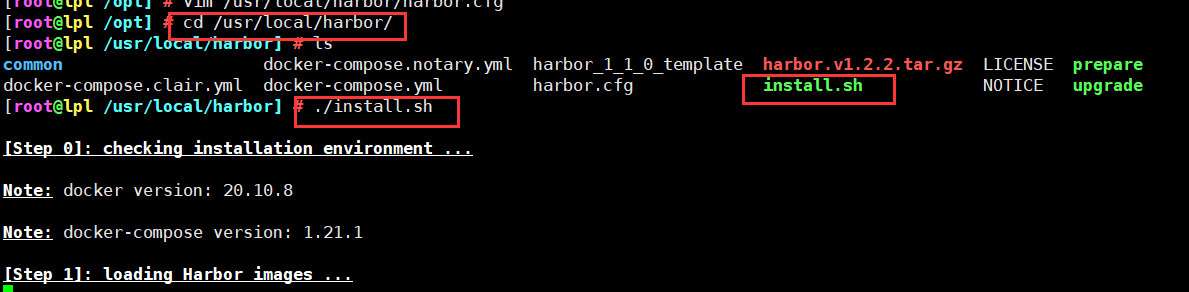
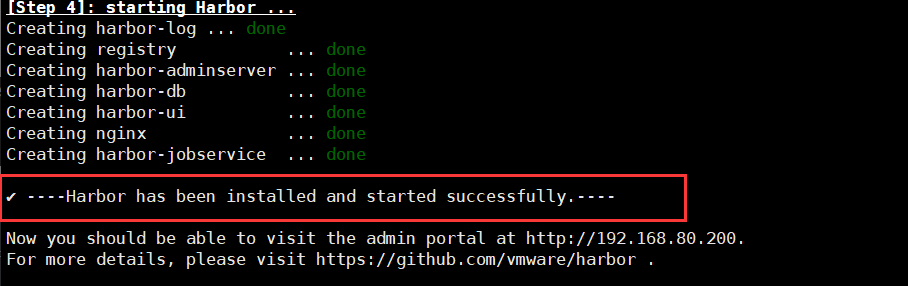
vim /usr/local/harbor/harbor.cfg ###The fifth line### hostname = 192.168.80.10 ###Line 59 default user name/Password is: admin/horbor12345### harbor_admin_password = Harbor12345 ```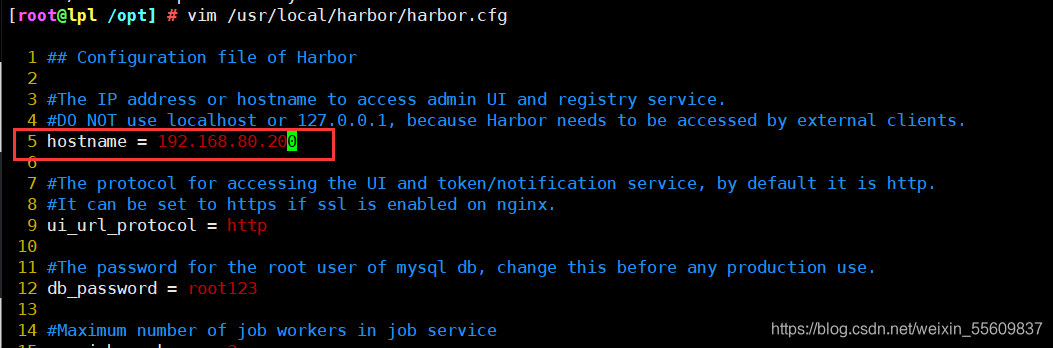  ### 3. Start harbor ```csharp cd /usr/local/harbor/ ./install.sh
4. View Harbor boot image

5. Create a new project to test
1. Visit the homepage of Harbor warehouse and enter the default account and password
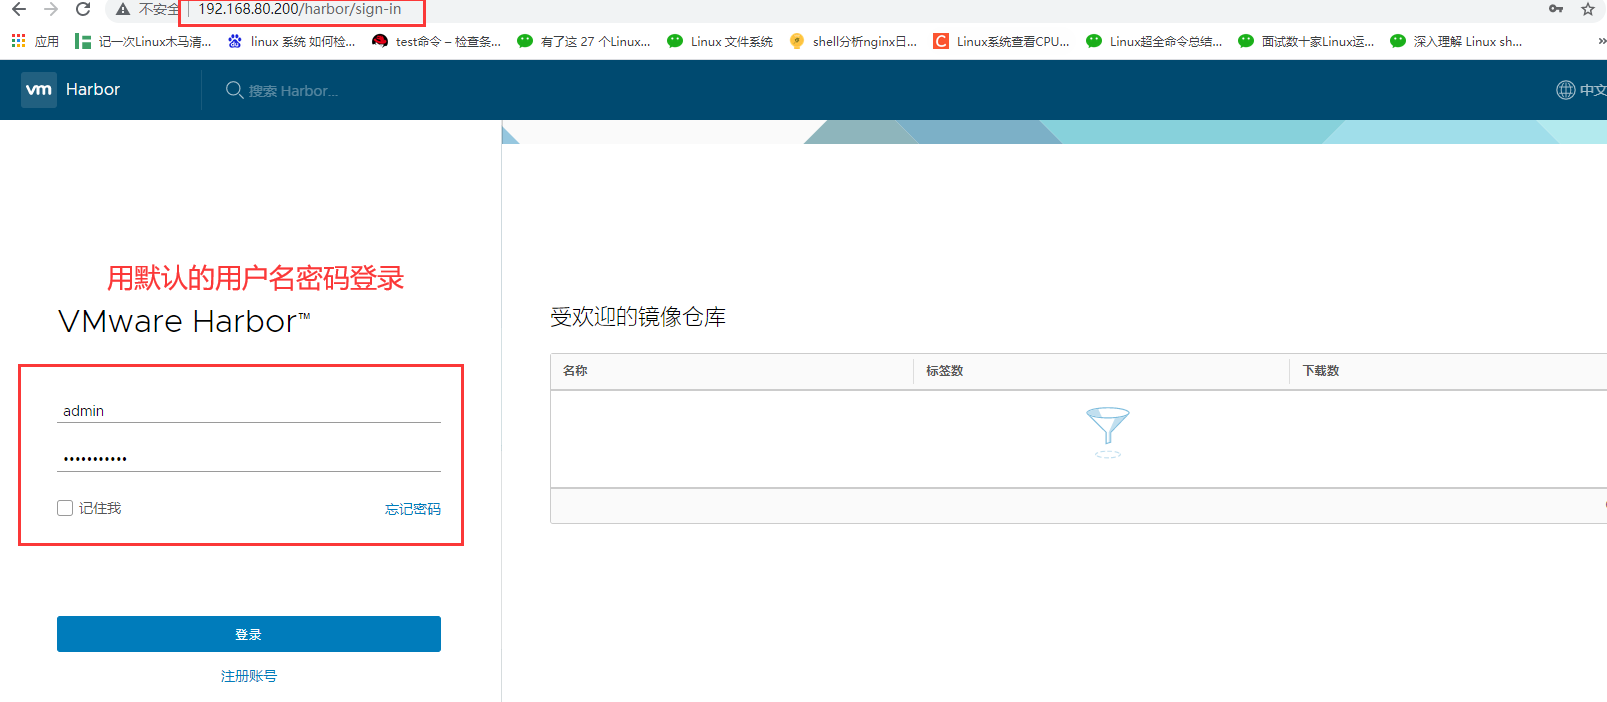
2. Log in to the system
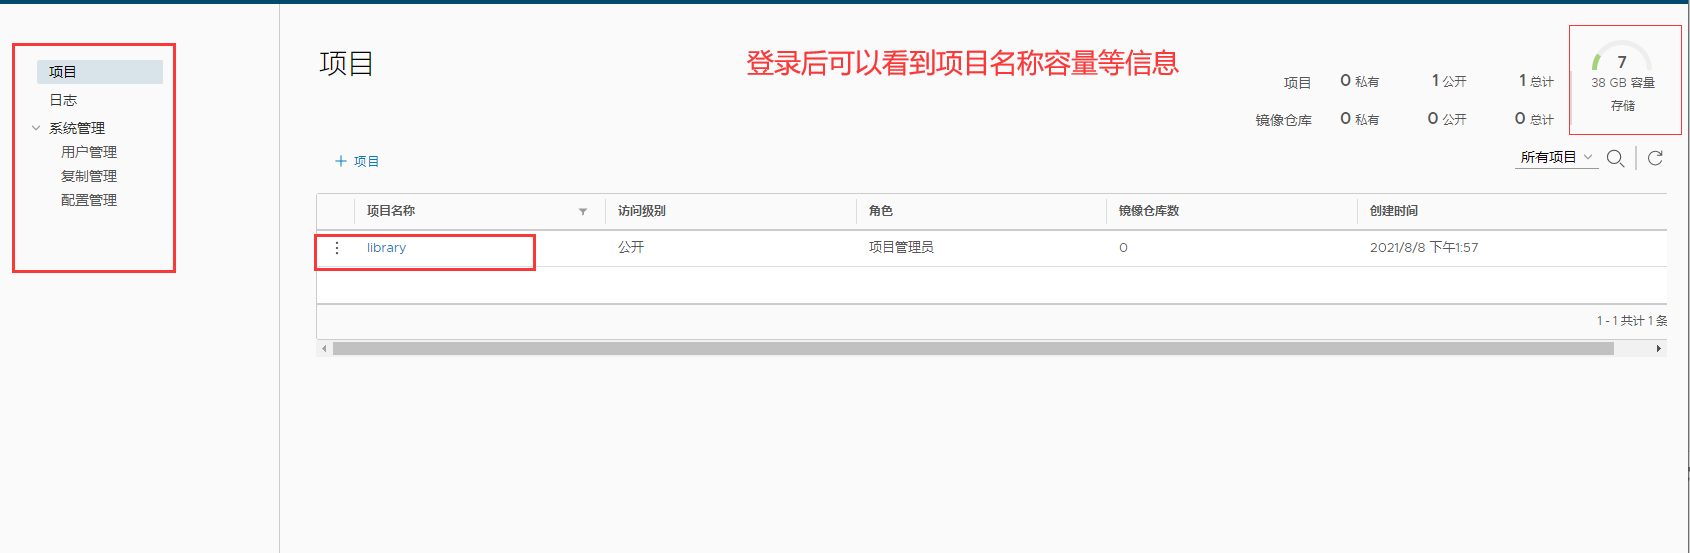
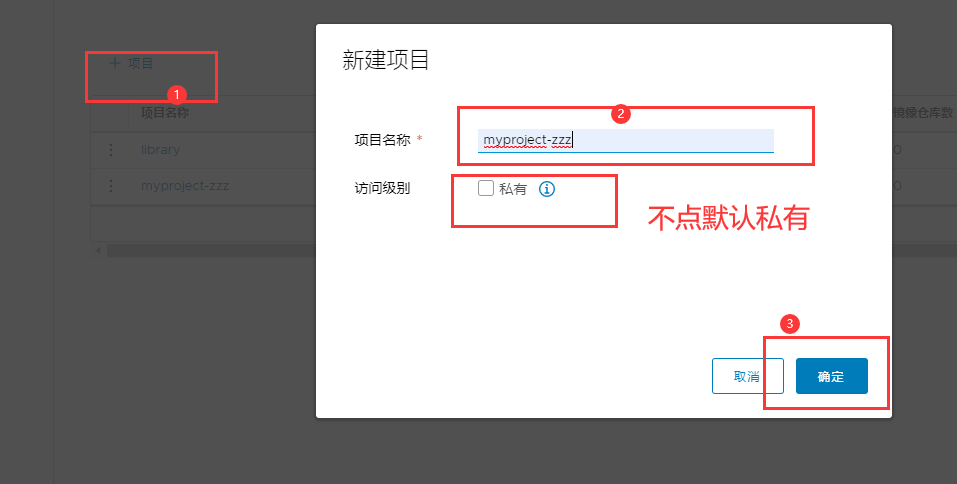
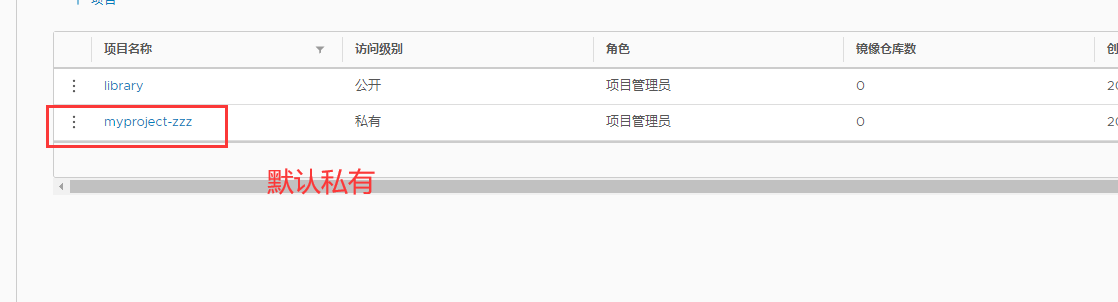
3 try to create a new project
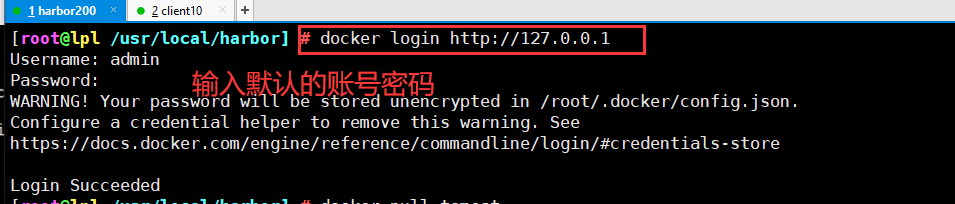
6. Use the Docker command to pass 127.0.0 locally 0.1 to log in and push images. By default, the Registry server listens on port 80
1 log in to Harbor
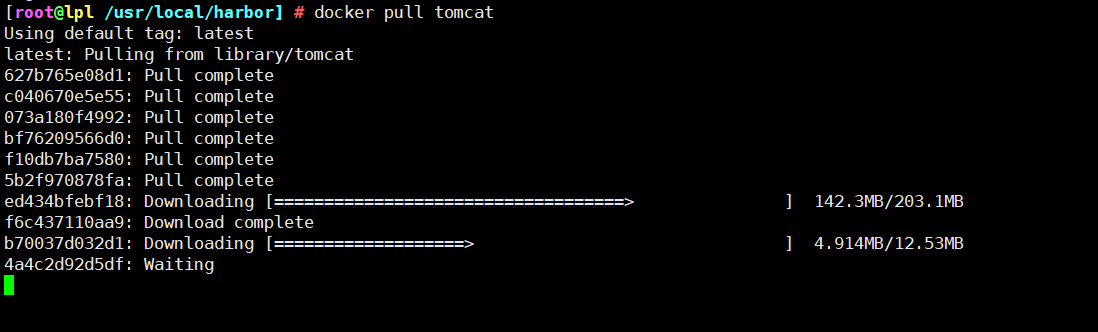
2. Download a tomcat image for testing
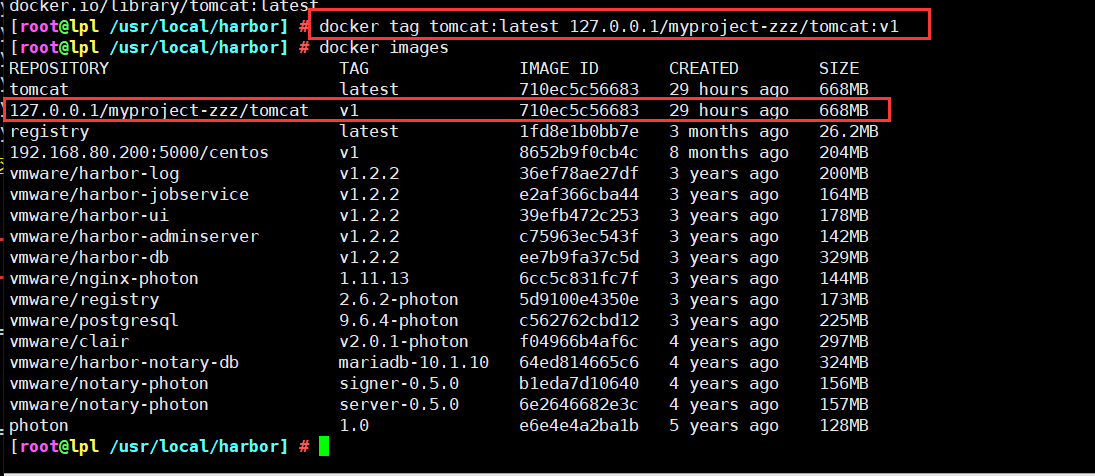
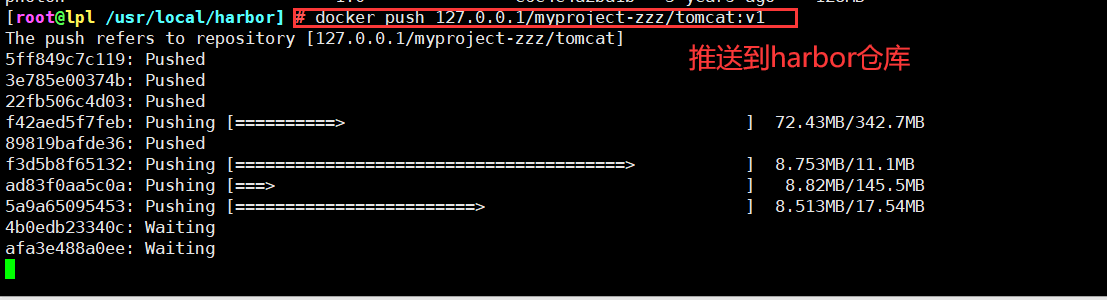
3. Modify the label of tomcat image and push it to Harbor warehouse
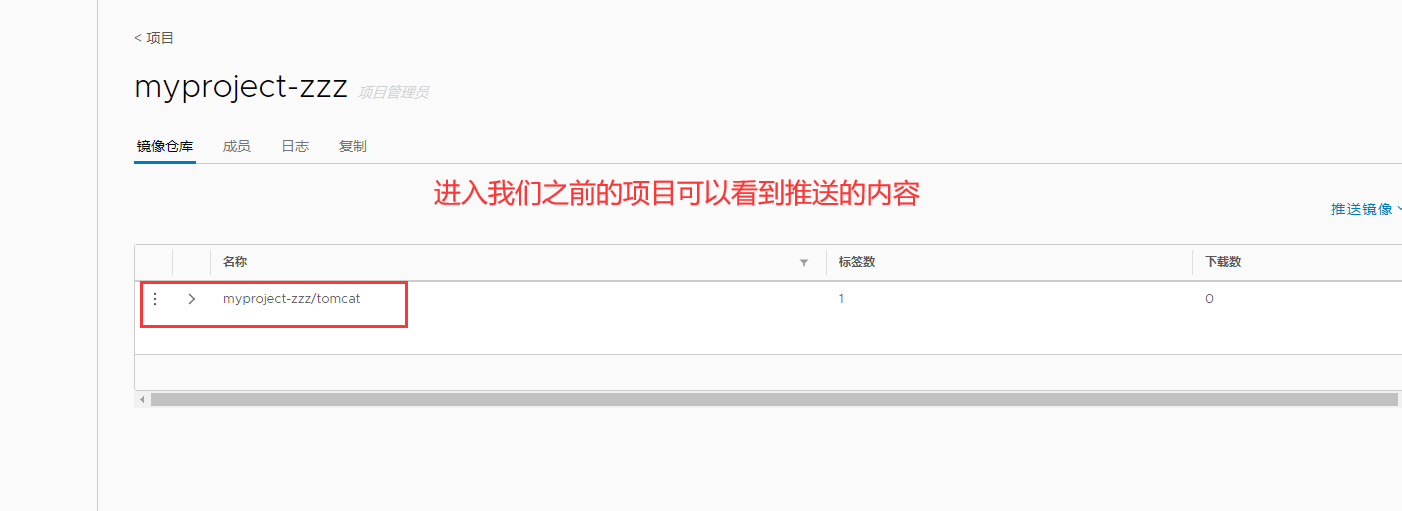
View the tomcat image we pushed in Harbor in the browser
7. Upload images on other clients
The above operations are performed locally on the Harbor server. If other clients log in to Harbor, the following error will be reported. The reason for this problem is that HTTPS is used by default for Docker Registry interaction, but HTTP service is used by default for building private images
Therefore, the following error occurs when interacting with the private image

resolvent:
1. Modify the configuration on Docker client
//The solution is: when the Docker server is started, add the startup parameters and use HTTP access by default.
[root@we ~] # vim /usr/lib/systemd/system/docker.service

  1 [Unit]
  2 Description=Docker Application Container Engine
  3 Documentation=https://docs.docker.com
  4 After=network-online.target firewalld.service containerd.service
  5 Wants=network-online.target
  6 Requires=docker.socket containerd.service
  7
  8 [Service]
  9 Type=notify
 10 # the default is not to use systemd for cgroups because the delegate issues still
 11 # exists and systemd currently does not support the cgroup feature set required
 12 # for containers run by docker
 13 ExecStart=/usr/bin/dockerd -H fd:// --insecure-registry 192.168.80.200 --containerd=/run/containerd/containerd.sock

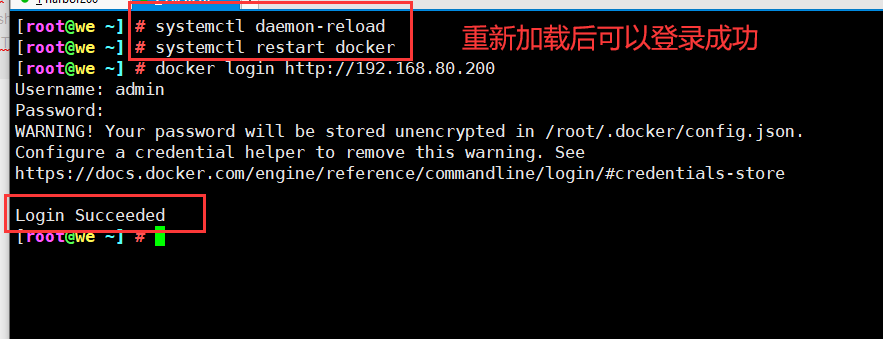
8. Reload Docker and log in to Harbor again
[root@we ~] # systemctl daemon-reload
[root@we ~] # systemctl restart docker
[root@we ~] # docker login http://192.168.80.200
Username: admin
Password:
WARNING! Your password will be stored unencrypted in /root/.docker/config.json.
Configure a credential helper to remove this warning. See
https://docs.docker.com/engine/reference/commandline/login/#credentials-store

Login Succeeded
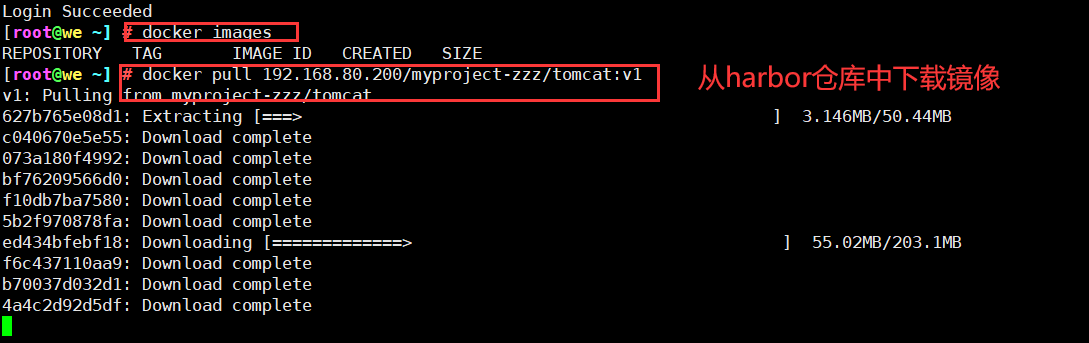
9. Download the tomcat image in Harbor warehouse

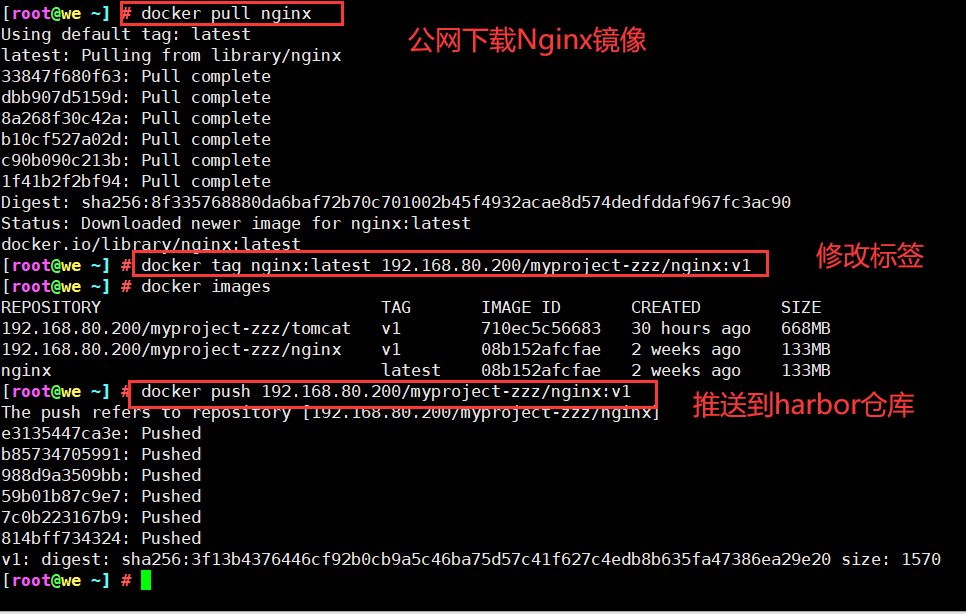
10. Download the nginx image from the public network and upload it to our Harbor warehouse
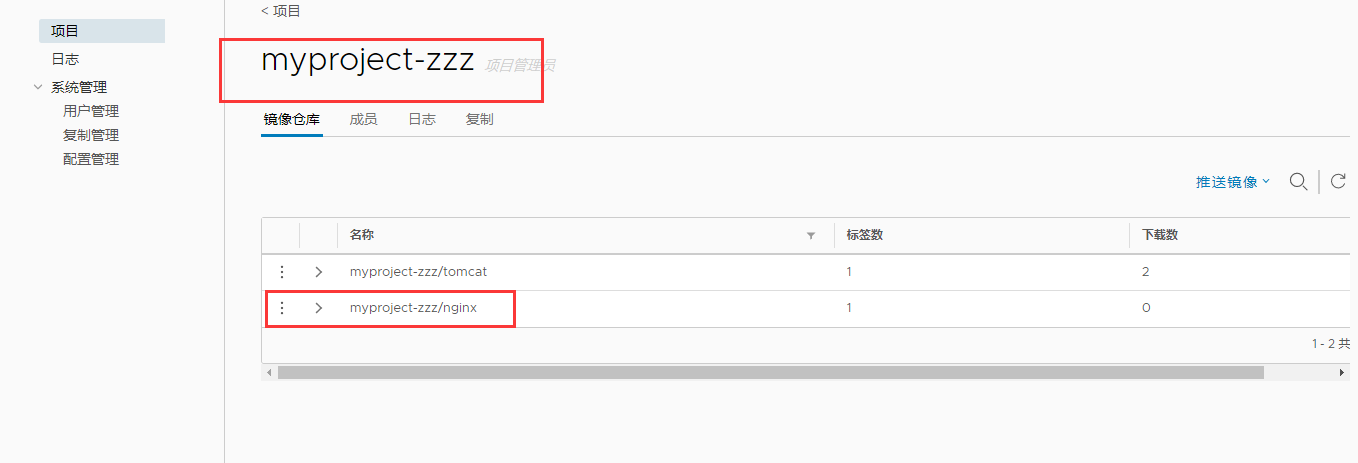
11. View in Harbor warehouse in browser
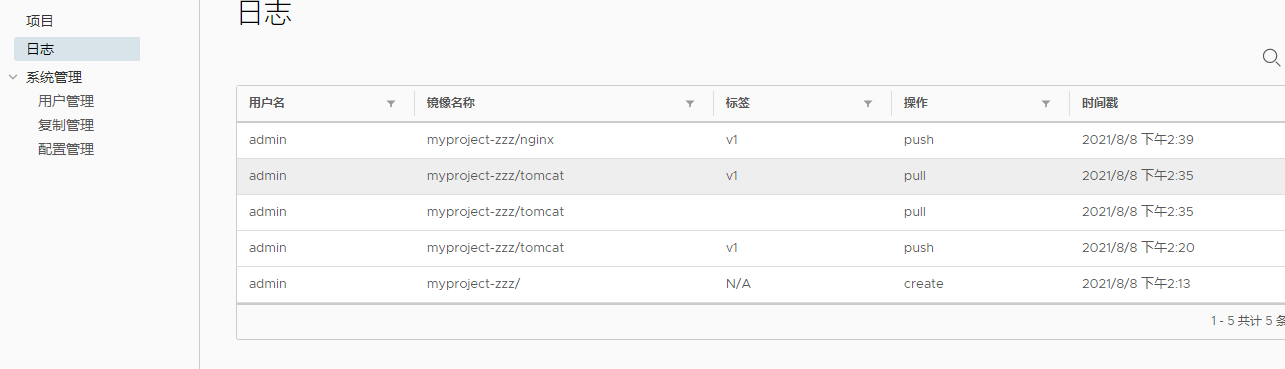
You can also view related logs
3, Maintenance management Harbir
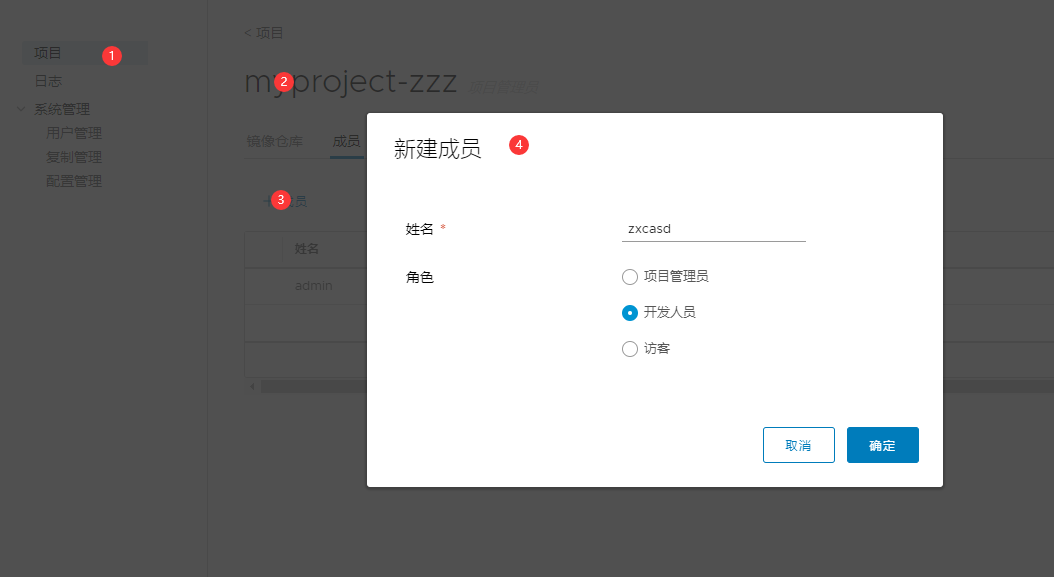
1. Create a project through Harbor Web
In the Harbor warehouse, any image must have its own project before being push ed to the regsitry.
Click "+ project" and fill in the project name. If the project level is set to "private", it will not be checked. If it is set as a public warehouse, the owner has read permission to the image under this project. The image can be downloaded without executing "Docker login" on the command line. The image operation is the same as that of Docker Hub.
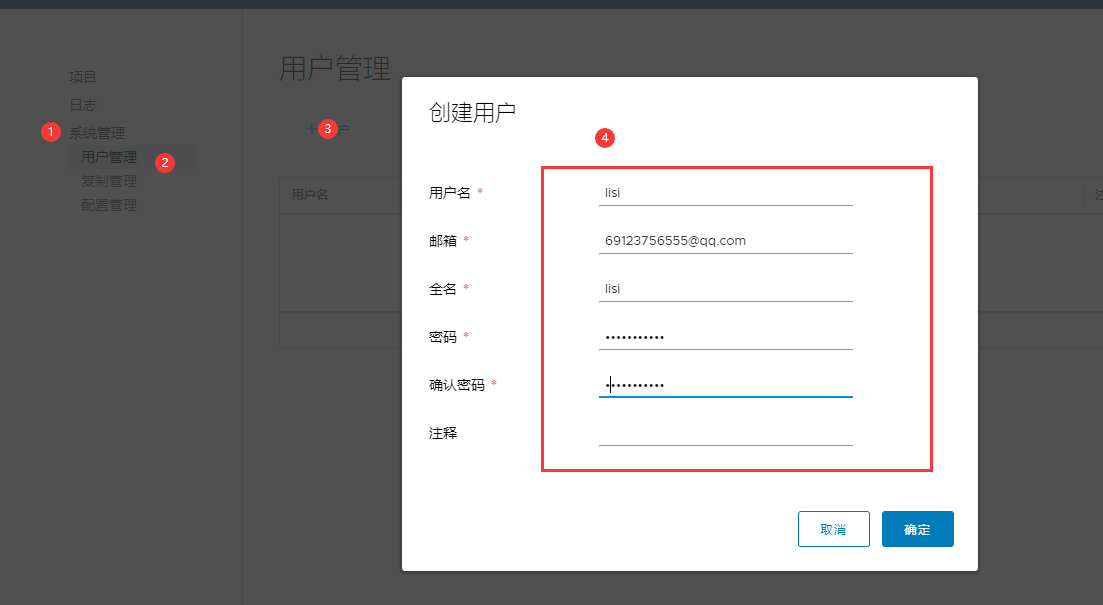
2. Create Harbor user