This article mainly introduces the usage of Binding adapters, as follows:
- databinding mechanism
- BindingMethods
- BindingAdapter
- BindingConversion
Databinding mechanism
Binding adapters can be used as a framework for setting a value. The databinding library allows you to specify specific methods to set related values. Some processing logic can be done in this method, and binding adapters will finally give you the desired results, So how do we call the corresponding attribute method when we use databinding to bind data in the layout file?
 <TextView
        android:layout_width="wrap_content"
        android:layout_height="wrap_content"
        android:text="@{user.name}" />
When binding a data in the layout file, such as the text attribute of TextView above, it will automatically receive the method corresponding to the compatible type parameter, such as setText(arg). At this time, the databinding library will find the receiving user Getname() returns the user corresponding to the type setName(arg) method, if user If the type returned by getname() is a String, the setName(arg) method with a String parameter will be called; otherwise, if it is an int type, the setName(arg) method with an int parameter will be called. Therefore, in order to ensure the correctness of data, try to ensure the correctness of the returned value in the expression in xml. Of course, type conversion can also be carried out according to actual needs.
It can be seen from the above analysis that if the property is set in the layout file, the databinding library will automatically find the relevant setter method to set it. That is, if TextView is taken as an example, only a setter method can be found for verification. There is a setError(error) method in TextView as follows:
@android.view.RemotableViewMethod
public void setError(CharSequence error) {
    if (error == null) {
        setError(null, null);
    } else {
        Drawable dr = getContext().getDrawable(com.android.internal.R.drawable.indicator_input_error);
        dr.setBounds(0, 0, dr.getIntrinsicWidth(), dr.getIntrinsicHeight());
        setError(error, dr);
    }
}
This method is mainly used to prompt error messages. Generally, we use it in the code. Here, we configure this method to the layout file for use. Refer to the following:
<TextView
    android:layout_width="wrap_content"
    android:layout_height="wrap_content"
    android:text="@{user.name,default=name}"
    app:error="@{user.name}"/>
The following is the test effect diagram:
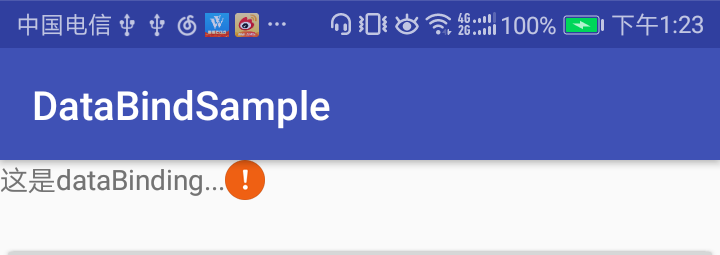
Because there is setError(String error) method, and user Name returns a String, so it can be configured here as a property.
BindingMethods
This is an annotation provided by the databinding library. It is used to map when a property in the View does not correspond to its corresponding setter method name. For example, the property android:textColorHint of TextView has the same function as the setHintTextColor method. At this time, the property name is inconsistent with the corresponding setter method name, This requires the BindingMethods annotation to bind the attribute to the corresponding setter method, so that databinding can find the corresponding setter method according to the attribute value. Databinding has handled the mismatch between such attributes and setter methods in the native View. Let's take a look at the processing of these mismatched attributes in TextView in the source code, as shown below:
@BindingMethods({
        @BindingMethod(type = TextView.class, attribute = "android:autoLink", method = "setAutoLinkMask"),
        @BindingMethod(type = TextView.class, attribute = "android:drawablePadding", method = "setCompoundDrawablePadding"),
        @BindingMethod(type = TextView.class, attribute = "android:editorExtras", method = "setInputExtras"),
        @BindingMethod(type = TextView.class, attribute = "android:inputType", method = "setRawInputType"),
        @BindingMethod(type = TextView.class, attribute = "android:scrollHorizontally", method = "setHorizontallyScrolling"),
        @BindingMethod(type = TextView.class, attribute = "android:textAllCaps", method = "setAllCaps"),
        @BindingMethod(type = TextView.class, attribute = "android:textColorHighlight", method = "setHighlightColor"),
        @BindingMethod(type = TextView.class, attribute = "android:textColorHint", method = "setHintTextColor"),
        @BindingMethod(type = TextView.class, attribute = "android:textColorLink", method = "setLinkTextColor"),
        @BindingMethod(type = TextView.class, attribute = "android:onEditorAction", method = "setOnEditorActionListener"),
})

public class TextViewBindingAdapter {
    //...
}
Therefore, for some properties in the View in the Android framework, the databinding library has used BindingMethods to automatically find and match properties. When some properties do not have corresponding setter methods, how to customize the setter methods when using databinding? BindingAdapter should be used at this time.
BindingAdapter
Property setting preprocessing when some properties require custom processing logic, BindingAdapter can be used. For example, we can use BindingAdapter to redefine the setText method of TextView to convert all input English to lowercase. The custom TextViewAdapter is as follows:
public class TextViewAdapter {
  @BindingAdapter("android:text")
  public static void setText(TextView view, CharSequence text) {
      //Omit special handling
      String txt = text.toString().toLowerCase();
      view.setText(txt);
  }
}
At this time, when we use the binding adapter defined by ourselves first, we may wonder why we can recognize it. During compilation, the data binding compiler will find the method with @ BindingAdapter annotation, and finally generate the custom setter method into the corresponding binding class. Some of the generated codes are as follows:
@Override
protected void executeBindings() {
    long dirtyFlags = 0;
    synchronized(this) {
        dirtyFlags = mDirtyFlags;
        mDirtyFlags = 0;
    }

    // batch finished
    if ((dirtyFlags & 0x2L) != 0) {
        // api target 1
        // Note: here is the custom TextViewAdapter
        com.manu.databindsample.activity.bindingmethods.TextViewAdapter.setText(this.tvData, "This is TextView");
    }
}
The following is a case to verify the use of BindingAdapter. The layout file is created as follows:
<?xml version="1.0" encoding="utf-8"?>
<layout xmlns:android="http://schemas.android.com/apk/res/android">
    <data> </data>
    <LinearLayout
        android:layout_width="match_parent"
        android:layout_height="match_parent"
        android:orientation="vertical">

        <!--default TextView-->
        <TextView
            android:layout_width="wrap_content"
            android:layout_height="wrap_content"
            android:background="#a37c7c"
            android:text="This is TextView..."
            android:textSize="16sp" />

        <!--use dataBinding of TextView-->
        <TextView
            android:id="@+id/tvData"
            android:layout_width="wrap_content"
            android:layout_height="wrap_content"
            android:layout_marginTop="10dp"
            android:background="#a37c7c"
            android:text="@{`This is TextView...`}"
            android:textSize="16sp" />

    </LinearLayout>
</layout>
The effect of using a custom BindingAdapter is as follows:
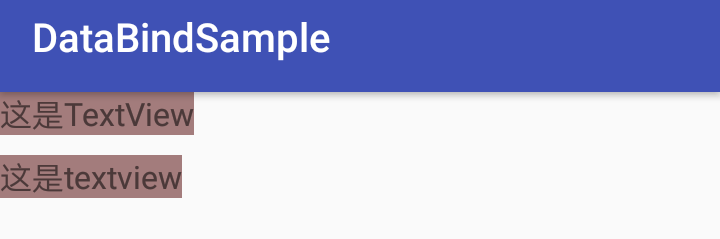
It can be seen that the user-defined TextViewAdapter has taken effect. It is convenient to pre process the following data according to requirements, which is also the function of BindingAdapter.
- Custom attribute settings custom attribute settings can define a single attribute or multiple attributes. First define a single attribute, as shown below:
public class ImageViewAdapter {
  /**
   * Define a single attribute
   * @param view
   * @param url
   */
  @BindingAdapter("imageUrl")
  public static void setImageUrl(ImageView view, String url) {
      Glide.with(view).load(url).into(view);
  }
}
At this point, we can use the custom attribute imageUrl in the layout file. The reference is as follows:
<?xml version="1.0" encoding="utf-8"?>
<layout xmlns:android="http://schemas.android.com/apk/res/android"
    xmlns:app="http://schemas.android.com/apk/res-auto">
    <data> </data>
    <LinearLayout
        android:layout_width="match_parent"
        android:layout_height="match_parent"
        android:orientation="vertical"
        android:gravity="center_horizontal">
        <!--Customize individual attributes-->
        <ImageView
            android:layout_width="100dp"
            android:layout_height="100dp"
            app:imageUrl="@{`https://goss.veer.com/creative/vcg/veer/800water/veer-136599950.jpg`}"/>
    </LinearLayout>
</layout>
The test results of the above codes are as follows:
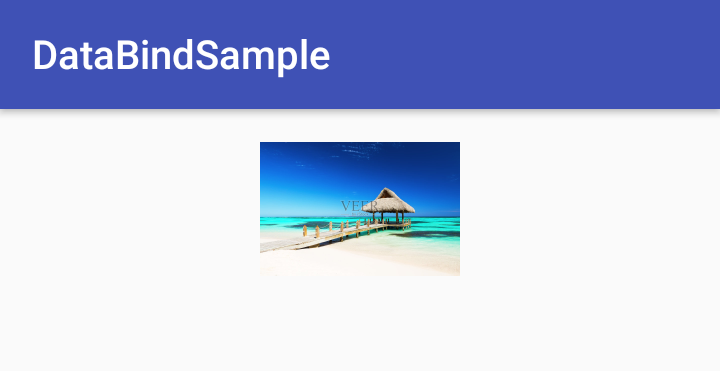
In this way, you can easily use the imageUrl attribute to load network images. Don't worry about thread switching here. The databinding library will automatically complete thread switching. How to customize multiple attributes.
Several attributes are defined as follows, and the definition method is as follows:
public class ImageViewAdapter {
    /**
     * Define multiple attributes
     * @param view
     * @param url
     * @param placeholder
     * @param error
     */
    @BindingAdapter(value = {"imageUrl", "placeholder", "error"})
    public static void loadImage(ImageView view, String url, Drawable placeholder, Drawable error) {
        RequestOptions options = new RequestOptions();
        options.placeholder(placeholder);
        options.error(error);
        Glide.with(view).load(url).apply(options).into(view);
    }
}
At this time, the three attributes defined above can be used in the layout file, namely imageUrl, placeholder and error. The usage method is as follows:
<?xml version="1.0" encoding="utf-8"?>
<layout xmlns:android="http://schemas.android.com/apk/res/android"
    xmlns:app="http://schemas.android.com/apk/res-auto">
    <data> </data>
    <LinearLayout
        android:layout_width="match_parent"
        android:layout_height="match_parent"
        android:orientation="vertical"
        android:gravity="center_horizontal">
        <!--Customize multiple attributes-->
        <ImageView
            android:layout_width="100dp"
            android:layout_height="100dp"
            android:layout_marginTop="10dp"
            app:imageUrl="@{`https://goss.veer.com/creative/vcg/veer/800water/veer-136599950.jpg`}"
            app:placeholder="@{@drawable/icon}"
            app:error="@{@drawable/error}"/>
    </LinearLayout>
</layout>
At this time, the BindingAdapter can work normally only if all three attributes are used. If some of these attributes are used, they cannot be compiled normally. Then how can you customize multiple attributes and normally use some of them? The @ BindingAdapter annotation also has a parameter requirell, which is true by default, indicating that all attributes must be used, Set it to false to use some attributes normally. At this time, when customizing multiple attributes, configure the requireAll attribute of annotation @ BindAdapter to be false. Refer to the following:
// requireAll = false
@BindingAdapter(value = {"imageUrl", "placeholder", "error"},requireAll = false)
public static void loadImage(ImageView view, String url, Drawable placeholder, Drawable error) {
    RequestOptions options = new RequestOptions();
    options.placeholder(placeholder);
    options.error(error);
    Glide.with(view).load(url).apply(options).into(view);
}
At this time, the layout file can use some properties. For example, the following layout file only uses imageUrl and placeholder without compilation errors:
<ImageView
    android:layout_width="100dp"
    android:layout_height="100dp"
    android:layout_marginTop="10dp"
    app:imageUrl="@{`https://goss.veer.com/creative/vcg/veer/800water/veer-136599950.jpg`}"
    app:placeholder="@{@drawable/icon}"/>
This concludes the introduction of BindingAdapter.
BindingConversion
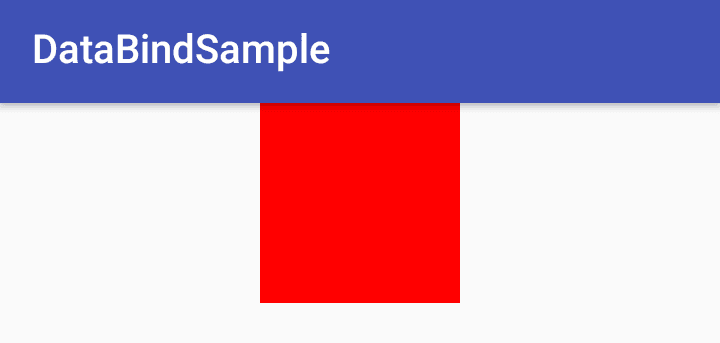
In some cases, conversion between types is required when setting properties. In this case, the annotation @ BindingConversion can be used to complete the conversion between types. For example, the android:background property receives a Drawable. When we set a color value in the databinding expression, @ BindingConversion is required. The layout file is created as follows:
<?xml version="1.0" encoding="utf-8"?>
<layout xmlns:android="http://schemas.android.com/apk/res/android"    xmlns:app="http://schemas.android.com/apk/res-auto">
    <data> </data>
    <LinearLayout
        android:layout_width="match_parent"
        android:layout_height="match_parent"
        android:orientation="vertical"
        android:gravity="center_horizontal">
        <!--Type conversion-->
        <ImageView
            android:layout_width="100dp"
            android:layout_height="100dp"
            android:background="@{true ? @color/colorRed : @color/colorBlue}"/>
    </LinearLayout>
</layout>
Use @ BindingConversion for type conversion. Refer to the following:
public class ColorConversion {
    @BindingConversion
    public static ColorDrawable colorToDrawable(int color){
        return new ColorDrawable(color);
    }
}
The test results of the above codes are as follows:
Use the same type when using @ BindingConversion annotation. For example, the android:background attribute above cannot be used in this way:
<!--Type conversion-->
<ImageView
    android:layout_width="100dp"
    android:layout_height="100dp"
    android:background="@{true ? @color/colorRed : @drawable/drawableBlue}"/>
Both BindingAdapter and BindingConversion will eventually generate relevant code into the corresponding binding class, and then set its value to the specified View. So far, this is all about BindingMethods, BindingAdapter and BindingConversion.