Dockerfile introduces and commonly used instructions, including FROM, RUN, COPY, ADD, EXPOSE, WORKDIR, etc. in fact, dockerfile has powerful functions and provides more than ten instructions.
About Dockerfile
Dockerfile is a text file used to build an image. The text content contains instructions and instructions required to build an image.
The most common way to create images in Docker is to use dockerfile. Dockerfile is A description file of Docker image, which can be understood as A, B, C, D of rocket launch Step. The dockerfile contains instructions, each of which builds A layer. Therefore, the content of each instruction is to describe how the layer should be built.
FROM directive - specifies the underlying image
The so-called customized image must be customized based on one image. FROM is to specify the basic image. Therefore, FROM in a Dockerfile must be the first instruction. As follows:
FROM centos
MAINTAINER maintainer information
Who maintains the image
MAINTAINER lightzhang lightzhang@xxx.com
ENV setting environment variable
There are two formats:
ENV <key> <value>
ENV <key1>=<value1> <key2>=<value2>...
This instruction is very simple. It is just to set environment variables. No matter other instructions, such as RUN or RUN-time applications, you can directly use the environment variables defined here.
ENV VERSION=1.0 DEBUG=on \
    NAME="Happy Feet"
This example demonstrates how to wrap a line and enclose the values with spaces in double quotation marks, which is consistent with the behavior under the Shell.
The following instructions support environment variable expansion:
ADD,COPY,ENV,EXPOSE,FROM,LABEL,USER,WORKDIR,VOLUME,STOPSIGNAL,ONBUILD,RUN.
You can feel from this instruction list that environment variables can be used in many places, which is very powerful. Through the environment variables, we can make a Dockerfile to make more images, just using different environment variables.
ARG build parameters
Format: Arg < parameter name > [= < default value >]
Build parameters have the same effect as ENV, setting environment variables. The difference is that the environment variables of the build environment set by ARG will not exist when the container runs in the future. But don't use ARG to save password and other information, because docker history can still see all the values.
The ARG instruction in the Dockerfile defines the parameter name and its default value. This default value can be overridden in the build command docker build with -- build ARG < parameter name > = < value >.
Before 1.13, the parameter name in -- build ARG must be defined in the Dockerfile with ARG. In other words, the parameter specified in -- build ARG must be used in the Dockerfile. If the corresponding parameter is not used, an error will be reported to exit the build.
Starting from 1.13, this kind of strict restriction is released. Instead of reporting an error to exit, it displays a warning message and continues to build. This is helpful for using CI system to build different dockerfiles with the same build process, avoiding that the build command must be modified according to the content of each Dockerfile.
RUN execute command
The RUN instruction is used to execute command line commands. Because of the power of the command line, the RUN instruction is one of the most commonly used instructions when customizing images. There are two formats:
shell format: run < command >, just like the command entered directly on the command line. As follows:
RUN echo '<h1>Hello, Docker!</h1>' > /usr/share/nginx/html/index.html
exec format: RUN ["executable", "parameter 1", "parameter 2"], which is more like the format in a function call.
Each instruction in the Dockerfile creates a layer, and RUN is no exception. Each RUN behavior will create a new layer on which to execute these commands. After execution, the modification of commit layer will form a new image.
 1 FROM debian:stretch
 2
 3 RUN apt-get update
 4 RUN apt-get install -y gcc libc6-dev make wget
 5 RUN wget -O redis.tar.gz "http://download.redis.io/releases/redis-5.0.3.tar.gz"
 6 RUN mkdir -p /usr/src/redis
 7 RUN tar -xzf redis.tar.gz -C /usr/src/redis --strip-components=1
 8 RUN make -C /usr/src/redis
 9 RUN make -C /usr/src/redis install
10 RUN rm redis.tar.gz
The above method creates an 8-layer image. This is totally meaningless, and a lot of things that are not needed at runtime are installed in the image, such as compiling environment, updated software package and so on. Even if the package is deleted in the last line, it is only the deletion of the current layer. Although we can't see the package, the package already exists in the image and follows the image all the time. There is no real deletion.
The result is a very bloated and multi-layered image, which not only increases the time of building deployment, but also is prone to errors. This is a common mistake made by many beginners of Docker.
In addition: there is a limit on the maximum number of layers of Union FS, such as AUFS, which used to be no more than 42 layers, but now it is no more than 127 layers.
 1 FROM debian:stretch
 2
 3 RUN buildDeps='gcc libc6-dev make wget' \
 4     && apt-get update \
 5     && apt-get install -y $buildDeps \
 6     && wget -O redis.tar.gz "http://download.redis.io/releases/redis-5.0.3.tar.gz" \
 7     && mkdir -p /usr/src/redis \
 8     && tar -xzf redis.tar.gz -C /usr/src/redis --strip-components=1 \
 9     && make -C /usr/src/redis \
10     && make -C /usr/src/redis install \
11     && rm -rf /var/lib/apt/lists/* \
12     && rm redis.tar.gz \
13     && rm -r /usr/src/redis \
14     && apt-get purge -y --auto-remove $buildDeps
Instead of using many RUN commands for different commands, we use only one RUN command and use & & to concatenate the required commands. Simplify the previous 8 layers to 1 layer, and delete unnecessary packages and directories later. When writing the Dockerfile, you should always remind yourself that this is not writing Shell scripts, but defining how to build each layer. Therefore, when building the image, make sure that each layer only adds what needs to be added, and anything irrelevant should be cleaned up.
One of the reasons why many people are learning from Docker to create a bloated image is that they forget to clean up irrelevant files at the end of each layer.
COPY copy file
Format:
1 COPY [--chown=<user>:<group>] <from path>... <Target path>
2 COPY [--chown=<user>:<group>] ["<Source path 1>",... "<Target path>"]
The COPY instruction copies files / directories from the build context directory < source path > to the < target path > location within the mirror of the new layer. For example:
COPY package.json /usr/src/app/
< source path > can be mu lt iple or even wildcard characters, and its wildcard rules should meet the requirements of Go filepath.Match Rules, such as:
1 COPY hom* /mydir/
2 COPY hom?.txt /mydir/
< target path > can be an absolute path within the container or a relative path relative to the working directory (the working directory can be specified by the WORKDIR instruction). The target path does not need to be created in advance. If the directory does not exist, the missing directory will be created before copying the file.
In addition, it should be noted that with the COPY instruction, all kinds of metadata of the source file will be preserved. For example, read, write, execute permissions, file change time, etc. This feature is useful for image customization. Especially when Git is used to manage the files related to building.
When using this instruction, you can also add the -- chown = < user >: < group > option to change the user and group of the file.
1 COPY --chown=55:mygroup files* /mydir/
2 COPY --chown=bin files* /mydir/
3 COPY --chown=1 files* /mydir/
4 COPY --chown=10:11 files* /mydir/
ADD more advanced copy file
The format and nature of ADD and COPY are basically the same. However, some functions have been added to COPY.
If the source path is a tar compressed file and the compression format is gzip, bzip2 and xz, the ADD instruction will automatically extract the compressed file to the target path.
In some cases, if we really want to copy a compressed file into it without decompressing it, then we can't use the ADD command.
In the official Dockerfile best practice document of Docker, it is required to use COPY as much as possible, because the semantics of COPY is very clear, that is, copying files, while ADD contains more complex functions, and its behavior is not necessarily very clear. The most suitable situation to use ADD is the one mentioned that needs automatic decompression.
Special note: when choosing between the COPY and ADD instructions, you can follow this principle. All file copies use the COPY instruction, and only use the ADD when you need to decompress automatically.
When using this instruction, you can also add the -- chown = < user >: < group > option to change the user and group of the file.
1 ADD --chown=55:mygroup files* /mydir/
2 ADD --chown=bin files* /mydir/
3 ADD --chown=1 files* /mydir/
4 ADD --chown=10:11 files* /mydir/
WORKDIR specifies the working directory
The format is workdir < working directory path >
Use the WORKDIR command to specify the working directory (or current directory). Later, the current directory of each layer will be changed to the specified directory. If the directory does not exist, WORKDIR will help you create a directory.
As mentioned before, some beginners often make the mistake of writing Dockerfile with Shell script. This kind of misunderstanding may also lead to the following errors:
1 RUN cd /app
2 RUN echo "hello" > world.txt
If you RUN the Dockerfile as a build image, you will find that / APP cannot be found/ world.txt File, or its content is not hello. In fact, the reason is very simple. In the Shell, two consecutive lines are the same process execution environment. Therefore, the memory state modified by the previous command will directly affect the latter command. In the Dockerfile, the execution environment of the RUN commands of the two lines is fundamentally different, and they are two completely different containers. This is the error caused by not understanding the concept of building tiered storage with Dockerfile.
As I said before, every RUN starts a container, executes commands, and then commits storage level file changes. The execution of RUN cd /app in the first layer is only the change of working directory of the current process, a change in memory, and the result will not cause any file change. When it comes to the second layer, it starts a new container, which has nothing to do with the first layer's container. Naturally, it is impossible to inherit the memory changes in the previous layer's construction process.
So if you need to change the location of the working directory of later layers, you should use the WORKDIR instruction.
USER specifies the current USER
Format: user < user name > [: < user group >]
The USER instruction is similar to WORKDIR in that it changes the state of the environment and affects subsequent layers. WORKDIR is to change the working directory, and USER is to change the status of such commands as RUN, CMD and ENTRYPOINT of the layer after the change.
Of course, just like WORKDIR, USER only helps you switch to the specified USER. This USER must be established in advance, otherwise it cannot be switched.
1 RUN groupadd -r redis && useradd -r -g redis redis
2 USER redis
3 RUN [ "redis-server" ]
If you want to change your identity during the execution of a script executed as root, for example, you want to run a service process as an established user, and do not use su or sudo. These all need more cumbersome configuration, and often make mistakes in the absence of TTY. gosu is recommended.
1 # Create a redis user and use gosu to replace another user to execute the command
2 RUN groupadd -r redis && useradd -r -g redis redis
3 # Download gosu
4 RUN wget -O /usr/local/bin/gosu "https://github.com/tianon/gosu/releases/download/1.7/gosu-amd64" \
5     && chmod +x /usr/local/bin/gosu \
6     && gosu nobody true
7 # Set up the CMD and execute it as another user
8 CMD [ "exec", "gosu", "redis", "redis-server" ]
VOLUME define anonymous VOLUME
The format is:
1 VOLUME ["<Path 1>", "<Path 2>"...]
2 VOLUME <route>
As we said before, we should try our best to keep the storage layer of the container free from write operation when the container is running. For applications where database classes need to save dynamic data, their database files should be saved in volumes. In order to prevent the user from forgetting to mount the directory saved in the dynamic file as a volume at runtime, we can specify some directories to mount as anonymous volumes in the Dockerfile in advance, so that if the user does not specify the mount at runtime, the application can also run normally and will not write a large amount of data to the container reservoir.
VOLUME /data
Here, the / data directory will automatically mount as an anonymous volume at runtime, and any information written to / data will not be recorded into the container storage layer, thus ensuring the stateless of the container storage layer. Of course, the runtime can override this mount setting. For example:
docker run -d -v mydata:/data xxxx
In this command line, mydata is used to mount the named volume to / data, which replaces the mount configuration of anonymous volume defined in Dockerfile.
EXPOSE declaration port
The format is expose < port 1 > [< port 2 >...]
The EXPOSE instruction is to declare that the runtime container provides the service port, which is only a declaration, and the application will not open the service of this port at runtime because of this declaration. There are two advantages of writing such a declaration in the Dockerfile: one is to help image users understand the guard port of the image service, so as to facilitate configuration mapping; the other is to automatically map the exit port when using random port mapping at runtime, that is, when docker run-p.
To distinguish EXPOSE from using - P < host port >: < container port > at run time. -p. It is to map the host port and container port. In other words, it is to EXPOSE the corresponding port service of the container to the outside world for access, while EXPOSE is only to declare what port the container intends to use, and it will not automatically map the port in the host.
ENTRYPOINT entry point
The format of ENTRYPOINT is the same as that of RUN instruction, which is divided into exec format and shell format.
The purpose of entrypoint is the same as that of CMD. It starts programs and parameters in the specified container. entrypoint can also be replaced at runtime, but it is a little more cumbersome than CMD. It needs to be specified by the parameter of docker run, entrypoint.
When ENTRYPOINT is specified, the meaning of CMD changes. Instead of directly running its command, the content of CMD is passed to the ENTRYPOINT command as a parameter [★★★], in other words, when it is actually executed, it will change to:
<ENTRYPOINT> "<CMD>"
So why do you need entry point after having CMD? What are the benefits of this < entry point > "< CMD >"? Let's look at a few scenarios.
Scenario 1: make the image work like a command
If we need an image to know our current public IP address, we can use CMD to realize it first:
1 FROM centos:7.7.1908
2 CMD [ "curl", "-s", "ifconfig.io" ]
If we use docker build -t myip. To build the image, if we need to query the current public IP address, we only need to execute:
1 $ docker run myip
2 183.226.75.148
Well, it seems that you can use the image directly as a command, but the command always has parameters. What if we want to add parameters? For example, from the above CMD, we can see that the actual command is curl. If we want to display HTTP header information, we need to add the - i parameter. Can we directly add the - i parameter to docker run myip?
1 $ docker run myip -i
2 docker: Error response from daemon: OCI runtime create failed: container_linux.go:348: starting container process caused "exec: \"-i\": executable file not found in $PATH": unknown.
3 ERRO[0000] error waiting for container: context canceled
We can see that the executable file is not found. As we said before, command [Usage: docker run [OPTIONS] IMAGE [COMMAND] [ARG ]], the runtime will replace the default value of the CMD. So the - i here replaces the original CMD instead of adding to the original curl -s ifconfig.io Back. And - i is not a command at all, so naturally it can't be found.
So if we want to add the - i parameter, we have to re-enter the command completely:
$ docker run myip curl -s ifconfig.io -i
This is obviously not a good solution, and using ENTRYPOINT can solve this problem. Now we use ENTRYPOINT to realize the image again:
1 FROM centos:7.7.1908
2 ENTRYPOINT [ "curl", "-s", "ifconfig.io" ]
Use docker build -t myip2. After building, let's try to use docker run myip2 -i directly:
 1 $ docker run myip2
 2 183.226.75.148
 3
 4 $ docker run myip2 -i
 5 HTTP/1.1 200 OK
 6 Date: Sun, 19 Apr 2020 02:20:48 GMT
 7 Content-Type: text/plain; charset=utf-8
 8 Content-Length: 15
 9 Connection: keep-alive
10 Set-Cookie: __cfduid=d76a2e007bbe7ec2d230b0a6636d115151587262848; expires=Tue, 19-May-20 02:20:48 GMT; path=/; domain=.ifconfig.io; HttpOnly; SameSite=Lax
11 CF-Cache-Status: DYNAMIC
12 Server: cloudflare
13 CF-RAY: 586326015c3199a1-LAX
14 alt-svc: h3-27=":443"; ma=86400, h3-25=":443"; ma=86400, h3-24=":443"; ma=86400, h3-23=":443"; ma=86400
15 cf-request-id: 0231d614d9000099a1e10d7200000001
16
17 183.226.75.148
As you can see, it was a success this time. This is because when there is ENTRYPOINT, the content of the CMD will be passed to ENTRYPOINT as a parameter, and here - i is the new CMD, so it will be passed to curl as a parameter, thus achieving the expected effect.
Scenario 2: preparation before application operation
Starting the container is to start the main process, but sometimes, some preparations are needed before starting the main process.
For example, mysql database may need some database configuration and initialization work, which should be solved before the final mysql server runs.
In addition, you may want to avoid using the root user to start the service, so as to improve security. Before starting the service, you need to perform some necessary preparations as root, and finally switch to the service user identity to start the service. Or in addition to services, other commands can still be executed as root for debugging.
These preparations have nothing to do with the container's CMD. No matter what the CMD is, a preprocessing is needed in advance. In this case, you can write a script and put it into ENTRYPOINT for execution. The script will take the received parameter (that is, < CMD >) as the command and execute it at the end of the script. For example, the official image of redis does this:
1 FROM alpine:3.4
2 ...
3 RUN addgroup -S redis && adduser -S -G redis redis
4 ...
5 ENTRYPOINT ["docker-entrypoint.sh"]
6
7 EXPOSE 6379
8 CMD [ "redis-server" ]
You can see that the redis user is created for the redis service, and the ENTRYPOINT is specified as the docker at the end- ENTRYPOINT.sh script.
1 #!/bin/sh
2 ...
3 # allow the container to be started with `--user`
4 if [ "$1" = 'redis-server' -a "$(id -u)" = '0' ]; then
5     chown -R redis .
6     exec su-exec redis "$0" "$@"
7 fi
8
9 exec "$@"
The content of the script is judged according to the content of the CMD. If it is a redis server, switch to the redis user identity to start the server. Otherwise, it is still executed as root. For example:
1 $ docker run -it redis id
2 uid=0(root) gid=0(root) groups=0(root)
CMD container start command
The format of CMD instruction is similar to RUN, and it is also a special format and two formats:
1 shell format: CMD < command >
2 exec format: CMD ["executable", "Parameter1", "parameter2"...]
3 parameter list format: CMD ["parameter 1", "parameter 2"...]. After specifying the ENTRYPOINT instruction, use CMD to specify specific parameters.
When introducing the container, I once said that the Docker is not a virtual machine, but a container is a process. Since it is a process, you need to specify the program and parameters to run when starting the container. The CMD directive is used to specify the start command of the default container main process.
In terms of instruction format, it is generally recommended to use exec format, which will be parsed into JSON array when parsing. Therefore, double quotation marks should be used instead of single quotation marks.
If the shell format is used, the actual command will be executed as a parameter of sh-c. For example:
CMD echo $HOME
In actual implementation, it will be changed to:
CMD [ "sh", "-c", "echo $HOME" ]
That's why we can use environment variables because they are parsed by the shell.
When it comes to CMD, we have to mention the application of container in foreground and background. This is a common confusion for beginners.
Docker is not a virtual machine. Applications in the container should be executed on the previous platform instead of using systemd to start the background service, as in virtual machines and physical machines. There is no concept of background service in the container.
For a container, its starting program is the container application process, and the container exists for the main process. When the main process exits, the container loses its meaning of existence, and exits. Other auxiliary processes are not something it needs to care about.
Some beginners write CMD as:
CMD service nginx start
Using the service nginx start command, you want upstart to start the nginx service in the form of a later daemons. As mentioned just now, CMD service nginx start will be understood as CMD ["sh", "- c", "service nginx start"], so the main process is actually sh. Then when the service nginx start command is finished, SH will also be finished. If sh exits as the main process, the container will exit naturally.
The correct way is to execute the nginx executable directly, and require the former form to run. For example:
CMD ["nginx", "-g", "daemon off;"]
Build image case - Nginx
Build files
 1 [root@docker01 make03]# pwd
 2 /root/docker_test/make03
 3 [root@docker01 make03]# ll
 4 total 12
 5 -rw-r--r-- 1 root root 720 Apr 19 16:46 Dockerfile
 6 -rw-r--r-- 1 root root  95 Apr 19 16:19 entrypoint.sh
 7 -rw-r--r-- 1 root root  22 Apr 19 16:18 index.html
 8 [root@docker01 make03]# cat Dockerfile   # Dockerfile file
 9 # base image
10 FROM centos:7.7.1908
11
12 # Maintainer
13 MAINTAINER lightzhang lightzhang@xxx.com
14
15 # Command: what has been done
16 RUN echo 'nameserver 223.5.5.5' > /etc/resolv.conf && echo 'nameserver 223.6.6.6' >> /etc/resolv.conf
17 RUN curl -o /etc/yum.repos.d/CentOS-Base.repo http://mirrors.aliyun.com/repo/Centos-7.repo && curl -o /etc/yum.repos.d/epel.repo http://mirrors.aliyun.com/repo/epel-7.repo
18 RUN yum install -y nginx-1.16.1 && yum clean all
19 RUN echo "daemon off;" >> /etc/nginx/nginx.conf
20
21 # Add file
22 COPY index.html /usr/share/nginx/html/index.html
23 COPY entrypoint.sh /usr/local/bin/entrypoint.sh
24
25 # Declaration of external exposure port
26 EXPOSE 80
27
28 # implement
29 ENTRYPOINT ["sh", "entrypoint.sh"]
30
31 # Execute command
32 CMD ["nginx"]
33
34 [root@docker01 make03]# cat index.html   # access files
35 nginx in docker, html
36 [root@docker01 make03]# cat entrypoint.sh   # entrypoint file
37 #!/bin/bash
38 if [ "$1" = 'nginx' ]; then
39     exec nginx -c /etc/nginx/nginx.conf
40 fi
41 exec "$@"
Build a mirror
 1 [root@docker01 make03]# docker build -t base/nginx:1.16.1 .
 2 Sending build context to Docker daemon  4.608kB
 3 Step 1/11 : FROM centos:7.7.1908
 4  ---> 08d05d1d5859
 5 Step 2/11 : MAINTAINER lightzhang lightzhang@xxx.com
 6  ---> Using cache
 7  ---> 1dc29e78d94f
 8 Step 3/11 : RUN echo 'nameserver 223.5.5.5' > /etc/resolv.conf && echo 'nameserver 223.6.6.6' >> /etc/resolv.conf
 9  ---> Using cache
10  ---> 19398ad9b023
11 Step 4/11 : RUN curl -o /etc/yum.repos.d/CentOS-Base.repo http://mirrors.aliyun.com/repo/Centos-7.repo && curl -o /etc/yum.repos.d/epel.repo http://mirrors.aliyun.com/repo/epel-7.repo
12  ---> Using cache
13  ---> b2451c5856c5
14 Step 5/11 : RUN yum install -y nginx-1.16.1 && yum clean all
15  ---> Using cache
16  ---> 291f27cae4df
17 Step 6/11 : RUN echo "daemon off;" >> /etc/nginx/nginx.conf
18  ---> Using cache
19  ---> 115e07b6313e
20 Step 7/11 : COPY index.html /usr/share/nginx/html/index.html
21  ---> Using cache
22  ---> 9d714d2e2a84
23 Step 8/11 : COPY entrypoint.sh /usr/local/bin/entrypoint.sh
24  ---> Using cache
25  ---> b16983911b56
26 Step 9/11 : EXPOSE 80
27  ---> Using cache
28  ---> d8675d6c2d43
29 Step 10/11 : ENTRYPOINT ["sh", "entrypoint.sh"]
30  ---> Using cache
31  ---> 802a1a67db37
32 Step 11/11 : CMD ["nginx"]
33  ---> Using cache
34  ---> f2517b4d5510
35 Successfully built f2517b4d5510
36 Successfully tagged base/nginx:1.16.1
Publish container and port view
 1 [root@docker01 ~]# docker run -d -p 80:80 --name mynginx_v2 base/nginx:1.16.1   # Start container
 2 50a45a0894d8669308de7c70d47c96db8cd8990d3e34d1d125e5289ed062f126
 3 [root@docker01 ~]#
 4 [root@docker01 ~]# docker ps
 5 CONTAINER ID   IMAGE               COMMAND                  CREATED         STATUS         PORTS                NAMES
 6 50a45a0894d8   base/nginx:1.16.1   "sh entrypoint.sh ng..."   3 minutes ago   Up 3 minutes   0.0.0.0:80->80/tcp   mynginx_v2
 7 [root@docker01 ~]# netstat -lntup  # Port view
 8 Active Internet connections (only servers)
 9 Proto Recv-Q Send-Q Local Address           Foreign Address         State       PID/Program name
10 tcp        0      0 127.0.0.1:25            0.0.0.0:*               LISTEN      1634/master
11 tcp        0      0 0.0.0.0:111             0.0.0.0:*               LISTEN      1/systemd
12 tcp        0      0 0.0.0.0:22              0.0.0.0:*               LISTEN      1349/sshd
13 tcp6       0      0 ::1:25                  :::*                    LISTEN      1634/master
14 tcp6       0      0 :::111                  :::*                    LISTEN      1/systemd
15 tcp6       0      0 :::80                   :::*                    LISTEN      13625/docker-proxy
16 tcp6       0      0 :::8080                 :::*                    LISTEN      2289/docker-proxy
17 tcp6       0      0 :::22                   :::*                    LISTEN      1349/sshd
18 udp        0      0 0.0.0.0:1021            0.0.0.0:*                           847/rpcbind
19 udp        0      0 0.0.0.0:111             0.0.0.0:*                           1/systemd
20 udp6       0      0 :::1021                 :::*                                847/rpcbind
21 udp6       0      0 :::111                  :::*                                1/systemd
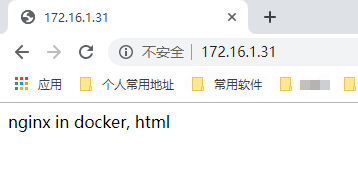
Browser access
http://172.16.1.31/
-—END-—
If you think it's good, pay attention to it!