1. ElasticSearch overview
The Elastic Stack, including elasticsearch, Kibana Beats and Logstash (also known as ELK Stack). It can safely and reliably obtain data from any source and any format, and then search, analyze and visualize the data in real time. Elasticsearch, abbreviated as ES, is an open-source and highly extended distributed full-text search engine, which is the core of the entire Elastic Stack technology stack. It can store and retrieve data in near real time It has good scalability and can be extended to hundreds of servers to process PB level data.
Elasticsearch's official address: https://www.elastic.co/cn/
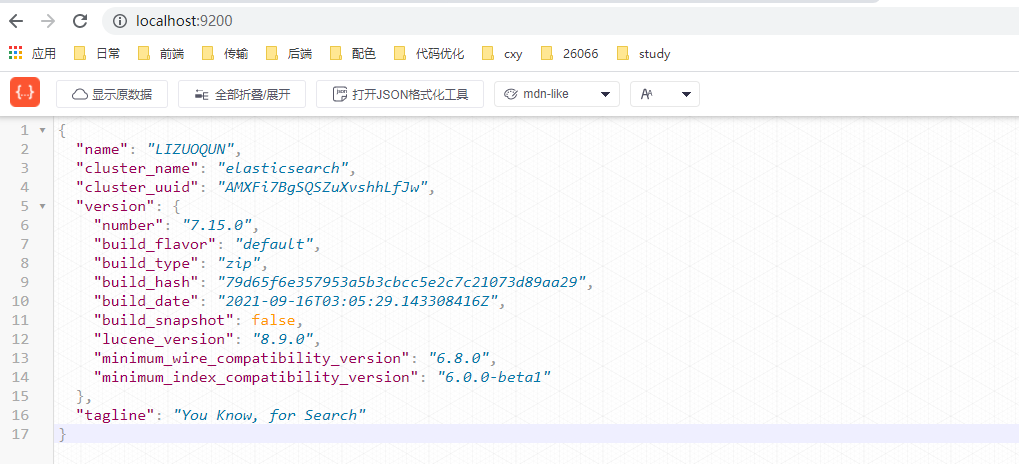
Go directly to the official website to download. After downloading, decompress directly. After decompressing, enter the bin file directory and click elastic search The ES service is started from the. Bat file. After decompression, the access to port 9200 is directly verified.
2. HTTP operation of ElasticSearch
2.1 index operation
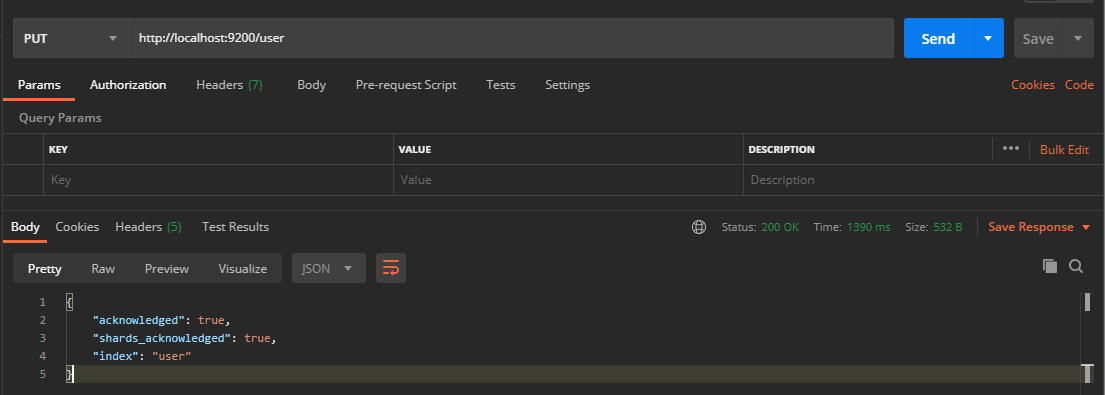
2.1. 1. New index
Compared with relational databases, creating an index is equivalent to creating a database. In Postman, send a PUT request to the ES server: http://localhost:9200/user
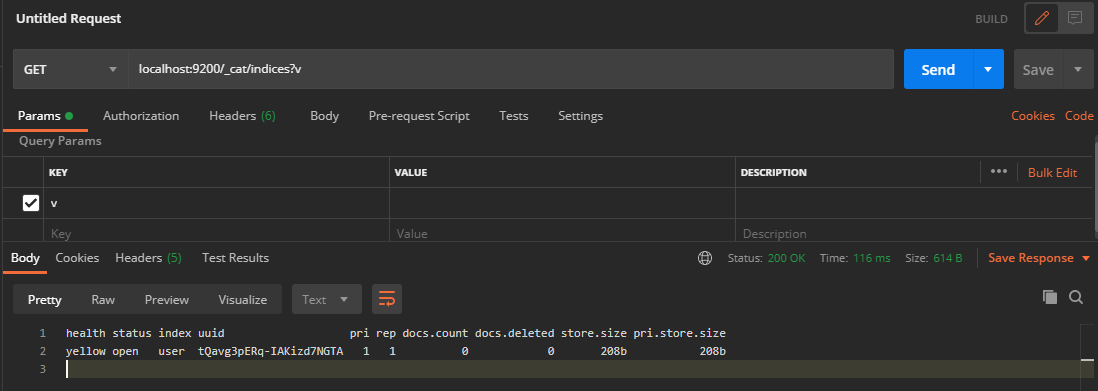
2.1. 2. View all indexes
In Postman, send a GET request to the ES server: localhost:9200/_cat/indices?v
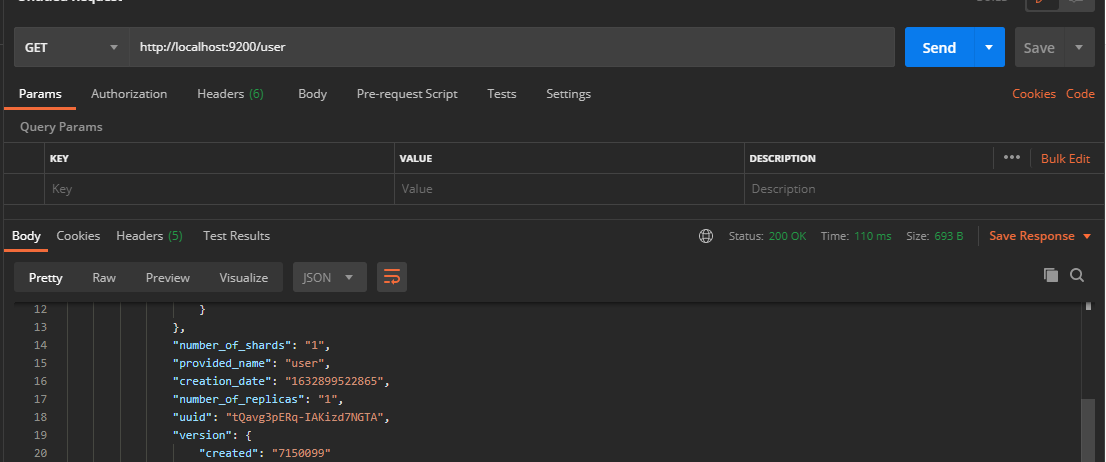
2.1. 3. View a single index
The request path sent by the index to the ES server is consistent with the index creation. However, the HTTP method is inconsistent, so it is changed to GET request
2.1. 4. Delete index
Change to DELETE request

2.2 document operation
2.2. 1. Create document
The document here can be compared to table data in a relational database, and the added data format is JSON format
In Postman, send a POST request to the ES server: http://localhost:9200/user/_doc
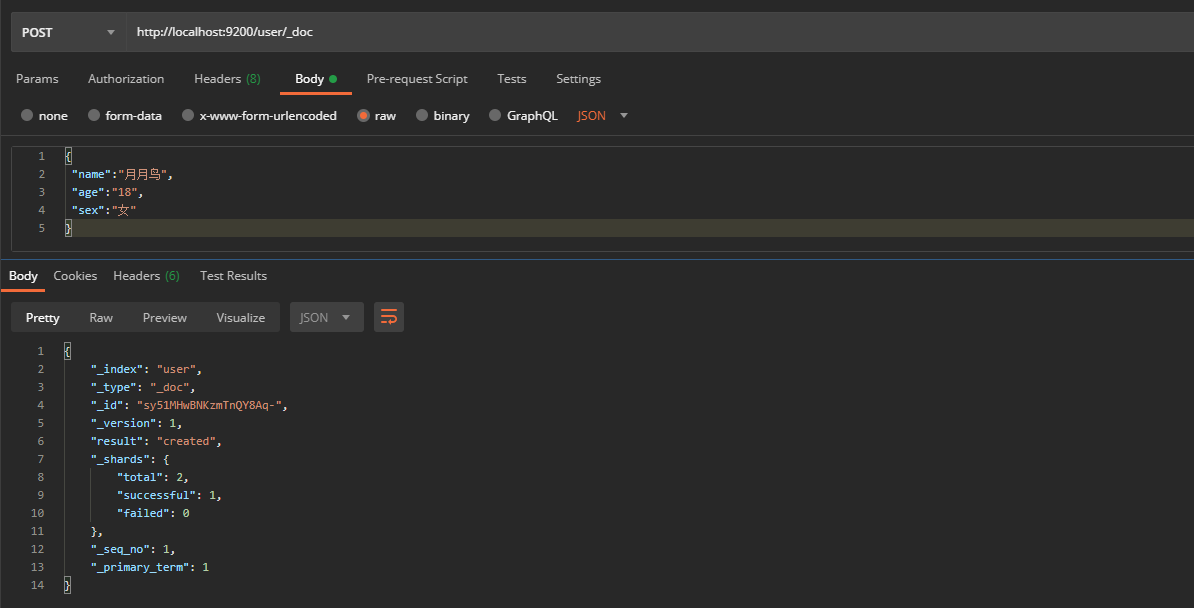
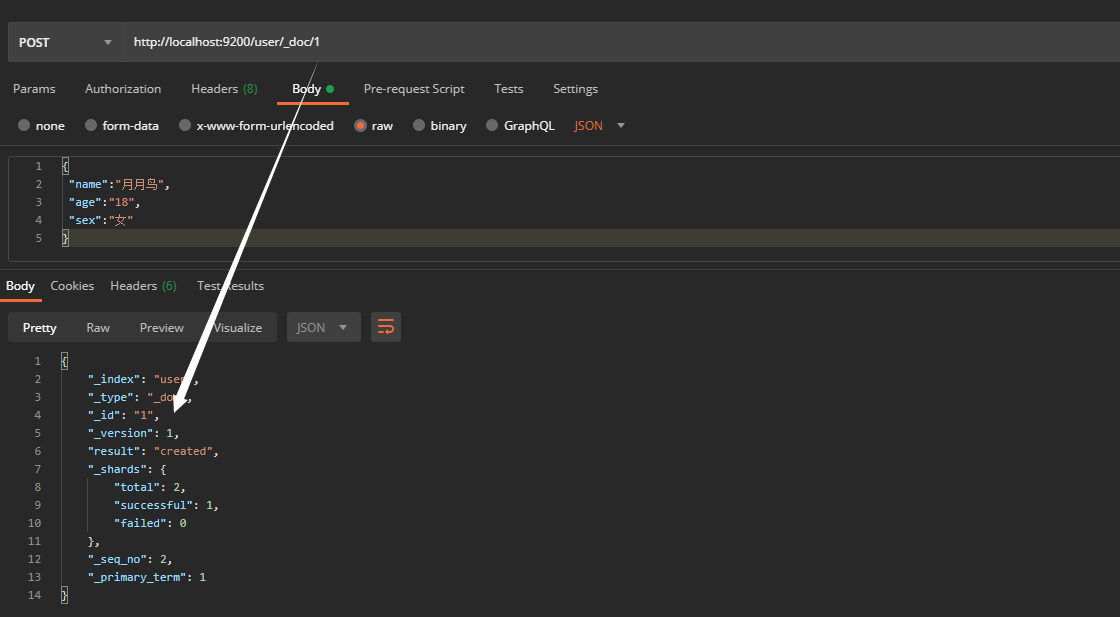
However, the id in the data returned here is generated by es. How can we set it if we want to use the id defined by ourselves? It can be specified during creation, and the id value is given at the end, as follows: 1
2.2. 2. View document
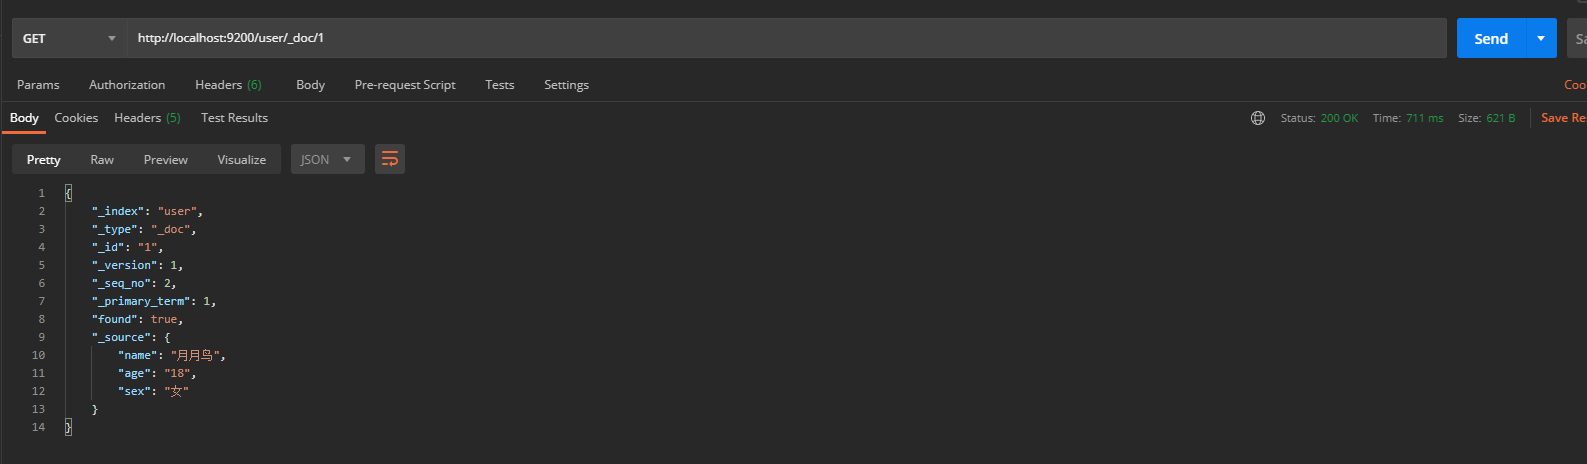
When viewing a document, you need to indicate the unique ID of the document, which is similar to the primary key query of data in MySQL. In Postman, send a GET request to the ES server: http://localhost:9200/user/_doc/1
2.2. 3. Modify document
Enter the same URL address request. If the request body changes, the original data content will be overwritten in Postman and a POST request will be sent to the ES server. When we send a PUT request, all data will be overwritten
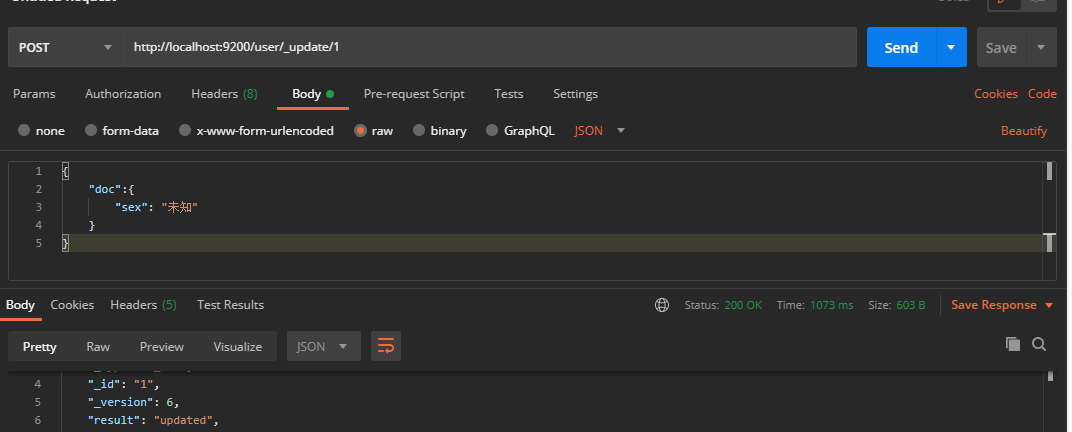
2.2. 4. Modify field
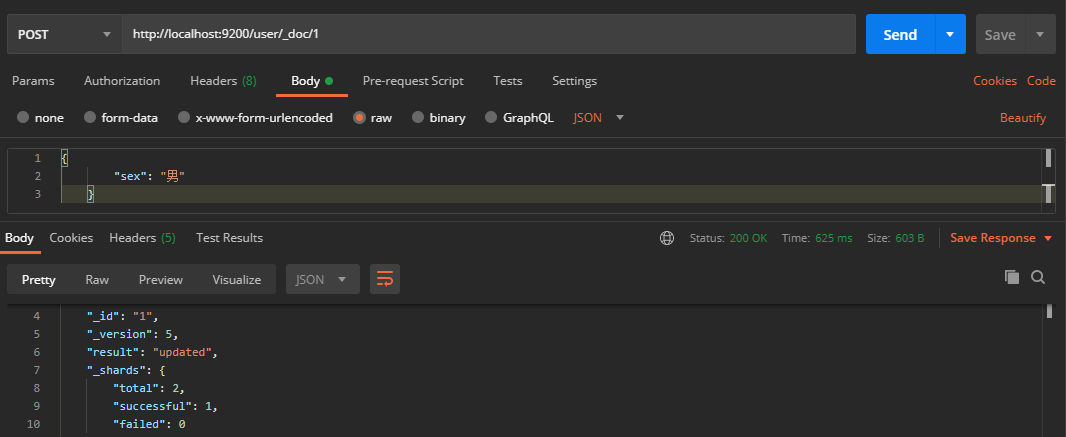
When modifying data, you can also modify only the local information of a given piece of data
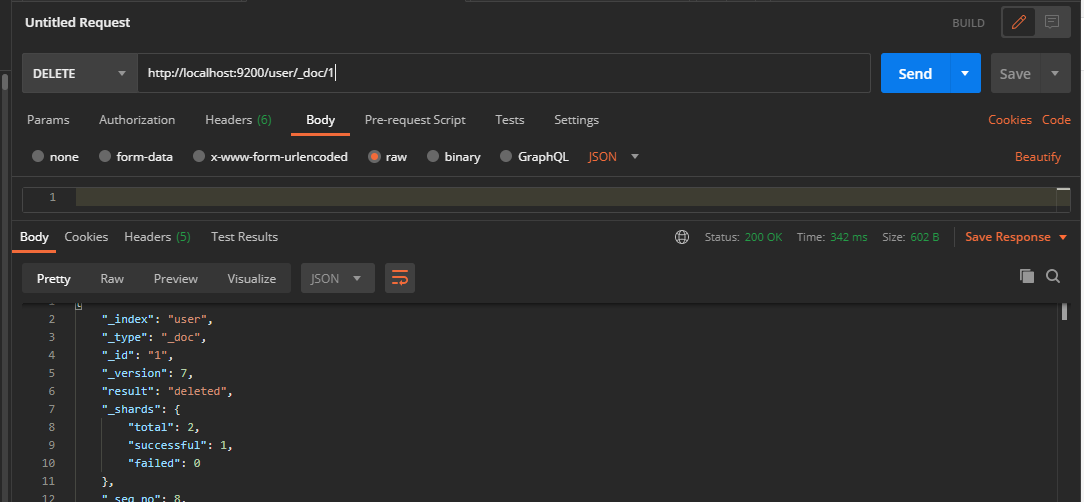
2.2. 5. Delete document
Deleting a document is not immediately removed from the disk. It is only marked as deleted (logical deletion). In Postman, send a DELETE request to the ES server
2.3 advanced query
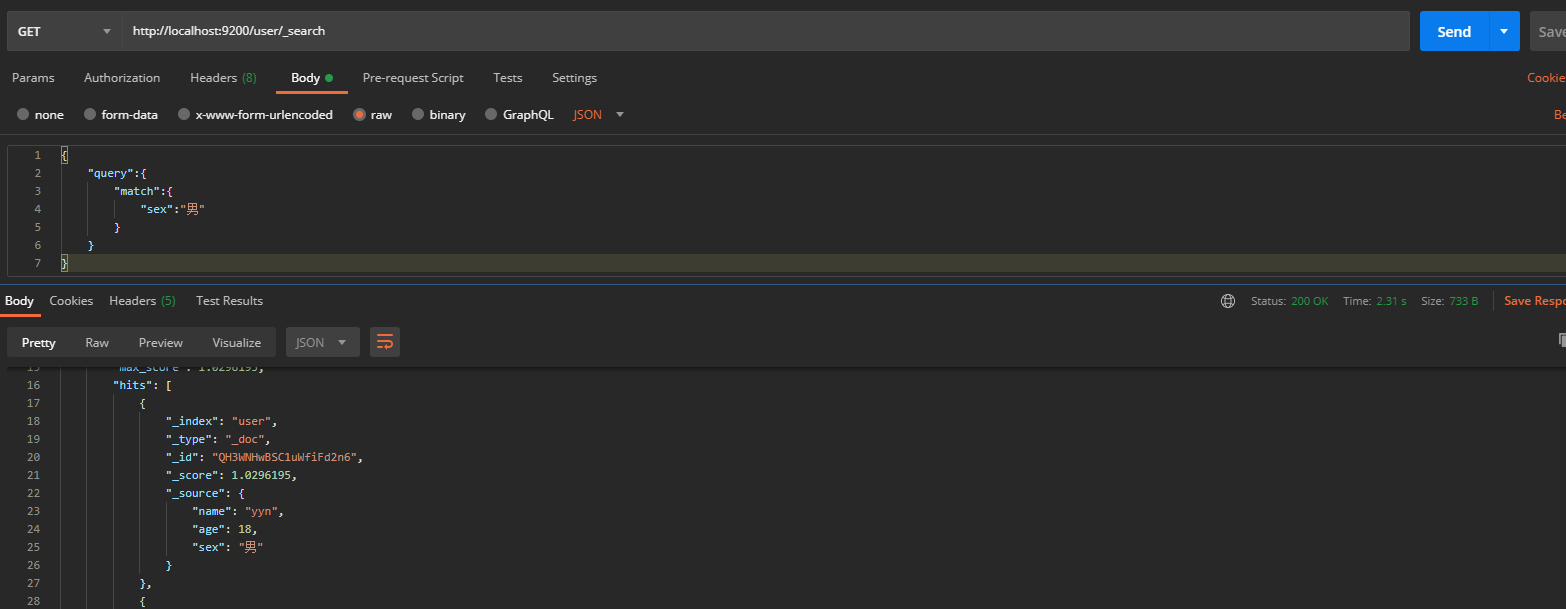
2.3. 1. Conditional query document
Request via get http://localhost:9200/user/_search , query through body
{
    "query":{
        "match":{
            "sex":"male"
        }
    }
}
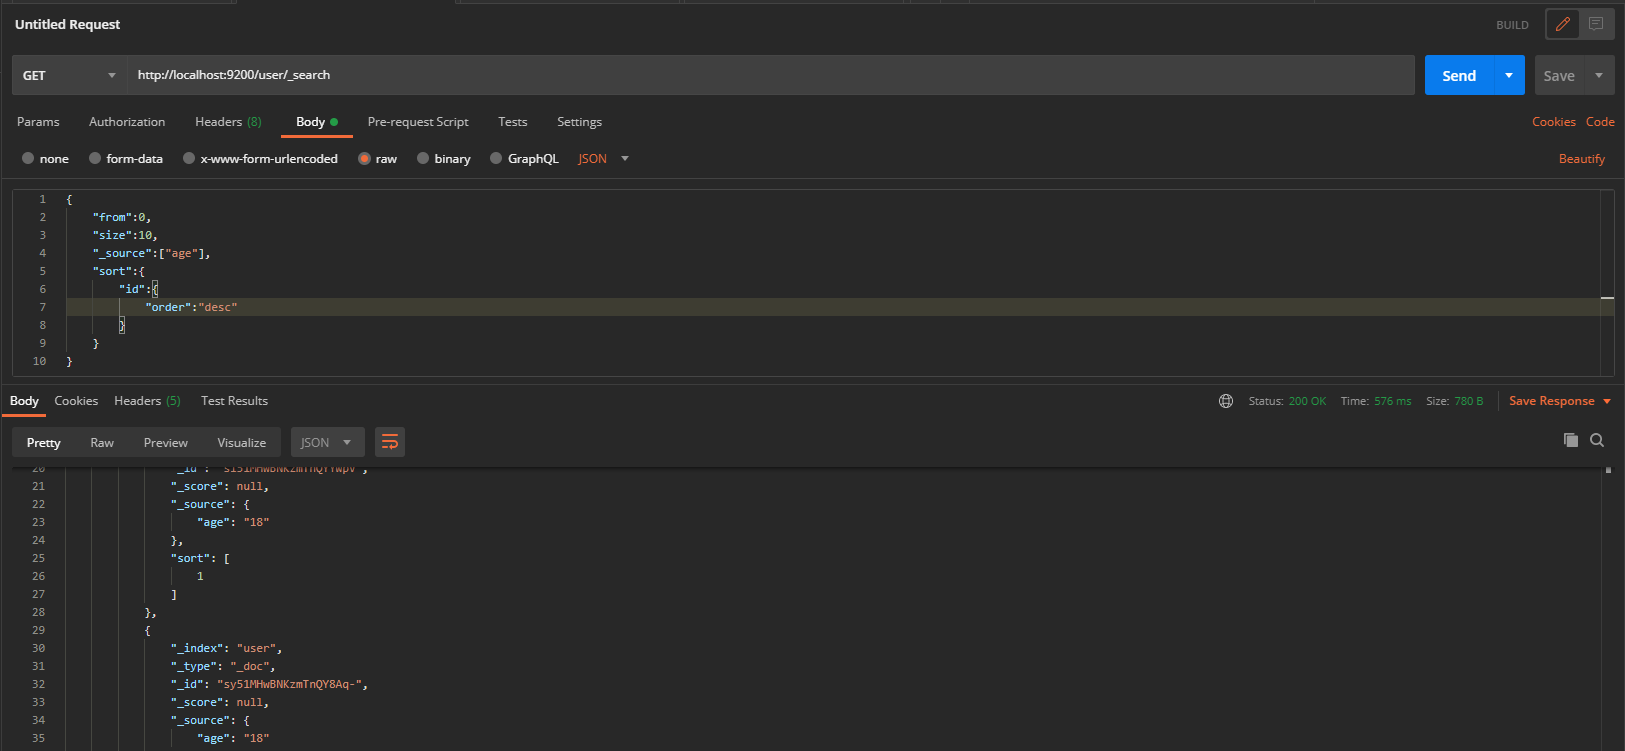
In addition, we can set from (start position) and size (number of entries per page) to set paging query, _source (query specified fields) and sort (sort according to specified fields)
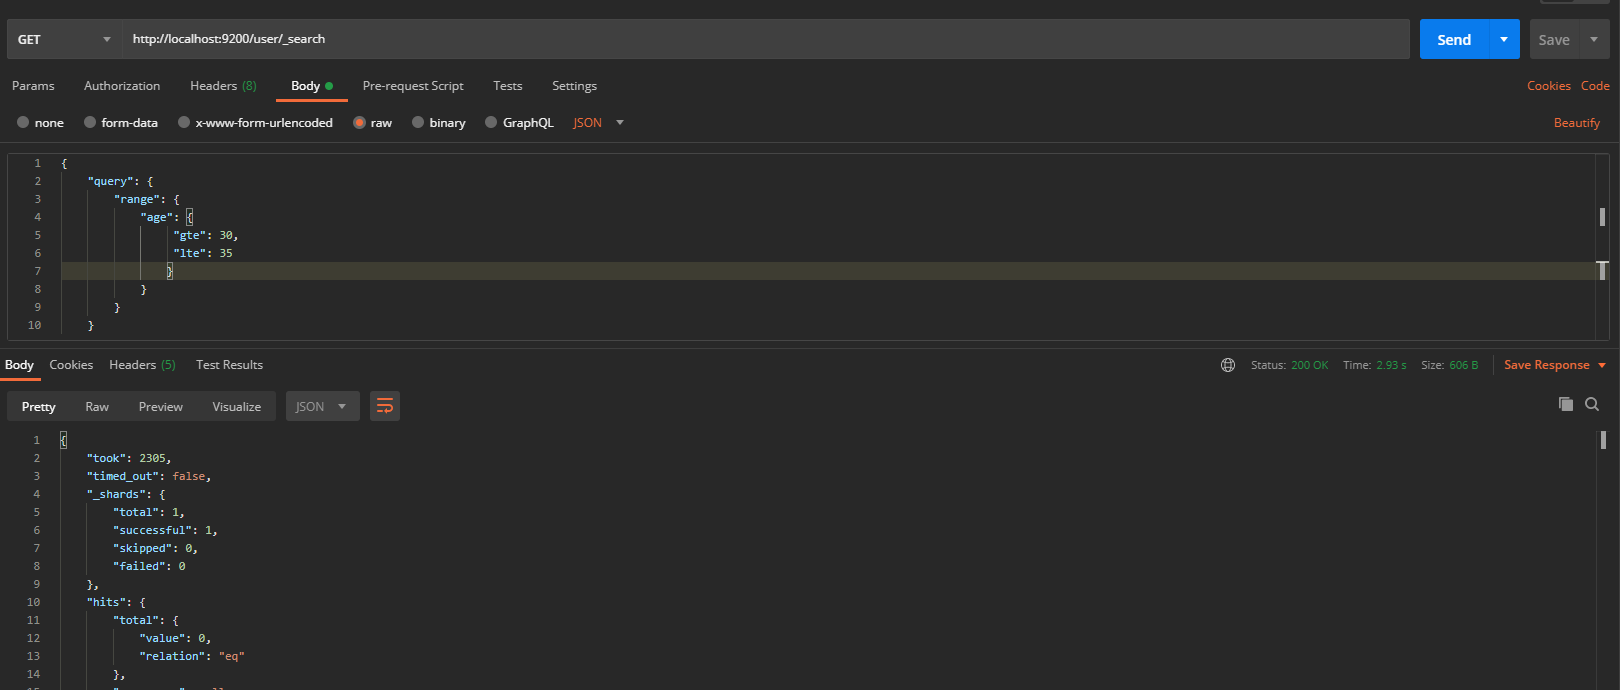
2.3. 2. Range query
The range query finds numbers or times that fall within a specified range. Range queries allow the following characters
| Operator | explain |
|---|---|
| gt | Greater than > |
| gte | Greater than or equal to >= |
| lt | Less than< |
| lte | Less than or equal to<= |
Query the range of age as follows
3. Java API operation of ElasticSearch
First, we create a maven project, and then we import the dependencies required by es.
    <dependencies>
        <dependency>
            <groupId>org.elasticsearch</groupId>
            <artifactId>elasticsearch</artifactId>
            <version>7.15.0</version>
        </dependency>
        <!-- elasticsearch Client for -->
        <dependency>
            <groupId>org.elasticsearch.client</groupId>
            <artifactId>elasticsearch-rest-high-level-client</artifactId>
            <version>7.15.0</version>
        </dependency>
        <!-- elasticsearch Dependency 2.x of log4j -->
        <dependency>
            <groupId>org.apache.logging.log4j</groupId>
            <artifactId>log4j-api</artifactId>
            <version>2.8.2</version>
        </dependency>
        <dependency>
            <groupId>org.apache.logging.log4j</groupId>
            <artifactId>log4j-core</artifactId>
            <version>2.8.2</version>
        </dependency>
        <dependency>
            <groupId>com.fasterxml.jackson.core</groupId>
            <artifactId>jackson-databind</artifactId>
            <version>2.9.9</version>
        </dependency>
        <!-- junit unit testing  -->
        <dependency>
            <groupId>junit</groupId>
            <artifactId>junit</artifactId>
            <version>4.12</version>
        </dependency>
    </dependencies>
3.1. Create index
    public static void main(String[] args) throws Exception {
        // Create client
        RestHighLevelClient client = new RestHighLevelClient(
                RestClient.builder(new HttpHost("localhost",9200,"http"))
        );
        // Create index
        CreateIndexRequest request = new CreateIndexRequest("order");
        CreateIndexResponse response = client.indices().create(request, RequestOptions.DEFAULT);

        boolean isAcknowledged = response.isAcknowledged();

        System.out.println(isAcknowledged);
        // close
        client.close();
    }
An error is reported ElasticsearchStatusException[Elasticsearch exception [type=invalid_index_name_exception, reason=Invalid index name [esIndex], must be lowercase]] this error indicates that the index needs to be in lowercase and can be changed to lowercase.
Error Java lang.ClassNotFoundException: org. elasticsearch. common. Checkedconsumer is because the version of es is incorrect. Adjust the corresponding version and client version to be consistent.
3.2. View index
        // Create client
        RestHighLevelClient client = new RestHighLevelClient(
                RestClient.builder(new HttpHost("localhost",9200,"http"))
        );
        // View index
        GetIndexRequest request = new GetIndexRequest("order");
        GetIndexResponse response = client.indices().get(request, RequestOptions.DEFAULT);

        System.out.println(response.getAliases());
        System.out.println(response.getMappings());
        System.out.println(response.getSettings());

        // close
        client.close();
3.3. Delete index
        // Delete index
        DeleteIndexRequest request = new DeleteIndexRequest("order");
        AcknowledgedResponse response = client.indices().delete(request, RequestOptions.DEFAULT);
3.4. New documents
        // Modify data
        UpdateRequest updateRequest = new UpdateRequest();
        updateRequest.index("order").id("0001");
        updateRequest.doc(XContentType.JSON,"price",9999.98);
        UpdateResponse response = client.update(updateRequest,RequestOptions.DEFAULT);
3.5. Modify documents
        // Modify data
        UpdateRequest updateRequest = new UpdateRequest();
        updateRequest.index("order").id("0001");
        updateRequest.doc(XContentType.JSON,"price",9999.98);
        UpdateResponse response = client.update(updateRequest,RequestOptions.DEFAULT);
3.6. Viewing documents
        // View data
        GetRequest indexRequest = new GetRequest();
        indexRequest.index("order").id("0001");

        GetResponse response = client.get(indexRequest,RequestOptions.DEFAULT);
3.7. Delete document
        // View data
        DeleteRequest indexRequest = new DeleteRequest();
        indexRequest.index("order").id("0001");

        DeleteResponse response = client.delete(indexRequest,RequestOptions.DEFAULT);
3.8. Batch adding documents
        // Create data
        BulkRequest indexRequest = new BulkRequest();

        indexRequest.add(new IndexRequest().index("order").id("1001").source(XContentType.JSON,"name","pen"));
        indexRequest.add(new IndexRequest().index("order").id("1002").source(XContentType.JSON,"name","ink"));
        indexRequest.add(new IndexRequest().index("order").id("1003").source(XContentType.JSON,"name","paper"));
        indexRequest.add(new IndexRequest().index("order").id("1004").source(XContentType.JSON,"name","Inkstone"));

        BulkResponse response = client.bulk(indexRequest, RequestOptions.DEFAULT);
3.9. Delete documents in batch
        // Create data
        BulkRequest indexRequest = new BulkRequest();

        indexRequest.add(new DeleteRequest().index("order").id("1001"));
        indexRequest.add(new DeleteRequest().index("order").id("1002"));
        indexRequest.add(new DeleteRequest().index("order").id("1003"));
        indexRequest.add(new DeleteRequest().index("order").id("1004"));

        BulkResponse response = client.bulk(indexRequest, RequestOptions.DEFAULT);
3.10. Full quantity and condition query documents
        // Full query
        SearchRequest searchRequest = new SearchRequest();
        searchRequest.indices("order");

        // Total quantity
        //searchRequest.source(new SearchSourceBuilder().query(QueryBuilders.matchAllQuery()));

        // Condition query
        searchRequest.source(new SearchSourceBuilder().query(QueryBuilders.termQuery("price",49.99)));

        SearchResponse response = client.search(searchRequest,RequestOptions.DEFAULT);
3.11. Paging, sorting and field selection query documents
        // q full query
        SearchRequest searchRequest = new SearchRequest();
        searchRequest.indices("order");

        SearchSourceBuilder  builder =new SearchSourceBuilder().query(QueryBuilders.matchAllQuery());

        // paging
        builder.from(0);
        builder.size(10);
        // sort
        builder.sort("price", SortOrder.DESC);
        // Filter field
        String [] exclude = {};
        String [] include = {"name"};
        builder.fetchSource(include,exclude);
        searchRequest.source(builder);
3.12. Combined query document
        RestHighLevelClient client = new RestHighLevelClient(
                RestClient.builder(new HttpHost("localhost",9200,"http"))
        );

        SearchRequest searchRequest = new SearchRequest();
        searchRequest.indices("order");

        SearchSourceBuilder builder = new SearchSourceBuilder();
        BoolQueryBuilder boolQueryBuilder = QueryBuilders.boolQuery();

        boolQueryBuilder.must(QueryBuilders.matchQuery("price",49.99));
        // boolQueryBuilder.must(QueryBuilders.matchQuery("name", "paper");
        boolQueryBuilder.should(QueryBuilders.matchQuery("name","Inkstone"));
        builder.query(boolQueryBuilder);

        searchRequest.source(builder);
3.12 scope query document
        RestHighLevelClient client = new RestHighLevelClient(
                RestClient.builder(new HttpHost("localhost",9200,"http"))
        );

        SearchRequest searchRequest = new SearchRequest();
        searchRequest.indices("order");

        SearchSourceBuilder builder = new SearchSourceBuilder();

        RangeQueryBuilder rangeQueryBuilder = QueryBuilders.rangeQuery("price");
        rangeQueryBuilder.gte(20);
        rangeQueryBuilder.lte(1000);

        builder.query(rangeQueryBuilder);
        searchRequest.source(builder);
3.13 fuzzy query document
        SearchSourceBuilder builder = new SearchSourceBuilder();
        builder.query(QueryBuilders.fuzzyQuery("name", "pen").fuzziness(Fuzziness.ONE));
        searchRequest.source(builder);
        SearchResponse response = client.search(searchRequest, RequestOptions.DEFAULT);
4. ElasticSearch cluster construction
4.1 cluster construction under Windows
To set up a cluster under Windows, first modify elasticsearch. In the conf folder YML, take this as the first node,
# Cluster name
cluster.name: my-application

# Node information
node.name: node-1
node.master: true
node.data: true

# Cross domain configuration
http.cors.enabled: true
http.cors.allow-origin: "*"

# ip address
network.host: localhost
# http port
http.port: 9201
# tcp listening port
transport.tcp.port: 9301
Then copy one as node 2. The configuration of node 2 needs to be added:
# Go to the previous node to find
discovery.seed_hosts: ["localhost:9301"]
discovery.zen.fd.ping_timeout: 1m
discovery.zen.fd.ping_retries: 5
Start node 1 and node 2 respectively. Access address: http://localhost:9201/_cluster/health
4.2 establishment of stand-alone service under Linux
First, download the corresponding gz file and upload it to the linux server. Firstly, because of security problems, Elasticsearch does not allow the root user to run directly, so to create a new user, create a new user in the root user:
useradd es #New es user
passwd es #Set password for es user
userdel -r es #If you are wrong, you can delete and add
chown -R es:123456 /tools/es #Folder owner
Modify / tools / ES / es-node1 / config / elasticsearch YML file
cluster.name: elasticsearch
node.name: node-1
network.host: 0.0.0.0
http.port: 9200
cluster.initial_master_nodes: ["node-1"]
Modify / etc / security / limits conf
# Limit on the number of files that can be opened per process
es soft nofile 65536
es hard nofile 65536
Modify / etc / security / limits d/20-nproc. conf
# Limit on the number of files that can be opened per process
es soft nofile 65536
es hard nofile 65536
# Operating system level limit on the number of processes created per user
* hard nproc 4096
Modify / etc / sysctl conf
# The number of Vmas (virtual memory areas) that a process can own. The default value is 65536
vm.max_map_count=655360
Finally, start es: bin/elasticsearch. Use elasticsearch under the bin directory to start.
Common problems during startup:
1,max file descriptors [4096] for elasticsearch process is too low, increase to at least [65536]
The maximum number of open files per process is too small. You can view the current number through the following two commands
ulimit -Hn
ulimit -Sn
vi /etc/security/limits.conf file, add configuration, and log in again after the user exits
*               soft    nofile          65536
*               hard    nofile          65536
2,max number of threads [3818] for user [es] is too low, increase to at least [4096]
The problem is the same as above. The maximum number of threads is too low. Modify the configuration file / etc / security / limits Conf (and question 1 is a file), add configuration
*               soft    nproc           4096
*               hard    nproc           4096
It can be viewed through the command
ulimit -Hu
ulimit -Su
3. Access after startup. Port 9200 shows no access
The problem is that the firewall is not closed. Just close the firewall:
# View firewall status
systemctl status firewalld

# Temporarily turn off the firewall
systemctl stop firewalld

# Permanently turn off the firewall
systemctl enable firewalld.service
systemctl disable firewalld.service
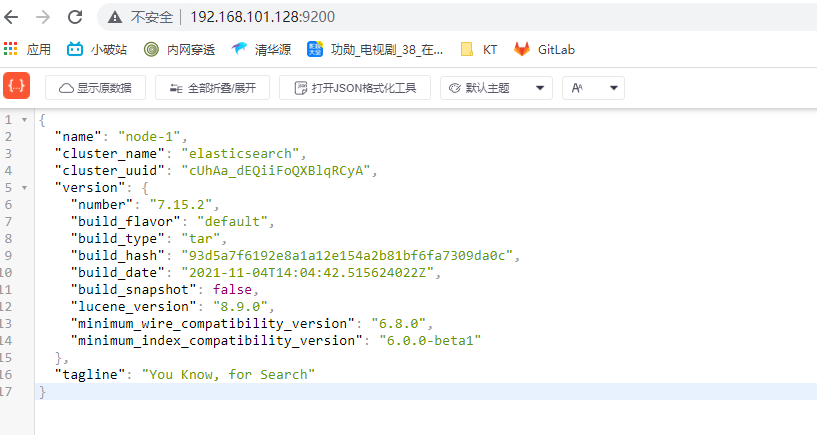
After startup, directly access port 9200 for verification:
4.3 cluster construction under Linux
Here, we still use pseudo distribution to build clusters. First, modify elasticsearch under conf YML file, take the first node as a master node, and modify the configuration according to its own linux cluster. (for example, IP address) to start three es services on the same server, you only need to modify the node name and port number.
#Cluster name
cluster.name: cluster-es
#Node name. The name of each node cannot be duplicate
node.name: node1
#ip address. The address of each node cannot be repeated
network.host: 0.0.0.0
network.publish_host: 192.168.101.128
http.port: 9201
transport.tcp.port: 9301
#es7. New configuration after X, node discovery
discovery.seed_hosts: ["192.169.101.128:9301","192.169.101.128:9302","192.169.101.128:9303"]
#es7.x. This configuration is required to elect a master when initializing a new cluster
cluster.initial_master_nodes: ["node1","node2","node3"]
gateway.recover_after_nodes: 2
http.cors.enabled: true
http.cors.allow-origin: "*"
The remaining configurations are consistent with the current node. After that, you can start this node directly, and the other two nodes can also be started. After startup, you can access the corresponding port numbers 9201, 9202 and 9203 respectively. You can see that all the information is the same after the cluster is built. cluster_uuid is the id of each node, which is different.
Cluster nodes always kill
Then start the ES server here. It is always killed halfway through the startup. It is found that there is not enough memory. Because the ES runs on the JVM, the JVM itself uses some off heap memory in addition to the allocated heap memory. Running es on a machine with small memory, if the heap is divided too much, the total memory used by the JVM may exceed the physical memory limit after accumulating the out of heap memory. If swap is closed again, it will be killed by the operating system oom killer. Subsequently, it turned out that the machine memory was not large enough, only 1g of memory, but 1g of heap size was configured in the JVM configuration file in ES, resulting in insufficient space allocation, so es could not be started., Change JVM Options file:
-Xmx512m
-Xms512m
4.4 elasticsreach head tool
github address: https://github.com/mobz/elasticsearch-head
npm install
npm run start
After starting the project, directly access the corresponding address. First, we can connect to our cluster to see the relevant information of the cluster.
5. ElasticSearch distributed cluster
5.1. Single node cluster
Creating an index named users in a cluster with an empty node will allocate three primary partitions and one replica (each primary partition has one replica partition)
PUT request			http://localhost:9201/user

{
	"settings" : {
		"number_of_shards" : 3,
		"number_of_replicas" : 1
	}
}
The cluster is now a single node cluster with one index. The three main partitions are assigned to node1. You can view the partition status of the cluster through the elastic search head tool.
5.2. Failover
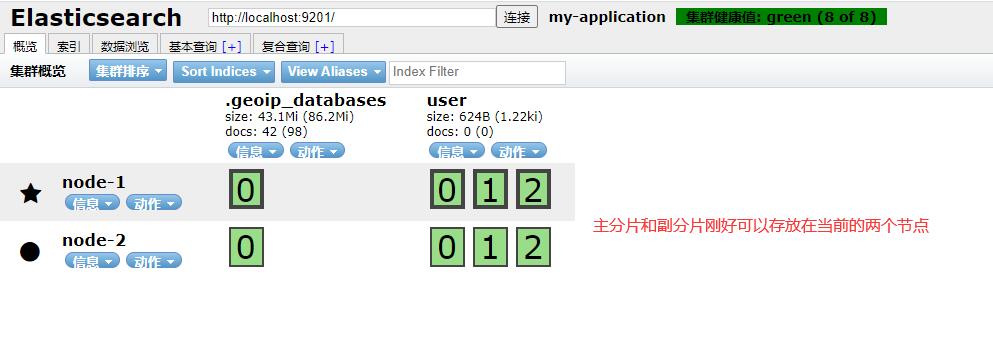
When only one node in the cluster is running, it means that there will be a single point of failure - no redundancy. At this time, we only need to start another node to prevent data loss. Only when the second node is started on the same machine, as long as it has the same cluster as the first node Name configuration, it will automatically discover the cluster and join it. However, when starting nodes on different machines, you need to configure a list of unicast hosts that you can connect to in order to join the same cluster. It is configured to use unicast discovery to prevent nodes from inadvertently joining the cluster. Only nodes running on the same machine will automatically form a cluster. If the second node is started, the cluster will have a cluster of two nodes: all primary and replica partitions have been assigned.
5.3 horizontal expansion
At this time, when the third node is started, the cluster will have a three node cluster: at this time, the fragments will be redistributed in order to distribute the load.
At this time, what should we do when we want to expand the capacity of more than 6 nodes?
The number of primary partitions is determined when the index is created. In fact, this number defines the maximum amount of data that the index can store. However, the search and return data of the read operation can be processed by the primary partition or replica partition at the same time, so the more replica partitions, the higher the throughput. On the running cluster, the number of replica fragments can be dynamically adjusted, and we can scale the cluster on demand.
{
	"number_of_replicas" : 2
}
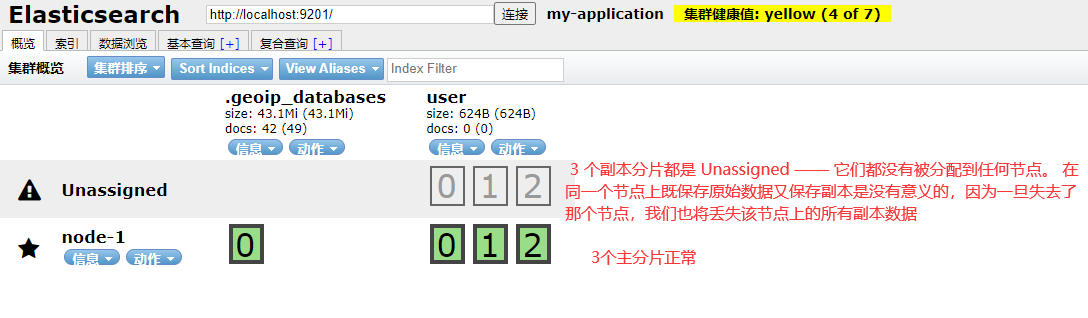
5.4. Fault response (node downtime)
When the primary node suddenly goes down, it is unavailable. At this time, the cluster must have a master node to ensure normal operation, so the first thing that happens is to elect a new master node: Node 2. When node1 node goes down, the primary partitions 1 and 2 are also lost, and the index cannot work normally when the primary partition is missing. At this time, the status of the cluster will change to red, that is, not all primary partitions are working normally.
However, there are complete replicas of these two primary partitions on other nodes, so the new primary node will immediately promote the replica partitions corresponding to these partitions on Node 2 and Node 3 to the primary partition. At this time, the status of the cluster will be yellow. The process of promoting the main partition occurs instantaneously, so there is no way to see the red state on the head.
5.5 route calculation
When a document is indexed, it is stored in a main partition. How does es store a document in which partition? First of all, this will definitely not be random, otherwise we won't know where to look for documents in the future. In fact, this process is determined according to the following formula:
shard = hash(routing) % number_of_primary_shards
routing is a variable value, which is the default value of the document_ id, which can also be set to a user-defined value. routing generates a number through the hash function, and then divides the number by number_ of_ primary_ The remainder is obtained after shards (the number of primary shards). The remainder distributed between 0 and number_of_primary_shards-1 is the location of the partition where the document is located.
5.6 slice control
5.6. 1. Write process
New, index and delete requests are all write operations. They must be completed on the primary partition before they can be copied to the relevant replica partition
- The client sends a new, index or delete request to Node1.
- Node uses the of the document_ id determines that the document belongs to fragment 0. The request will be forwarded to Node 3 because the primary partition of partition 0 is currently assigned to Node 3.
- Node3 executes the request on the primary partition. If successful, it forwards the request in parallel to the replica shards of Node1 and Node2. Once all replica shards report success, node3 will report success to the coordination node, and the coordination node will report success to the client.
5.6. 2. Read process
We can retrieve documents from the master shard or from any other replica shard
- The client sends a get request to Node1.
- Node uses the of the document_ id to determine that the document belongs to fragment 0. Replica shards of shard 0 exist on all three nodes. In this case, it forwards the request to Node2.
- Node2 returns the document to Node1, and then returns the document to the client
5.6. 3. Update process
- The client sends an update request to Node1.
- It forwards the request to Node3 where the primary partition is located.
- Node 3 retrieves the document from the main partition and modifies it_ JSON in the source field and try to re index the document of the main fragment. If the document has been modified by another process, it will retry step 3, exceeding retry_ on_ Give up after conflict times.
- If Node3 successfully updates the document, it forwards the new version of the document to the replica fragments on Node1 and Node2 in parallel and re establishes the index. Once all replica fragmentation returns success, Node3 returns success to the coordination node, and the coordination node returns success to the client.
5.7 slicing principle
Slice is the smallest work unit of ES. Traditional databases store a single value for each field, but this is not enough for full-text retrieval. Each word in the text field needs to be searched, which means that for the database, a single field needs the ability to index multiple values. The best support is that the data structure required for multiple values of a field is inverted index.
5.8 inverted index
ES uses a structure called inverted index, which is suitable for fast full-text search. If there is an inverted index, there must be a forward index. The more familiar name of forward index and inverted index is inverted index. The so-called forward index is that the search engine will correspond all the files to be searched with a file ID. when searching, the ID will correspond with the search keyword to form a K-V pair, and then count the keywords
5.9,Kibana
Kibana is a free and open user interface that allows you to visualize Elasticsearch data and navigate in the Elastic Stack. You can do everything from tracking query loads to understanding how requests flow through your entire application.
Download address: https://github.com/medcl/elasticsearch-analysis-ik/releases
Download address: https://www.elastic.co/cn/downloads/past-releases#kibana The same version as ES must be installed here
After downloading, unzip and modify kibana YML profile
server.port: 5601
elasticsearch.hosts: ["http://localhost:9201"]
kibana.index : ".kibana"
i18n.locale: "zh-CN"
Start Es first, and then kibana (under the bin directory).
6. Spring integration ElasticSearch
6.1 project initialization
First, create a Maven project first, and then add the subsequent dependency configuration to it. Alternatively, you can directly use springboot for quick initialization. Here, you can import the related dependencies first.
		<!-- Used to operate ElasticSearch -->
        <dependency>
            <groupId>org.springframework.boot</groupId>
            <artifactId>spring-boot-starter-data-elasticsearch</artifactId>
        </dependency>
Add the corresponding configuration:
server.port=8989
elasticsearch.host=127.0.0.1
elasticsearch.port=9200
logging.level.com.lzq=debug
Add an entity class here for ES index mapping
@Data
@NoArgsConstructor
@AllArgsConstructor
@ToString
@Document(indexName = "product", shards = 3, replicas = 1)
public class Product {
    @Id
    private Long id;
    /**
     * type : Field data type
     * analyzer : Word breaker type
     * index : Index (default: true)
     * Keyword : Phrase, no word segmentation
     */
    @Field(type = FieldType.Text, analyzer = "ik_max_word")
    private String title;
    @Field(type = FieldType.Keyword)
    private String category;
    @Field(type = FieldType.Double)
    private Double price;
    @Field(type = FieldType.Keyword, index = false)
    private String images;
}
Add a Dao interface and inherit it to the ElasticsearchRepository class. The ElasticsearchRepository class encapsulates a series of methods for ES operation, which is similar to the BaseMapper of mybatis plus.
@Repository
public interface ProductDao extends ElasticsearchRepository<Product,Long> {
}
Finally, add a configuration class
- ElasticsearchRestTemplate is a class in spring data elasticsearch project, which is similar to the template in other spring projects.
- In the new version of spring data elasticsearch, ElasticsearchRestTemplate replaces the original ElasticsearchTemplate. The reason is that ElasticsearchTemplate is based on TransportClient, which will be launched in August Removed in later versions of X.
- ElasticsearchRestTemplate is based on the RestHighLevelClient client. You need to customize the configuration class, inherit AbstractElasticsearchConfiguration, implement elasticsearchClient() abstract method, and create RestHighLevelClient object.
@ConfigurationProperties(prefix = "elasticsearch")
@Configuration
@Data
public class EsConfig extends AbstractElasticsearchConfiguration {
    private String host;
    private Integer port;

    @Override
    public RestHighLevelClient elasticsearchClient() {
        RestClientBuilder builder = RestClient.builder(new HttpHost(host, port));
        RestHighLevelClient restHighLevelClient = new
                RestHighLevelClient(builder);
        return restHighLevelClient;
    }
}
6.2 index operation
Here, you can directly use the test test provided by springBoot to test,
6.2. 1. Create index
Start the service directly here, or compile the program through the Test here. The index here will be created through the entity class. After creation, you can use: http://localhost:9200/_cat/indices?v View all indexes
    @Test
    public void createIndex(){
        //When you create an index, the system will automatically create an index during initialization
        System.out.println("Create index");
    }
6.2. 2. Delete index
Here, the ElasticsearchRestTemplate template needs to be injected first, and subsequent operations can be directly operated through the method encapsulated by this template.
    @Autowired
    private ElasticsearchRestTemplate elasticsearchRestTemplate;

    @Test
    public void deleteIndex(){
        boolean flg = elasticsearchRestTemplate.deleteIndex(Product.class);
        System.out.println("Delete index = " + flg);
    }
6.3 document operation
The document operation here still uses the methods provided by the parent class implemented by the ProductDao interface.
    @Autowired
    private ProductDao productDao
    @Test
    public void insert(){
        Product product = new Product();
        product.setId(1L);
        product.setCategory("miao shu");
        product.setImages("image address");
        product.setPrice(50.0);
        product.setTitle("title 1");
        // The same method is used for addition and modification. Judge whether the id exists, and add and modify it automatically
        productDao.save(product);
    }

    @Test
    public void find(){
        Product product = productDao.findById(1L).get();
        System.out.println(product);
    }

    @Test
    public void findAll(){
        Iterable<Product> all = productDao.findAll();
        for (Product product : all){
            System.out.println(product);
        }
    }

    @Test
    public void delete(){
        Product product = new Product();
        product.setId(2L);
        productDao.delete(product);
    }

    @Test
    public void insertAll(){
        List<Product> productList = new ArrayList<>();
        for (int i =0;i<10;i++){
            Product product = new Product();
            product.setId(Long.valueOf(i));
            product.setTitle("title["+i+"]");
            product.setCategory("category"+i);
            product.setPrice(1999.0+i);
            product.setImages("image"+i);
            productList.add(product);
        }
        productDao.saveAll(productList);
    }

    @Test
    public void page(){
        Sort sort = Sort.by(Sort.Direction.DESC,"id");
        int currentPage=0;
        int pageSize = 5;
        //Set query paging
        PageRequest pageRequest = PageRequest.of(currentPage, pageSize,sort);
        Page<Product> productPage = productDao.findAll(pageRequest);
        for (Product product : productPage.getContent()) {
            System.out.println(product);
        }
    }
6.4 document search
    @Test
    public void termQuery() {
        TermQueryBuilder termQueryBuilder = QueryBuilders.termQuery("title", "5");
        Iterable<Product> products = productDao.search(termQueryBuilder);
        for (Product product : products) {
            System.out.println(product);
        }
    }

    @Test
    public void termQueryByPage() {
        int currentPage = 0;
        int pageSize = 5;
        //Set query paging
        PageRequest pageRequest = PageRequest.of(currentPage, pageSize);
        TermQueryBuilder termQueryBuilder = QueryBuilders.termQuery("title", "title");
        Iterable<Product> products = productDao.search(termQueryBuilder, pageRequest);
        for (Product product : products) {
            System.out.println(product);
        }
    }
7. ElasticSearch optimization
7.1 hardware selection
Elasticsearch is based on Lucene. All index and document data are stored on local disks. The greater the throughput that the disk can handle, the more stable the node will be.
7.2 slice strategy
7.2. 1. Reasonably set the number of slices
The design of sharding and replica provides ES with the characteristics of supporting distribution and failover, but it does not mean that sharding and replica can be allocated indefinitely. Moreover, after the partition of the index is allocated, the number of partitions cannot be modified due to the routing mechanism of the index.
Moreover, the larger the slice, the better. This is because:
- The underlying layer of a partition is a Lucene index, which will consume a certain file handle, memory and CPU operation
- Each search request needs to hit each fragment in the index. It's ok if each fragment is in a different node, but it will split if multiple fragments need to compete on the same node and use the same resources
Therefore, it is also necessary to adjust the settings for segmentation
- It is controlled that the hard disk capacity occupied by each partition does not exceed the heap space setting of the maximum JVM of ES (generally no more than 32G, refer to the JVM setting principle below). Therefore, if the total capacity of the index is about 500G, the partition size can be about 16; of course, it is best to consider principle 2 at the same time.
- Considering the number of nodes, a node is sometimes a physical machine. If the number of partitions is too large, which greatly exceeds the number of nodes, it is likely to lead to multiple partitions on a node. Once the node fails, even if more than one replica is maintained, it may also lead to data loss and the cluster cannot recover. Therefore, it is generally set that the number of slices does not exceed 3 times the number of nodes.
- The number of primary partitions, replicas and the maximum number of nodes can refer to the following relationship during allocation: number of nodes < = number of primary partitions * (number of replicas + 1)
7.2. 2. Postpone partition allocation
For the problem of instantaneous interruption of nodes, by default, the cluster will wait one minute to check whether the node will rejoin. If the node rejoins during this period, the rejoined node will maintain its existing partition data and will not trigger new partition allocation. This can reduce the huge overhead of ES in automatically rebalancing available fragments. By modifying the parameter delayed_timeout, which can extend the rebalancing time, can be set globally or in the index
Level to modify:
PUT /_all/_settings
{
	"settings": {
		"index.unassigned.node_left.delayed_timeout": "5m"
	}
}
7.3 routing
When we query a document, how does elastic search know which partition a document should be stored in? In fact, it is calculated through the following formula: the default value of routing is the document id, or user-defined values, such as user id, can be used
shard = hash(routing) % number_of_primary_shards
Query without routing
When querying, the whole process is divided into two steps because we don't know which partition the data to be queried is on
- Distribution: after the request reaches the coordination node, the coordination node distributes the query request to each partition.
- Aggregation: the coordination node collects the query results on each slice, sorts the query results, and then returns the results to the user.
Query with routing
When querying, you can directly locate an allocation query according to the routing information. You do not need to query all the allocations, but sort through the coordination node. Query the user defined above. If the routing is set to userid, you can directly query the data, and the efficiency is greatly improved.
7.4. Write speed optimization
7.4. 1. Batch data submission
ES provides Bulk API to support batch operations. When we have a large number of write tasks, we can use Bulk to write in batches.
The general policy is as follows: the volume of data submitted in batch cannot exceed 100M by default. The number of data pieces is generally determined according to the size of the document and the performance of the server, but the data size of a single batch should gradually increase from 5MB to 15MB. When the performance is not improved, take this data amount as the maximum.
7.4. 2. Fair use consolidation
Lucene stores data in segments. When new data is written to the index, Lucene will automatically create a new segment. As the amount of data changes, the number of segments will increase, the number of multi file handles and CPU consumed will increase, and the query efficiency will decrease. Because Lucene segment merging requires a large amount of computation and consumes a large amount of I/O, ES adopts a more conservative strategy by default to allow the background to merge segments regularly
7.4. 3. Reduce the number of refreshes
When Lucene adds data, it adopts the strategy of delayed writing. By default, the index is refreshed_ The interval is 1 second. Lucene writes the data to be written to memory first, When it exceeds 1 second (the default), Refresh will be triggered, and then Refresh will Refresh the data in memory to the file cache system of the operating system. If we do not have high requirements for the effectiveness of search, we can extend the Refresh cycle, such as 30 seconds. This can also effectively reduce the number of segment refreshes, but it also means that more Heap memory needs to be consumed.
7.4. 4. Increase the Flush setting
The main purpose of Flush is to persist the segments in the file cache system to the hard disk. When the data volume of Translog reaches 512MB or 30 minutes, Flush will be triggered once. index. Translog. Flush_ threshold_ The default value of the size parameter is 512MB, which can be modified. Increasing the parameter value means that more data may need to be stored in the file cache system, so we need to leave enough space for the file cache system of the operating system.
7.4. 5. Reduce the number of replicas
ES to ensure the availability of the cluster, Provides replicas (Replica) support. However, each replica will also perform analysis, indexing and possible merging processes, so the number of replicas will seriously affect the efficiency of writing the index. When writing the index, you need to synchronize the written data to the replica node. The more replica nodes, the slower the efficiency of writing the index. If you need to write in large quantities, you can disable replica replication first , set index number_ of_ Replicas: 0 close replica. After the write is complete, replica is modified back to the normal state.
7.5. Memory setting
The default memory set after ES installation is 1GB, which is too small for any real business. Include a JVM in the ES installation file Option file, add the following commands to set the heap size of ES, Xms represents the initial size of the heap, Xmx represents the maximum memory that can be allocated, both of which are 1GB. Ensure that the sizes of Xmx and Xms are the same. The purpose is to waste resources without re separating and calculating the size of the heap area after the Java garbage collection mechanism has cleaned up the heap area, so as to reduce the pressure caused by scaling the heap size.
The allocation of ES heap memory needs to meet the following two principles:
- Do not exceed 50% of physical memory:
- The size of heap memory should not exceed 32GB:
7.6 configuration description
| Parameter name | Parameter value | explain |
|---|---|---|
| cluster.name | elasticsearch | Configure the cluster name of ES. The default value is es. It is recommended to change it to a name related to the stored data. Es will automatically find nodes with the same cluster name under the same network segment |
| node.name | node-1 | Node names in a cluster cannot be duplicated in the same cluster. Once the node name is set, it cannot be changed. Of course, it can also be set to the host name of the server, such as node name:${HOSTNAME}. |
| node.master | true | Specifies whether the node is eligible to be elected as a Master node. The default is True. If it is set to True, it is only eligible to become a Master node. Whether it can become a Master node needs to be elected. |
| node.data | true | Specifies whether the node stores index data. The default is True. Data addition, deletion, modification and query are all completed in the data node. |
| index.number_of_shards | 1 | Set the number of index slices. The default is 1 slice. You can also set this value when creating an index. The specific setting depends on the size of the data volume. If the amount of data is small, the efficiency is the highest when it is set to 1 |
| index.number_of_replicas | 1 | Set the default number of index copies, which is 1 by default. The more replicas, the better the availability of the cluster, but the more data needs to be synchronized when writing the index. |
| transport.tcp.compress | true | Set whether to compress data when transmitting data between nodes. The default value is False and not compressed |
| discovery.zen.minimum_master_nodes | 1 | Set the minimum number of candidate master nodes to participate in the election of master nodes. The default is 1. If the default value is used, brain fissure may occur when the network is unstable. The reasonable value is (master_eligible_nodes/2)+1, where Master_ eligible_ Nodes indicates the number of candidate primary nodes in the cluster |
| discovery.zen.ping.timeout | 3s | Set the timeout of Ping connection when automatically discovering other nodes in the cluster. The default is 3 seconds. In a poor network environment, it needs to be set larger to prevent partition transfer due to misjudgment of the survival state of the node |
8. ElasticSearch summary
8.1 why use ES
With the development of business and the passage of time, there will be a lot of data in the system. In business, fuzzy query is often used for data search, and fuzzy query will cause the query engine to give up the index, resulting in full table scanning when the system queries the data. In a million level database, the query efficiency is very low, and we use es to do a full-text index, Query some fields of frequently queried system functions as the index of ES.
8.2 ES master node election process
- The selection of Elasticsearch is the responsibility of ZenDiscovery module, which mainly includes ping (nodes discover each other through this RPC) and Unicast (Unicast module contains a host list to control which nodes need ping)
- All nodes that can become a master (node.master: true) are sorted according to the nodeId dictionary. Each time, each node is elected, the nodes they know are ranked in order, and then the first (bit 0) node is selected. For the time being, it is considered a master node.
- If the number of votes for a node reaches a certain value (it can become the number of master nodes n/2+1) and the node elects itself, the node is the master. Otherwise, re-election will continue until the above conditions are met.
- The responsibilities of the master node mainly include the management of clusters, nodes and indexes, and are not responsible for document level management; The data node can turn off the http function.
8.3 causes and solutions of ES cluster cerebral fissure
Causes of cerebral fissure:
- Network problem: the network delay between clusters causes some nodes to lose access to the master. They think the master is dead, so they elect a new master, mark the partitions and replicas on the master in red, and assign a new master partition
- Node load: the role of the master node is both master and data. When the traffic is large, the ES may stop responding and cause a large area delay. At this time, other nodes cannot get the response from the master node. It is considered that the master node is dead and the master node will be re selected.
- Memory recycling: the ES process on the data node occupies a large amount of memory, causing the JVM to reclaim large-scale memory, causing the ES process to lose response.
Solution
- Reduce misjudgment: discovery zen. ping_ The timeout node status response time is 3s by default and can be increased appropriately. If the master does not respond within the response time range, it is judged that the node has hung up. Increasing the parameters (such as 6s, discovery.zen.ping_timeout:6) can appropriately reduce misjudgment.
- Election trigger: discovery zen. minimum_ master_ Nodes: this parameter is used to control the minimum number of cluster primary nodes where election behavior occurs. When the number of alternative master nodes is greater than or equal to the value of this parameter, and there are nodes of this parameter in the alternative master nodes, it is considered that the master node is hung, and the election is carried out. The official recommendation is (n/2) + 1, n is the number of primary nodes (that is, the number of nodes qualified to become primary nodes)
- Role separation: that is, the master node is separated from the data node, limiting roles
The primary node is configured as node master: true node. data: false
The slave node is configured as: node master: false node. data: true
8.4 ES query document process
-
By default, the coordination node uses the document ID to participate in the calculation (also supports routing), so as to provide appropriate fragments for routing:
shard = hash(document_id) % (num_of_primary_shards)
-
When the node where the partition is located receives the request from the coordination node, it will write the request to the Memory Buffer, and then write it to the Filesystem Cache regularly (every 1 second by default). This process from the Memory Buffer to the Filesystem Cache is called refresh;
-
Of course, in some cases, the data with Momery Buffer and filesystem cache may be lost. ES ensures the reliability of the data through the translog mechanism. The implementation mechanism is that after receiving the request, it will also be written to the translog. When the data in the filesystem cache is written to the disk, it will be cleared. This process is called flush;
-
In the flush process, the buffer in memory will be cleared and the content will be written to a new segment. The fsync of the segment will create a new commit point and refresh the content to disk. The old translog will be deleted and a new translog will be started.
-
The timing of flush trigger is timed trigger (30 minutes by default) or when the translog becomes too large (512M by default);
8.5 ES update and delete document process
- Deletion and update are also write operations, but the documents in Elasticsearch are immutable, so they cannot be deleted or changed to show their changes;
- Each segment on the disk has a corresponding del file. When the delete request is sent, the document is not really deleted, but in del file is marked for deletion. The document can still match the query, but it will be filtered out in the results. When segments are merged, in Documents marked for deletion in the del file will not be written to the new segment.
- When a new document is created, Elasticsearch will specify a version number for the document. When the update is performed, the old version of the document will be updated The del file is marked for deletion, and the new version of the document is indexed to a new segment. The old version of the document can still match the query, but it will be filtered out in the results.
8.6 in the case of concurrency, if the ES data is consistent in reading and writing
- Optimistic concurrency control can be used through the version number to ensure that the new version will not be overwritten by the old version, and the application layer will handle specific conflicts;
- In addition, for write operations, the consistency level supports quorum/one/all, and the default is quorum, that is, write operations are allowed only when most shards are available. However, even if most of them are available, there may be failure to write to the replica due to network and other reasons. In this way, the replica is considered to be faulty, and the fragment will be rebuilt on a different node.
- For read operations, you can set replication to sync (default), which makes the operation return only after the primary partition and replica partition are completed; If replication is set to async, you can also set the search request parameters_ The preference is the primary node to query the primary partition and ensure that the document is the latest version.