preface:
With the prevalence of microservices, the projects we create are basically parent-child projects. We introduce jars through the parent project and define unified version numbers, so that we can directly reference and use them in the child projects without repeating the declaration of version numbers, which will facilitate the unified management of jar packages of the whole project, Make the project hierarchy clearer. Usually, when we create a micro service architecture, it is a parent project, and then there are api sub projects, common component sub projects, pojo entity class projects, service service projects, etc. they perform their respective duties and jointly build a complete distributed service. Needless to say, how to create this parent-child project in actual operation.
1, Create parent-child project
1. Create parent project
- Step 1: file – > New – > project – > maven
The parent project is just an ordinary maven project. We directly create an ordinary maven project without introducing any jar packages. Here we go to the next step
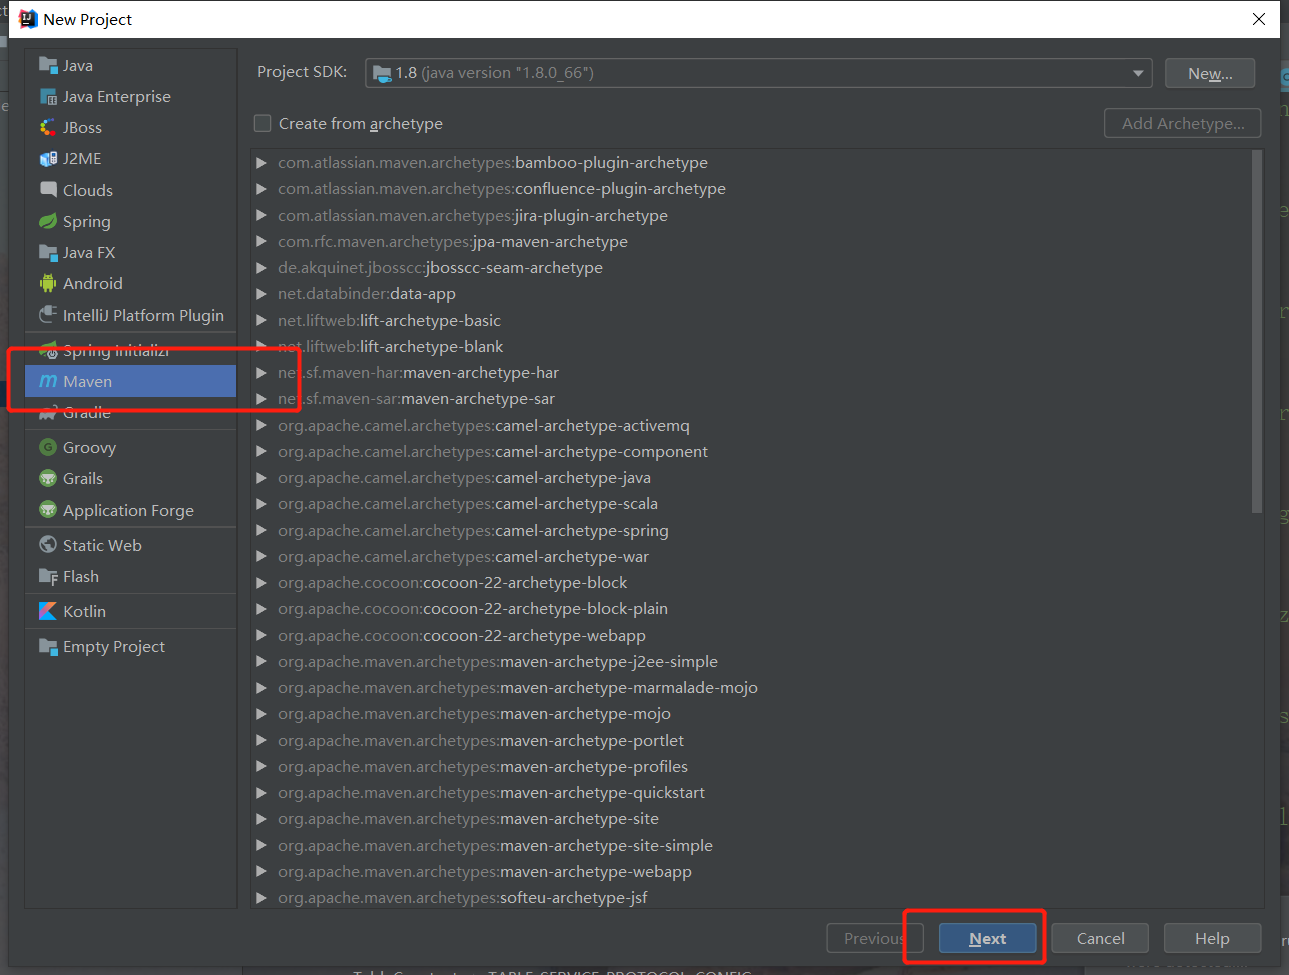
- Step 2: enter groupid and artifactid. There is no stress here. Name it to see your mood, and then continue to the next step
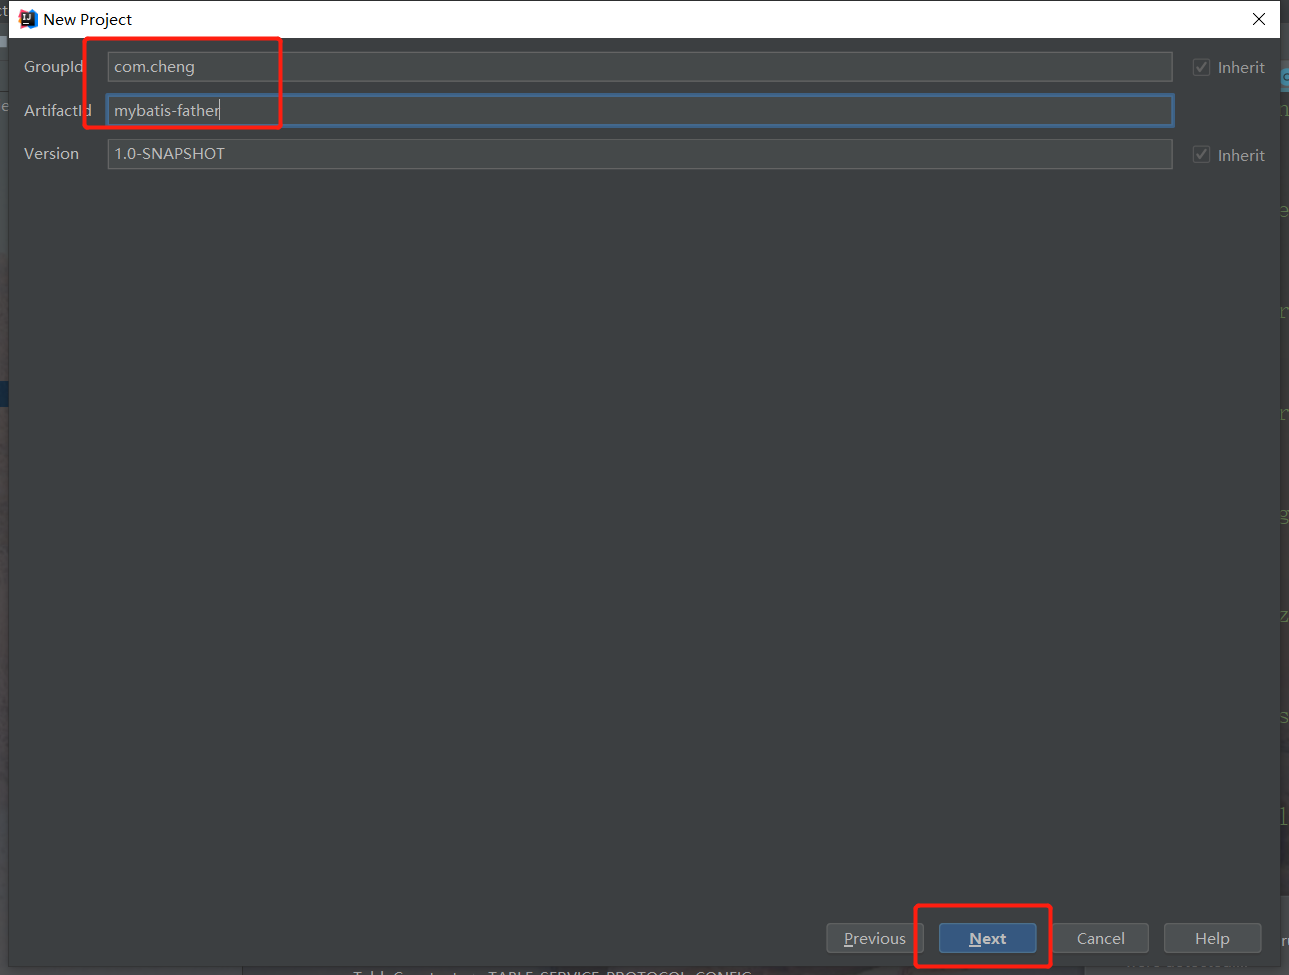
- Step 3: here, the normal maven project is completed and the src is deleted (the parent project is not used)
- Step 4: configure POM xml
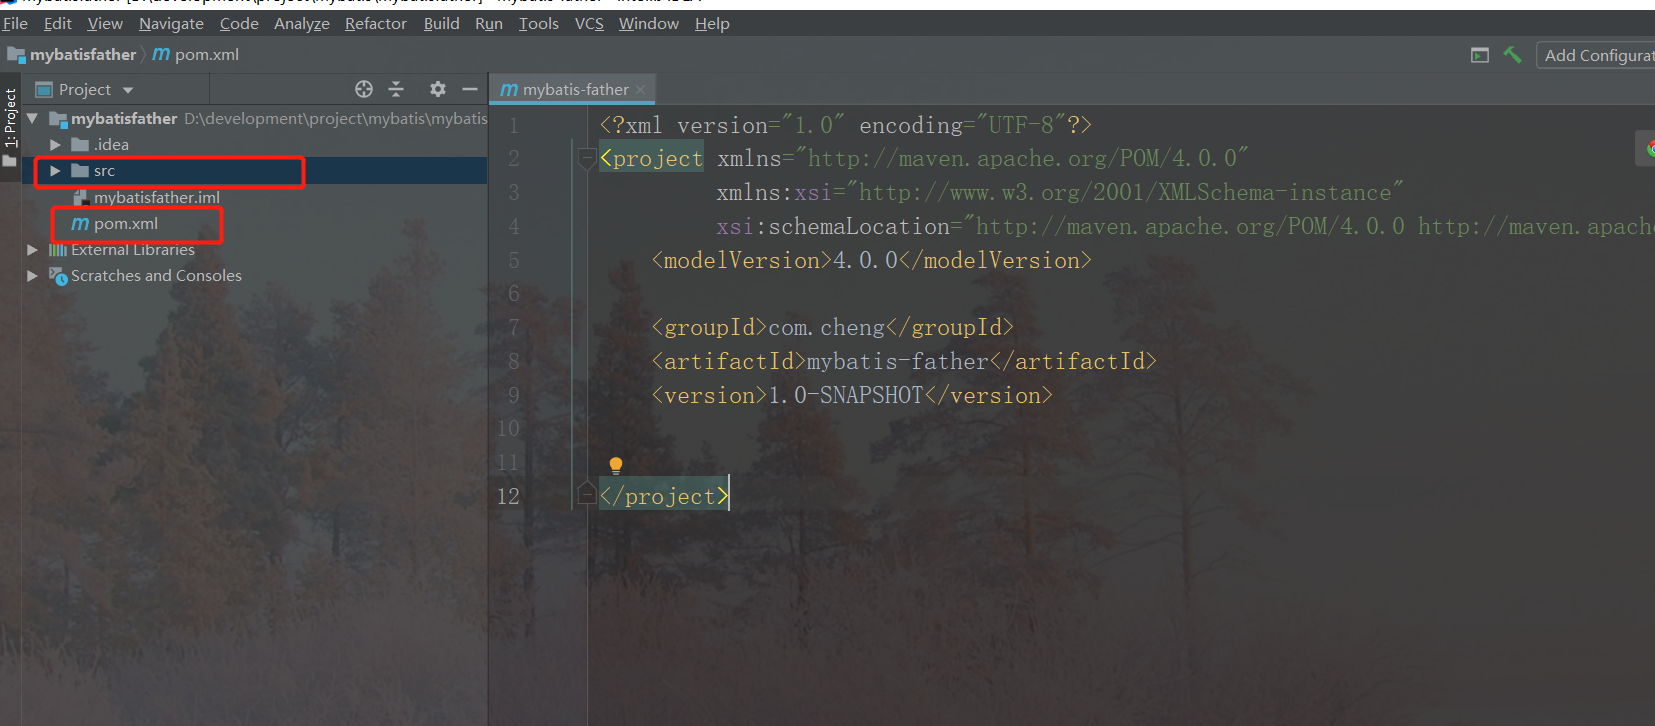
We use properties to uniformly manage the version number, dependency management to manage dependencies, and declare that the packaging method of the parent project is pom. The specific operations are as follows:
It should be noted here that the dependencies of the parent project can be directly placed in dependencies or wrapped with a layer of dependency management. However, if you want to directly point to the parent project in the child project, you need to use dependency management to manage the dependencies. However, the version number of the dependencies in the child project needs to be declared again. In addition, the packaging method of the parent project should be pom, not jar. Here, it needs to be declared manually using packaging.<?xml version="1.0" encoding="UTF-8"?> <project xmlns="http://maven.apache.org/POM/4.0.0" xmlns:xsi="http://www.w3.org/2001/XMLSchema-instance" xsi:schemaLocation="http://maven.apache.org/POM/4.0.0 http://maven.apache.org/xsd/maven-4.0.0.xsd"> <modelVersion>4.0.0</modelVersion> <groupId>com.cheng</groupId> <artifactId>mybatis-father</artifactId> <packaging>pom</packaging> <version>1.0-SNAPSHOT</version> <properties> <mybatis-version>3.5.6</mybatis-version> <mysql-connector-version>5.1.38</mysql-connector-version> <junit-version>4.13</junit-version> </properties> <dependencyManagement> <dependencies> <dependency> <groupId>org.mybatis</groupId> <artifactId>mybatis</artifactId> <version>${mybatis-version}</version> </dependency> <dependency> <groupId>mysql</groupId> <artifactId>mysql-connector-java</artifactId> <version>${mysql-connector-version}</version> </dependency> <dependency> <groupId>junit</groupId> <artifactId>junit</artifactId> <version>${junit-version}</version> </dependency> </dependencies> </dependencyManagement> </project>
2. Create sub project
- 1) Step 1: create a module sub project
In this step, you can choose to use spring initializer to create a sub project, or you can choose maven to create it directly. By selecting spring initializer, we can select the required dependencies, so there is no need to import them manually. After selecting maven to create us, we also need to import jar s manually. Here is to show the dependency relationship between parent and child projects. We use maven to create them. As shown below:

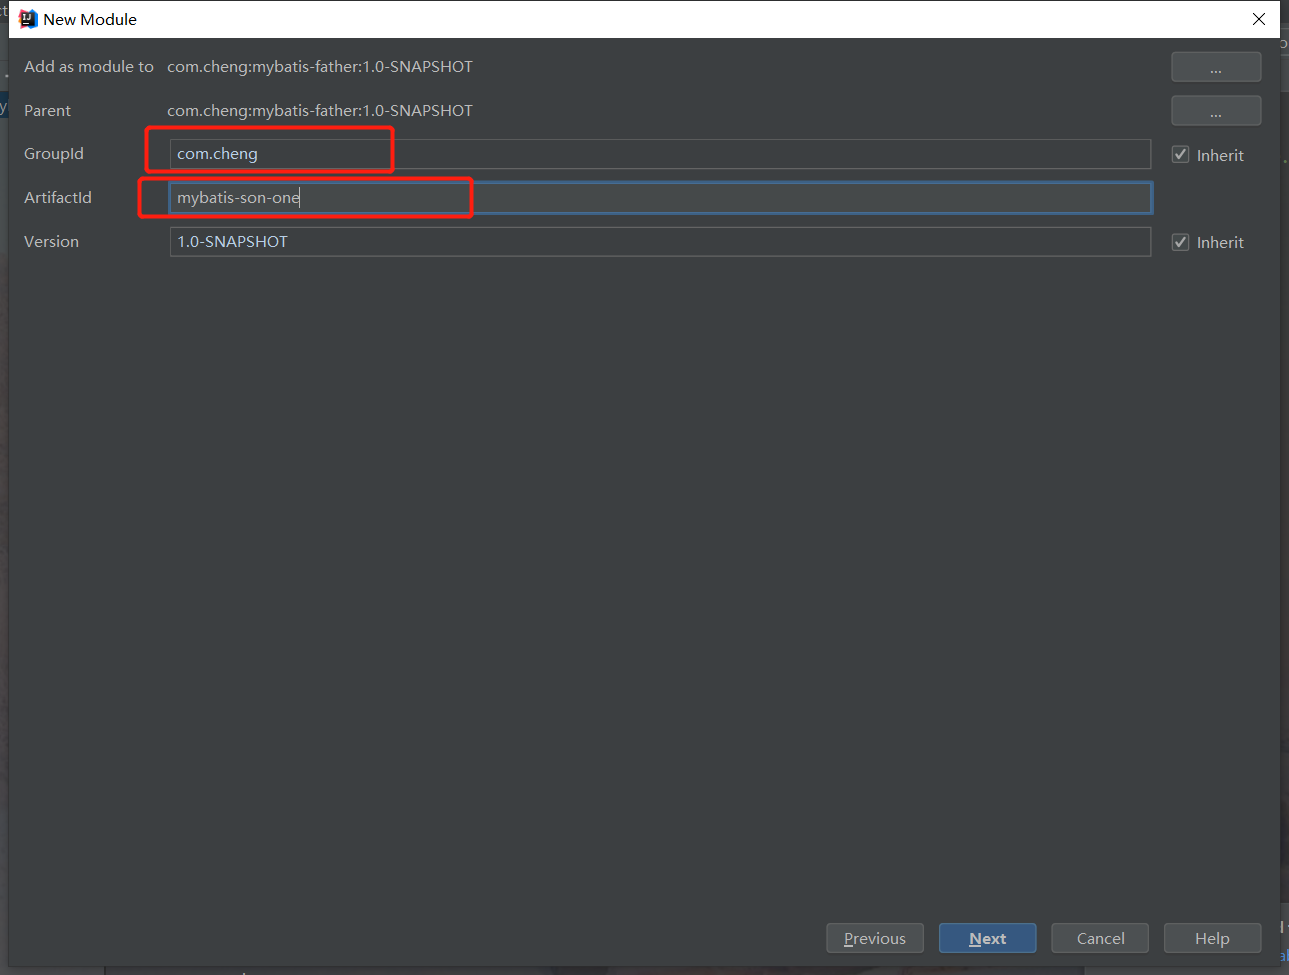
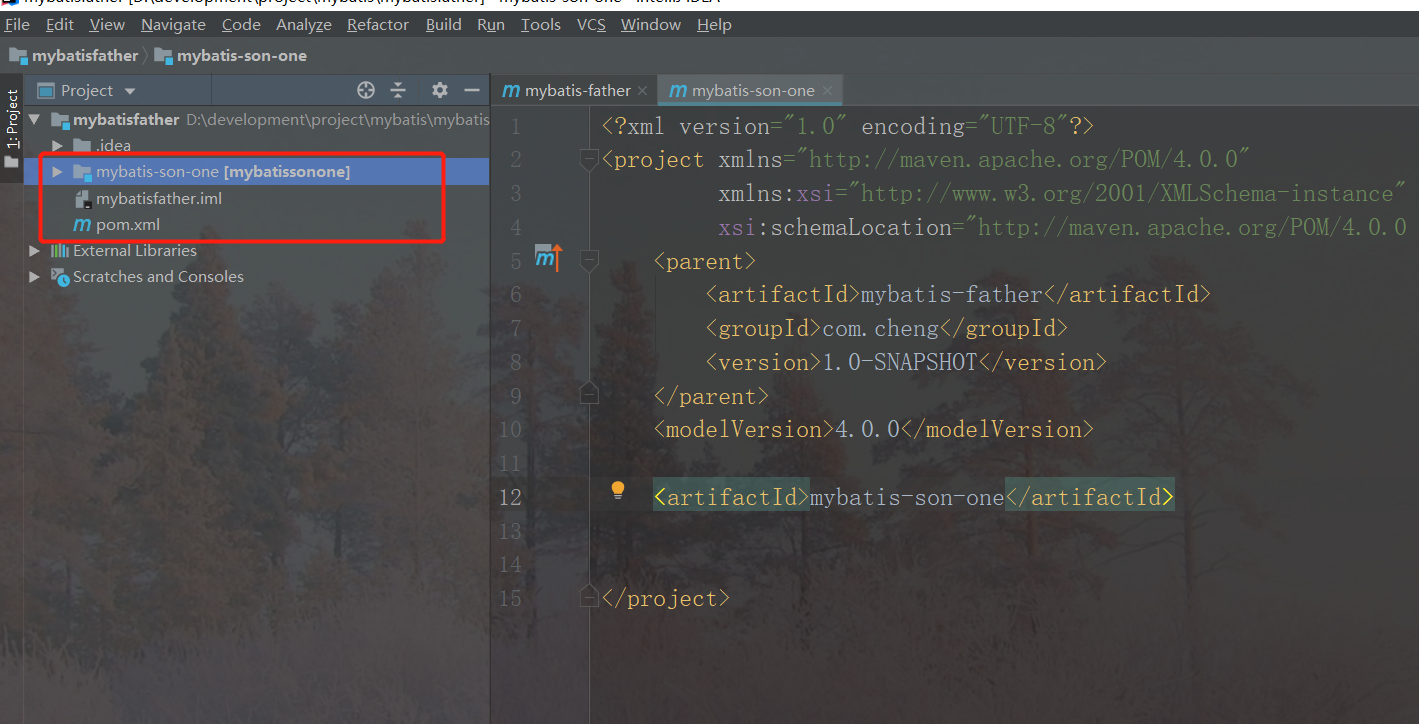
- 2) Declare artifactid
We don't need to declare the groupid here. Because it is a sub project, the value is fixed. We can customize the artifactid, as shown in the figure below. After this, we can next find.
- 3) Display subproject
The following is the sub project we just created.
- 4) Configure POM of subproject xml
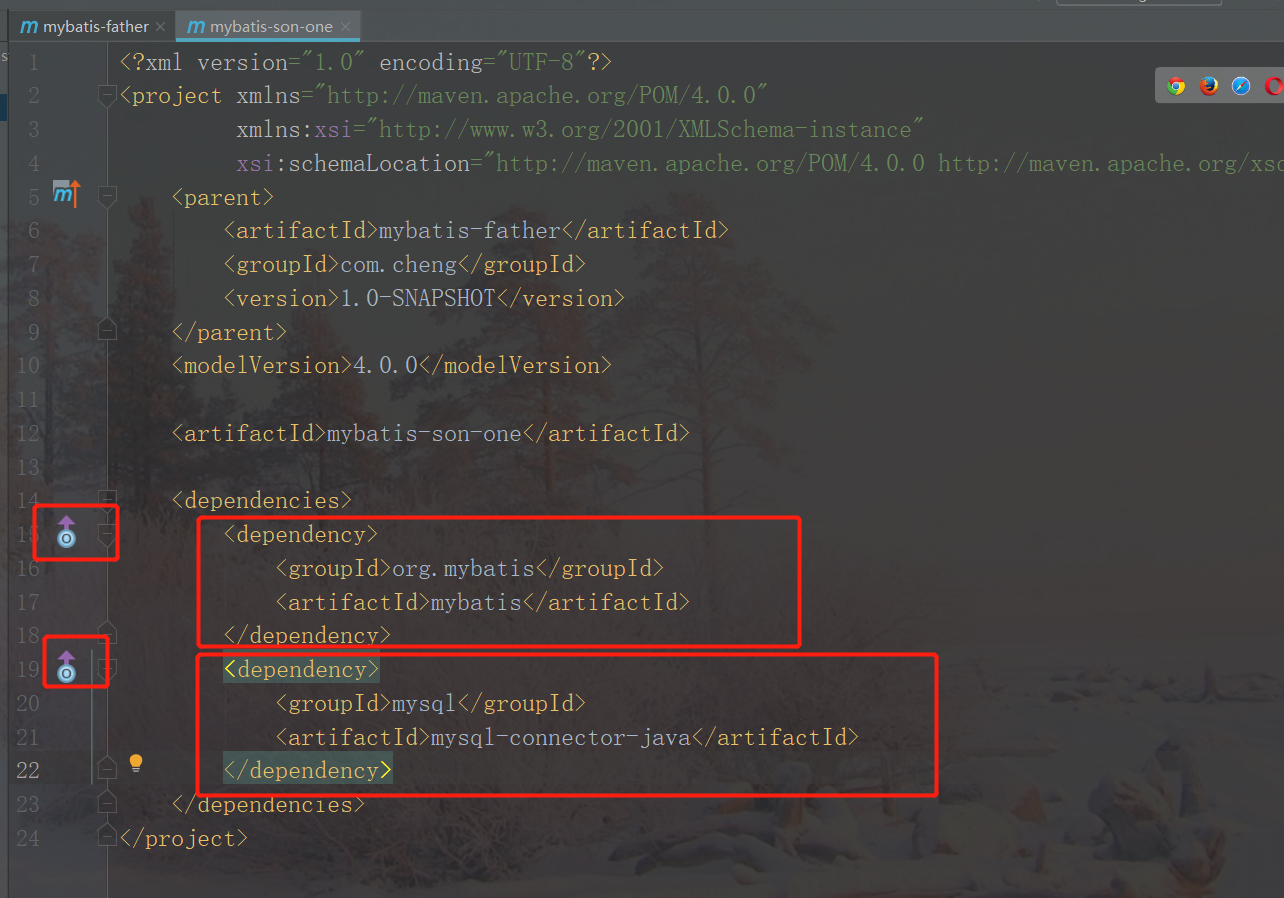
First, we need to introduce different jar packages for different sub projects. Of course, only one sub project is shown here. We introduce the jar packages in the parent project into the current sub project, as shown in the following figure,
We don't need to declare the version number in the subproject. Why? You can see that there is a purple up arrow on the left of the import dependency location. Click it to find that it jumps to the parent project, which is why we don't need to declare the version number. Because the current jar package reference points to the parent project, they share the version number. Of course, the jar package still needs to be imported for the child project that shares the version number.
2, Points needing attention
All operations are finished here. In fact, it is easy to create a parent-child project. Everything will be easy if it is difficult. However, there are several points that need to be paid attention to. The author lists them and we encourage each other.
1.Parent project pom.xml The file should be packaged as pom
2.If you want the dependency of the child project to point to the parent project, the dependency of the parent project should use dependencyManagement To manage.