Windows7_ultimate_x64
Qt 5.11.1 Official download address
CMake 3.12.1 Official download address
OpenCV 3.4.3 Official download address
1, Install Qt
This version is used here: QT opensource windows x86 5.9.2 Exe, you can directly search this keyword and download it on the Internet,
Qt needs to select a compiler during installation. This paper uses C + + as the development language. The compiler can choose MinGW or MSVC. MSVC needs to install the corresponding version of Visual Studio as support. This paper selects MinGW and tick the corresponding version of MinGW during installation.

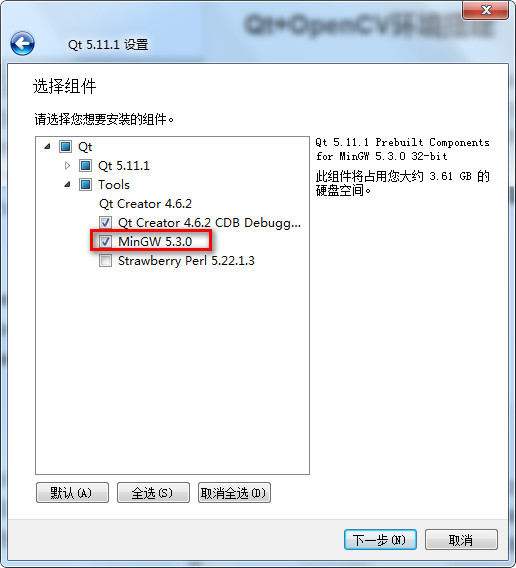
QT installation completed
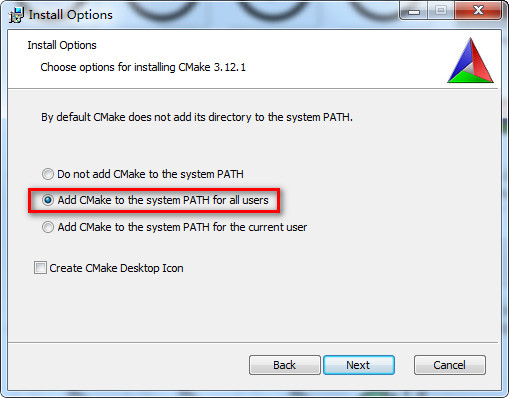
2, Install CMake. Generally, those downloaded from the Internet can be decompressed directly. In case of installation, you can install it according to the following figure
Check "Add CMake to the system PATH for all users" during installation.
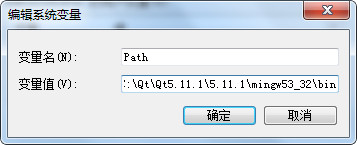
3, Add MinGW environment variable for QT
Add the Path of MinGW under Path (different according to your own Qt installation Path, pay attention to use; separation when adding environment variables). After the configuration is completed, you need to restart the computer to take effect.
C:\Qt\Qt5.11.1\5.11.1\mingw53_32\bin
C:\Qt\Qt5.11.1\Tools\mingw530_32\bin
4, Compiling OpenCV
OpenCV must be compiled through Cmake to generate files that can be used locally. You can refer to the file path in qt
Install and run directly. Compile after installation.
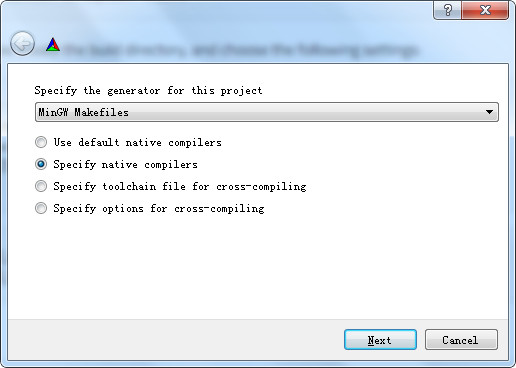
Run cmake GUI Exe, select the source code path and compilation output path of OpenCV respectively
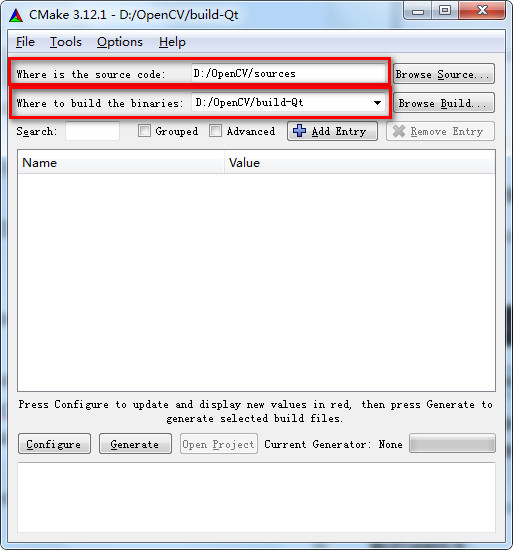
Click Configure to configure as follows, and then next
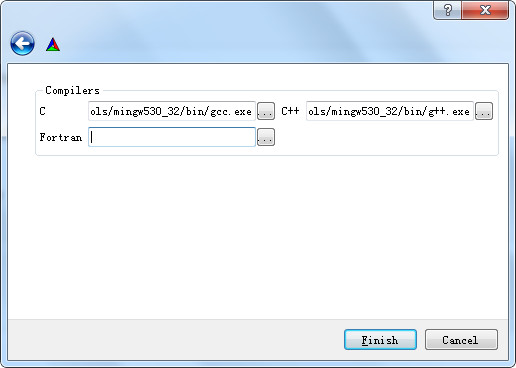
Configure the compiler path and finish
C: C:/Qt/Qt5.11.1/Tools/mingw530_32/bin/gcc.exe
C++: C:/Qt/Qt5.11.1/Tools/mingw530_32/bin/g++.exe
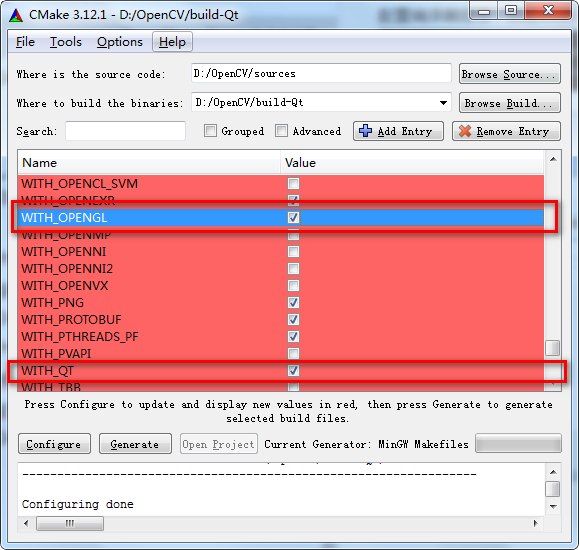
After the first configure, check WITH_QT and WITH_OPENGL, click Configure again
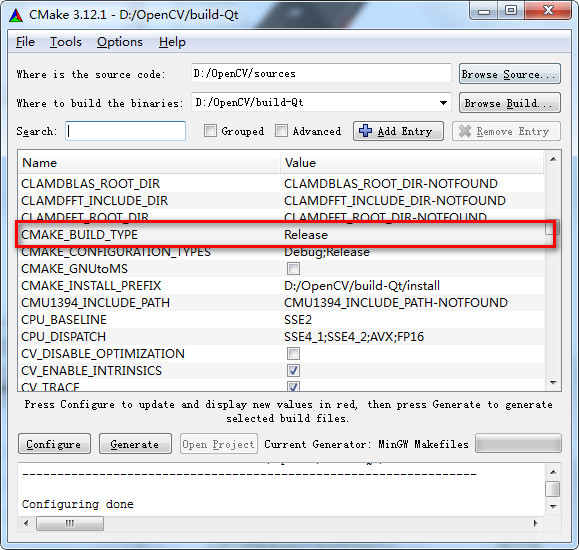
After the second configure, cmake_ BUILD_ Change the type to Release and click Configure again
After the third configure, click generate. After the generation, open cmd, enter the compilation output directory, and execute the compilation instruction (- j indicates multi-threaded work. The computer is a multi-core CPU, and the following parameters can be set to save compilation time)
d:
cd OpenCV
cd build-Qt
mingw32-make -j 4
mingw32-make install
If an error like this is encountered during compilation
... windres.exe: unknown option -- W ...
You can set enable when configuring Cmake_ PRECOMPILED_ Heads closes and recompiles.
If an error like this is encountered during compilation
'sprintf_instead_use_StringCbPrintfA_or_StringCchPrintfA' was not declared in this scope
You can modify the source file of OpenCV in cap_ dshow. Search in cpp file
#include "DShow.h"
Add before this line of code
#define NO_DSHOW_STRSAFE
Then recompile can be solved.
If an error like this is encountered during compilation
using invalid field '{anonymous}::ComPtr<T>::p'
You can set with in Cmake configuration_ MSFS shutdown and recompilation can be solved.
If an error like this is encountered during compilation
'nullptr' was not declared in this scope
You can set enable in Cmake configuration_ Cxx11 can be solved by opening and recompiling.
After the compilation is successful, add the compiled library to the system environment variable and add it in Path (according to your own compilation Path)
D:\OpenCV\build-Qt\install\x86\mingw\bin
4, Test Qt+OpenCV environment
Create a new QWindow project named TestOpenCV, and modify the project configuration file TestOpenCV Pro, add the file containing path and required library file at the end of the file
INCLUDEPATH += D:\OpenCV\build\include

LIBS += D:\OpenCV\build-Qt\bin\libopencv_core343.dll
LIBS += D:\OpenCV\build-Qt\bin\libopencv_highgui343.dll
LIBS += D:\OpenCV\build-Qt\bin\libopencv_imgcodecs343.dll
LIBS += D:\OpenCV\build-Qt\bin\libopencv_imgproc343.dll
LIBS += D:\OpenCV\build-Qt\bin\libopencv_features2d343.dll
LIBS += D:\OpenCV\build-Qt\bin\libopencv_calib3d343.dll
Modify MainWindow The cpp file is as follows
#include "mainwindow.h"
#include "ui_mainwindow.h"

#include <opencv2/core/core.hpp>
#include <opencv2/highgui/highgui.hpp>


MainWindow::MainWindow(QWidget *parent) :
    QMainWindow(parent),
    ui(new Ui::MainWindow)
{
    ui->setupUi(this);

    // read an image
    cv::Mat image = cv::imread("d://1.jpg", 1);
    // create image window named "My Image"
    cv::namedWindow("My Image");
    // show the image on window
    cv::imshow("My Image", image);
}

MainWindow::~MainWindow()
{
    delete ui;
}
After running successfully, the environment is built successfully.
5, Compile the boost source code as a static library
 1>Put your Qt Tool catalog for(have g++.exe)Set environment variables. (mine is) F:\Qt592\Tools\mingw530_32\bin,(according to the actual situation)
 2>download boost Source code and extract it (e.g boost_1_65_1.zip)
 3>Enter at the command line boost_1_65_1/tools/build/src/engine
 4>implement build.bat gcc,Will be generated in the current directory bin.ntx86 Folder, which contains two exe file b2.exe,bjam.exe
 5>take bin.ntx86\bjam.exe copy to E:\boost_1_65_1
 6>change dir get into boost_1_65_1
 7>Execute command bjam "toolset=gcc" install,Executing the command will C Generate a file under the root directory Boost folder. The header file we want to use is the same as lib It's inside.
The following two steps are critical:
  8>Will 7>Generated in Boost Inside boost Copy folder to qt of include Below (mine) F:\Qt592\5.9.2\mingw53_32\include)
  9>Will 7>Generated in Boost Inside lib lower.a Copy files to qt lib Under the directory (mine) F:\Qt592\5.9.2\mingw53_32\lib)