Original link: here
0. Preface
In the previous article, we downloaded the front-end code and modified the front-end code, and successfully ran the modified front-end code. In this piece, we updated the modified front-end code to the server.
There are two ways of thinking. The first is to mount the front-end code on the server. The other is to package the front-end code into an image file and write docker compose In the YML file.
1. Mount the front-end code to the server
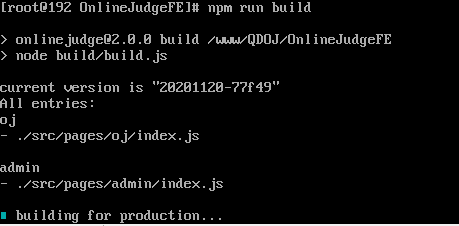
We will open the code modified in the previous article, switch to the corresponding directory, and then execute
npm run build
Wait for a while and you will be prompted with success
At this time, our front-end folder will have another dist folder. At this time, our packaged folder.
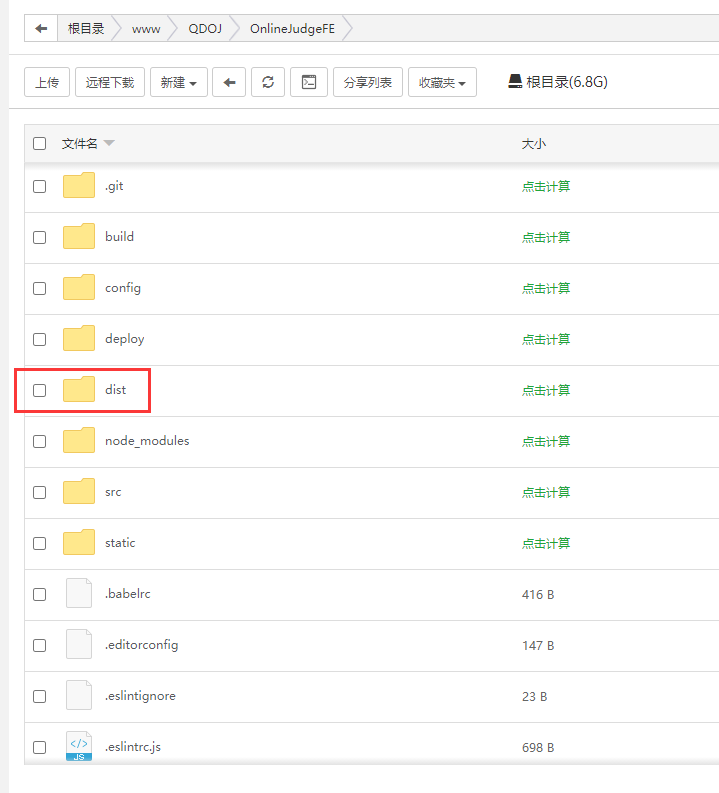
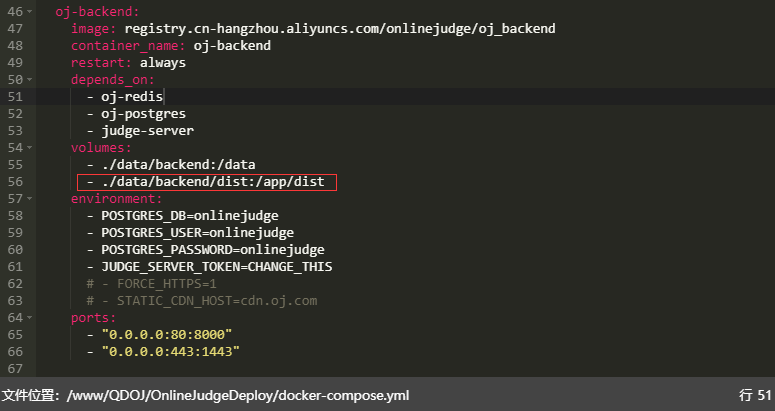
We copy the dist folder to a folder under the directory of docker one click installation
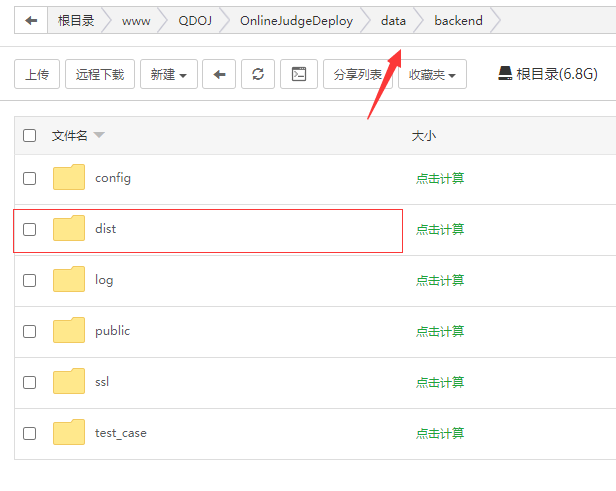
Then we open docker - compose YML, add a line under volumes:
/www/QDOJ/OnlineJudgeDeploy/data/backend/dist:/app/dist
The one before the colon should be changed to the actual directory.
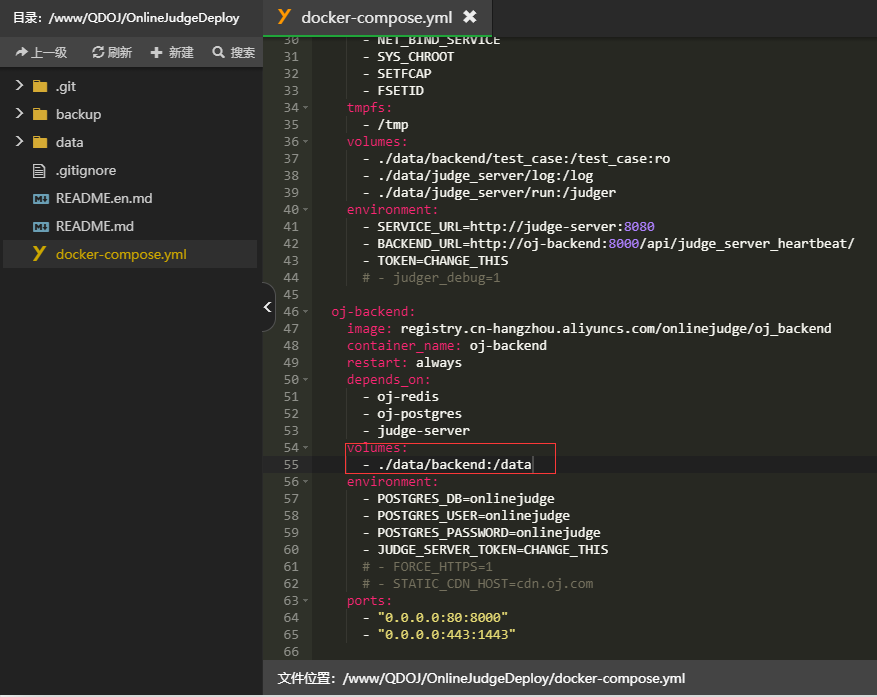
Because I'm in the directory here, I write directly from the primary directory of data.
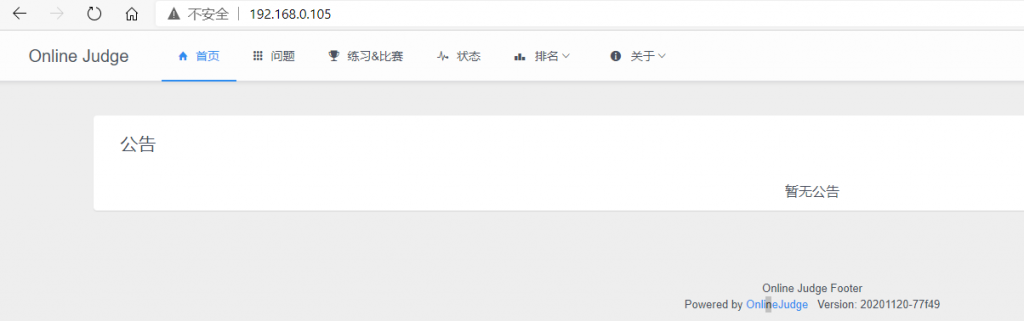
Then you can see that our revised Chinese version has been replaced. (some need to execute the "docker compose up - D" command in the folder where docker-compose.yml is located)
2. Package the front-end files into images
The first method is relatively simple, but it does not conform to the idea of one click installation. If your modified version is determined, you can package it with one click and write it to docker compose In the YML file.
(1) Before that: we need to register a docker image warehouse on Alibaba cloud.
Please click here for registration method and simple use method.
(2) Then we need to restore the onlinejudge to its original state, which is the state where you install it with one click. (if you changed the docker-compose.yml file in the previous step, remember to change it back and re docker-compose up -d)
(3) Then switch to the directory of our modified front-end and check the ID of our front-end image first
docker ps -a

CONTAINER ID        IMAGE                                                        COMMAND                  CREATED             STATUS                   PORTS                                         NAMES
5f9ae32a7349        registry.cn-hangzhou.aliyuncs.com/onlinejudge/oj_backend     "/bin/sh -c /app/dep..."   11 minutes ago      Up 4 minutes (healthy)   0.0.0.0:443->1443/tcp, 0.0.0.0:80->8000/tcp   oj-backend
64a37ad3e582        redis:4.0-alpine                                             "docker-entrypoint.s..."   13 hours ago        Up 6 minutes             6379/tcp                                      oj-redis
582049a81a00        registry.cn-hangzhou.aliyuncs.com/onlinejudge/judge_server   "/bin/sh -c /code/en..."   13 hours ago        Up 6 minutes (healthy)   8080/tcp                                      judge-server
9fc5e96326d4        postgres:10-alpine                                           "docker-entrypoint.s..."   13 hours ago        Up 6 minutes             5432/tcp                                      oj-postgres
(4) First copy the OJ backend container ID, which will be used later.
Then we execute
NODE_ENV=production npm run build:dll

then

npm run build
(5) After packaging, we still inject the contents of dist into the docker container, and we execute
docker cp ./dist  5f9ae32a7349:/app/
#Here 5f9ae32a7349 is the container ID of OJ backend we just looked at. Note that there is no space between the container ID and colon
(6) Then package the injected container into a local image
docker commit -m "Prompt information" -a "author"   container ID  Image name
docker images

//Where, the container ID is the above
5f9ae32a7349,The image name can be set by itself,After success, a value will be generated
After docker images is executed, the following interface will appear. We copy the image ID we just created: 0fe727ff77e7, which will be used later

(7) push the packaged image to Alibaba cloud warehouse
According to the registration method of Alibaba cloud warehouse mentioned in this article, Alibaba provides the method of pull ing to the warehouse. It is recommended to open it and copy it for future use
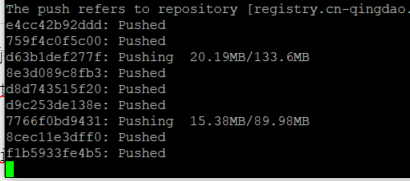
sudo docker login --username=Your username registry.cn-qingdao.aliyuncs.com
sudo docker tag [image ID] registry.cn-qingdao.aliyuncs.com/Your namespace/qdoj:[Mirror version number]
sudo docker push registry.cn-qingdao.aliyuncs.com/Your namespace/qdoj:[Mirror version number]

#Note that there are no square brackets when submitting
Wait a while and push succeeded
Then you can see the uploaded version in the "image version"

Then we can copy the public address of the uploaded warehouse and copy it to docker compose In the YML file, note that the image address should have the version number

After saving, re execute docker compose up - D under the one click installation folder
After re - running, you can see it directly in the browser

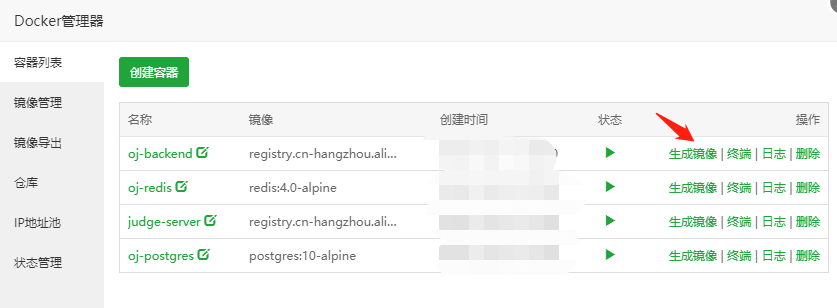
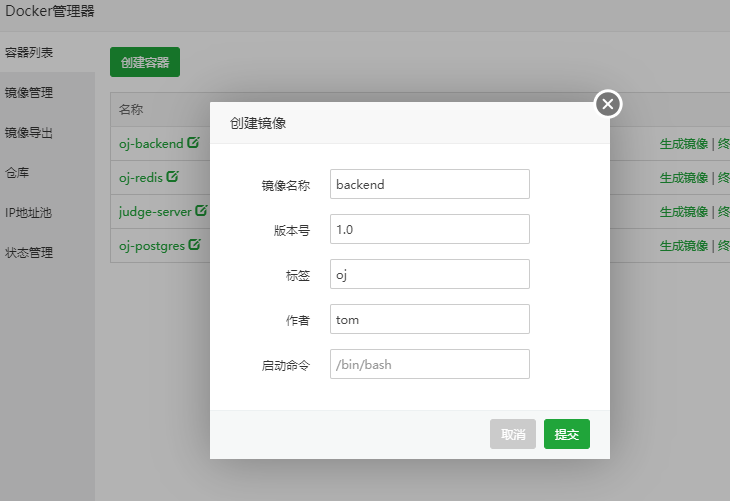
3. Use the docker provided by the pagoda to generate
From the previous to the injection part, click "generate image" after injection
Fill in the necessary information
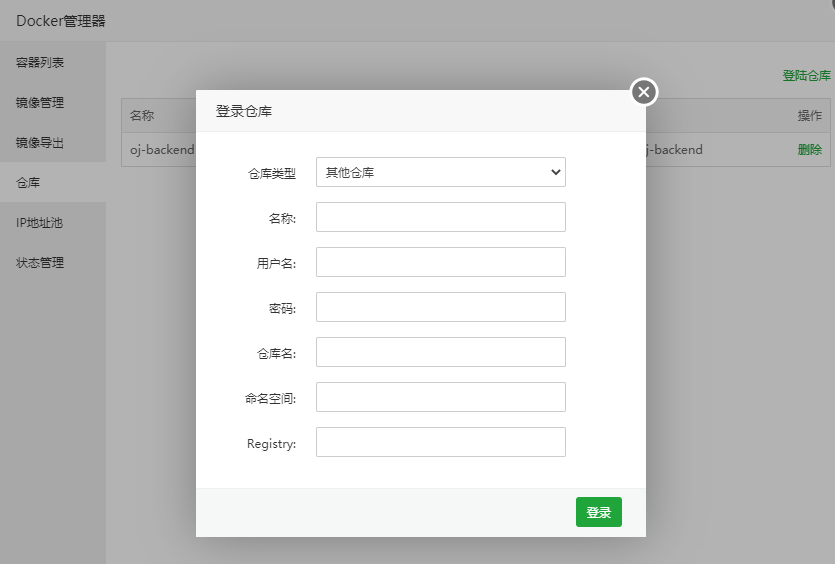
Then, fill in all the contents according to your Alibaba cloud information, and select "other warehouses" for "warehouse type"
Then click "push"
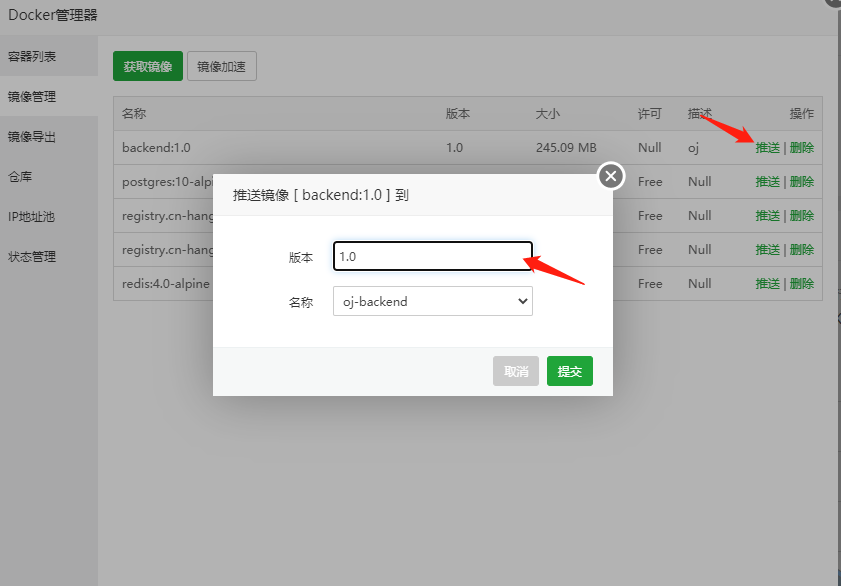
It's normal to see the version information in Alibaba cloud (but this place shows that the push is successful. I don't know why I haven't seen the version information in Alibaba cloud yet)