1. New Django project
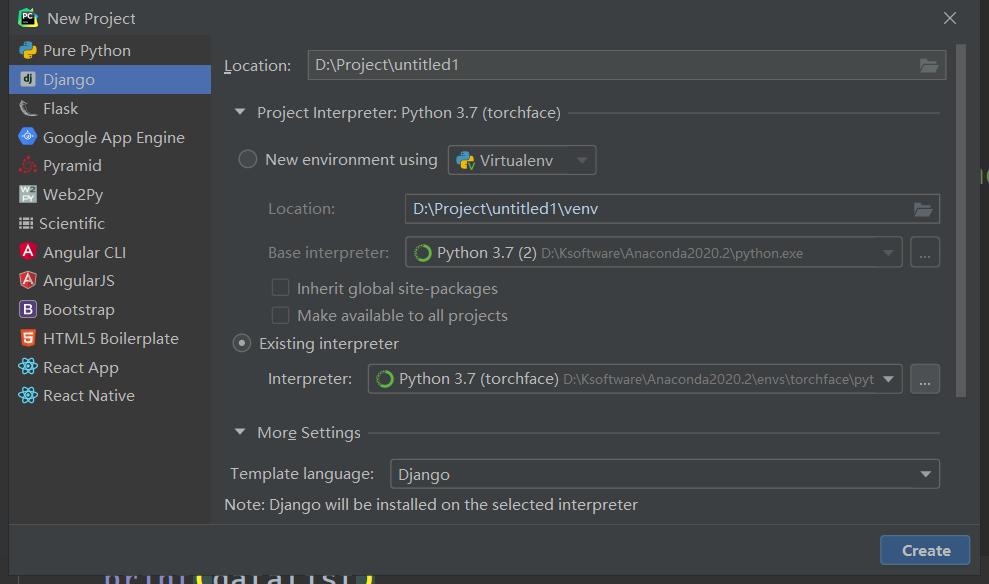
At the end of the Location is the Django project name, and select the virtual environment
In More Setting, you can select the template language and enter the APP name in Application name. If you do not enter the APP name, the new project does not contain APP by default. After the project is completed, you can use the command Python manage py startapp my_app new APP, my_app is the APP name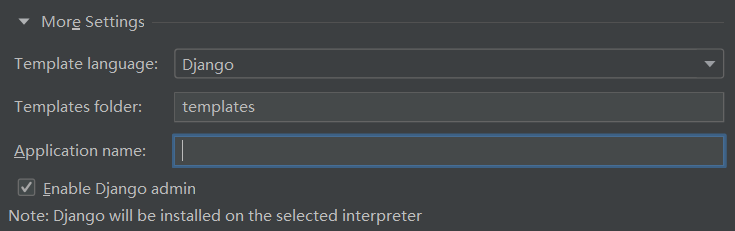
2. Project directory structure
The following figure shows the directory structure of my new project, where discipline_inspection is the project name of the new project in Figure 1, which contains several files in the figure. Among them, settings are some configurations, url is the routing address, and the remaining two are not used for the time being.

discipline is APP, and some database migration files are stored in migration. Views is a new folder created by me. In order to facilitate post coding classification, don't worry. urls is a new file used to store secondary routes, mainly using models Py and views Py, the former is used to build the database model, and the latter is used to write functional code.
Static and templates are copied from dattable project. In order to use its styles and templates, static stores static resources.
3. Build database model

Each class represents a table in the database. The class name is the table name. The above figure is the example code. charfield represents varchar field, integerfield represents int field and foreignkey represents foreign key. For details, you can check some Chinese documents, which will not be repeated here.
After the model is built successfully, execute the database migration command to generate the sqlite3 database of Django, and the database migration command
python manage.py makemigrations
python manage.py migrate
Install the database plug-in in pycharm to view the contents of the data table. I forgot what plug-in is. Baidu. As shown in the figure
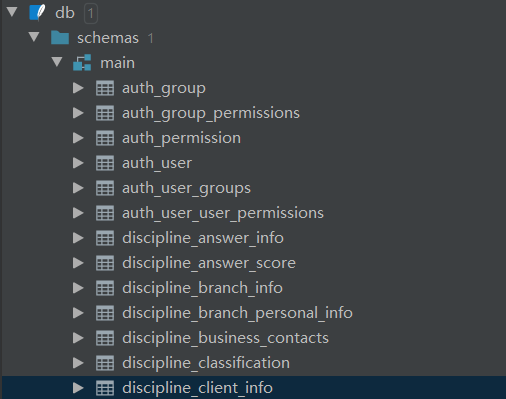
The table is too long. I only listed a part. In addition to the models built by myself, there are also some models built by the system. The naming rules are app name + model name. auth is the user mechanism built by the system. All the tables under disciplineAPP are self built tables
4.settings configuration
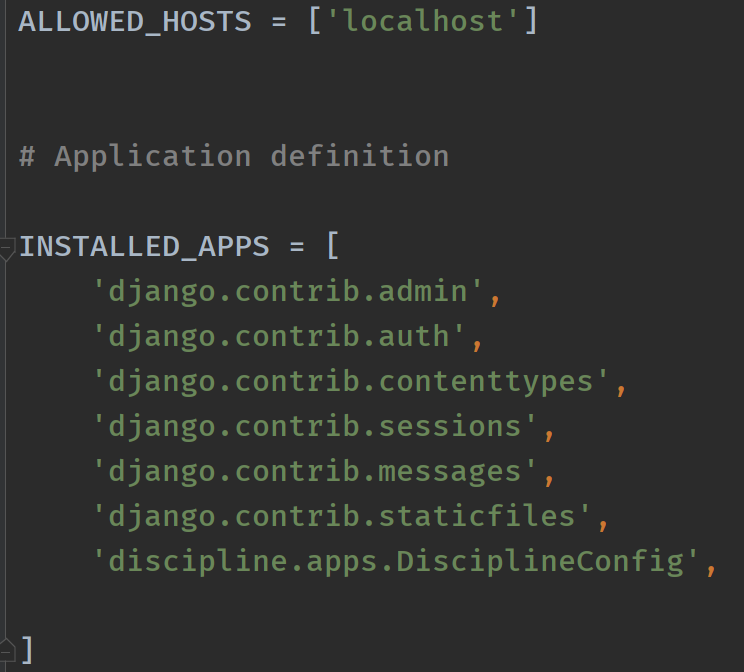
In settings Py requires some configuration, including allowed_hosts is the allowed access address. localhost is filled in by default when testing here
installed_apps include apps. If the APP name is filled in when creating a new APP, it does not need to be registered here (if it is registered, an error will be reported and the APP will be repeated). If there is a later APP, the APP name needs to be added after it.
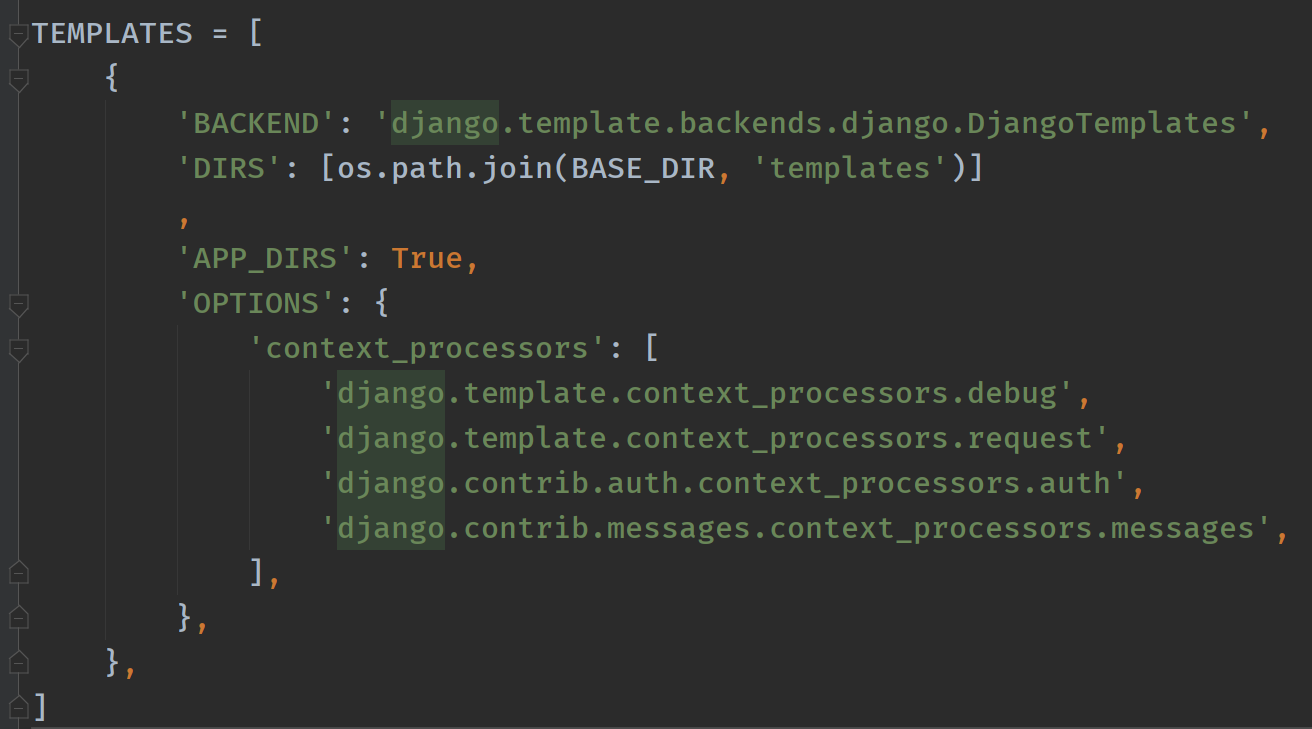
This is the related configuration of templates. You need to configure the related information of templates here to use Django template. DIRS is the address of the Templates folder. I put it in the root directory here, so I can directly splice the name of the Templates folder with basedir.
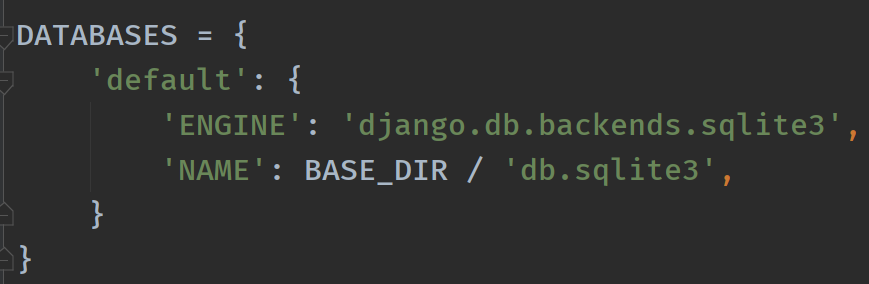
The following figure shows the configuration database. Since Django's default sqlite3 database is used during the test, there is no change here. If you need to replace the MySQL database later, you can directly configure it here.
In the following figure, language_code is the default language. The default language is en US English. It is modified to zh Hans. timezone means time zone. Asia/Shanghai is used here
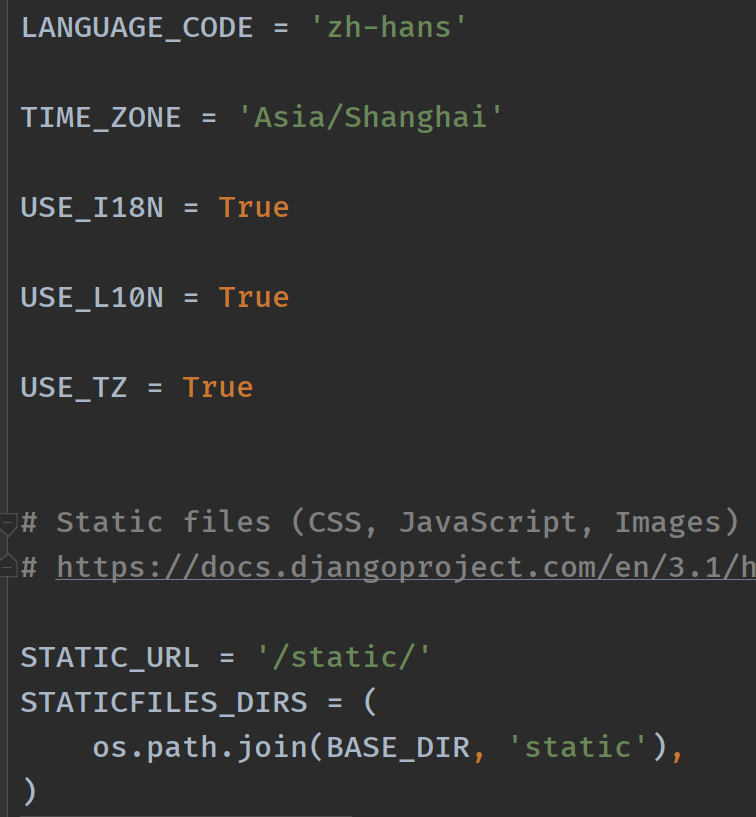
static_url is the address where some static resources are stored. Because some static resources are required in the templates template, the static resource address needs to be configured here. The static folder in this project is stored in the root directory.
5. Configure routing
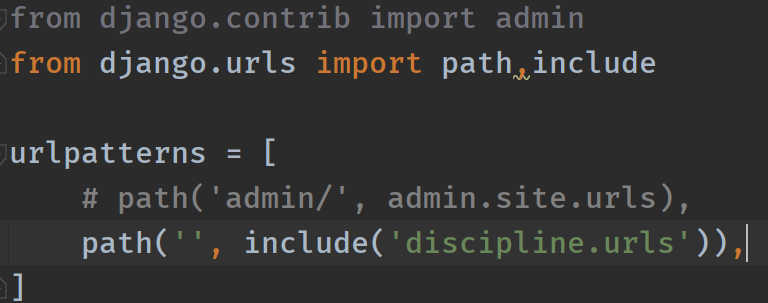
The default urls route configuration is under the project name folder, which is the primary route, and the commented statements are the default statements. In order to facilitate management, the secondary route is generally used here. The configuration in this file is the primary route. If the project contains multiple apps, you only need to use the include method to point to each APP path here.
The following figure shows the configuration of secondary routing. Create URLs under the APP folder Py file, in which code in the following format is written, app_name is the APP name, so that the reverse parsing url can be written in app:urlname format on the template side or during redirection, which will be mentioned later.

Configure paths in urlpatterns, which respectively point to the names of methods in views. The example code is shown in the figure, which contains three parameters,
- The first parameter is the path name of the browser side. If it is empty, it will be accessed by default when the browser is started,
- The second parameter points to the corresponding method name written in views. There are two modes of writing: CBV and FBV. CBV is function based view (method based view), which is the writing method in the figure, and the method written in view; FBV is a class based view, and class is written in the view. I haven't used it. I can go to Baidu. It's probably written as XXX as_ view()
- The third parameter is the name used in url redirection, which will be mentioned later.
After writing the new method in views, you must write it in URLs Configure the route in py and directly add path after it.
6. Write methods in views
Take the home page as an example, define the method named index, which corresponds to the second parameter in urls, receive the request sent by the front end, write the function to be realized and the value to be passed in the method, and finally render returns a page and renders the value in the page. The render method returns three parameters, namely (request, url, context) the page whose url is the orientation, and the context is the json string that needs to be passed to the front-end template. This method mainly transfers' datalist 'data to the front end (the writing method of a blogger I refer to here is different from the standard writing method. You can check the specific usage of render function on Baidu.)
def index(request):
    gh = request.session.get('gh')
    print(gh)
    if gh is None:
        return redirect('discipline:login')
    context = {}
    datalist = []
    firstlist = []
    secondlist = []
    thirdlist = []
    title_list = []
    role = client_info.objects.filter(employeeno=gh).values('roleid_id')
    print(role)
    functionsno = Role_function.objects.filter(role_id_id=role[0]['roleid_id'])
    print(functionsno)
    for no in functionsno:
        fuid = model_to_dict(no)['function_id']
        funo = system_function.objects.filter(id=fuid).values('function_name','functionno')
        if len(funo[0]['functionno'])==1:
            firstlist.append({'no':funo[0]['functionno'],'name':funo[0]['function_name']})
        elif len(funo[0]['functionno'])==2:
            secondlist.append({'no':funo[0]['functionno'],'name':funo[0]['function_name']})
        elif len(funo[0]['functionno'])==3:
            thirdlist.append({'no':funo[0]['functionno'],'name':funo[0]['function_name']})
        datalist.append(fuid)
    for i in firstlist:
        second = []
        for j in secondlist:
            third = []
            if j['no'][:1]==i['no']:
                second.append(j['name'])
            for k in thirdlist:
                if k['no'][:2]==j['no']:
                    third.append(k['no'])
        print(third)
        title_list.append({'first': i['name'], 'second': second, 'third':third})
        # second.clear()
    context['datalist'] = title_list
    context['role'] = '1'
    context['first'] = firstlist
    context['second'] = secondlist
    context['third'] = thirdlist
    print(datalist)
    html_template = loader.get_template('home/index.html')
    return HttpResponse(html_template.render(context, request))
The specific database orm operation of Django can be Baidu. Just use it and check it now. Here is a reference link Liu Jiang's Django tutorial I think this one is quite easy to understand.
7.templates directory structure
The figure below shows Datta-Able The templates directory structure of the template.
- The accounts folder contains the login and registration pages. The login and registration in DattaAble uses the auth user mechanism provided by Django. Because this mechanism is not used in this project, these two pages are not used. The login page under the home directory is directly modified.
- layouts contains basic pages, and other child pages can inherit these two parent pages
- include contains some embedded small modules, such as the navigation bar.
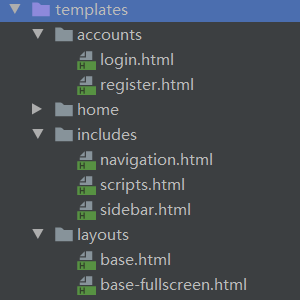
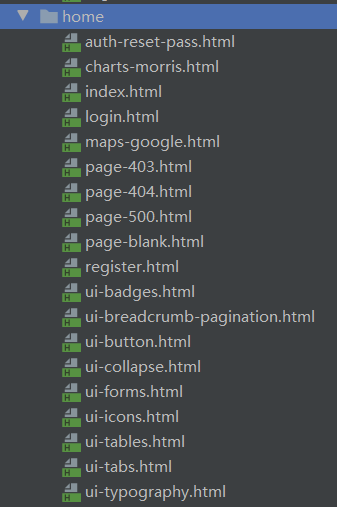
- The home folder contains some basic pages, such as home page, exception handling page, etc.
8. Introduction to each page of Datta able template
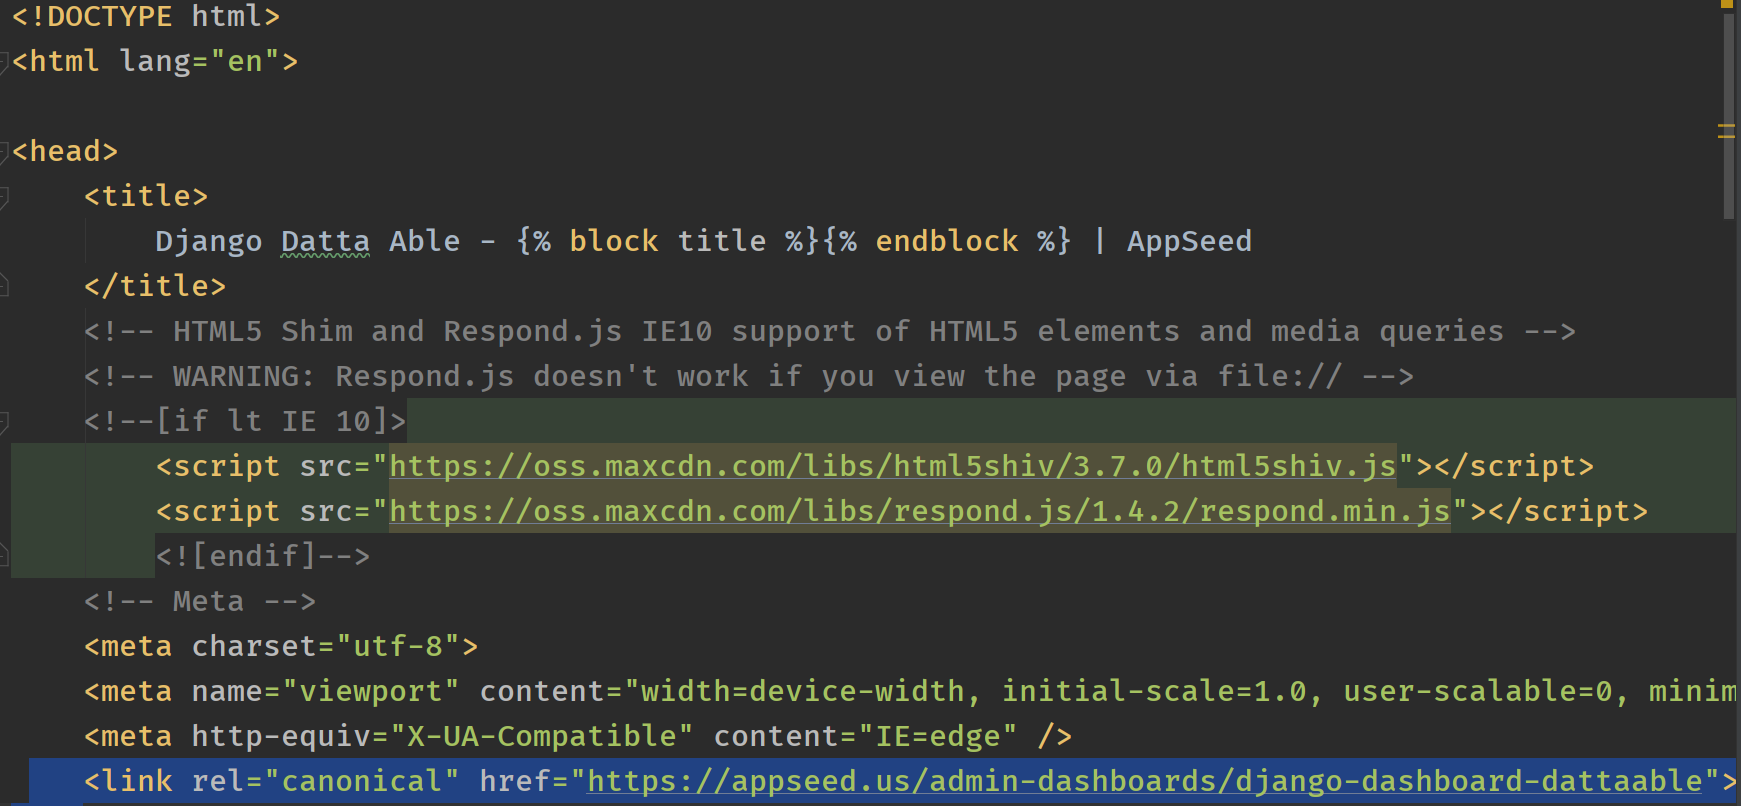
1.base.html
Datta able is written in some styles of bootstrap 4. The following figure shows the base. In the layouts folder HTML page, which is one of the master pages of the entire template, and other pages can inherit this page.
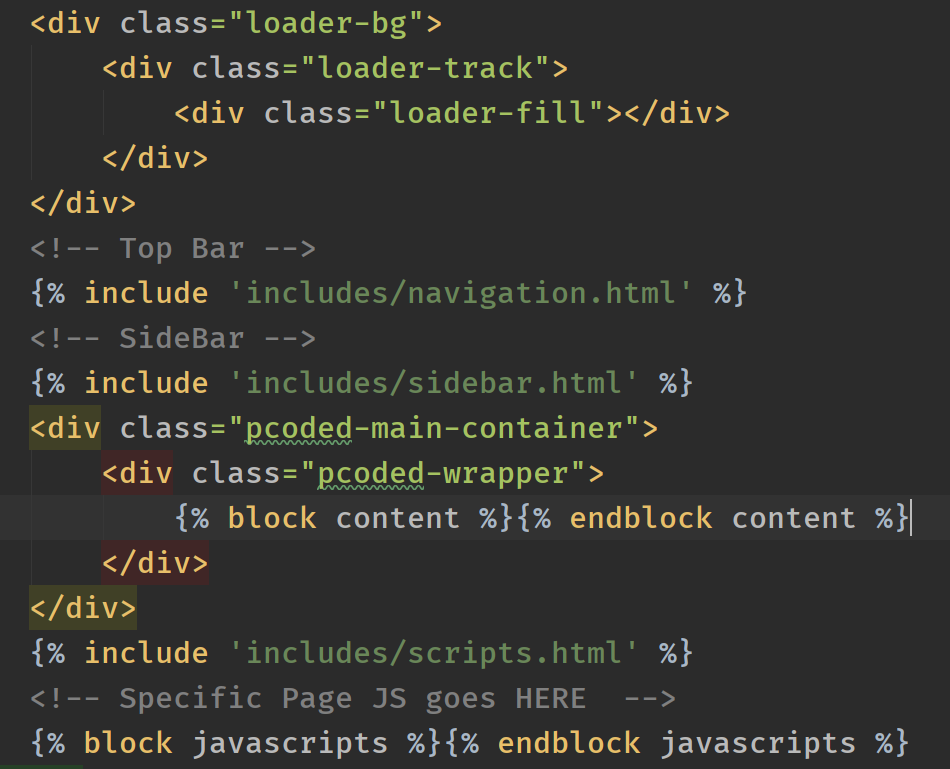
The following figure shows the contents in the body of the page. You can see that the include in the page includes the sidebar under the includes folder HTML, sidebar is the navigation bar, and the master page embeds it in the page. {% include%} is a Django template language. You can learn some basics from the tutorial. For others, just check them now.
2. index.html
The following figure is my simple modified homepage index HTML, you can see that the page directly inherits from layouts / base html. {% block%} {% endblock%} is a changeable module. In the base home page, the place containing the block tag can be changed. If you want to inherit the navigation bar of the parent page, but want to write some content yourself, you can directly add the content of your own page to the corresponding block content of the parent page.
Each time a new page is created, it directly inherits base HTML, just write the content you need in the content block.
3.sidebar.html modification
The following code is for include / sidebar HTML modification, in order to make the navigation bar meet our needs.
- Under the list is the entire navigation bar,
- First level navigation,
- New list under
- It is secondary navigation. In order to facilitate maintenance, different contents are displayed here according to the function data table and different permissions of the login user.
<nav class="pcoded-navbar">
        <div class="navbar-wrapper">
            <div class="navbar-brand header-logo">
                <a target="_blank"
                   href="https://appseed.us/admin-dashboards/django-dashboard-dattaable" class="b-brand">
                    <div class="b-bg">
                        <i class="feather icon-trending-up"></i>
                    </div>
                    <span class="b-title">xxx Working platform</span>
                </a>
                <a class="mobile-menu" id="mobile-coll
                apse" href="javascript:"><span></span></a>
            </div>
            <div class="navbar-content scroll-div">
                <ul class="nav pcoded-inner-navbar">
                    {% for i in datalist %}
                    <li class="nav-item pcoded-menu-caption">
                            <li class="nav-item pcoded-hasmenu">
                            <a href="javascript:" class="nav-link "><span class="pcoded-mtext">{{i.first}}</span></a>
                            <ul class="pcoded-submenu">
                                {% for j in i.second %}
                                <li class="nav-item pcoded-hasmenu">
                                    <a href="javascript:" class="nav-link "><span class="pcoded-mtext">{{j}}</span></a>
                                </li>
                            {% endfor %}
                            </ul>
                            </li>
                    </li>
                    {% endfor %}
                </ul>
            </div>
        </div>
    </nav>
4.home/login. Modification of HTML page
In the login page, you need to submit the login user's form and use the form tab to write the form content. The submission method is POST. {% csrf_token%} this tag is Django's form protection mechanism. You need to add this tag after the < form > tag to run normally, but I don't know why I added it or reported an error here, so I took another solution, adding @ CSRF before the method in views_ Exempt ID. However, the two methods cannot be used at the same time, and an error will be reported.
{% extends "layouts/base-fullscreen.html" %}

{% block title %} Login {% endblock %}

{% block content %}

    <div class="auth-wrapper">
        <div class="auth-content">
            <div class="auth-bg">
                <span class="r"></span>
                <span class="r s"></span>
                <span class="r s"></span>
                <span class="r"></span>
            </div>
            <div class="card">
                <div class="card-body text-center">
                    <div class="mb-4">
                        <i class="feather icon-unlock auth-icon"></i>
                    </div>
                    <h3 class="mb-4">
                        Sign in
                    </h3>

                    <span class="mb-0 text-muted">
                        {{msg}}
                    </span>

                    <br />
                    <br />

                    <form role="form" action="/" method="POST">
                        {% csrf_token %}
                        <div class="input-group mb-3">
                            <input class="form-control" name="gh" placeholder="Job number">
                        </div>

                        <div class="input-group mb-4">
                            <input type="password" class="form-control" name="pwd" placeholder="password">
                        </div>

                        <div class="form-group text-left">
                            <div class="checkbox checkbox-fill d-inline">
                                <input type="checkbox" name="checkbox-fill-1" id="checkbox-fill-a1" checked="">
                                <label for="checkbox-fill-a1" class="cr">Save password</label>
                            </div>
                        </div>
                        <button name="login" class="btn btn-primary shadow-2 mb-4">Sign in</button>

                    </form>

                    <p class="mb-0 text-muted">No account yet? <a href="/register.html" >register</a></p>
                    <br />
                </div>
            </div>
        </div>
    </div>

{% endblock content %}
9. Front and rear end interactive rendering data
1. Create a new template page that needs to be written. Here, you can directly use index. Under home HTML page as an example.
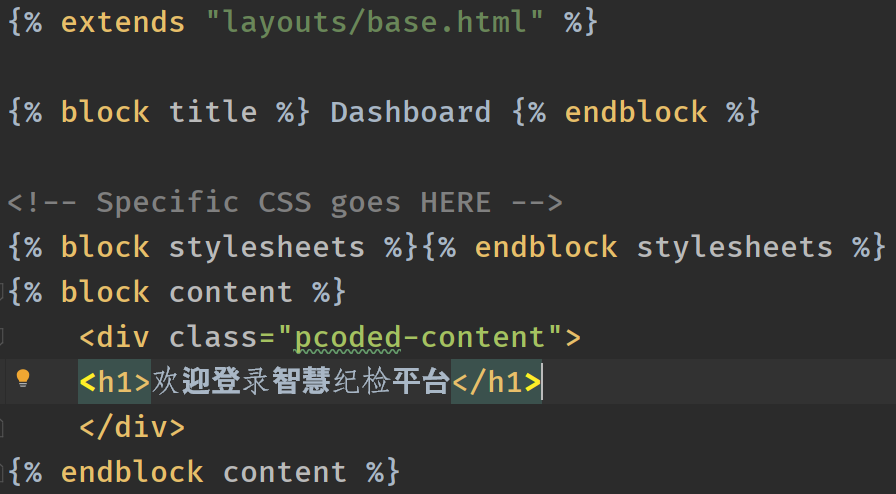
Create a new page and write the template content. The following is index HTML sample code. You can see here that it inherits layout / base HTML page, what we need to do is to dynamically render the side navigation bar on the home page, which is embedded in base HTML page, so the reference is in include / sidebar HTML navigation bar page.
{% extends "layouts/base.html" %}

{% block title %} Dashboard {% endblock %}

<!-- Specific CSS goes HERE -->
{% block stylesheets %}{% endblock stylesheets %}
{% block content %}
    <div class="pcoded-content">
    <h1>Welcome to login xxx platform</h1>
    </div>
{% endblock content %}
Sidebar is shown in 8.3 The code of the HTML page needs to get the value of the datalist from the back end, traverse the datalist to display the primary title, and then traverse the second list of each item of the datalist to get the name of the secondary title.
2. Write functions in the view layer
You can write function functions in views under APP and pass parameters to the front end. In the index method in 6, query the desired information according to the database operation, assign it to the context, pass the context to the front end through render, and return the html page path.