1, Create project
The project is based on GitHub Hosting websites for source code
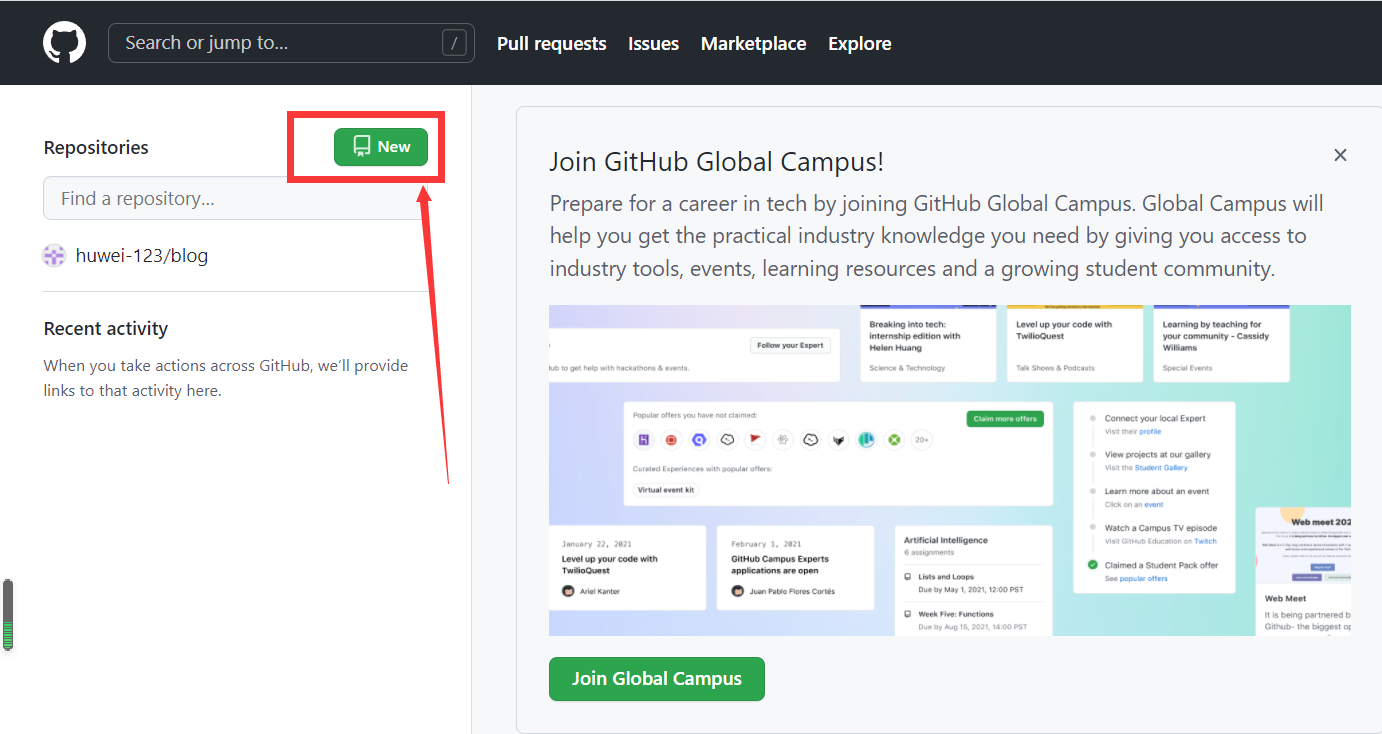
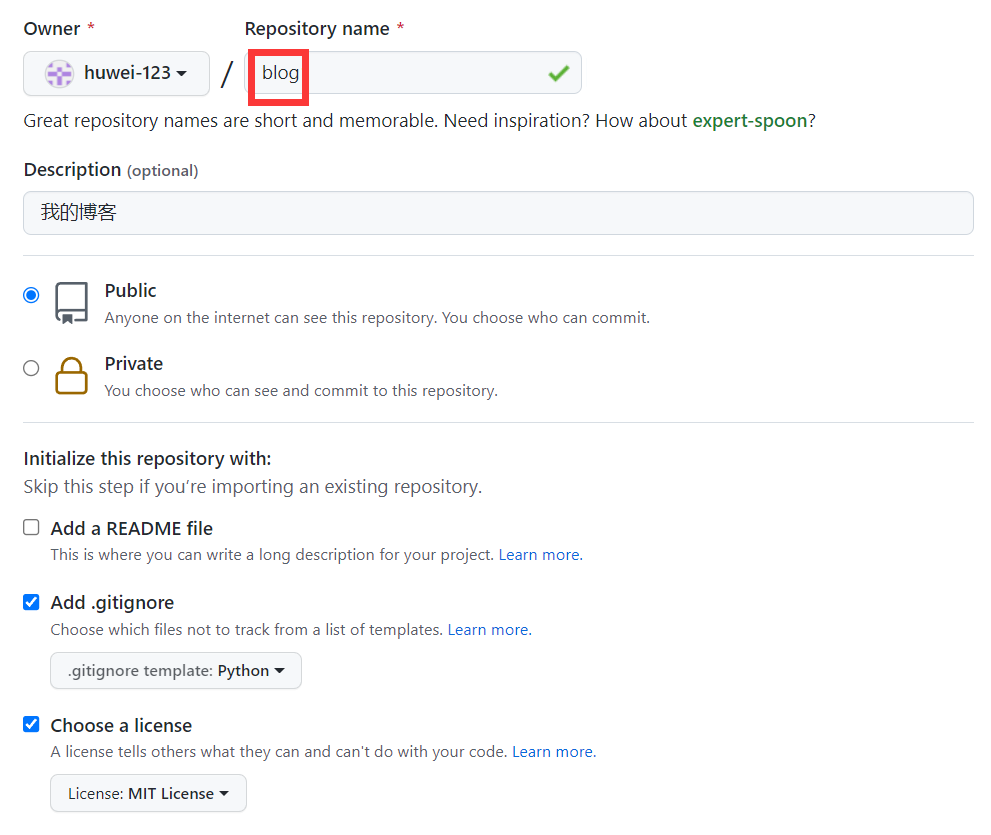
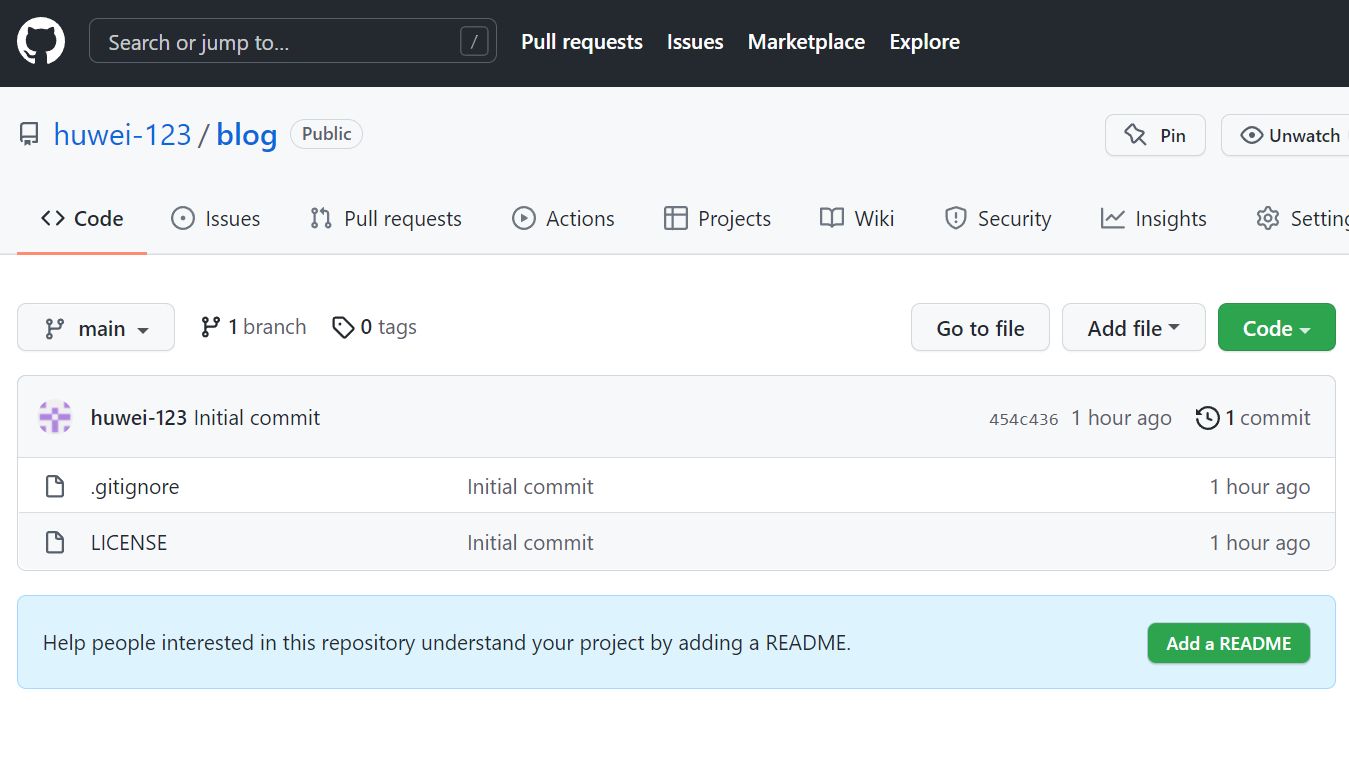
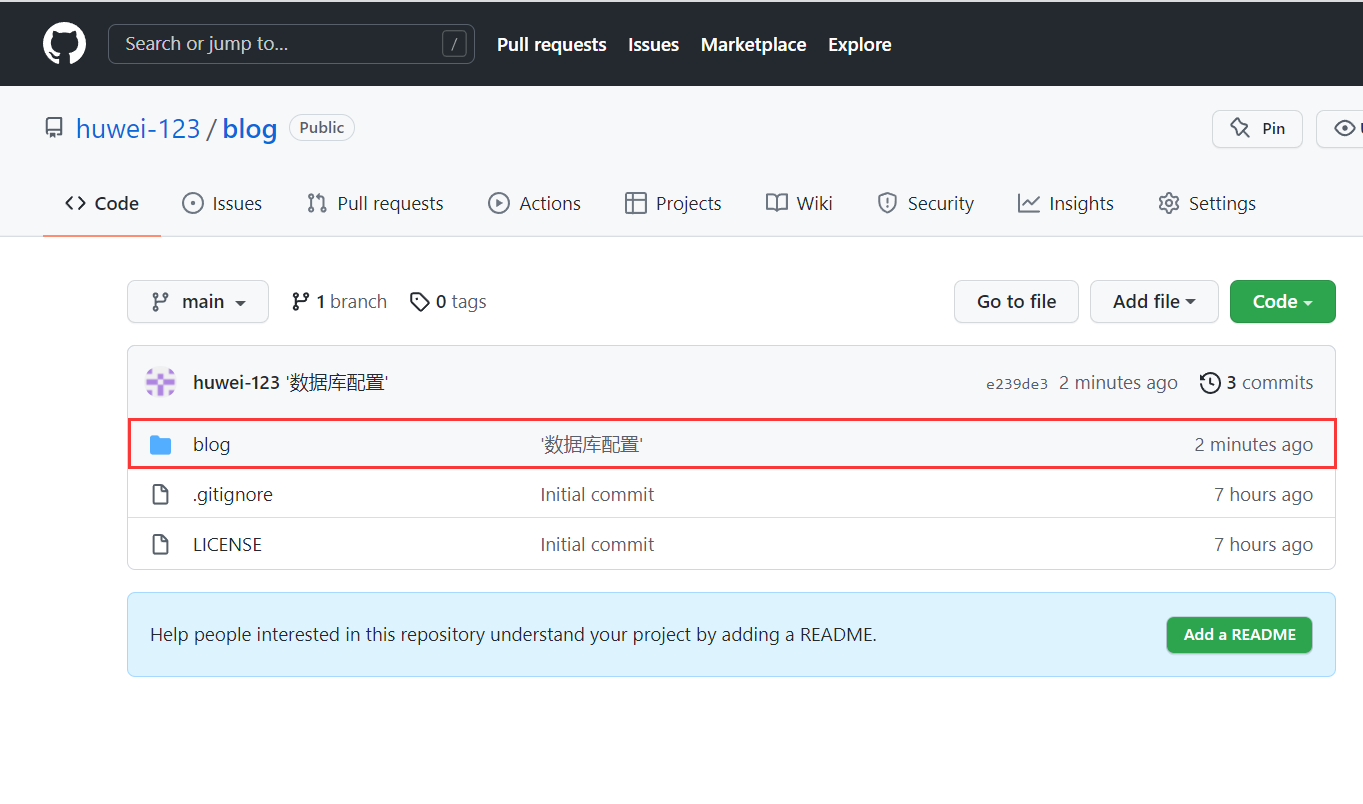
1. Create a remote repository of source code: blog
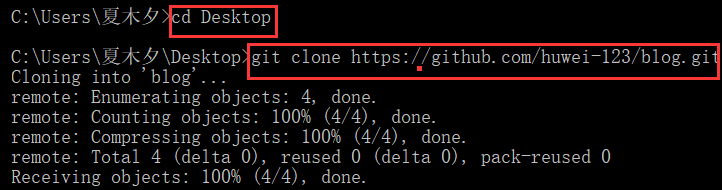
2. Clone remote warehouse
Note: git needs to be installed. Enter "git" on the windows terminal to test the environment

Note: you need to install the virtual environment (python3): PIP install virtualenvwrapper win
Attached: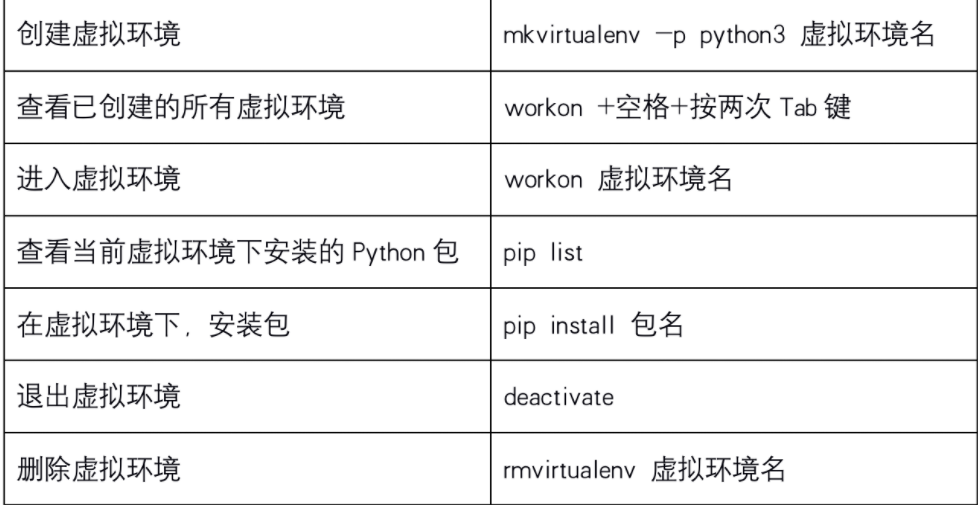
3. Create project
(1) Enter local warehouse directory
cd blog/
(2) Create a blog project virtual environment and install the Django framework under this project
mkvirtualenv -p python3 blog

pip install django==2.2
(3) Create blog project
django-admin startproject blog
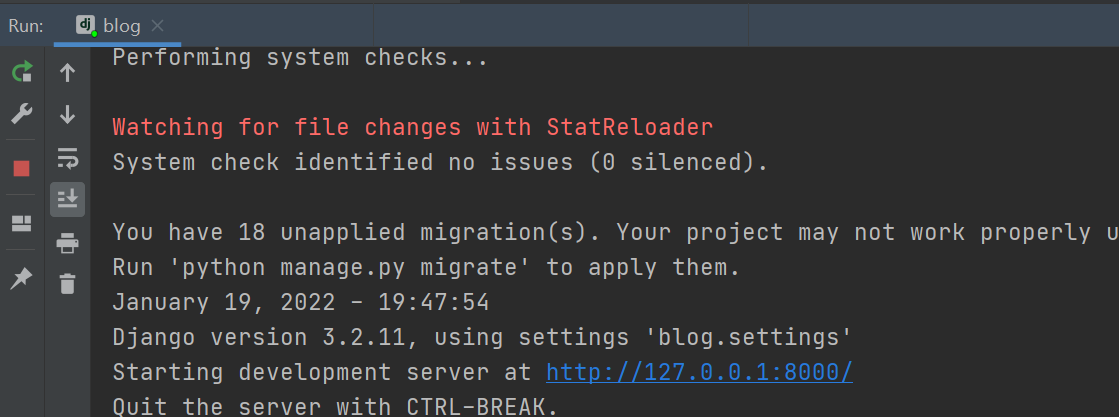
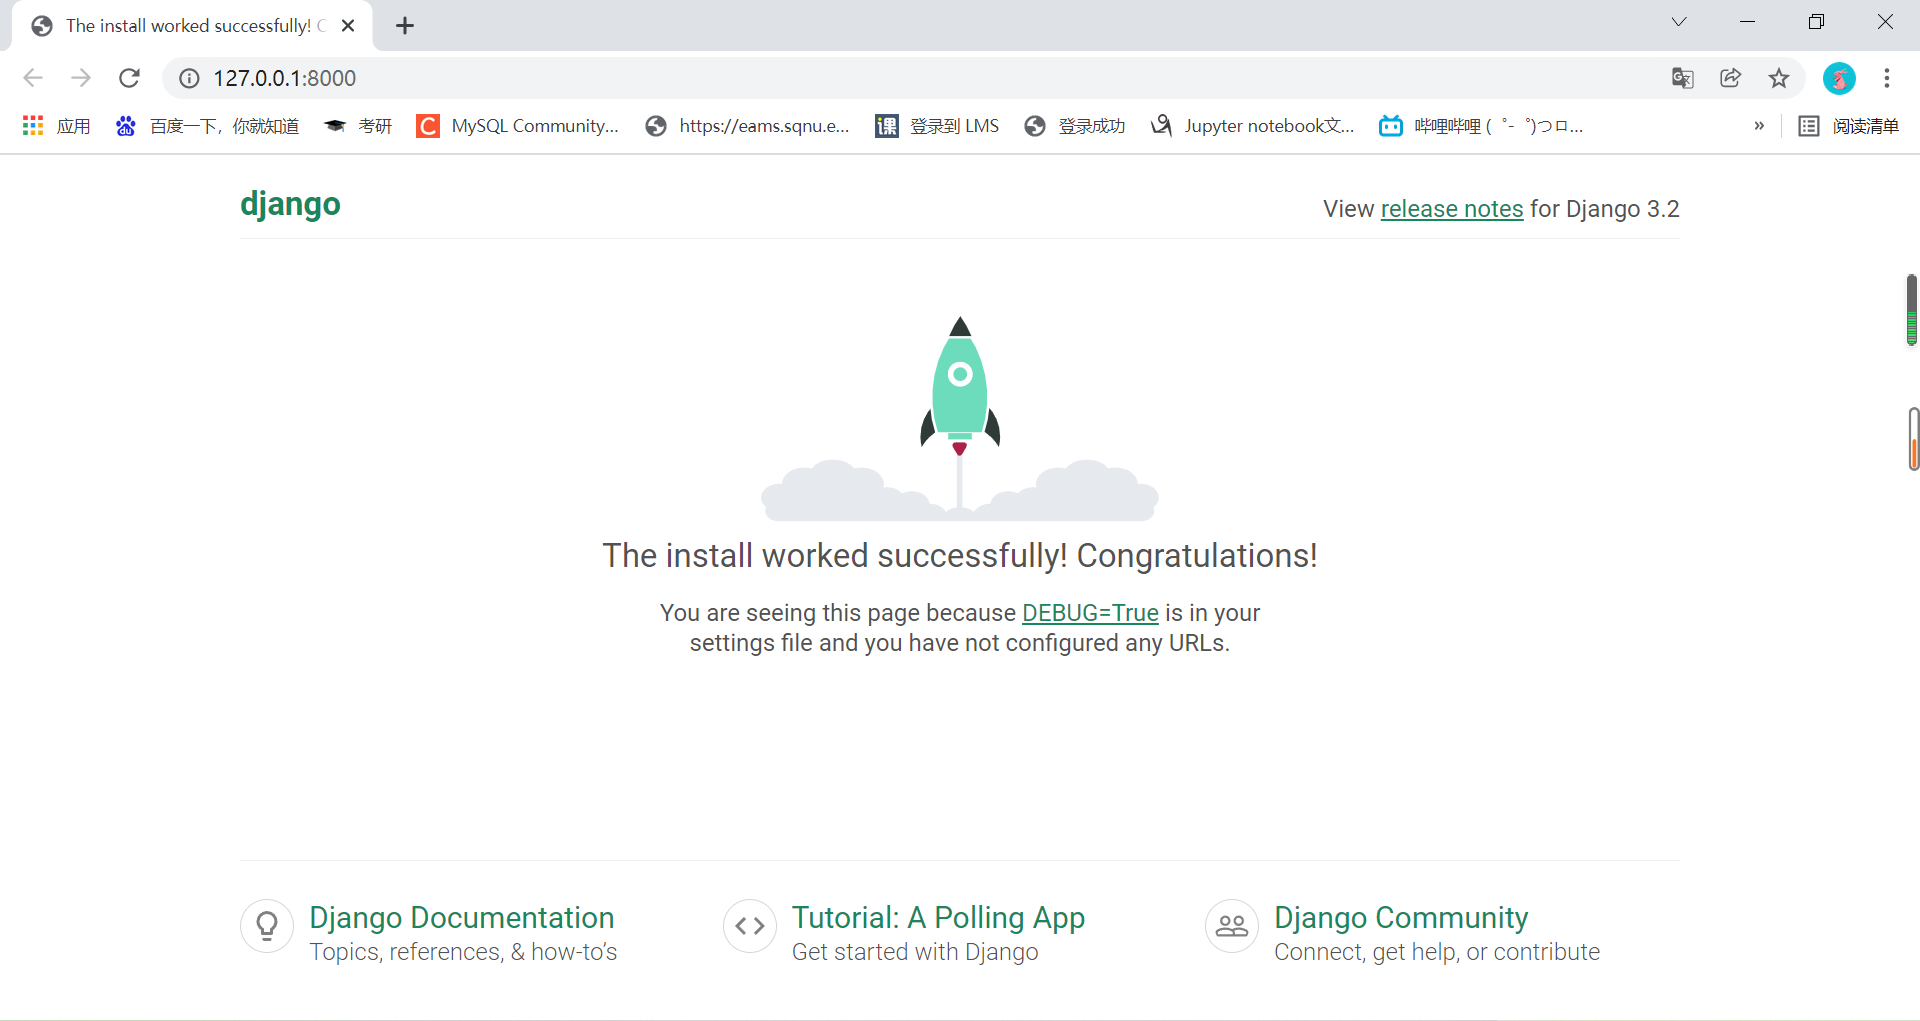
(4) Run the program, test results
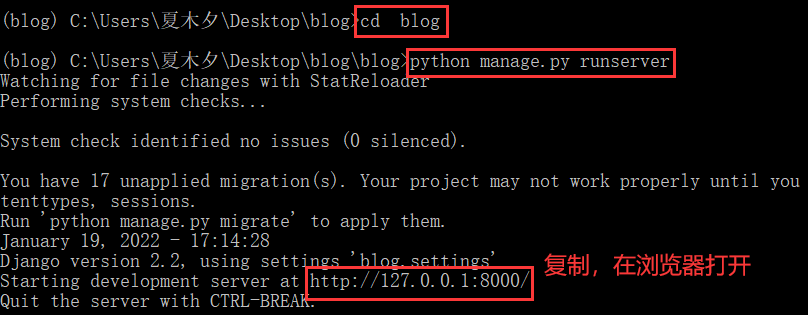
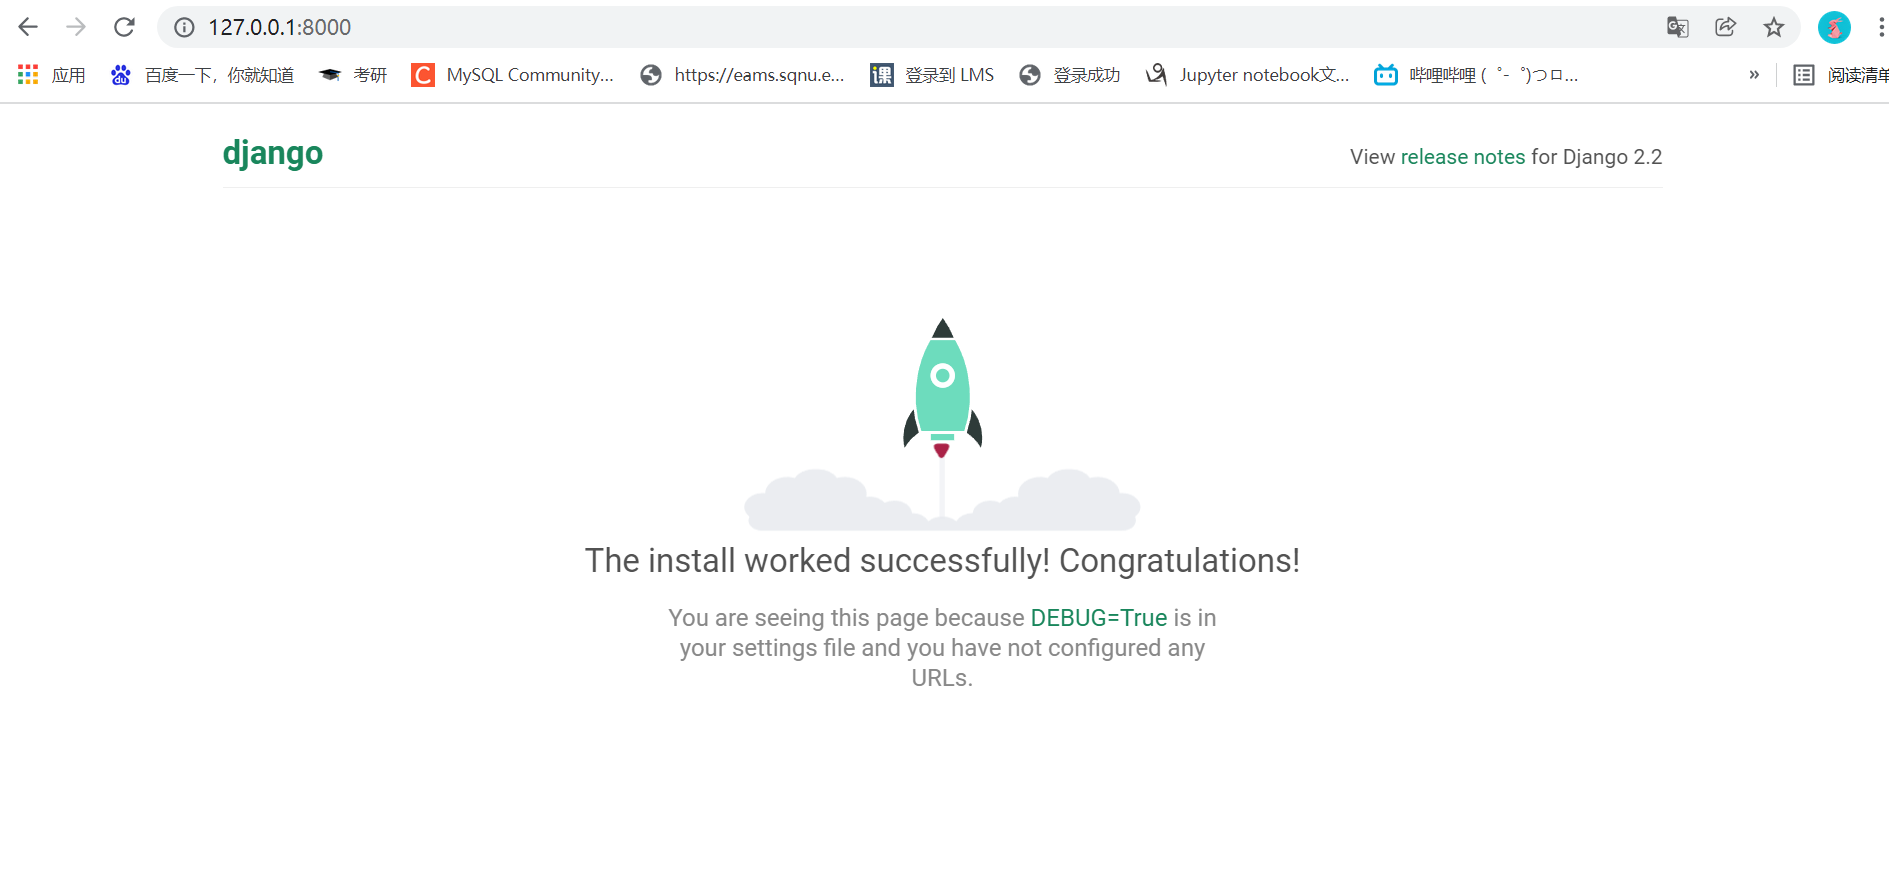
As shown in the figure, the Django project is created successfully!
Ctrl+C stop project
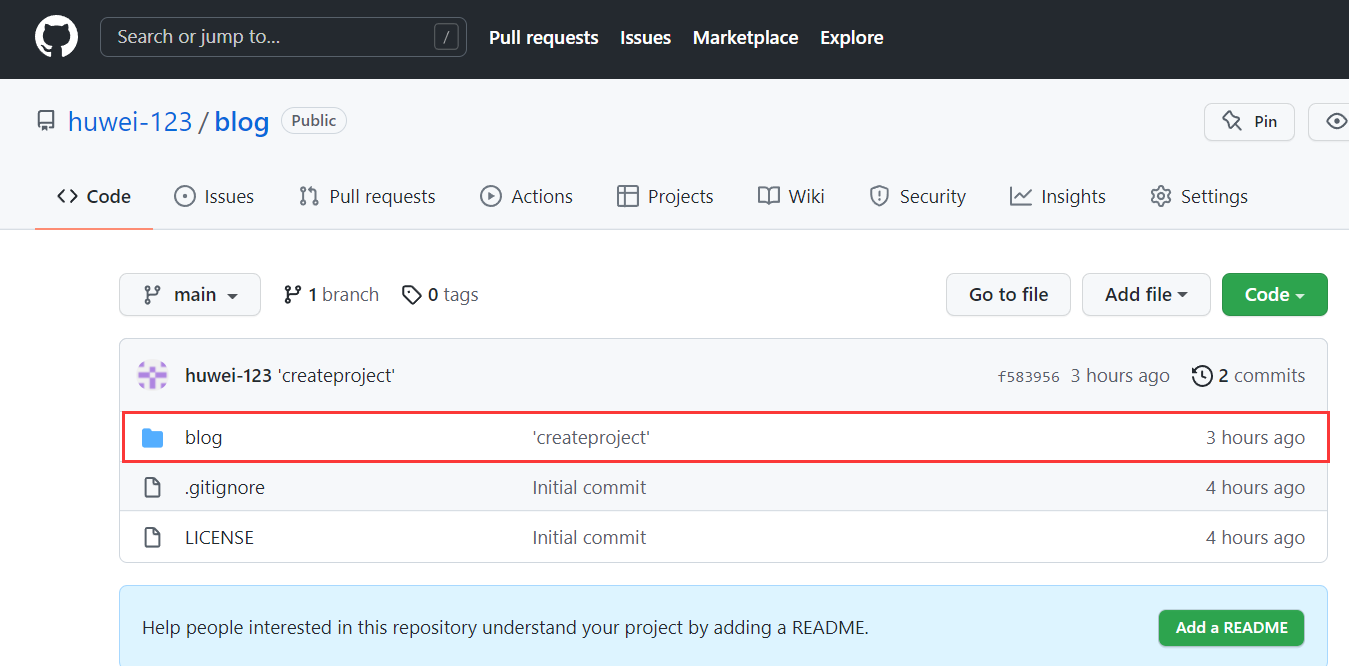
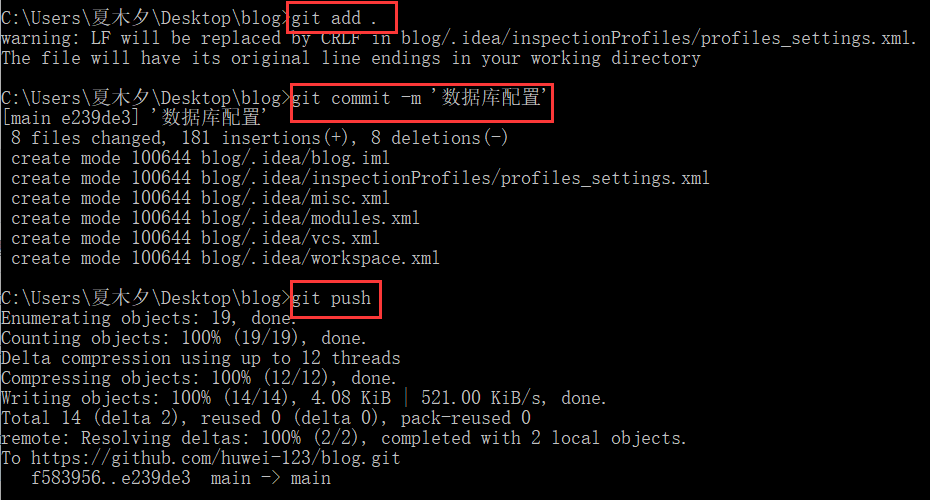
4. Submission code
cd ..
git add .
git commit -m 'createproject'
git push
2. Project configuration
(1) Configure Mysql database
Enter the virtual environment blog
workon blog
Link Mysql
mysql -uroot -p123123 //Where root is the user name and 123123 is the password (according to your own mysql)
New Mysql database: blog
create database blog charset=utf8;
New Mysql user: blog
create user huwei identified by '123123'; //Where huwei is the user name and 123123 is the password (custom)
Authorized user huwei to access blog database
grant all on blog.* to 'huwei'@'%';
Refresh privileges after authorization
flush privileges;
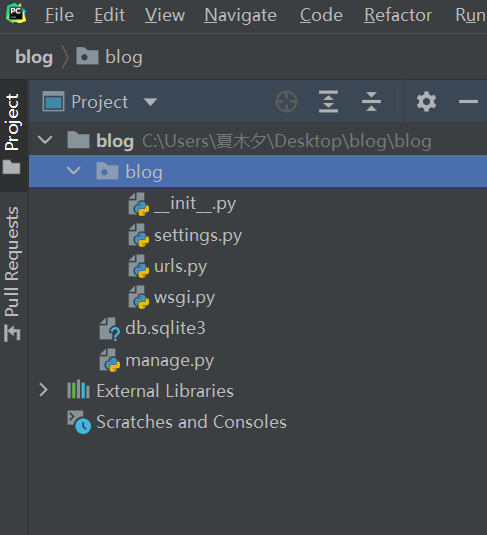
Use pycharm to open the blog folder under the blog on the desktop
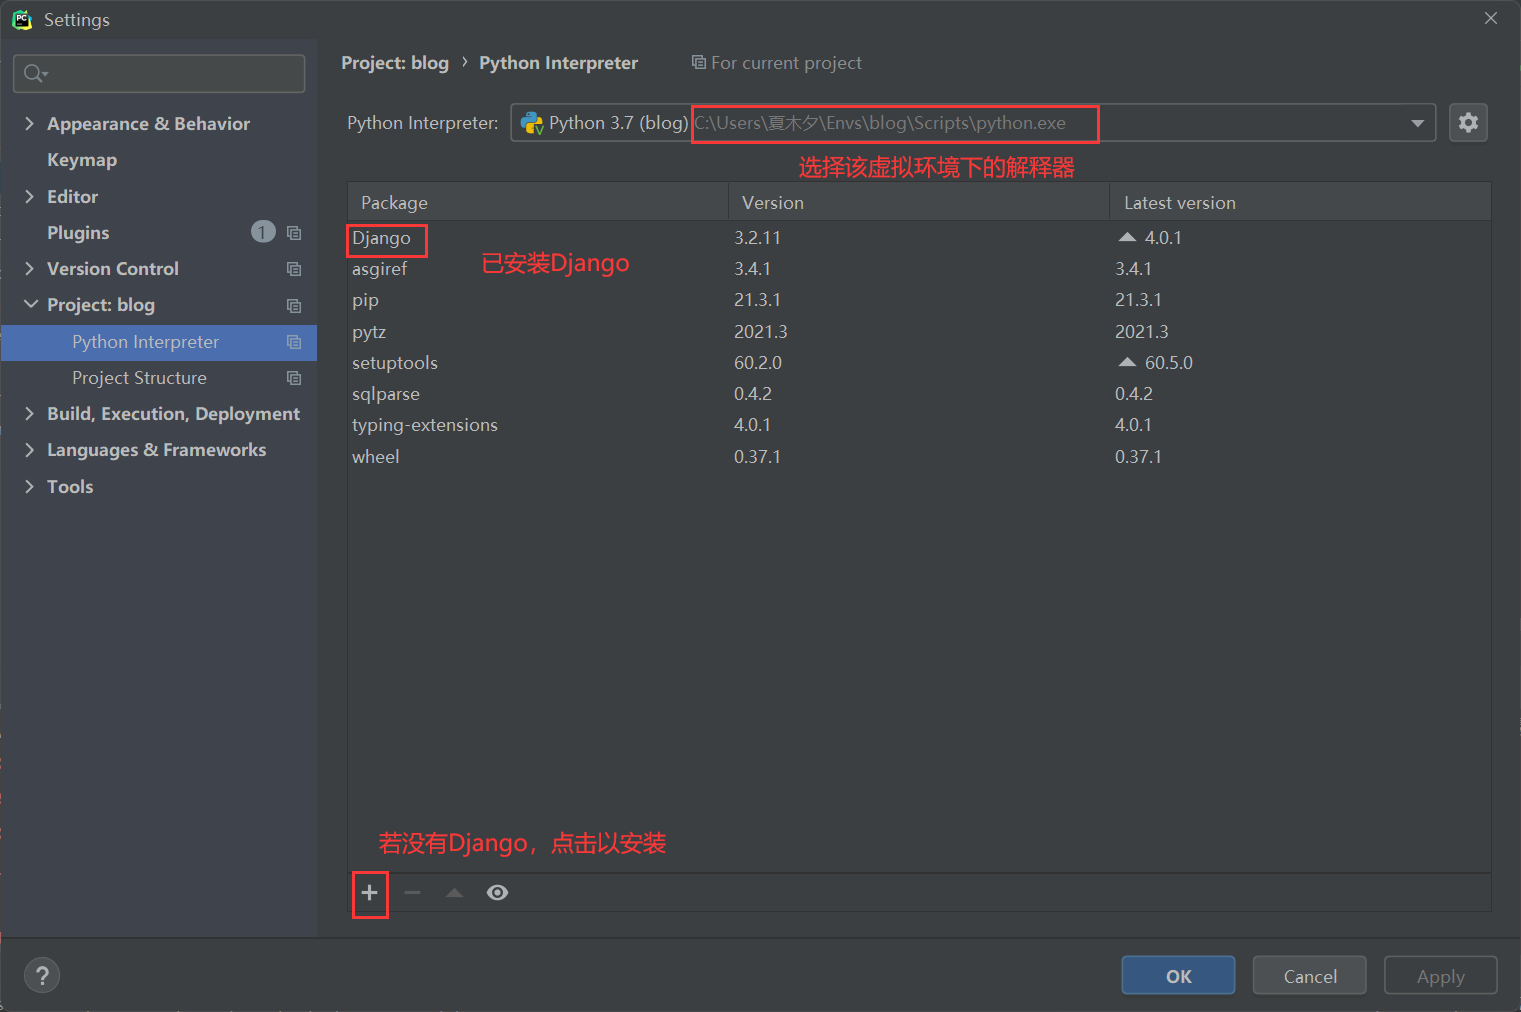
Configure Python Interpreter, File - > Settings - > Project: Blog - > Python Interpreter
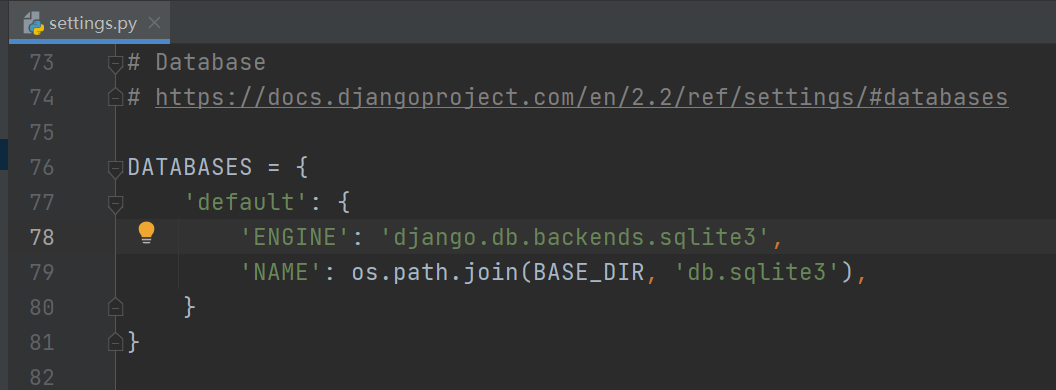
Open settings Py, configure Mysql
take
Replace with:
DATABASES = {
    'default': {
        'ENGINE': 'django.db.backends.mysql',  # database engine
        'HOST': '127.0.0.1',  # Database host
        'PORT': 3306,  # Database port
        'USER': 'huwei',  # Database user name
        'PASSWORD': '123123',  # Database user password
        'NAME': 'blog'  # Database name
    }
}
Run the Django project
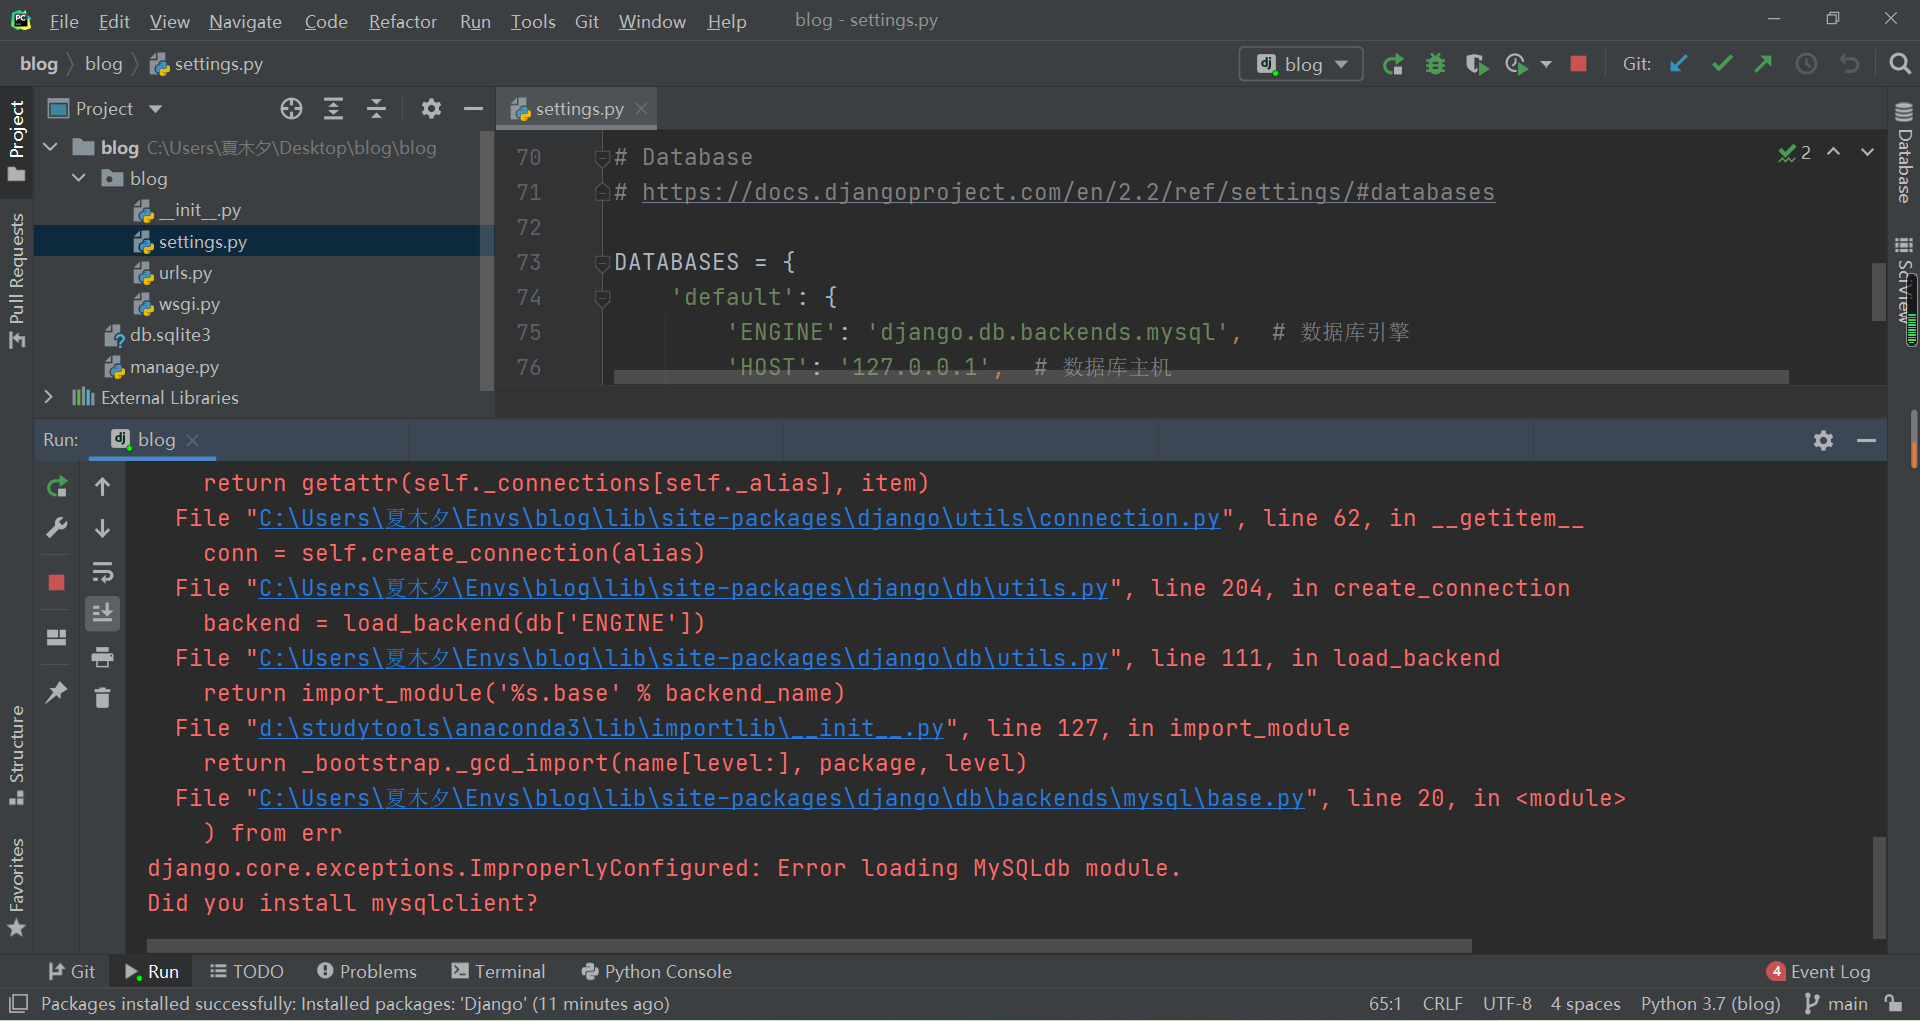
The Mysql database operation in Django requires the driver Mysql dB, but there is no driver Mysql dB in the current project virtual environment
MySQL DB is only applicable to Python 2 X version, python 3 X version uses PyMySQL instead of MySQL LDB, so PyMySQL extension package should be installed
Install PyMySQL driver
Three installation methods are provided to ensure installation in this virtual environment
- Directly click "+" in Settings to search for pymysql
- Enter the command pip install PyMySQL on the pycharm terminal
- Through the Windows terminal, enter the project

Under the subdirectory with the same name of the project__ init__.py file, add the following code:
import pymysql
pymysql.install_as_MySQLdb()
After the configuration is completed, run the program and test the results
Copy the URL and open it in the browser
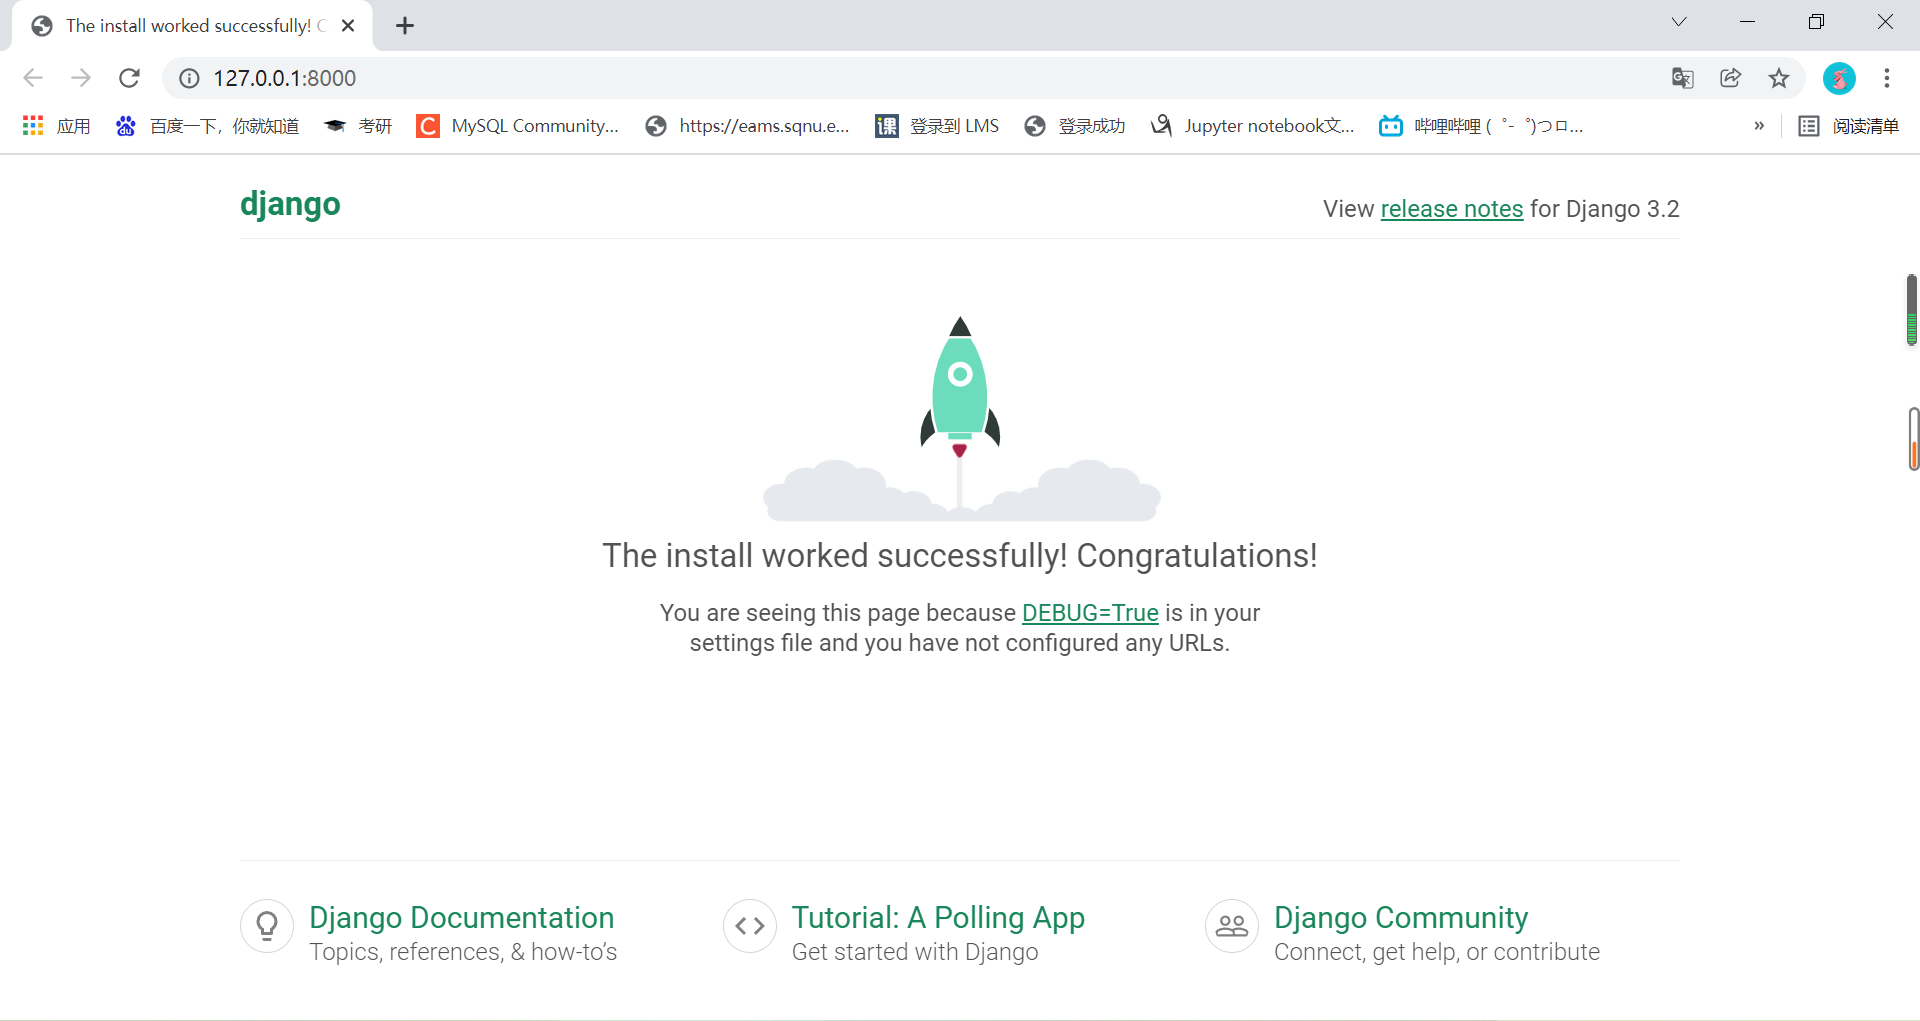
Configuration succeeded!
Submit configuration modification
(2) Configure Redis database
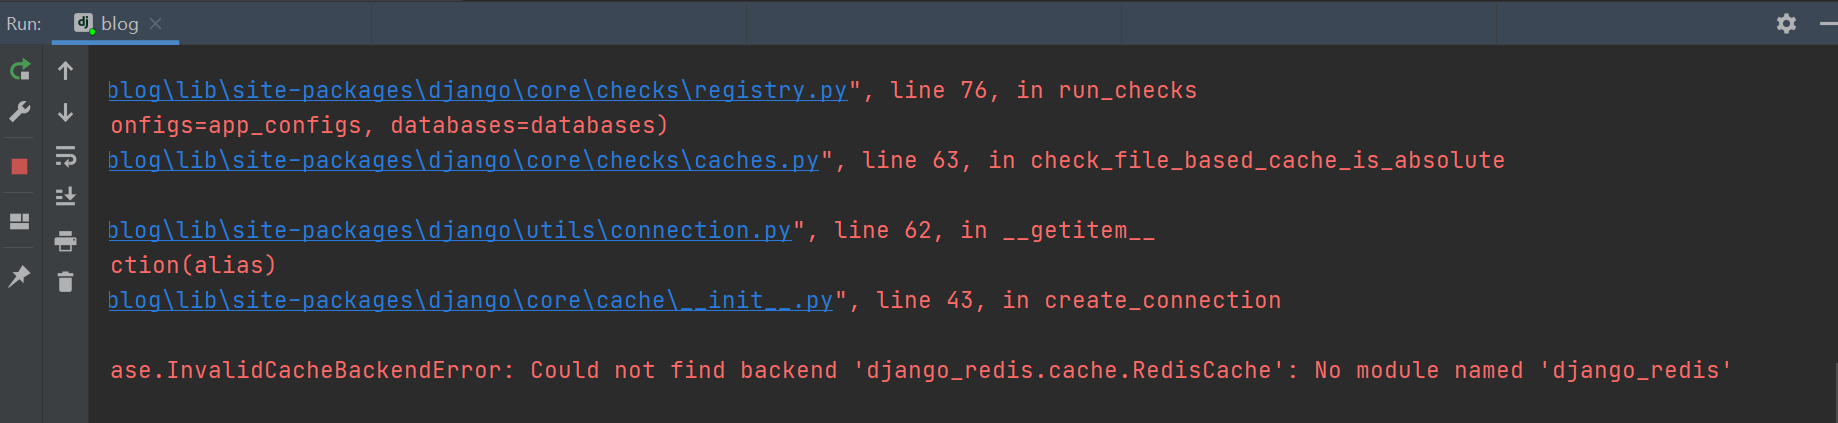
Install Django redis expansion pack
pip install django-redis //Note that you can refer to the three methods described above for installing in a virtual environment
Open settings Py, add the following code at the end to configure Redis
CACHES = {
    "default": {
        "BACKEND": "django_redis.cache.RedisCache",
        "LOCATION": "redis://127.0.0.1:6379 / 0 ", # library 0
        "OPTIONS": {
            "CLIENT_CLASS": "django_redis.client.DefaultClient",
        }
    },
    "session": {
        "BACKEND": "django_redis.cache.RedisCache",
        "LOCATION": "redis://127.0.0.1:6379 / 1 ", # warehouse 1
        "OPTIONS": {
            "CLIENT_CLASS": "django_redis.client.DefaultClient",
        }
    },
}
# The session is changed from database storage to redis
SESSION_ENGINE = "django.contrib.sessions.backends.cache"
SESSION_CACHE_ALIAS = "session"
Start redis server and test
Before that, the computer needs to install redis
Refer to: https://blog.csdn.net/weixin_41381863/article/details/88231397
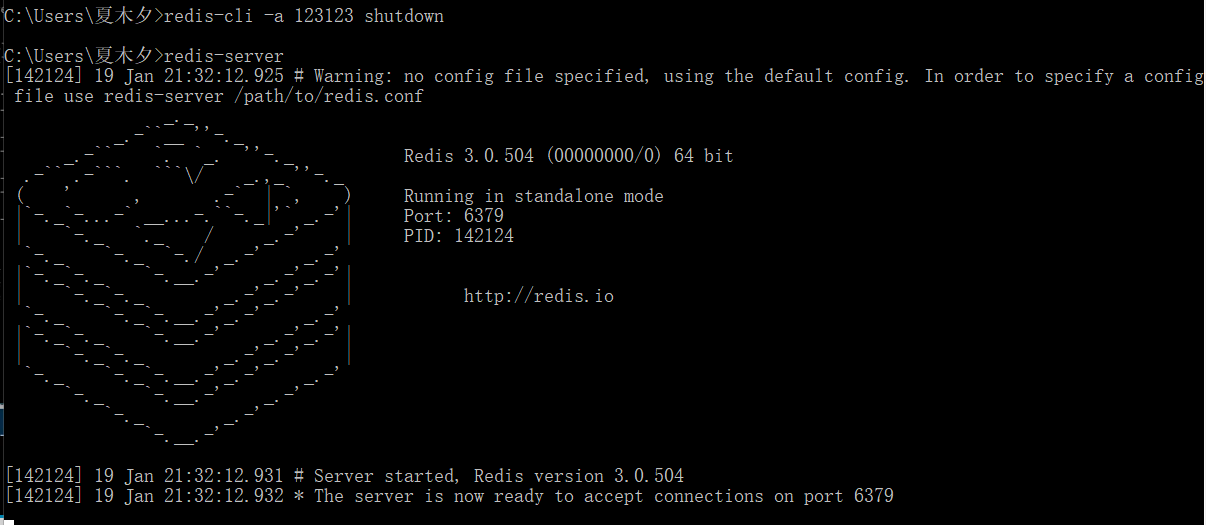
Note: when I first installed redis, an error occurred when I started redis with the redis server command:
"Could not create server TCP listening socket *:6379: bind: Address already in use", and there is no redis pattern on the terminal
Search and get the solution. Enter redis cli - a < your password > shutdown in the terminal and start it again
Install Django redis expansion pack
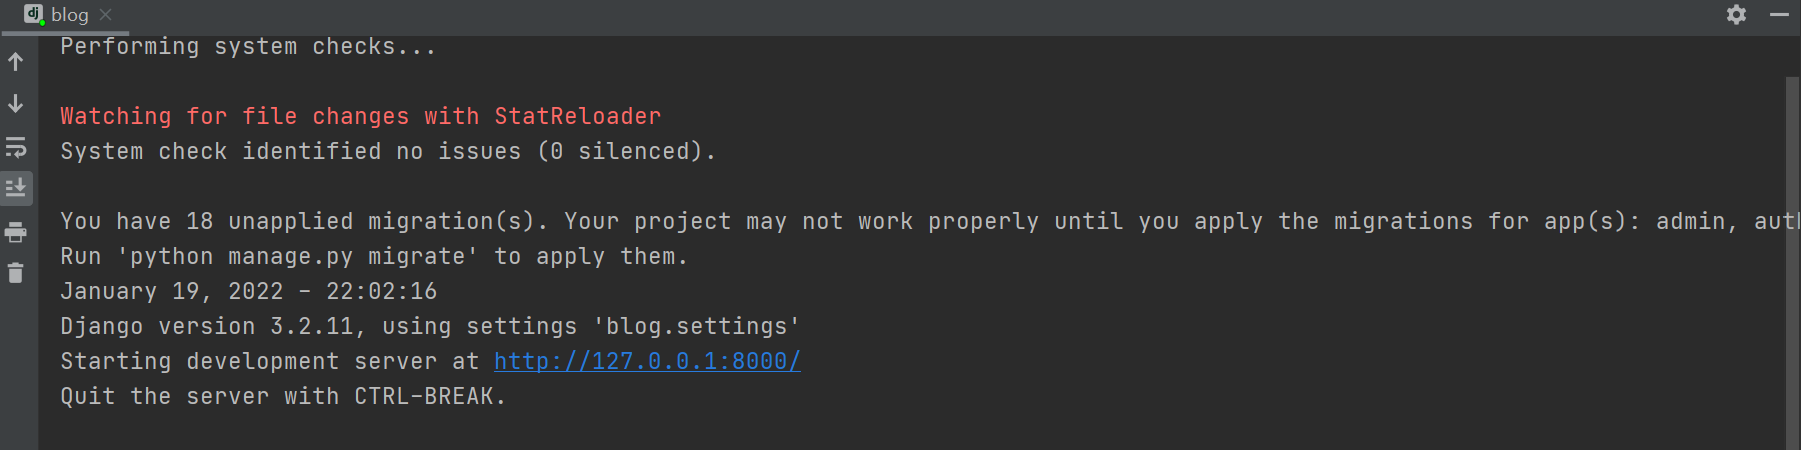
Configuration succeeded!
(3) Configuration log
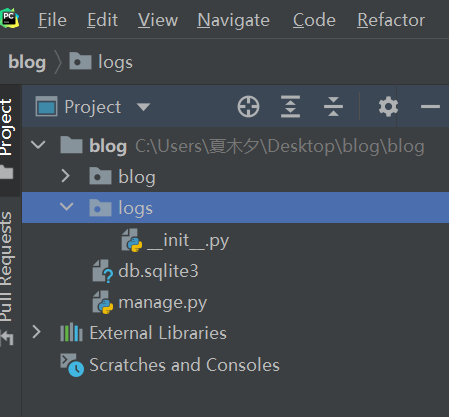
New logs folder
Open settings Py, add the following code at the end to configure the log
#journal
LOGGING = {
    'version': 1,
    'disable_existing_loggers': False,  # Disable existing loggers
    'formatters': {  # Format of log information display
        'verbose': {
            'format': '%(levelname)s %(asctime)s %(module)s %(lineno)d %(message)s'
        },
        'simple': {
            'format': '%(levelname)s %(module)s %(lineno)d %(message)s'
        },
    },
    'filters': {  # Filter logs
        'require_debug_true': {  # django only outputs logs in debug mode
            '()': 'django.utils.log.RequireDebugTrue',
        },
    },
    'handlers': {  # Log processing method
        'console': {  # Output log to terminal
            'level': 'INFO',
            'filters': ['require_debug_true'],
            'class': 'logging.StreamHandler',
            'formatter': 'simple'
        },
        'file': {  # Output log to file
            'level': 'INFO',
            'class': 'logging.handlers.RotatingFileHandler',
            'filename': os.path.join(BASE_DIR, 'logs/blog.log'),  # Location of log files
            'maxBytes': 300 * 1024 * 1024,
            'backupCount': 10,
            'formatter': 'verbose'
        },
    },
    'loggers': {  # Logger
        'django': {  # A logger named django is defined
            'handlers': ['console', 'file'],  # The log can be output to the terminal and file at the same time
            'propagate': True,  # Continue to deliver log information
            'level': 'INFO',  # The minimum log level received by the logger
        },
    }
}
Edit URLs py
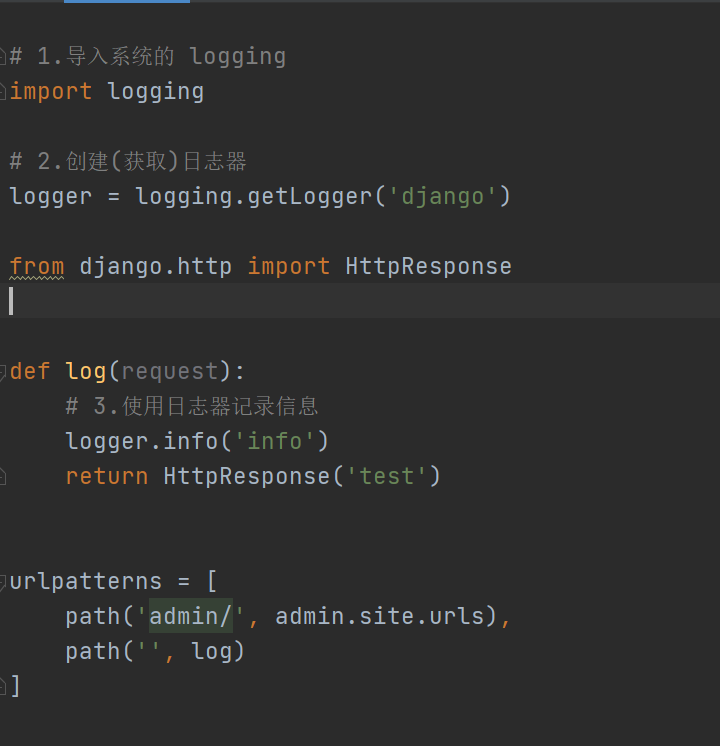
Run the project, and there is one more blog in the logs folder Log file, visit the website, and then view the blog Log file
Not finished waiting for change!!!