1. Django
1. Why Django?
- Free open source
- Rich functions
- Rapid development
- Strong scalability
- Templating System
- back-stage management
2. Create a new Python virtual environment
-
Create a new project folder on the desktop, such as website
-
From the command line, use the cd command to enter the website folder
-
input
python3 -m venv djangoenv
-
A djangoenv folder appears in the website folder
-
Windows users continue entering
djangoenv\Scripts\activate
- Mac users continue to enter
source djangoenv/bin/activate
The word (djangoenv) will appear at the beginning of the command line, as shown in the figure:

Enter on the command line
pip3 install django
Mac in the virtual environment, directly input python is the version of python 3.

3. Install Django and build a new project
Installation complete input
django-admin startproject my_blog .
# django-admin.py startproject my_blog
Where my_blog is the project name of Django website, which can be changed according to your own needs
Note: do not use names that are prone to conflict, such as django or test
Then my will appear in the website folder_ Blog folder
The contents are shown in the figure
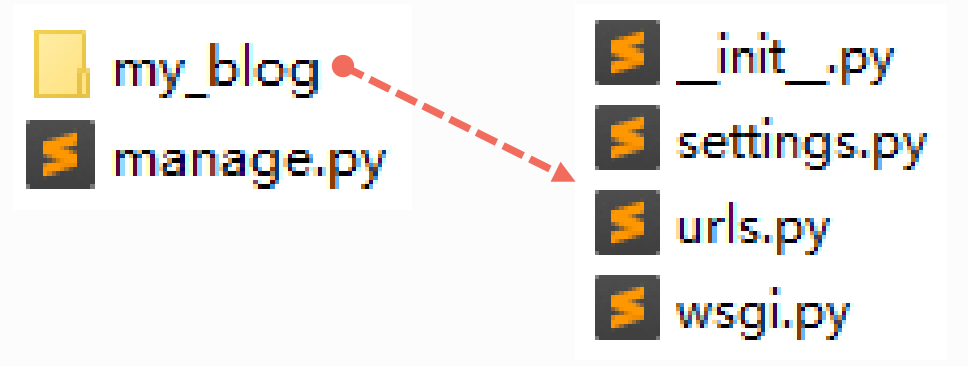
4. Purpose of initialization generated file
| File name | purpose |
|---|---|
| manage.py | A website management tool that can be called from the command line |
| In my_blog folder: | |
| __init__.py | Tell Python that this folder is a module |
| settings.py | my_ Some configurations of blog project |
| urls.py | Each URL statement within the website |
| wsgi.py | Interface between web server and Django project |
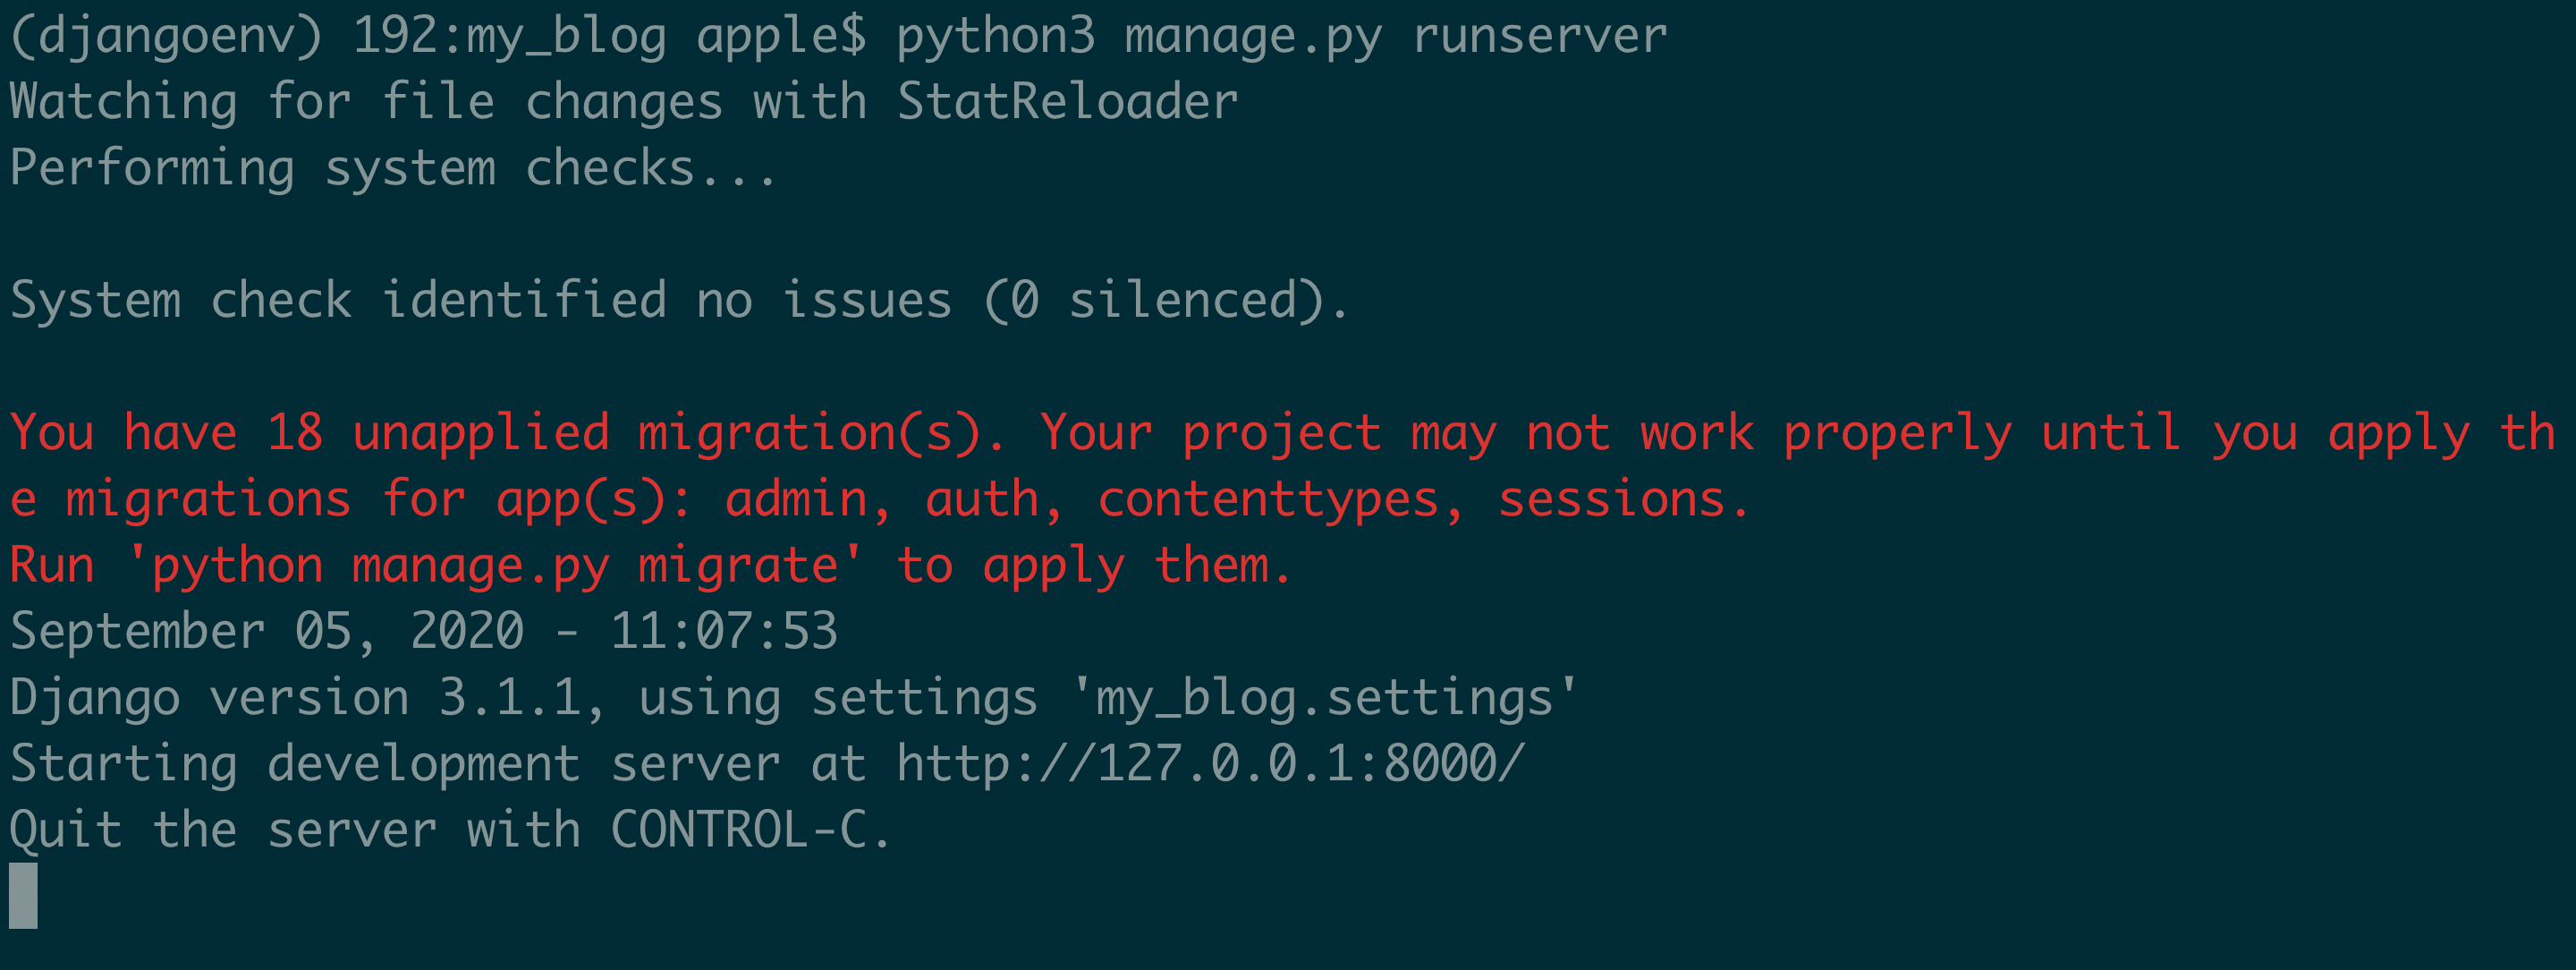
5. Check whether Django project is successfully installed
Enter on the command line
python3 manage.py runserver
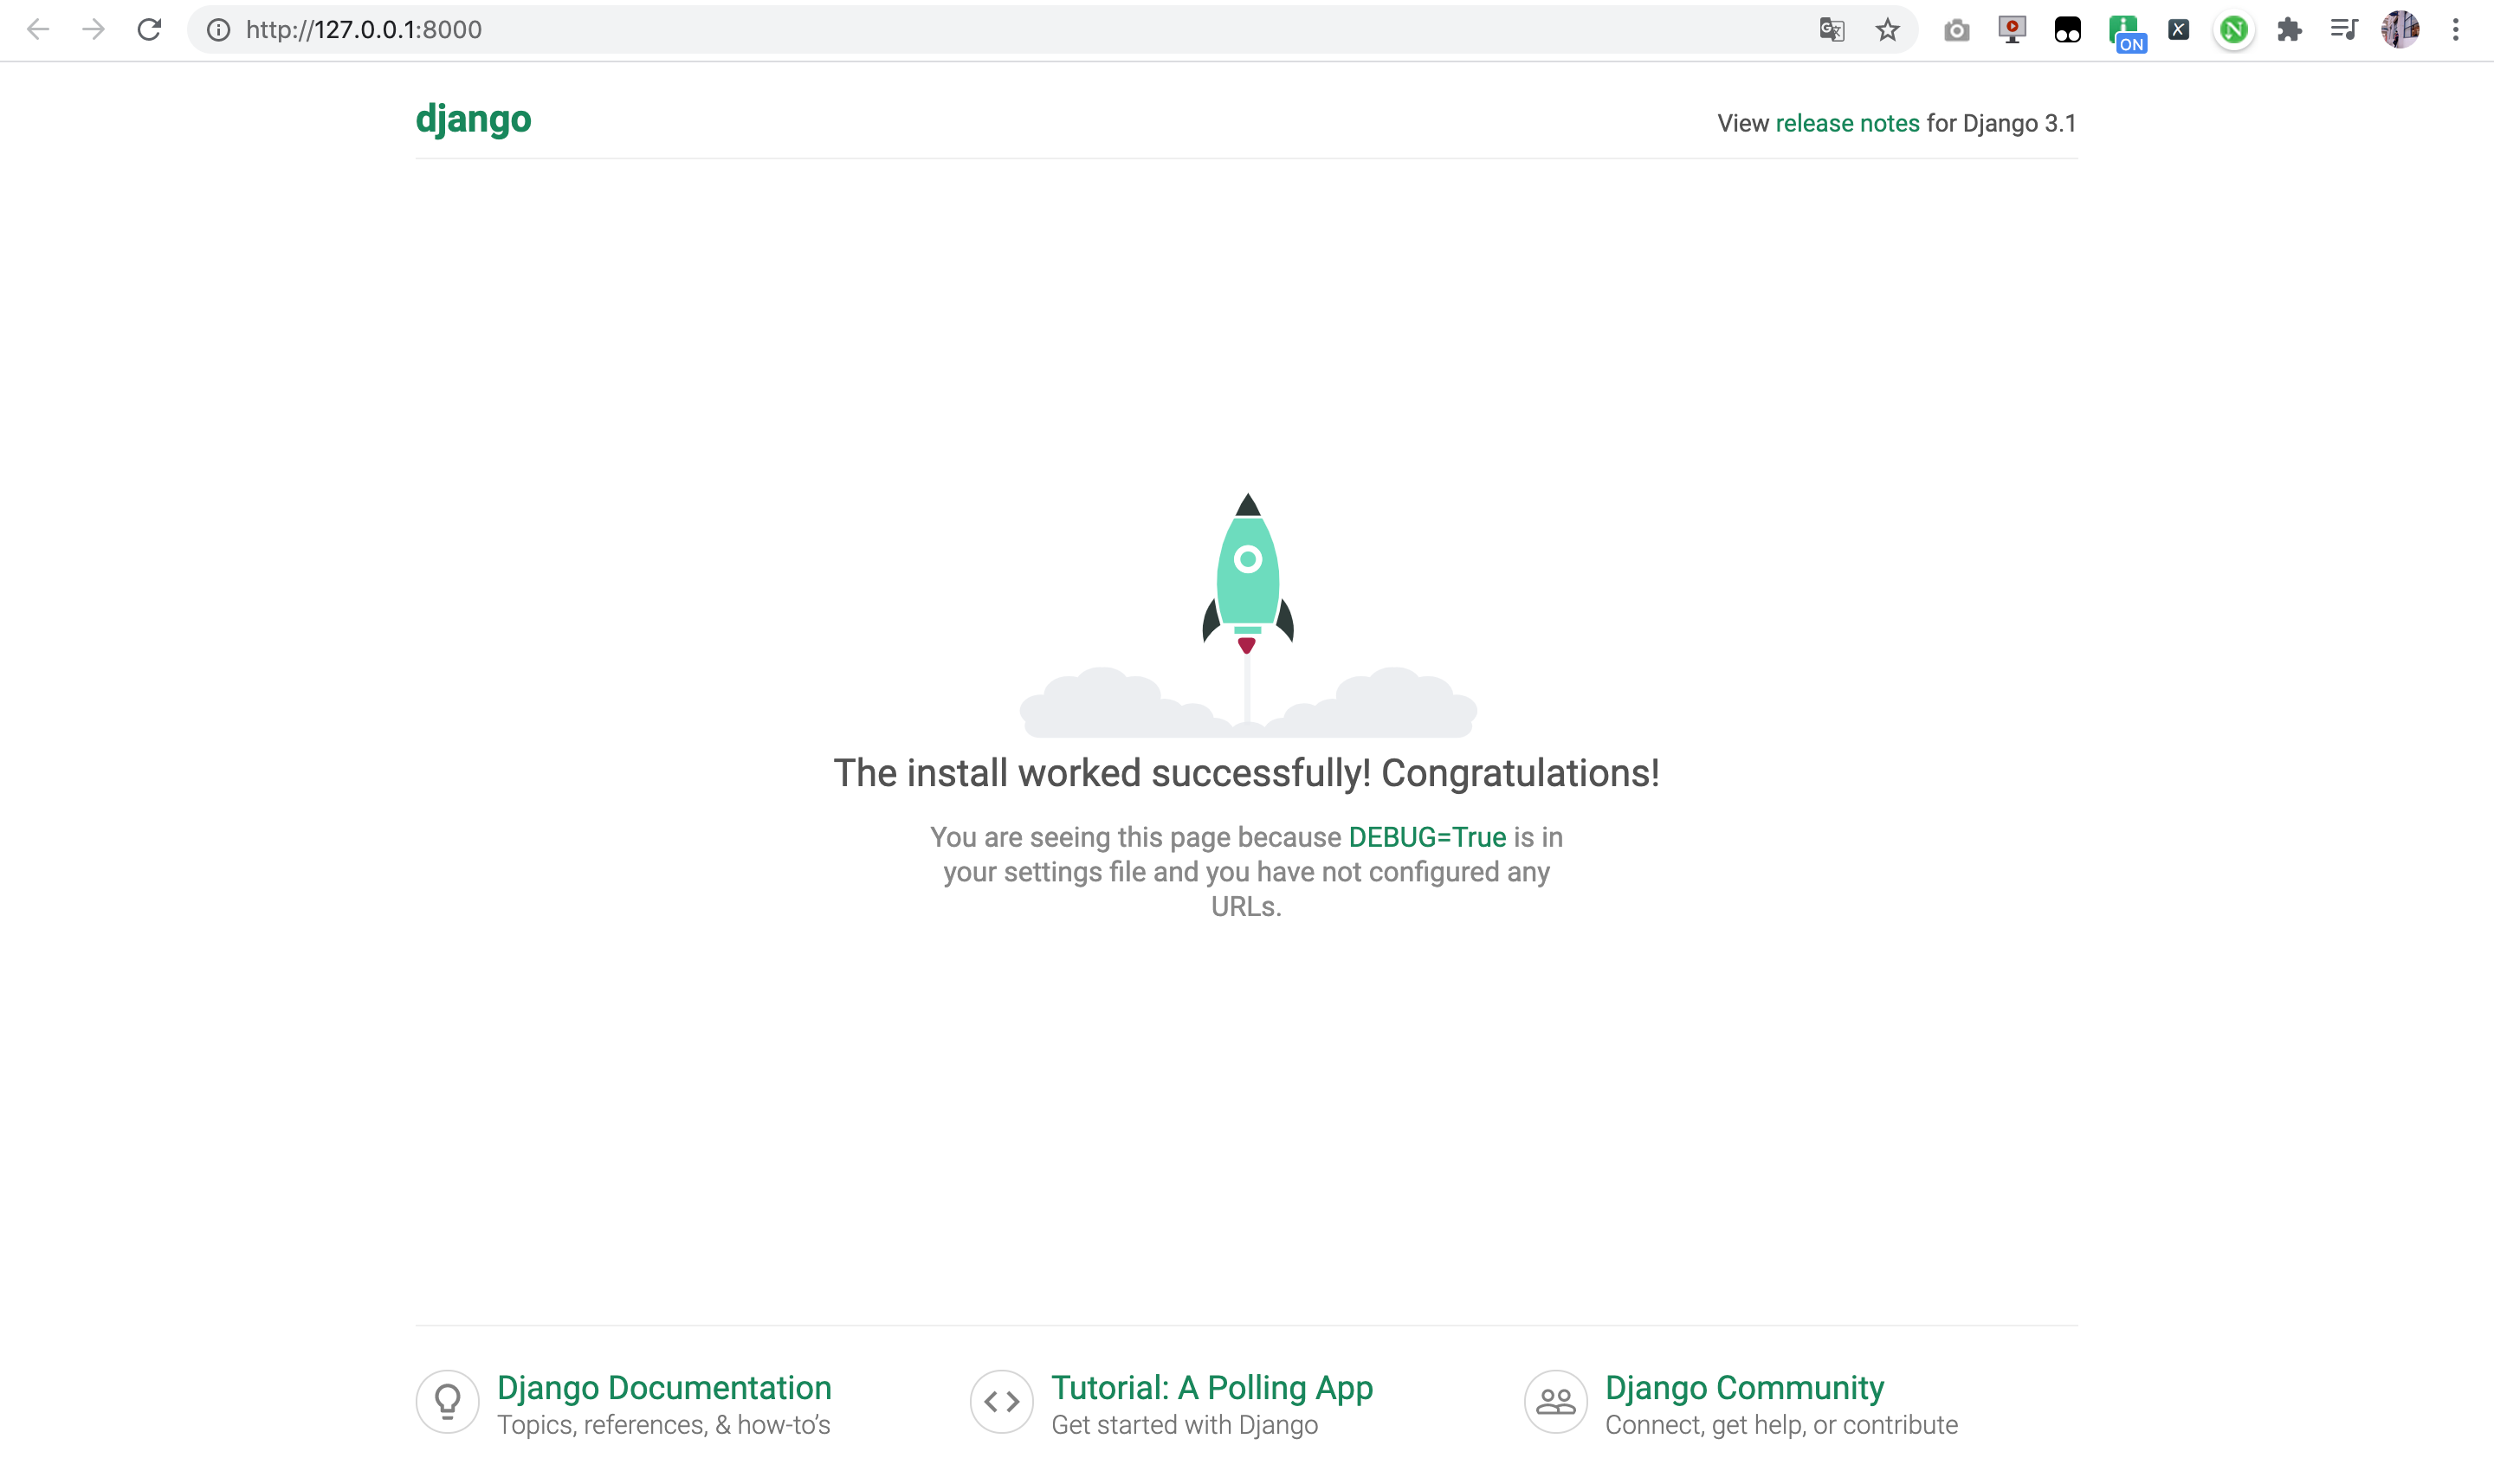
6. Check whether Django project is successfully installed
Enter the web address in the browser: 127.0.0.1:8000
7. Quickly open the folder with cd on the command line
Enter cd + space on the command line and drag the folder in
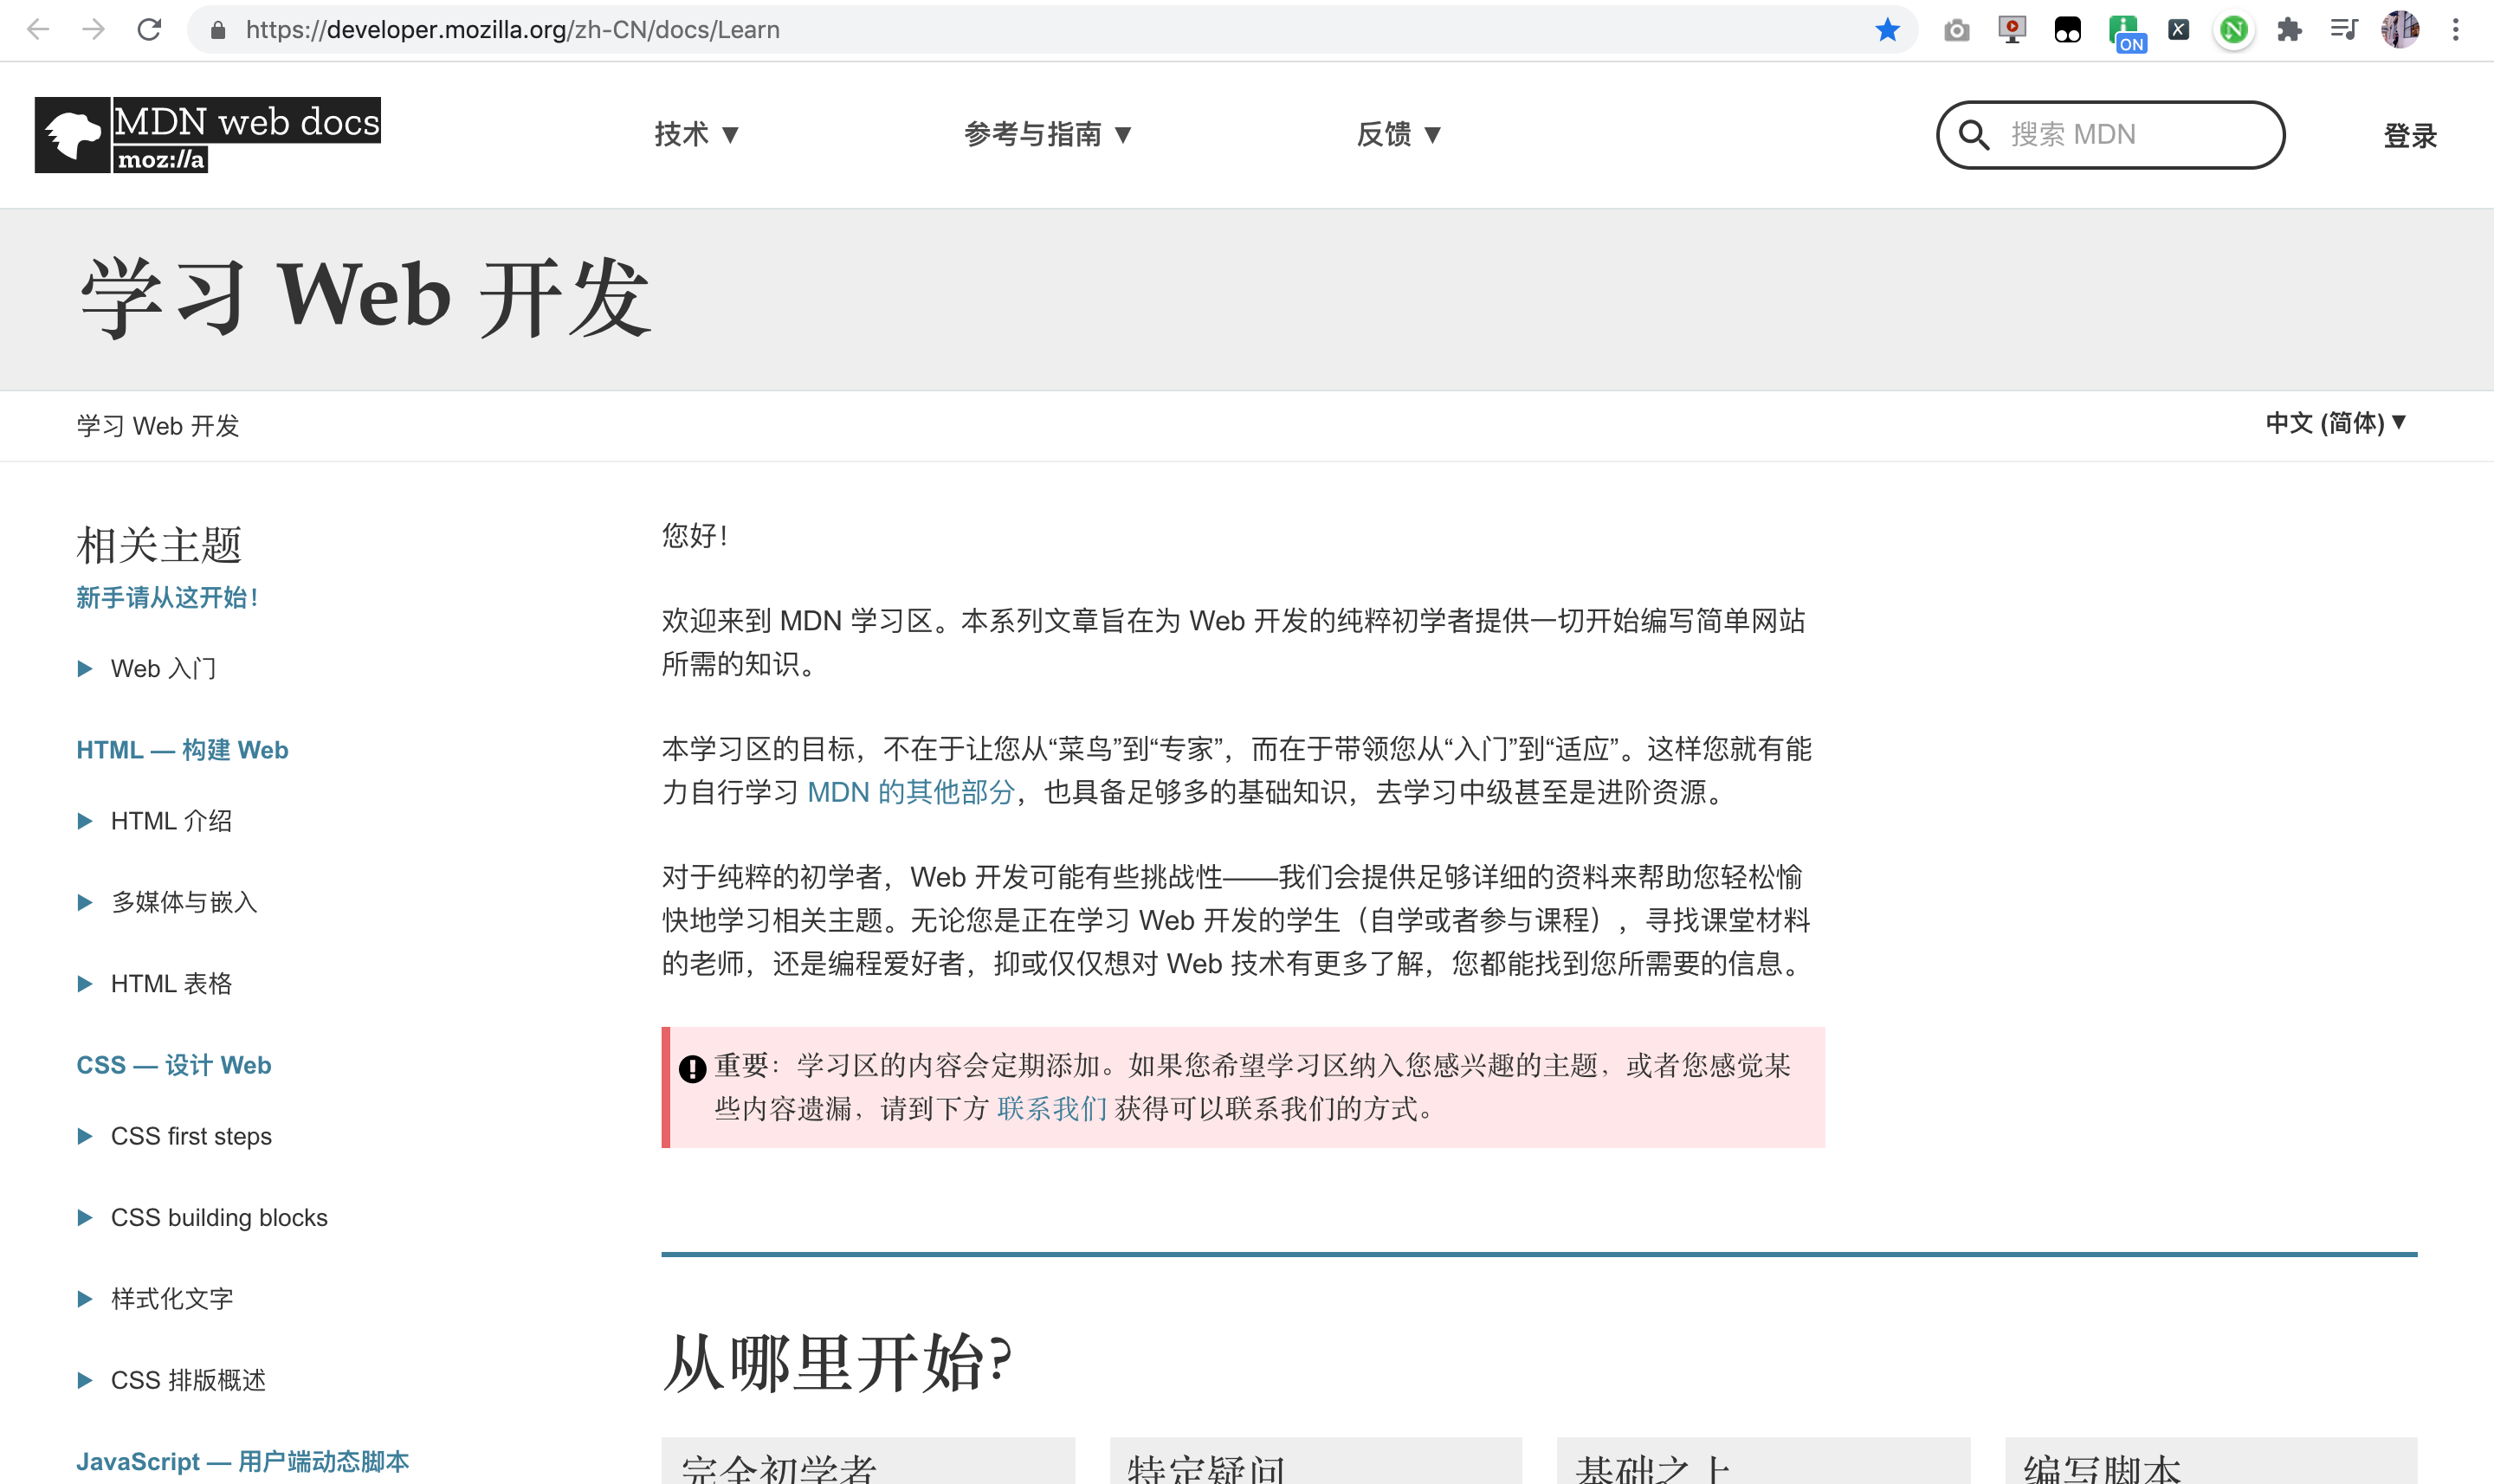
8. Learning resources
- MDN
Link: https://developer.mozilla.org/zh-CN/docs/Learn
- Color reference
Link: https://coolors.co/palettes/trending
9. Operation
Create a Django website and your blog home page, build a Django project on your computer, and make a website home page.
2. Django view and website
1. python manage.py migrate
When we run Django earlier, the command line prompts us as follows:
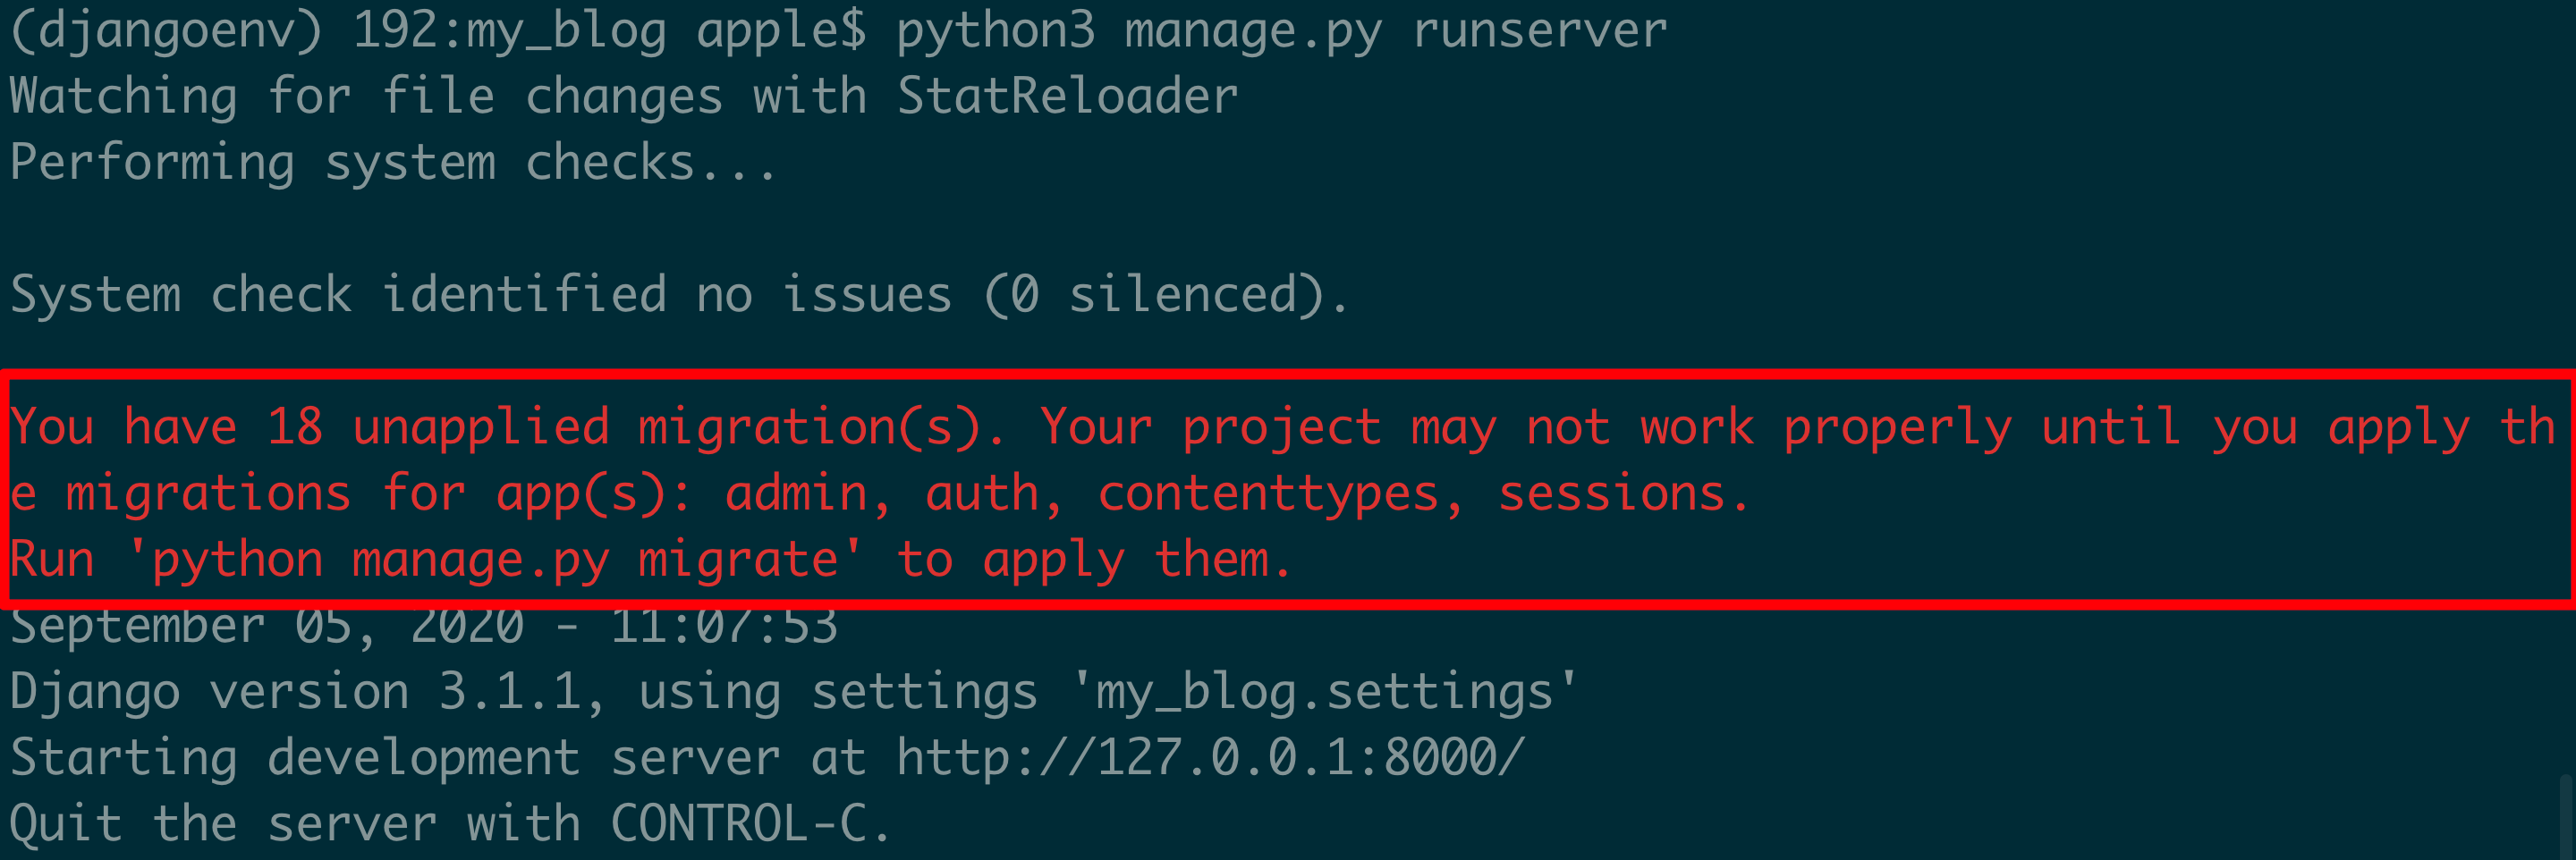
You have 18 unapplied migrations. Your project may not work until your application is migrated: admin, auth, contenttype, session.
Run "python manager.py migrate" to apply them.
You can understand it as creating a database. When helping us do this kind of relatively perfect project, its tips are generally comprehensive. So sometimes you can translate and know what to do.
2. Create a Django App
On the command line, go to the Django project folder, that is, and manage Py same path:
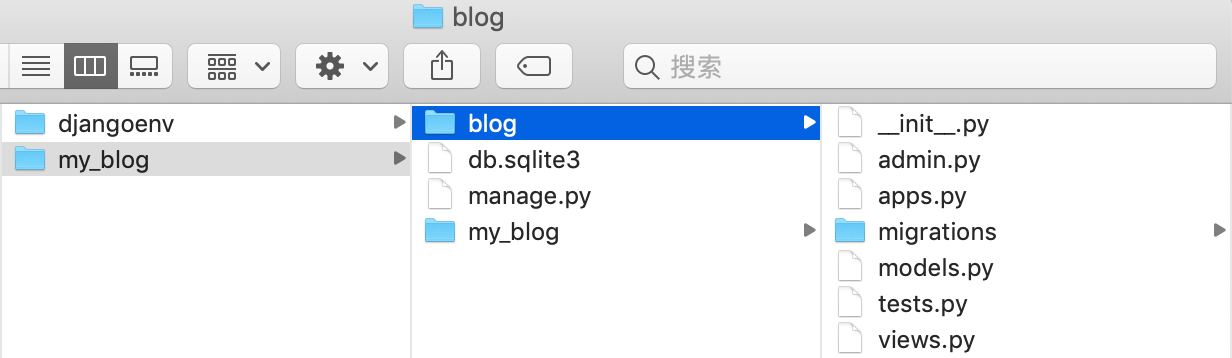
python3 manage.py startapp blog
After completion, an additional blog folder will appear, with the following contents
Role of App:
For example, the function of a website message board is an App, or the user login function, which is also an App. This App can be registered. After registration, the website can be used. That is, copying this App to other Django websites can also be used directly.
At present, we have just created an App, and we have not registered to the website, so we need to register to the website.
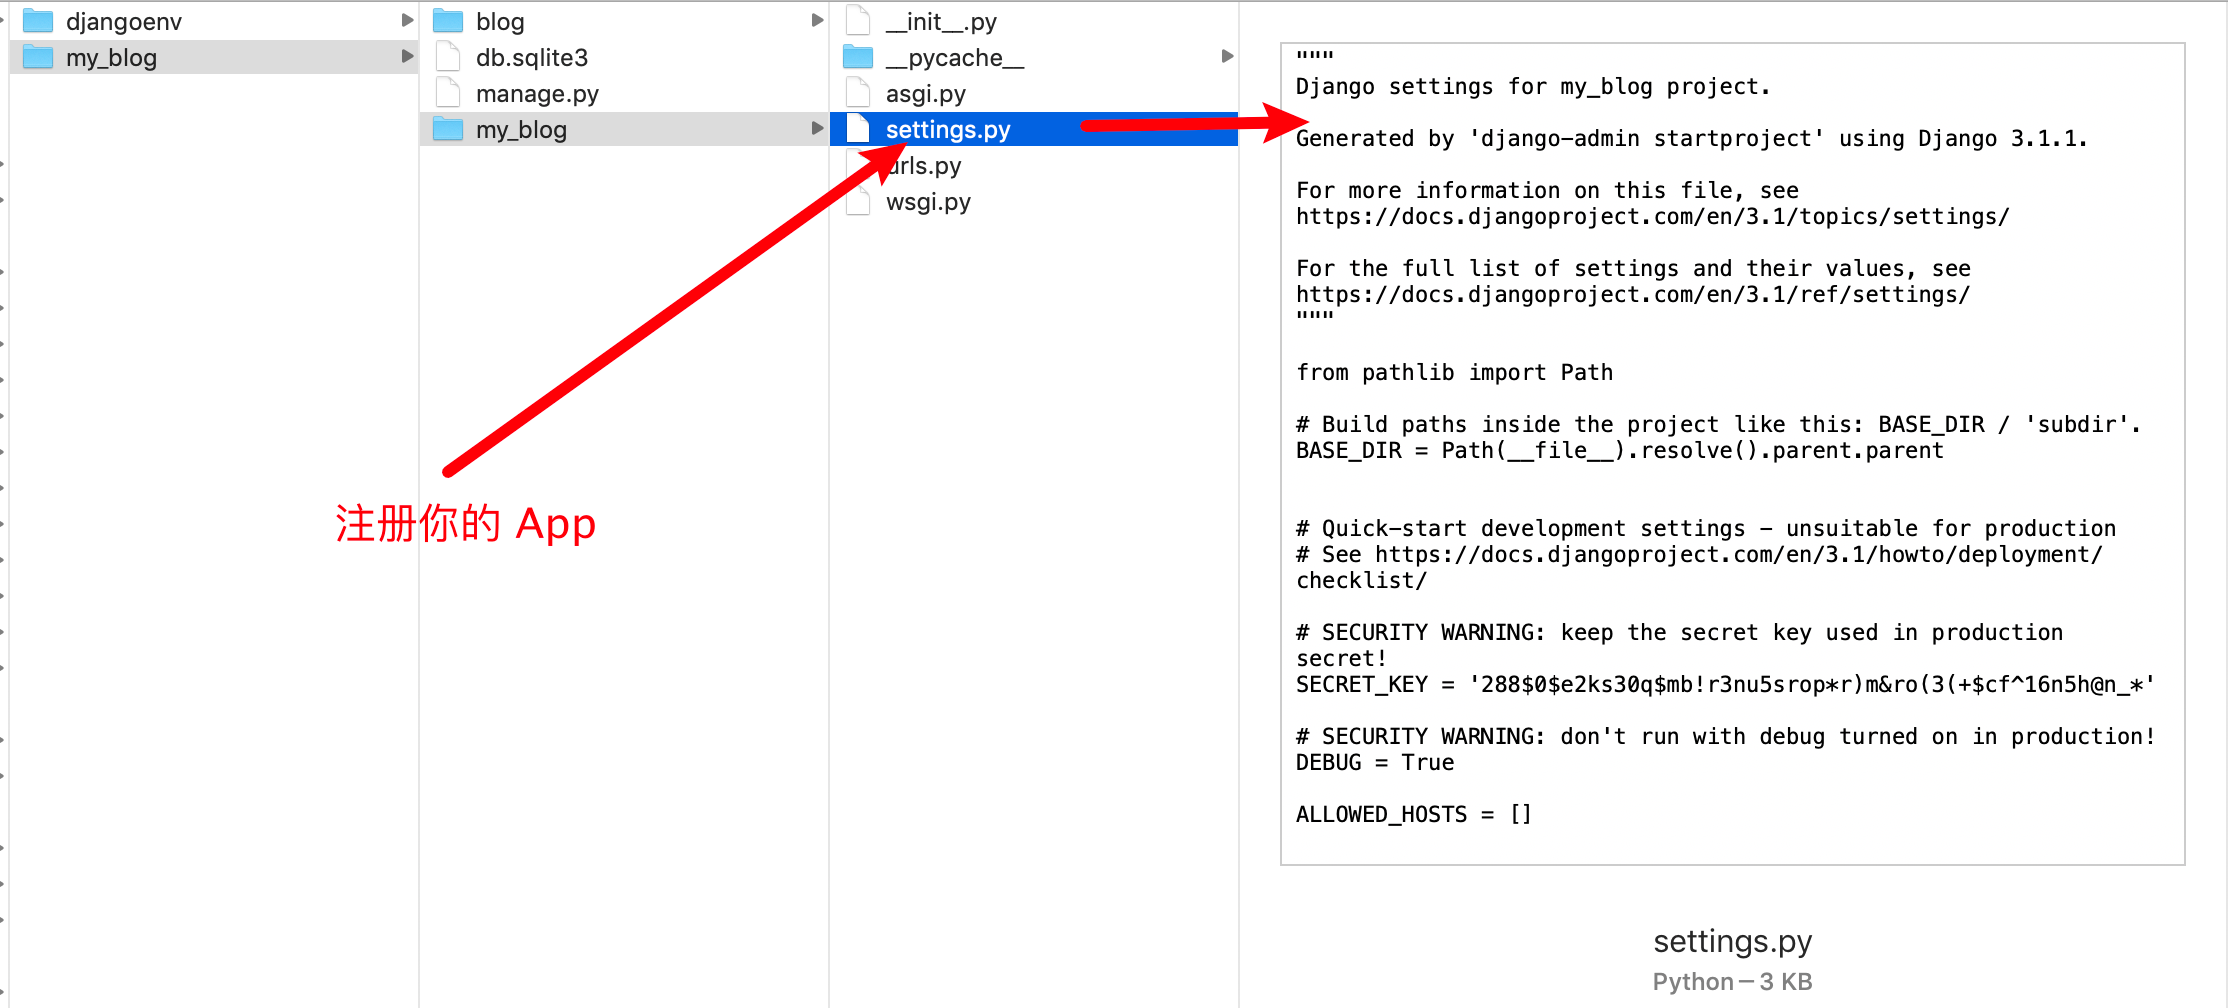
3. Add App to settings Py Li
In the Django project folder, there is a folder with the same name as the current project, in which there is a setting Py file, in installed_ Add a blog item to apps

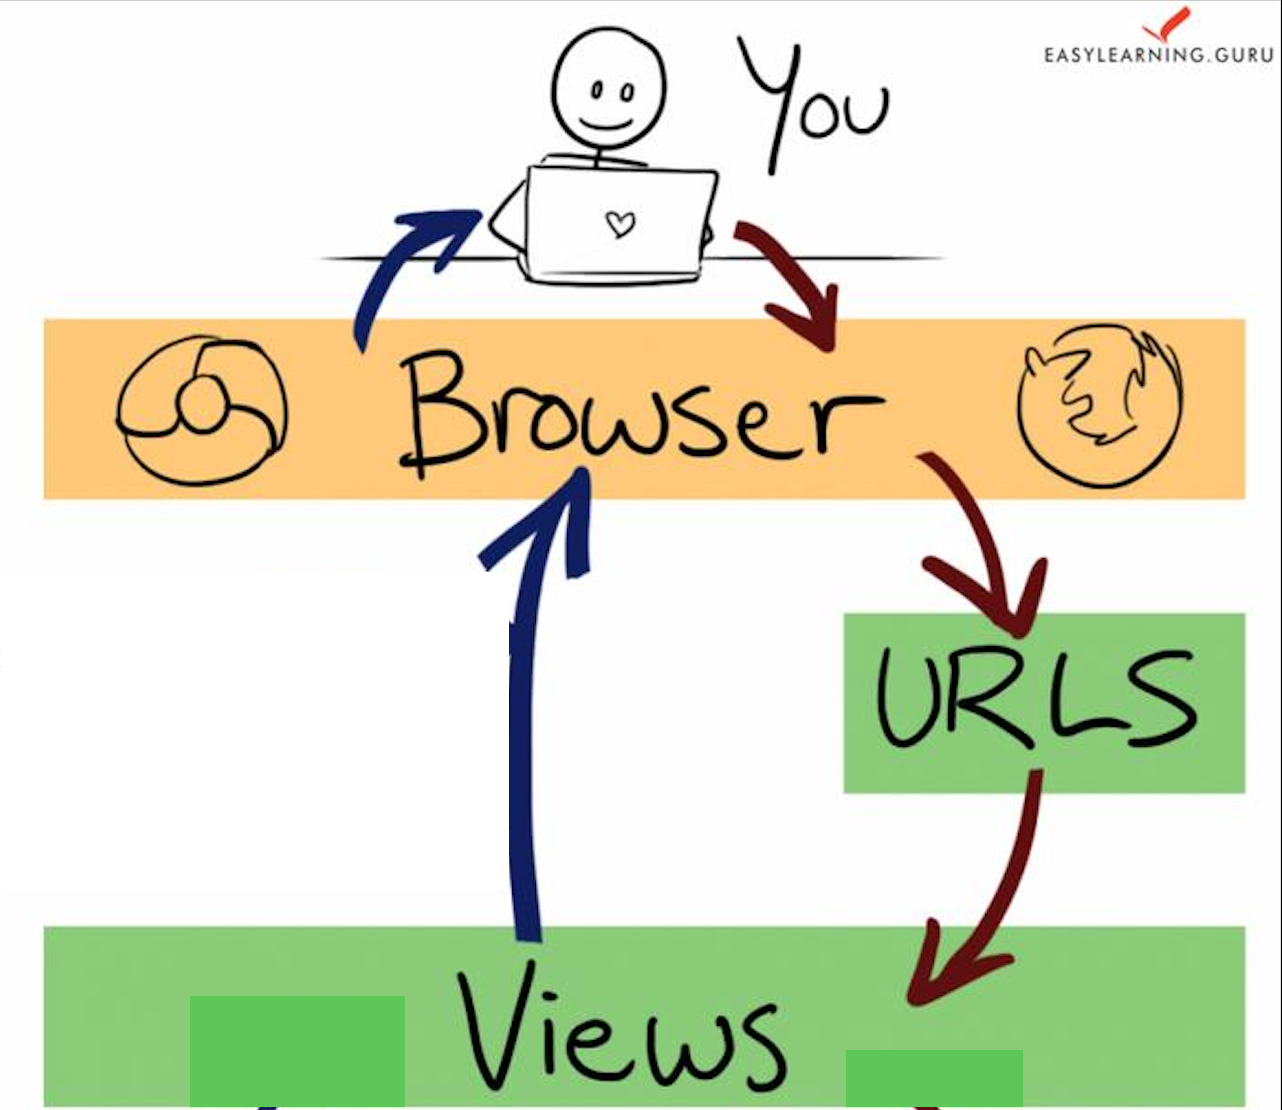
4. Django's MTV mode
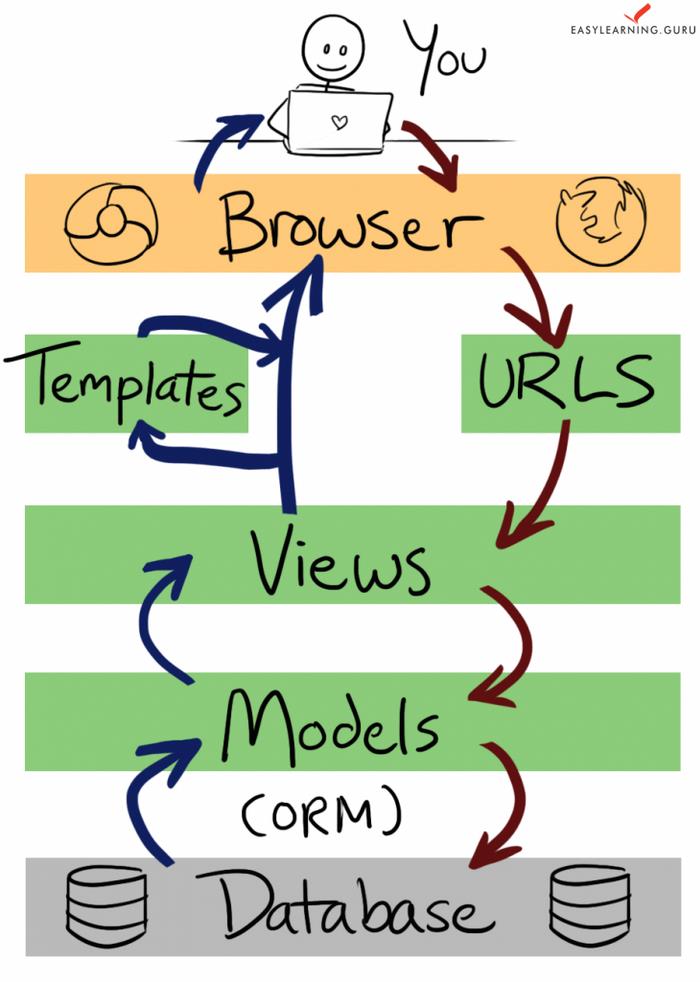
- Browser: Browser
- URL: Web address
- View: View
- Model: Model
- Database: Database
- Template: template

5. Write view function
Open blog / views Py file
The default interface is as follows


6. Write views py
Add the following statement
from django.shortcuts import render
from django.http import HttpResponse # The HttpResponse function is introduced from the http module of django
# from a sub module of a module to import a function

def index(request):
    # Define an index function to process the access Request of the home page. The Request contains the content of the HTTP Request from the user's browser
	return HttpResponse("Welcome to AI Yuechuang blog!") # Use the HttpResponse function to directly return a text to the user
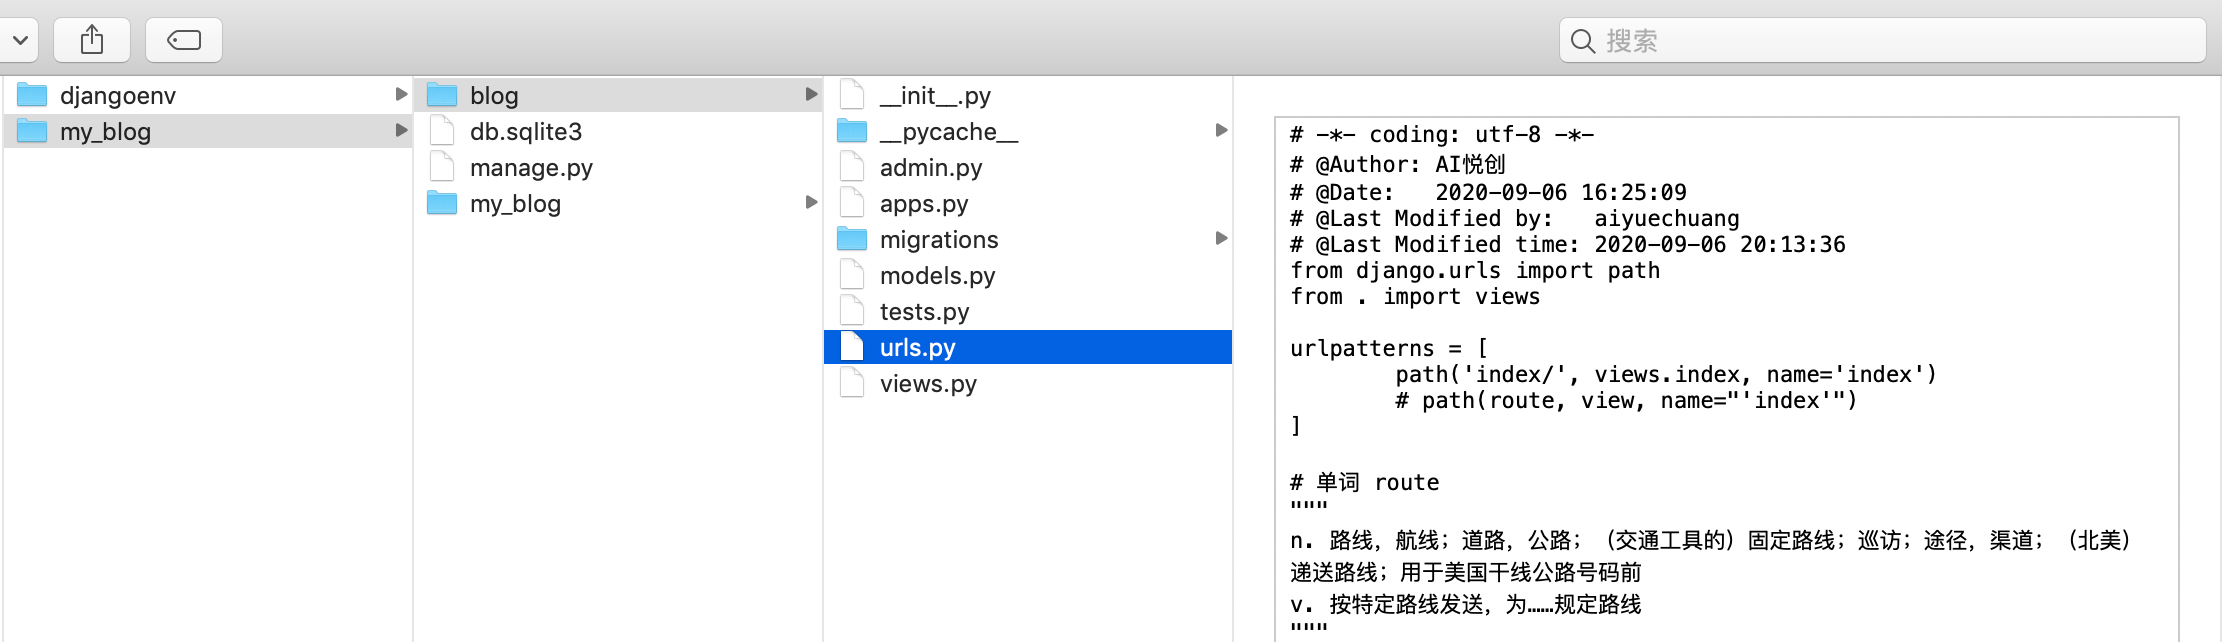
7. Create URLs py
Create a new file in the blog folder and save it as URLs Py "the bolg here is the App we created above."
Used to handle URL parsing
Fill in the following
from django.urls import path
from . import views

urlpatterns = [
	path('', views.index, name='index')
    # path(route, view)
	# path(route, view, name="'index'")
]

# Word route
"""
n. Route, route; Roads, highways; Fixed routes (of vehicles); Patrol; Channel, channel; (North America) delivery routes; Used before U.S. trunk highway numbers
v. Send by a specific route to set a route for
"""
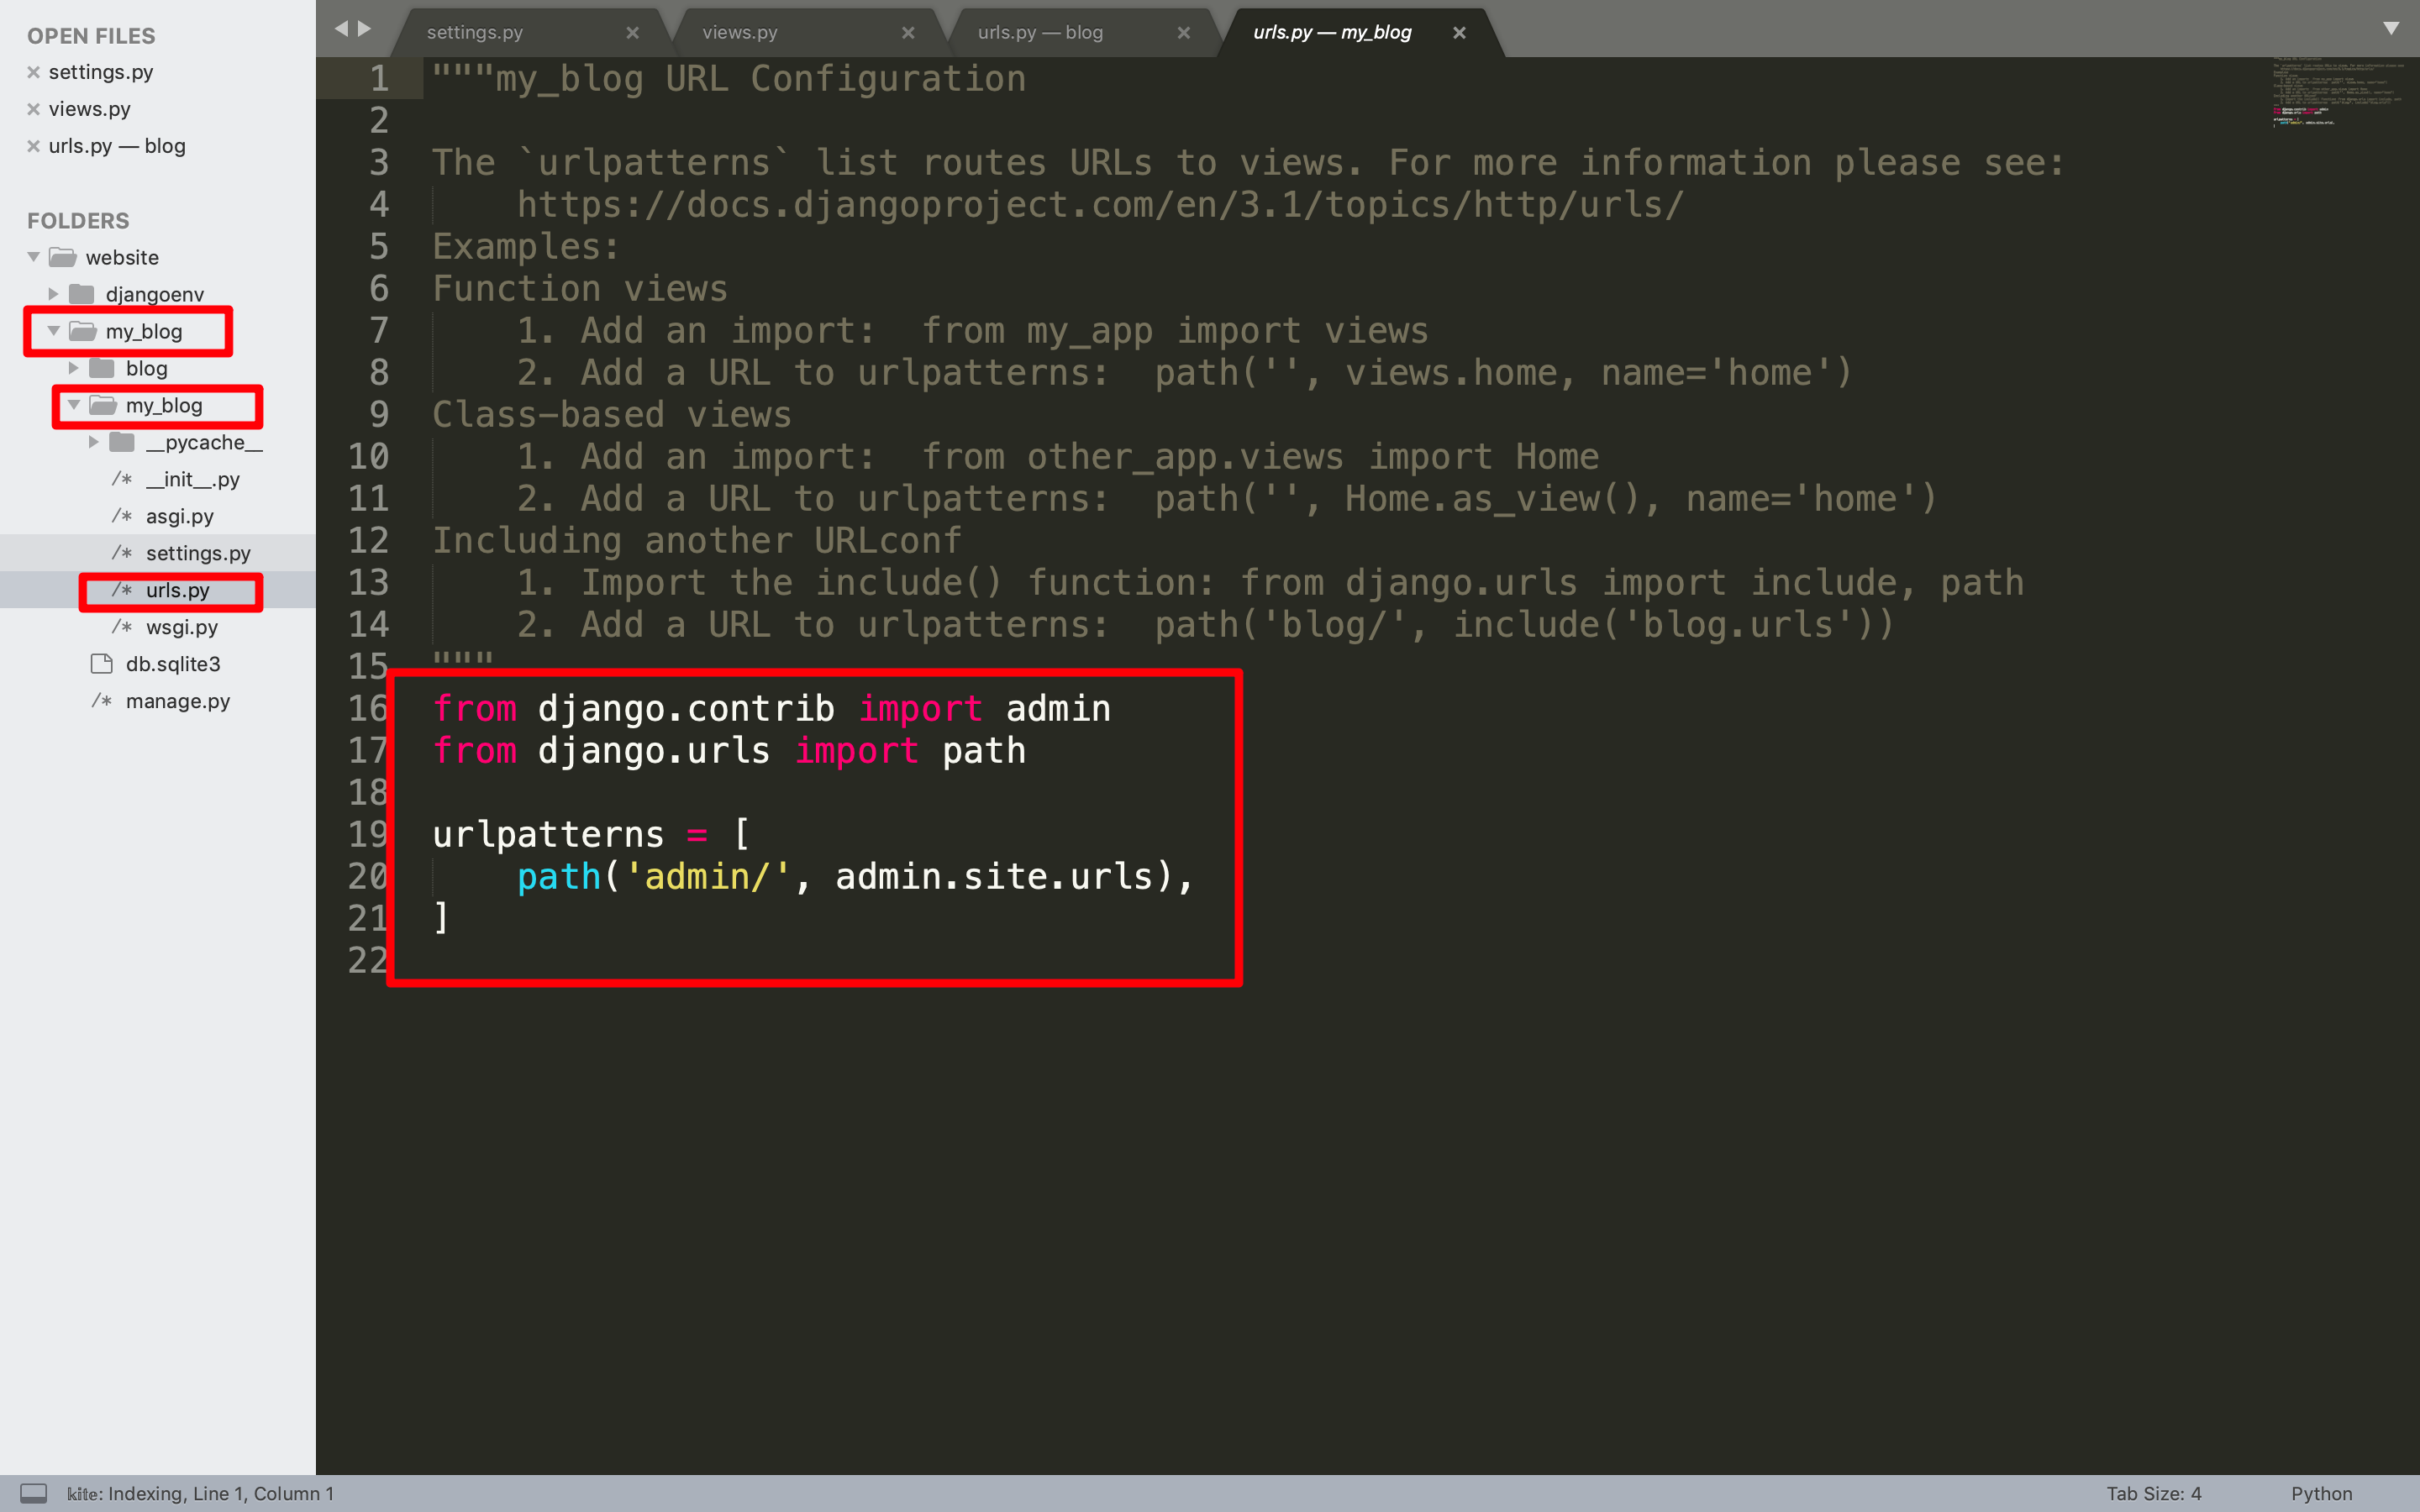
8. Attention!
In my_ There are URLs in the blog folder Py file and urls.py file we just created Py is not the same
9. URLs of configuration items py
Open my_ URLs in blog folder Py, see the following

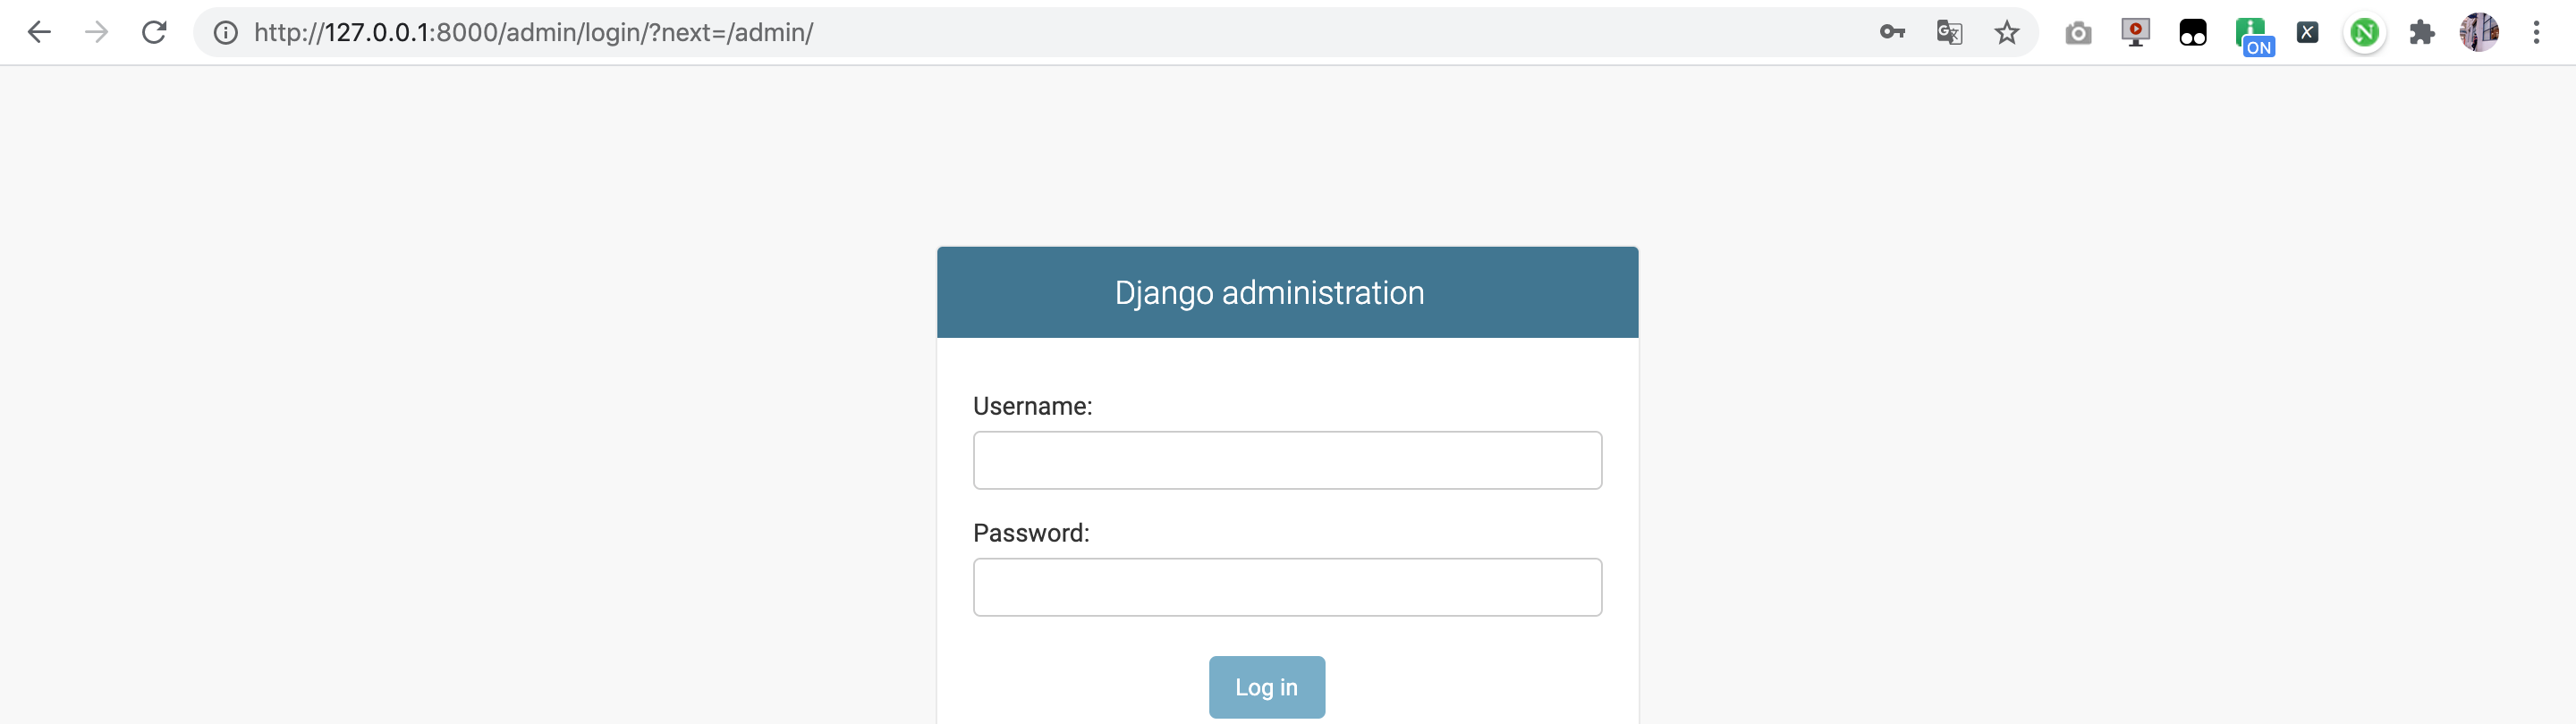
10. There is an admin web address by default
Run on the command line
python3 manage.py runserver
Then open the web address in the browser: 127.0.0.1:8000/admin
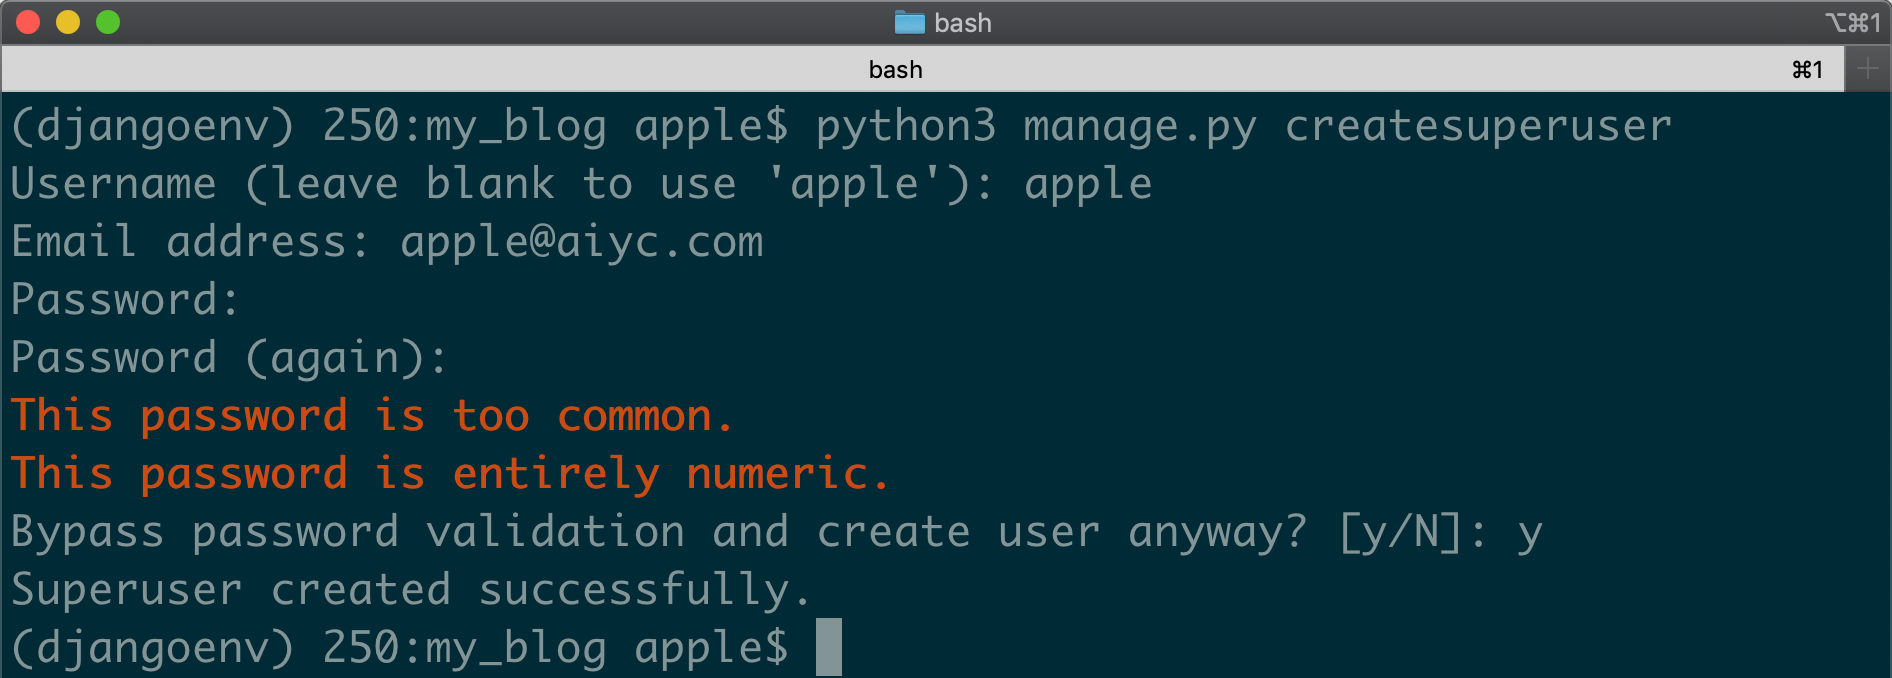
11. Create an administrator account
Enter the following on the command line
python manage.py createsuperuser
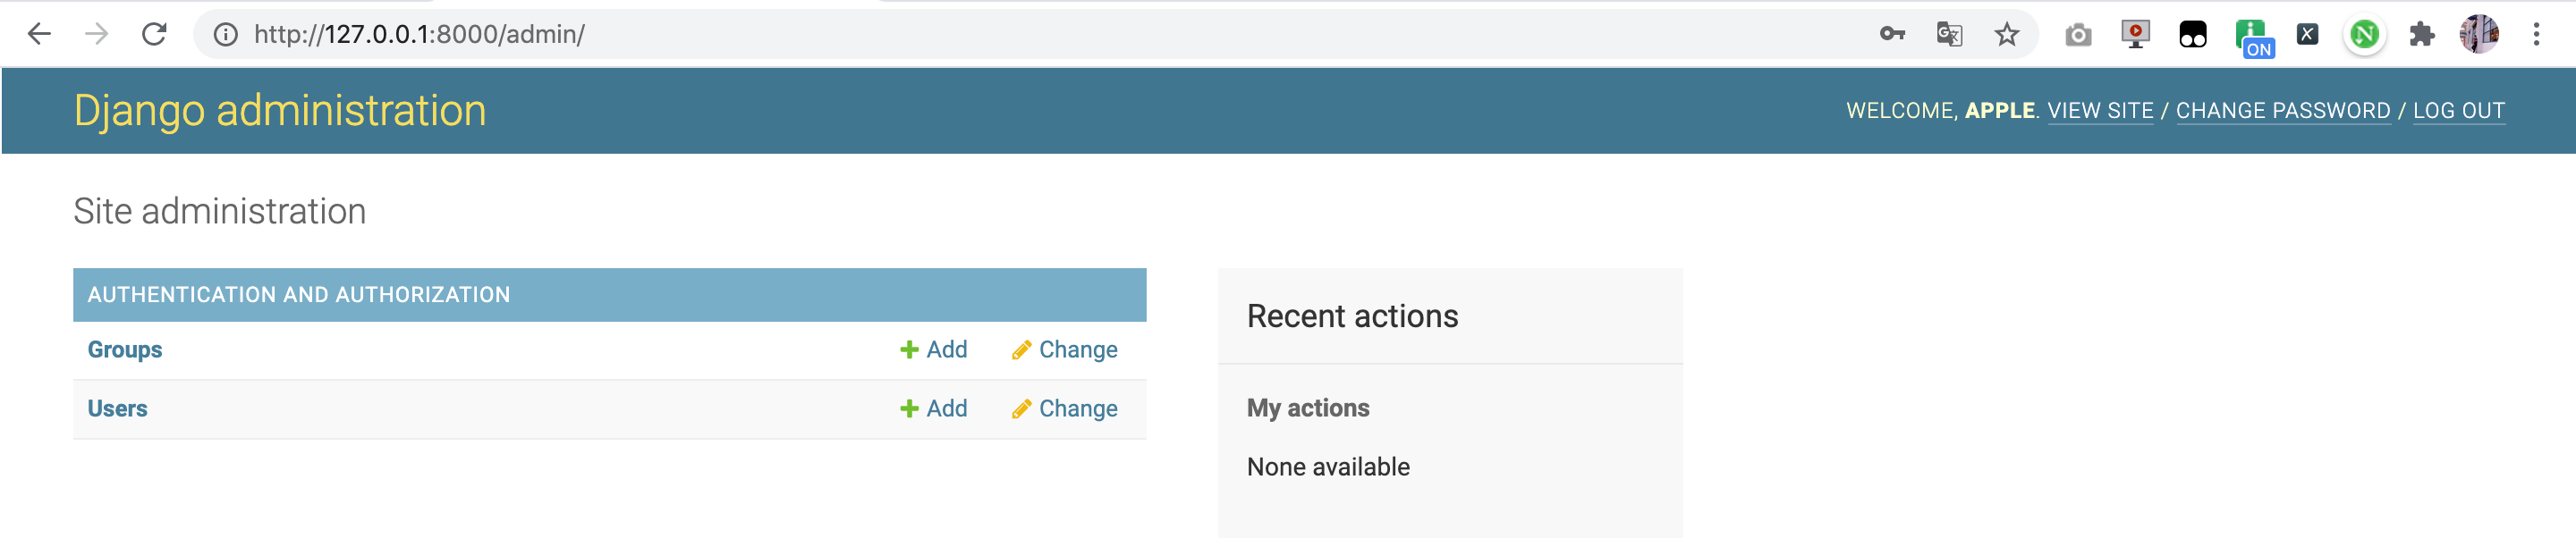
12. Log in to the background with the administrator account
Run on the command line
python manage.py runserver
Then open the web address in the browser: 127.0.0.1:8000/admin
If your service is not closed, you can refresh the page and visit the local link. admin link to log in.
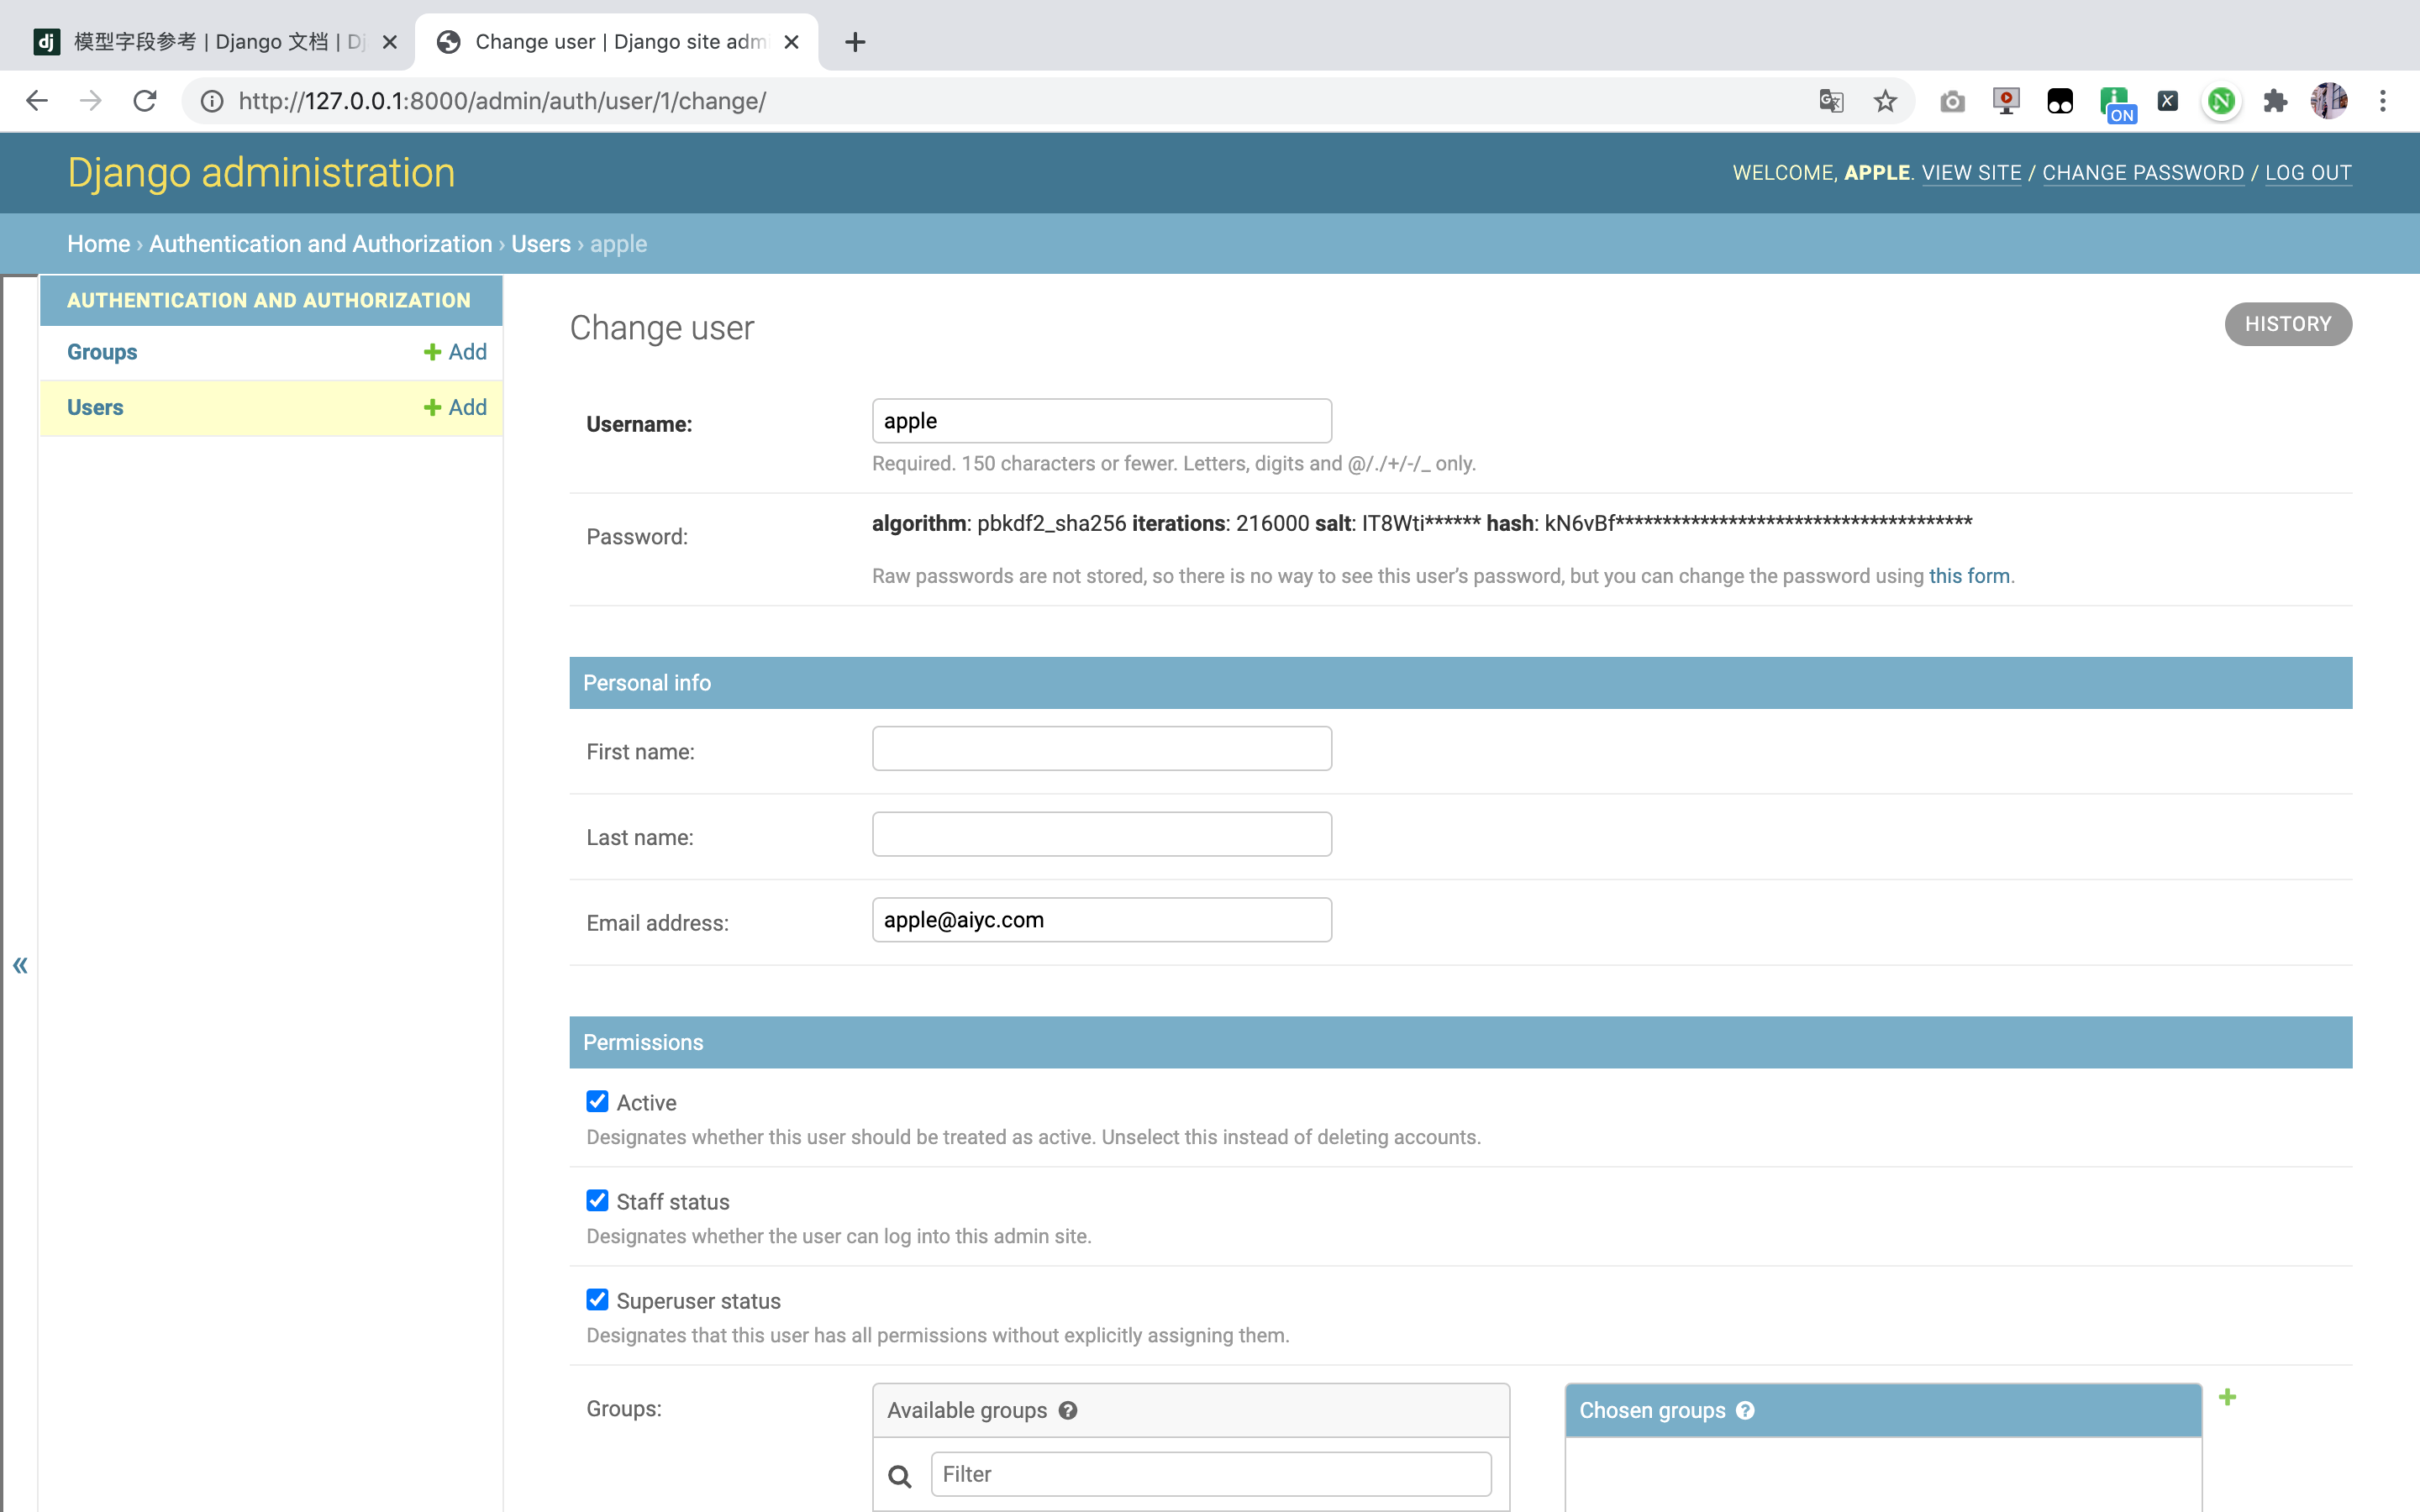
Of course, we can also create users in the background, which is no problem at all.
13. URLs of configuration items py
Modify my_ URLs in blog folder py
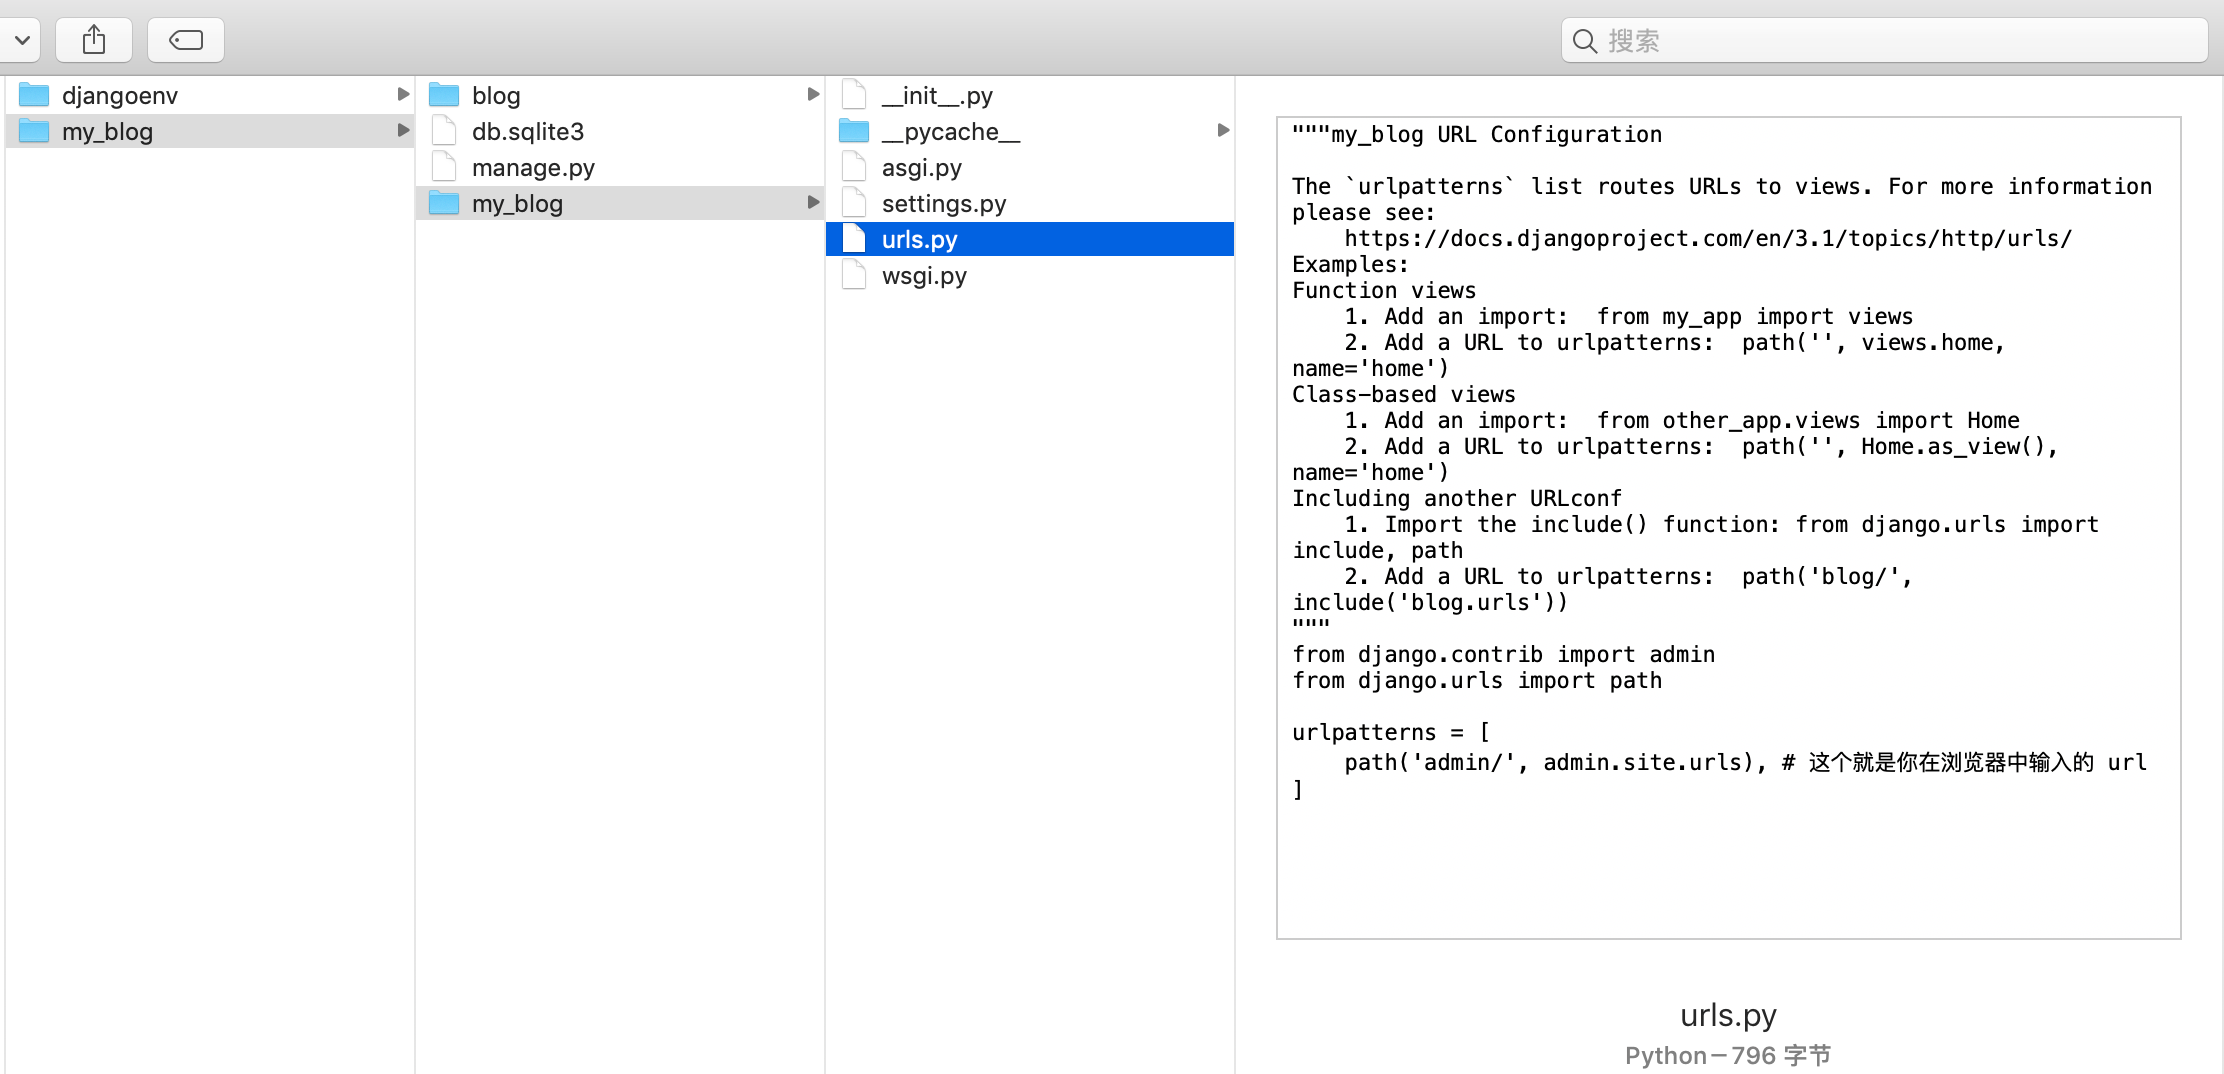
Add two contents
from django.contrib import admin
from django.urls import path, include # Add an include

urlpatterns = [
    path('admin/', admin.site.urls), # This is the url you enter in the browser
    path('blog/', include('blog.urls'), name='aiyc'),  # The end of the address needs to be added/
]
At this time, your home page link becomes: http://127.0.0.1:8000/blog/ Direct access: http://127.0.0.1:8000/ The following page appears:
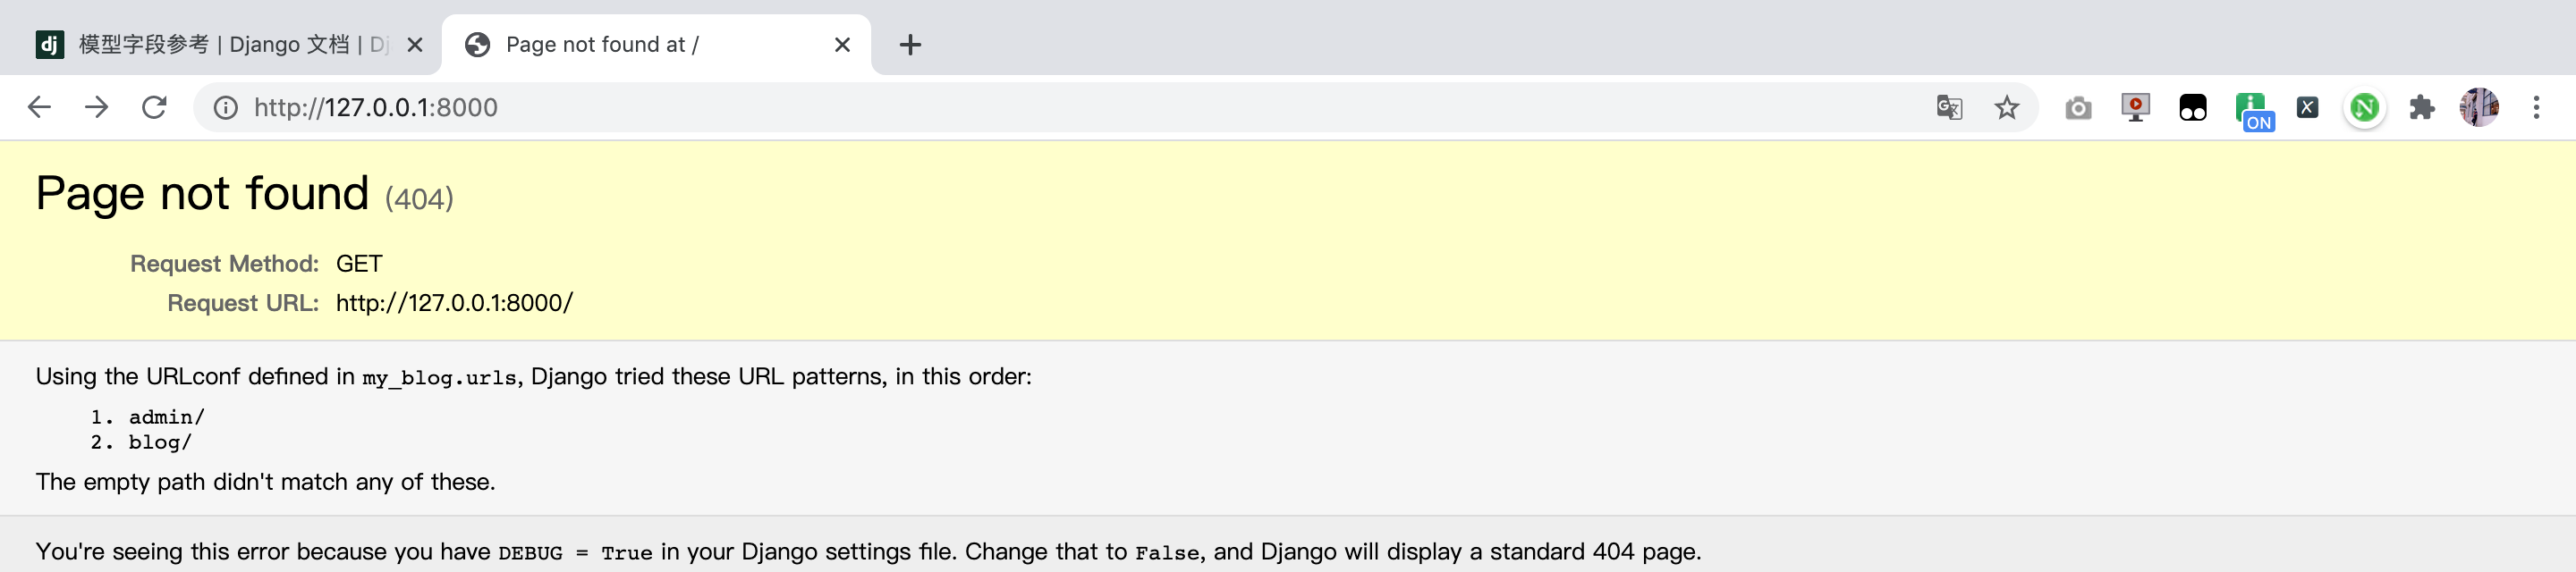
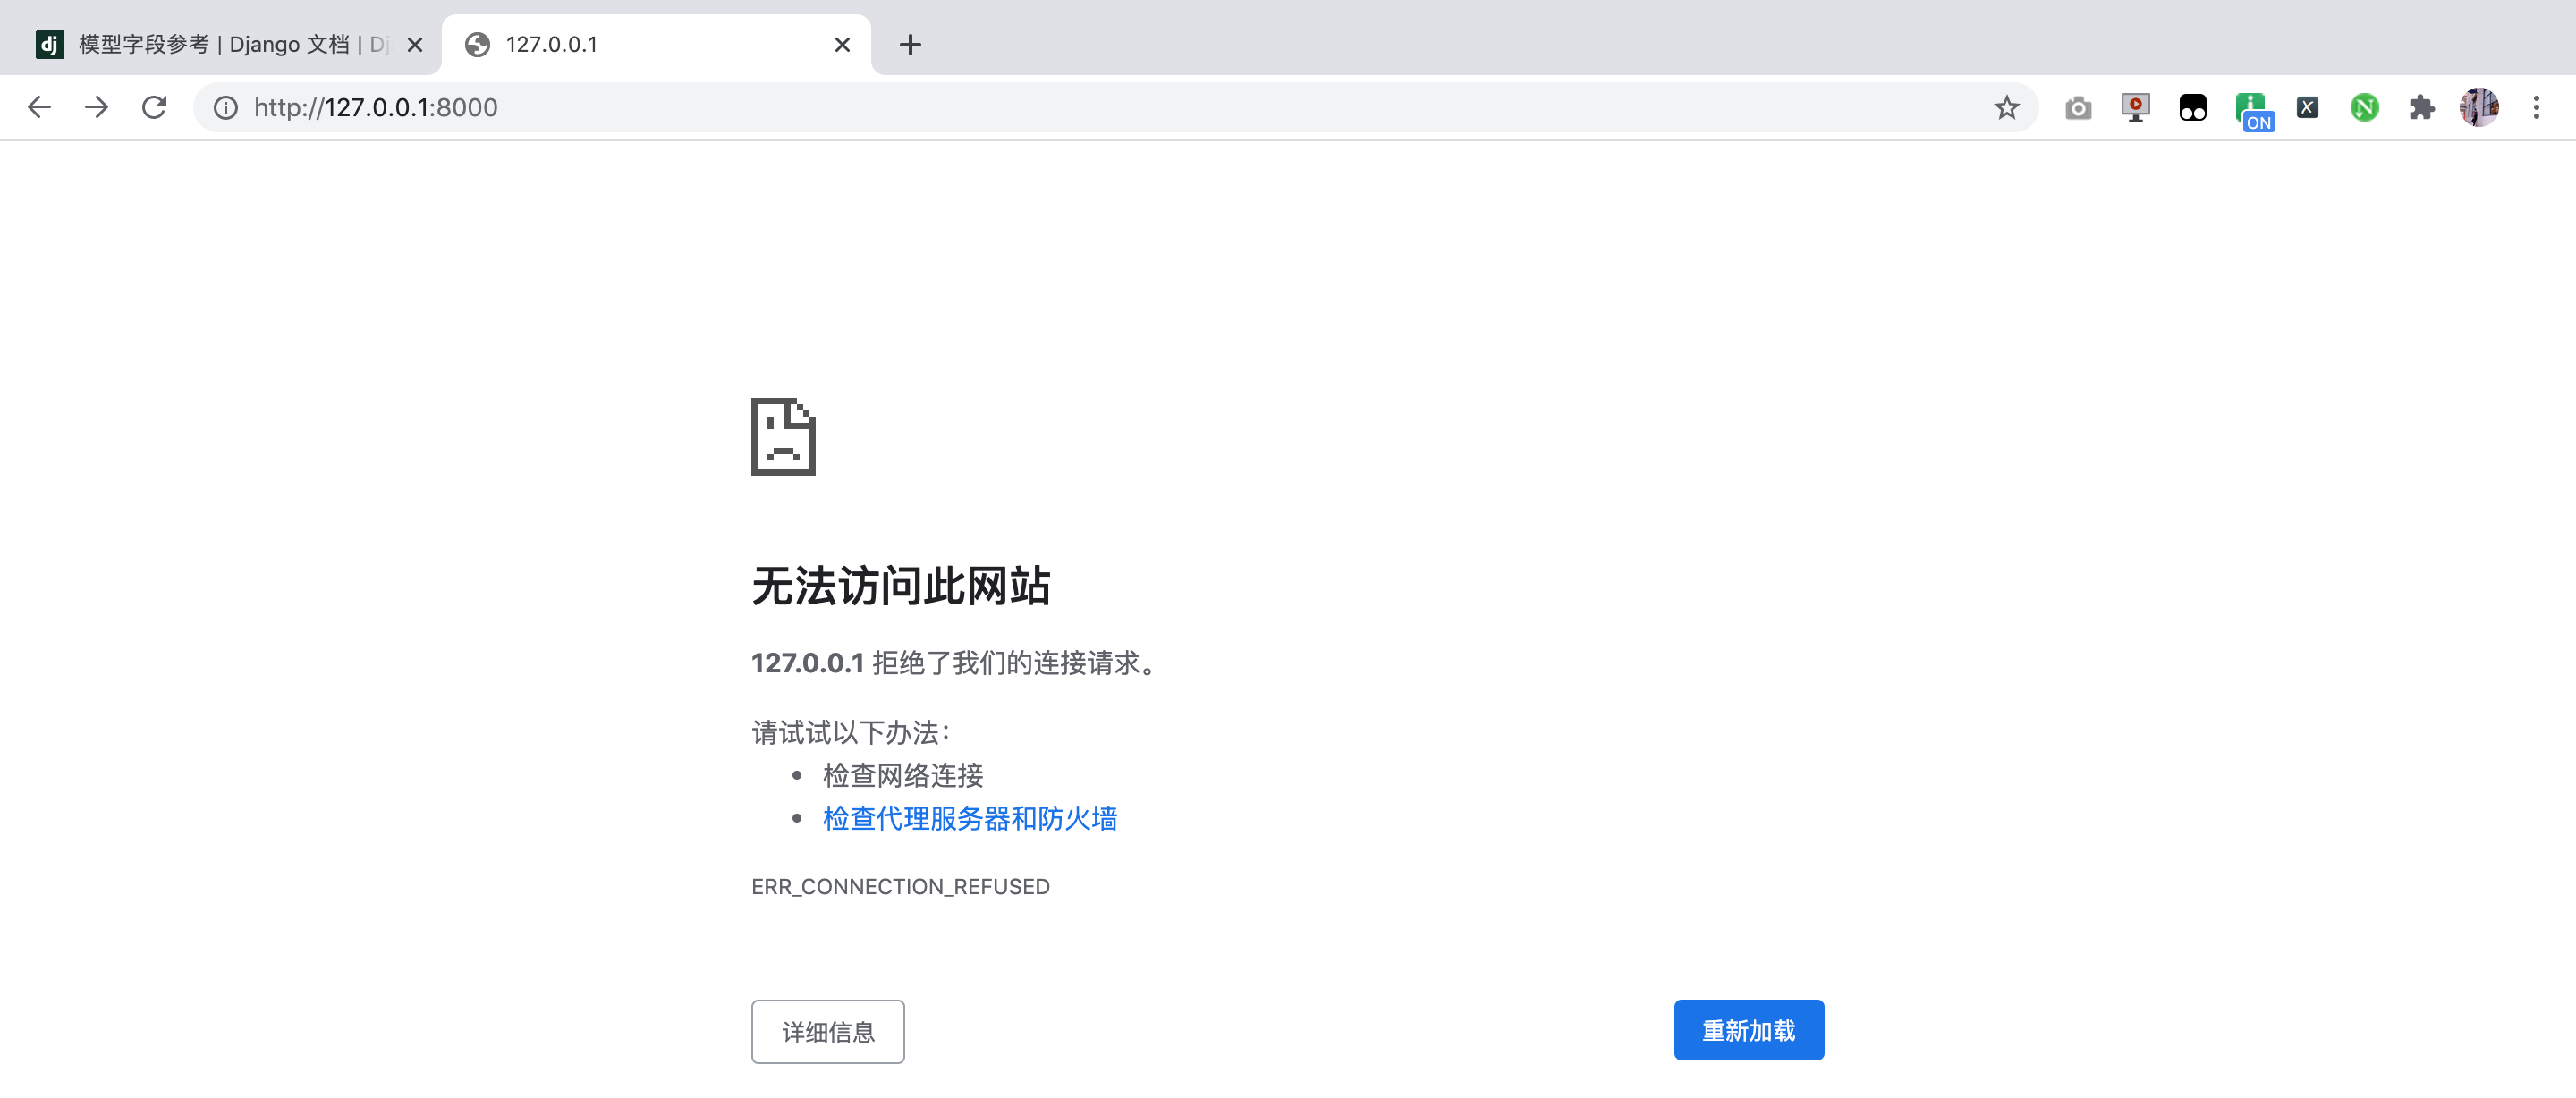
The above page is displayed only when DEBUG = True is enabled by default. If you close it, it is similar to the following page:
14. If you modify URLs py
If you modify URLs in your blog What happens to the URL of Py
Original and current code:
from django.urls import path
from . import views

urlpatterns = [
	path('', views.index, name='index')
	# path(route, view, name="'index'")
]
Modified code:
from django.urls import path
from . import views

urlpatterns = [
	path('index/', views.index, name='index')
	# path(route, view, name="'index'")
]
At this time, when you visit the blog page, you can't directly visit the blog. You also need to add an index, that is, this link: http://127.0.0.1:8000/blog/index/
If a line of code is added to the blog app at this time: path('', views.index, name='index '), then if http://127.0.0.1:8000/blog/ If you don't connect anything later, use the new statement. If yes, find the matching. For example, index matches the page view contained in index.
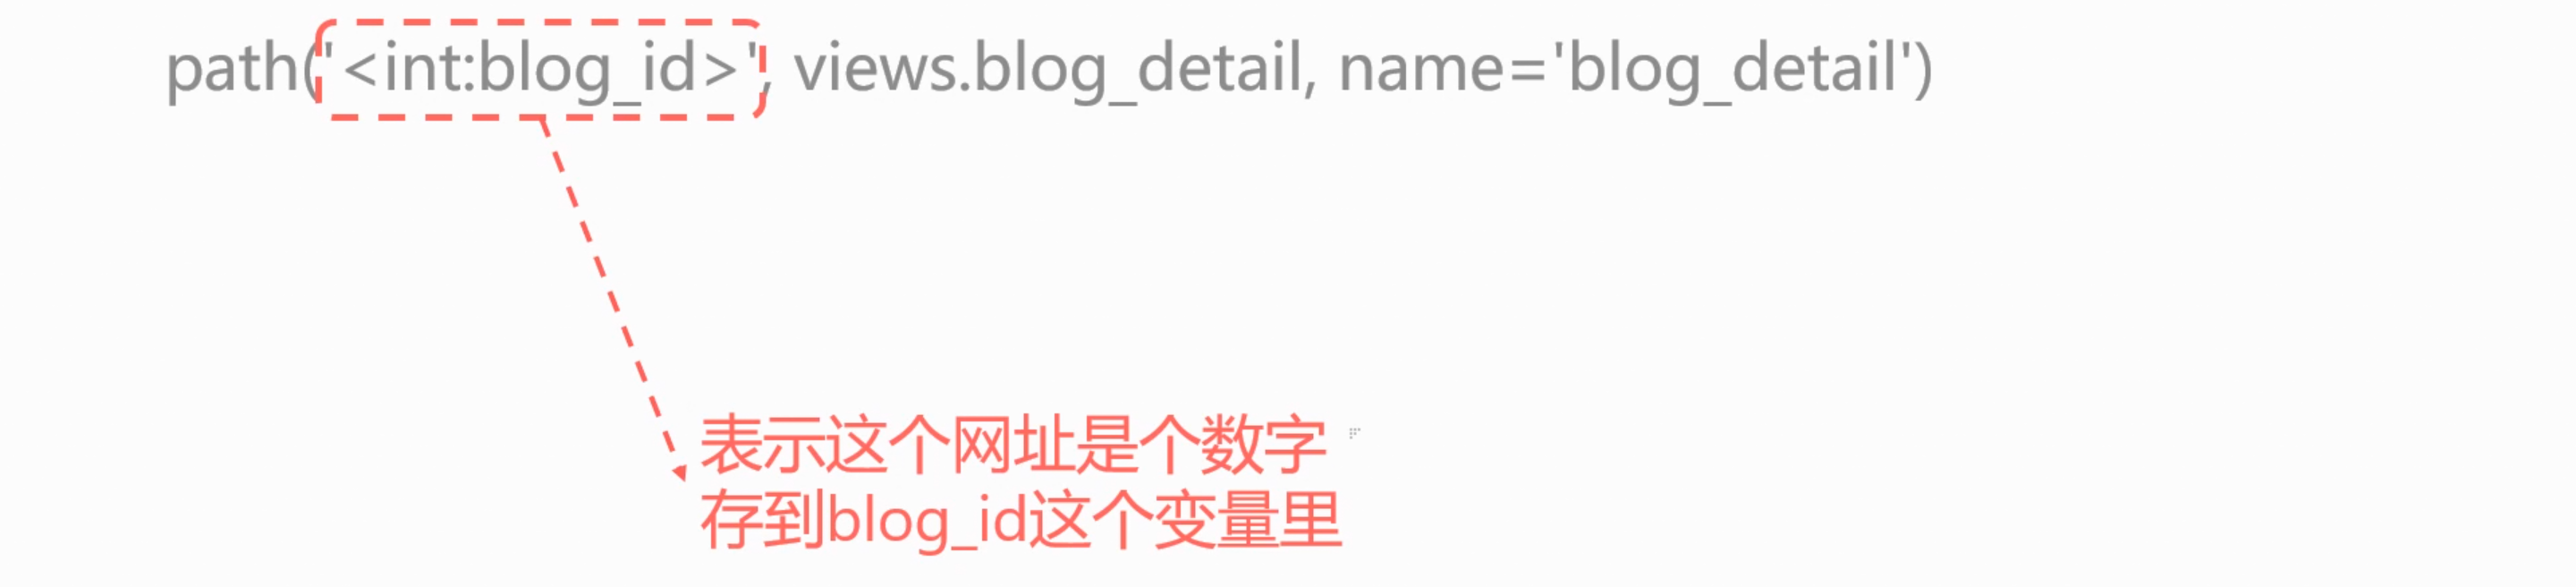
15. More complex web site processing
Modify URLs in blog folder Py add a line:
from django.urls import path
from . import views

urlpatterns = [
	path('index/', views.index, name='index'),
	# path(route, view, name="'index'")
	path('<int:blog_id>', views.blog_detail, name='blog_detail')
]
16. In views Py add function
from django.shortcuts import render
from django.http import HttpResponse # Introduce the HttpResponse function from the http module of django
# from a sub module of a module import s a function
def index(request):
# Define an index function to process the access Request of the home page. The Request contains the content of the HTTP Request from the user's browser
return HttpResponse("Welcome to AI Yuechuang blog!") # Use the HttpResponse function to directly return a text to the user
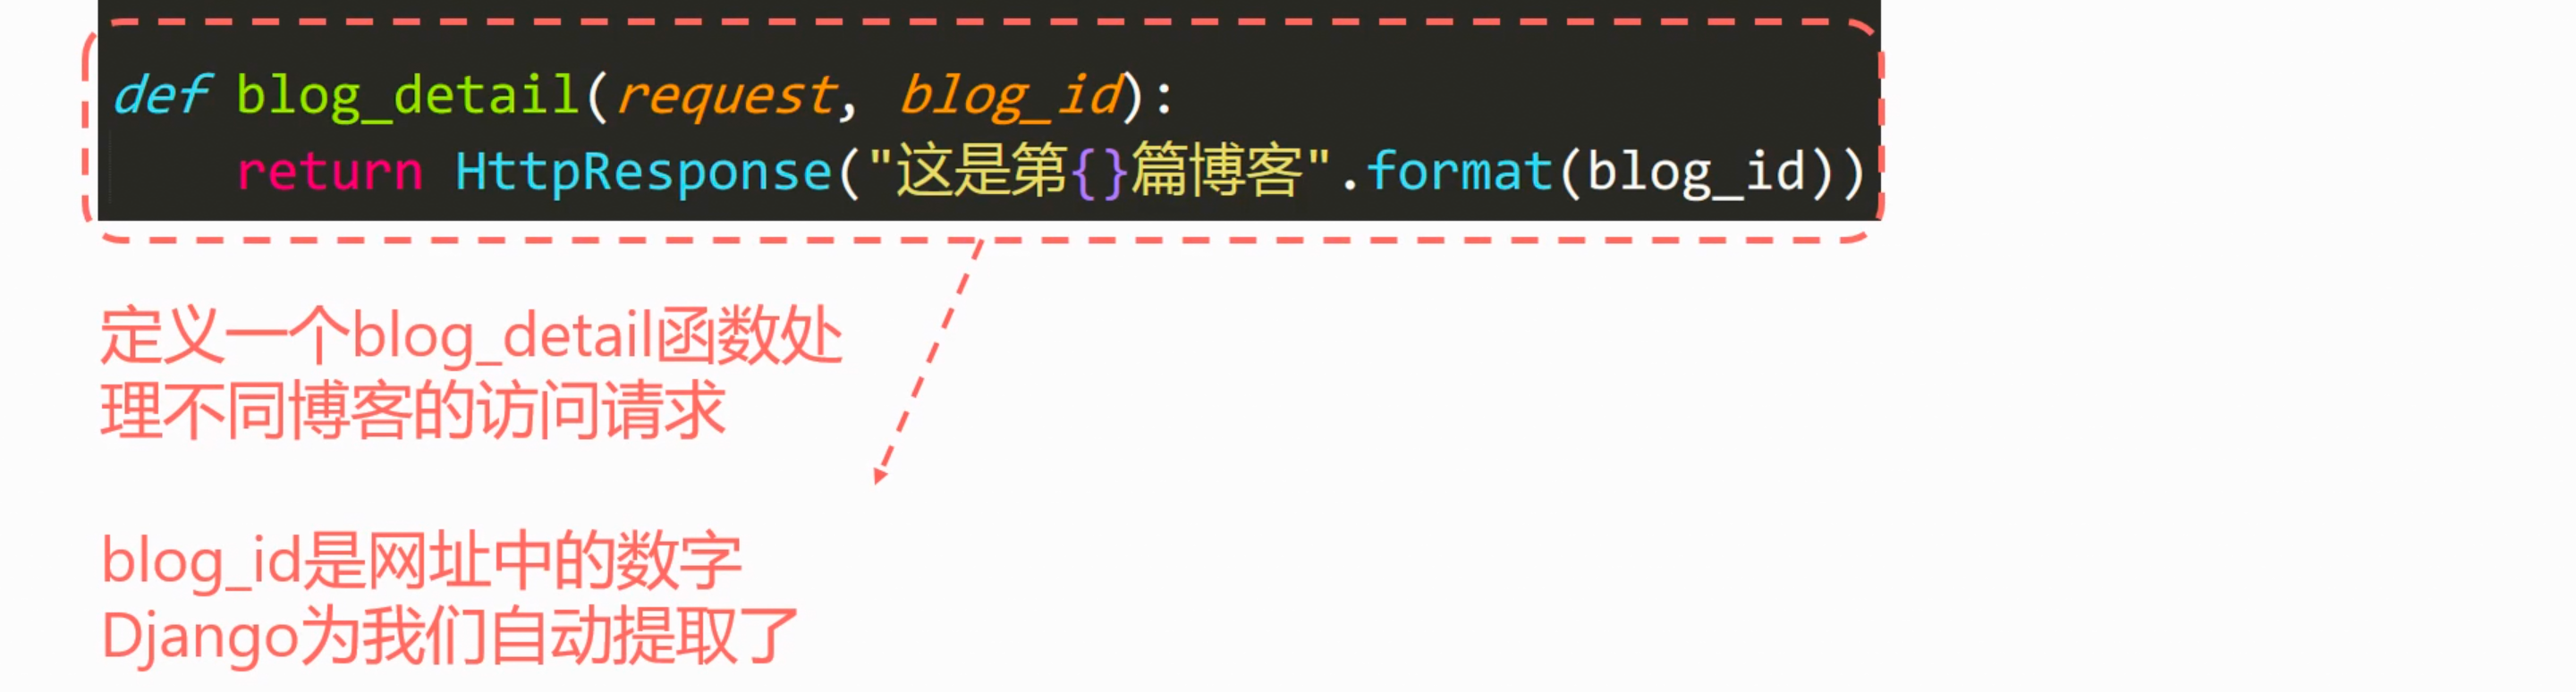
def blog_detail(request, blog_id):
return HttpResponse("This is the second「{}」Blog".format(blog_id))

17. Implement an adder through the web address
If we want to implement an adder through a website such as / blog/123/456 to get the result of 123 + 456, how to design URLs py
- URLs in Blog py
from django.urls import path
from . import views

urlpatterns = [
	path('index/', views.index, name='index'),
	# path(route, view, name="'index'")
	path('<int:blog_id>', views.blog_detail, name='blog_detail'),
	path('<int:blog_id1>/<int:blog_id2>', views.blog_sum, name='blog_sum'),
]
- Views in Blog py
from django.shortcuts import render
from django.http import HttpResponse # Introduce the HttpResponse function from the http module of django
# from a sub module of a module import s a function
def index(request):
# Define an index function to process the access Request of the home page. The Request contains the content of the HTTP Request from the user's browser
return HttpResponse("Welcome to AI Yuechuang blog!") # Use the HttpResponse function to directly return a text to the user
def blog_detail(request, blog_id):
return HttpResponse("This is the second「{}」Blog".format(blog_id))
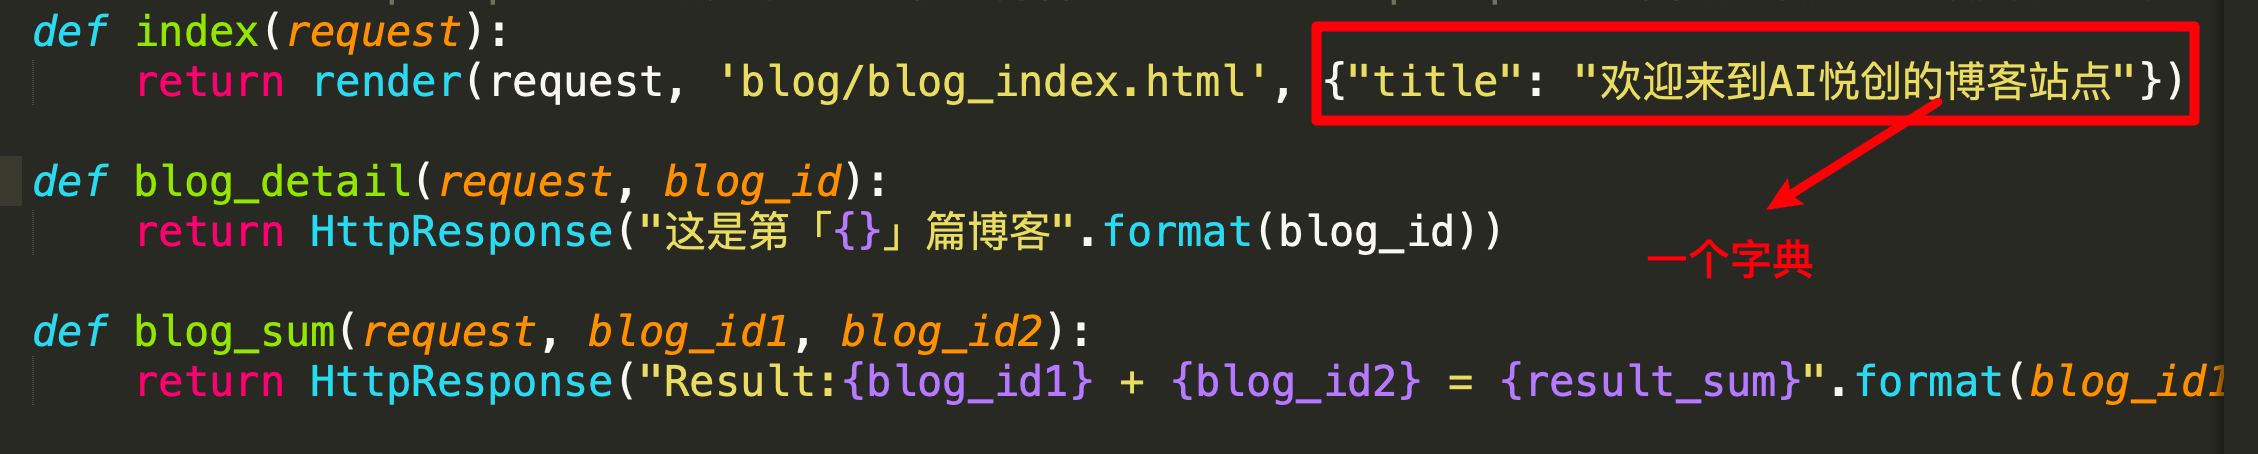
def blog_sum(request, blog_id1, blog_id2):
return HttpResponse("Result:{blog_id1} + {blog_id2} = {result_sum}".format(blog_id1=blog_id1, blog_id2=blog_id2, result_sum=blog_id1 + blog_id2))
More reference links: https://docs.djangoproject.com/zh-hans/3.1/topics/http/urls/
System explanation:
for example
Here is a simple URLconf:
from django.urls import path

from . import views

urlpatterns = [
    path('articles/2003/', views.special_case_2003),
    path('articles/<int:year>/', views.year_archive),
    path('articles/<int:year>/<int:month>/', views.month_archive),
    path('articles/<int:year>/<int:month>/<slug:slug>/', views.article_detail),
]
be careful:
- To take a value from a URL, use angle brackets.
- The captured values can optionally contain converter types. For example, use < int: name > to capture integer parameters. If no converter is included, any characters other than / are matched.
- There is no need to add a backslash here, because every URL has a backslash. For example, it should be articles instead of / articles.
Some examples of requests:
- /articles/2005/03 / will match the third item in the URL list. Django calls the function views month_ archive(request, year=2005, month=3) .
- /articles/2003/ would match the first pattern in the list, not the second one, because the patterns are tested in order, and the first one is the first test to pass. Feel free to exploit the ordering to insert special cases like this. Here, Django would call the function views.special_case_2003(request)
- /articles/2003 would not match any of these patterns, because each pattern requires that the URL end with a slash.
- /articles/2003/03/building-a-django-site / will match the last item in the URL list. Django calls the function views article_ detail(request, year=2003, month=3, slug="building-a-django-site") .
Path converter
The following path converters are valid by default:
- str - matches non empty strings other than '/'. If the expression does not contain a converter, the string is matched by default.
- Int - matches 0 or any positive integer. Returns an int.
- slug - matches any short label consisting of ASCII letters or numbers and hyphens and underscores. For example, building your 1st Django site.
- UUID - matches a formatted UUID. To prevent multiple URL s from mapping to the same page, you must include dashes and all characters are lowercase. For example, 075194d3-6885-417e-a8a8-6c931e272f00. Return a UUID example.
- Path - matches non empty fields, including the path separator '/'. It allows you to match the full URL path instead of matching part of the url like str.
18. Overall logic diagram
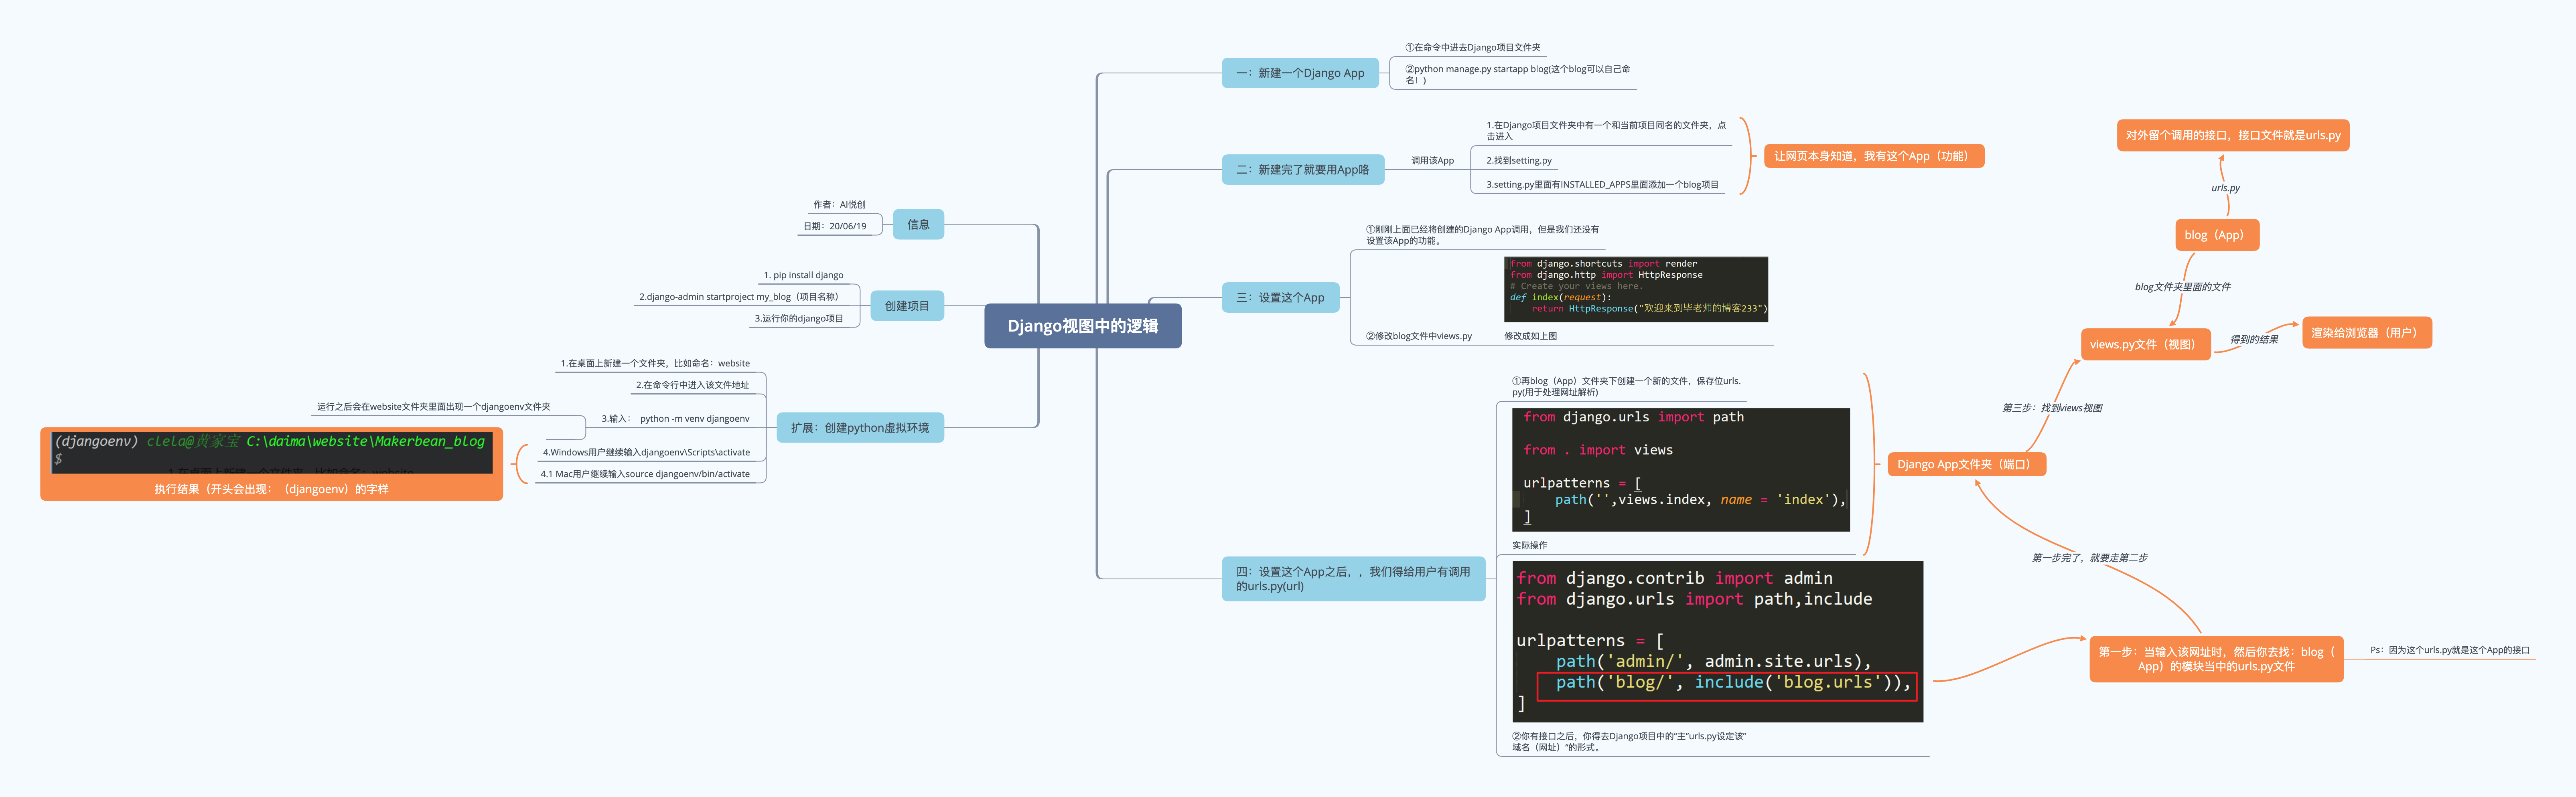
We have directly used the following process here:
Then we add a template to make our website more beautiful.
19. Operation
Create a Blog App, which can handle the access request of the blog home page and different blog Digital IDs.
3. Django template
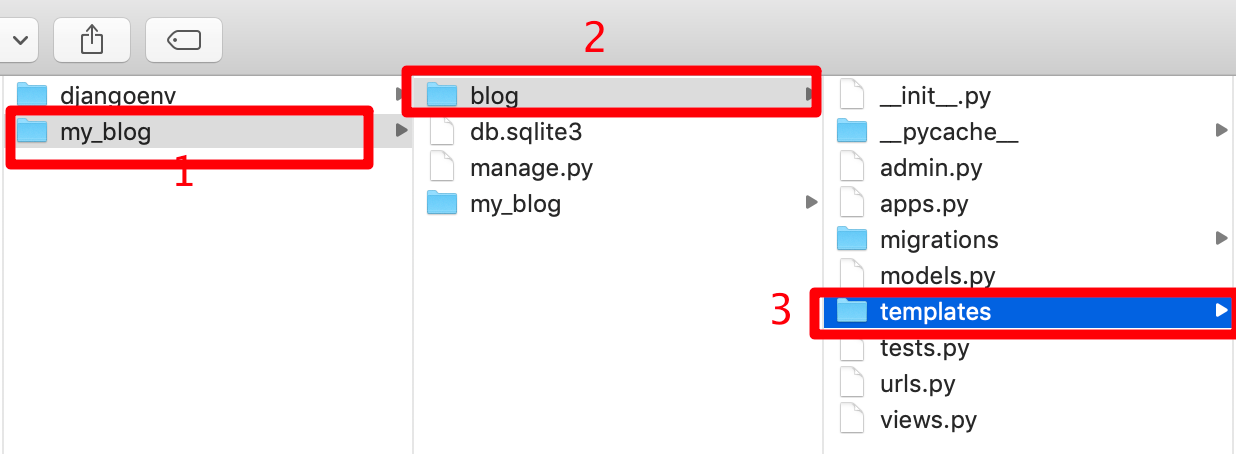
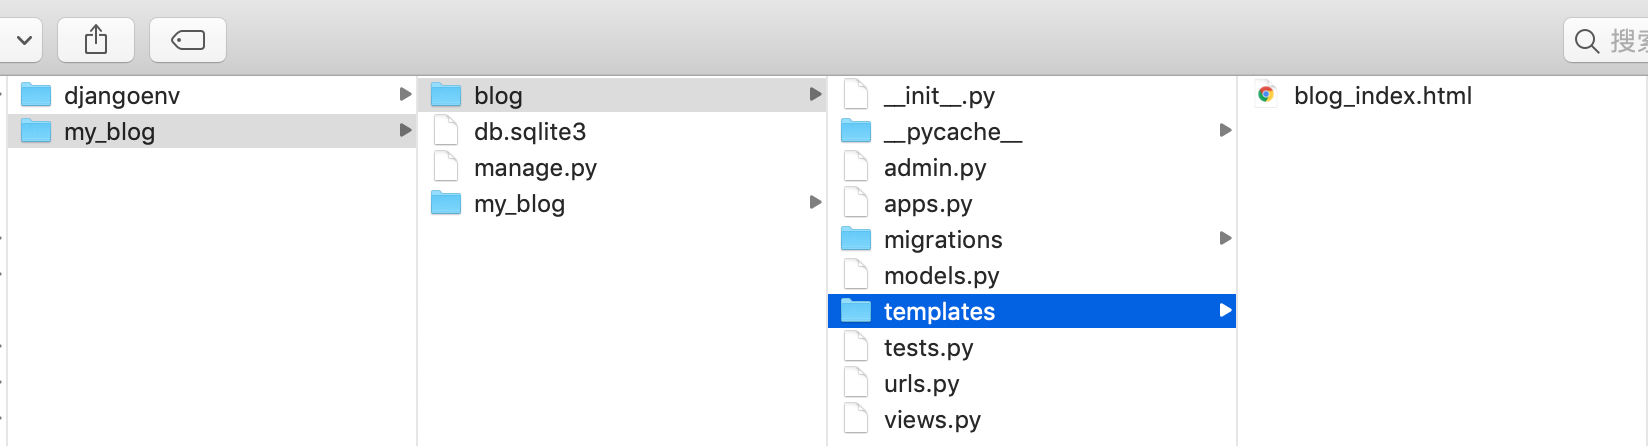
1. Create templates folder
Create a new templates folder in the blog folder, with the following structure
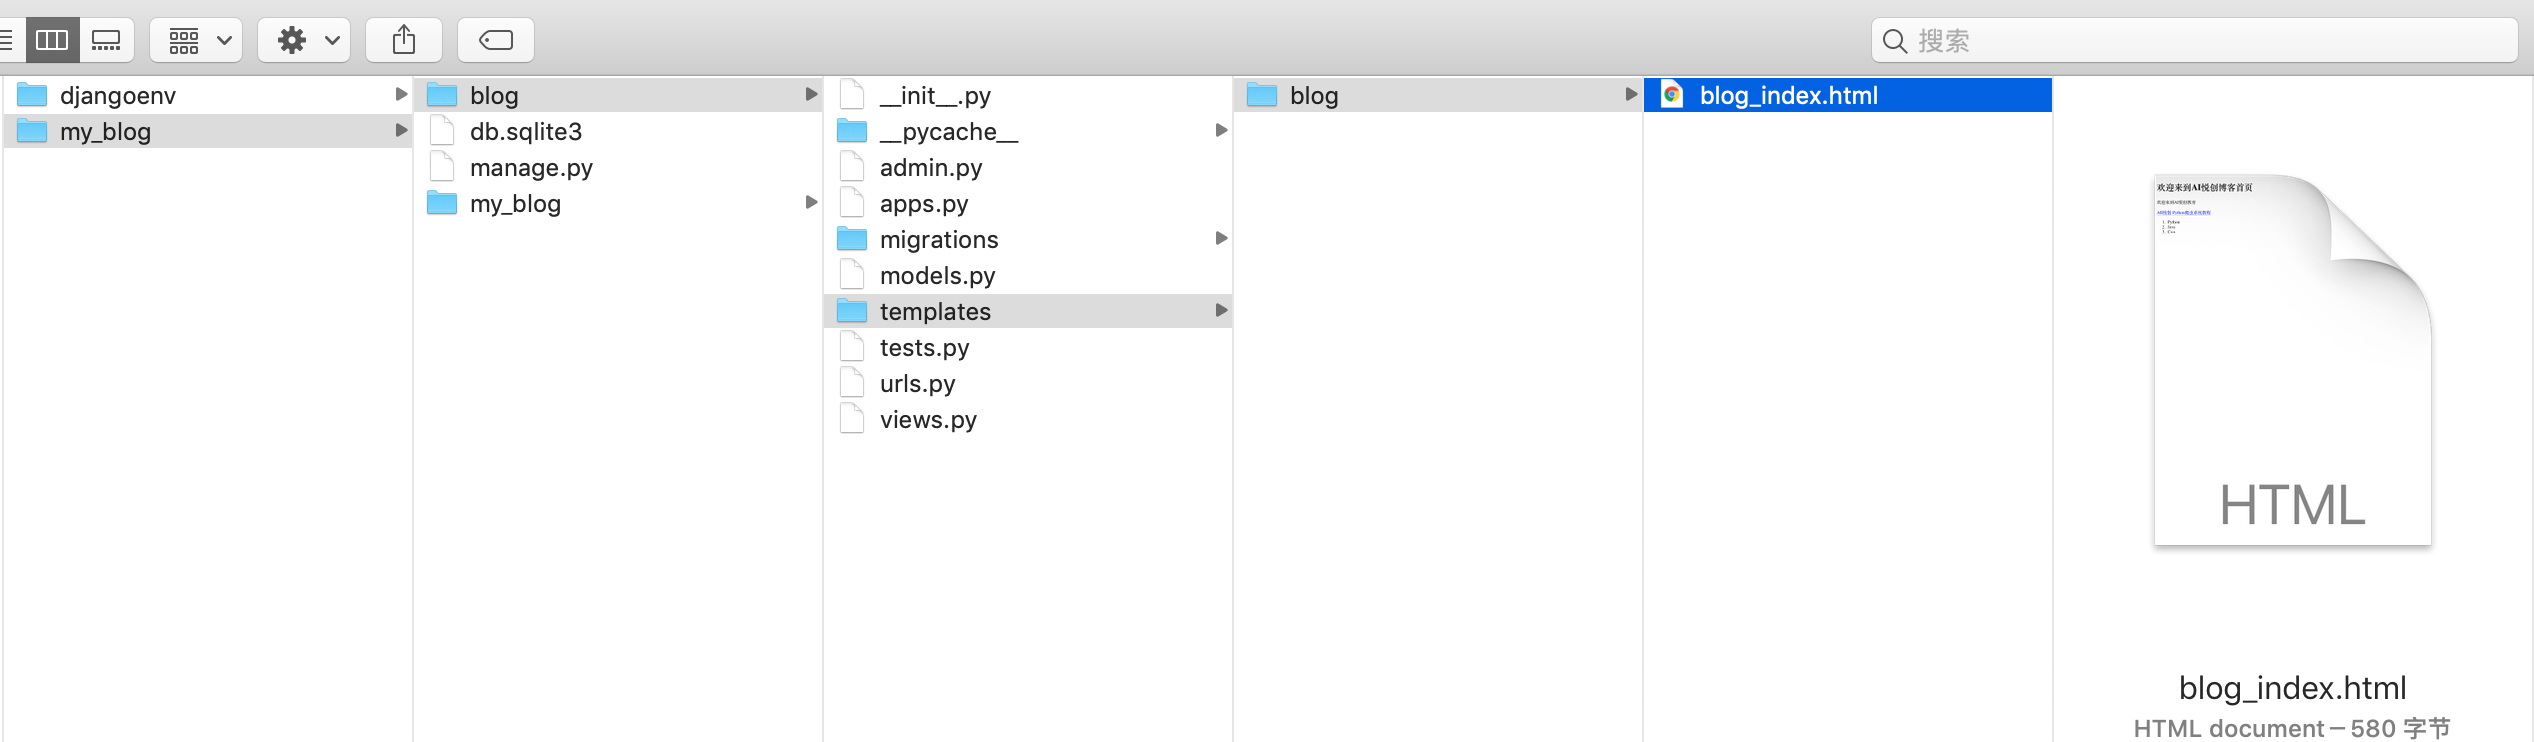
2. Add HTML of blog home page
Create a new blog in the templates folder you just created_ index. HTML file, blog_ index. Fill in simple welcome content on the home page in HTML
<!DOCTYPE html>
<html>
	<head>
		<meta charset="utf-8">
		<meta http-equiv="X-UA-Compatible" content="IE=edge,chrome=1">
		<title>AI Yuechuang blog</title>
		<meta name="description" content="">
		<meta name="keywords" content="">
	</head>
	<body>
		<h1>Welcome to AI Yuechuang blog home page</h1>
		<p id="welcome-line">Welcome to AI Yuechuang Education</p>
		<a class="link" href="https://www.aiyc. Top "> aii yuechuang</a>
		<a class="link" href="https://www.aiyc. Top / python3spiderlearn "> Python crawler system tutorial</a>
		<ol>
			<li>Python</li>
			<li>Java</li>
			<li>C++</li>
		</ol>
	</body>
</html>
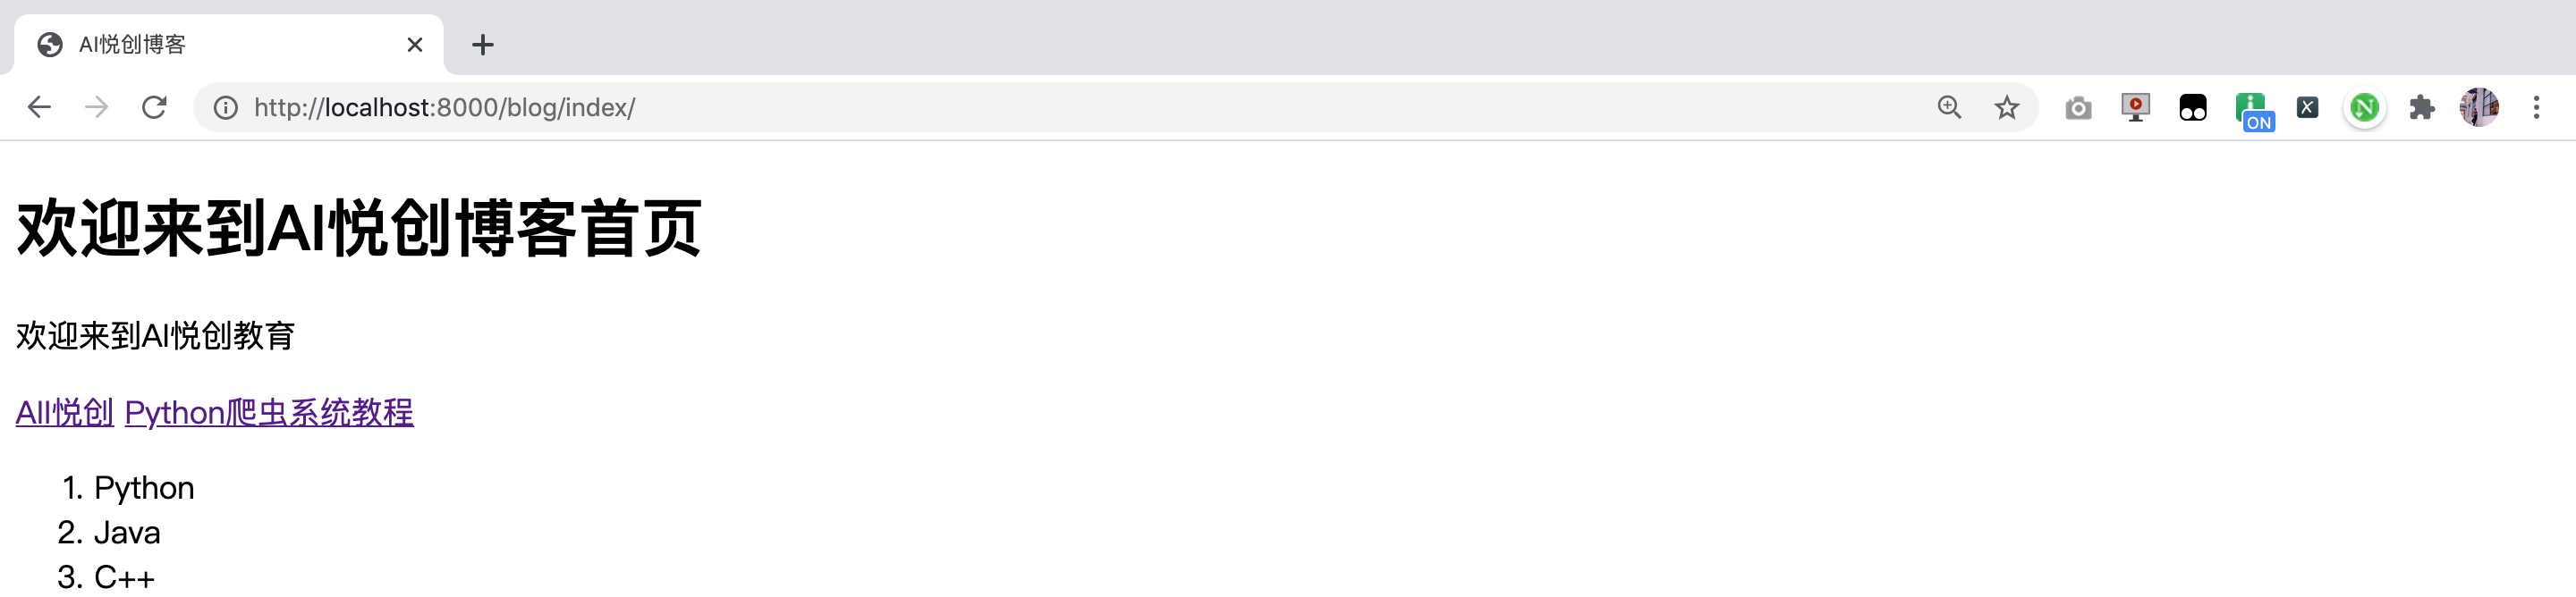
Objective: after entering 127.0.0.1:8000/blog / website, open the following HTML. In the last lesson, we used view to directly return results. In this lesson, we used view to use our templates.
3. Modify views py
Original content:
def index(request):
	# Define an index function to process the access Request of the home page. The Request contains the content of the HTTP Request from the user's browser
	return HttpResponse("Welcome to AI Yuechuang blog!") # Use the HttpResponse function to directly return a text to the user
Amend to read:
def index(request):
	return render(request, 'blog_index.html')
4. Run Django server
Run on the command line
python manage.py runserver
Then open the web address in the browser: http://localhost:8000/blog/index/
5. Understand the template system
In views Py to render a template

Django will automatically search the Templates folder of each App, and then click blog/templates/blog_index.html
6. Question?
html files with the same name may exist in different apps, which is prone to conflict. What should I do?
7. Solutions
Create a folder with the same name as the current App in the templates folder, and put the html file in the folder.
That is, the original is: blog/templates/blog_index.html
Change to: blog/templates/blog/blog_index.html
Modify views Py content is
def index(request):
	return render(request, 'blog/blog_index.html')
8. Advanced Django formwork
1. Powerful template system
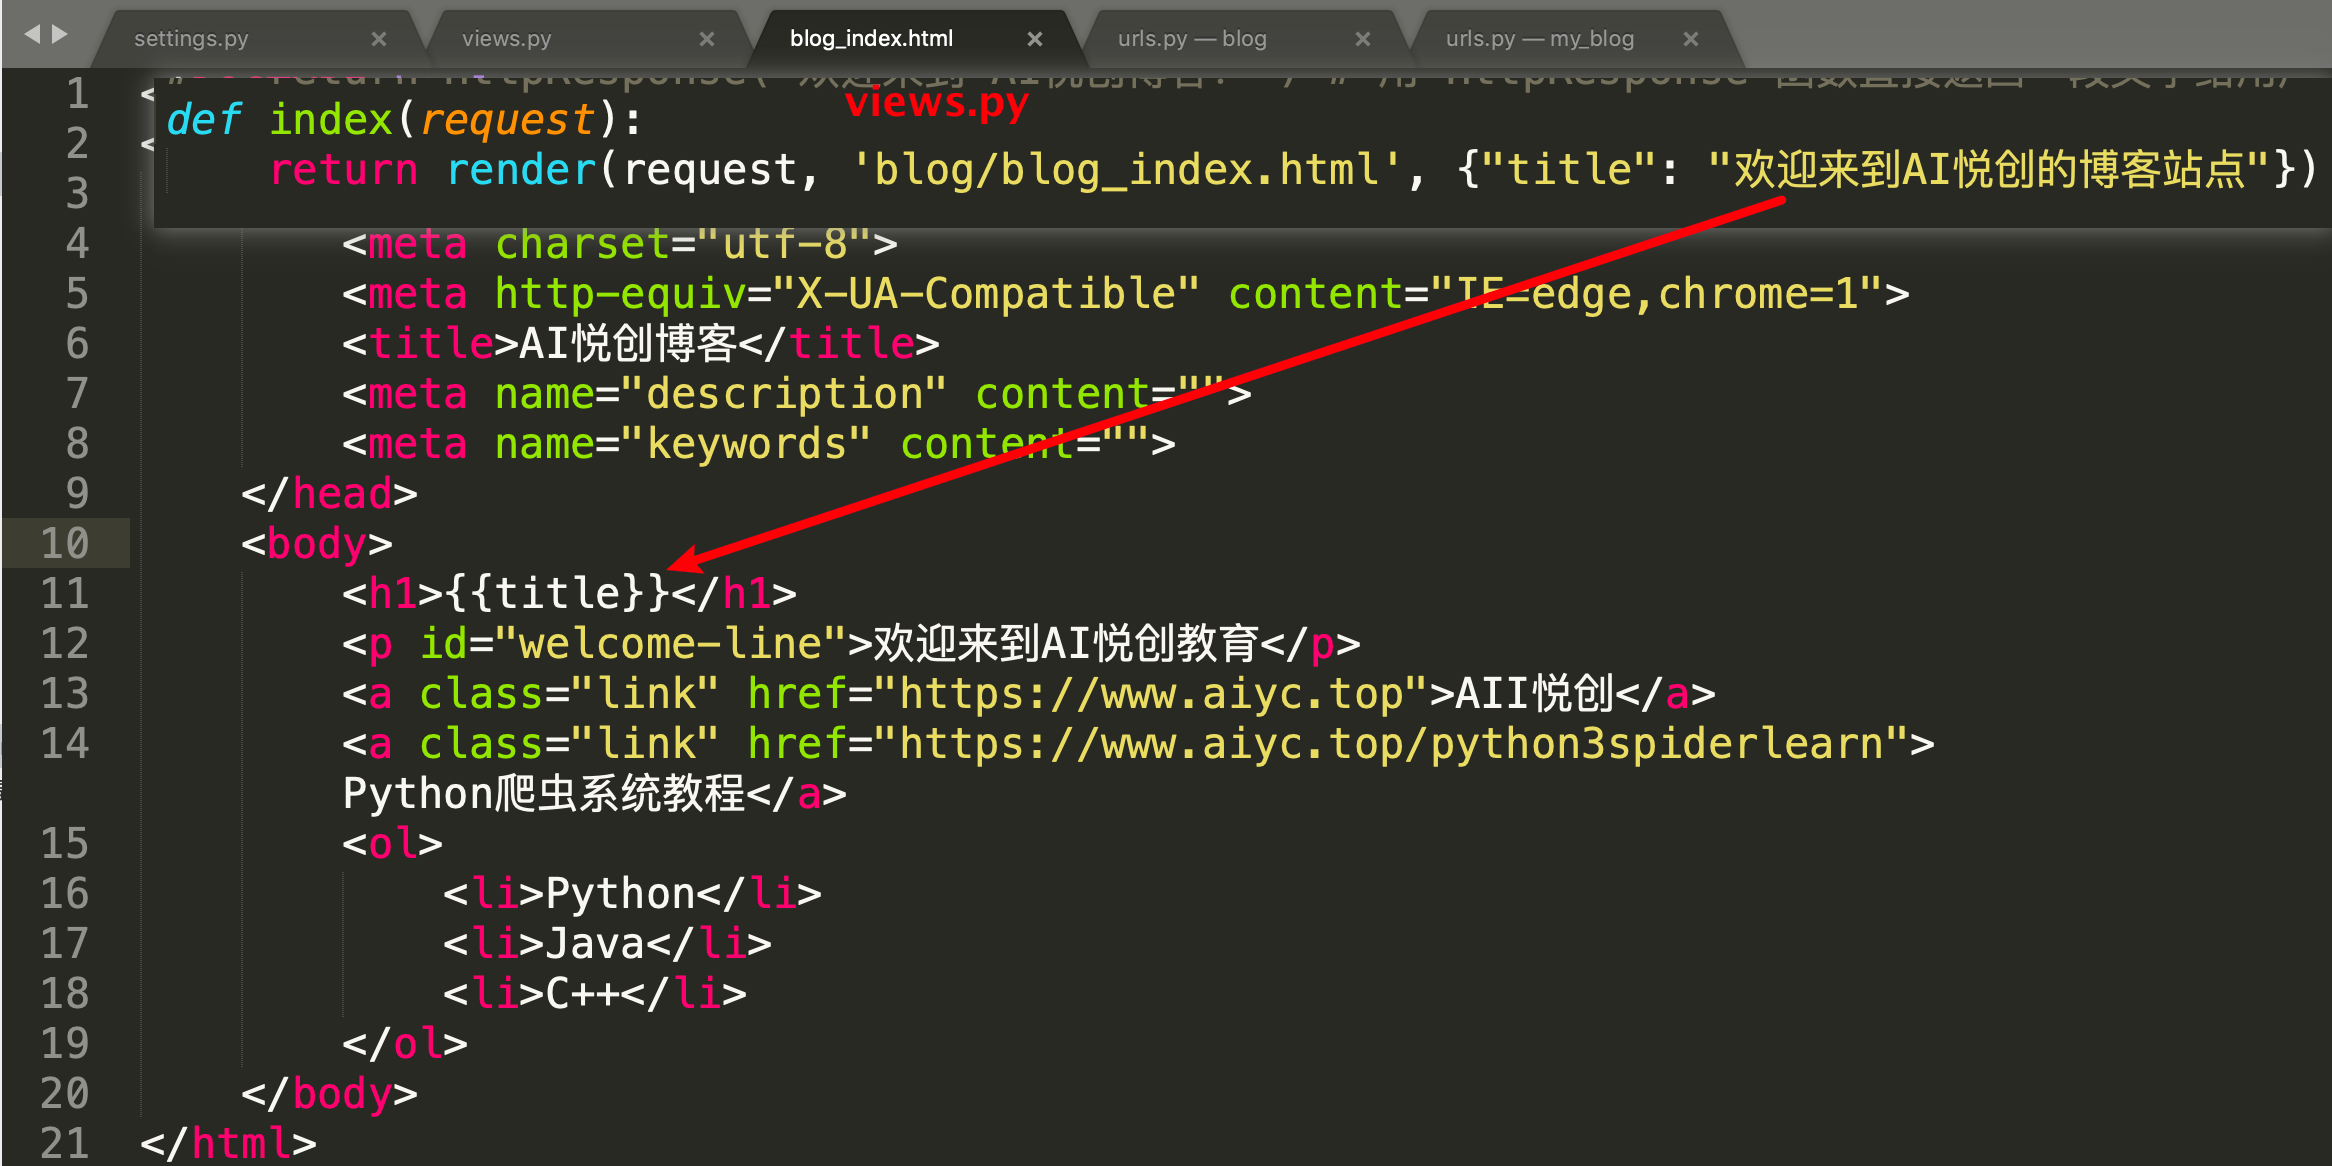
For example, I hope our data is not written in HTML files, which is equivalent to filling in "similar to the test paper" in our HTML. The answer is filled in by view.
Modify blog_index.html file

2. Modify views py
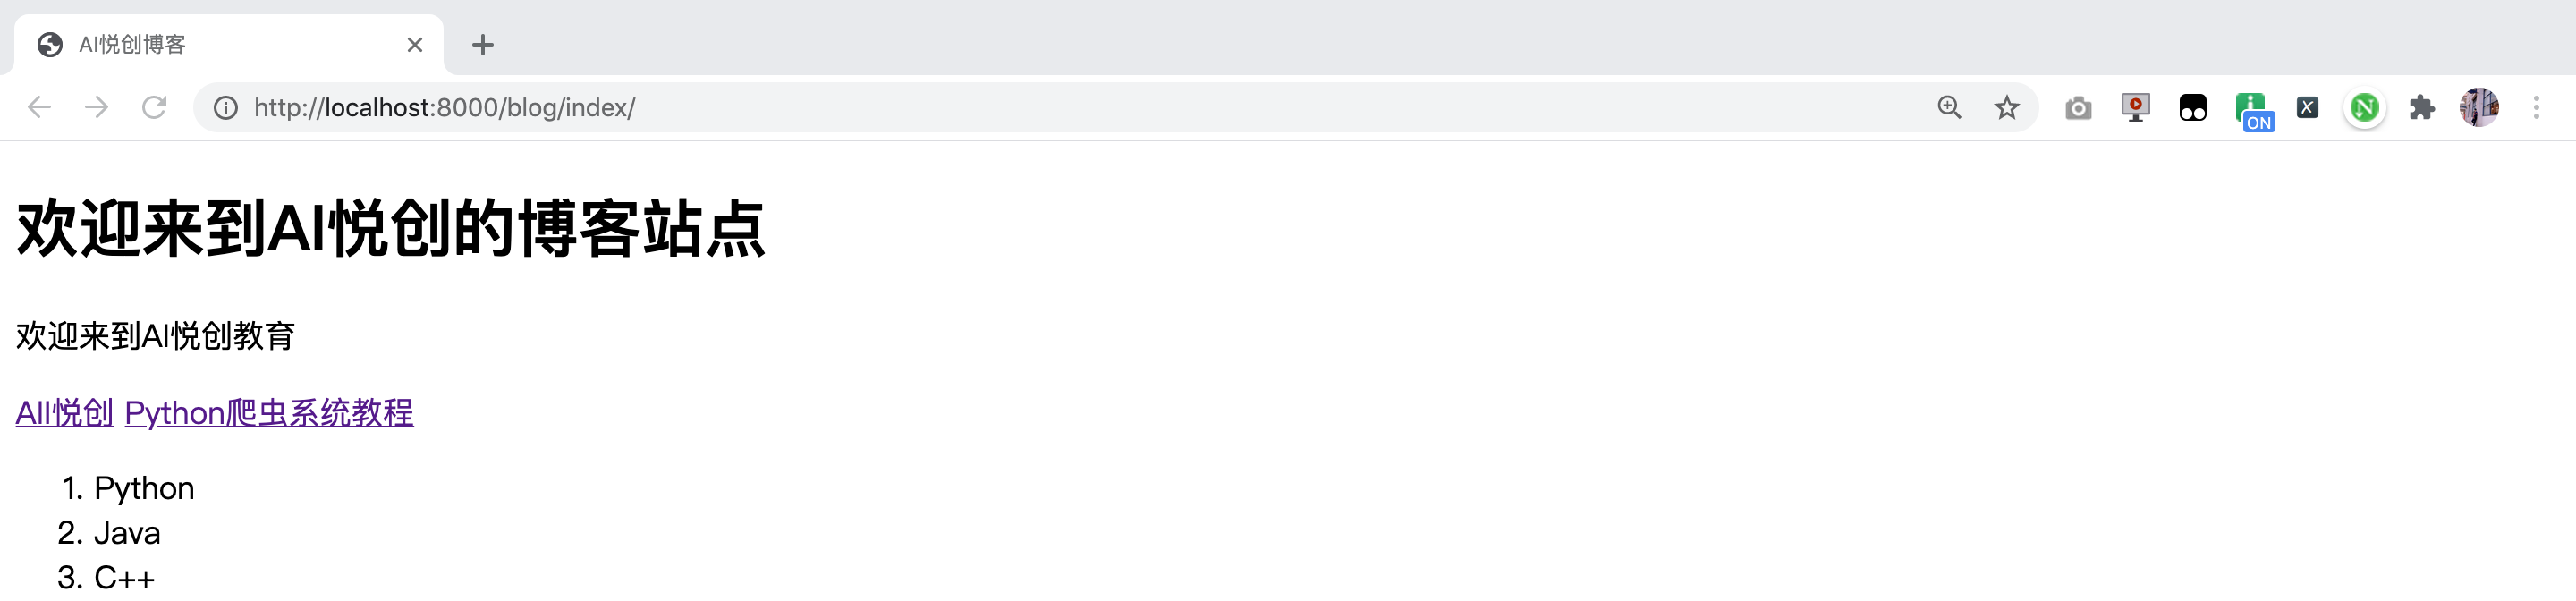
Add the following statement:
After starting the service, you can access this page:
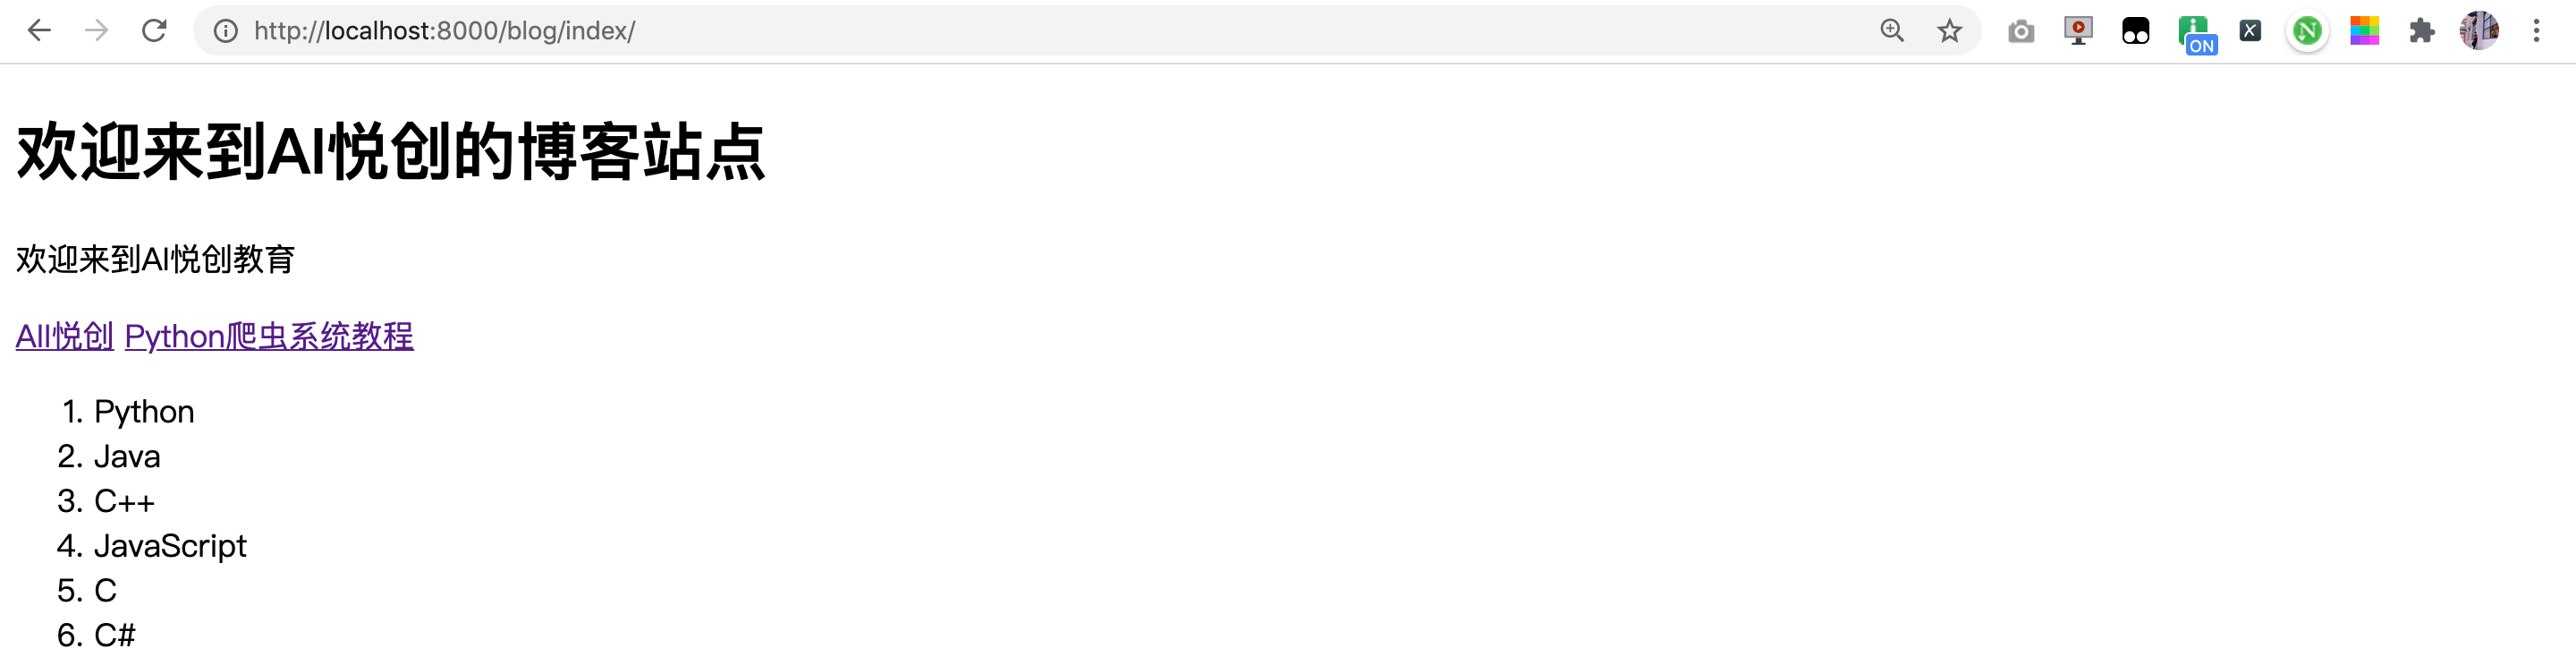
3. Rendering list
views.py
def index(request):
	language_list = ['Python', 'Java', 'C++', 'JavaScript', 'C', 'C#']
	return render(request, 'blog/blog_index.html',
		{"title": "Welcome to AI Yuechuang's blog site", 'language_list': language_list})
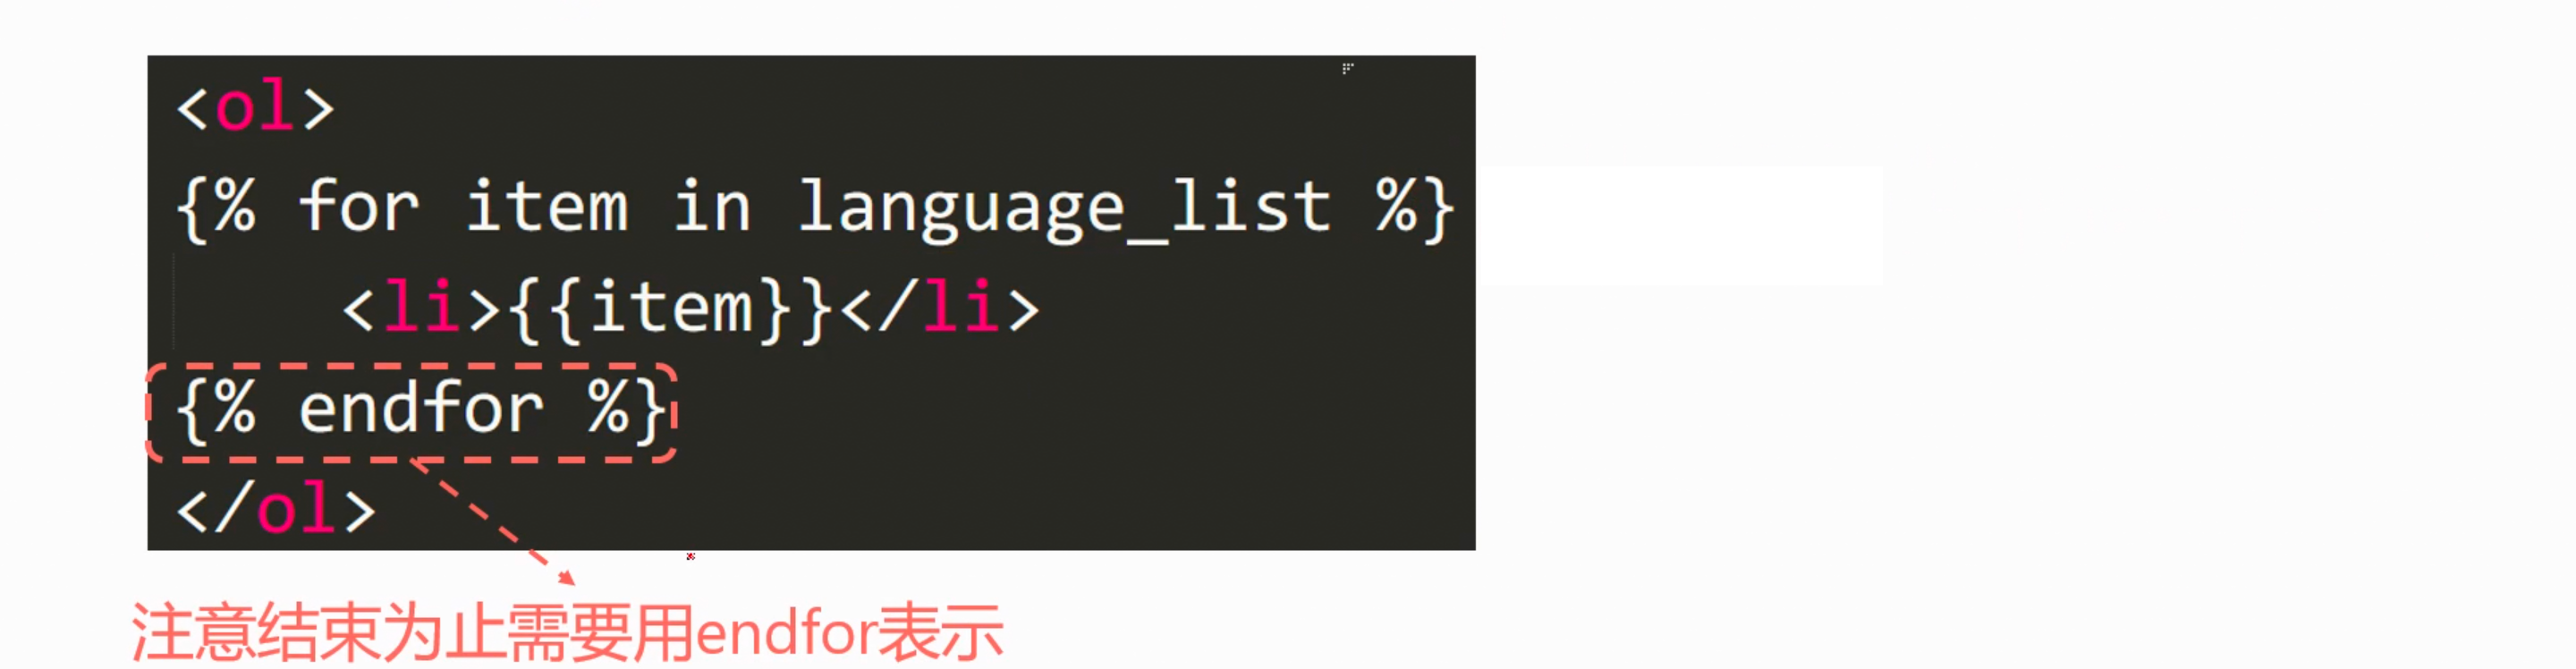
4. Circular statement
Modify blog_index.html file

Results after refreshing the page:
5. Get cyclic number

<!-- --snip-- -->
		<ol>
			{% for item in language_list %}
			<li>{{forloop.counter}}---{{item}}</li>
			{% endfor %}
		</ol>
6. Rendering dictionary

Modify blog_index.html file
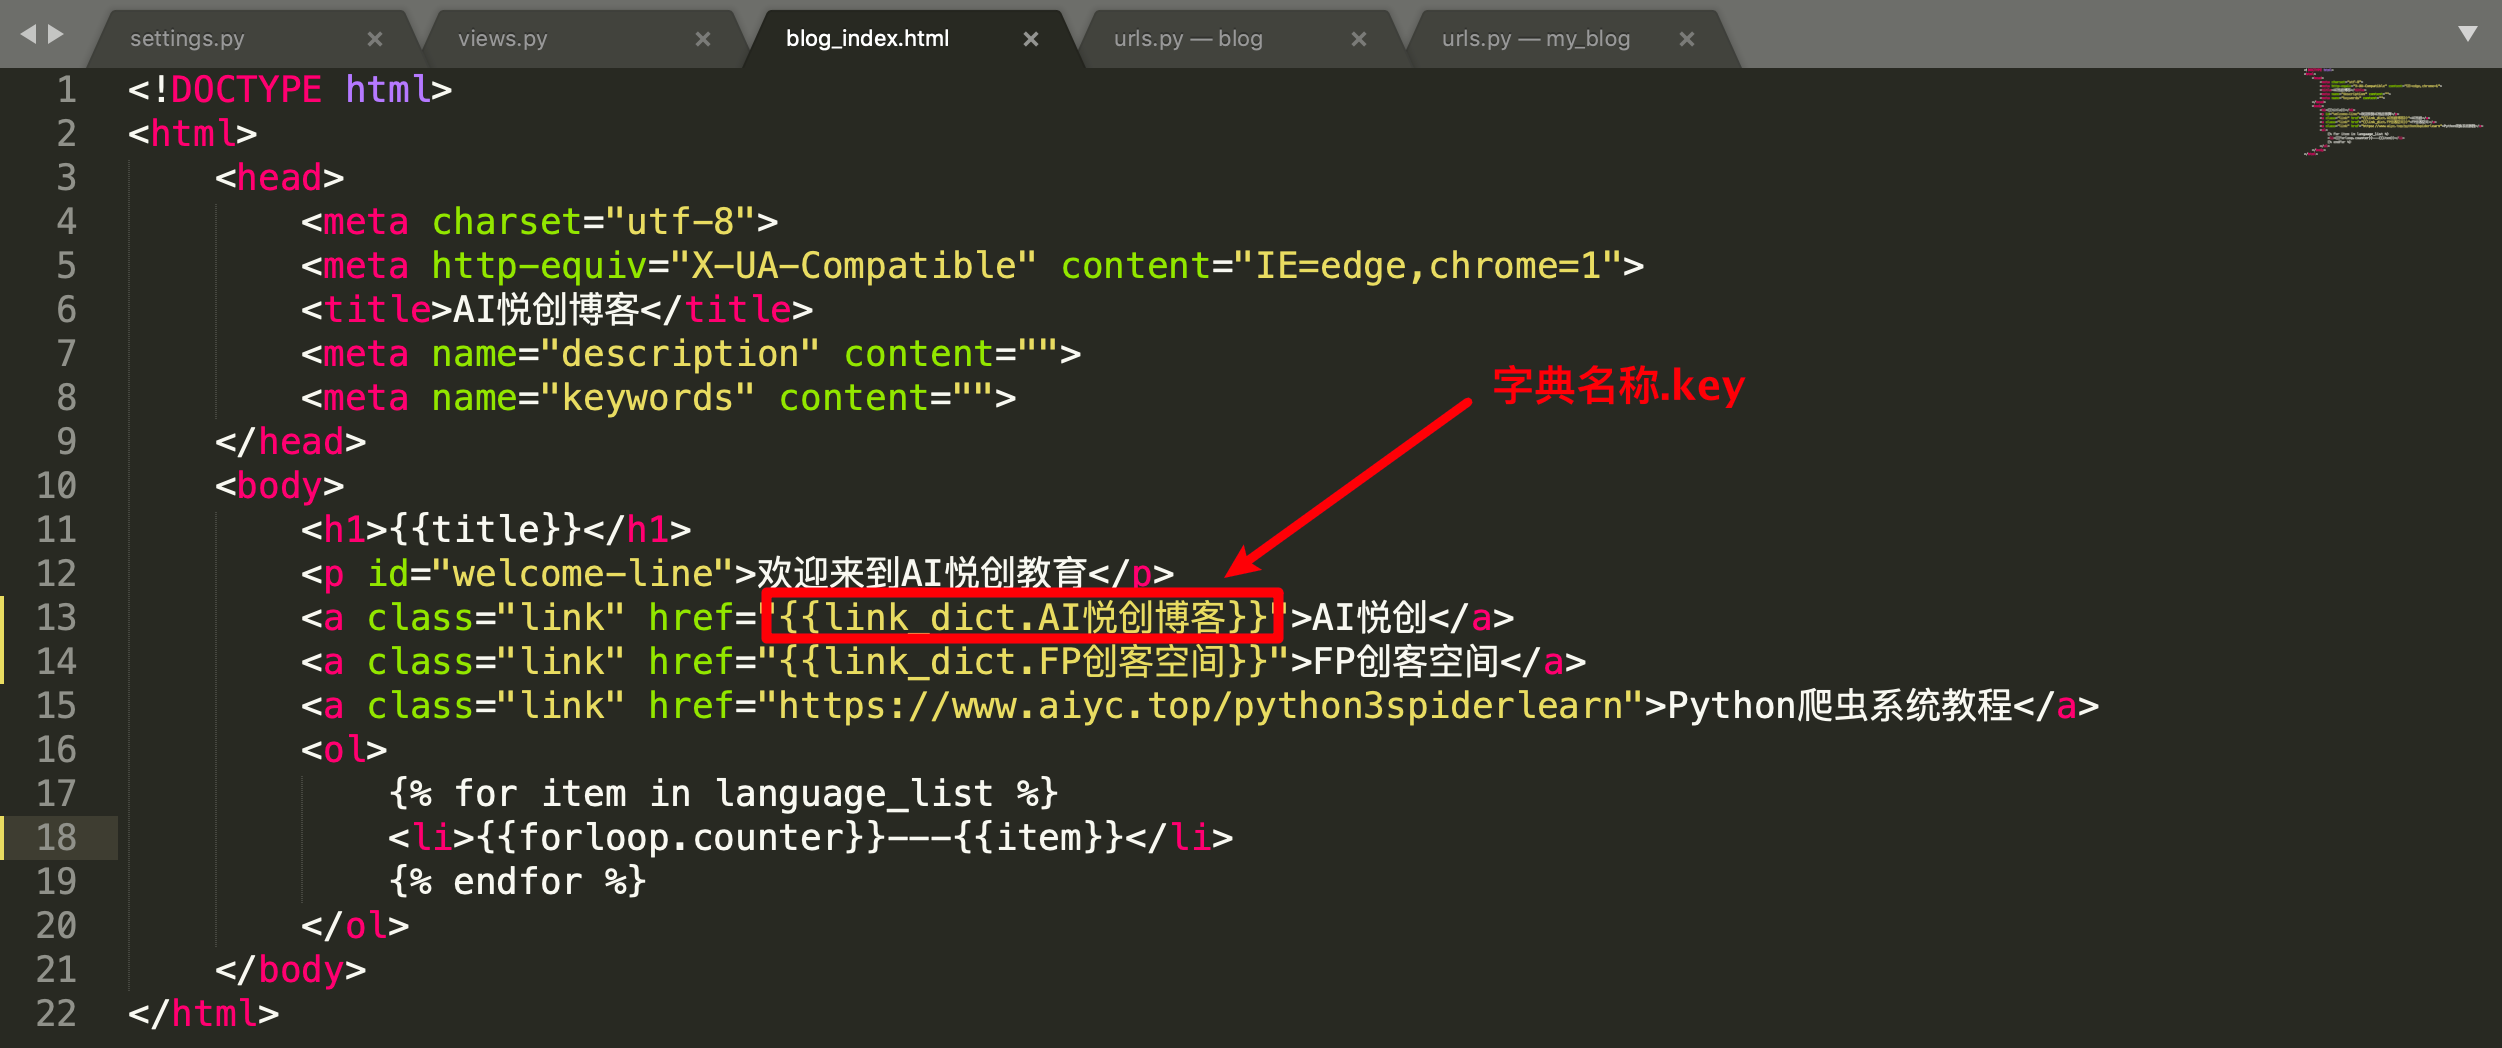
7. Condition judgment in the template
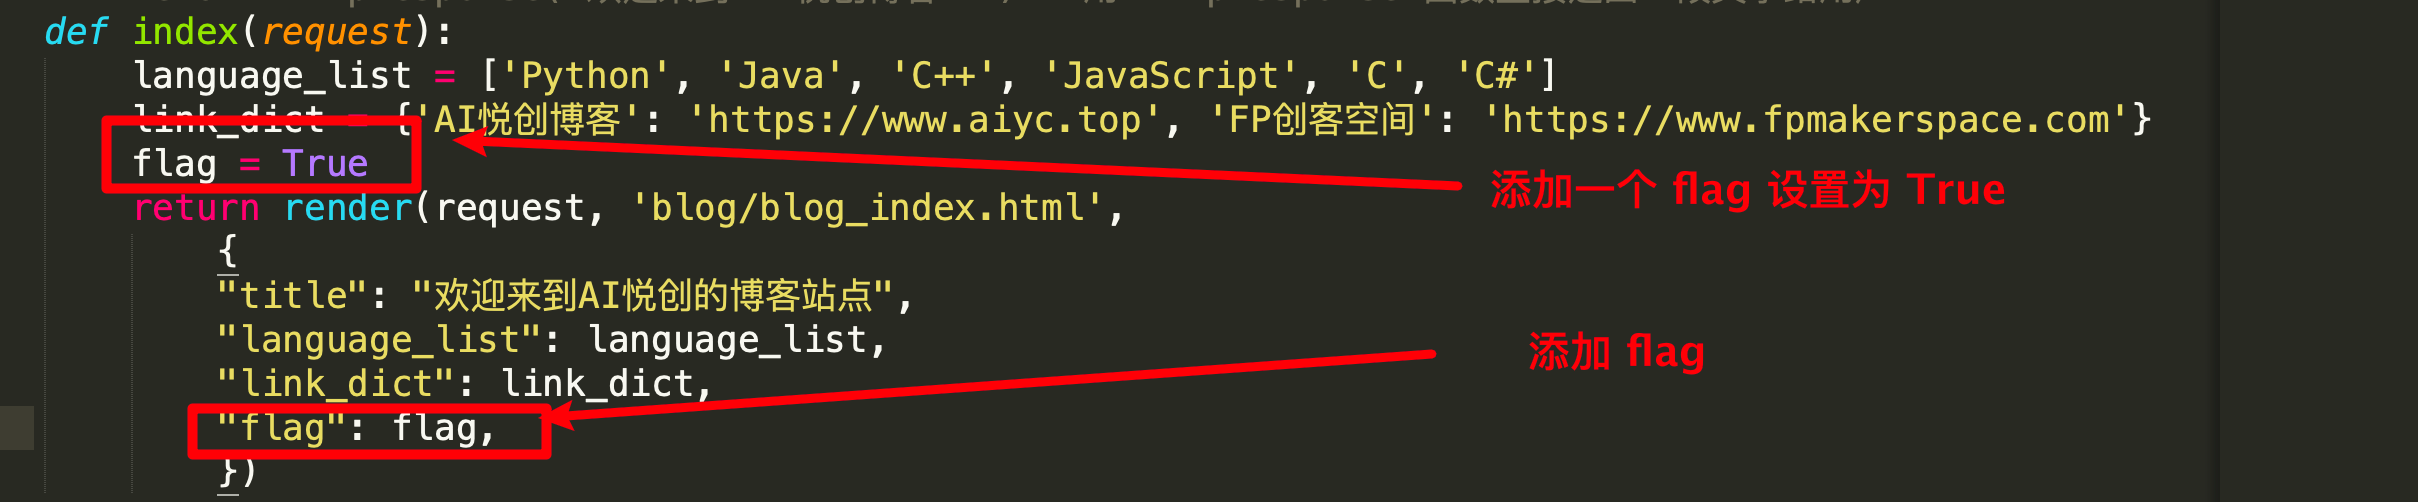
views.py
Modify blog_index.html file

elif, else, and, or and other keywords can be used
8. Judge whether the user logs in

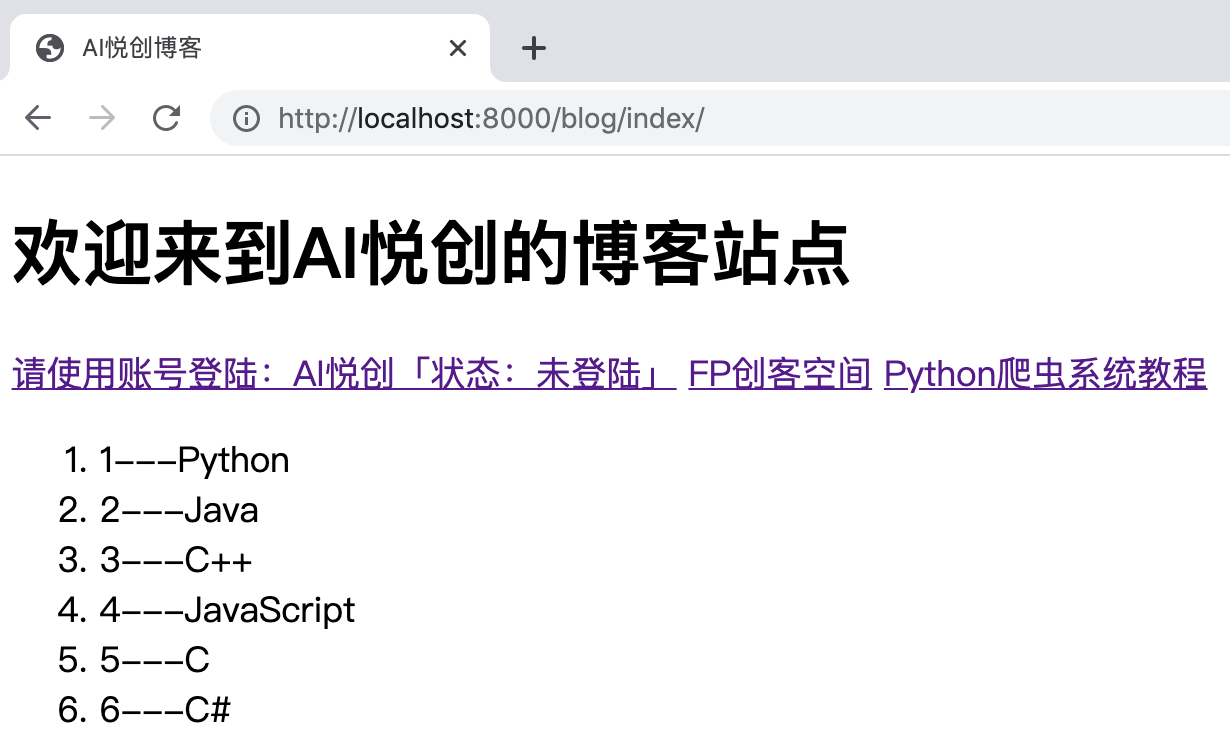
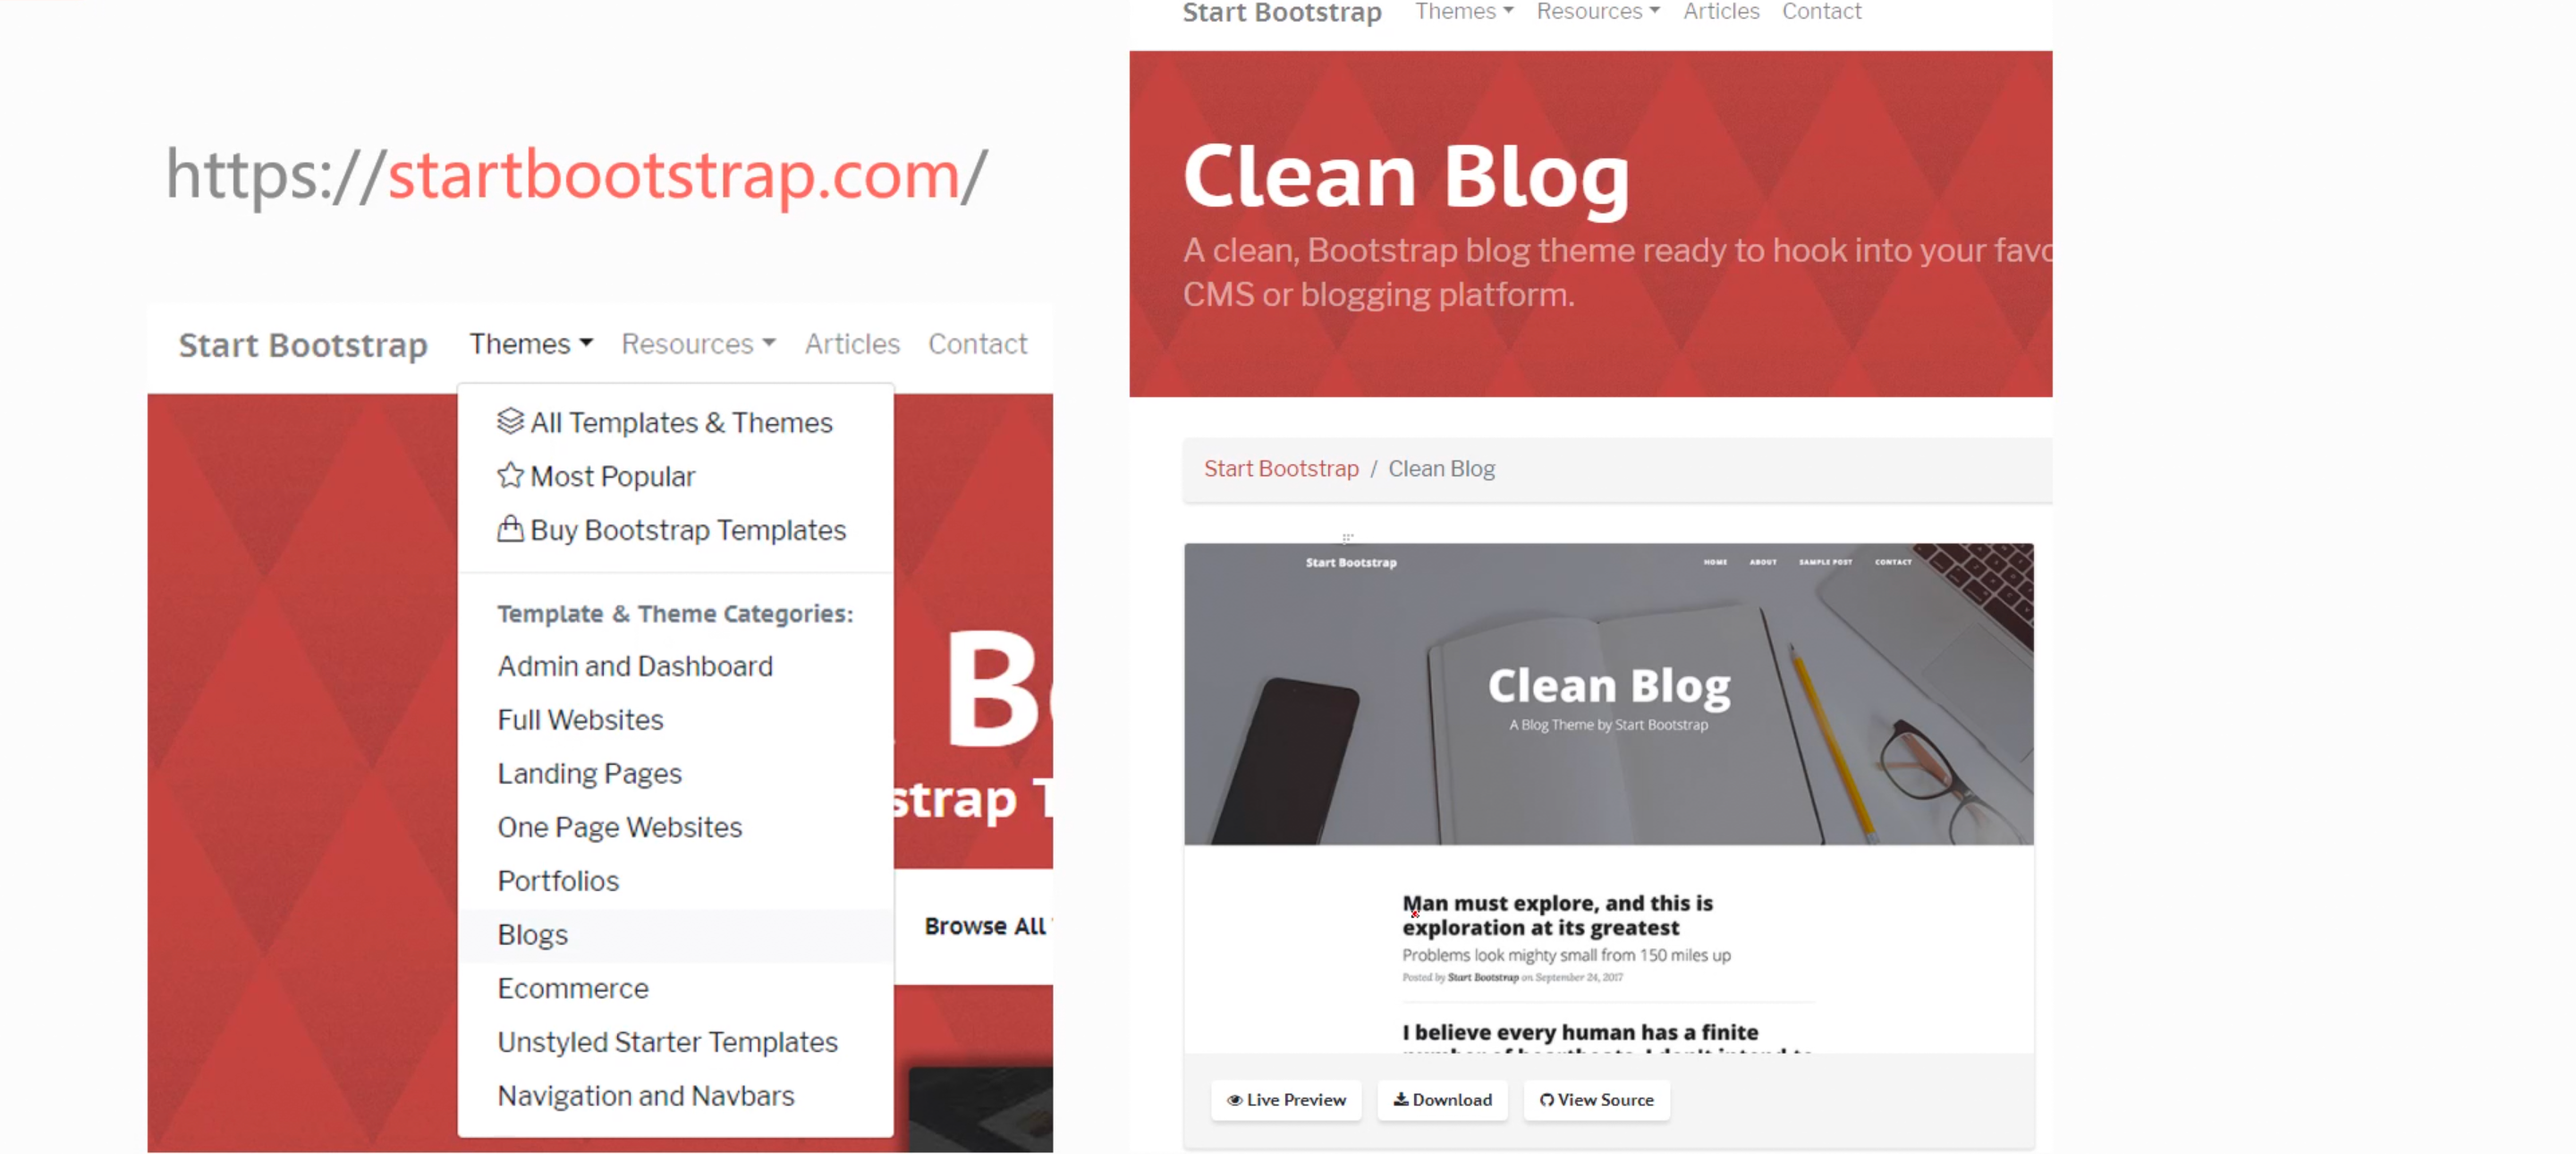
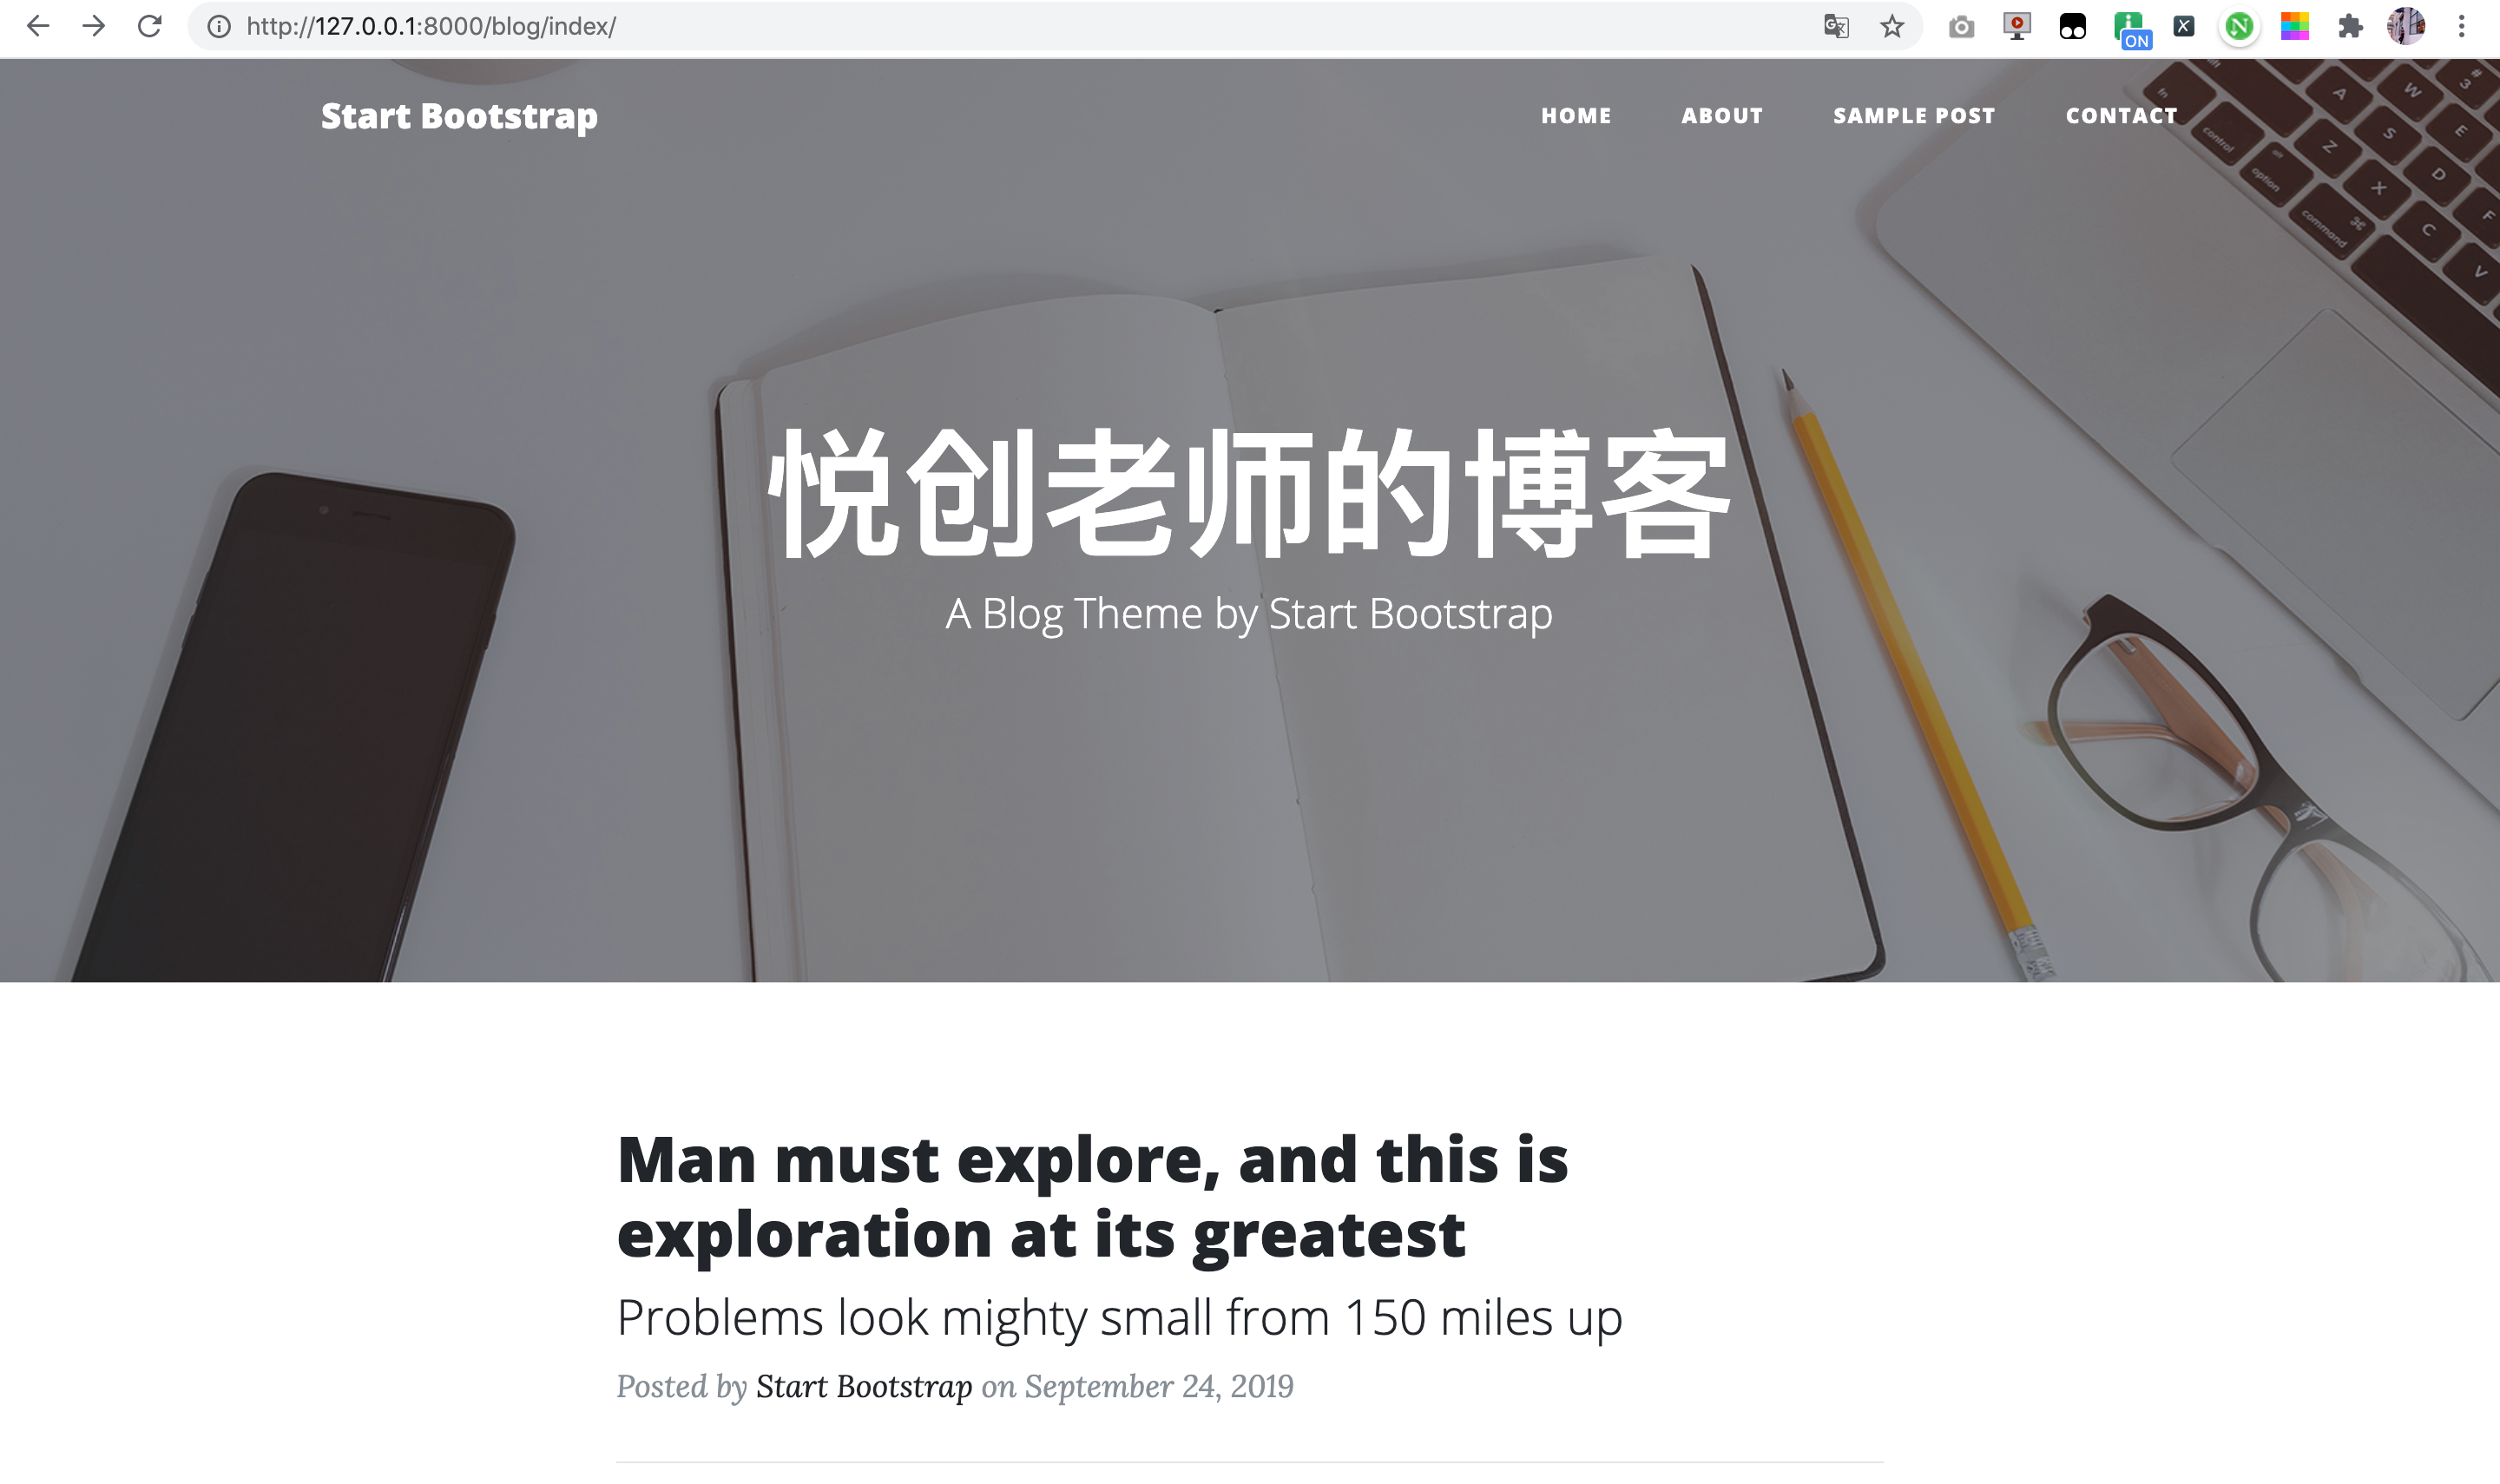
9. Use ready-made blog templates
10. index.html
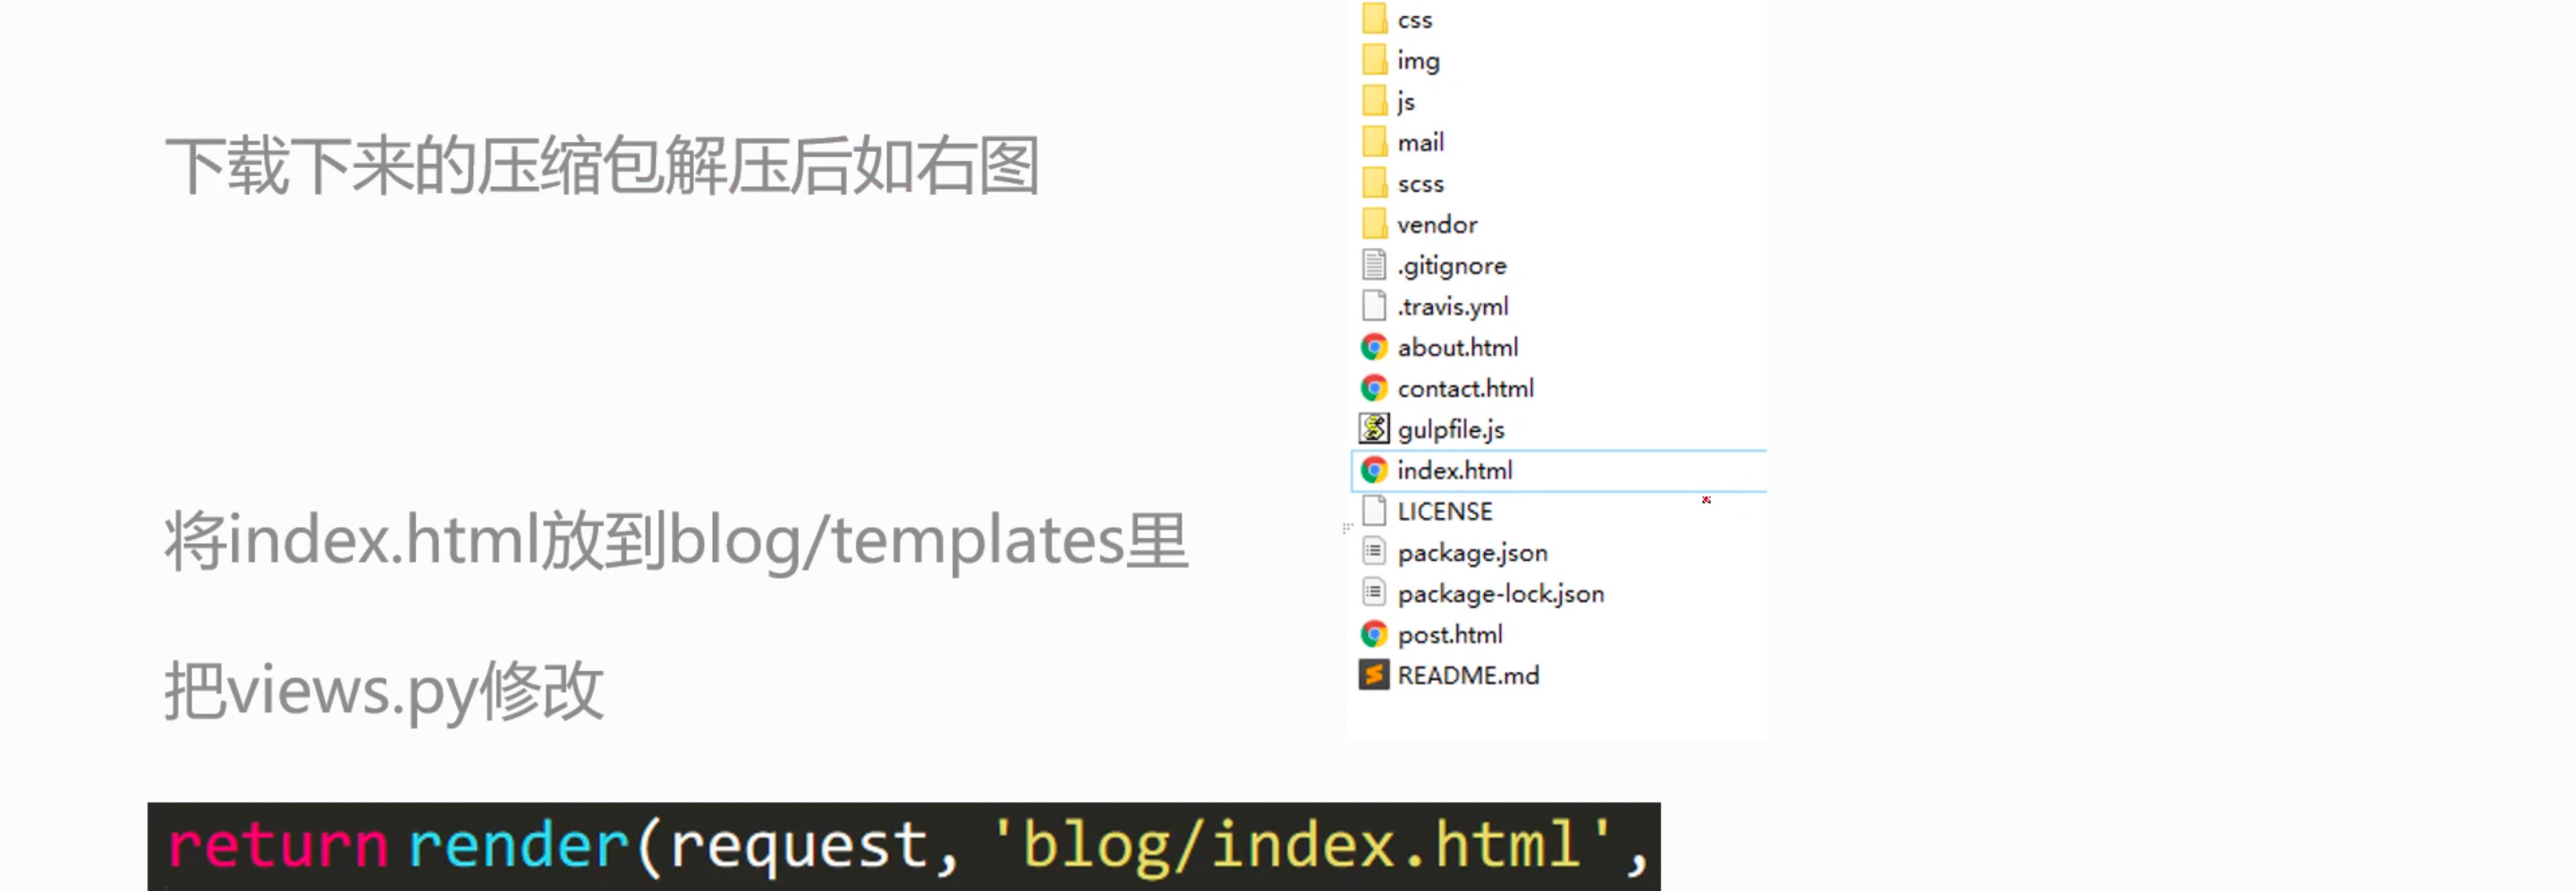
Original code:
def index(request):
	language_list = ['Python', 'Java', 'C++', 'JavaScript', 'C', 'C#']
	link_dict = {'AI Yuechuang blog': 'https://www.aiyc. Top ',' FP maker space ':' https://www.fpmakerspace.com '}
	flag = False
	return render(request, 'blog/blog_index.html',
		{
		"title": "Welcome to AI Yuechuang's blog site",
		"language_list": language_list,
		"link_dict": link_dict,
		"flag": flag,
		})
After modification:
def index(request):
	language_list = ['Python', 'Java', 'C++', 'JavaScript', 'C', 'C#']
	link_dict = {'AI Yuechuang blog': 'https://www.aiyc. Top ',' FP maker space ':' https://www.fpmakerspace.com '}
	flag = False
	return render(request, 'blog/index.html',
		{
		"title": "Welcome to AI Yuechuang's blog site",
		"language_list": language_list,
		"link_dict": link_dict,
		"flag": flag,
		})
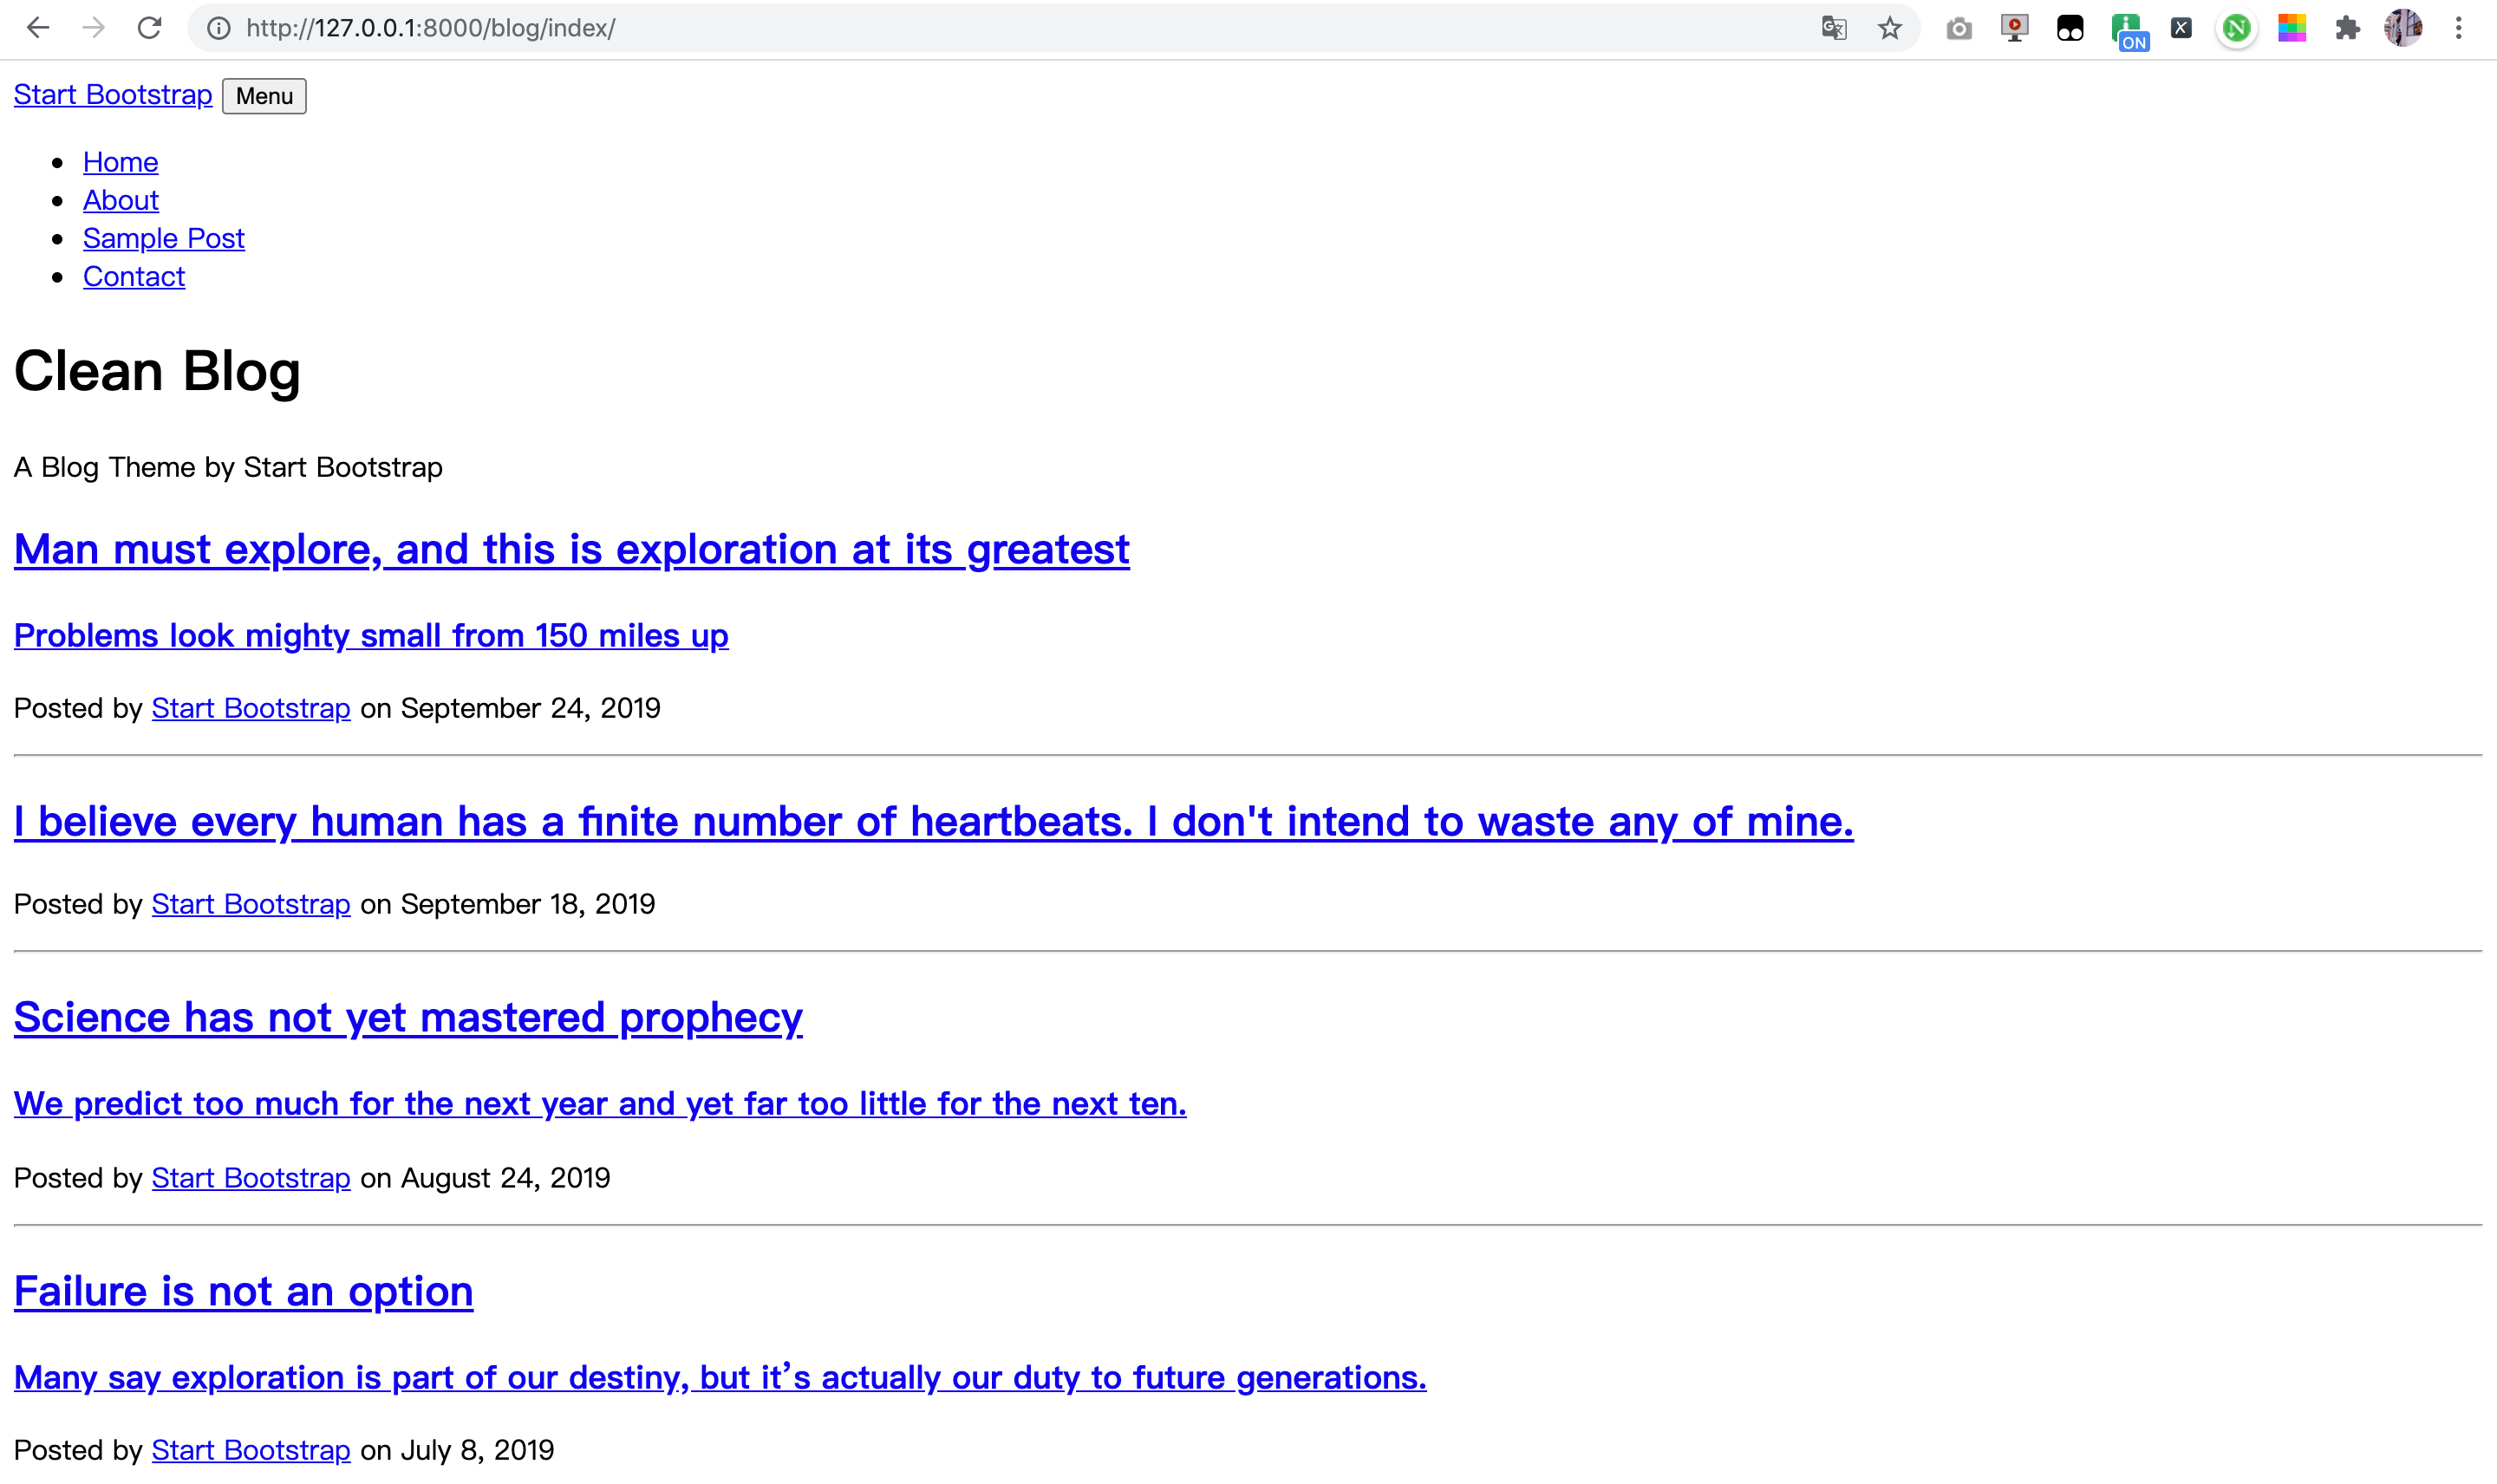
11. Open 127.0.0.1:8000/blog/index
There is something wrong with the style. CSS, JS, pictures and other materials are not found
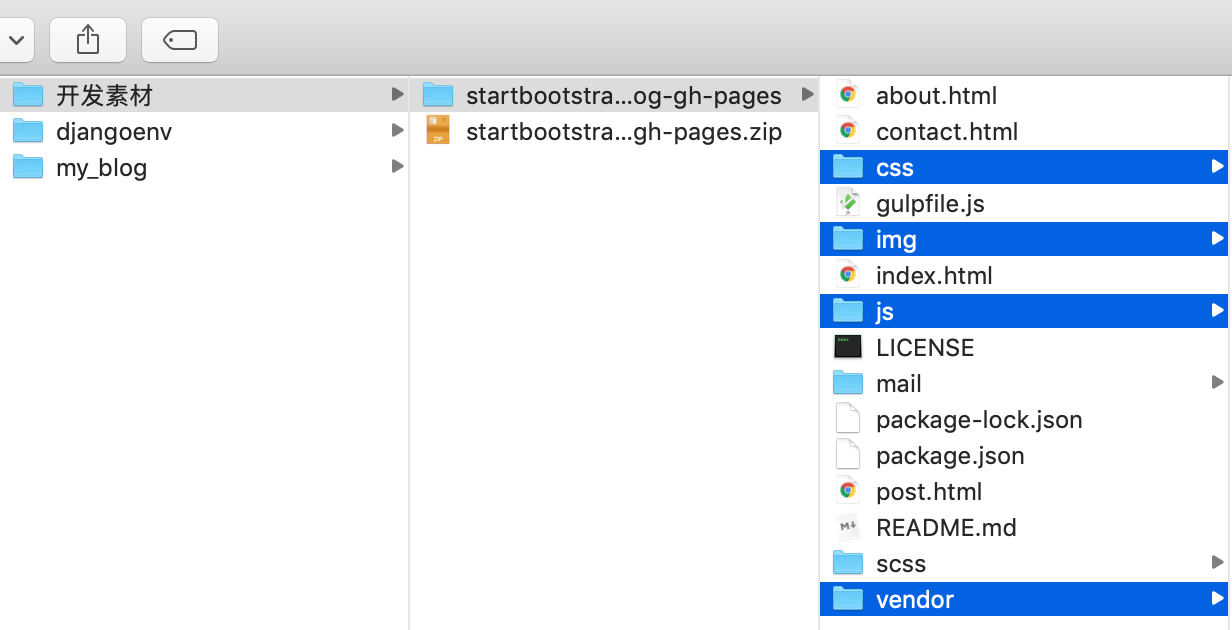
12. Copy material
Copy the material into the project
Create a new static folder under the project root directory
Create a new blog file in the static folder

Copy css, img, js and vendor to the newly created blog folder

13. Modify settings py
Open settings Py file
Add a line at the end
import os
STATICFILES_DIRS = [os.path.join('static'), ]
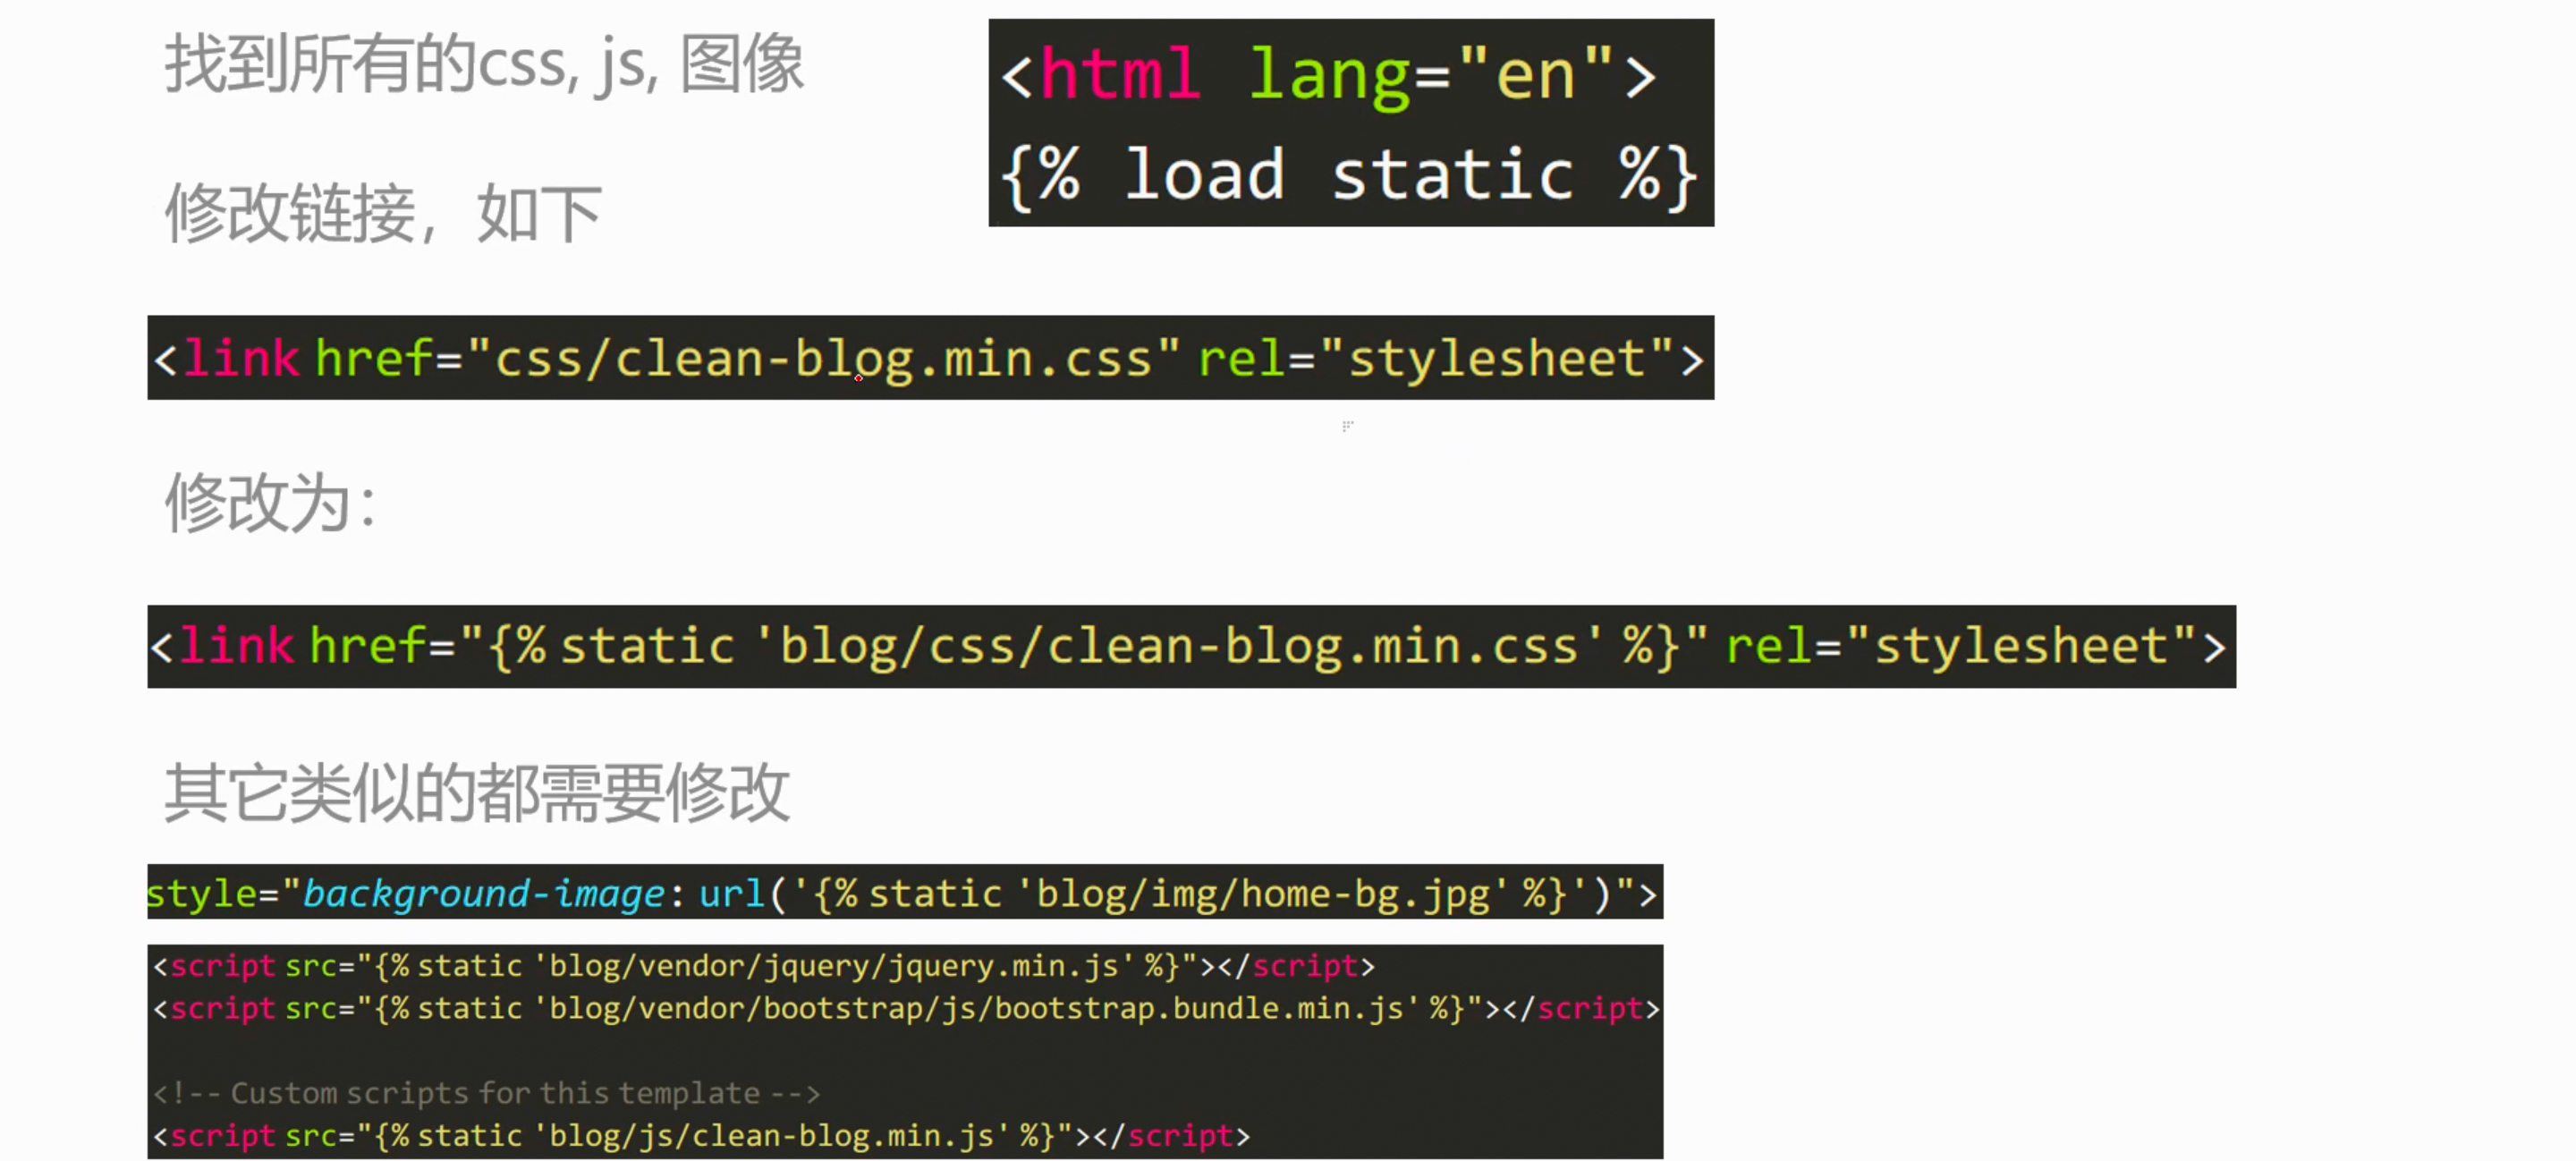
14. Modify index html
15. Open normally at this time
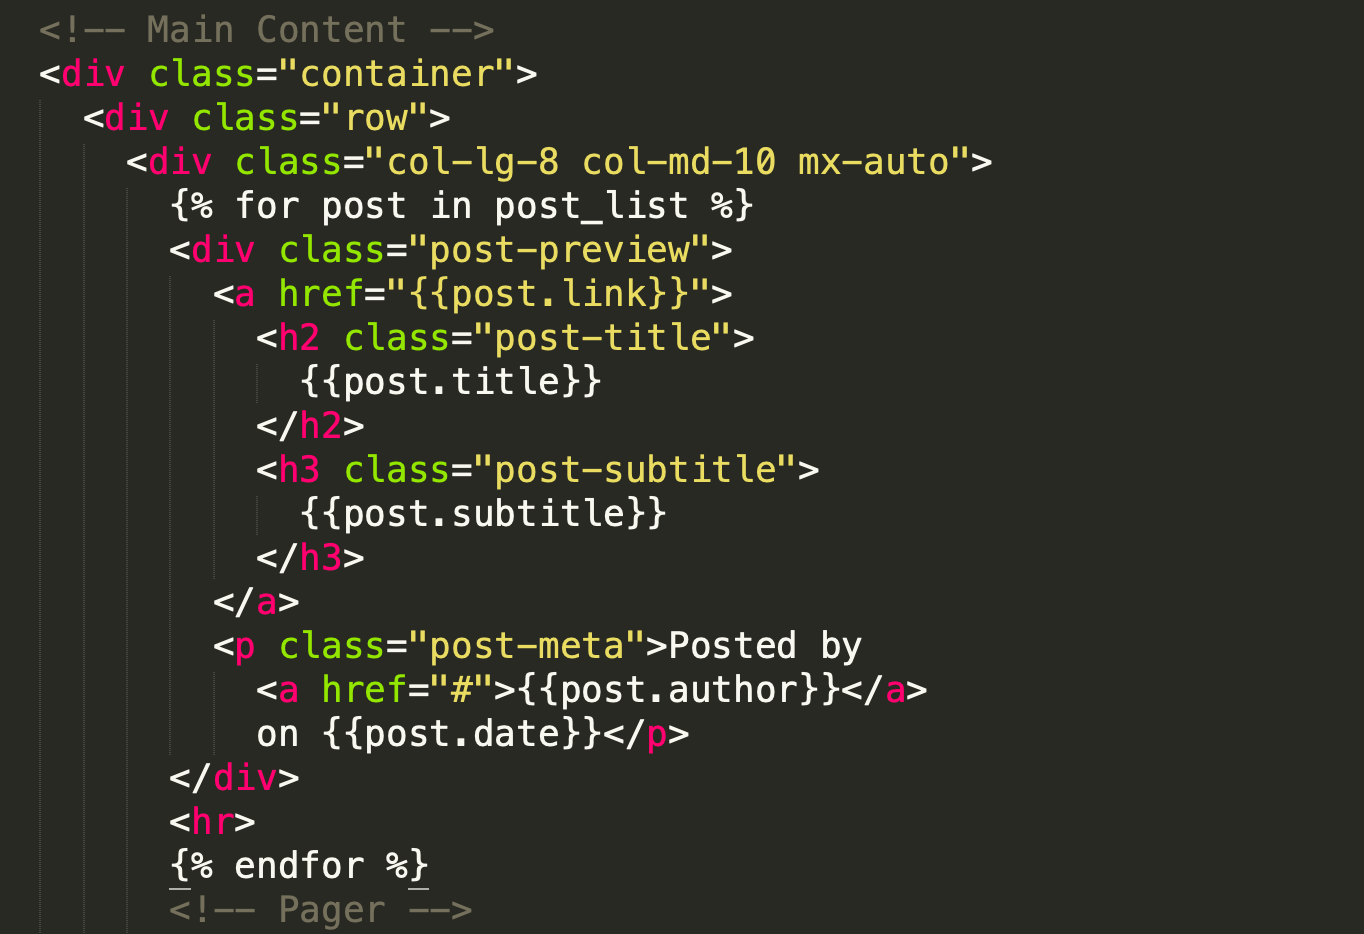
16. Modify index HTML, adding template parameters
Find index HTML and blog related content
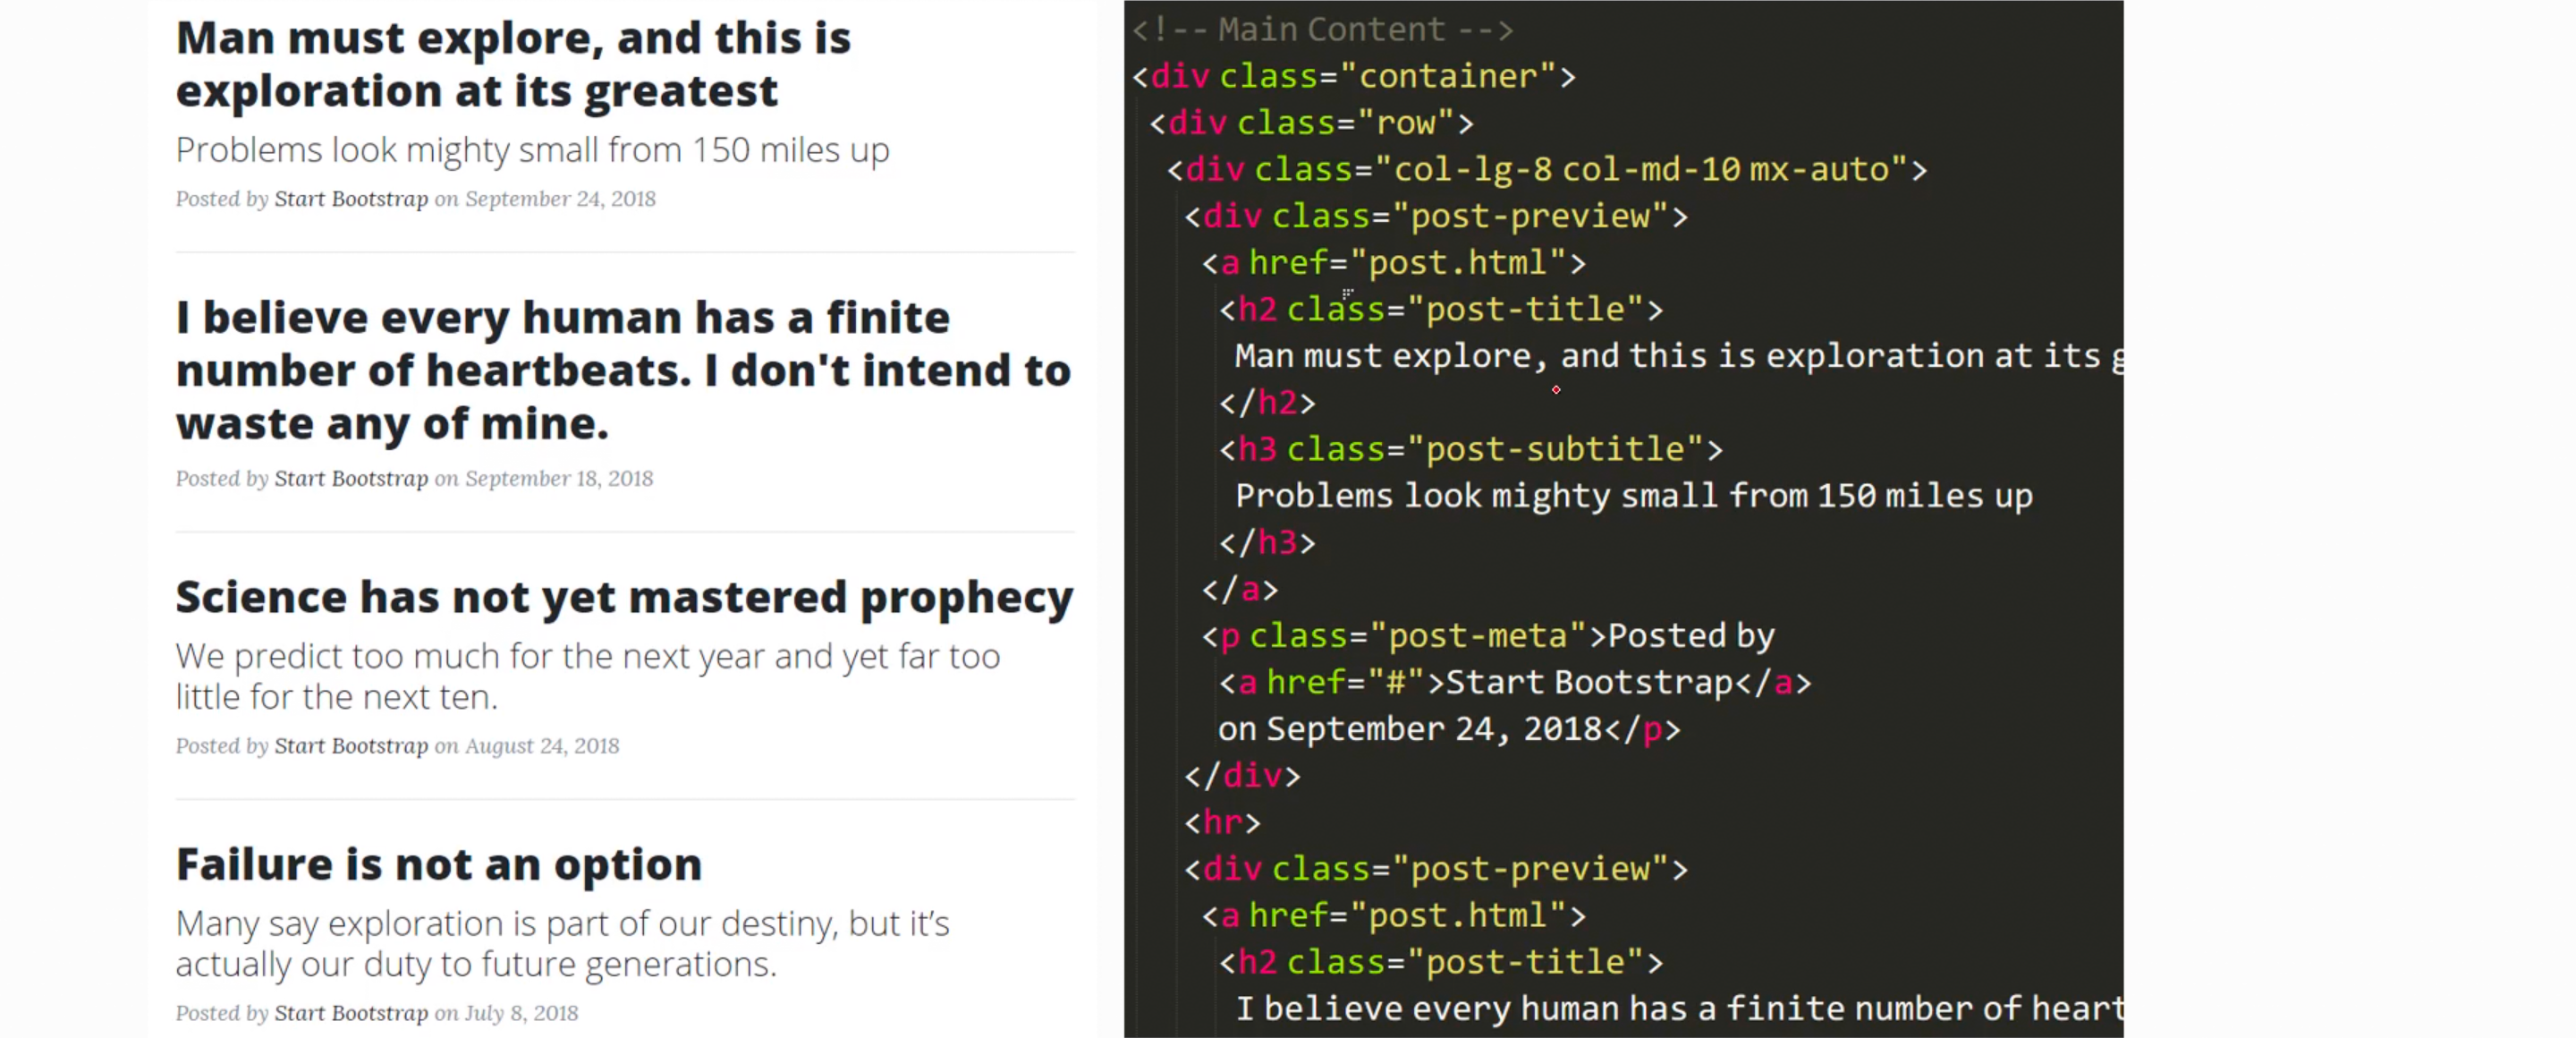
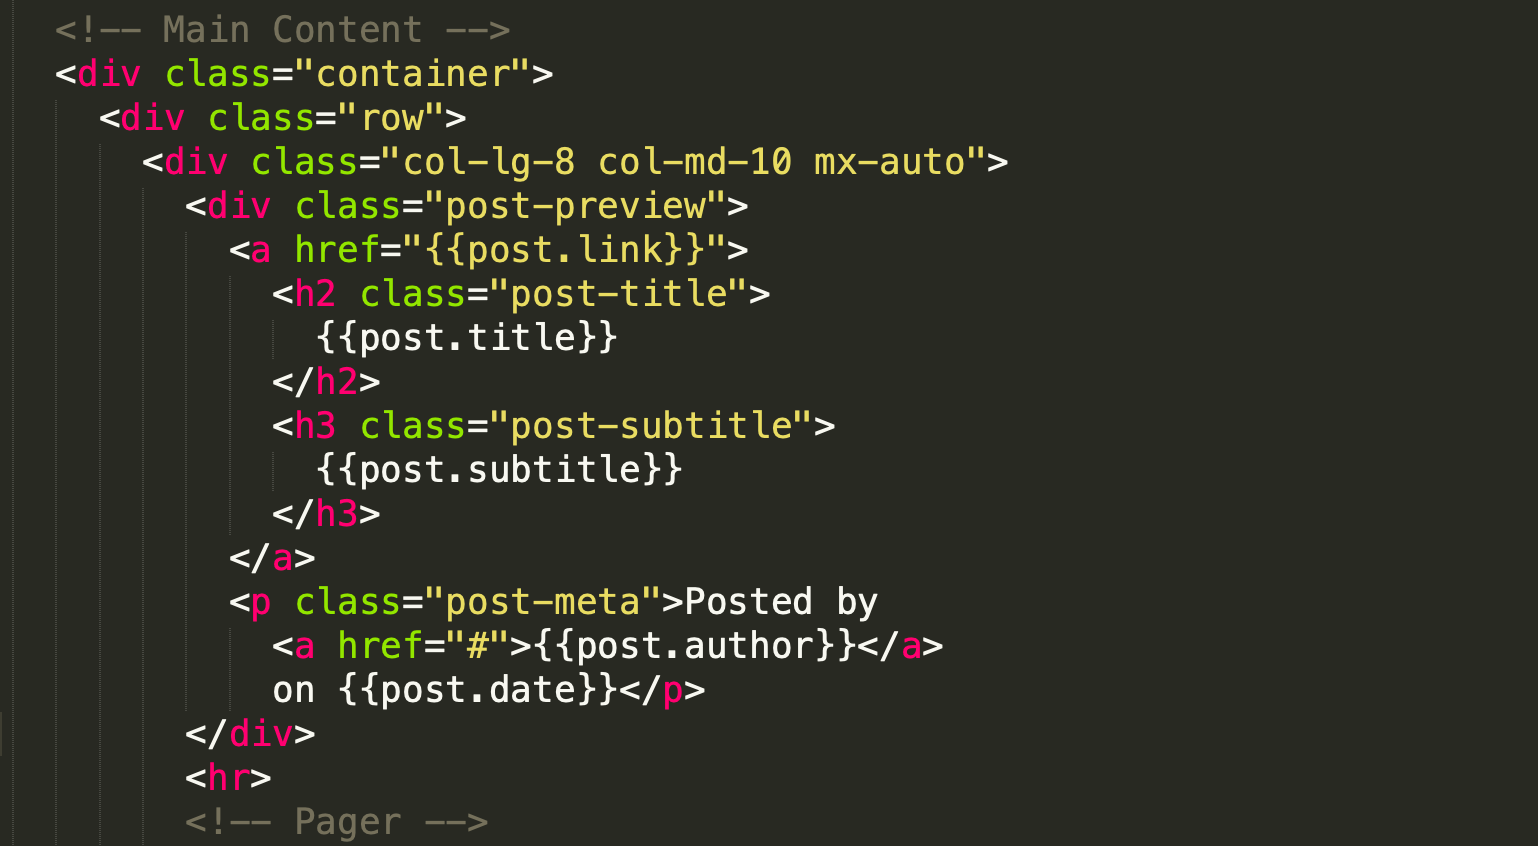
Find the law and change it to template writing
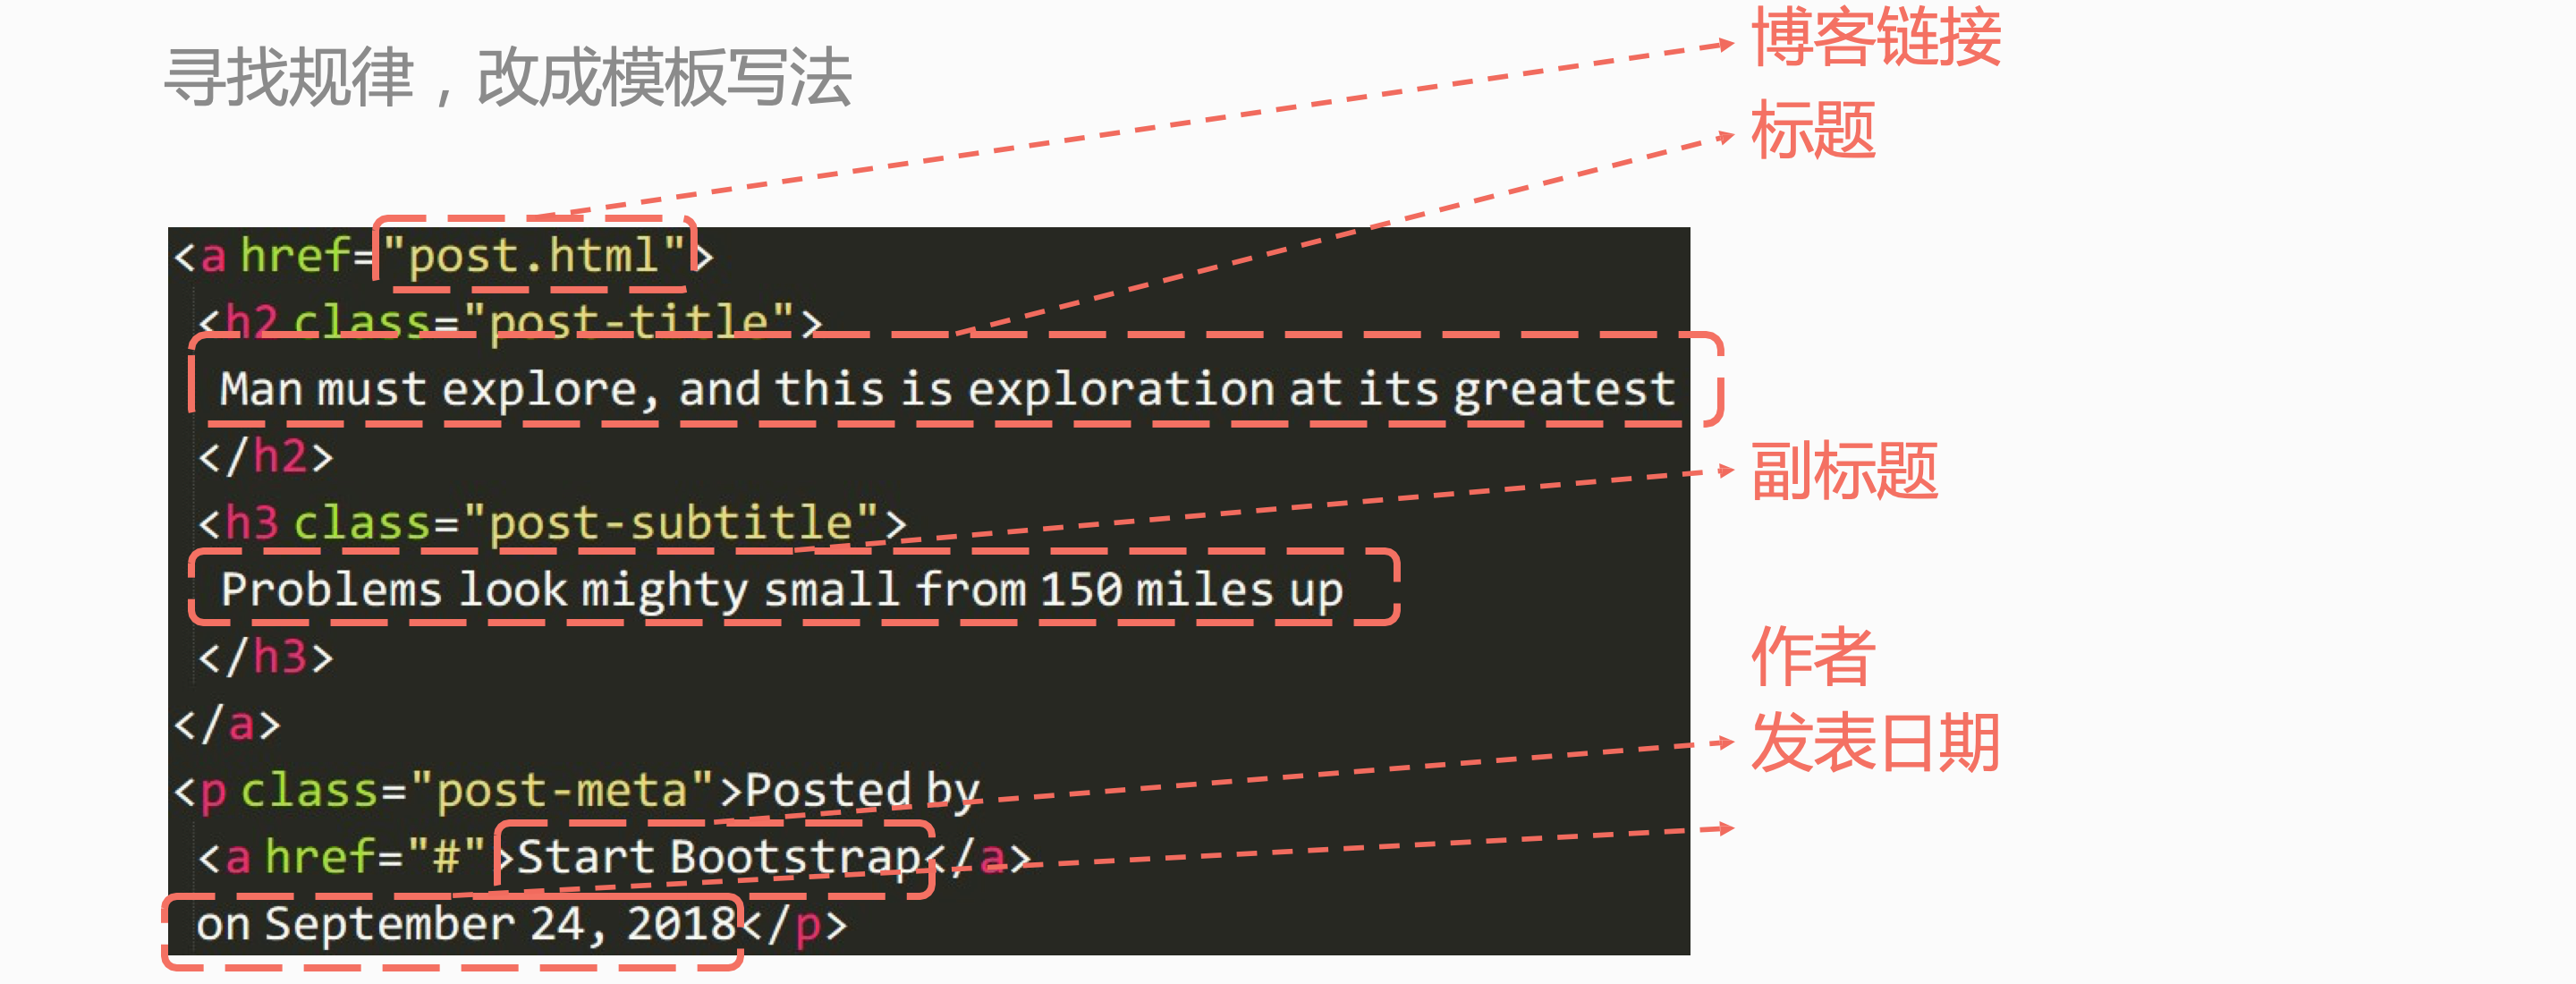
Find index HTML and blog related content
17. Modify views py
Add views The rendering parameters in py are modified according to the template design
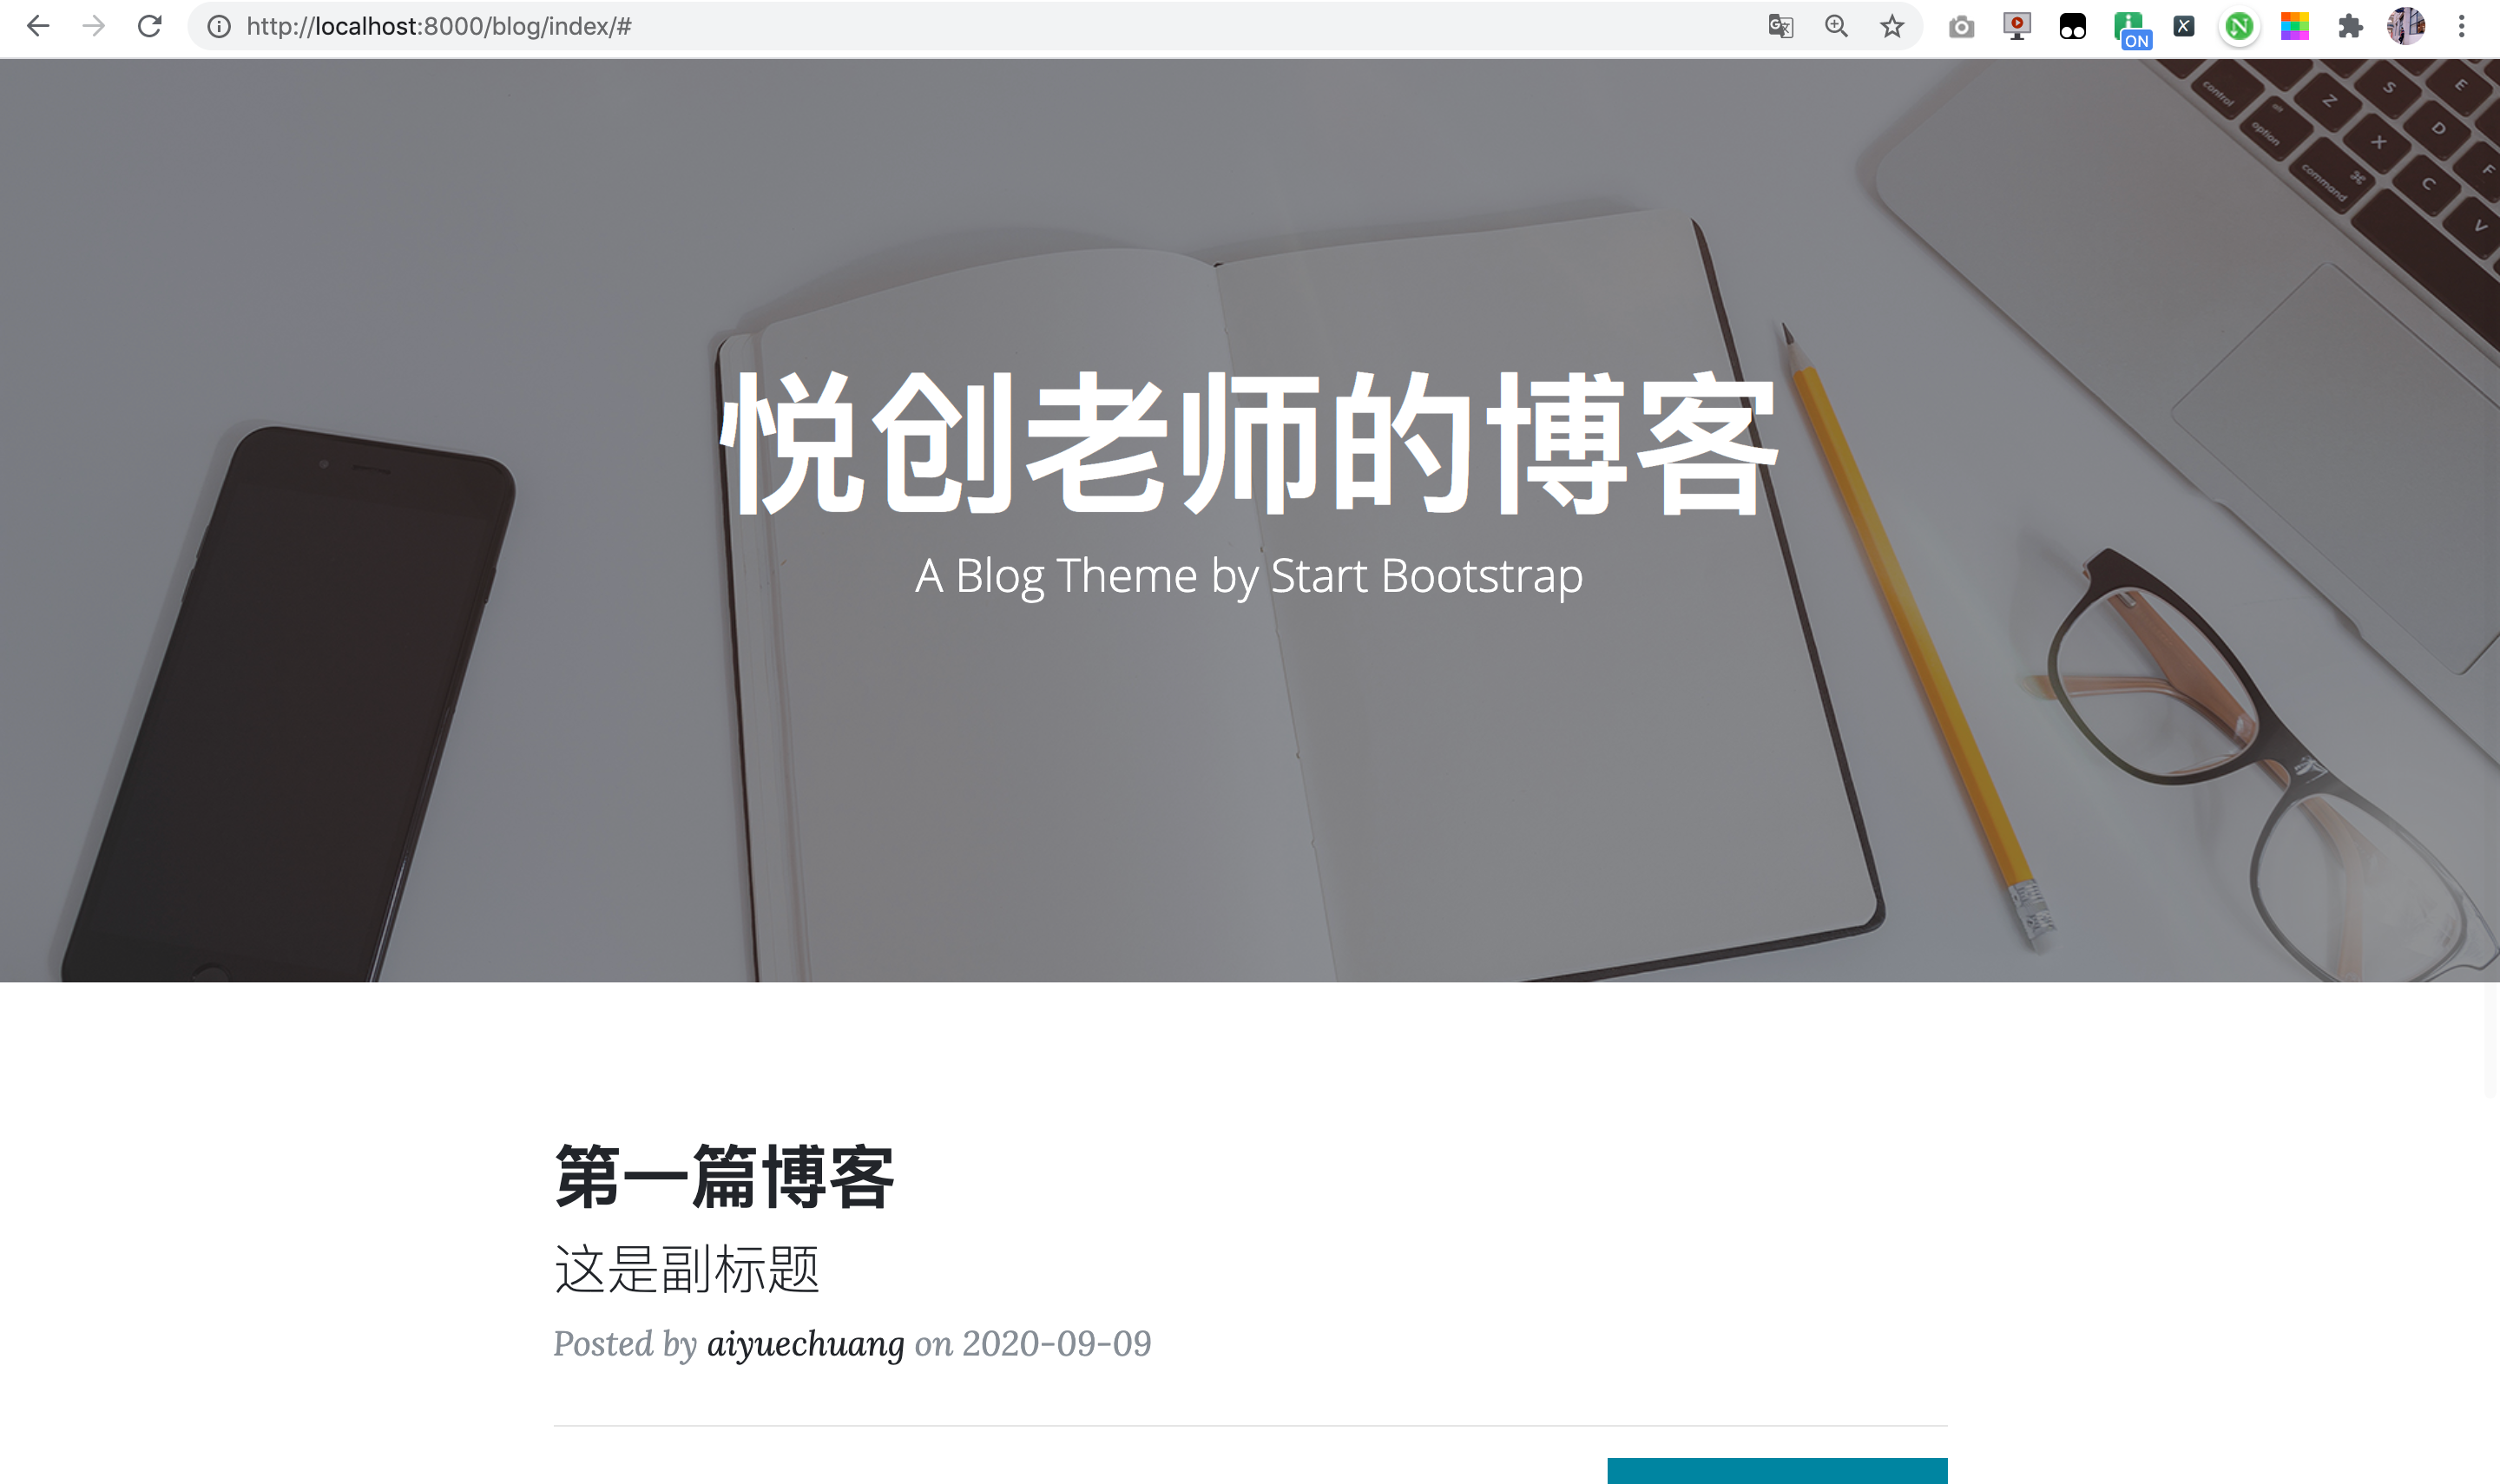
def index(request):
	post = {
		'link': 'http://www.aiyc.top',
		'title': 'First blog',
		'subtitle': 'This is the subtitle',
		'author': 'aiyuechuang',
		'date': '2020-09-09'
	}
	return render(request, 'blog/index.html',
		{
		"title": "Yuechuang teacher's blog",
		'post': post,
		})
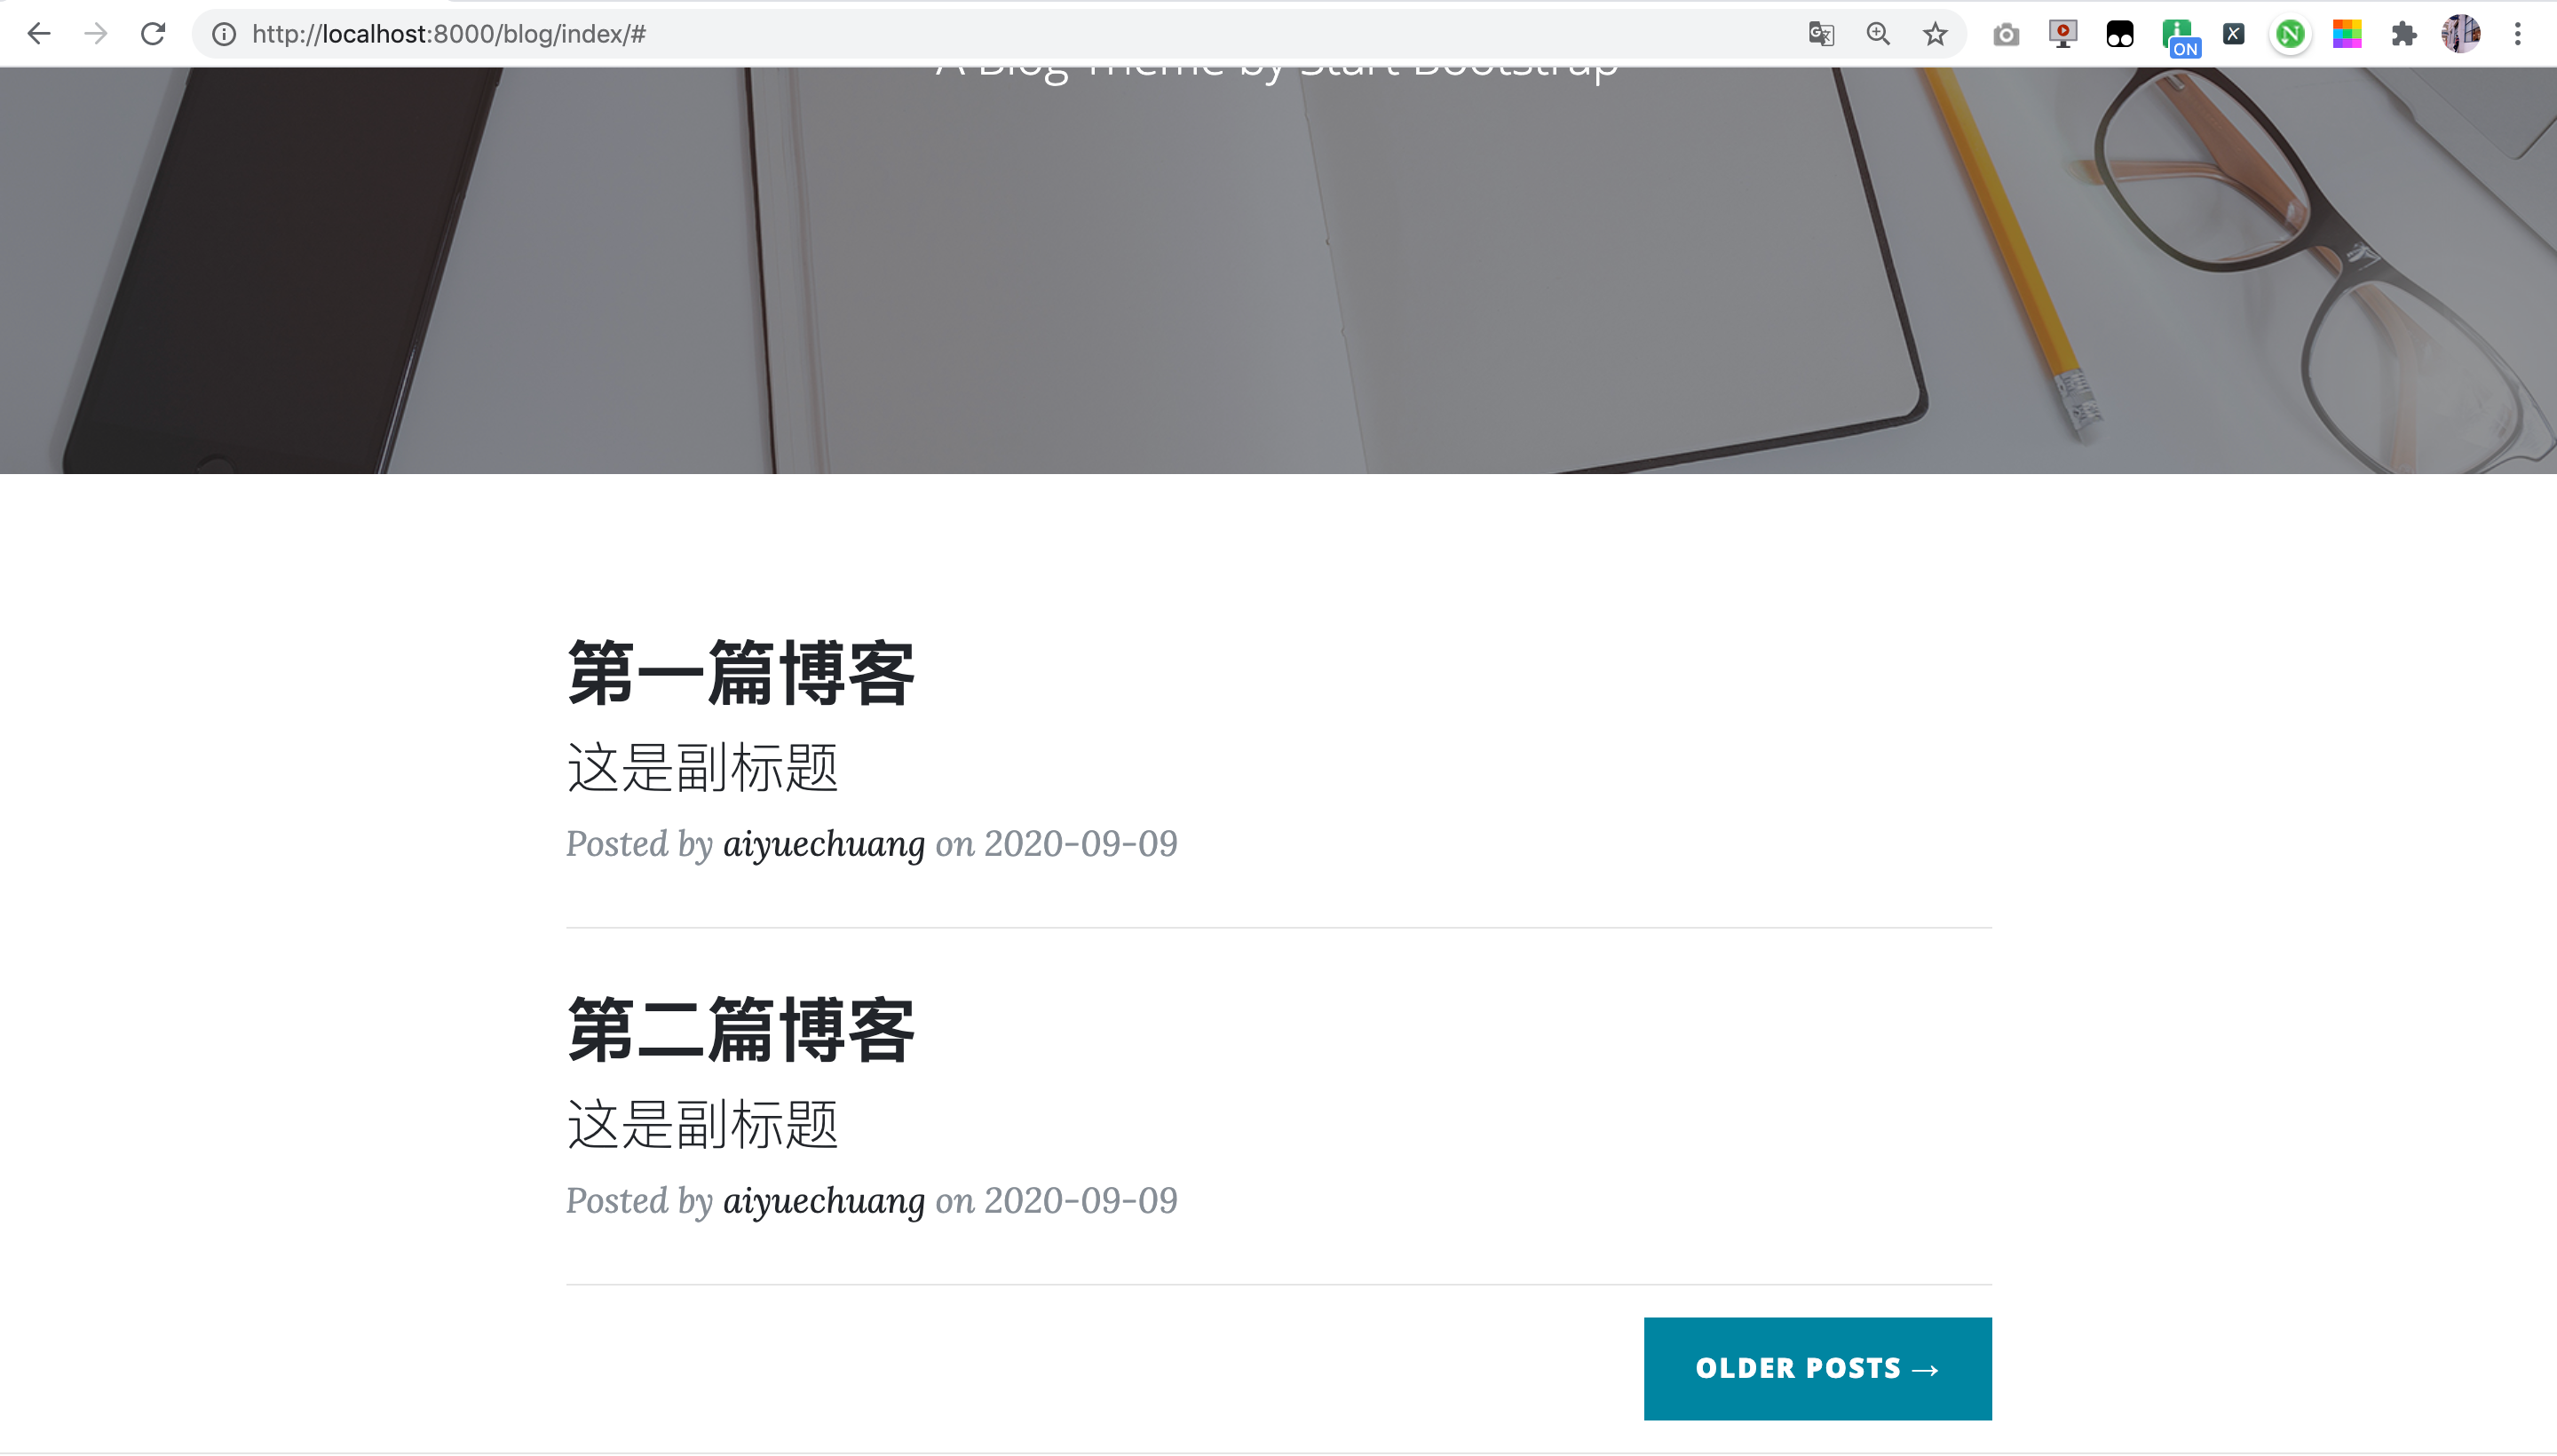
def index(request):
	post_list = [
	{
		'link': 'http://www.aiyc.top',
		'title': 'First blog',
		'subtitle': 'This is the subtitle',
		'author': 'aiyuechuang',
		'date': '2020-09-09'
	},
	{
		'link': 'http://www.aiyc.top',
		'title': 'Second blog',
		'subtitle': 'This is the subtitle',
		'author': 'aiyuechuang',
		'date': '2020-09-09'
	},
	]
	return render(request, 'blog/index.html',
		{
		"title": "Yuechuang teacher's blog",
		"post_list": post_list,
		})
18. Blog details page
Post the template Copy the HTML to the blog in the project templates.

Modify views Code in PY
Before modification:
def blog_detail(request, blog_id):
	return HttpResponse("This is the second「{}」Blog".format(blog_id))
After modification:
def blog_detail(request, blog_id):
	return render(request, 'blog/post.html')
Here, my url definition is:
urlpatterns = [
	path('index/', views.index, name='index'),
	# path(route, view, name="'index'")
	path('<int:blog_id>', views.blog_detail, name='blog_detail'),
	path('<int:blog_id1>/<int:blog_id2>', views.blog_sum, name='blog_sum'),
]
Therefore, the web pages we tested were:
http://localhost:8000/blog/1 # blog is followed by the number "this is the URL definition above, depending on your specific situation"
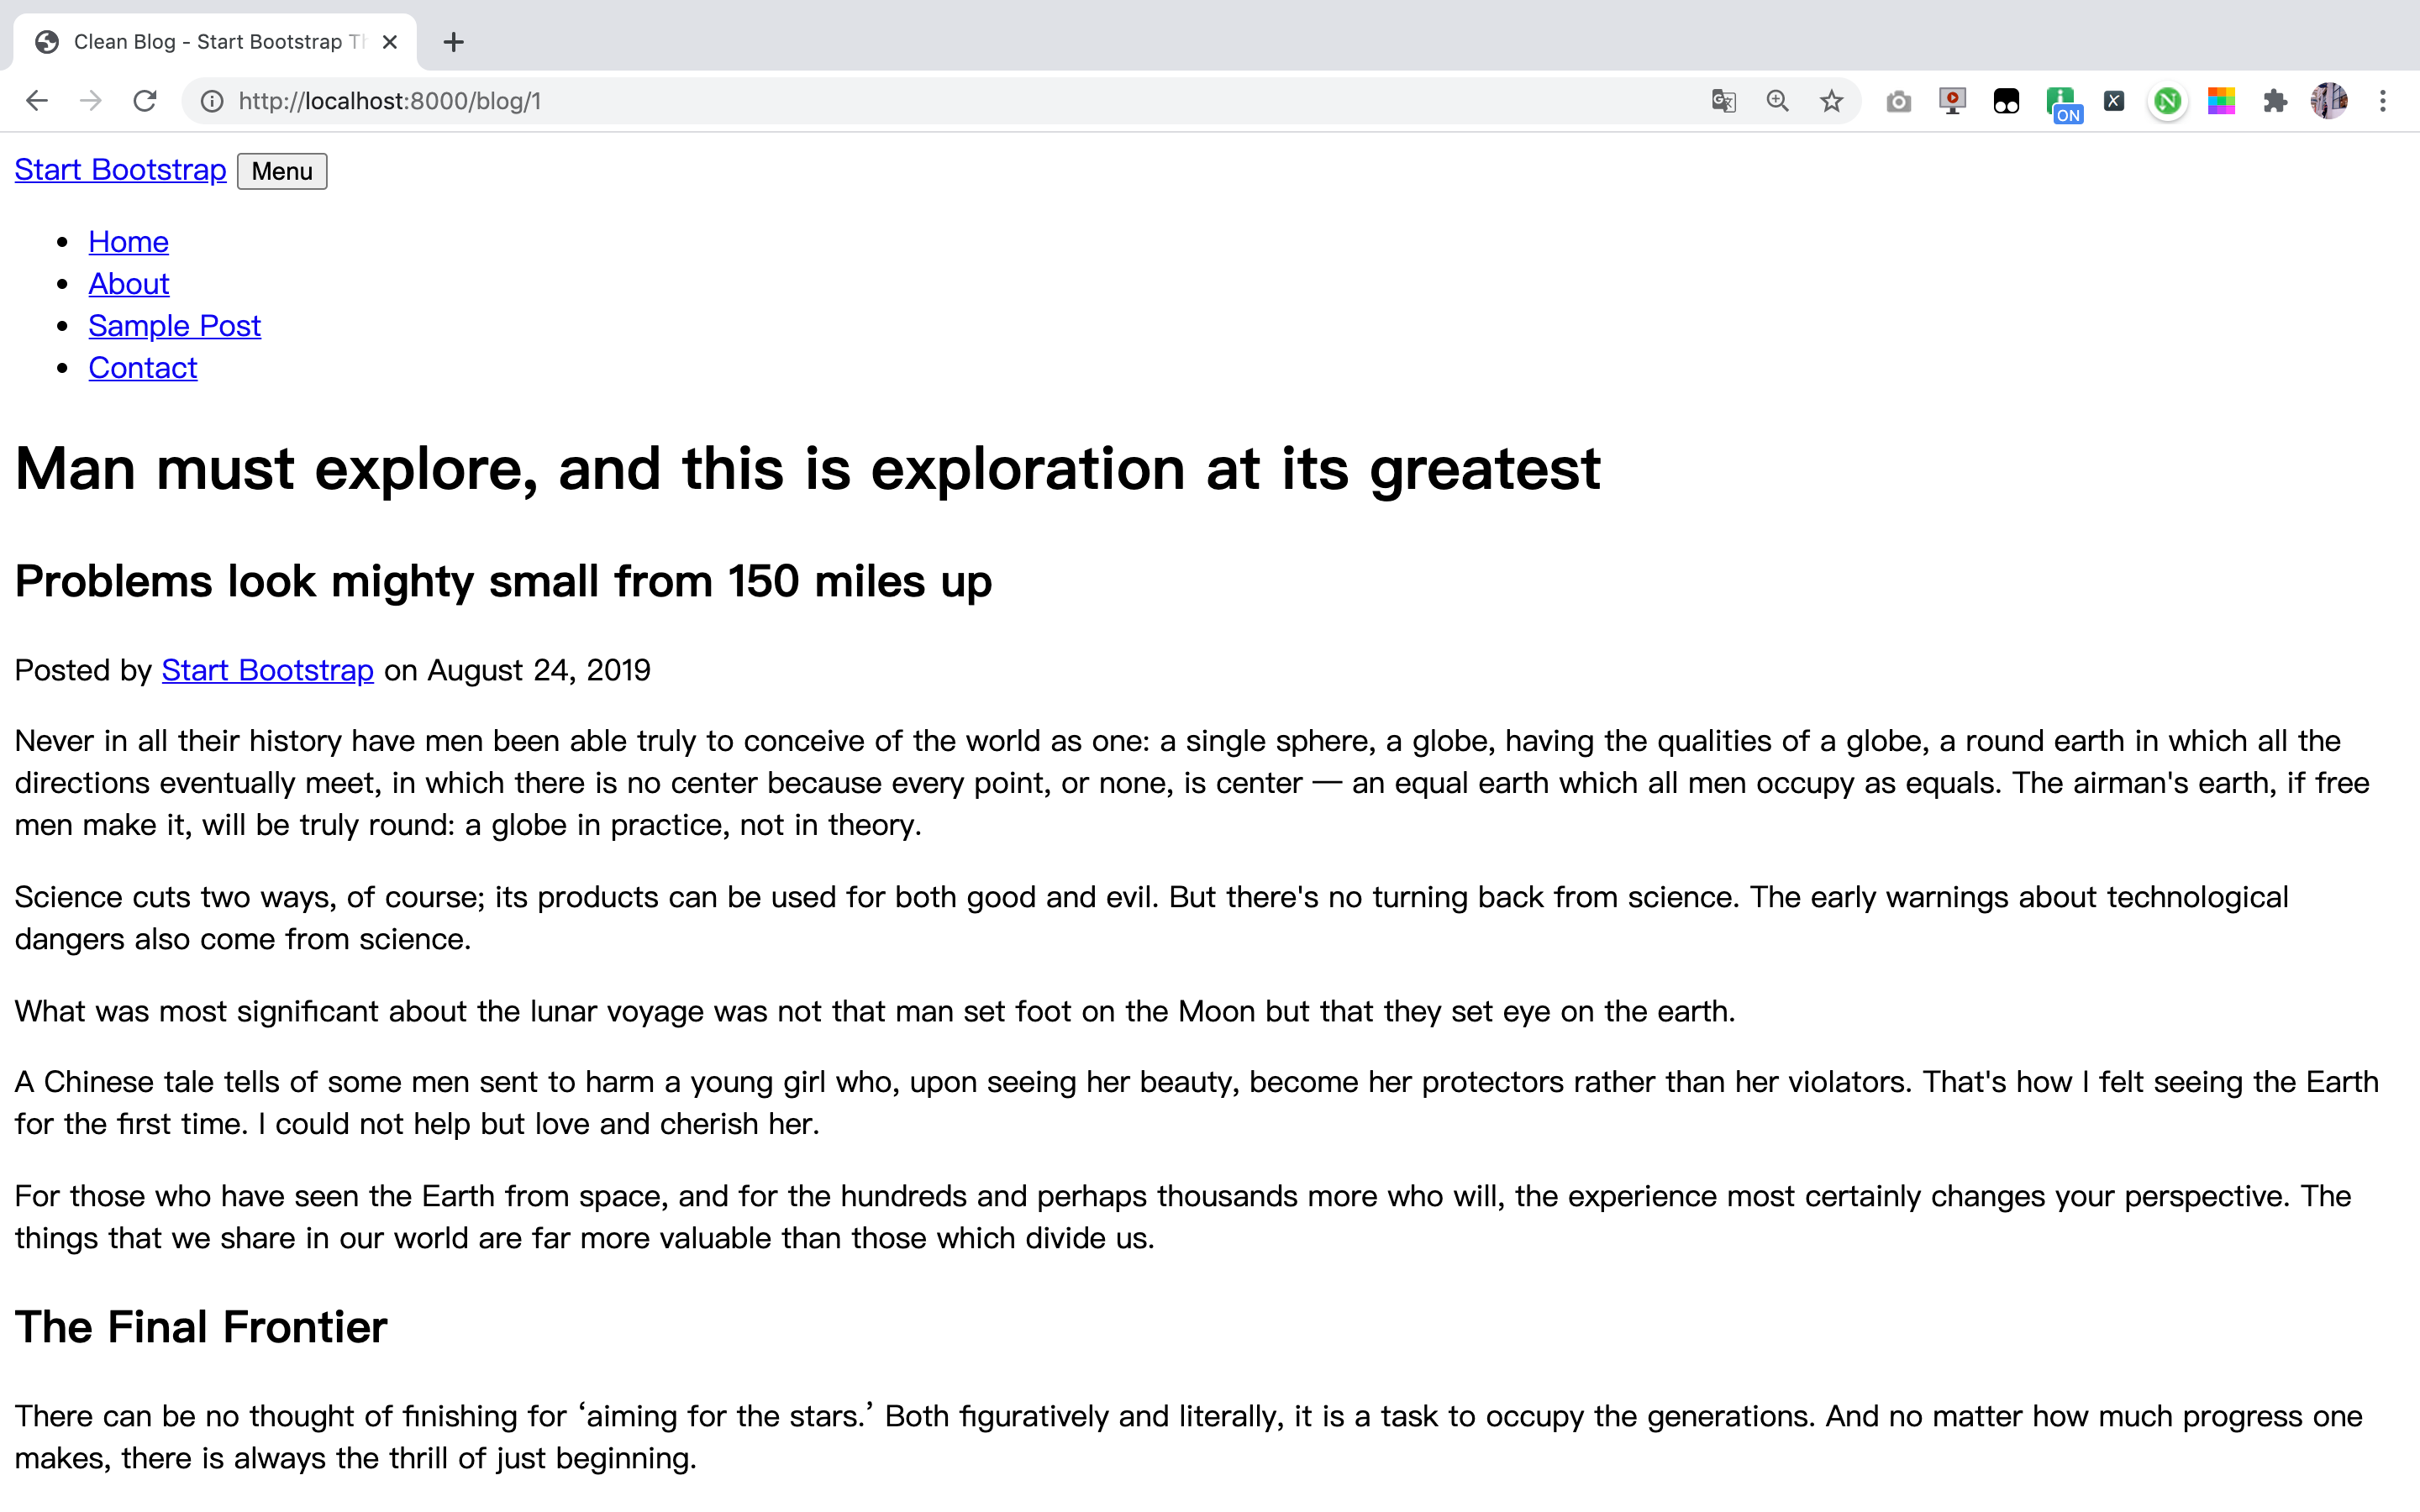
Copy the material "the required material has been imported in the index step", modify the path of the required material, and modify the index above Html is a meaning.
You can modify views Py, the modification example is as follows.
Before modification:
def index(request):
	post_list = [
	{
		'link': 'http://www.aiyc.top',
		'title': 'First blog',
		'subtitle': 'This is the subtitle',
		'author': 'aiyuechuang',
		'date': '2020-09-09'
	},
	{
		'link': 'http://www.aiyc.top',
		'title': 'Second blog',
		'subtitle': 'This is the subtitle',
		'author': 'aiyuechuang',
		'date': '2020-09-09'
	},
	]
	return render(request, 'blog/index.html',
		{
		"title": "Yuechuang teacher's blog",
		"post_list": post_list,
		})
After modification:
def index(request):
	post_list = [
	{
		'link': '/blog/1',
		'title': 'First blog',
		'subtitle': 'This is the subtitle',
		'author': 'aiyuechuang',
		'date': '2020-09-09'
	},
	{
		'link': '/blog/2',
		'title': 'Second blog',
		'subtitle': 'This is the subtitle',
		'author': 'aiyuechuang',
		'date': '2020-09-09'
	},
	]
	return render(request, 'blog/index.html',
		{
		"title": "Yuechuang teacher's blog",
		"post_list": post_list,
		})
You can jump to our details page.
A little more advanced, we can replace the title of the details page with the link we visit.
views.py
def blog_detail(request, blog_id):
	return render(request, 'blog/post.html',
			{
				'title_link': request.path,
				'url_host': request.get_host(),
			}
		)
post.html
<h1>{{url_host}}{{title_link}}</h1>
9. Operation
Improve the blog system
Improve the template of blog system and the corresponding rendering function
Through views Py list rendering blog home page
4. Django model
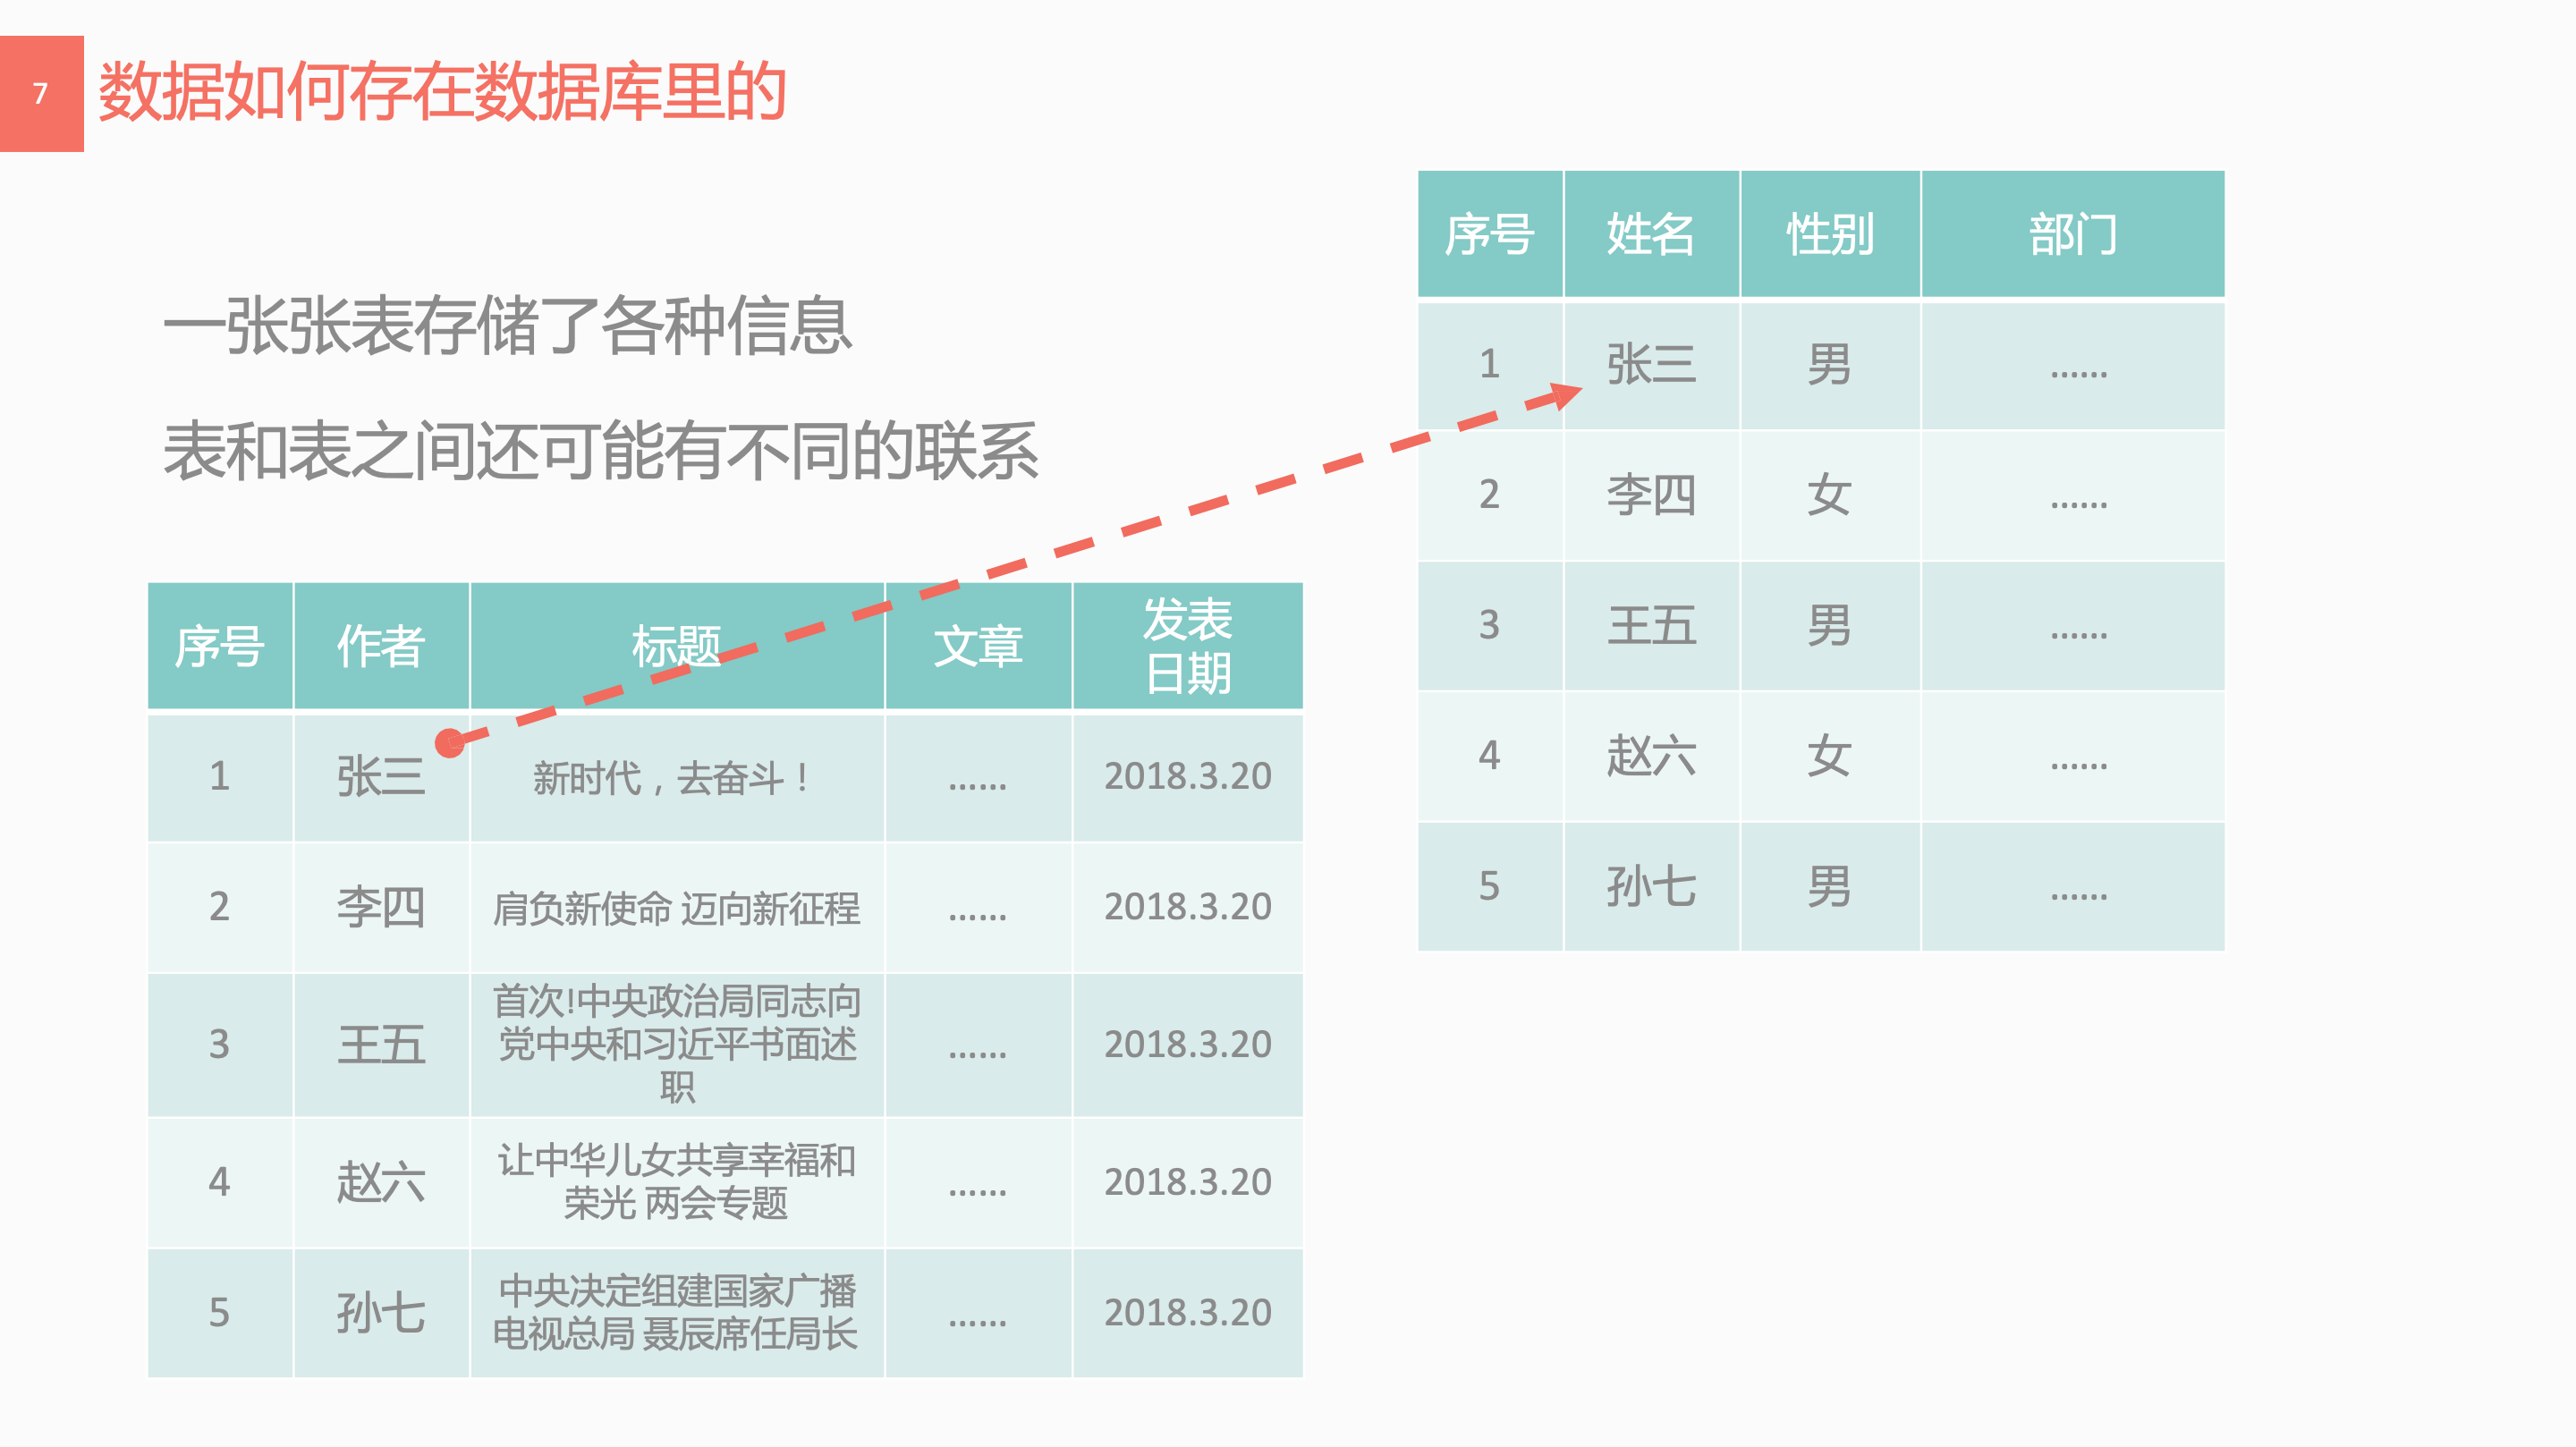
1. Awareness database
Warehouse for storing data
What is data?
**Student's name, gender, student number and grade**
User's bank card number, balance and transaction record
**Website login account, password and registered course information**
User name, equipment, attribute and level in the game
......
Data is everywhere in the information age
2. Database in Django
Try it and open models in the blog application Py file

Add the following
from django.db import models

# Create your models here.
class Post(models.Model):
	title = models.CharField(max_length=80)
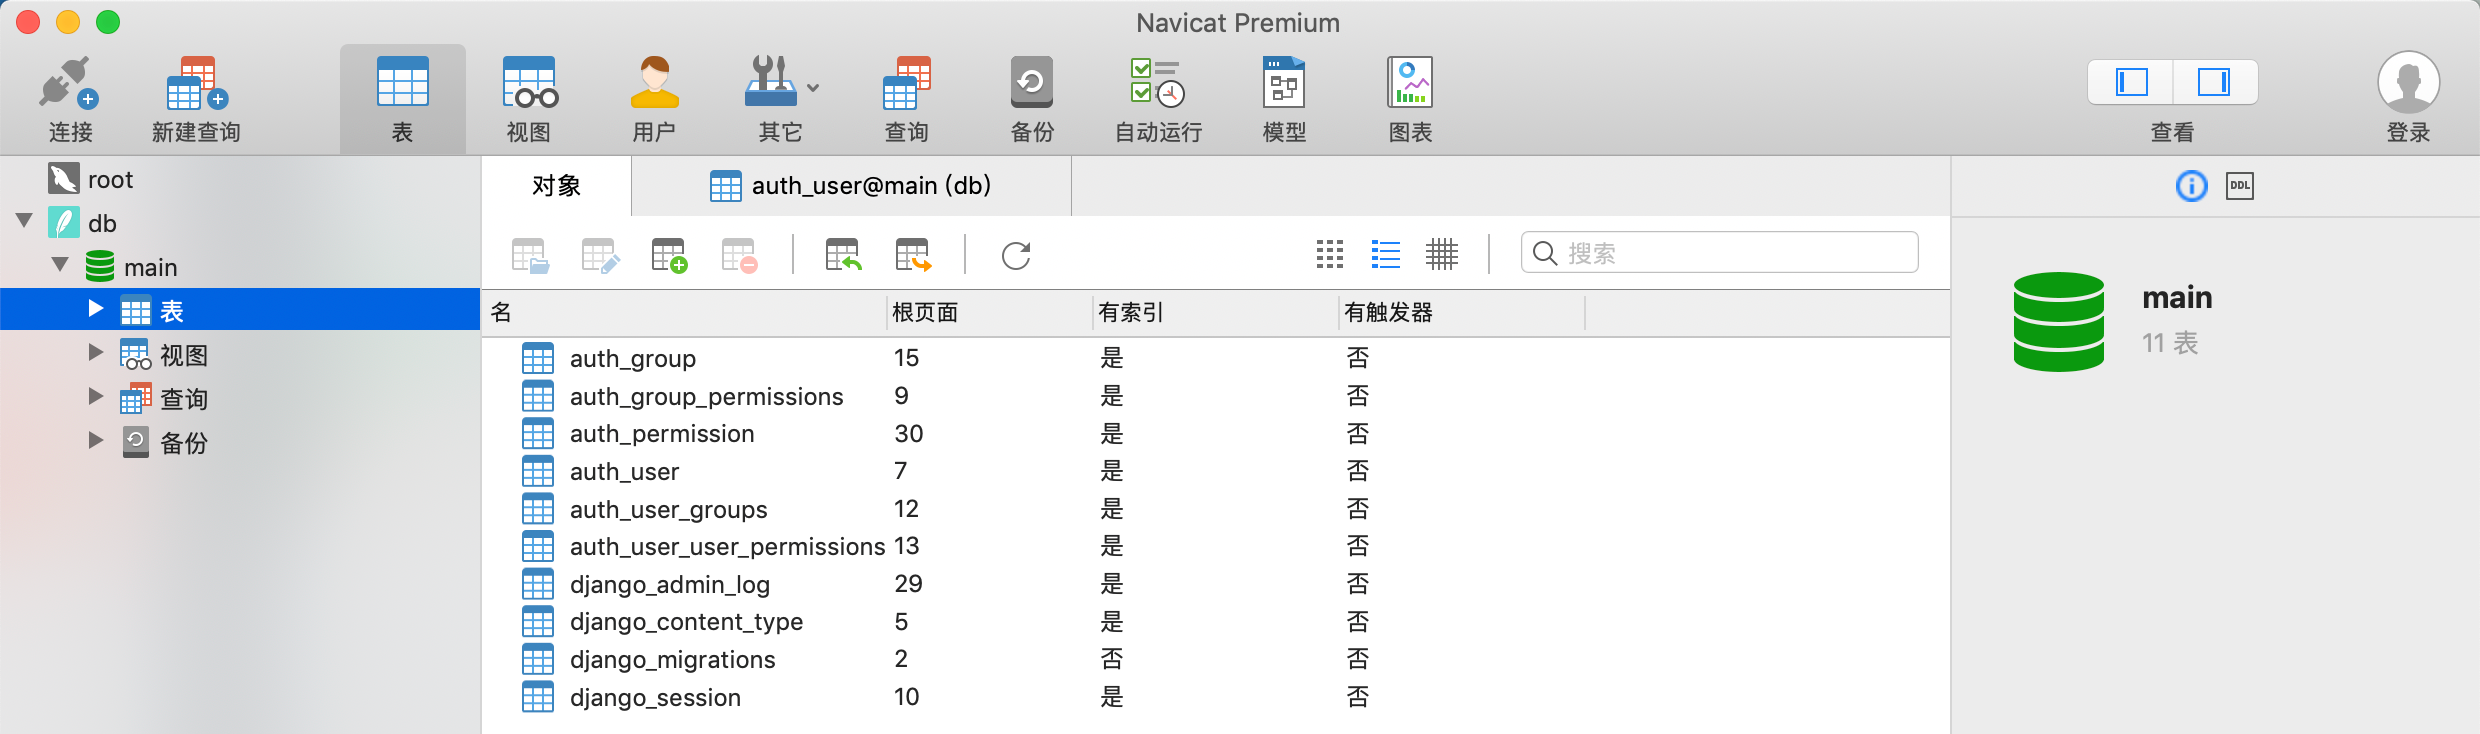
3. Synchronize database
Run on the command line:
python manage.py makemigrations
After getting the following prompt, you can see that the Post model is created, "that is, a py file is generated, and the contents of the PY file are how to modify the database. - generate database synchronization script"

Continue running on the command line:
python manage.py migrate
Get the following tips:

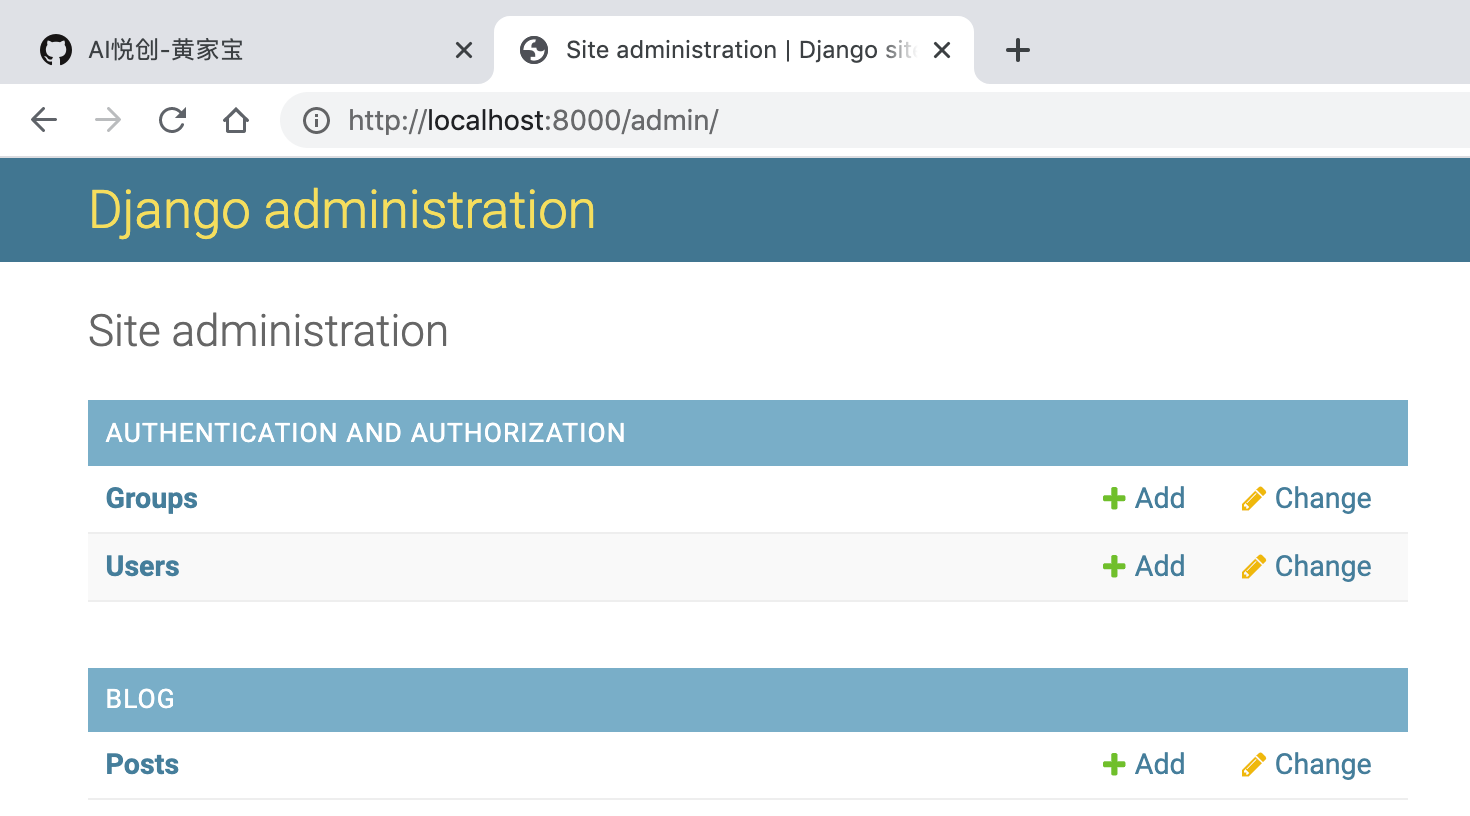
4. Use admin background system to manage data
Register the model we created in the background.
Modify admin. In the blog folder py
from django.contrib import admin
from .models import Post

# Register your models here.
admin.site.register(Post)
On the command line, run Python manage Py runserver start server
visit: http://localhost:8000/admin/ After logging in, you can see a new column
5. admin background system management
Click Posts to see the content that has not been posted
Click ADD POST + to add a Post Title directly
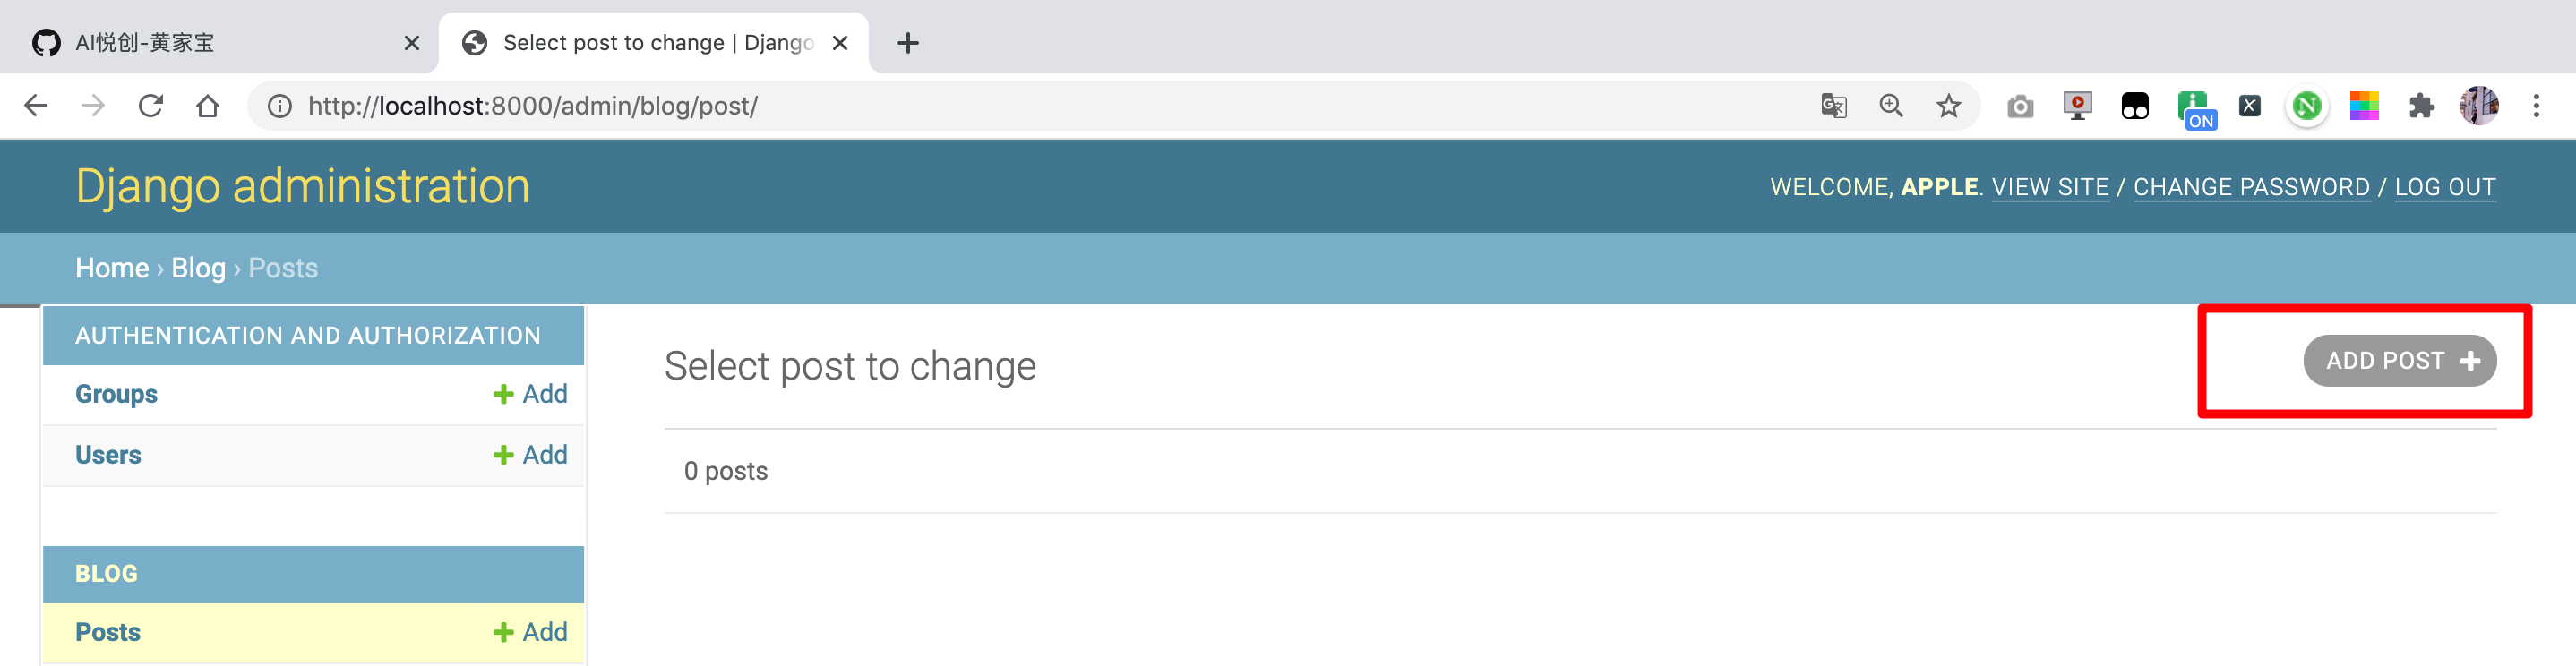
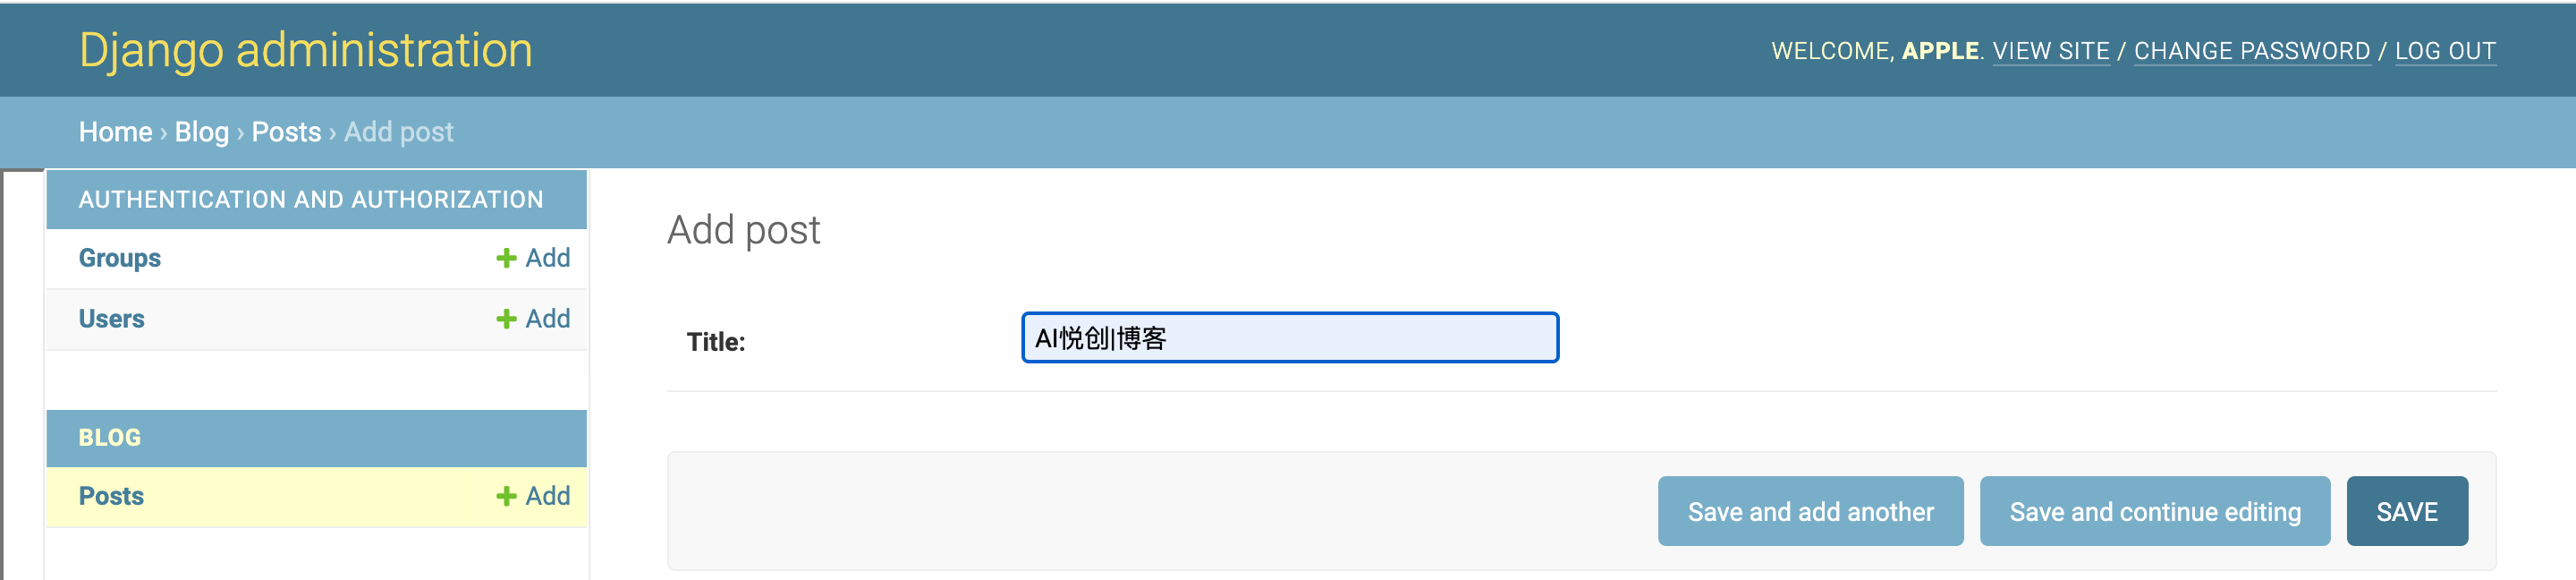
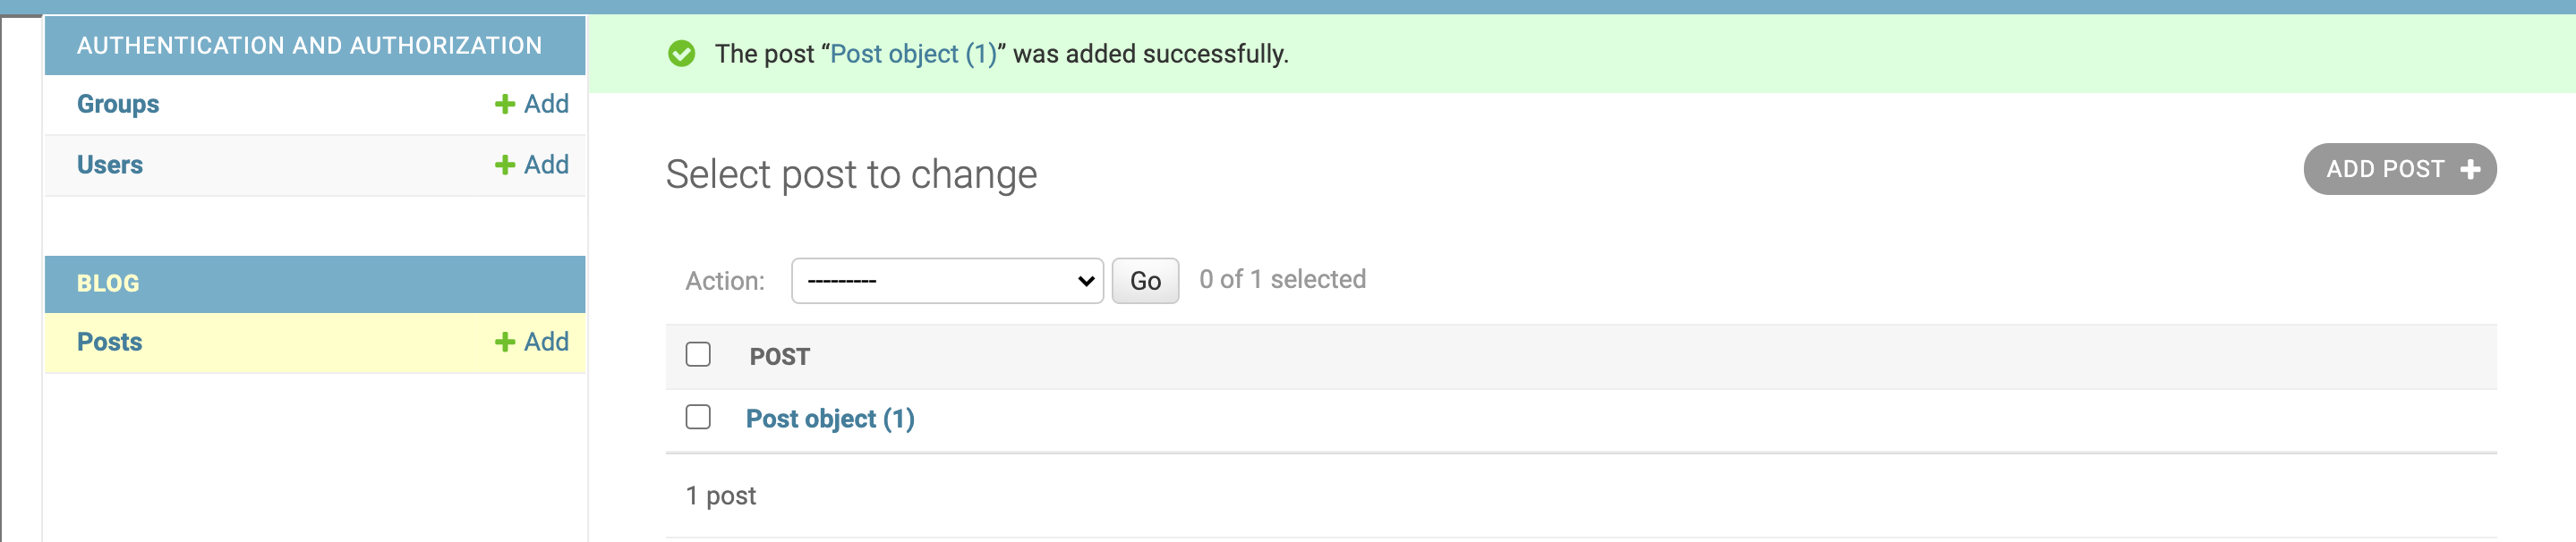
After saving, the content is as follows, which is called Post object (1), which is not intuitive
6. Modify models py
Modify the models in the blog folder py
from django.db import models

# Create your models here.
class Post(models.Model):
	title = models.CharField(max_length=80)

	def __str__(self):
		return self.title
After refreshing the page, you can see that the title becomes the title

7. Design blog model
The information related to a blog is as follows:
-
title
-
Subtitle
-
author
-
Publication date
-
label
-
classification
-
Blog content
-
Blog link
-
(optional) number of likes
-
(optional) reading volume
8. Various models available in Django
-
AutoField
-
BigAutoField
-
BigIntegerField
-
BinaryField
-
BooleanField
-
CharField
-
DateField
-
DateTimeField
-
DecimalField
-
DurationField
-
EmailField
-
FileField
-
FileField and FieldFile
-
FilePathField
-
FloatField
-
ImageField
-
IntegerField
-
GenericIPAddressField
-
NullBooleanField
-
PositiveIntegerField
-
PositiveSmallIntegerField
-
SlugField SmallIntegerField
-
TextField
-
TimeField
-
URLField
-
UUIDField
9. Design blog model - simple version
| content | Template |
|---|---|
| title | CharField |
| Subtitle | CharField |
| author | CharField |
| Publication date | DateTimeField |
| label | CharField |
| classification | CharField |
| Blog content | TextField |
| Blog link | CharField |
| (optional) number of likes | IntegerField |
| (optional) reading volume | IntegerField |
What's wrong with this design?

10. Design blog model - advanced version
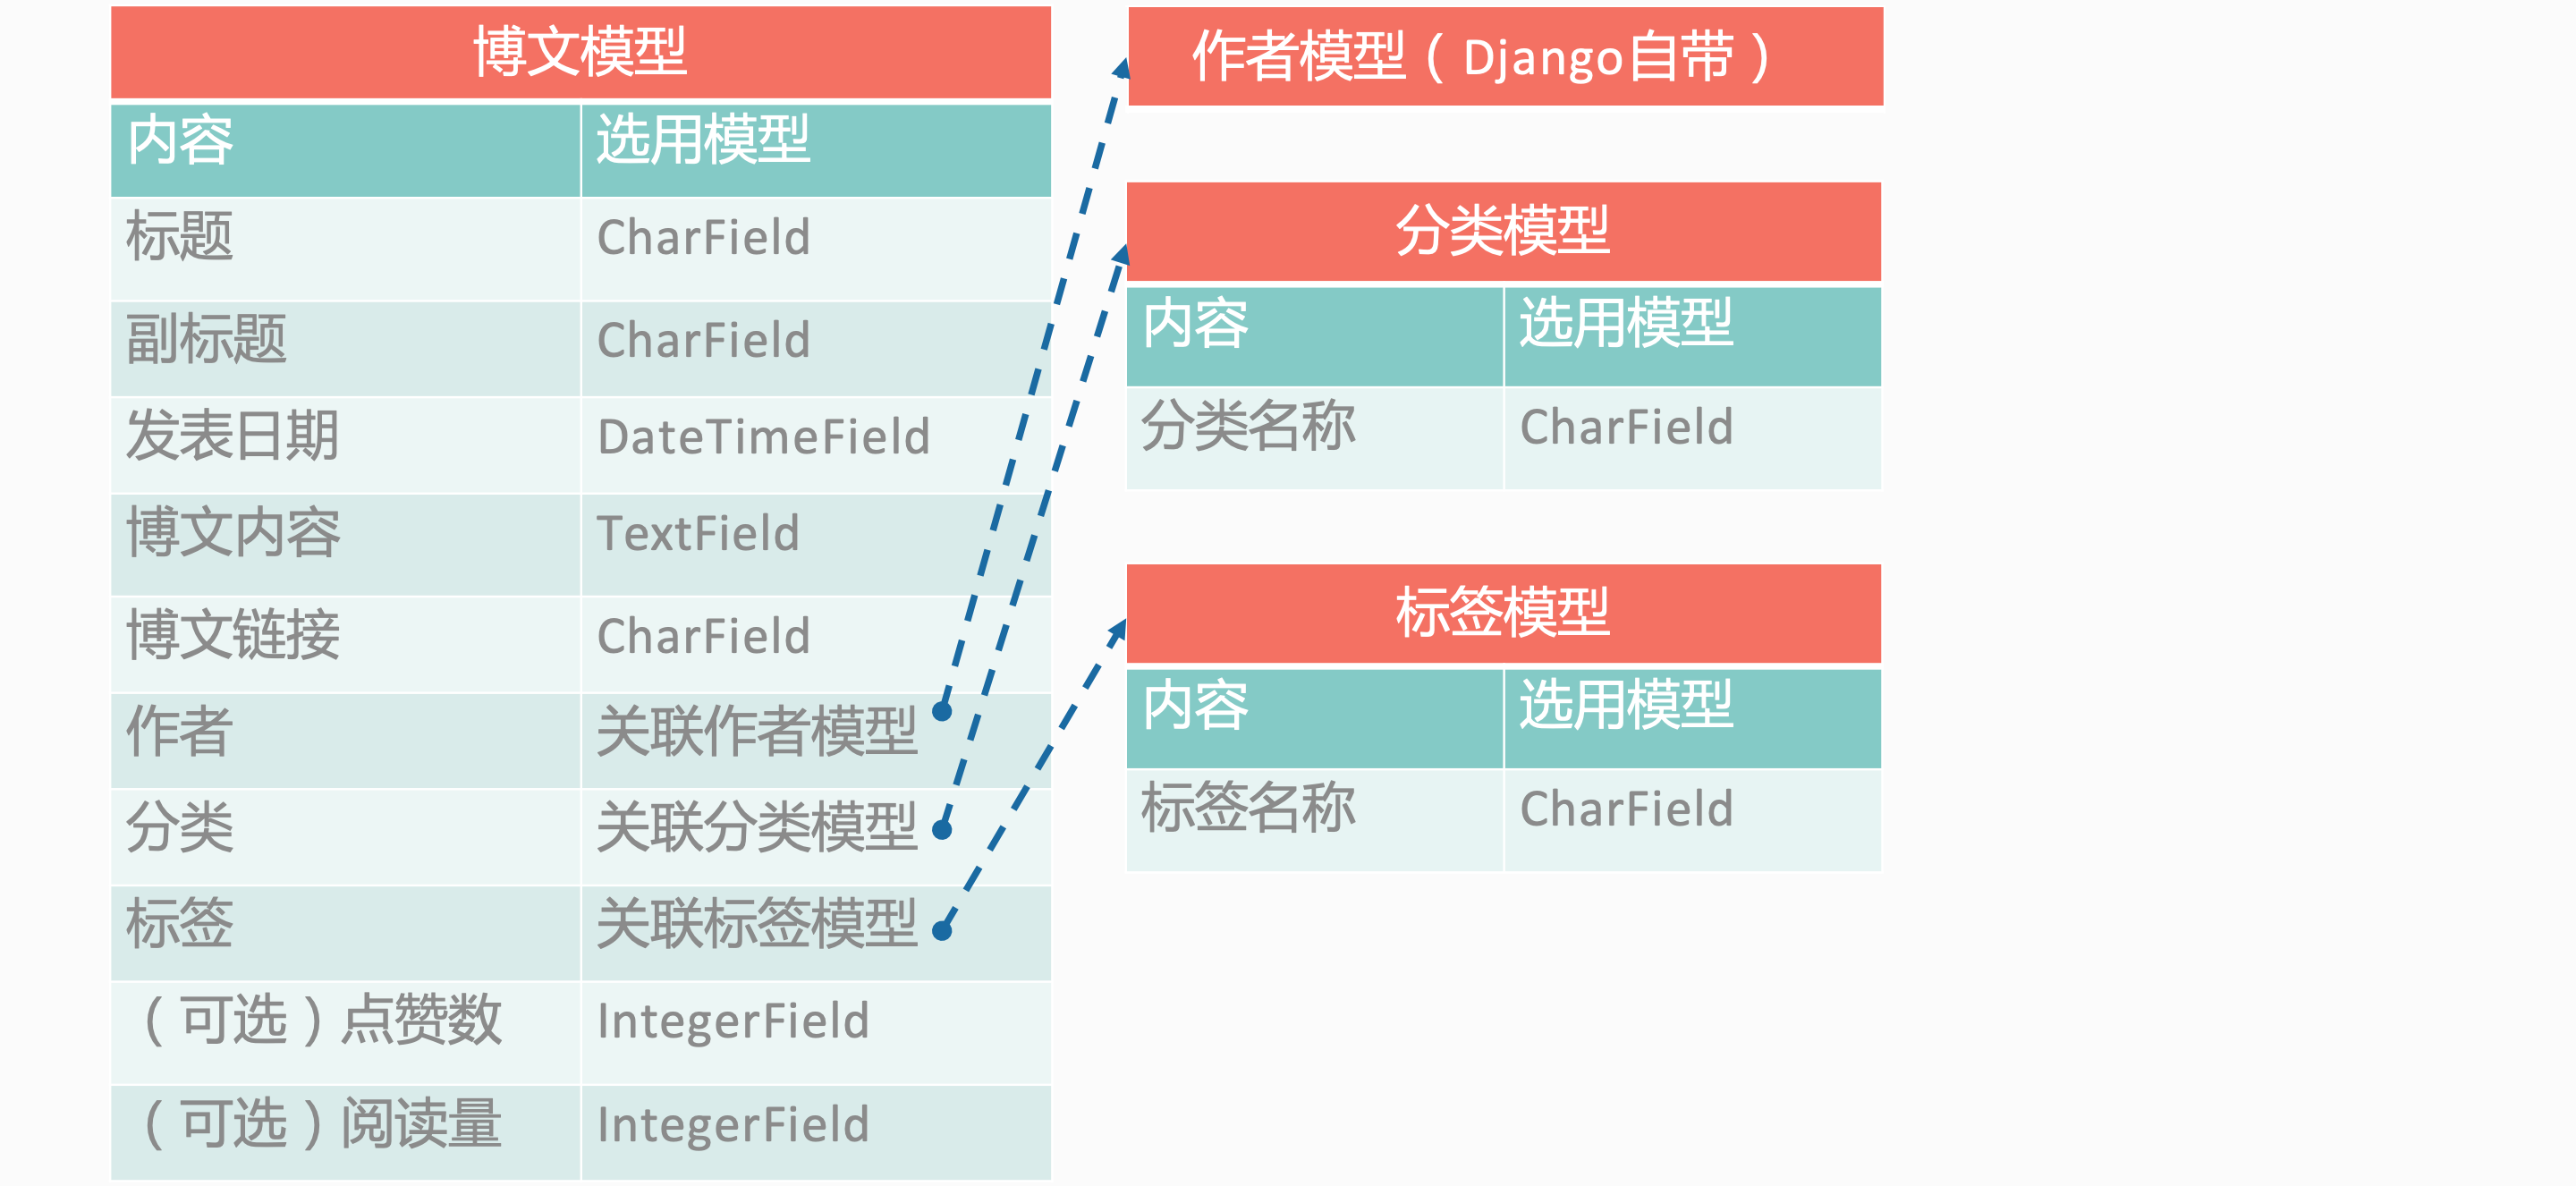
11. Basic blog model
from django.db import models

# Create your models here.
class Post(models.Model):
	title = models.CharField(max_length=80)
	subtitle = models.CharField(max_length=80)
	published_date = models.DateTimeField()
	content = models.TextField()
	link = models.CharField(max_length=100)


	def __str__(self):
		return self.title
12. Associated author model
from django.db import models
from django.contrib.auth.models import User

# Create your models here.
class Post(models.Model):
	title = models.CharField(max_length=80)
	subtitle = models.CharField(max_length=80)
	published_date = models.DateTimeField()
	content = models.TextField()
	link = models.CharField(max_length=100)
	auth = models.ForeignKey(User, on_delete=models.CASCADE, blank=True)
	# Use ForeignKey() to associate another model
	# on_delete=models.CASCADE: it means that if the user is deleted, the table associated with the user will also be deleted

	def __str__(self):
		return self.title
ForeignKey foreign key means one to many. One author can create multiple articles.
Therefore, the author has a one to many relationship with the article, so let's put the author on the side of many. Every time we search the table, we can search the author through the table.
13. Create a new classification model and label model
class Category(models.Model):
	category_name = models.CharField(max_length=100, blank=True) # blank=True can be null

	def __str__(self):
		return self.category_name

class Tag(models.Model):
	tag_name = models.CharField(max_length=100, blank=True)

	def __str__(self):
		return self.tag_name
14. Associated classification and labeling model
	category = models.ForeignKey(Category, on_delete=models.CASCADE, blank=True) # Even if you delete this category, the articles in it will also be deleted.
	tag = models.ManyToManyField(Tag, blank=True)
Another model can also be associated with ManyToManyField()
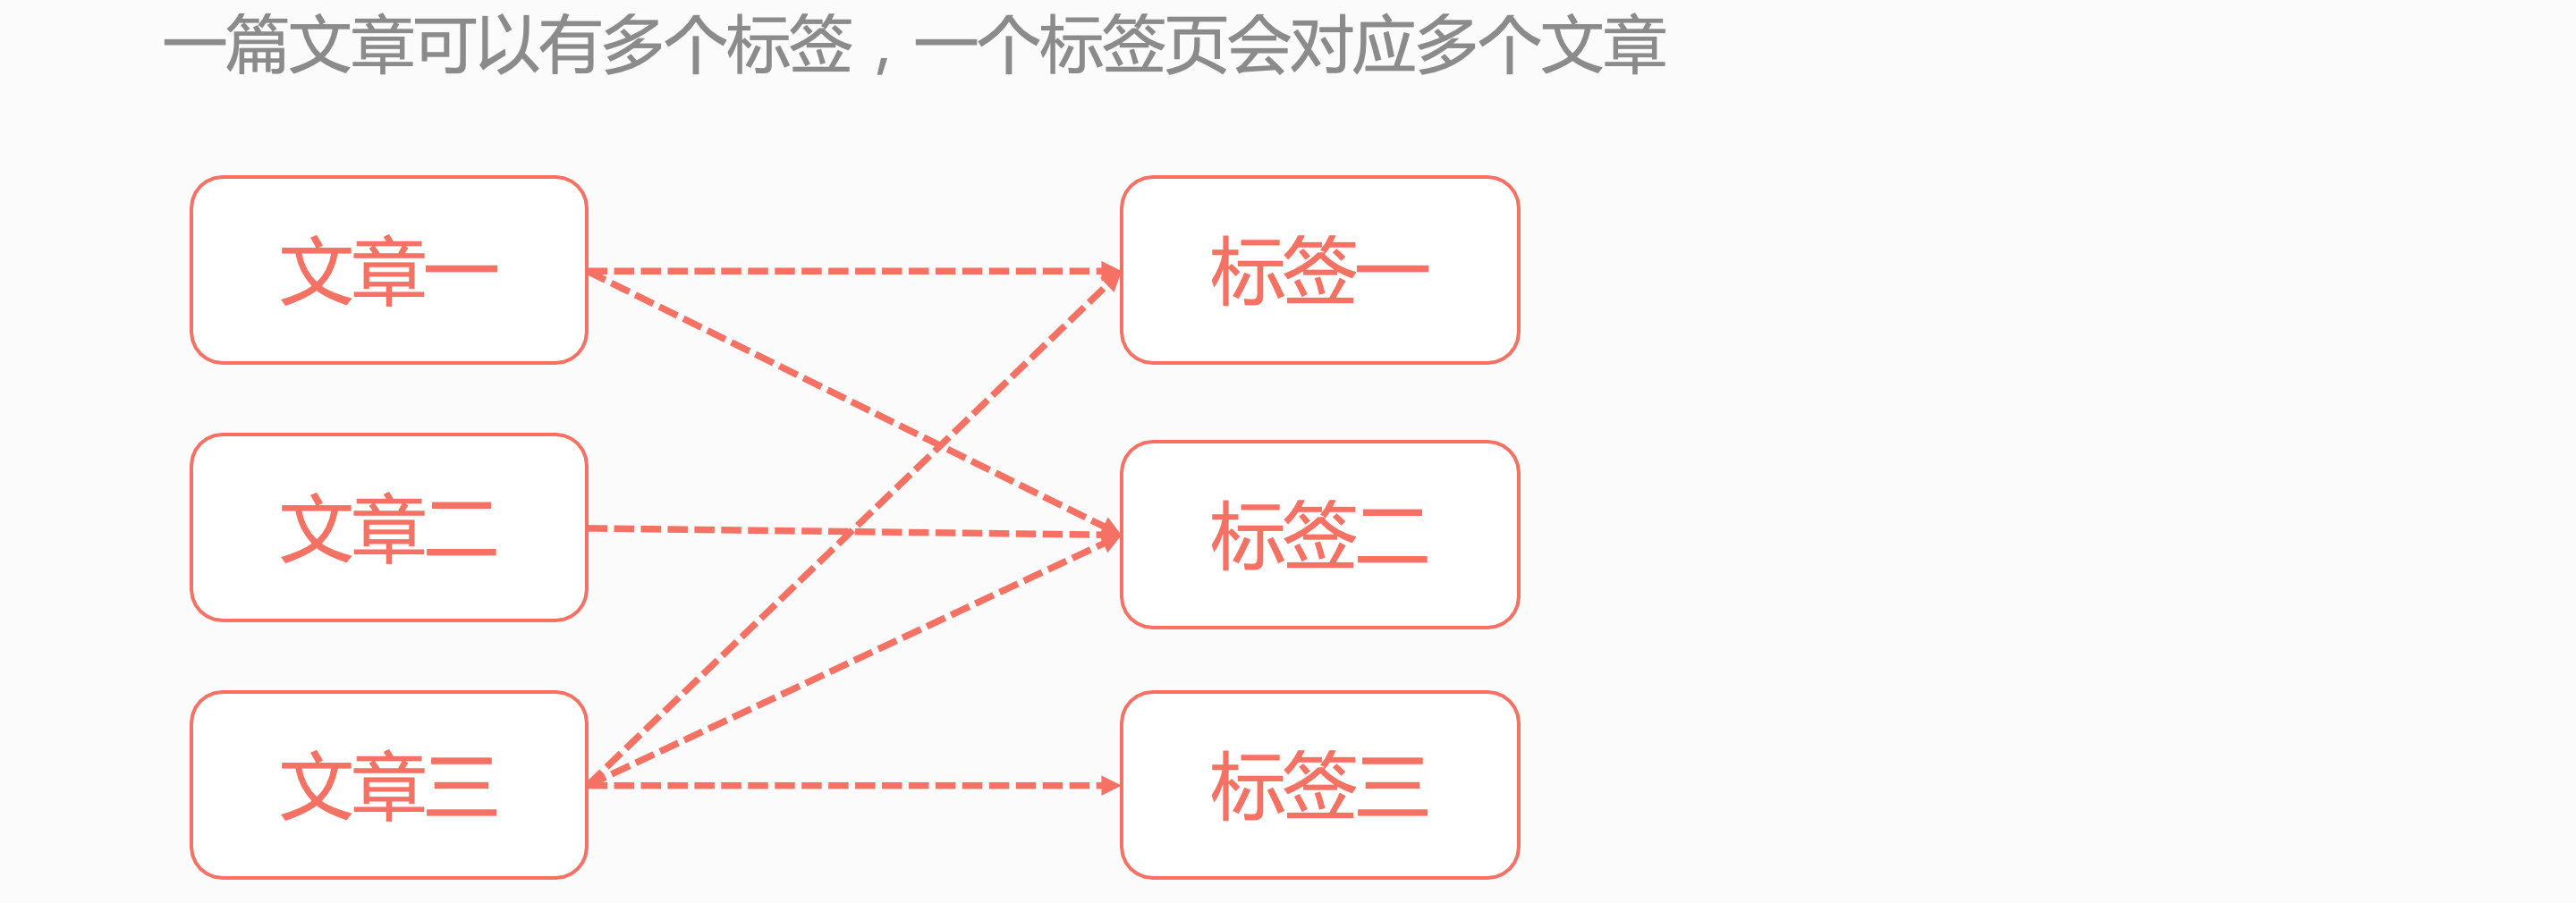
What is the difference between ForeignKey and ManyToManyField?
15. One to many

16. Many to many
17. Run Django management command
On the command line, run Python manage py makemigrations
Note: every time you modify models Py needs to run the above sentence
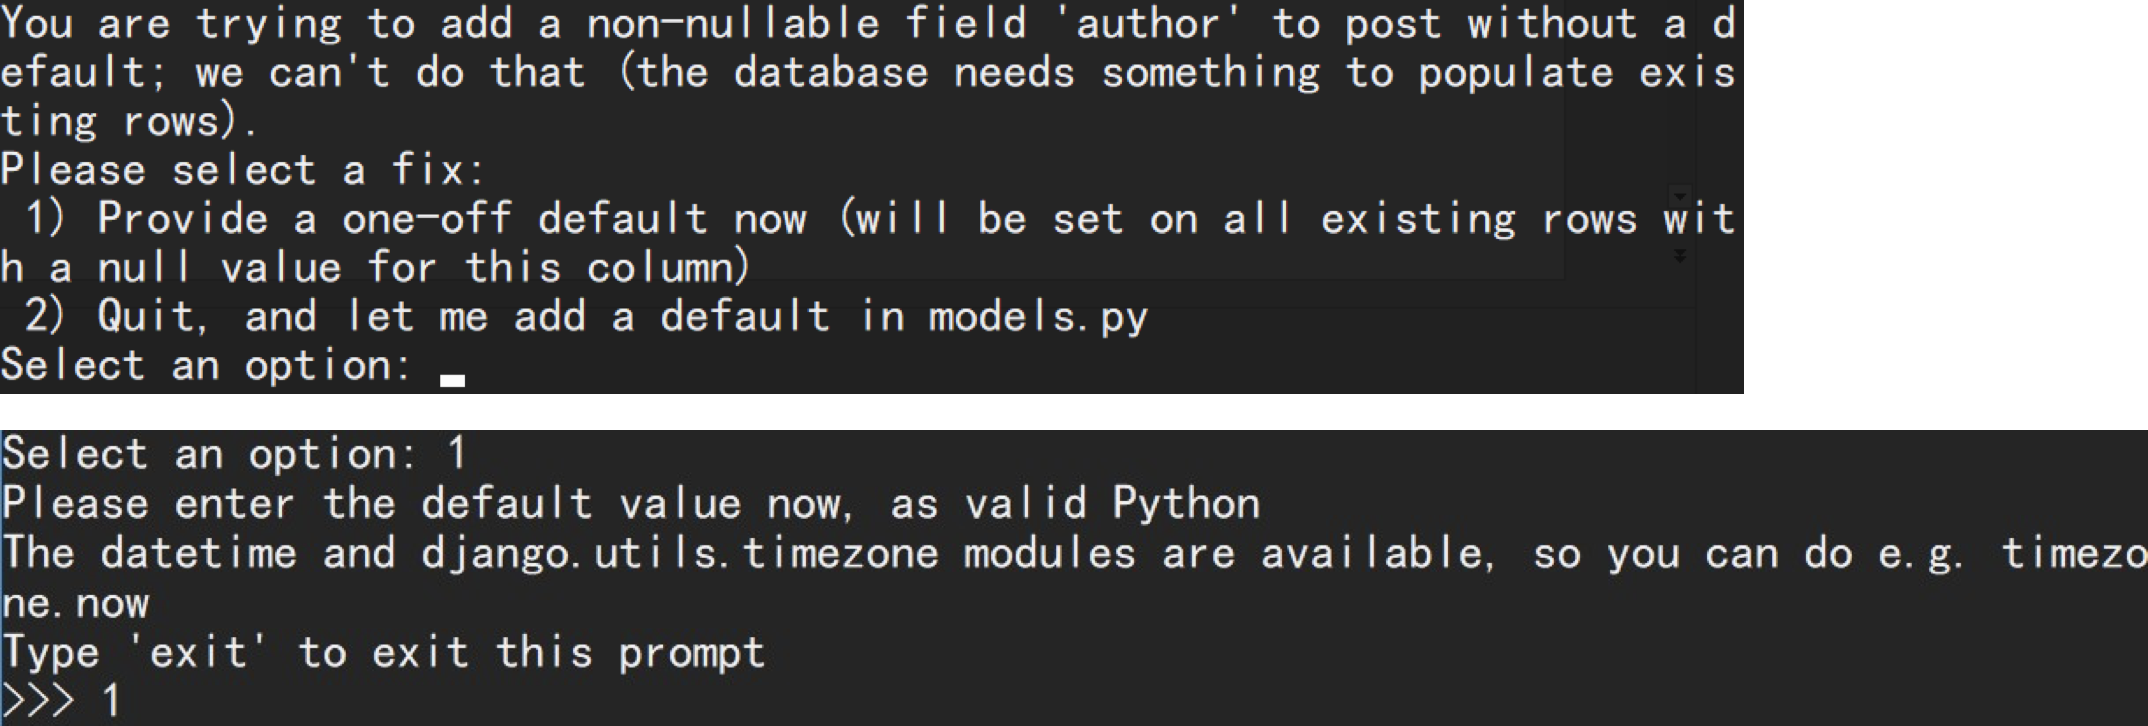
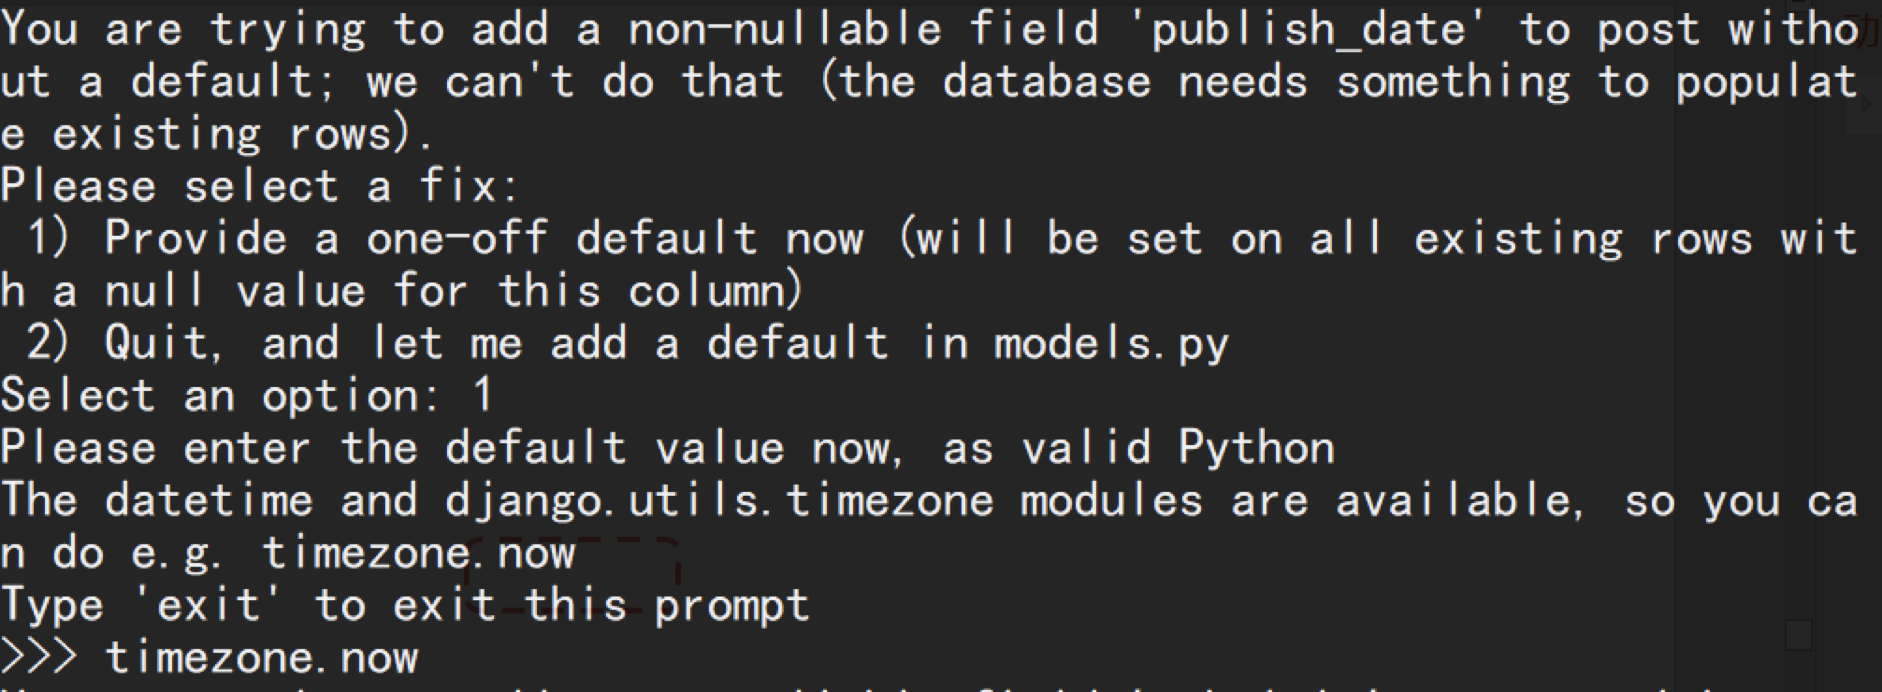
18. Complete makemigrations
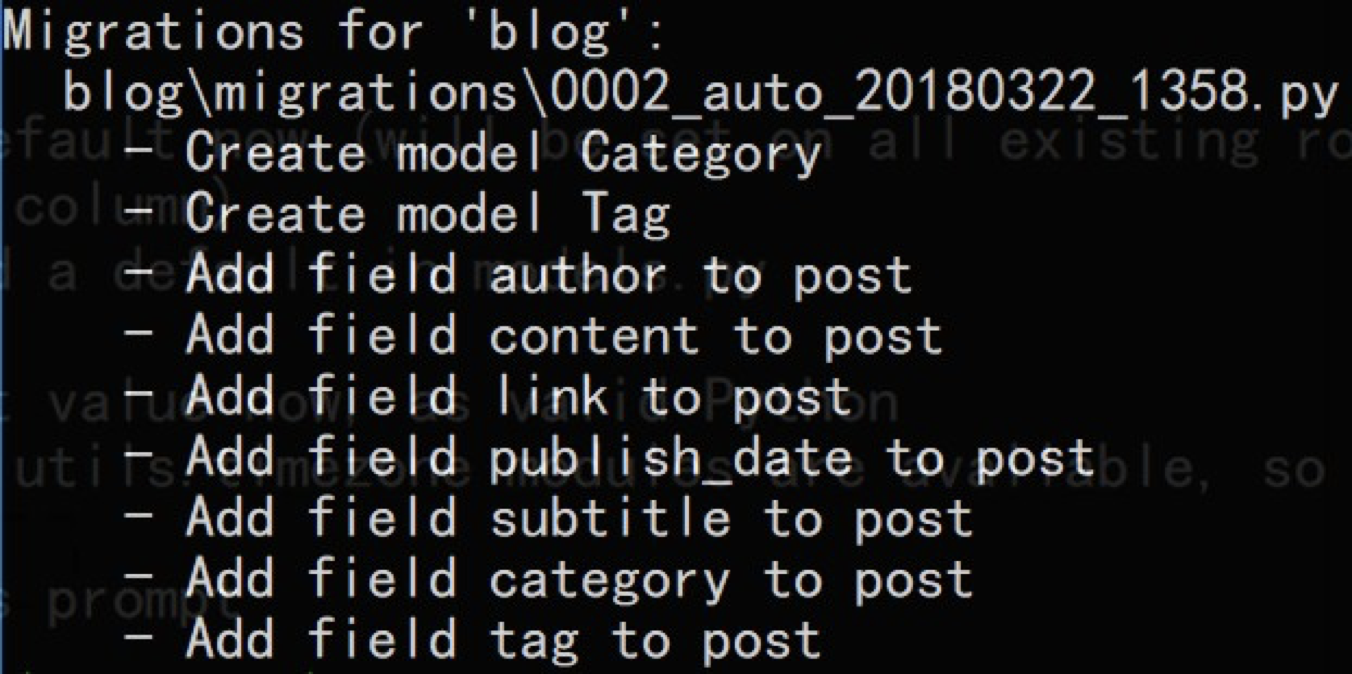
19. Run Django management command
On the command line, run Python manage py migrate
Note: migrate after making migrations

20. Rerun the Django server
Run Python manage py runserver
Log in to admin to view Post in the background
21. Add model to admin background
Modify admin. In the blog folder py
from django.contrib import admin
from .models import Post, Category, Tag

# Register your models here.
admin.site.register(Post)
admin.site.register(Category)
admin.site.register(Tag)
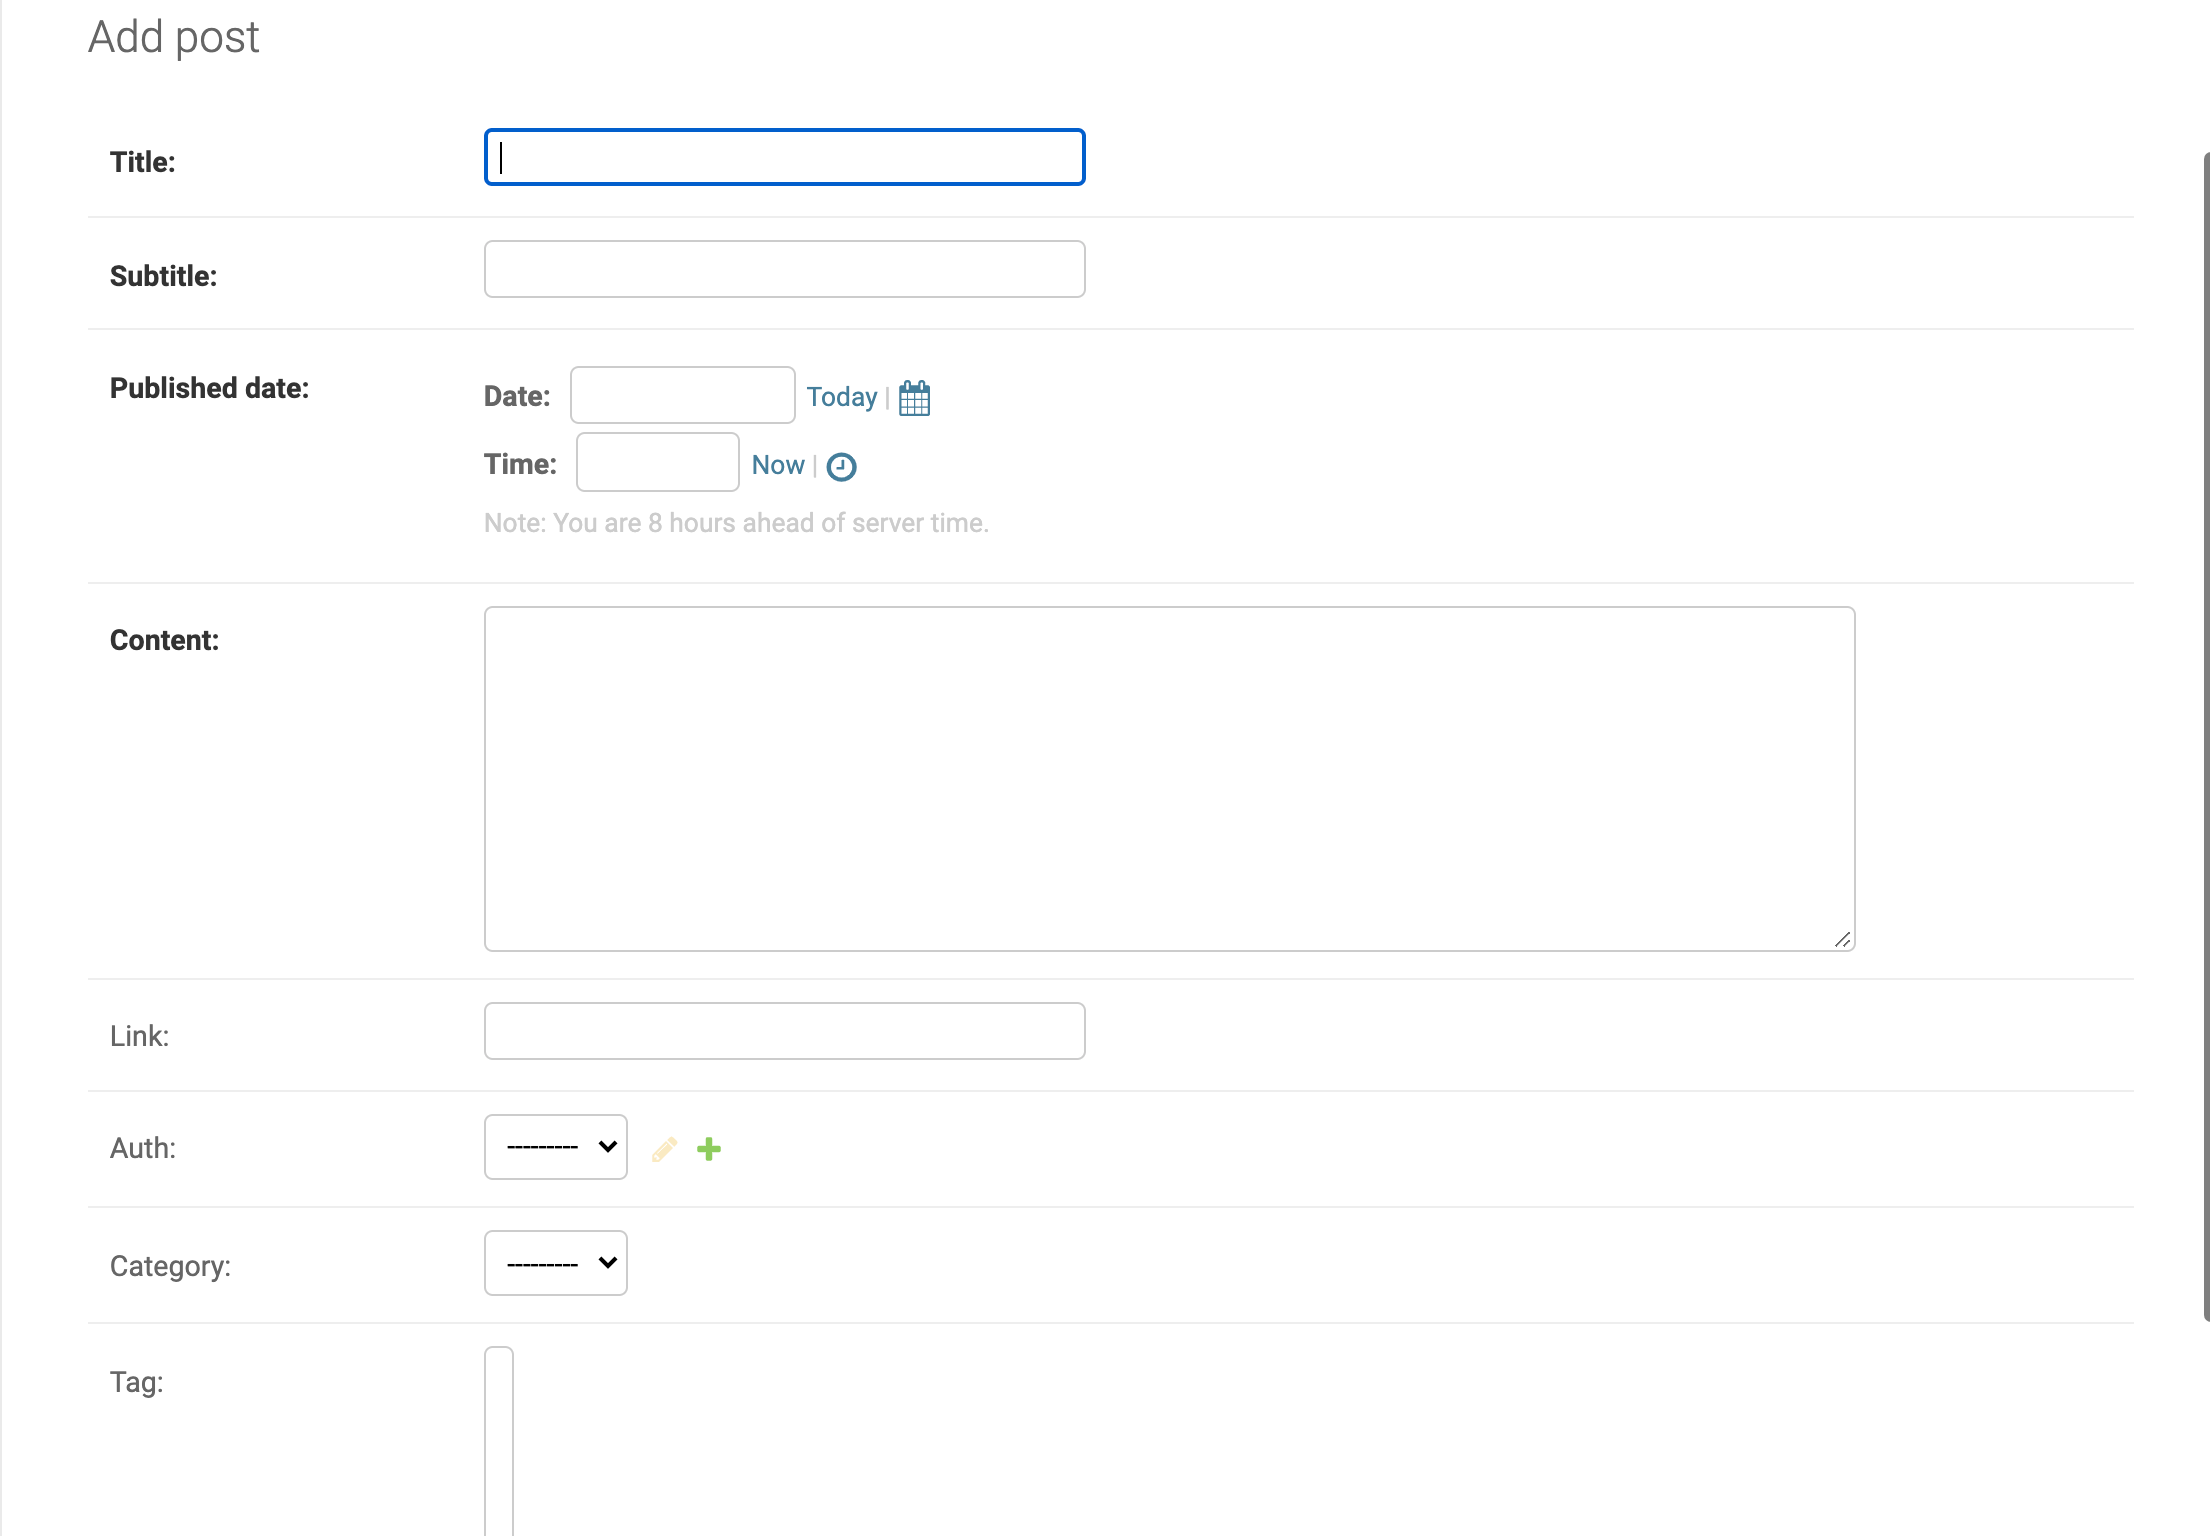
22. Add Category
Add a Python classification in the background

In the future, you can directly select Python classification when adding Post
Add article content, labels, etc. for the following operations.
23. Extract real blog information from the database
from .models import Post
def index(request):
	post_list = Post.objects.all().order_by('-published_date')
	return render(request, 'blog/index.html',
		{
		"title": "Yuechuang teacher's blog",
		"post_list": post_list,
		})

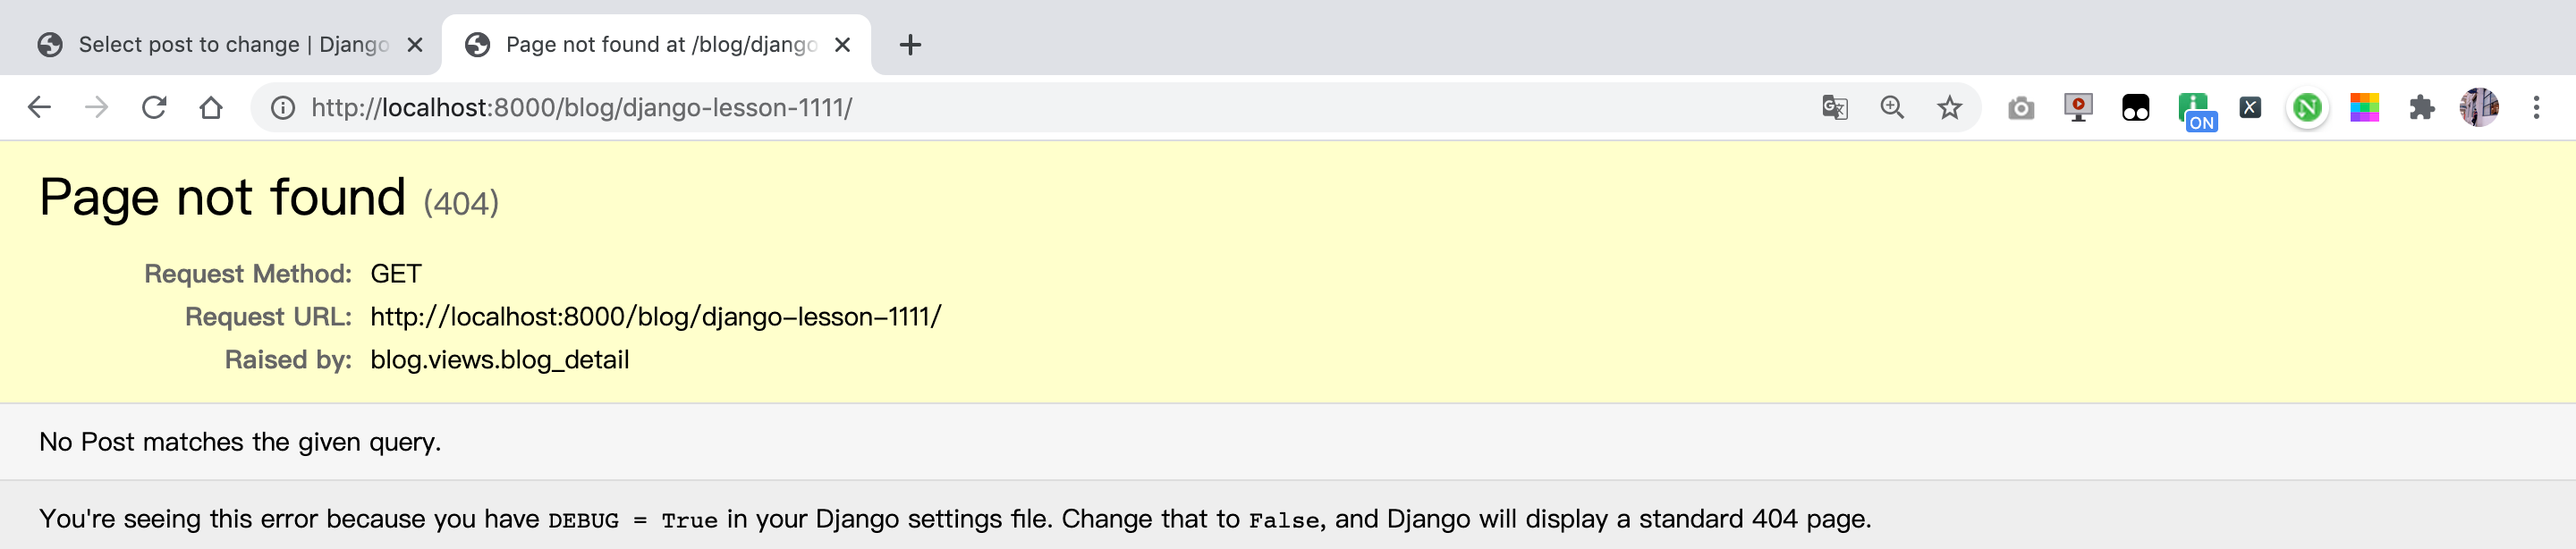
24. Website of design blog details page
Each blog post has an English website, such as
https://www.aiyc/blog/django-lesson-1
The red part consists of numbers, letters, dashes and underscores
When publishing in the background, you only need to fill in the red part

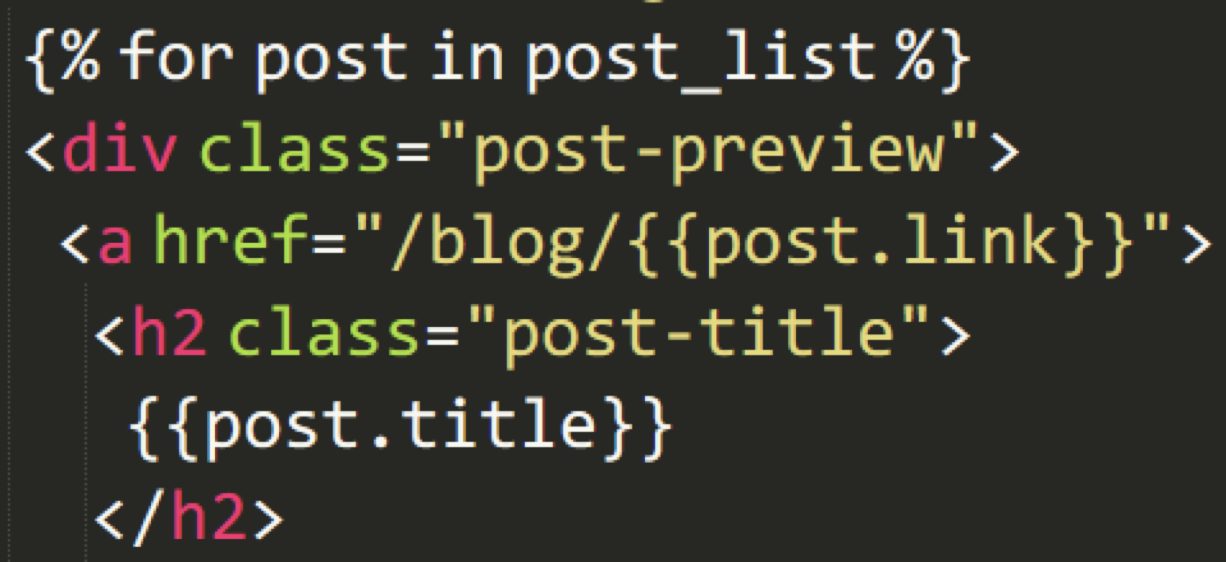
25. Modify the link to the details page on the front page of the blog
The link is designed as a link stored in / blog /
26. Modify URLs py
from django.urls import path
from . import views

urlpatterns = [
	path('', views.index, name='index'),
	# path(route, view, name="'index'")
	# path('<int:blog_id>', views.blog_detail, name='blog_detail'),
	path('<slug:blog_link>/', views.blog_detail, name='blog_detail'),
	# path('index/<sug:blog_id>', views.blog_detail, name='blog_detail')
	path('<int:blog_id1>/<int:blog_id2>', views.blog_sum, name='blog_sum'),
]
slug represents a string composed of letters, numbers, horizontal bars and underscores
This will match the URL in the form of / blog / django-less-1
And extract django-less-1 and save it to the variable blog_link Li
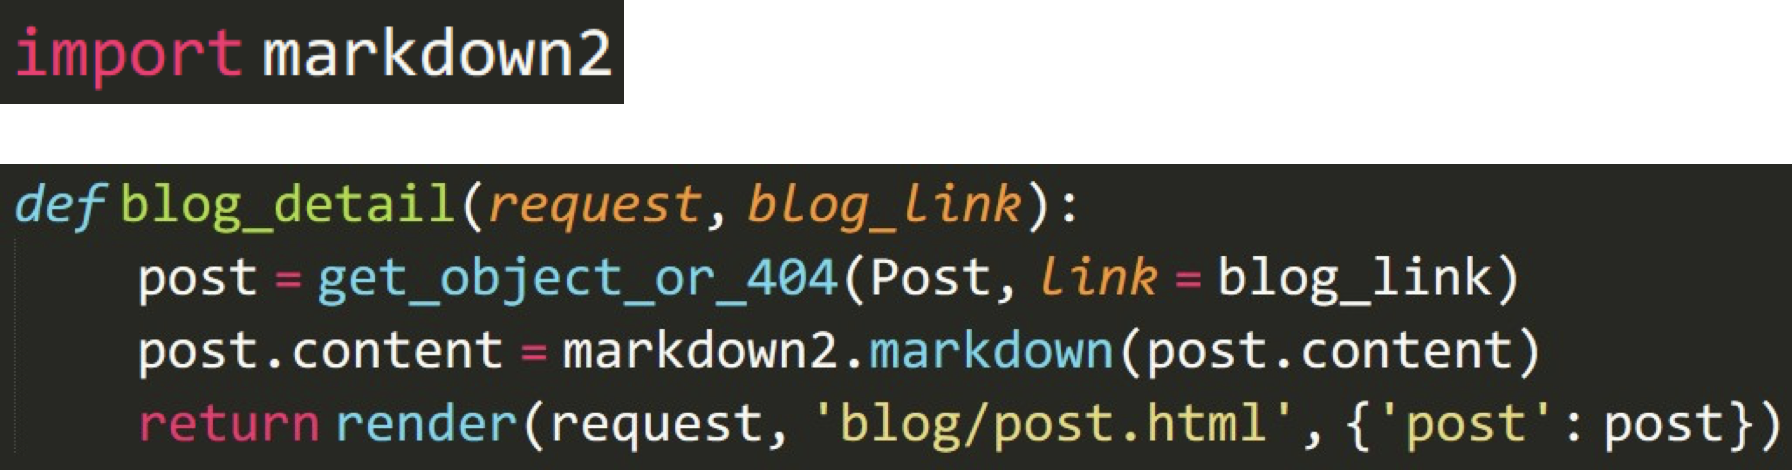
27. Modify views py

from django.shortcuts import get_object_or_404
def blog_detail(request, blog_link):
	post  = get_object_or_404(Post, link=blog_link)
	return HttpResponse(post.content)
get_object_or_404 indicates that a certain section of data is extracted from a certain model according to keywords
If it is found, the data will be returned, and if it is not found, the 404 page will be returned

28. Add blog details page template
Copy post from the blog template HTML to templates/blog /
And modify views py
def blog_detail(request, blog_link):
	post  = get_object_or_404(Post, link=blog_link)
	return render(request, 'blog/post.html', {'post': post})
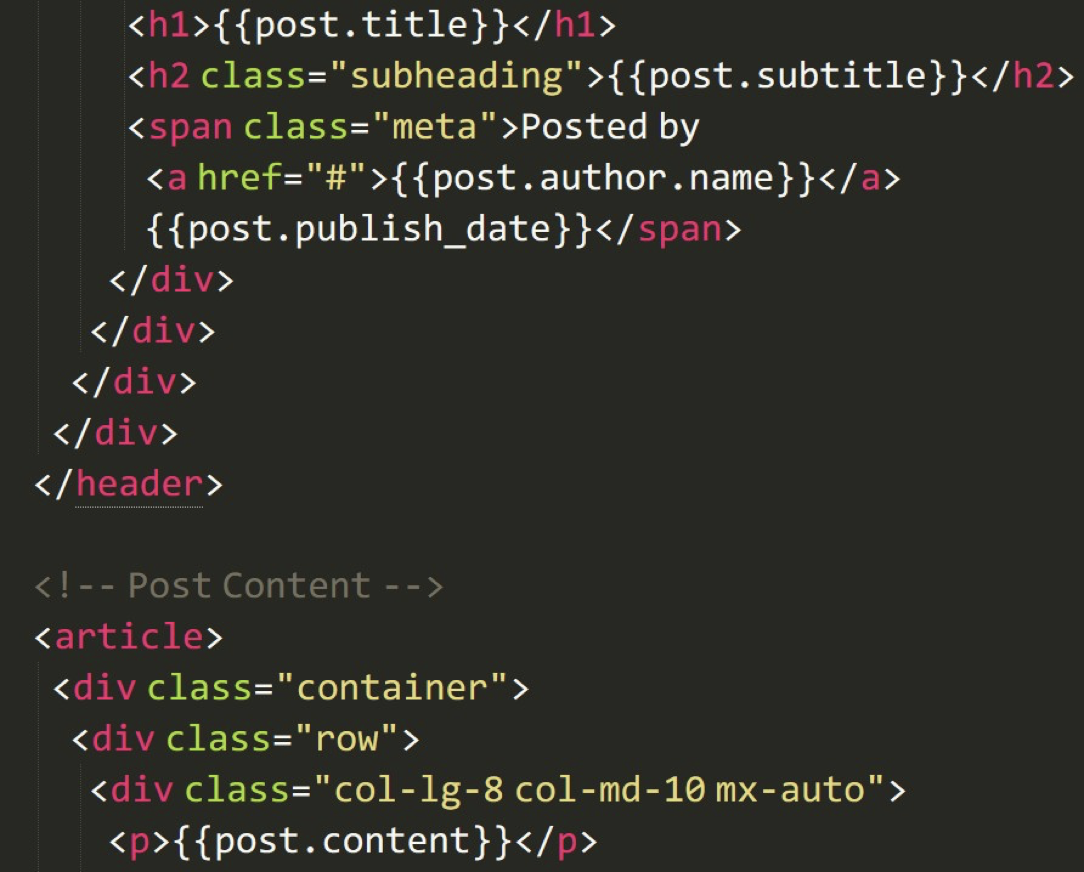
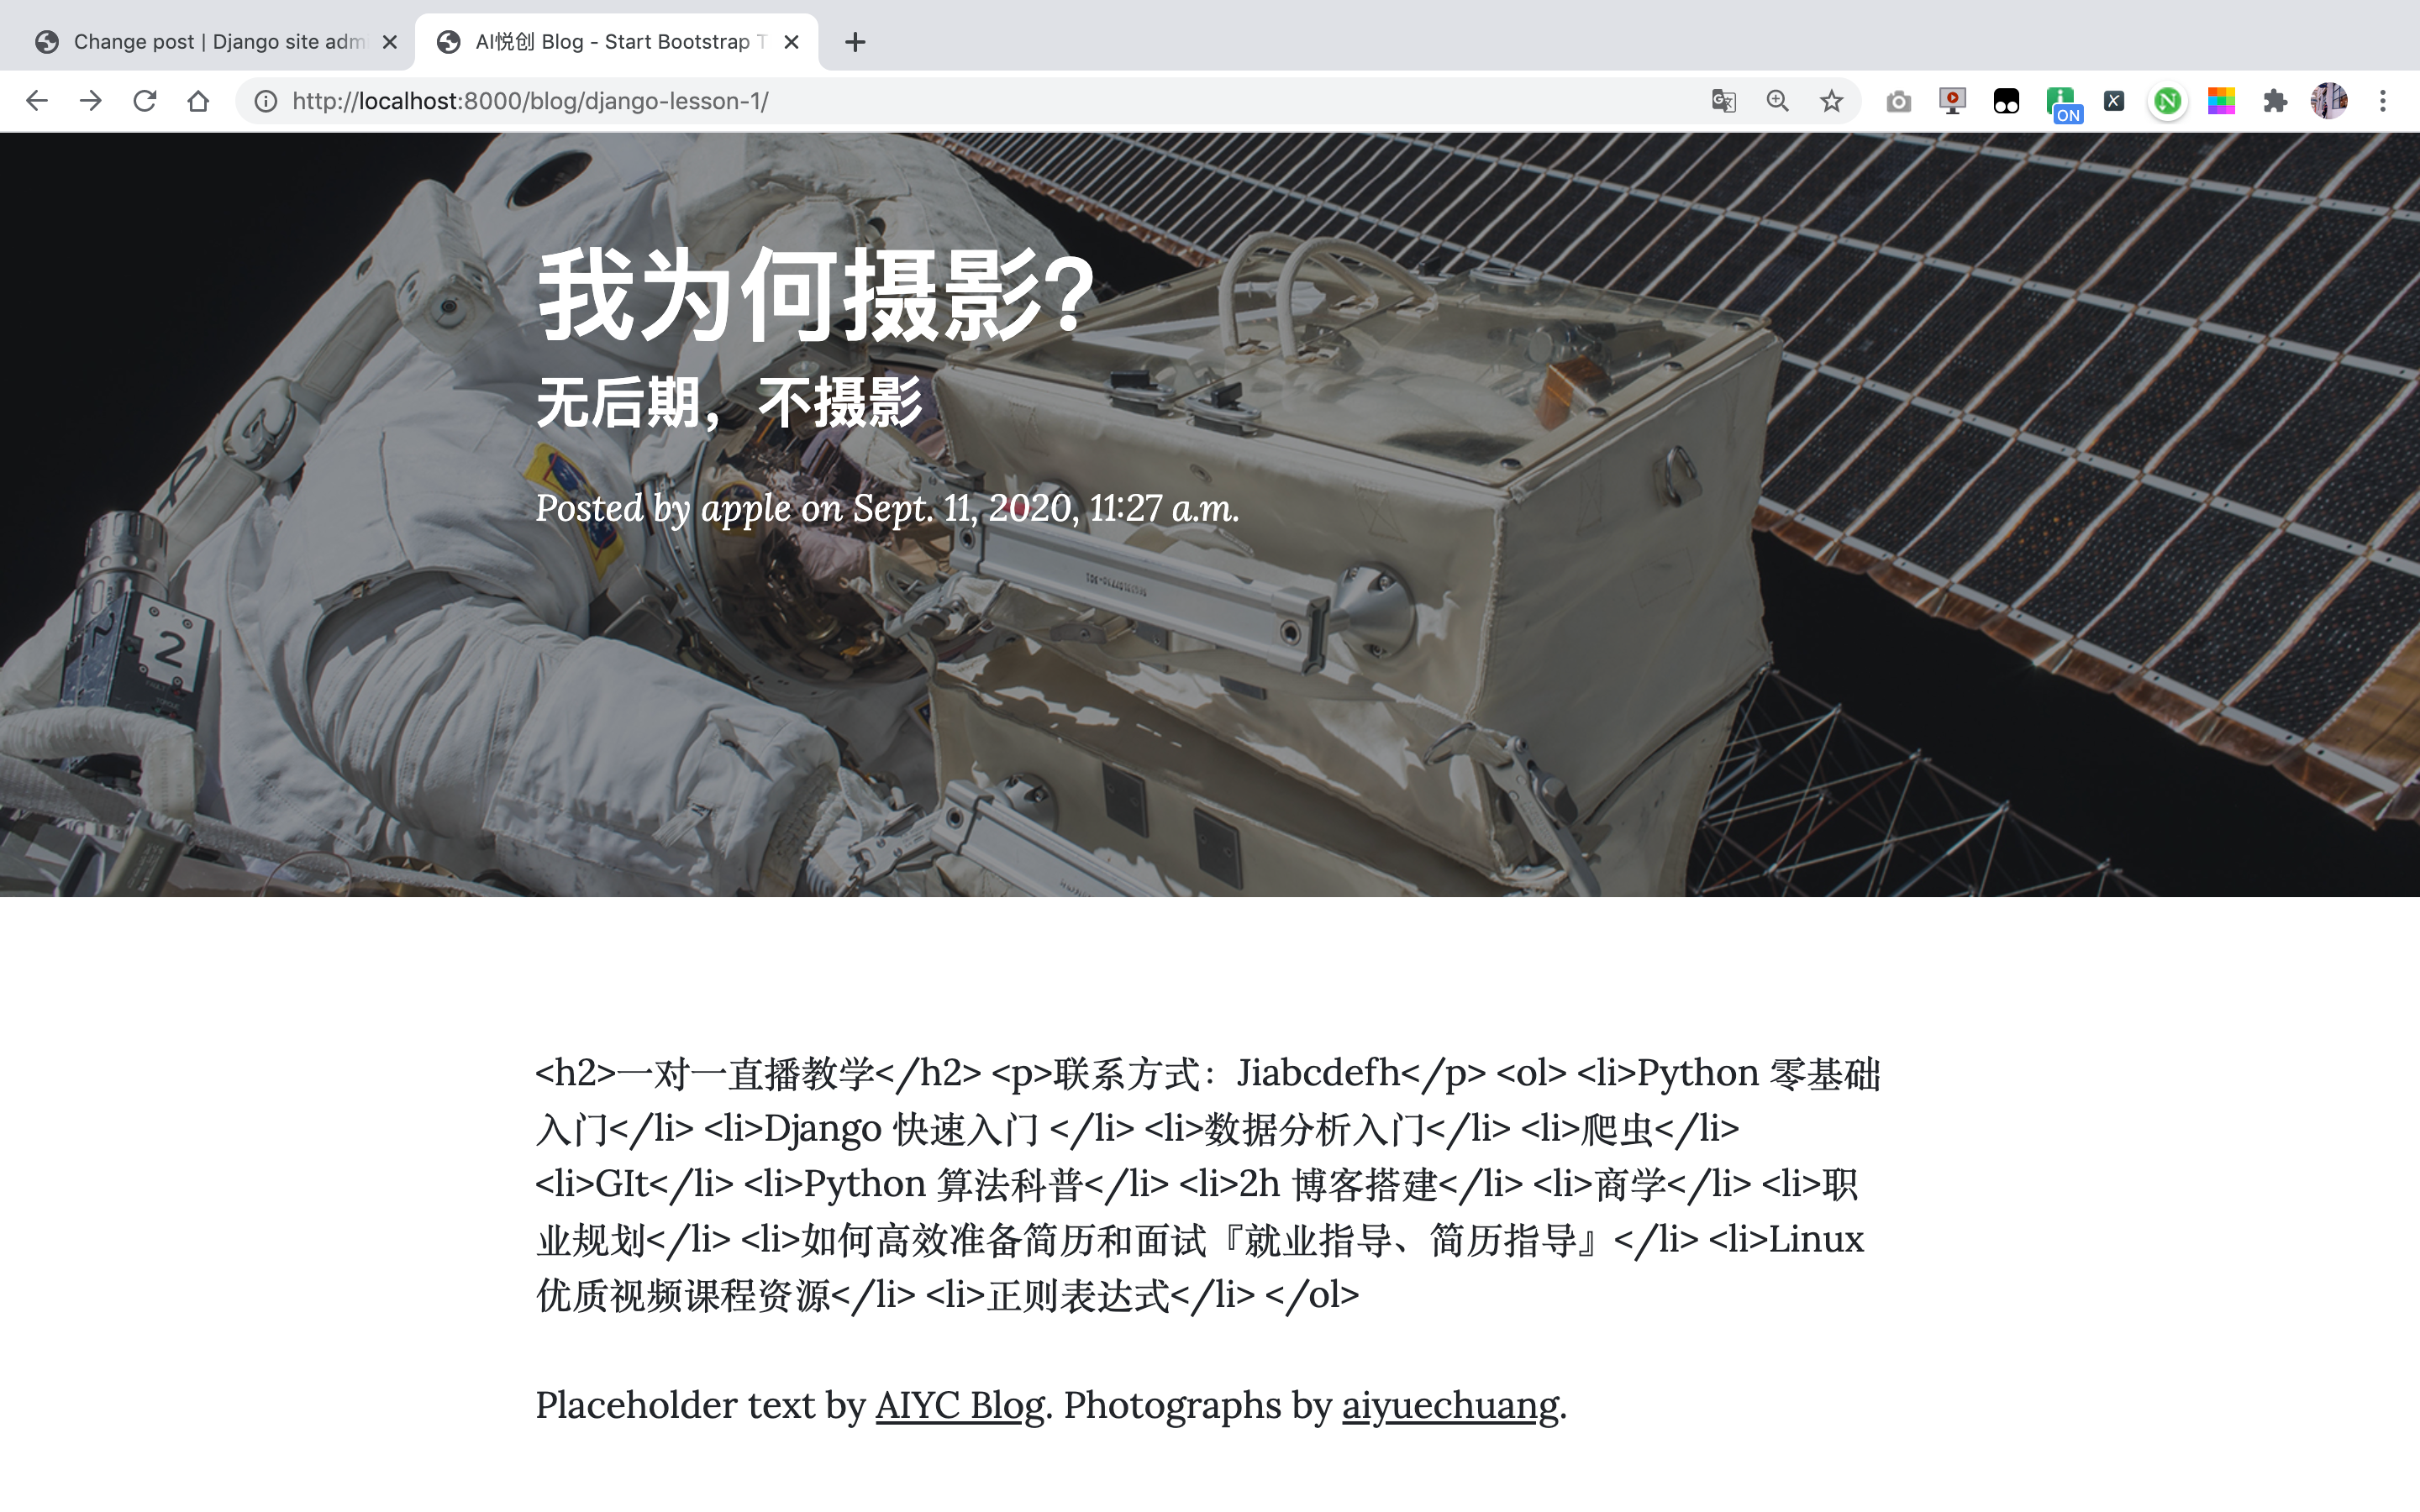
29. Modify post Html is in template format
  <!-- Page Header -->
  <header class="masthead" style="background-image: url('{% static 'blog/img/post-bg.jpg' %}')">
    <div class="overlay"></div>
    <div class="container">
      <div class="row">
        <div class="col-lg-8 col-md-10 mx-auto">
          <div class="post-heading">
            <h1>{{post.title}}</h1>
            <h2 class="subheading">{{post.subtitle}}</h2>
            <span class="meta">Posted by
              <a href="#">{{post.auth}}</a>
              on {{post.published_date}}</span>
          </div>
        </div>
      </div>
    </div>
  </header>

  <!-- Post Content -->
  <article>
    <div class="container">
      <div class="row">
        <div class="col-lg-8 col-md-10 mx-auto">
          <p>{{post.content}}</p>

          <p>Placeholder text by
            <a href="https://www.aiyc.top/">AIYC Blog</a>. Photographs by
            <a href="https://www.aiyc.top/">aiyuechuang</a>.</p>
        </div>
      </div>
    </div>
  </article>
30. More beautiful typesetting
Write blog posts in Markdown format

31. Install markdown module
Run pip install markdown2 on the command line
Modify views py
32. Page rendering
33. Add safe tag
In order to prevent Django from being attacked, I only need to add a safe. Let him trust what I wrote.

34. Adjust url
Now the website of the blog home page is / blog /, which needs to be adjusted
my_ URLs in blog py

URLs in blog py
