Dockerfile builds nginx and combines php
1. Build base image
First, build a basic image, add a repo environment and a compilation environment, and the centos image is the initial official image. Later, build php, nginx and mysql, and use the image as base image:
[root@server myCentos]# cat Dockerfile   #View Dockerfile file
# base image
FROM centos:centos7.3.1611

# MAINTAINER
MAINTAINER 2331233079@qq.com

# add epel and 163 yum
RUN yum install wget epel-release -y \
    && mv /etc/yum.repos.d/CentOS-Base.repo /etc/yum.repos.d/CentOS-Base.repo.back \
    && wget -P /etc/yum.repos.d/ http://mirrors.aliyun.com/repo/Centos-7.repo \
    && wget -P /etc/yum.repos.d/ http://mirrors.163.com/.help/CentOS7-Base-163.repo \
    && yum clean all && yum makecache

# Necessary packages
RUN yum install -y  wget gcc gcc-c++ glibc make autoconf openssl openssl-devel ntpdata crontabs

# change timzone to Asia/Shanghai
RUN cp /usr/share/zoneinfo/Asia/Shanghai /etc/localtime
[root@server myCentos]# docker build -t centos:v1 . #The build image is named centos:v1
[root@server myCentos]# docker images  #View the image after the build is complete
REPOSITORY          TAG                 IMAGE ID            CREATED              SIZE
centos              v1                  cca50f986518        About a minute ago   665MB
View the directory structure of nginx and php:
[root@server ~]# tree nginx
nginx
├── Dockerfile
├── fastcgi_params
├── nginx-1.8.1.tar.gz
├── nginx.conf
└── www.conf
[root@server ~]# tree php
php
├── Dockerfile
├── libmcrypt-2.5.8.tar.gz
├── php-5.6.35.tar.gz
├── php-fpm.conf.default
└── php.ini-production
The construction process of nginx and php is described in detail here. All toolkits and configuration files used in the construction process have been described
2. Building nginx images
First, build the nginx image and view the Dockerfile of nginx:
[root@server nginx]# cat Dockerfile
# base image
FROM centos:v1

MAINTAINER 2331233079@qq.com

RUN useradd -M -s /sbin/nologin www
ADD nginx-1.8.1.tar.gz /usr/local/src

# install Dependency package
RUN yum install libxslt-devel -y gd gd-devel GeoIP GeoIP-devel pcre pcre-devel libxml2 libxml2-dev libxslt-devel

WORKDIR /usr/local/src/nginx-1.8.1

# make && make install
RUN ./configure --user=www --group=www --prefix=/usr/local/nginx --with-file-aio --with-ipv6 --with-http_ssl_module  --with-http_spdy_module --with-http_realip_module    --with-http_addition_module    --with-http_xslt_module   --with-http_image_filter_module    --with-http_geoip_module  --with-http_sub_module  --with-http_dav_module --with-http_flv_module    --with-http_mp4_module --with-http_gunzip_module  --with-http_gzip_static_module  --with-http_auth_request_module  --with-http_random_index_module   --with-http_secure_link_module   --with-http_degradation_module   --with-http_stub_status_module && make && make install

# configure
COPY nginx.conf /usr/local/nginx/conf/nginx.conf
COPY fastcgi_params /usr/local/nginx/conf/fastcgi_params
RUN mkdir /usr/local/nginx/conf/conf.d
COPY www.conf /usr/local/nginx/conf/conf.d/www.conf

EXPOSE 80

CMD ["/usr/local/nginx/sbin/nginx","-g","daemon off;"]
Here, nginx adopts compilation and installation, creates the user www and installs some dependent packages of nginx, and copies some configuration files into the image. Detailed configuration file reference:
Build nginx image through Dockerfile:
[root@server nginx]# docker build -t nginx:v1 .  #Build nginx image with tag v1
[root@server nginx]# docker images   #View the built image
REPOSITORY          TAG                 IMAGE ID            CREATED             SIZE
nginx               v1                  c1c90aaefa1e        33 seconds ago      752MBcentos              v1                  cca50f986518        2 hours ago         665MB
Specify the following configuration files:
[root@server nginx]# cat www.conf
server {
    listen   80;
    root /usr/local/nginx/html;
    index index.htm index.html index.php;
    location ~ \.php$ {
        root /usr/local/nginx/html;
        fastcgi_pass php:9000;
        fastcgi_index index.php;
        fastcgi_param  SCRIPT_FILENAME  $document_root$fastcgi_script_name;
        include fastcgi_params;
    }
}
Fastcgi can be found_ pass php:9000;
This is because php is also a container, which is isolated from nginx. When the container is started later, nginx will be interconnected with the image through - link
3. Build php image
View the Dockerfile of php:
[root@server php]# cat Dockerfile
# base image
FROM centos:v1

MAINTAINER 2331233079@qq.com

ADD libmcrypt-2.5.8.tar.gz /usr/local/src

WORKDIR /usr/local/src/libmcrypt-2.5.8
RUN ./configure && make && make install

ADD php-5.6.35.tar.gz /usr/local/src

RUN yum -y install libxml2 libxml2-devel bzip2 bzip2-devel libjpeg-turbo libjpeg-turbo-devel libpng libpng-devel freetype freetype-devel zlib zlib-devel libcurl libcurl-devel

WORKDIR /usr/local/src/php-5.6.35
RUN ./configure --prefix=/usr/local/php --with-pdo-mysql=mysqlnd --with-mysqli=mysqlnd --with-mysql=mysqlnd --with-openssl --enable-mbstring --with-freetype-dir --with-jpeg-dir --with-png-dir --with-mcrypt --with-zlib --with-libxml-dir=/usr --enable-xml  --enable-sockets --enable-fpm --with-config-file-path=/usr/local/php/etc --with-bz2 --with-gd && make && make install


COPY php.ini-production /usr/local/php/etc/php.ini
COPY php-fpm.conf.default /usr/local/php/etc/php-fpm.conf

RUN useradd -M -s /sbin/nologin php
RUN sed -i -e 's@;pid = run/php-fpm.pid@pid = run/php-fpm.pid@g' -e 's@nobody@php@g' -e 's@listen = 127.0.0.1:9000@listen = 0.0.0.0:9000@g' /usr/local/php/etc/php-fpm.conf
RUN sed -i 's@;daemonize = yes@daemonize = no@g' /usr/local/php/etc/php-fpm.conf


EXPOSE 9000

CMD ["/usr/local/php/sbin/php-fpm"]
The built service must run in the foreground. For nginx, daemon off means that the background operation is turned off, so it runs in the foreground
For PHP: sed -i's@;daemonize = yes@daemonize = no@g ’ /usr/local/php/etc/php-fpm.conf
The daemon mode is also turned off here, so / usr / local / PHP / SBIN / PHP FPM runs in the foreground
Build php image through Dockerfile:
[root@server php]# docker build -t php:v1 .  #Build php image with tag v1
[root@server php]# docker images  #View the built image
REPOSITORY          TAG                 IMAGE ID            CREATED             SIZE
php                 v1                  2019612cc0a4        35 seconds ago      1.19GBnginx               v1                  c1c90aaefa1e        About an hour ago   752MBcentos              v1                  cca50f986518        2 hours ago         665M
4. Start the nginx container and php container
Start php and nginx services with the built image:
[root@server php]# docker run -d --name php -v /www:/usr/local/nginx/html php:v1  #Start a php container and map it with - v
cf77c85e7c2f63a7ac2db2edaa37d22418503e8cfa35d87b9cfad541d03e004a
[root@server php]# docker run -d --name nginx -p 80:80 -v /www:/usr/local/nginx/html --link=php:php nginx:v1  #Start an nginx container, map it through - v and associate it with a php container through -- link
3bbc12db8e9cc118a7824c5a314d13c4e37f3a6397f32bbfe939f9e424b306e0
When starting the php container above, use - v for mapping. If there is no mapping here, the php program will start, but the file at the end of php will not be parsed, resulting in a file not found error
Supplement: the production environment generally stores the configuration files, log files and web site directories on the host machine, which is convenient for management. If the nginx configuration changes, you can directly dock stop the nginx container name and then start it. Start the nginx container as follows
# docker run -d --name nginx -p 80:80 -v /opt/docker/www:/usr/local/nginx/html -v /docker/NginxConf/:/usr/local/nginx/conf/conf.d -v /docker/log:/usr/local/nginx/logs --link=php:php nginx:v1
To view container status:
[root@server php]# docker ps -a
CONTAINER ID        IMAGE               COMMAND                  CREATED             STATUS                      PORTS                NAMES
3bbc12db8e9c        nginx:v1            "/usr/local/nginx/sb..."   26 seconds ago      Up 25 seconds               0.0.0.0:80->80/tcp   nginx
cf77c85e7c2f        php:v1              "/usr/local/php/sbin..."   2 minutes ago       Up 2 minutes                9000/tcp             php
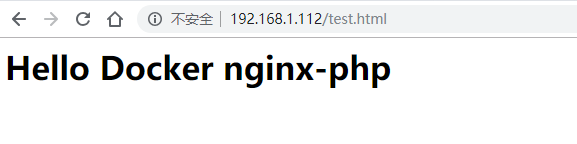
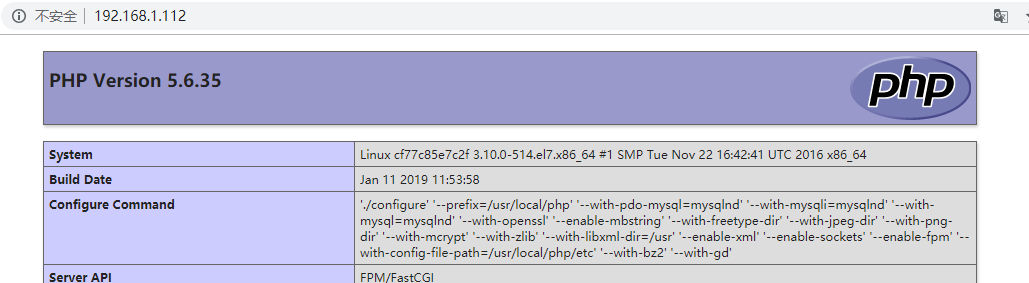
Create a test file on the host to the site directory:
[root@server www]# tree .  #View the structure of the site directory
.
├── index.php
└── test.html
[root@server www]# cat index.php   #View index PHP file
<?php phpinfo() ?>
[root@server www]# cat test.html   #View test HTML file
<h1>Hello Docker nginx-php</h1>
Access test:
 Enter the php container to view the hosts file:
[root@server ~]# docker exec -it php /bin/bash  #Use exec to enter php container
[root@cf77c85e7c2f php-5.6.35]# cat /etc/hosts
127.0.0.1    localhost
::1    localhost ip6-localhost ip6-loopback
fe00::0    ip6-localnet
ff00::0    ip6-mcastprefix
ff02::1    ip6-allnodes
ff02::2    ip6-allrouters
172.17.0.2    cf77c85e7c2f
Enter the nginx container to view the hosts file:
[root@server ~]# docker exec -it nginx /bin/bash  #Use exec to enter the nginx container
[root@3bbc12db8e9c nginx-1.8.1]# cat /etc/hosts
127.0.0.1    localhost
::1    localhost ip6-localhost ip6-loopback
fe00::0    ip6-localnet
ff00::0    ip6-mcastprefix
ff02::1    ip6-allnodes
ff02::2    ip6-allrouters
172.17.0.2    php cf77c85e7c2f
172.17.0.3    3bbc12db8e9c
Copy code
You can see that there is a php parsing in the hosts file of nginx, which is why nginx can communicate with php (specified through – link)
Based on the above steps, the connection between nginx and php is ok. Next, add a mysql and test the deployment of wordpress
5. Build mysql image
View the directory structure of mysql:
[root@server mysql]# tree .
.
├── business.sql
├── Dockerfile
├── MariaDB-10.0.33-centos7-x86_64-client.rpm
├── MariaDB-10.0.33-centos7-x86_64-common.rpm
├── MariaDB-10.0.33-centos7-x86_64-compat.rpm
├── MariaDB-10.0.33-centos7-x86_64-server.rpm
├── server.cnf
└── setup.sh
View the Dockerfile of mysql:
[root@server mysql]# cat Dockerfile
FROM centos

MAINTAINER 381347268@qq.com

COPY MariaDB-10.0.33-centos7-x86_64-client.rpm /root/MariaDB-10.0.33-centos7-x86_64-client.rpm
COPY MariaDB-10.0.33-centos7-x86_64-common.rpm /root/MariaDB-10.0.33-centos7-x86_64-common.rpm
COPY MariaDB-10.0.33-centos7-x86_64-compat.rpm  /root/MariaDB-10.0.33-centos7-x86_64-compat.rpm
COPY MariaDB-10.0.33-centos7-x86_64-server.rpm  /root/MariaDB-10.0.33-centos7-x86_64-server.rpm
WORKDIR /root
RUN yum remove mysql-libs -y
RUN yum -y install *.rpm
ADD business.sql /root/business.sql
ADD server.cnf /etc/my.cnf.d/server.cnf
ADD setup.sh /root/setup.sh

RUN yum clean all
RUN chmod +x /root/setup.sh
EXPOSE 3306

CMD ["/root/setup.sh"]
(1) The basic image used here is centos (official image, latest); (2) The configuration file is mounted during startup (if there are changes later, you only need to create the configuration file in a directory and then mount it); (3)business.sql is about executing sql (giving root password, creating database, etc.); (4)setup.sh is to reinitialize mysql (mariadb) and finally restart the service (use -- user=mysql to avoid starting mariadb with the root user)
setup.sh script principle: Dockerfile is used to install the database service. After the installation is completed, use setup After the SH script reinitializes my sql, start the MySQL service and execute setup SH, close the MySQL database and restart the MySQL database service from the previous server
[root@server mysql]# cat setup.sh
#!/bin/sh
chown -R mysql:mysql /var/lib/mysql

mysql_install_db --user=mysql > /dev/null

mysqld_safe --user=mysql &

sleep 5

mysql < /root/business.sql

sleep 5

ps -wef | grep mysql | grep -v grep | awk '{print $2}' | xargs kill -9

mysqld_safe --user=mysql

setup.sh
[root@server mysql]# cat business.sql
create database wordpress DEFAULT CHARACTER SET utf8;

USE mysql;
GRANT ALL PRIVILEGES ON *.* TO 'root'@'%' WITH GRANT OPTION;
FLUSH PRIVILEGES;

UPDATE user SET password=PASSWORD("root") WHERE user='root';
FLUSH PRIVILEGES;

business.sql
[root@server mysql]# cat server.cnf
[mysqld]
bind-address=0.0.0.0
console=1
general_log=1
general_log_file=/dev/stdout
collation-server=utf8_unicode_ci
character-set-server=utf8
server.cnf
Build mysql image through Dockerfile:
[root@server mysql]# docker build -t mysql:v1 . #Build mysql image
To view the built image:
[root@server mysql]# docker images  #View three mirrors
REPOSITORY          TAG                 IMAGE ID            CREATED             SIZE
mysql               v1                  4a3e428817c1        2 hours ago         813MB
php                 v1                  2019612cc0a4        3 hours ago         1.19GB
nginx               v1                  c1c90aaefa1e        4 hours ago         752MB
6. Deploy lnmp environment and wordpress
Build the lnmp environment based on the above three images nginx, mysql and php. We first delete the container started above because it is useless
Start three containers first
[root@server mysql]# docker run -d --name mysql -v /root/mysql/server.cnf:/etc/my.cnf.d/server.cnf -v /data/mysql:/var/lib/mysql -p 3306:3306 mysql:v1  #Start a mysql container
df28bcb97289676654ea7b573b0e3e52f910a599ff03b2dbf2dfe6345726127d
[root@server mysql]# docker run -d --name php -v /www:/usr/local/nginx/html --link=mysql:mysql php:v1  #Start a php container
2f7fd098f0069deeaef4eb5b067e981c6be01a16d0769c3bc4203eab03a45c40
[root@server mysql]# docker run -d --name nginx -p 80:80 -v /www:/usr/local/nginx/html --link=php:php nginx:v1  #Start an nginx container
b68688cd6f2d324e58c469cfb49fa7a14257ef2bb0c301a40a36ef244201c159
[root@server mysql]# docker ps  #View the status of the three containers started
CONTAINER ID        IMAGE               COMMAND                  CREATED              STATUS              PORTS                    NAMES
b68688cd6f2d        nginx:v1            "/usr/local/nginx/sb..."   11 seconds ago       Up 10 seconds       0.0.0.0:80->80/tcp       nginx
2f7fd098f006        php:v1              "/usr/local/php/sbin..."   About a minute ago   Up About a minute   9000/tcp                 php
df28bcb97289        mysql:v1            "/root/setup.sh"         About a minute ago   Up About a minute   0.0.0.0:3306->3306/tcp   mysql
Here are the three containers to be started: (1) start a mysql container and connect the above server CNF configuration files and data directories are mounted inside the container to prevent data loss; (2) Then start a php container and use - v for mapping. If there is no mapping here, the php program will start, but the file at the end of php will not be parsed, resulting in the error of file not found, and -- link is used to associate with mysql, so that the php container can connect to the mysql database; (3) Finally, start an nginx container, also use - v for mapping, map the website directory to the host, and associate it with php through -- link.
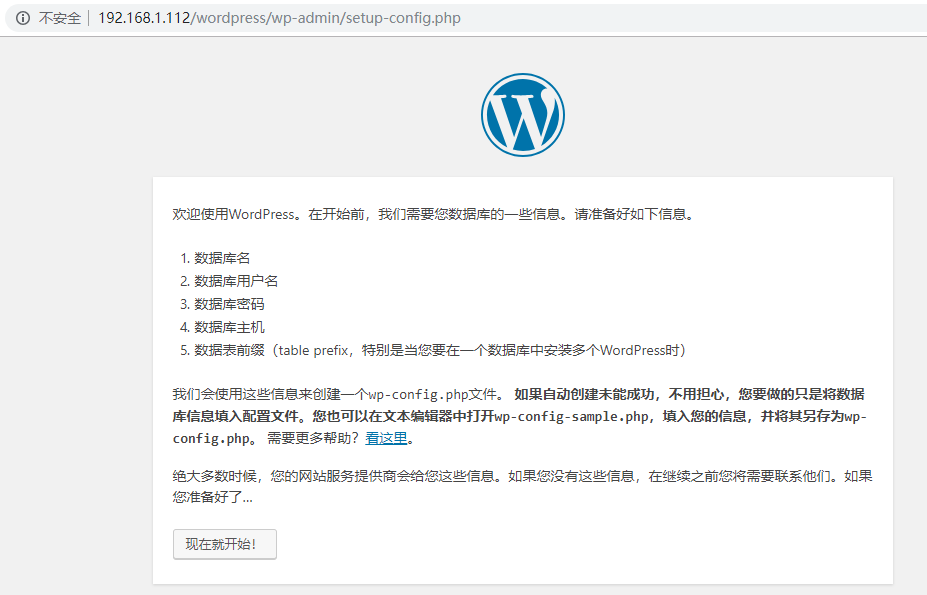
To begin installing wordpress:
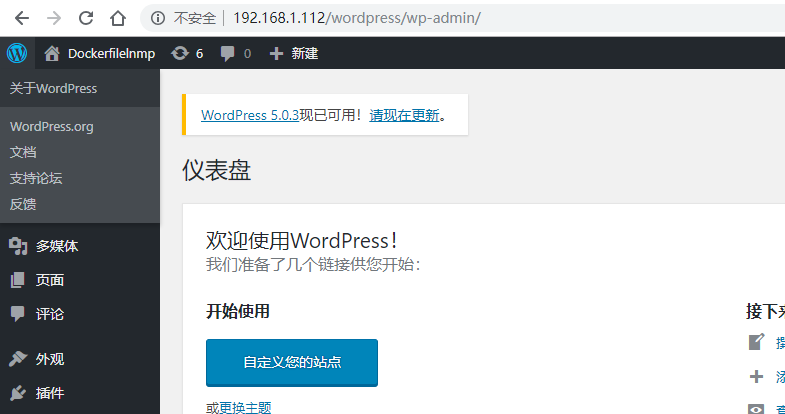
[root@server ~]# cd /www/
[root@server www]# wget https://cn.wordpress.org/wordpress-4.7.4-zh_CN.tar.gz
[root@server www]# tar xf wordpress-4.7.4-zh_CN.tar.gz
[root@server www]# ll
 Total consumption 8324
-rw-r--r-- 1 root   root           19 1 November 12:27 index.php
-rw-r--r-- 1 root   root           32 1 November 12:04 test.html
drwxr-xr-x 5 nobody nfsnobody    4096 4 March 23, 2017 wordpress
-rw-r--r-- 1 root   root      8507412 4 March 23, 2017 wordpress-4.7.4-zh_CN.tar.gz
Access the host through the browser for installation: http://IP/wordpress
Enter the mysql container to view the hosts:
[root@server ~]# docker exec -it mysql /bin/bash  #Use exec to enter mysql container
[root@df28bcb97289 ~]# cat /etc/hosts
127.0.0.1    localhost
::1    localhost ip6-localhost ip6-loopback
fe00::0    ip6-localnet
ff00::0    ip6-mcastprefix
ff02::1    ip6-allnodes
ff02::2    ip6-allrouters
172.17.0.2    df28bcb97289
Enter the php container to view the hosts:
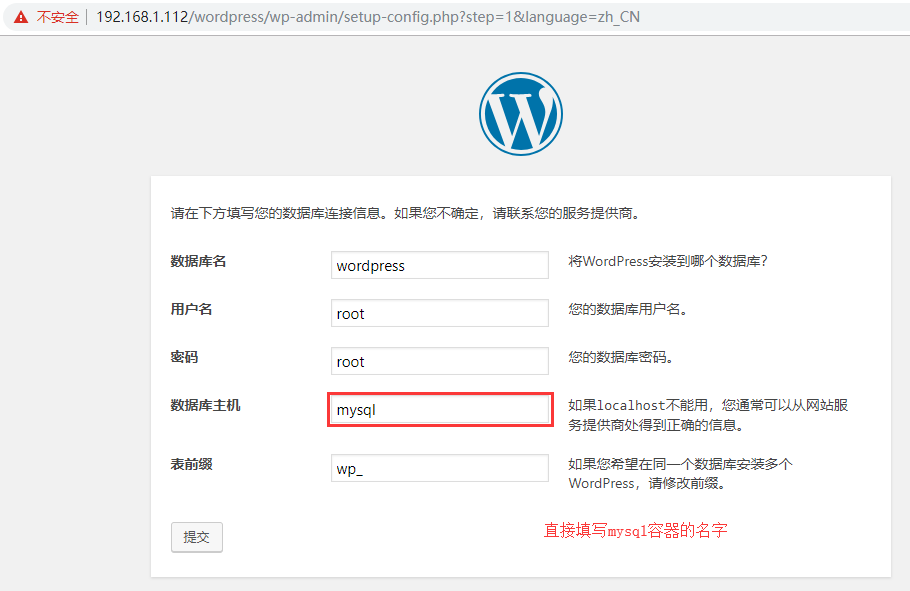
[root@server ~]# docker exec -it php /bin/bash  #Use exec to enter the php container
[root@2f7fd098f006 php-5.6.35]# cat /etc/hosts
127.0.0.1    localhost
::1    localhost ip6-localhost ip6-loopback
fe00::0    ip6-localnet
ff00::0    ip6-mcastprefix
ff02::1    ip6-allnodes
ff02::2    ip6-allrouters
172.17.0.2    mysql df28bcb97289
172.17.0.3    2f7fd098f006
Enter the nginx container to view the hosts:
[root@server ~]# docker exec -it nginx /bin/bash  #Use exec to enter the nginx container
[root@b68688cd6f2d nginx-1.8.1]# cat /etc/hosts
127.0.0.1    localhost
::1    localhost ip6-localhost ip6-loopback
fe00::0    ip6-localnet
ff00::0    ip6-mcastprefix
ff02::1    ip6-allnodes
ff02::2    ip6-allrouters
172.17.0.3    php 2f7fd098f006
172.17.0.4    b68688cd6f2d
Through observation, we can see that there is a mysql record in the hosts of the php container, which is why when wordpress is installed, we can directly fill in the name of the mysql container to connect. Similarly, there is also a php record in nginx.
See GitHub for relevant software packages and configuration files: https://github.com/buji595/docker_project/tree/master/Dockerfile_Project/lnmp