1. Mysql (master)
1, Create a new master server container instance 3307
docker run --restart=always -p 3307:3306 --name mysql-master \
-v /mydata/mysql-master/log:/var/log/mysql \
-v /mydata/mysql-master/data:/var/lib/mysql \
-v /mydata/mysql-master/conf:/etc/mysql \
-e MYSQL_ROOT_PASSWORD=root \
-d mysql:5.7
Command details
--restart=always  Startup container self start
-p Port mapping, inside the host 3307 port mapping container 3306
--name Container name
-v Data volume mapping directory generally maps log data configuration files
-e Runtime environment
-d Run the container in the background and return to the container ID
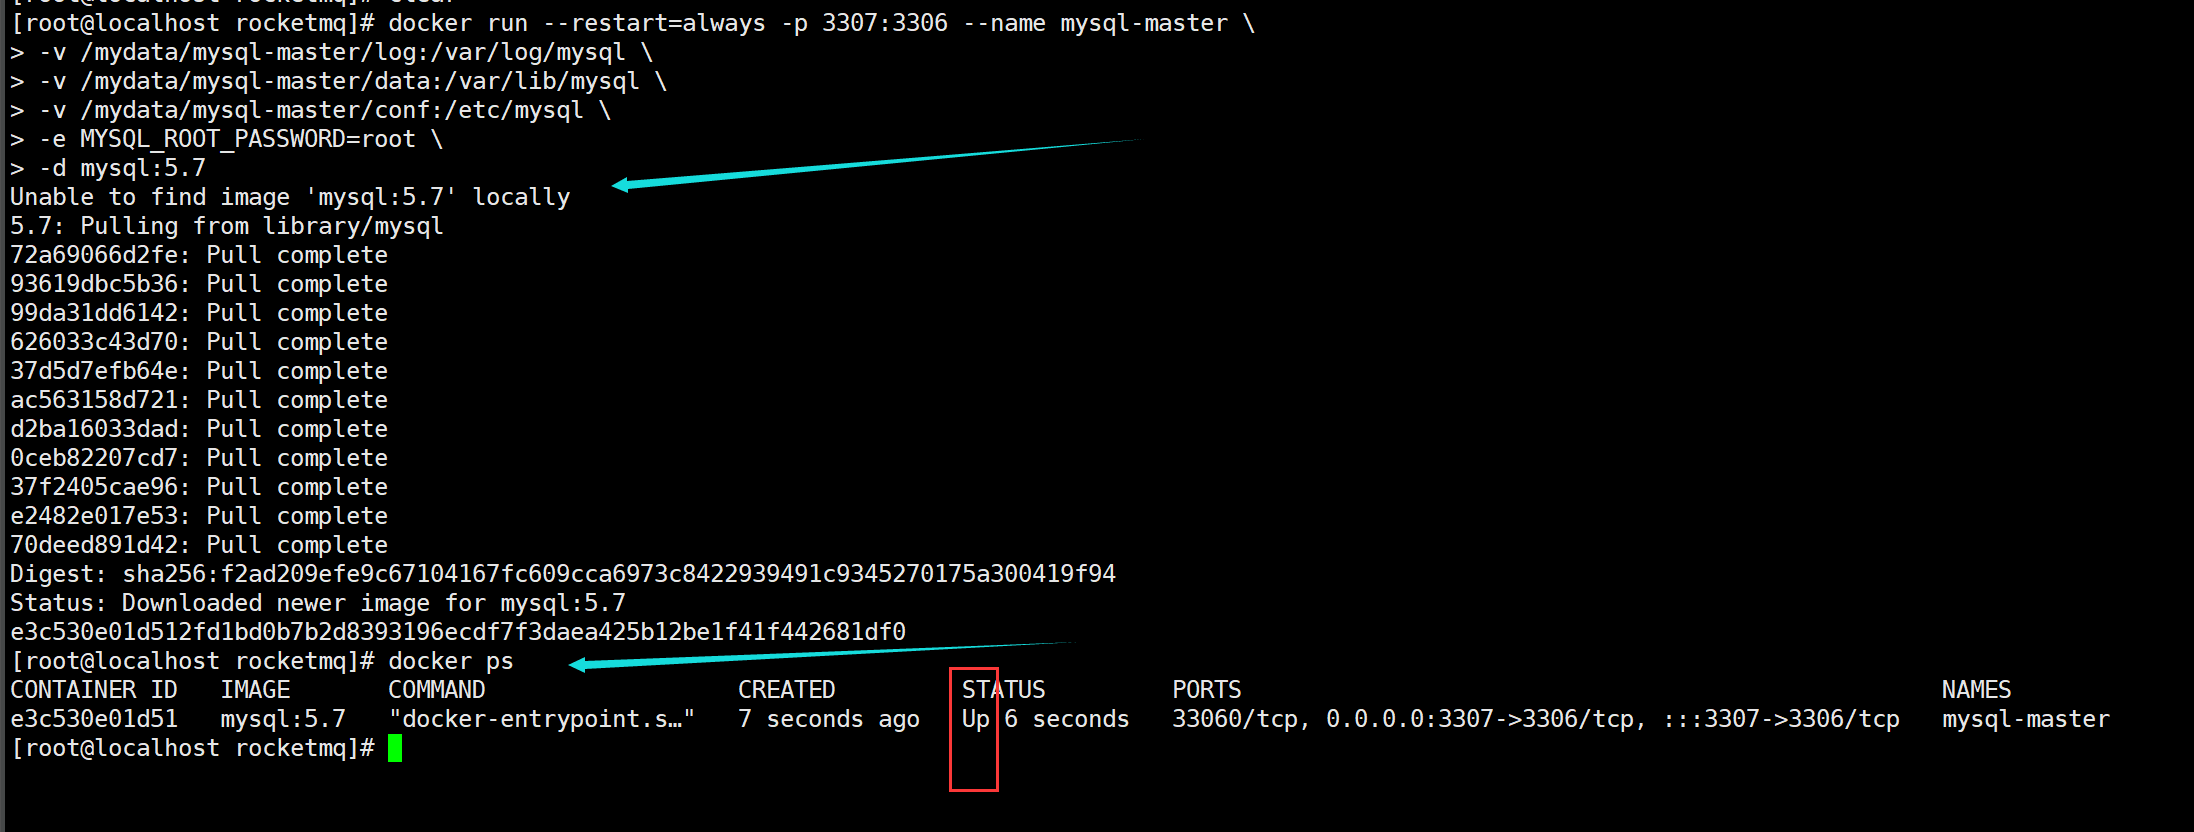
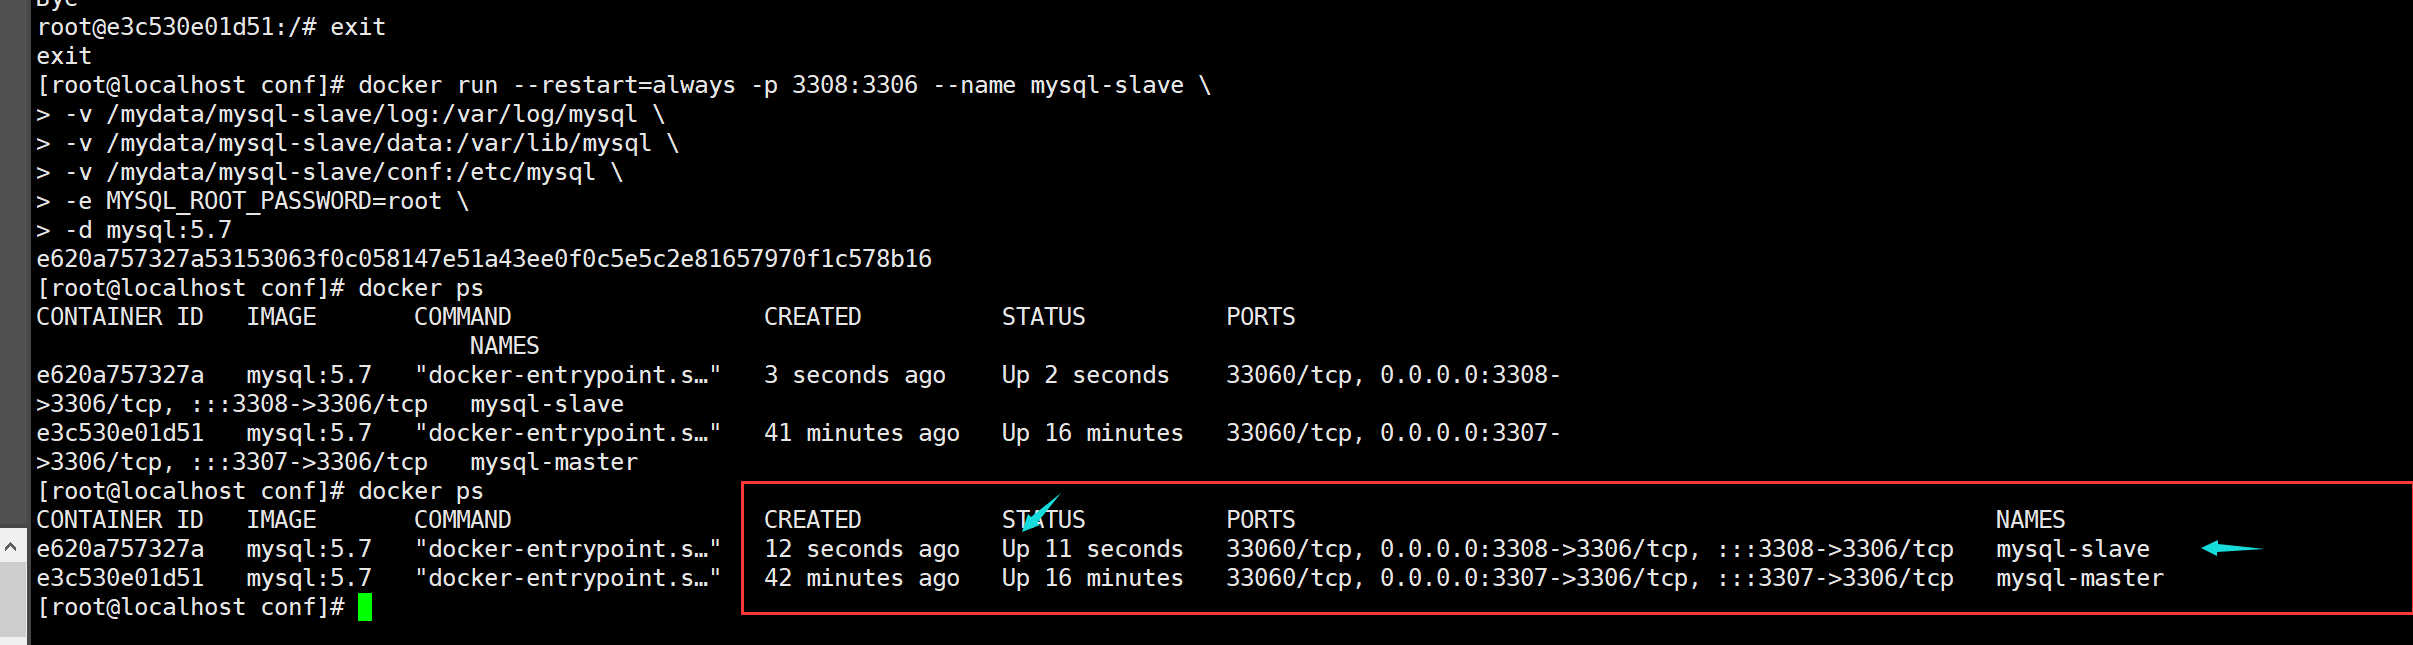
If you have not pulled it before, you will pull it first and then run the container # docker ps # if you see the STATUS # STATUS # is Up, the operation is successful
2, Enter / mydata / MySQL master / conf directory to create a new my cnf
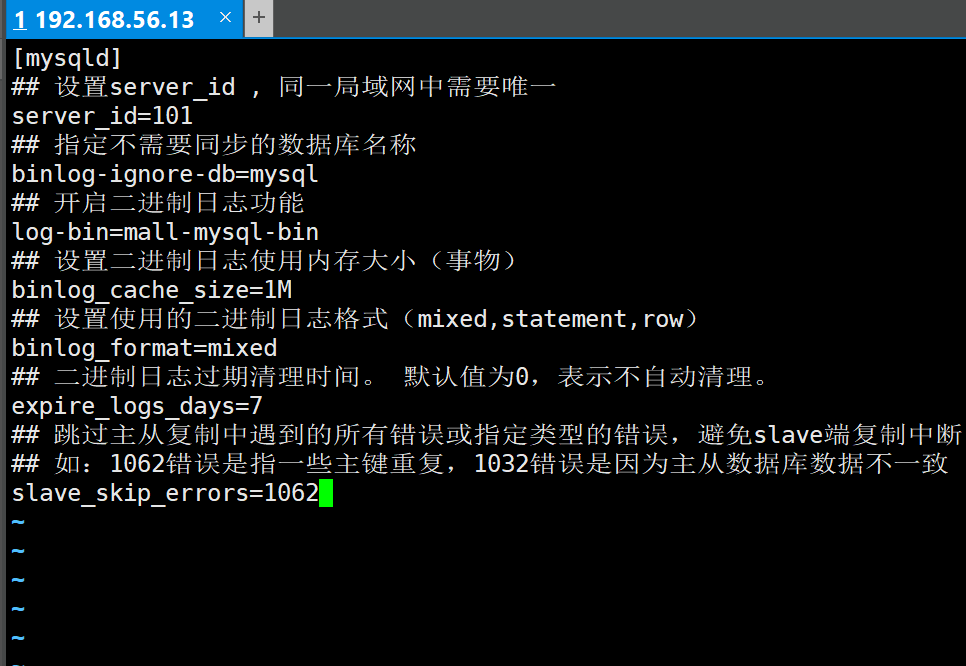
[mysqld]
## Set up server_id, which needs to be unique in the same LAN
server_id=101
## Specify the name of the database that does not need to be synchronized
binlog-ignore-db=mysql
## Enable binary log function
log-bin=mall-mysql-bin
## Set the memory size used by binary log (transaction)
binlog_cache_size=1M
## Set the binary log format used (mixed,statement,row)
binlog_format=mixed
## Binary log expiration cleanup time. The default value is 0, which means no automatic cleaning.
expire_logs_days=7
## Skip all errors encountered in master-slave replication or specified types of errors to avoid the interruption of slave side replication.
## For example, the 1062 error refers to the duplication of some primary keys, and the 1032 error is due to the inconsistency between the primary and secondary database data
slave_skip_errors=1062
Enter the / mydata / MySQL master / conf directory
vi my.cnf
Just stick it in
3, Restart the master instance after modifying the configuration
docker restart mysql-master

4, Enter MySQL master container
1. Pass the container name
docker exec -it mysql-master /bin/bash
2. Pass the container id
docker exec -it e3c bash

Both commands can be entered
5, Create a data synchronization user in the master container instance
Let the slave server use this user for data synchronization.
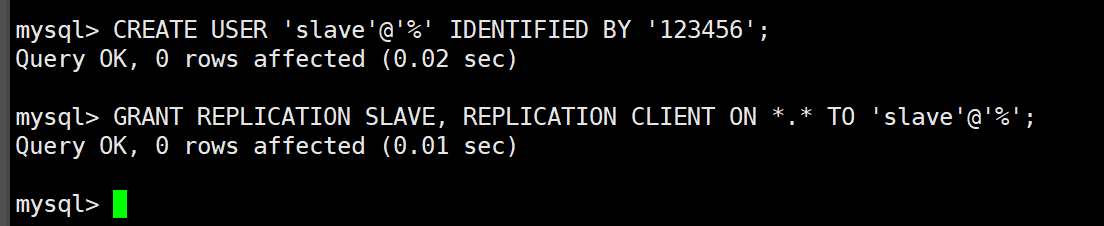
1. Create user
CREATE USER 'slave'@'%' IDENTIFIED BY '123456';
2. Grant permissions
GRANT REPLICATION SLAVE, REPLICATION CLIENT ON *.* TO 'slave'@'%';
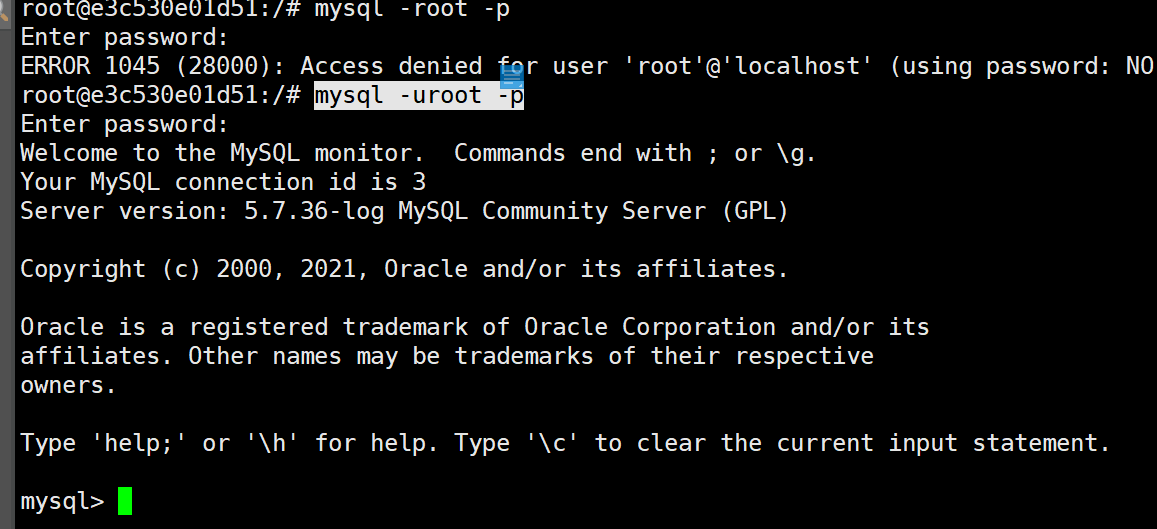
Enter mysql
mysql -uroot -p
2. From Mysql (slave)
1, New slave server container instance 3308
docker run --restart=always -p 3308:3306 --name mysql-slave \
-v /mydata/mysql-slave/log:/var/log/mysql \
-v /mydata/mysql-slave/data:/var/lib/mysql \
-v /mydata/mysql-slave/conf:/etc/mysql \
-e MYSQL_ROOT_PASSWORD=root \
-d mysql:5.7
2, Enter the / mydata / MySQL slave / conf directory to create a new my cnf
[mysqld]
## Set up server_id, which needs to be unique in the same LAN
server_id=102
## Specify the name of the database that does not need to be synchronized
binlog-ignore-db=mysql
## Enable binary log function
log-bin=mall-mysql-slave1-bin
## Set the memory size used by binary log (transaction)
binlog_cache_size=1M
## Set the binary log format used (mixed,statement,row)
binlog_format=mixed
## Binary log expiration cleanup time. The default value is 0, which means no automatic cleaning.
expire_logs_days=7
## Skip all errors encountered in master-slave replication or specified types of errors to avoid the interruption of slave side replication.
## For example, the 1062 error refers to the duplication of some primary keys, and the 1032 error is due to the inconsistency between the primary and secondary database data
slave_skip_errors=1062
## relay_log configure relay log
relay_log=mall-mysql-relay-bin
## log_slave_updates means that the slave writes the replication event to its binary log
log_slave_updates=1
## slave is set to read-only (except for users with super permission)
read_only=1
Enter the / mydata / MySQL slave / conf directory
vi my.cnf

3, Restart the slave instance after modifying the configuration
docker restart mysql-slave
4, View master-slave synchronization status in master database
show master status;

5, Enter MySQL slave container
Enter the docker container first, and then enter mysql
e62 is the container id
docker exec -it e62 bash
mysql -uroot -proot

Vi. configure master-slave replication in the slave database
change master to master_host='Host computer ip',master_user='slave',master_password='123456',master_port=3307,master_log_file='mall-mysql-bin.000001',master_log_pos=617,master_connect_retry=30;
master_host: IP address of the main database;
master_port: the running port of the master database;
master_user: the user account created in the master database for data synchronization;
master_password: the user password created in the master data to synchronize data;
master_log_file: Specifies the day file to copy data from the database, and obtains the file parameter by viewing the status of the master data;
master_log_file: specify where to copy data from the database, and obtain the position parameter by viewing the status of the master data;
master_connect_retry: the time interval between connection failures and retries, in seconds.
Note that this is from the database

Corresponding to the related configuration of the host
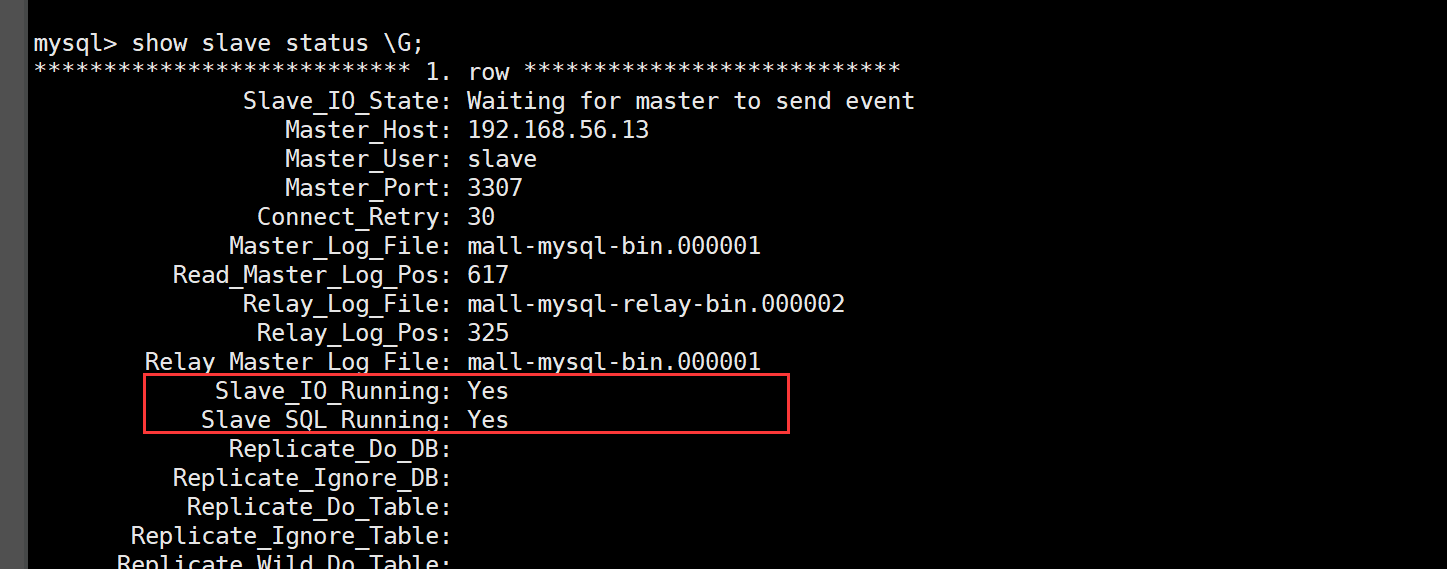
VII. View the master-slave synchronization status in the slave database
show slave status \G;

Key value = key value pair
VIII. Start master-slave synchronization in the slave database

start slave
IX. check the database status and find that it has been synchronized
show slave status \G;
3. Test read-write separation
1, Host write data
Enter the host

create database db01;
use db01;
create table t1(
id int,
name varchar(20)
);
insert into t1 values(1,'zs');
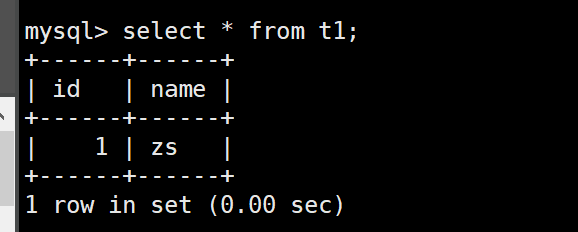
2, Read data from machine
Enter slave

Data synchronization succeeded} and the work was finished