Docker compose + nginx deployment front and back end separation project
The project is a front-end and back-end separation project using Vue +Springboot
1, Pretreatment
1. Before packing the project, go to File – > setting – > File encoding and change it to UTF-8 to prevent random code errors!

Note: at this time, if it is modified to UTF8, our properties configuration file is garbled in Chinese: don't panic, no problem, just delete the Chinese and write it again!
2. Since the back-end project is written using SpringBoot, we need a packaging plug-in. Remember to import the package! Otherwise, there may be nothing in the bag
			<plugins>
                <plugin>
                    <groupId>org.apache.maven.plugins</groupId>
                    <artifactId>maven-resources-plugin</artifactId>
                    <version>2.7</version>
                    <dependencies>
                        <dependency>
                            <groupId>org.apache.maven.shared</groupId>
                            <artifactId>maven-filtering</artifactId>
                            <version>1.3</version>
                        </dependency>
                    </dependencies>
                </plugin>
            </plugins>
2, Install Docker
1. Update package to the latest version available from yum or up2date
yum update
2. Install the required packages. Yum util provides the yum config manager function. The other two are dependent on the devicemapper driver
yum install -y yum-utils device-mapper-persistent-data lvm2
3. Set yum source
yum-config-manager --add-repo https://download.docker.com/linux/centos/docker-ce.repo
4. Install docker and press y when the input interface appears
yum install -y docker-ce
5. Check the docker version and verify whether the verification is successful
docker --version
6. Start docker
/bin/systemctl start docker.service
3, Install docker compose
If you have other problems with docker compose, visit this article https://blog.csdn.net/m0_46571920/article/details/121600136
#Installed in Linux system
csudo curl -L "https://github.com/docker/compose/releases/download/1.29.2/docker-compose-$(uname -s)-$(uname -m)" -o /usr/local/bin/docker-compose

#If the installation is too slow, change the github source to get.daocloud.io
curl -L https://get.daocloud.io/docker/compose/releases/download/1.29.2/docker-compose-`uname -s`-`uname -m` -o /usr/local/bin/docker-compose
Go to the installation directory and check: Download succeeded!

2. Set file executable permissions
sudo chmod +x /usr/local/bin/docker-compose
3. View version information
docker-compose -version

,
4. Uninstall docker compose
sudo rm /usr/local/bin/docker-compose
Note: if there is a problem with the installation, use the following command to uninstall!
When the above environment is ready, start writing relevant configuration files!
Preview: create the nginx directory and html directory under the root directory after all configuration files are completed according to the following rules
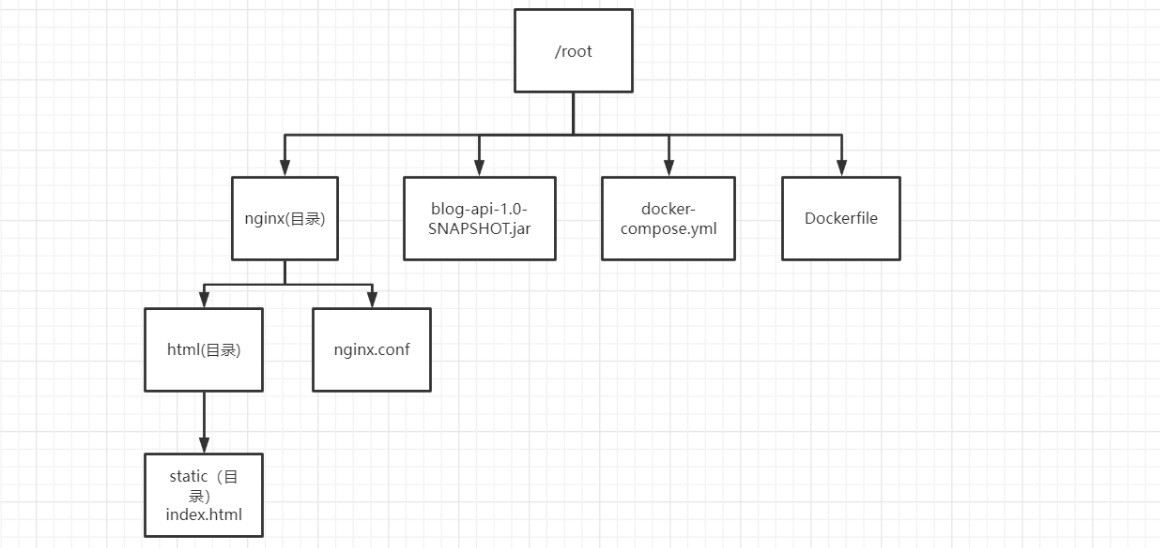
From left to right
- html (directory): store the packaged results of our Vue front-end project!
- nginx.conf: our core configuration of nginx
- Blog API: jar package of our backend Spriongboot project
- docker-compose.yml: the core configuration file of docker compose
- Dockerfile: our spring boot project cannot be pulled directly from DockerHub. We need to use its built image
Next, let's break them one by one
4, Write configuration file
4.1. Write Docker-Compose.yml
version: '3'

services:
  nginx: #Service name
    image: nginx:latest
    ports:
    - 80:80
    volumes:
    - /root/nginx/html:/usr/share/nginx/html  #Mount: the front is where to mount, and the back is the configuration directory of nginx
    - /root/nginx/nginx.conf:/etc/nginx/nginx.conf
    privileged: true   #Solve the problem of file call permission of nginx
  mysql:
    image: mysql:5.7
    ports:
    - 3307:3306    #The front is the port of the host, and the back is the port of the container itself
    environment:
      - MYSQL_ROOT_PASSWORD= #Enter your own password
  redis:
    image: redis:latest
  vueblog:
     image: vueblog:latest
     build: .
     ports:
     - 8888:8888
    depends_on:
      - mysql
      - redis
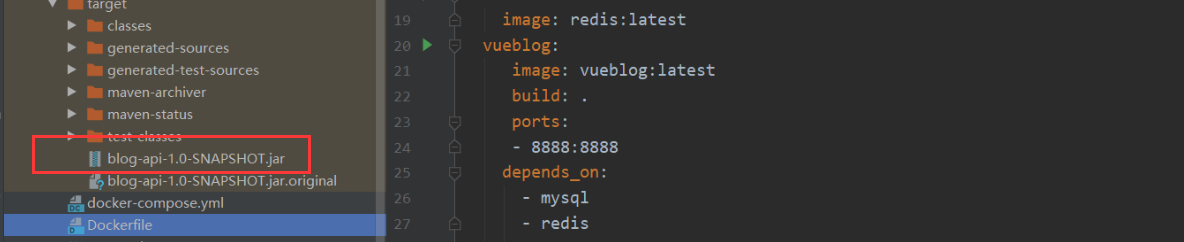
4.2. Write Dockerfile
FROM java:8

EXPOSE 8888

ADD blog-api-1.0-SNAPSHOT.jar app.jar   #The first half, the name of your project after packaging!
RUN bash -c 'touch /app.jar'

ENTRYPOINT ["java","-jar","/app.jar","--spring.profiles.active=prod"]
The two configuration files in the figure have been solved, and the two configuration files have been uploaded to the / root directory
5, Backend project packaging
Since we have two modules, do not directly declare the cycle package of Maven, and use the following method
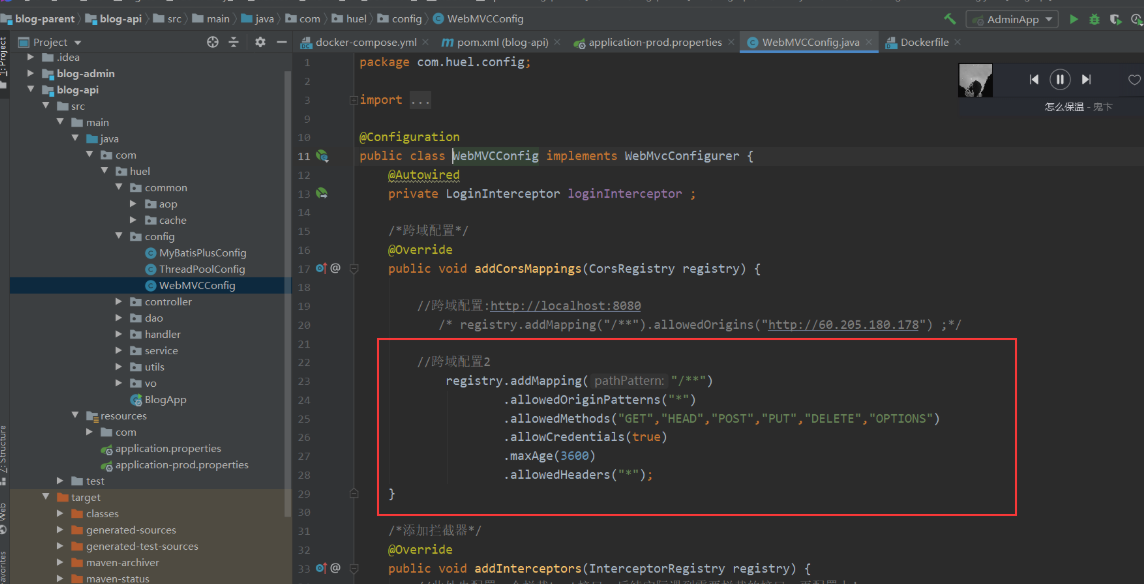
5.1 packaging pretreatment
The following three configurations
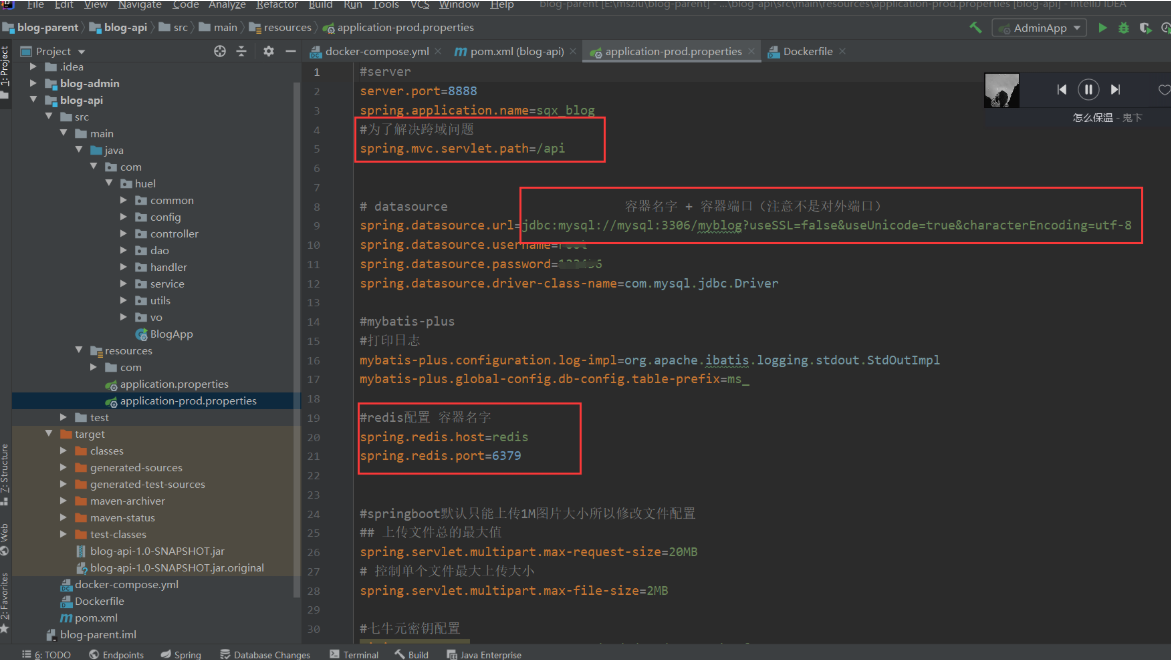
Remember to change the cross domain configuration: otherwise, the local cross domain processing is invalid!
5.2. Start packing
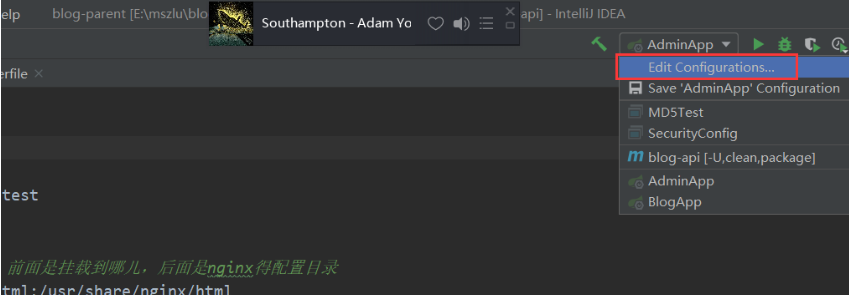
Select the + sign, find Maven, and configure as follows

When you find the target, you will find that it has been packaged as a jar
Finish, and then upload it to the server / root directory
6, Front end project packaging
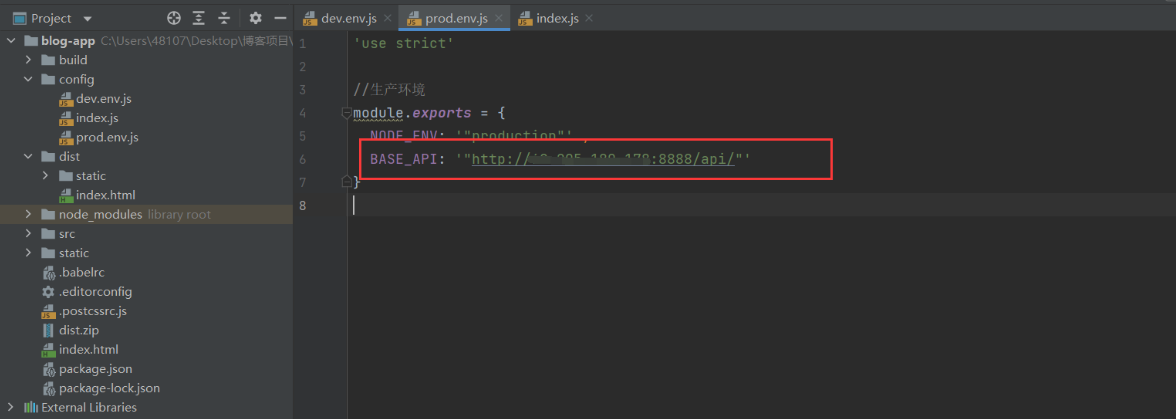
6.1 packaging pretreatment
Change the configuration file in the production environment to ip + port + request prefix
6.2 start packing
Execute npm run build under the terminal
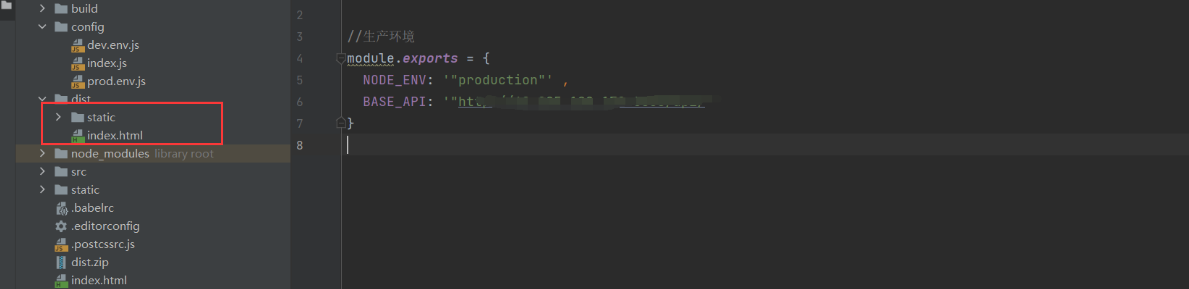
Finish, and then upload it to the html directory of the service
7, Write the configuration of Nginx
7.1. Write nginx.conf
worker_processes  1;

events {
    worker_connections  1024;
}

http {
    include       mime.types;
    default_type  application/octet-stream;

    sendfile        on;
    keepalive_timeout  65;

    server {
        listen       80;
        server_name  localhost;

        location / {
            root   /usr/share/nginx/html;
            try_files  $uri  $uri/  /index.html last;  #Add it!
            index  index.html index.htm;
        }

        error_page   500 502 503 504  /50x.html;
        location = /50x.html {
            root   html;
        }

    }
}
After writing, upload to nginx directory
So far, everything in our picture has been completed. Remember: put it according to the position in the picture!
8, After editing, start
Then enter the directory of Docker-compose.yml and execute the command docker-compose-up -d

Start successfully!
Test access
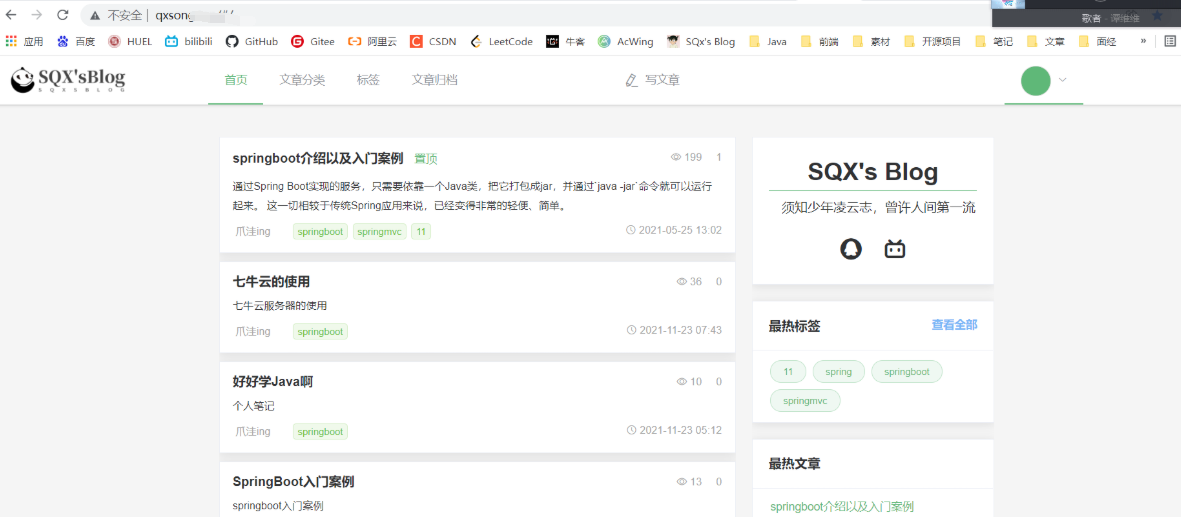
It's over!