Docker data persistence
After the container is deleted, the data inside will also be deleted. The preservation and reuse of data are the most basic requirements, that is, data persistence. When writing Dockerfile, you can use the VOLUME command to specify data persistence
The VOLUME command sets persistence
When you know that the data in the container cannot be persisted, you can use the VOLUME command to set the persistent directory when writing Dockerfile.
dockerfile
FROM ubuntu:21.04
VOLUME ["/app"]
RUN apt-get update && \
    apt-get install vim -y
Then build the image docker image build - t volume test: 1
[root@iZwz9257qzx65bg8c3p88gZ docker-test]# docker image ls -a
REPOSITORY                     TAG       IMAGE ID       CREATED          SIZE
volume-test                    1         0526a62af1d2   16 seconds ago   180MB
....
And use the image to start a container. The parameter is to enter the container in command line mode
docker container run -it -p 3999:3999 0526a62af1d2 sh
[root@iZwz9257qzx65bg8c3p88gZ docker-test]# docker container run -it -p 3999:3999 0526a62af1d2 sh
# ls
app  bin  boot  dev  etc  home  lib  lib32  lib64  libx32  media  mnt  opt  proc  root  run  sbin  srv  sys  tmp  usr  var
# echo hello > app/hello.txt
# cd app
# ls
hello.txt
# cat hello.txt
hello
# exit
[root@iZwz9257qzx65bg8c3p88gZ docker-test]#
The above operations are
- After entering the container, you can see that there is an app folder under the root directory (the directory sharing data with the host specified through VOLUME ["/app"])
- Then enter the app directory, write a hello.txt file under the app, and then exit the command line of the container
Then we need to verify whether the file is also synchronized to our host machine, so as to ensure the persistence of container data`
docker volume related commands
[root@iZwz9257qzx65bg8c3p88gZ _data]# docker volume

Usage:  docker volume COMMAND

Manage volumes

Commands:
  create      Create a volume
  inspect     Display detailed information on one or more volumes
  ls          List volumes
  prune       Remove all unused local volumes
  rm          Remove one or more volumes

Run 'docker volume COMMAND --help' for more information on a command.
First, ls queries all volume s
[root@iZwz9257qzx65bg8c3p88gZ _data]# docker volume ls
DRIVER    VOLUME NAME
local     0bdf00aab64d926f21a6f90342e391d84a4c6ec14b67fe249f8c96ac4e59d91b
local     0ea958861d42b680f60053c59c5384a44069d53e7229f47118ffd64399b46926
local     01b1566780ad5af79b7228f10741b14cc38246e784f3fa5669fe7888a94bfb09
local     3cea763fa6e484560cc489b2aa9f794d370f0f34809a0a4fdd2e513a9c474a74
local     5d599f822fd7cf3f217423af17d483f14deecde3f0adaab300b5c777b3e77636
local     5f61686f8e896c94fb4e1ad2f518e9fb4e4160be75c5358be430919f7a1f5130
local     6b3f0fc9738e3402273e21b605629e6d5dfbf34c37747df4818fa5cd2b1e6059
local     7ae7a3c826c0bdf9a3f893266fedb5c6356d7067cb54bef2ca8506194483b635
local     8ad42e37588d4bb6386f4c18e8c887ffd3a20d7ec4a4742947d01b6f7514331b
local     8b24b542f0d75f7073c47e555d155c7719cd5d65c09b5b03b2a3f87dab4ba513
local     98e980c61c1b6fac75f899303f959f9ff8f788fdb6094edba8349d2dd950ce34
local     824de8cf2066827829e7ff90efc66073607956d8ad6c33e9d3811f8ba2cbc3e0
local     9759e4fb808c4674d384785b6bc746122d0284cafb2c94623d900c7f3508931e
local     40334acb4196bae68de3232bacb4dad775cc63b9cb96f4d9940c99acc3a491ce
local     c69dc1de5d77b32eae6ccb7654921bbd63a07c4cf39b7b86ed818e79b211d480
local     d5c0e014d7499a3a08642700f8ca8208f2d32a2d06fded94a621a82ccbf3cfe5
local     e38488f4bd0dc6f910bee270bd1e1bd5ac9816d6f2e581f9406e7feab444cc45
Then find the one we just created (here I find it one by one... Below you can know how to name volume ~)
[root@iZwz9257qzx65bg8c3p88gZ _data]# docker volume inspect 8ad42e37588d4bb6386f4c18e8c887ffd3a20d7ec4a4742947d01b6f7514331b
[
    {
        "CreatedAt": "2021-11-28T16:06:46+08:00",
        "Driver": "local",
        "Labels": null,
        "Mountpoint": "/var/lib/docker/volumes/8ad42e37588d4bb6386f4c18e8c887ffd3a20d7ec4a4742947d01b6f7514331b/_data",
        "Name": "8ad42e37588d4bb6386f4c18e8c887ffd3a20d7ec4a4742947d01b6f7514331b",
        "Options": null,
        "Scope": "local"
    }
]
The path corresponding to Mountpoint is the path of persistent data of the host
[root@iZwz9257qzx65bg8c3p88gZ _data]# cd /var/lib/docker/volumes/8ad42e37588d4bb6386f4c18e8c887ffd3a20d7ec4a4742947d01b6f7514331b/_data
[root@iZwz9257qzx65bg8c3p88gZ _data]# ls
hello.txt
[root@iZwz9257qzx65bg8c3p88gZ _data]# cat hello.txt
hello
After verification, it is found that the data is indeed synchronized from the container to the host, and the persistence of container data is completed
Set the name of the startup container volume
The difference from the above is that we use the - v command when using the image to start the container
docker container run -d -v VolumeName:DockerfileVOLUMEPath image
Our orders here become
docker container run -it -p 3999:3999 -v my-data:/app 0526a62af1d2 sh
[root@iZwz9257qzx65bg8c3p88gZ _data]#  docker container run -it -p 3999:3999 -v my-data:/app  0526a62af1d2 sh
# ls
app  bin  boot  dev  etc  home  lib  lib32  lib64  libx32  media  mnt  opt  proc  root  run  sbin  srv  sys  tmp  usr  var
# cd app
# ls
# echo "hello my data" > hello.txt
# ls
hello.txt
# cat hello.txt
hello my data
# exit
Repeat file operation
Then exit and go to the host computer to view the volume of docker of the host computer
[root@iZwz9257qzx65bg8c3p88gZ _data]# docker volume ls
DRIVER    VOLUME NAME
local     0bdf00aab64d926f21a6f90342e391d84a4c6ec14b67fe249f8c96ac4e59d91b
local     0ea958861d42b680f60053c59c5384a44069d53e7229f47118ffd64399b46926
local     01b1566780ad5af79b7228f10741b14cc38246e784f3fa5669fe7888a94bfb09
local     3cea763fa6e484560cc489b2aa9f794d370f0f34809a0a4fdd2e513a9c474a74
local     5d599f822fd7cf3f217423af17d483f14deecde3f0adaab300b5c777b3e77636
local     5f61686f8e896c94fb4e1ad2f518e9fb4e4160be75c5358be430919f7a1f5130
local     6b3f0fc9738e3402273e21b605629e6d5dfbf34c37747df4818fa5cd2b1e6059
local     7ae7a3c826c0bdf9a3f893266fedb5c6356d7067cb54bef2ca8506194483b635
local     8ad42e37588d4bb6386f4c18e8c887ffd3a20d7ec4a4742947d01b6f7514331b
local     8b24b542f0d75f7073c47e555d155c7719cd5d65c09b5b03b2a3f87dab4ba513
local     98e980c61c1b6fac75f899303f959f9ff8f788fdb6094edba8349d2dd950ce34
local     824de8cf2066827829e7ff90efc66073607956d8ad6c33e9d3811f8ba2cbc3e0
local     9759e4fb808c4674d384785b6bc746122d0284cafb2c94623d900c7f3508931e
local     40334acb4196bae68de3232bacb4dad775cc63b9cb96f4d9940c99acc3a491ce
local     c69dc1de5d77b32eae6ccb7654921bbd63a07c4cf39b7b86ed818e79b211d480
local     d5c0e014d7499a3a08642700f8ca8208f2d32a2d06fded94a621a82ccbf3cfe5
local     e9b25fe9c662b3d06d2914878b3d1ec498532fa8bf936de61ec1b6076d0fa360
local     e38488f4bd0dc6f910bee270bd1e1bd5ac9816d6f2e581f9406e7feab444cc45
local     my-data
At this time, you can find that one of the volume s is our user-defined name, and we have just generated the detailed information
[root@iZwz9257qzx65bg8c3p88gZ _data]# docker volume inspect my-data
[
    {
        "CreatedAt": "2021-11-28T16:24:42+08:00",
        "Driver": "local",
        "Labels": null,
        "Mountpoint": "/var/lib/docker/volumes/my-data/_data",
        "Name": "my-data",
        "Options": null,
        "Scope": "local"
    }
]
Verify that the data is synchronized to the host ✅
[root@iZwz9257qzx65bg8c3p88gZ _data]# cd /var/lib/docker/volumes/my-data/_data
[root@iZwz9257qzx65bg8c3p88gZ _data]# ls
hello.txt
[root@iZwz9257qzx65bg8c3p88gZ _data]# cat hello.txt
hello my data
The new container uses the data of the host
The data and files in the container have been saved on the operating system. The current requirement is to create another container. How can the new container use the persistent data we saved with volume?
Now that we have the data synchronized and persisted by the previous container locally, what if we restart a container and use this piece of data? In fact, it is very simple, which is the same as the command specifying the volume name
[root@iZwz9257qzx65bg8c3p88gZ docker-test]# docker container run -it -p 3002:3002 -v my-data:/app --name datafromlocal volume-test sh
# ls
app  bin  boot  dev  etc  home  lib  lib32  lib64  libx32  media  mnt  opt  proc  root  run  sbin  srv  sys  tmp  usr  var
# cd app
# ls
hello.txt
# cat hello.txt
hello my data
# exit
Bind Mount for data persistence
In addition to Data Volume, there is also a kind of data persistence called Bind Mount, which is mount binding in Chinese translation. In short, it is to bind the persistent data in the container to a custom location on the machine
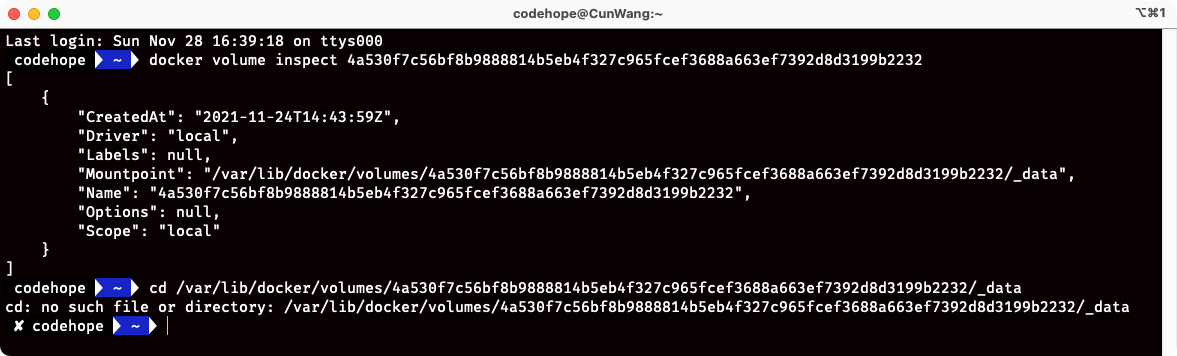
Data Volume is difficult to use in WIndows/Mac environment because the path is the path of virtual machine and is not easy to find (mac is not easy to find, the problem in the figure below has not been solved, and can not be found under mac ~ ha ha)
Compared with Data Volume, Bind Mount is easier to set and can be better integrated with the development environment
[root@iZwz9257qzx65bg8c3p88gZ docker-test]# docker container run -it -p 3002:3002 -v ~/docker-test:/app --name datafromlocal volume-test sh
# ls
app  bin  boot  dev  etc  home  lib  lib32  lib64  libx32  media  mnt  opt  proc  root  run  sbin  srv  sys  tmp  usr  var
# cd app
# ls
dockerfile
# cat dockerfile
FROM ubuntu:21.04
VOLUME ["/app"]
RUN apt-get update && \
    apt-get install vim -y

# ls
dockerfile
# exit
In fact, this usage is to customize the directory of a host machine and bind it to a directory in the container, rather than managing it in a specified location like volume
[root@iZwz9257qzx65bg8c3p88gZ docker-test]# ls
dockerfile
[root@iZwz9257qzx65bg8c3p88gZ docker-test]# docker container run -it -p 3002:3002 -v ~/docker-test:/app --name datafromlocal volume-test sh
# cd app
# ls
dockerfile
# vim newFile.txt
# exit
[root@iZwz9257qzx65bg8c3p88gZ docker-test]# ls
dockerfile  newFile.txt
Completed the data sharing and persistence of host and container!
- A newFile.txt is created in the container
- Exit the container and return to the host machine. Through the ls command, it is found that the container has been synchronized from the container and the persistence of container data has been completed