Docker Compose
1. Introduction
Official introduction
Compose is a tool for defining and running multi-container Docker applications. With Compose, you use a YAML file to configure your application's services. Then, with a single command, you create and start all the services from your configuration. To learn more about all the features of Compose, see the list of features.
- How to define and run multiple containers
- YAML file configuration file
- What are the advantages of single common
Compose works in all environments: production, staging, development, testing, as well as CI workflows. You can learn more about each case in Common Use Cases.
- Docker Compose can be used in all environments
Using Compose is basically a three-step process:
-
Define your app's environment with a Dockerfile so it can be reproduced anywhere.
Dockerfile ensures that our project (app) can run anywhere
-
Define the services that make up your app in docker-compose.yml so they can be run together in an isolated environment.
Configure the service in the YAML configuration file
-
Run docker compose up and the Docker compose command starts and runs your entire app. You can alternatively run docker-compose up using the docker-compose binary.
Launch our project (app)
Summary: batch container orchestration can manage multiple services (containers)
Compose is an official open source project of Docker, so it needs to be installed!
Configuration file: docker-compose.yml
version: "3.9"  # optional since v1.27.0
services:
  web:
    build: .
    ports:
      - "5000:5000"
    volumes:
      - .:/code
      - logvolume01:/var/log
    links:
      - redis
  redis:
    image: redis
volumes:
  logvolume01: {}
Our task is to write such a configuration file to manage our multiple services (containers)
It can start multiple services at the same time through docker compose up
2. Install Compose
Address: https://docs.docker.com/compose/install/

1. Download docker compose
#Installed in Linux system
csudo curl -L "https://github.com/docker/compose/releases/download/1.29.2/docker-compose-$(uname -s)-$(uname -m)" -o /usr/local/bin/docker-compose

#If the installation is too slow, change the github source to get.daocloud.io
curl -L https://get.daocloud.io/docker/compose/releases/download/1.29.2/docker-compose-`uname -s`-`uname -m` -o /usr/local/bin/docker-compose
Go to the installation directory and check: Download succeeded!

2. Set file executable permissions
sudo chmod +x /usr/local/bin/docker-compose
3. View version information
docker-compose -version

4. Uninstall docker compose
sudo rm /usr/local/bin/docker-compose
3. Experience Docker Compose quickly
Reference documents: https://docs.docker.com/compose/gettingstarted/
1. Create a directory under which all operations are performed
 mkdir composetest
 cd composetest
2. Create a py application (similar to counting browsing times and counters)
import time

import redis				#Imported our redis
from flask import Flask		#Imported our Flask (a framework dependency of python)

app = Flask(__name__)
cache = redis.Redis(host='redis', port=6379)

def get_hit_count():
    retries = 5
    while True:
        try:
            return cache.incr('hits')
        except redis.exceptions.ConnectionError as exc:
            if retries == 0:
                raise exc
            retries -= 1
            time.sleep(0.5)

@app.route('/')
def hello():
    count = get_hit_count()
    return 'Hello World! I have been seen {} times.\n'.format(count)
3. Create a configuration text, requirements.txt
flask
redis
4. Create Dockerfile
# syntax=docker/dockerfile:1
FROM python:3.7-alpine
WORKDIR /code
ENV FLASK_APP=app.py
ENV FLASK_RUN_HOST=0.0.0.0
RUN apk add --no-cache gcc musl-dev linux-headers
COPY requirements.txt requirements.txt
RUN pip install -r requirements.txt
EXPOSE 5000
COPY . .
CMD ["flask", "run"]
5. Create docker-compose.yml
version: "3.9"
services:
  web:
    build: .
    ports:
      - "5000:5000"
  redis:
    image: "redis:alpine"
6. Start
docker-compose up
Start successfully!
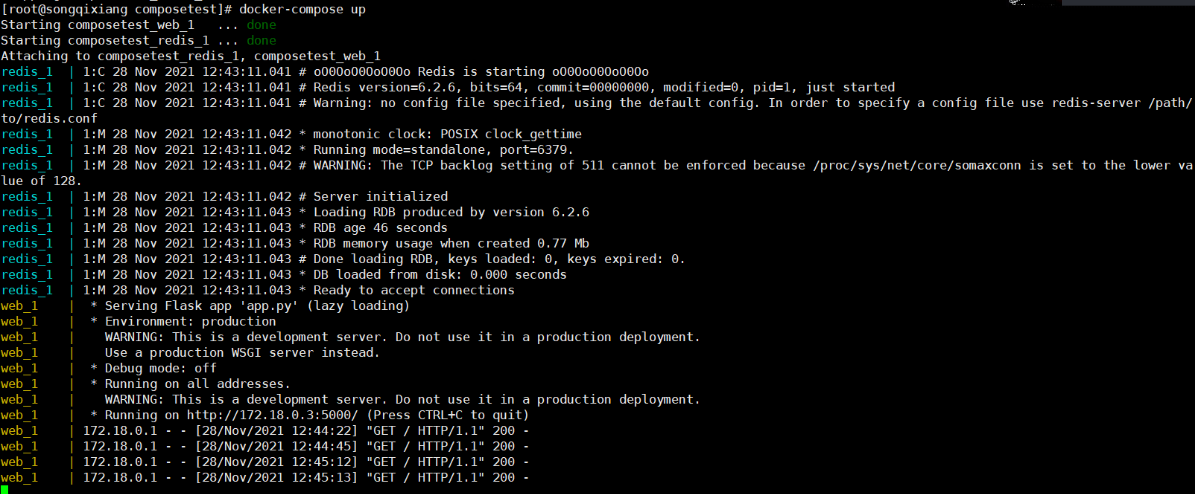
test result
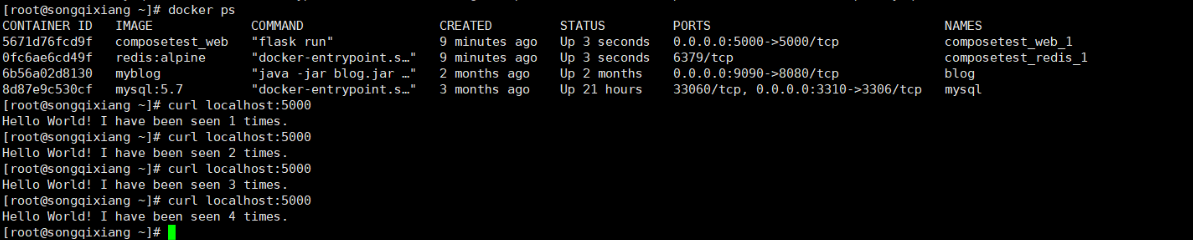
hh, it's really comfortable to start two applications with one click!
4. Docker Compose default configuration
1. Automatically download the image in the configuration file docker-compose.yml

2. Automatically generate service name and file name_ Service name_ num
Starting composetest_web_1   ... done   #web Services
Starting composetest_redis_1 ... done	#redis service
3. Network rules

By default, a network will be generated, with 10 services = > networks (the contents of the project are all under the same network and can be accessed by container name)
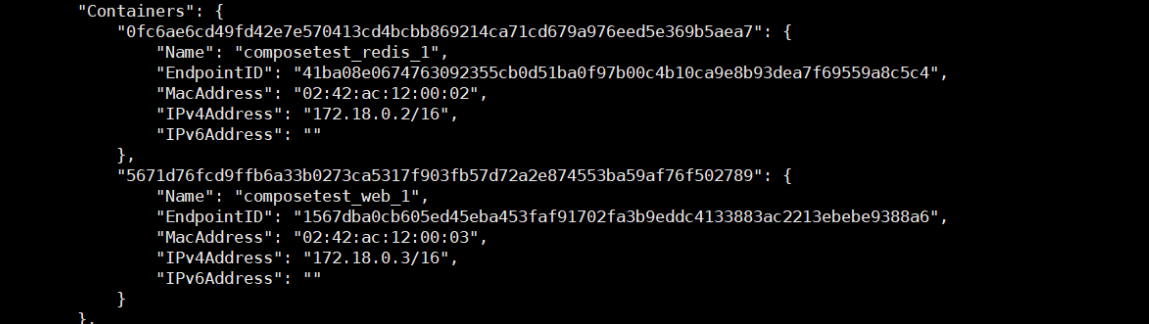
In the same network, it can be accessed directly through the container name (domain name)
4. Stop
- Docker compose down: it needs to be executed in the yaml configuration file directory of compose, otherwise it cannot be found!
- ctrl + c
Section
1. Docker image, run = = > container
2. Dockerfile build image (service packaging)
3. Docker compose startup project (orchestration, multiple microservices / environments)
4. Docker network!
5. The project needs to be updated. docker compose up --build is enough
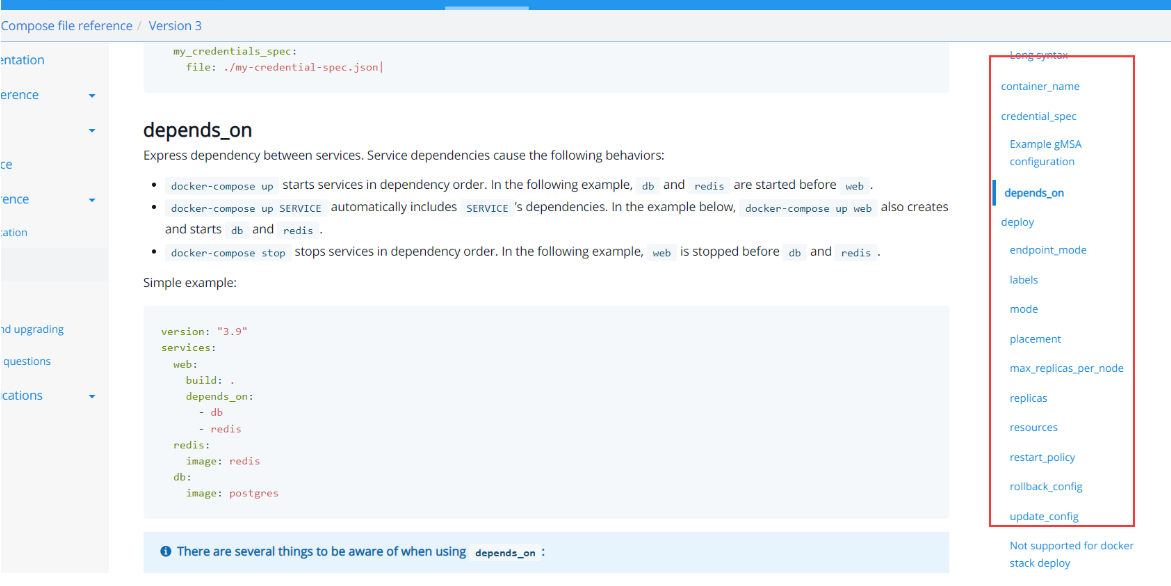
5. Compose write configuration rules
Reference documents: https://docs.docker.com/compose/compose-file/compose-file-v3/
Core: write docker-compose.yaml
#3rd floor
version: ''  #edition
services: 	 #service
	Service 1: web
		#Configuration of service docker container
		images:
		build:
		network:
		depends_on:       #depents_on: web services depend on redis and mysql. Let them start first! (this is the reason for the arrangement)
			-redis
			-mysql
	Service 2: redis
		...
	Service 2: mysql
		...
#Other configuration network / volume, global rules
volumes:
network:
configs:
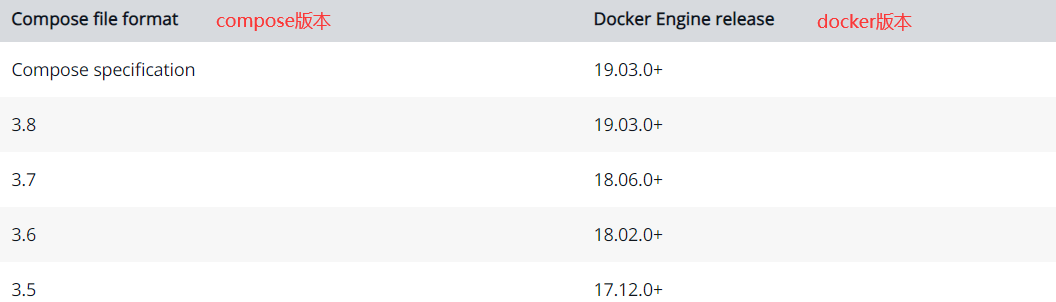
1. Version selection
2. Service related configuration
6. Compose one click deployment WP blog
Reference documents: https://docs.docker.com/samples/wordpress/
1. Create directory and enter directory
mkdir my_wordpress/
cd my_wordpress/
2. Write docker-compose.yml
version: "3.9"

services:
  db:
    image: mysql:5.7
    volumes:
      - db_data:/var/lib/mysql
    restart: always
    environment:
      MYSQL_ROOT_PASSWORD: somewordpress
      MYSQL_DATABASE: wordpress
      MYSQL_USER: wordpress
      MYSQL_PASSWORD: wordpress

  wordpress:
    depends_on:
      - db
    image: wordpress:latest
    volumes:
      - wordpress_data:/var/www/html
    ports:
      - "8000:80"
    restart: always
    environment:
      WORDPRESS_DB_HOST: db:3306
      WORDPRESS_DB_USER: wordpress
      WORDPRESS_DB_PASSWORD: wordpress
      WORDPRESS_DB_NAME: wordpress
volumes:
  db_data: {}
  wordpress_data: {}
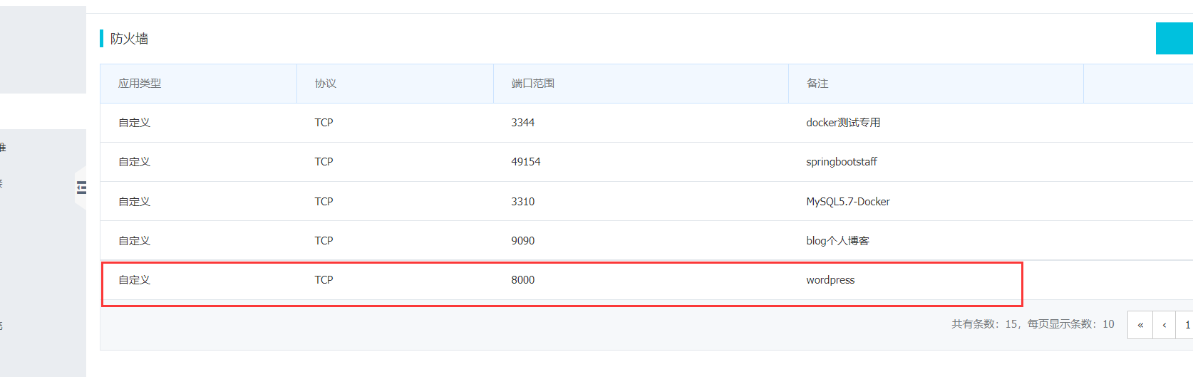
3. Port 8000 of our server is released
4. Start Compose
docker-compose up -d

5. Detect whether the container is started
docker ps

6. Access test: http://qxsong.top:8000/ (own ip+8000 port)

End of work!!!