Before reading this article, make sure that you have properly containerized a machine and can deploy the container using docker compose. If not, refer to Layout document.
There are two kinds of nodes in a swarm cluster, manager node and worker node. A containerized machine (either physical or virtual) can be upgraded to a swarm node. The so-called swarm single node mode is that there is only one manager node in the swarm cluster.
Why upgrade a common container machine to a swarm node?
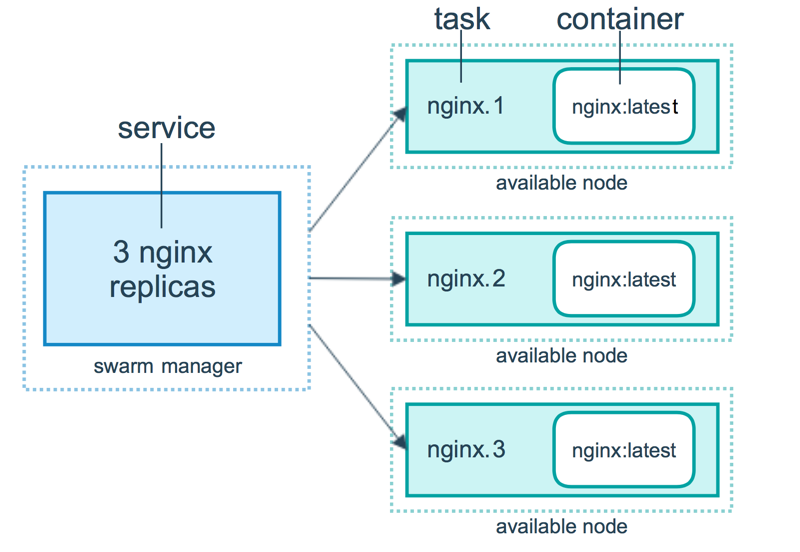
- The common container machine only has the concepts of image and container, while swarm node introduces the concepts of stack, service and task, which can more easily create, scale and manage containers, and also facilitate load balancing.

- After upgrading to a swarm node, it can form a swarm cluster with other containerized machines to manage across nodes.
//First, make sure that the machine has been containerized. Use docker machine to create or Docker Desktop for * * installation.
//Upgrade the machine to a swarm management node.
docker swarm init		//After successful execution, the machine is upgraded to the manager node
//After executing this sentence, you can get a token, which can be added to the cluster later by token and address
docker swarm join --token ****** --listen-addr **
//If you forget the token, you can use the following command to query:
docker swarm join-token manager //Management node token
docker swarm join-token worker //Work node token
//The cluster connection ip port of the management node can be queried by the command:
docker info
Through the above steps, you can upgrade a container machine to a swarm node.
Then refer to the grammar Write the deployment configuration file. Here is the reference
//Services can be accessed through the service name without linking the container with the links parameter
version: "3.7"
networks:
  xxl:
    driver: overlay		//Create overlay network
    ipam:
      driver: default
      config:
        - subnet: 172.18.0.0/16
services:
  nginx:
    image: nginx		//It can only be created through image. The build parameter is not supported
    networks:
      - xxl
    ports:
      - "0.0.0.0:80:80"
      - "0.0.0.0:443:443"
    volumes:
      - "./nginx/nginx.conf:/etc/nginx/nginx.conf:ro"
      - "./dist:/dist:ro"
    deploy:		//The key is the deploy ment parameter. You can take a closer look
      replicas: 1
      placement:
        constraints:
          - node.role== manager
  redis:
    image: redis
    networks:
      - xxl
    ports:
      - "0.0.0.0:6379:6379"
    volumes:
      - "./redis/redis.conf:/etc/redis/redis.conf:ro"
      - "./redis:/data:rw"
    command: redis-server /etc/redis/redis.conf
    deploy:
      replicas: 1
      placement:
        constraints:
          - node.role == manager
  mysql:
    image: xxl-mysql
    networks:
      - xxl
    ports:
      - "0.0.0.0:33060:3306"
    volumes:
      - "./mysql:/var/lib/mysql:rw"
    deploy:
      replicas: 1
      placement:
        constraints:
          - node.role == manager
  rabbitmq:
    image: xxl-rabbitmq
    networks:
      - xxl
    ports:
      - "0.0.0.0:15672:15672"
      - "0.0.0.0:1883:1883"
    deploy:
      replicas: 1
      placement:
        constraints:
          - node.role == manager
  nexus:
    image: sonatype/nexus3
    networks:
      - xxl
    ports:
      - "0.0.0.0:8081:8081"
    volumes:
      - "./nexus:/nexus-data:rw"
    deploy:
      replicas: 1
      placement:
        constraints:
          - node.role == manager
  portainer:		//Used to view the cluster
    image: portainer/portainer
    networks:
      - xxl
    ports:
      - "0.0.0.0:8082:9000"
    volumes:
      - "/var/run/docker.sock:/var/run/docker.sock"
    deploy:
      replicas: 1
      placement:
        constraints:
          - node.role == manager
Then use the yml file to create containers, tasks, services, and stacks
//Create a stack named xxl according to the configuration file
docker stack deploy -c .\docker-compose.yml xxl
//Remove the stack named xxl
docker stack rm xxl
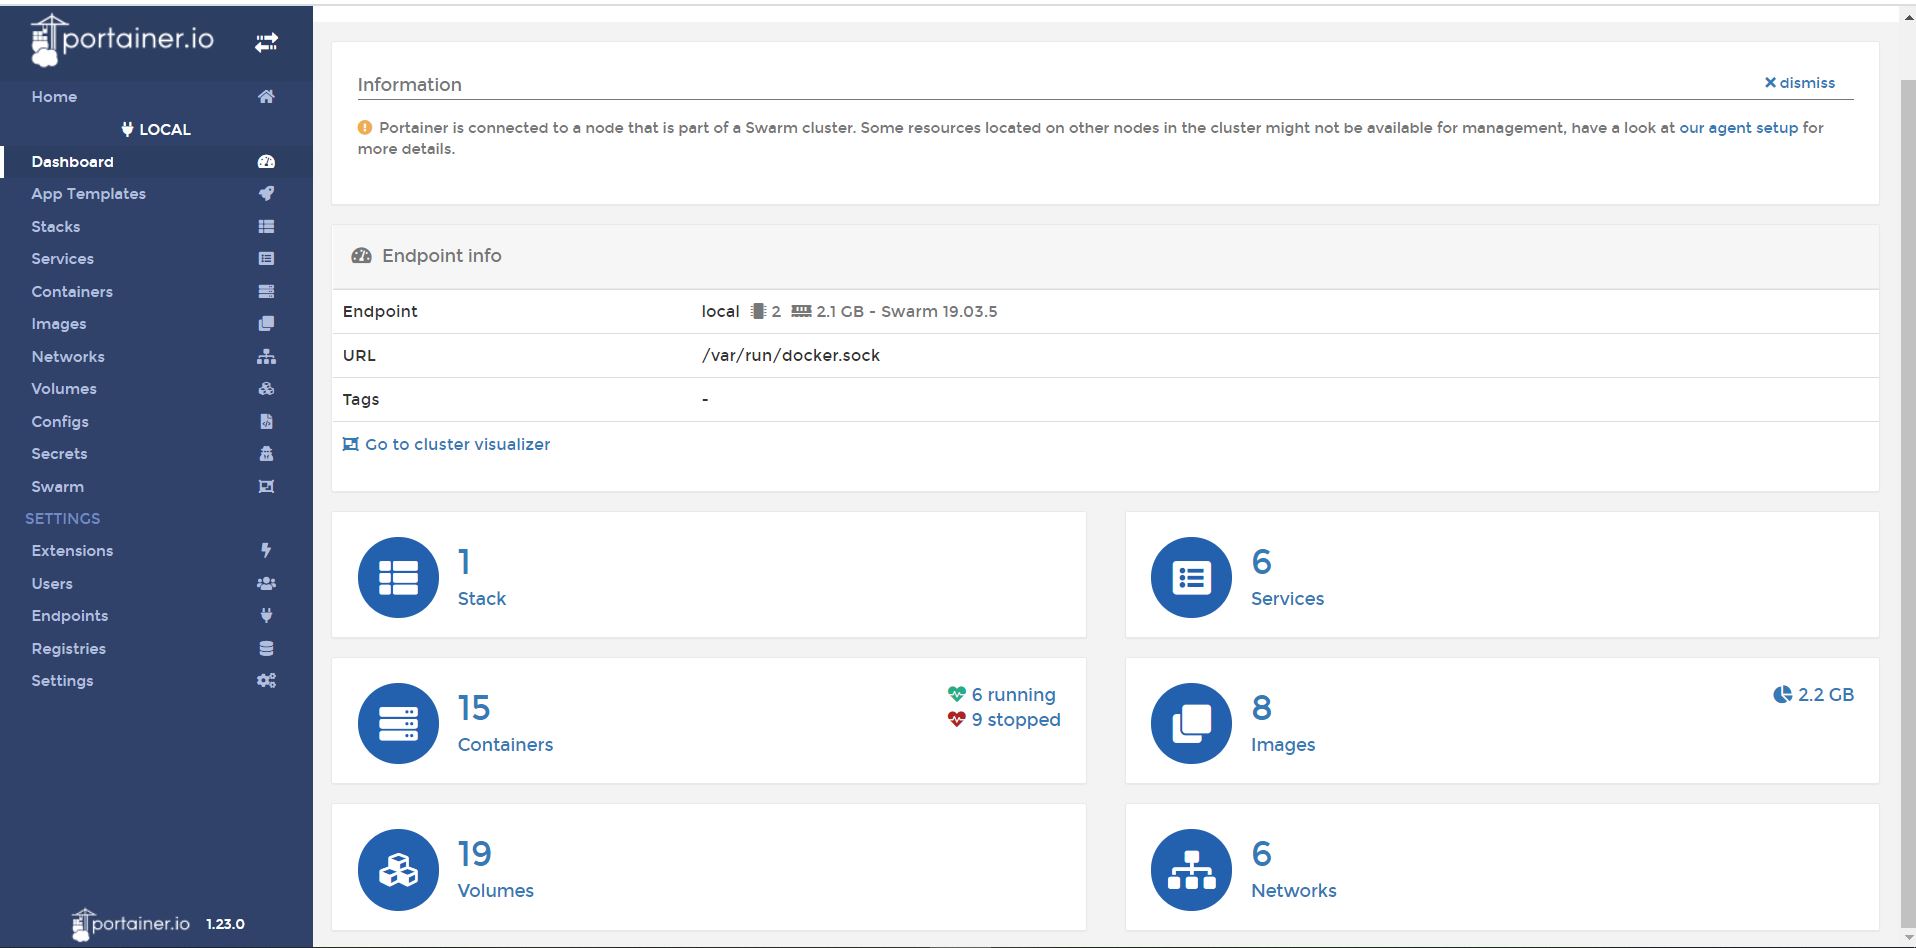
Because the server is added to the service, you can access the http: / / localhost: 8082 / ා / home cluster
At this point, the containerized machine + docker compose deployment has been upgraded to the Swan single node mode successfully.

