1,Docker0
Empty all images and containers in the host; Then view the network IP
# Delete all containers
docker rm -f $(docker ps -aq)

# Delete all mirrors
docker rmi -f $(docker images -aq)

# View IP
ip addr
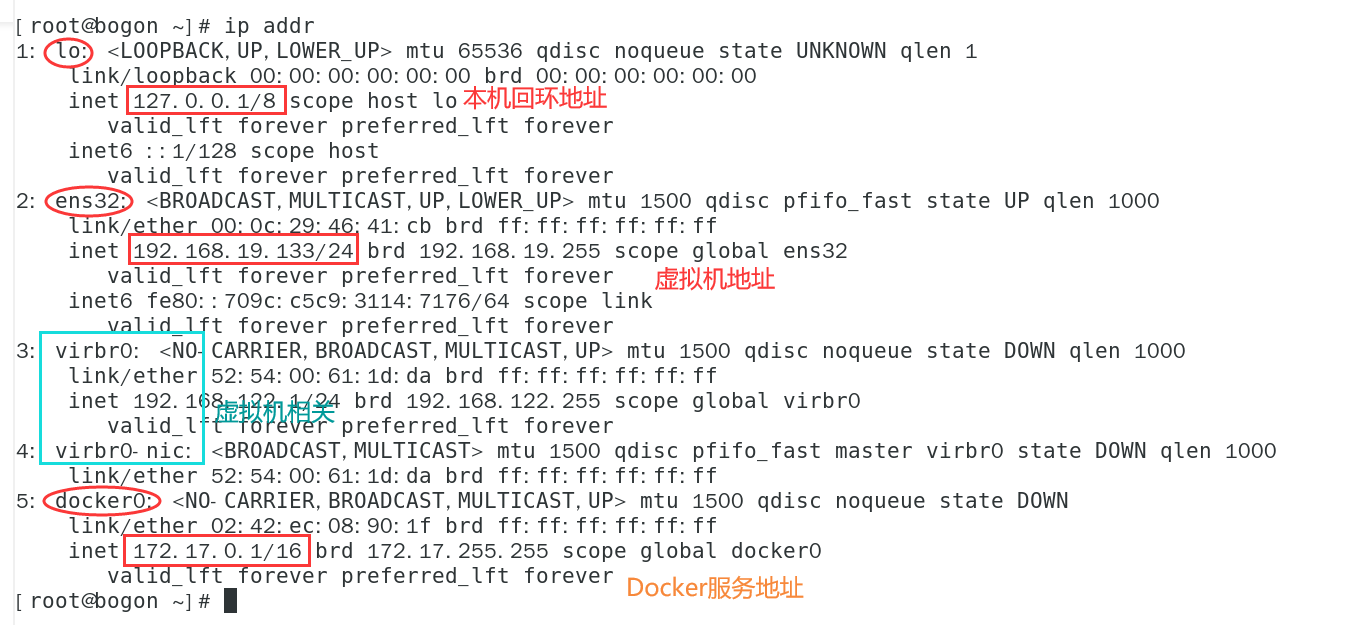
test
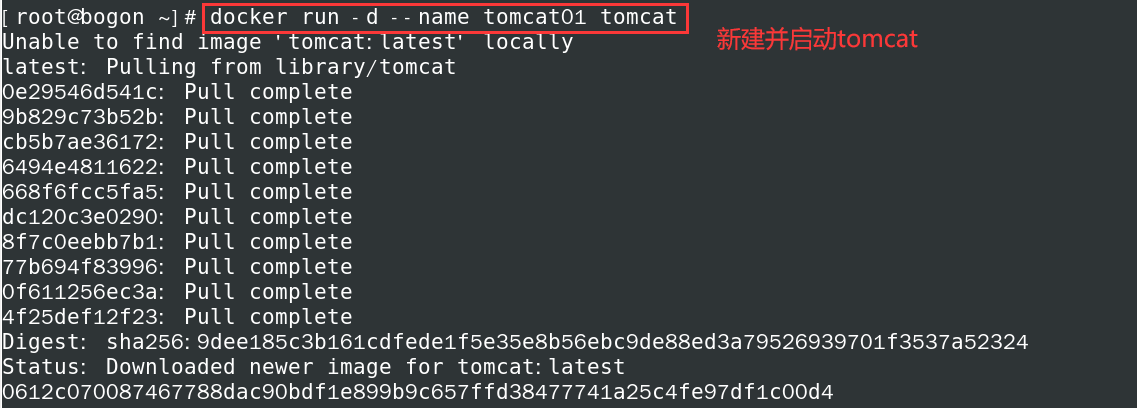
- Create and start a Tomcat container
docker run -d --name tomcat01 tomcat
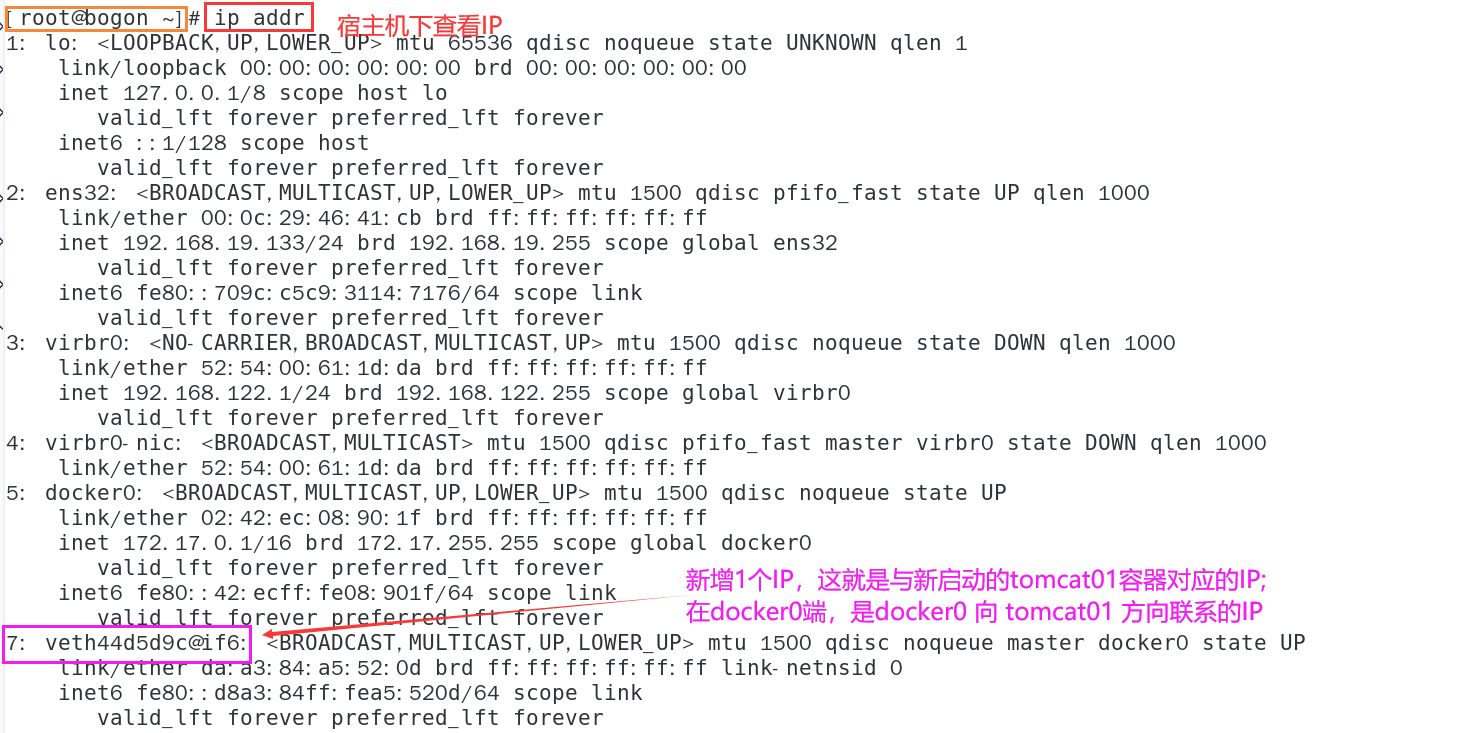
- View IP changes in host
- Try to enter the tomcat01 container to view the internal IP address
docker exec -it tomcat01 ip addr
# An error is found during execution. OCI runtime exec failed; Because the basic image of tomcat container is a compact version, there is no ip addr command in it, so it needs to be installed manually

- Manually install ip related commands in the container
# Manually install ip related commands
# Enter container
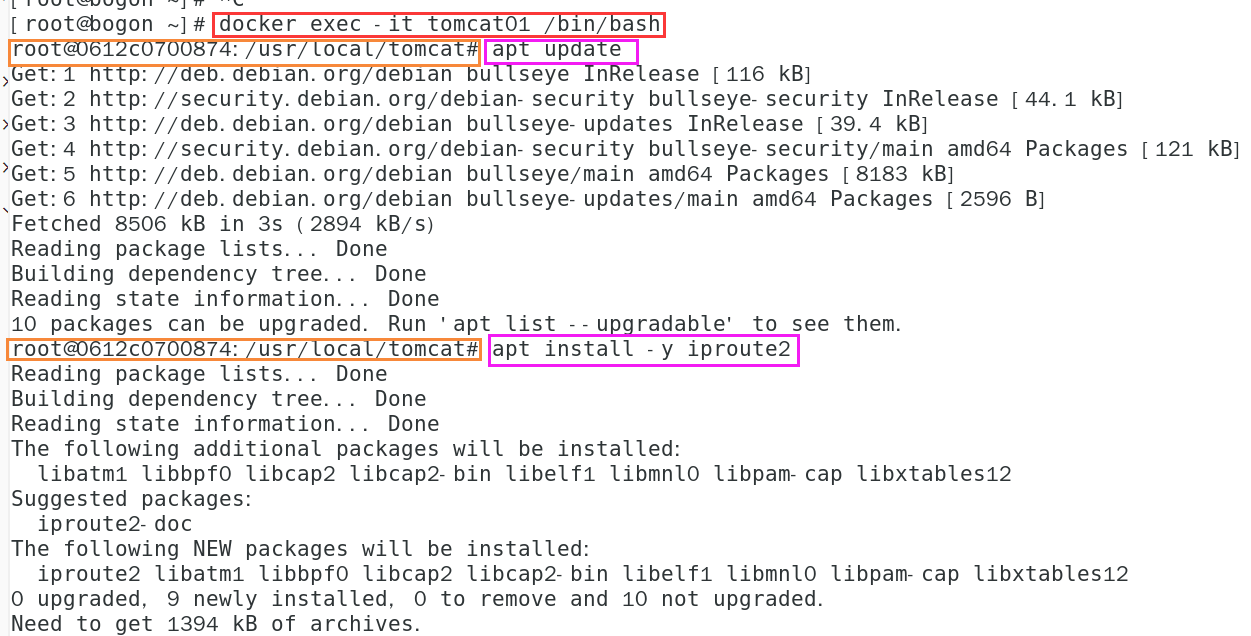
docker exec -it tomcat01 /bin/bash

# Execute in container
apt update
# Execute apt update

# Execute in container
apt install -y iproute2
# Execute apt install -y iproute2
- View IP in tomcat01 container
# View IP in container
ip addr

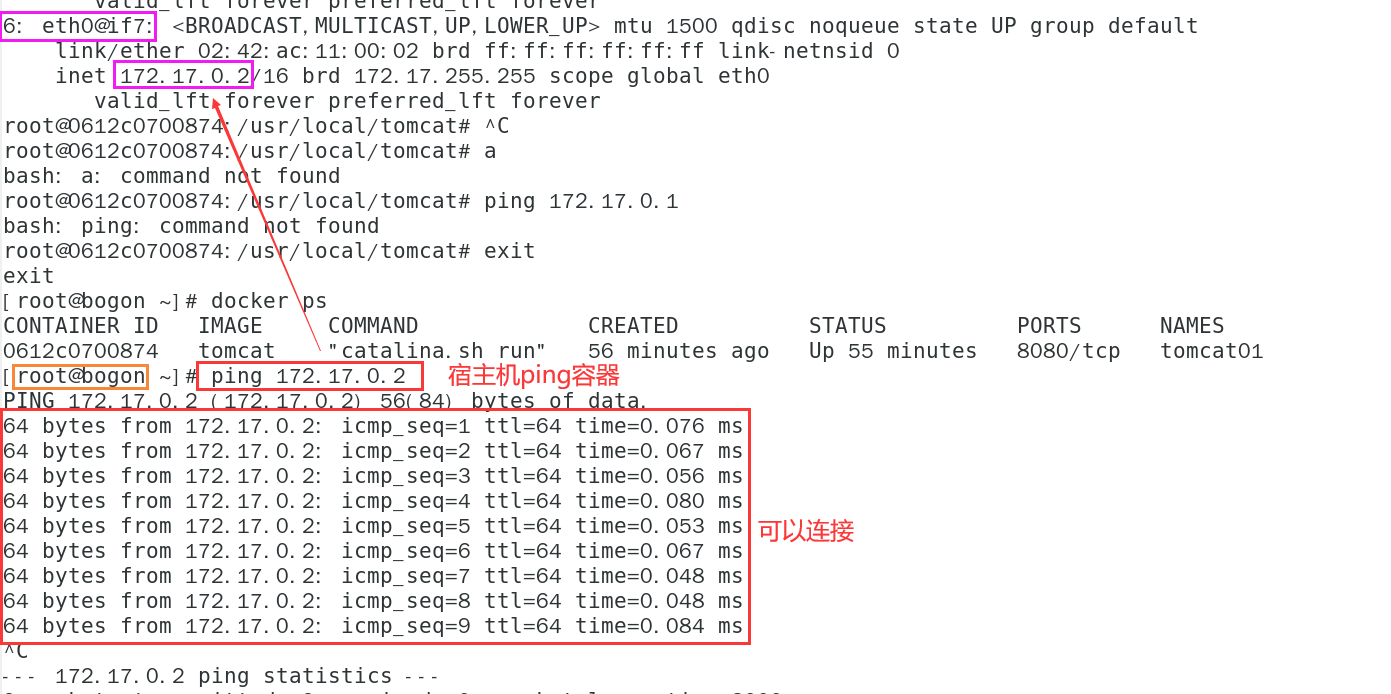
- Host ping container
ping container IP
- Container ping host
# First install the ping command in the container
# Execute the following two commands in sequence in the container
apt-get update
apt install iputils-ping

# ping
# Let's take 172.17.0.1 as the host, but it's actually docker0, which is not exactly the same as the host
ping 172.17.0.1

principle
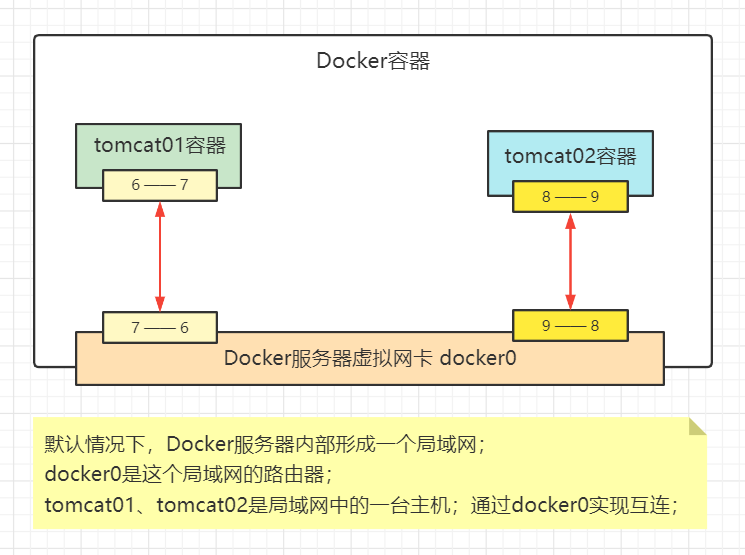
Every time a docker container is started, the docker server will assign an ip to the docker container. As long as the docker server is installed, there will be a docker0 bridging mode, using Veth pair technology!
- Start another container tomcat02
docker run -d --name tomcat02 tomcat
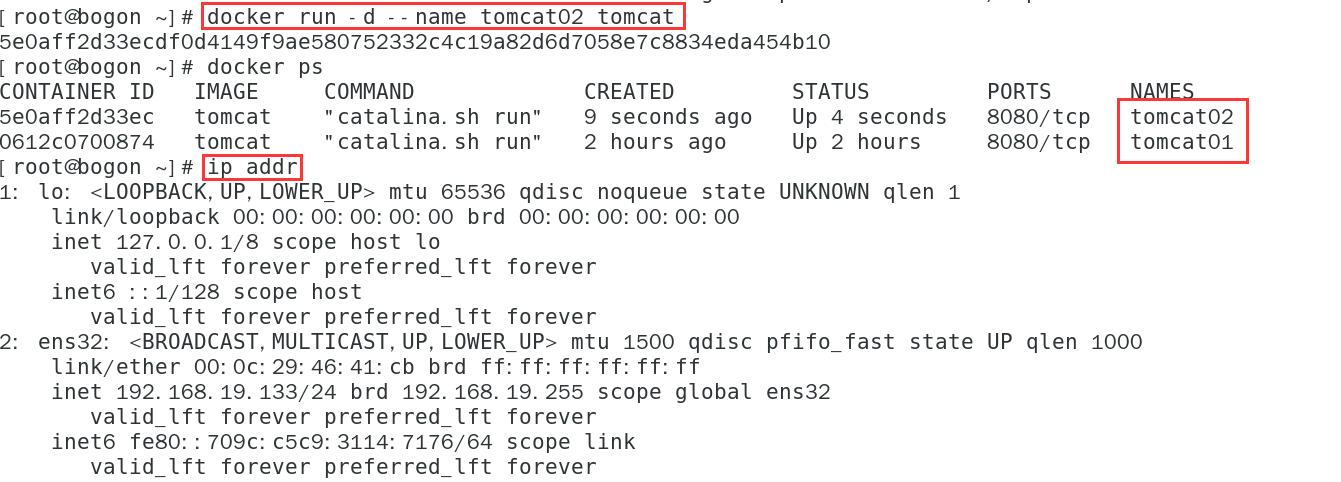

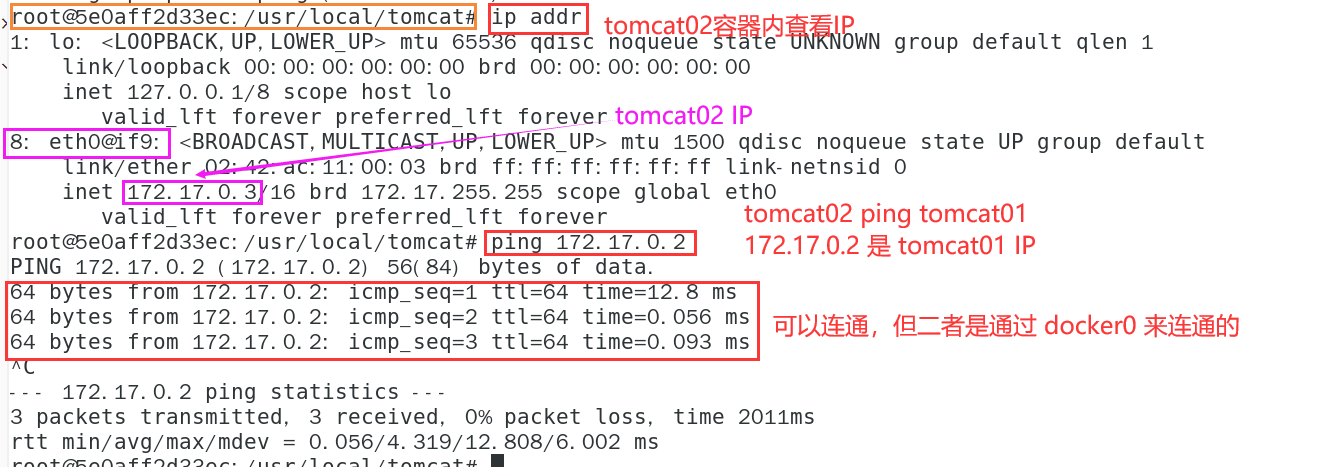
- tomcat02 container ping tomcat01 container
# Install ip and ping commands in tomcat02

# tomcat02 execution in container
# ip command
apt update
apt install -y iproute2

# ping command
apt-get update
apt install iputils-ping

# ping
ping 172.17.0.2
- tomcat01 container ping tomcat02 container
# Enter tomcat01 and ping tomcat02
docker exec -it tomcat01 ping 172.17.0.3

summary
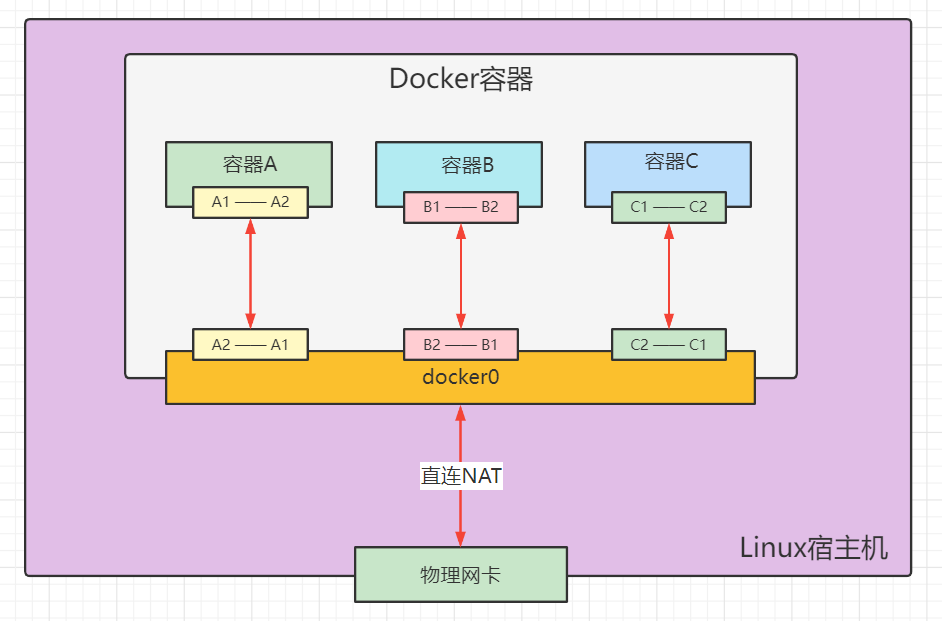
- All network interfaces in Docker are virtual, which has high forwarding efficiency
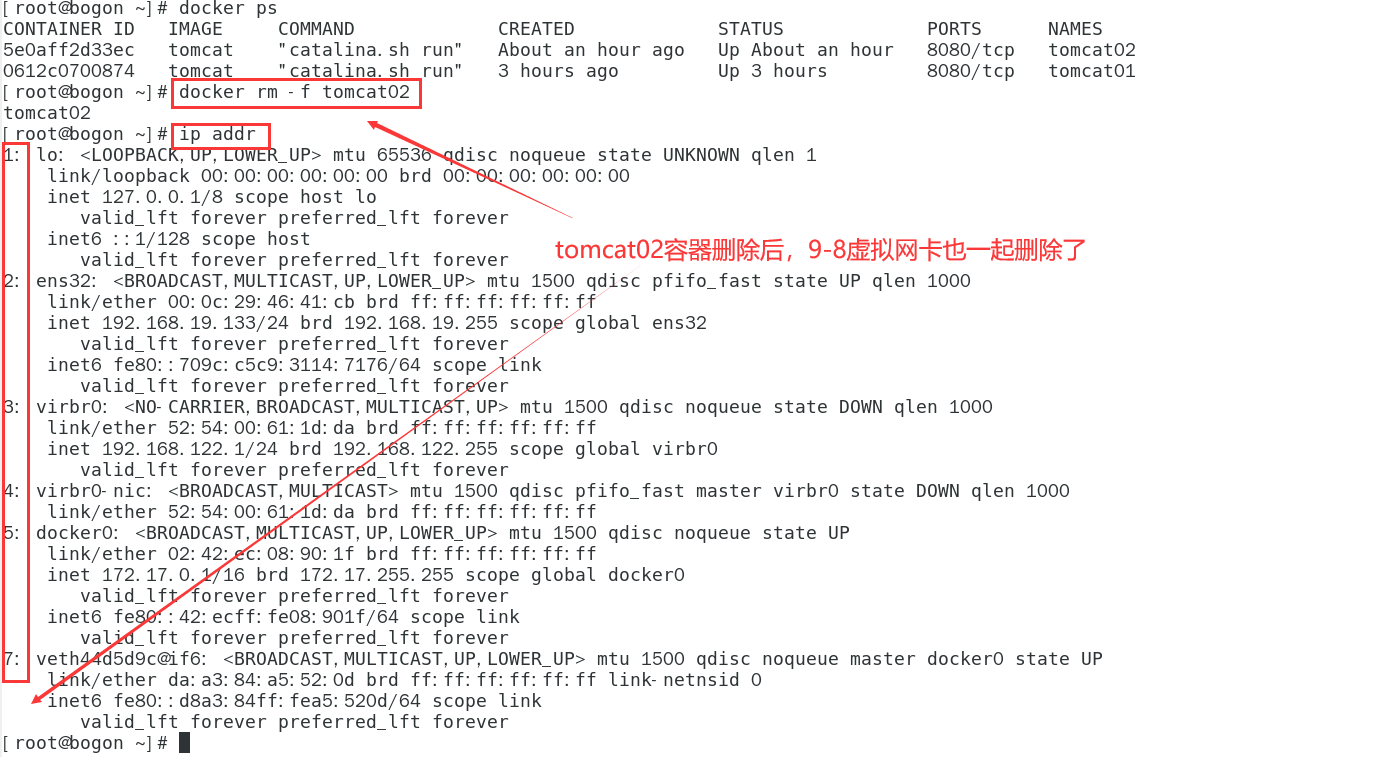
- As long as the container is deleted, the corresponding bridge will be gone!

2,–link
- --link container name
- You can connect through the container name. The essence is to add a mapping in etc/hosts
- -- link is not recommended
# ping the container name directly, but the ping is not valid
docker exec -it tomcat02 ping tomca01
ping: tomca01: Name or service not known


# Run a tomcat03 --link tomcat02
docker run -d -P --name tomcat03 --link tomcat02 tomcat
5f9331566980a9e92bc54681caaac14e9fc993f14ad13d98534026c08c0a9aef

# ping tomcat02 with tomcat03
# To support ping command in tomcat03
docker exec -it tomcat03 ping tomcat02
PING tomcat02 (172.17.0.3) 56(84) bytes of data.
64 bytes from tomcat02 (172.17.0.3): icmp_seq=1 ttl=64 time=0.115 ms
64 bytes from tomcat02 (172.17.0.3): icmp_seq=2 ttl=64 time=0.080 ms

# Reverse operation
# Using tomcat02 to Ping tomcat03 to Ping fails; Because there is no configuration in tomcat02
explore

docker network inspect network ID
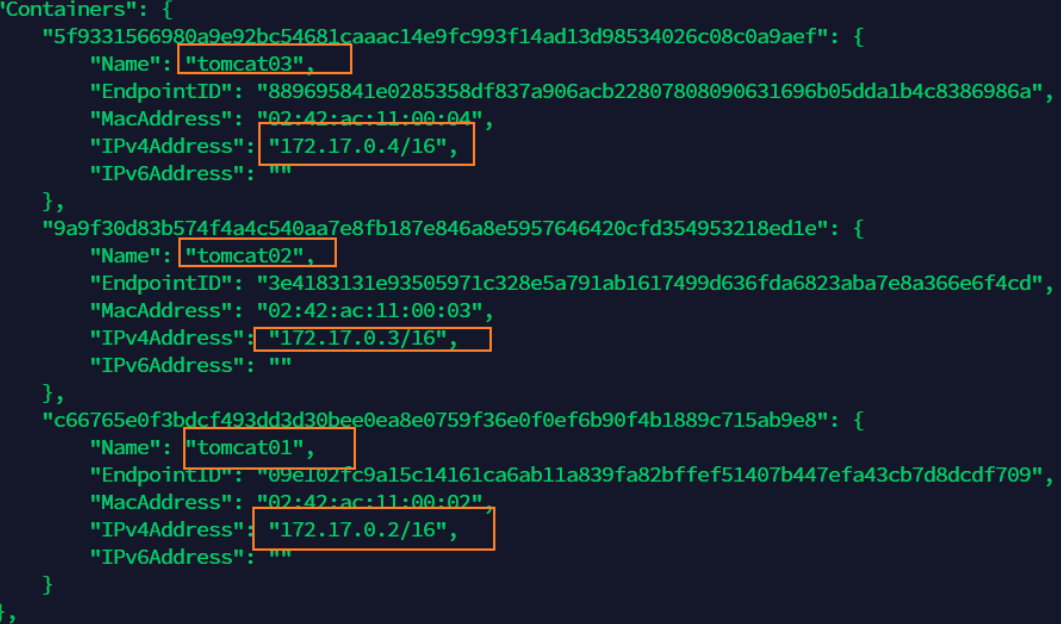
docker inspect tomcat03

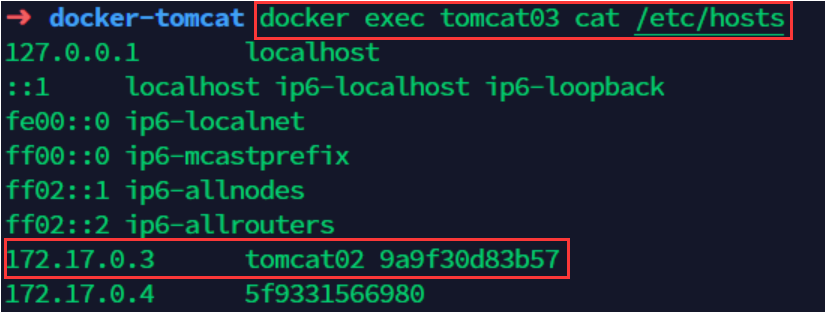
# Check / etc/hosts in tomcat03 and find the configuration of tomcat02
docker exec tomcat03 cat /etc/hosts
3. Custom network
- Custom network, do not use docker0! Recommended!
- docker0 problem: container name connection access is not supported!
- Basic command
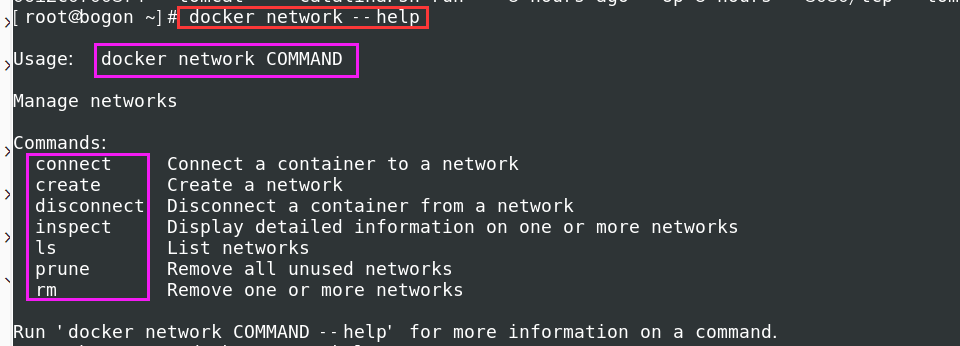
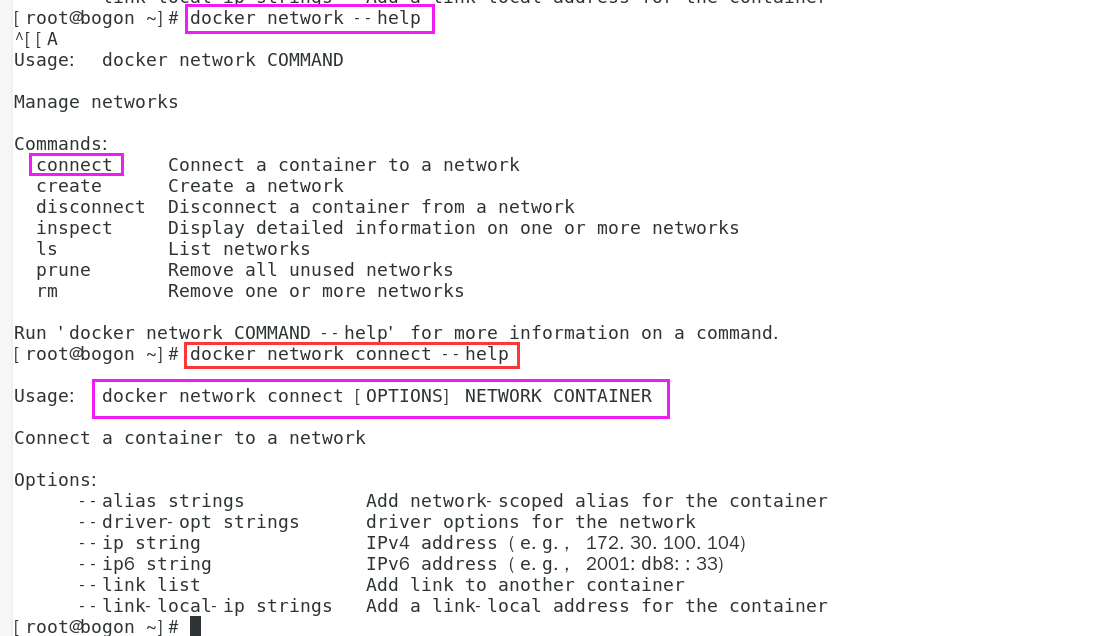
docker network --help

Usage:  docker network COMMAND

Manage networks

Commands:
  connect     Connect a container to a network
  create      Create a network
  disconnect  Disconnect a container from a network
  inspect     Display detailed information on one or more networks
  ls          List networks
  prune       Remove all unused networks
  rm          Remove one or more networks
- View all docker networks
docker network ls

- Network mode
- Bridge: Bridge docker (by default, you can create it yourself in bridge mode)
- none: the network is not configured. Generally, it is not used
- Host: share the network with the host
- Container: container network connectivity (less used! Very limited)
test
# The command to start directly -- net bridge, and this is docker0
# bridge is docker0
# The following two commands are equivalent
docker run -d -P --name tomcat01 tomcat
docker run -d -P --name tomcat01 --net bridge tomcat

# docker0, features: by default, the container name (domain name) cannot be accessed-- link can get through the connection, but it's troublesome!
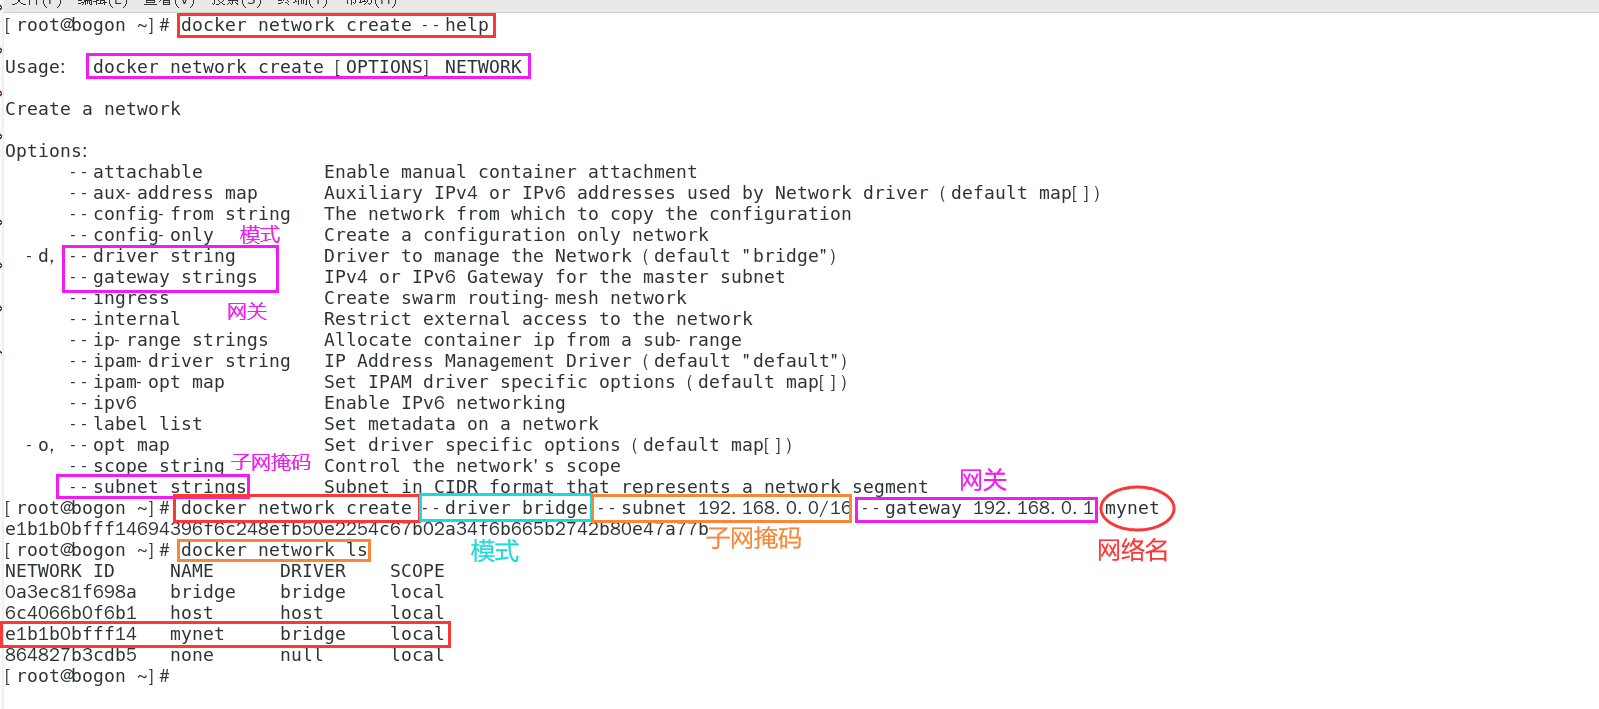
- Custom network
# --driver: network mode
# --Subnet: subnet mask
# --gateway: gateway
docker network create --driver bridge --subnet 192.168.0.0/16 --gateway 192.168.0.1 mynet
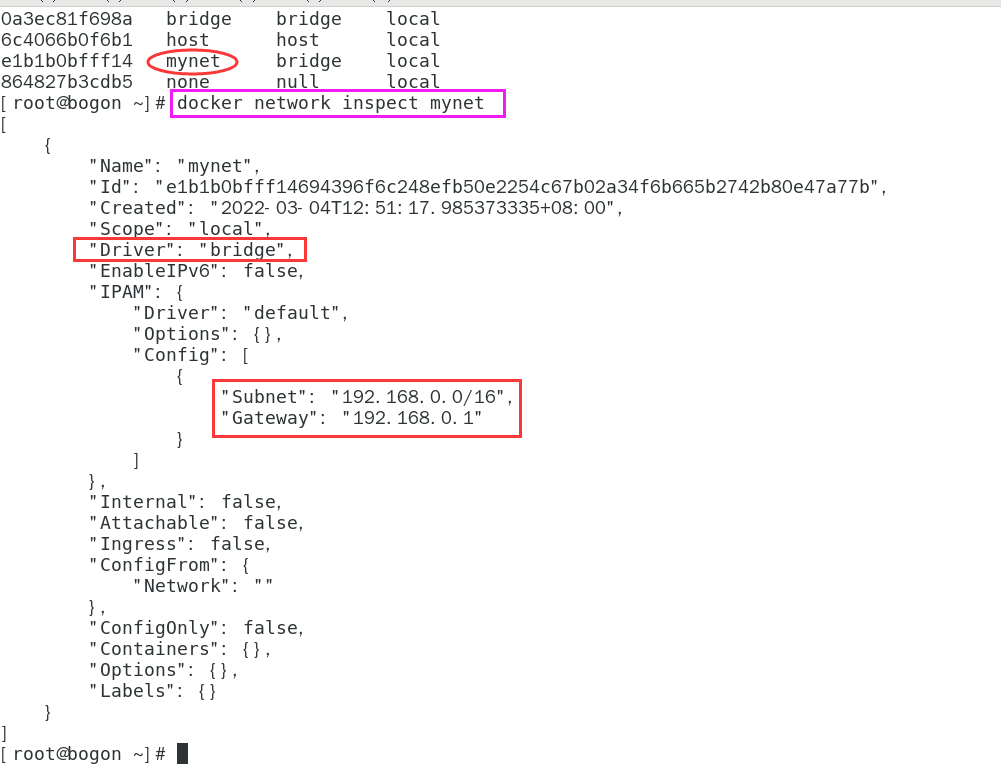
- View custom network information
docker network inspect mynet
- Launch two tomcat containers with a custom network
docker run -d -P --name tomcat-net-01 --net mynet tomcat
docker run -d -P --name tomcat-net-02 --net mynet tomcat

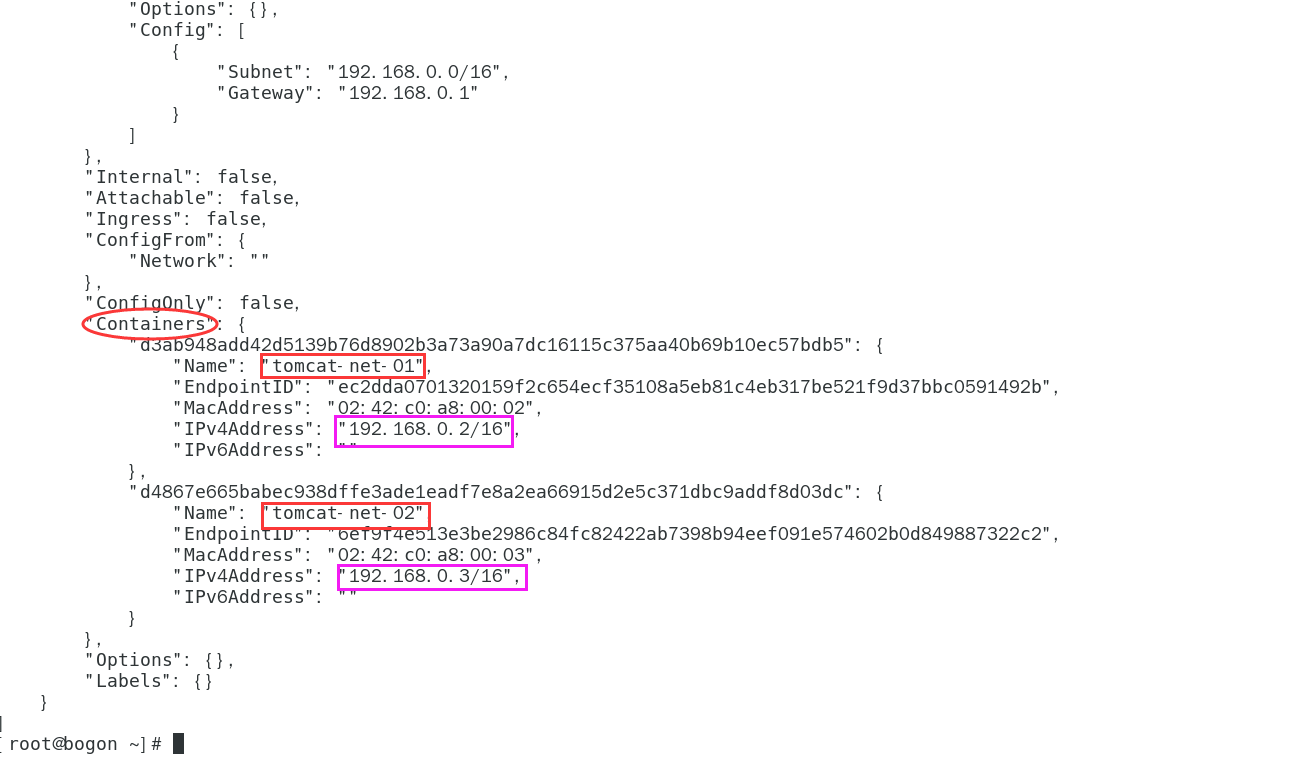
- View custom network information again
docker network inspect mynet
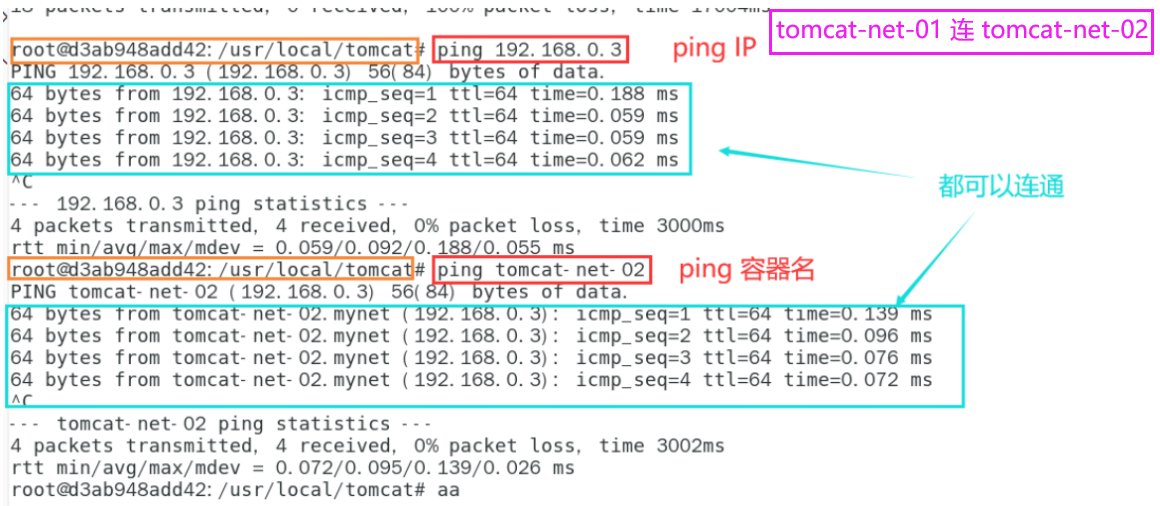
- Test the connection between two containers in a custom network
# First, install the ping command in two containers
apt-get update
apt install iputils-ping
# tomcat-net-01 ping tomcat-net-02
# ping ip
ping 192.168.0.3
# ping container name
ping tomcat-net-02

Benefits:
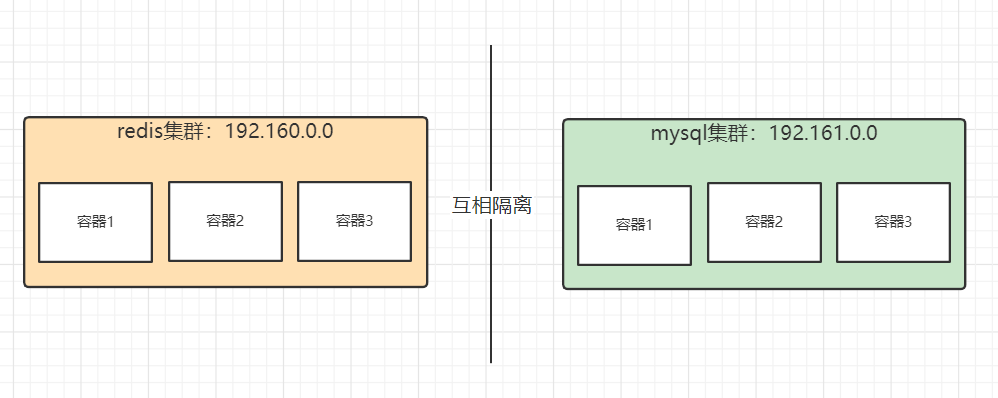
Different clusters use different networks to ensure that the cluster is safe and healthy
4. Network connectivity
docker network connect network name or ID container name or ID
Interworking containers in different network segments
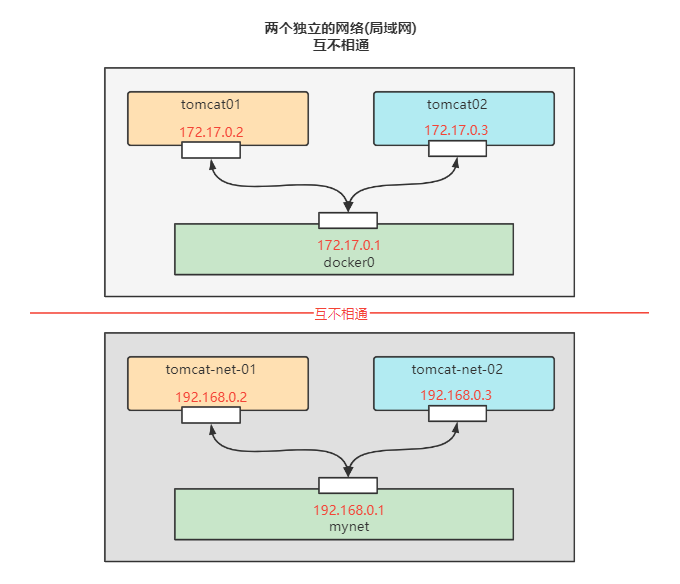
- Current container network condition

-
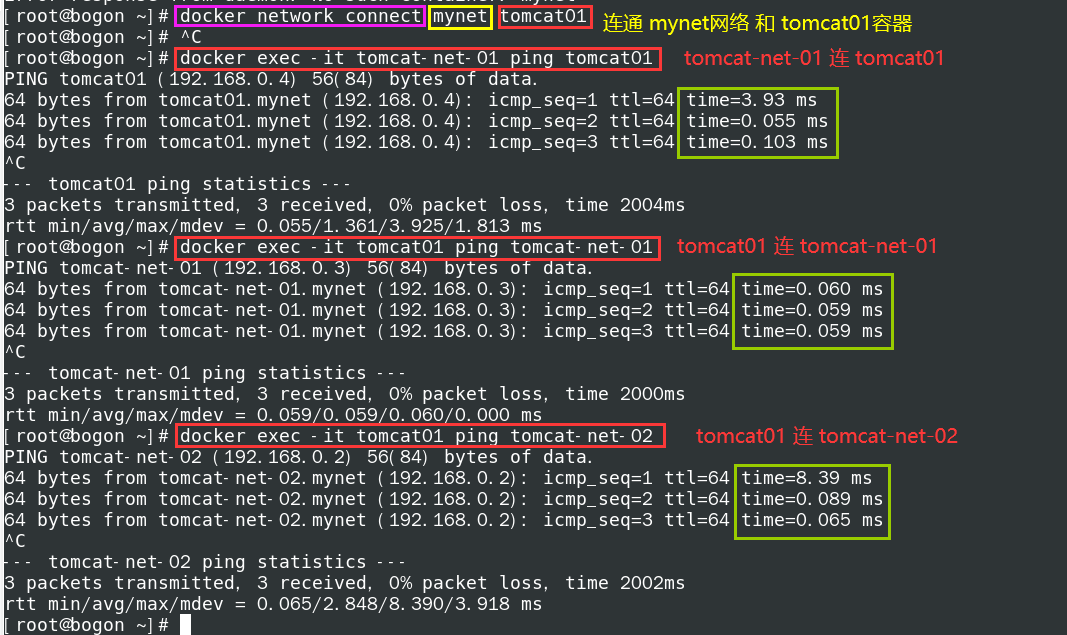
tomcat01 connected to mynet
To connect tomcat01 to tomcat-net-01, to connect is to add tomcat01 to mynet network
One container and two IPS (tomcat01)
docker network connect mynet tomcat01
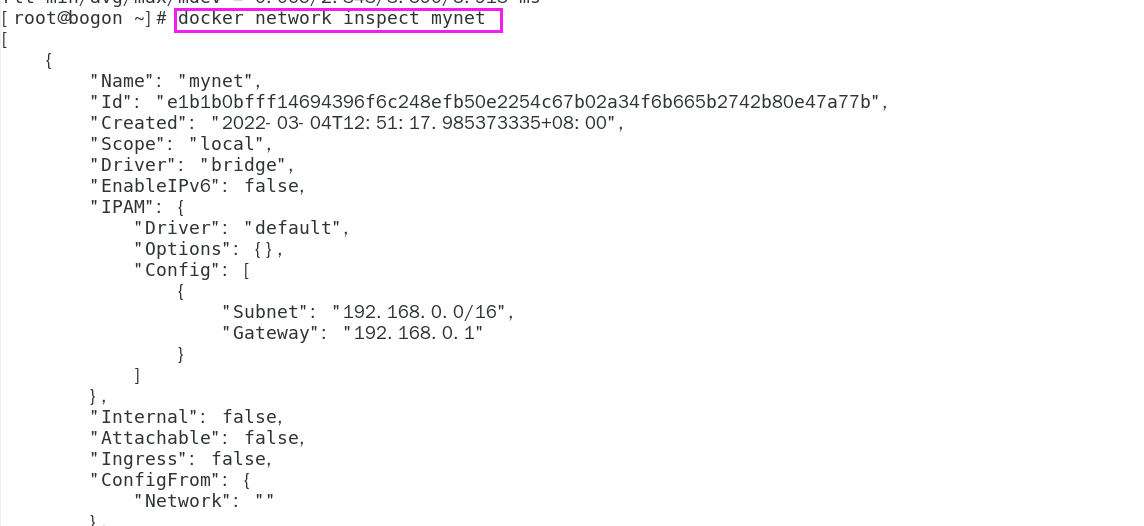
- View mynet network
docker network inspect mynet
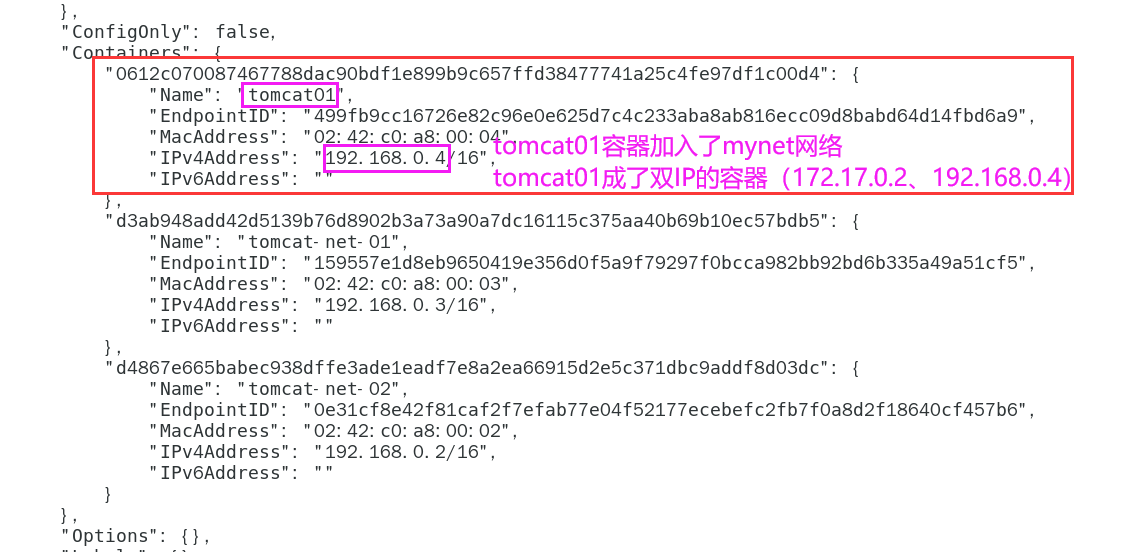
-
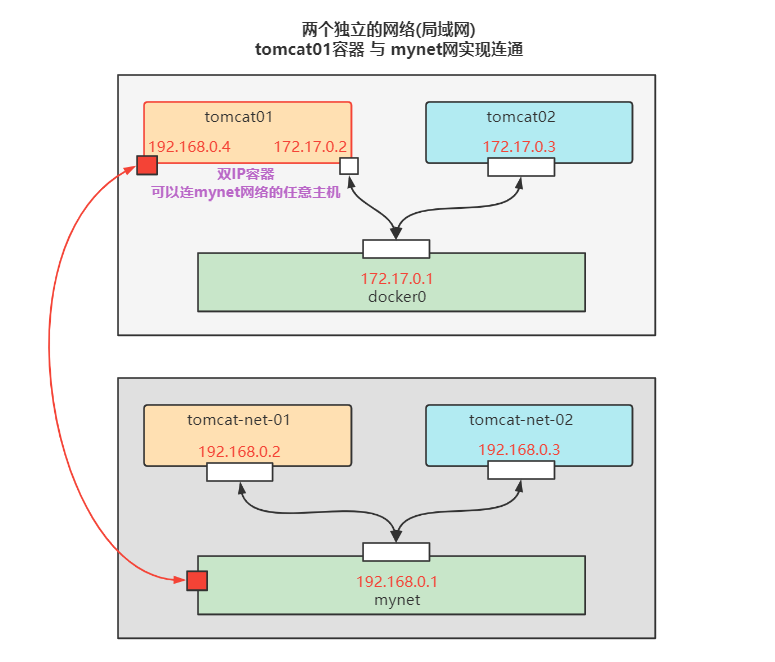
Network connection diagram
- Tomcat01 is connected with mynet. At this time, any host in tomcat01 and mynet can be connected
- tomcat02 and mynet are still disconnected
5. Actual combat: deploy Redis cluster
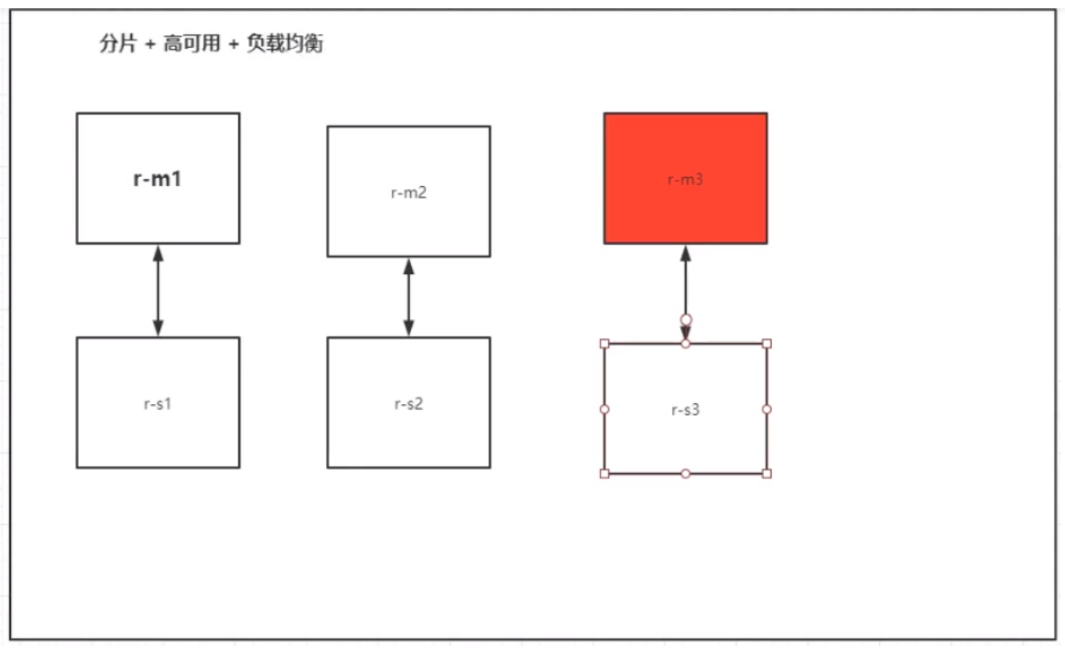
# Create network card
docker network create redis --subnet 172.38.0.0/16
# Create six redis configurations through scripts
for port in $(seq 1 6);\
do \
mkdir -p /mydata/redis/node-${port}/conf
touch /mydata/redis/node-${port}/conf/redis.conf
cat << EOF >> /mydata/redis/node-${port}/conf/redis.conf
port 6379
bind 0.0.0.0
cluster-enabled yes
cluster-config-file nodes.conf
cluster-node-timeout 5000
cluster-announce-ip 172.38.0.1${port}
cluster-announce-port 6379
cluster-announce-bus-port 16379
appendonly yes
EOF
done

# Run six redis through script
for port in $(seq 1 6);\
docker run -p 637${port}:6379 -p 1667${port}:16379 --name redis-${port} \
-v /mydata/redis/node-${port}/data:/data \
-v /mydata/redis/node-${port}/conf/redis.conf:/etc/redis/redis.conf \
-d --net redis --ip 172.38.0.1${port} redis:5.0.9-alpine3.11 redis-server /etc/redis/redis.conf
docker exec -it redis-1 /bin/sh #redis does not have bash by default
redis-cli --cluster create 172.38.0.11:6379 172.38.0.12:6379 172.38.0.13:6379 172.38.0.14:6379 172.38.0.15:6379 172.38.0.16:6379  --cluster-replicas 1
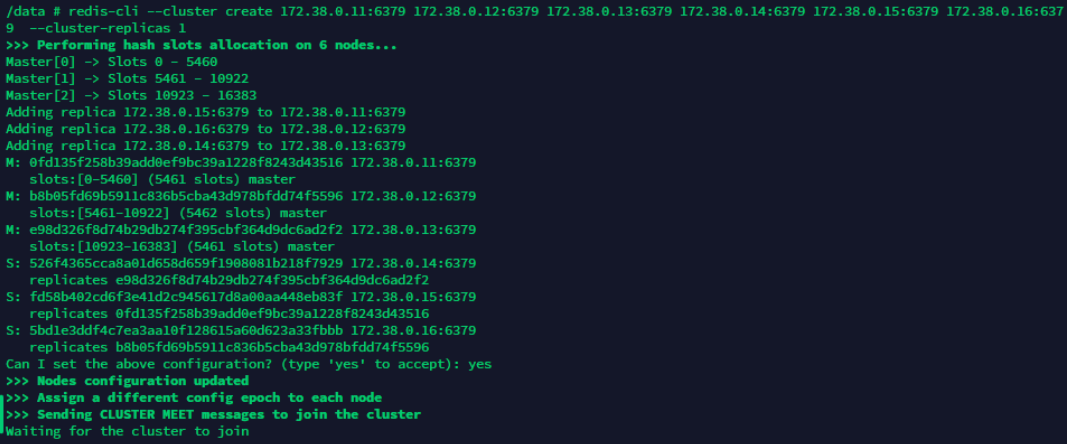
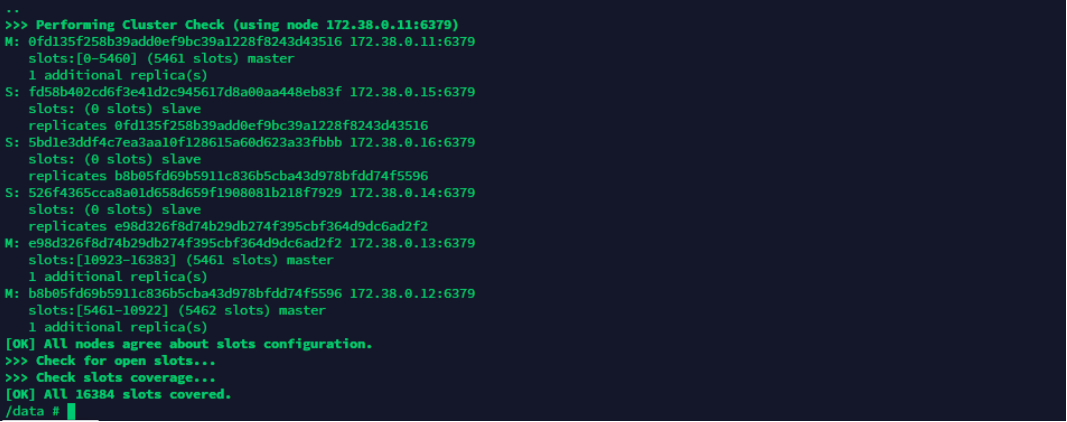
docker set up the redis cluster!
