Okay, entrusted to a friend, Xiaobian will record the EDVR code in detail in the first person in this article.
1. Environment Configuration
Configuration of virtual environments based on virtualenv can be found in the blog vid2vid Code Debugging+Training+Test (debug+train+test) (1) Test Paper.
2. Download Code
$ git clone https://github.com/xinntao/EDVR.git
$ cd EDVR
After that we'll be in'.../EDVR/"directory.
3. Preparing the dataset
Under directory'.../EDVR/datasets/' The filename of a file implies that we place the data in that directory.
Suppose we are now doing the task of DEBLUR, which requires the same resolution of the training data (input and output).The training data structure is as follows _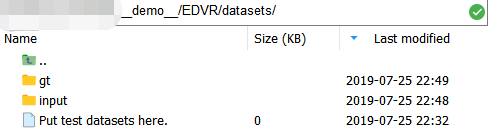
"""
datasets
     |--input
           |--000000                        # clip
               |--000000.jpg
               |--000001.jpg
               ...
               |--000029.jpg                    # 30 frames for each clip in our datasets
           |--000001
               |--000000.jpg
               ...
           ...
     |--gt
           |--000000                        # clip
               |--000000.jpg
               |--000001.jpg
               ...
               |--000029.jpg                    # 30 frames for each clip in our datasets
           |--000001
               |--000000.jpg
               ...
           ...
"""
** Here our picture format is.jpg;
** The video clip (subfolder) format is: xxxxxx
** The format for naming frames is: xxxxxx.jpg
** Image size is: 480 high x Wide 640

** These are important and we'll change the code later.
This project also encapsulates the data beforehand because if each iteration (note that we have several epochs during training, and there are many iterations in each epoch, i.e. iterations, the number of iterations depends on the size of the dataset and the batch size selected, generally num of iterations = size of datasets / batch size) Reading picture data from disk will be slow!Therefore, using the lmdb library, which is a database, is typically loaded directly in memory, so reading is fast!
Let's first look at the generated code.
pip install lmdb
# Install the corresponding python library first
cd goes into the directory'/u demo_u/EDVR/codes/data_scripts/',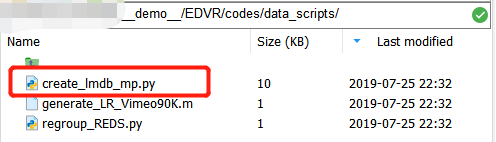 This project was originally designed for two datasets: 1) vimeo90k for user video superresolution tasks, and 2) REDS for video frame de-blurring.
The input of the data in the small edition here is the same resolution as the GT, so it should be a video deblurring task similar to REDS; therefore, we intend to modify the code in the file "greate_lmdb_mp.py" to generate the file in LMDB format for the REDS dataset.
There are four functions in total, so we modify the third REDS.We copy the entire function and rename it OURS.
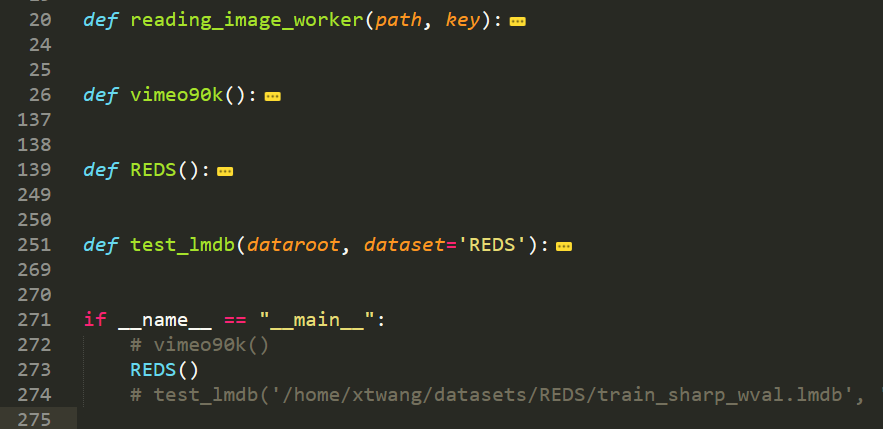
Note that the comment'# **'is the line and comment that was modified.
def OURS(mode="input"):
    '''create lmdb for the REDS dataset, each image with fixed size
    GT: [3, H, W], key: 000000_000000
    LR: [3, H, W], key: 000000_000000
    key: 000000_00000
    ** Remember our previous data structure?{Subdirectory Name}_{Picture Name}
    '''
    #### configurations
    mode = mode                                                                     # ** Data mode: input / gt
    read_all_imgs = False  # whether real all images to the memory. Set False with limited memory
    BATCH = 5000           # After BATCH images, lmdb commits, if read_all_imgs = False

    if mode == 'input':
        img_folder = './../../datasets/train/input'                                 # **input to our dataset using relative paths
        lmdb_save_path = './../../datasets/train_input_wval.lmdb'                   # **Path to the lmdb file store to be generated
        '''Instead of using global paths, we use relative paths'''
        H_dst, W_dst = 480, 640                                                     # Frame size: H, W

    elif mode == 'gt':
        img_folder = './../../datasets/train/gt'                                    # **input to our dataset using relative paths
        lmdb_save_path = './../../datasets/train_gt_wval.lmdb'                      # **Path to the lmdb file store to be generated
        '''Instead of using global paths, we use relative paths'''
        H_dst, W_dst = 480, 640                                                     # Frame size: H, W

    n_thread = 40
    ########################################################
    if not lmdb_save_path.endswith('.lmdb'):
        raise ValueError("lmdb_save_path must end with \'lmdb\'.")                  # Save format must end with'.lmdb'
    #### whether the lmdb file exist
    if osp.exists(lmdb_save_path):
        print('Folder [{:s}] already exists. Exit...'.format(lmdb_save_path))       # Does the file already exist
        sys.exit(1)

    #### read all the image paths to a list
    print('Reading image path list ...')
    all_img_list = data_util._get_paths_from_images(img_folder)                     # Gets the full path name of all frames under input/gt as a list
    keys = []
    for img_path in all_img_list:
        split_rlt = img_path.split('/')
        # Take subfolder name XXXX
        a = split_rlt[-2]
        # Take the name of the frame, go out file suffix XXXX
        b = split_rlt[-1].split('.jpg')[0]                                          # ** Our image ends with'.jpg'
        keys.append(a + '_' + b)

    if read_all_imgs:                                                               # read_all_images = False, so this part doesn't matter
        #### read all images to memory (multiprocessing)
        dataset = {}  # store all image data. list cannot keep the order, use dict
        print('Read images with multiprocessing, #thread: {} ...'.format(n_thread))
        pbar = util.ProgressBar(len(all_img_list))

        def mycallback(arg):
            '''get the image data and update pbar'''
            key = arg[0]
            dataset[key] = arg[1]
            pbar.update('Reading {}'.format(key))

        pool = Pool(n_thread)
        for path, key in zip(all_img_list, keys):
            pool.apply_async(reading_image_worker, args=(path, key), callback=mycallback)
        pool.close()
        pool.join()
        print('Finish reading {} images.\nWrite lmdb...'.format(len(all_img_list)))

    #### create lmdb environment
    data_size_per_img = cv2.imread(all_img_list[0], cv2.IMREAD_UNCHANGED).nbytes    # Image Size per Frame (byte)
    if 'flow' in mode:
        data_size_per_img = dataset['000_00000002_n1'].nbytes
    print('data size per image is: ', data_size_per_img)
    data_size = data_size_per_img * len(all_img_list)                               # How much space is needed in total
    env = lmdb.open(lmdb_save_path, map_size=data_size * 10)                        # Get so many bits

    #### write data to lmdb
    pbar = util.ProgressBar(len(all_img_list))
    txn = env.begin(write=True)
    idx = 1
    for path, key in zip(all_img_list, keys):
        idx = idx + 1
        pbar.update('Write {}'.format(key))
        key_byte = key.encode('ascii')
        data = dataset[key] if read_all_imgs else cv2.imread(path, cv2.IMREAD_UNCHANGED)
        if 'flow' in mode:
            H, W = data.shape
            assert H == H_dst and W == W_dst, 'different shape.'
        else:
            H, W, C = data.shape  # fixed shape
            assert H == H_dst and W == W_dst and C == 3, 'different shape.'
        txn.put(key_byte, data)
        if not read_all_imgs and idx % BATCH == 1:
            txn.commit()
            txn = env.begin(write=True)
    txn.commit()
    env.close()
    print('Finish writing lmdb.')

    #### create meta information                                                    # Storing metadata: name (str) + resolution (str)
    meta_info = {}
    meta_info['name'] = 'OURS_{}_wval'.format(mode)                                 # ** The dataset is now OURS
    if 'flow' in mode:
        meta_info['resolution'] = '{}_{}_{}'.format(1, H_dst, W_dst)
    else:
        meta_info['resolution'] = '{}_{}_{}'.format(3, H_dst, W_dst)
    meta_info['keys'] = keys
    pickle.dump(meta_info, open(osp.join(lmdb_save_path, 'meta_info.pkl'), "wb"))
    print('Finish creating lmdb meta info.')
Incidentally modify the following "if u name_u =='u main_u':" as follows:
if __name__ == "__main__":
    OURS(mode="input")
    OURS(mode="gt")
Then execute in the current directory:
$ python create_lmdb_mp.py
Once we've finished, we'll see two more lmdb files in the datasets directory: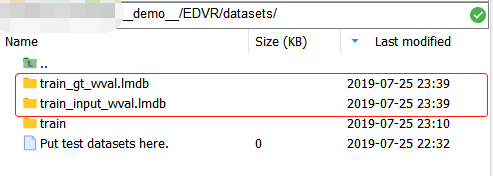 And they are actually folders!Include under each folder
 Where: data.mdb contains data from an image array (stored in binary form), lock.mdb is a lock in the database that prevents read-write conflicts, and meta_info.pkl has three parts, structured as follows:
"""
{
    'name': 'xxxxxxxxxxxx',
    'resolution': '3_480_640',
    'keys': ['000000_000000', '000000_000001', ...]
}
"""
Yes, we need these key s to access the corresponding image data in data.mdb!
Now that we're ready for the data, we're still one final step away!Obviously, the new "train_input_wval.lmdb" in the datasets directory has the same content as the meta_info.pkl in "train_gt_wval.lmdb"!!!We need to copy one of them to the "EDVR/codes/data/" directory. It's important to use it during training!
$ cd ../
$ cp datasets/train_input_wval.lmdb/meta_info.pkl codes/data/
Okay, here's the data ready!
4. Modify model configuration
Now let's modify the training profile under'/EDVR/codes/options/train/'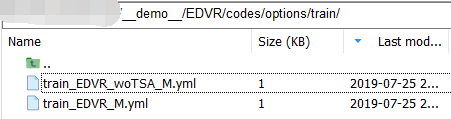 .First copy one of them to the same directory, change the name to "train_EDVR_OURS_M.yml", and then change it as follows:
#### general settings
name: 001_EDVR_OURS                     # **Lab Name
use_tb_logger: true
model: VideoSR_base
distortion: sr
scale: 4
gpu_ids: [0]                            # ** Because the small lab is shy, only one card can be used to train Ha~

#### datasets
datasets:
  train:
    name: REDS
    mode: REDS
    interval_list: [1]                  # The sampling frequency of the frame is:..., t-2k, t-k, t, t+k, t+2k,...
    random_reverse: false
    border_mode: false
    dataroot_GT: ./../datasets/train_gt_wval.lmdb
    dataroot_LQ: ./../datasets/train_input_wval.lmdb
                                        # **Modify the path of the training data to point to the lmdb file we generated above, as this command is intended for. /EDVR/codes/train.py, so we need to define the relative path based on. /EDVR/codes/
    cache_keys: meta_info.pkl           # **The meta_info.pkl we copied earlier

    N_frames: 5
    use_shuffle: true
    n_workers: 3  # per GPU
    batch_size: 16                      # ** Don't batch size too big, or you can't eat a single card, Tuhao Lab's multi-card distribution should be random~
    GT_size: 256
    LQ_size: 256                        # **Note that in the deblur task, the size of input and output is the same
    use_flip: true
    use_rot: true
    color: RGB

#### network structures network structure
network_G:
  which_model_G: EDVR
  nf: 64
  nframes: 5
  groups: 8
  front_RBs: 5
  back_RBs: 10
  predeblur: true                                                      # **Whether to use a precoding layer which is used to downsample the input HxW to obtain H/4xW/4 feature s to match the latter network
  HR_in: true                                                          # ** Important!!Set to true as long as your input and output are of the same resolution
  w_TSA: true                                                          # ** Whether to use TSA module

#### path
path:
  pretrain_model_G: ~                   # ~denotes None
  strict_load: true
  resume_state: ~

#### training settings: learning rate scheme, loss
train:
  lr_G: !!float 4e-4
  lr_scheme: CosineAnnealingLR_Restart
  beta1: 0.9
  beta2: 0.99
  niter: 600000
  warmup_iter: -1  # -1: no warm up
  T_period: [150000, 150000, 150000, 150000]
  restarts: [150000, 300000, 450000]
  restart_weights: [1, 1, 1]
  eta_min: !!float 1e-7

  pixel_criterion: cb
  pixel_weight: 1.0
  val_freq: !!float 2e3

  manual_seed: 0

#### logger
logger:
  print_freq: 10                                                       # How many iterations to print the log
  save_checkpoint_freq: !!float 2e3                                    # How many iterations to save the model
When we're done, there's one more thing we need to change,'. /EDVR/codes/data/REDS_dataset.py'.
The rules for reading data for this project are: encapsulating all data in the form of lmdb in the previous section requires reading by key (picture name, no suffix); in dataset_u getitem_, reading all keys first (that is, the value corresponding to keys in the meta_info.pkl file we need to prepare earlier)), then read several consecutive keys at a time, and get the image array through the _read_img_mc_BGR function
First, near line 45,
        #### directly load image keys
        if opt['cache_keys']:
            # Here we get our meta_info.pkl and we want to read it
            logger.info('Using cache keys: {}'.format(opt['cache_keys']))
            cache_keys = opt['cache_keys']
        else:
            cache_keys = 'REDS_trainval_keys.pkl'
        logger.info('Using cache keys - {}.'.format(cache_keys))
        self.paths_GT = pickle.load(open('./data/{}'.format(cache_keys), 'rb'))["keys"]
        # ** Read it here, but as we said, our meta_info.pkl is a dictionary that contains
        """
        name: "xxxxxxxxx",
        resolution: "H_W_C"
        keys: ["000000_000000", "000000_000001", ..., "000001_000000", "000001_000001", ...]
        """
        # So finally we just need to read the list of filenames corresponding to keys in it
The following edition will show you a less friendly place for this project.There is a pit in the function u getitem_ (self, index), near line 158.
        ...
        #### get LQ images
        LQ_size_tuple = (3, 180, 320) if self.LR_input else (3, 720, 1280)
        img_LQ_l = []
        for v in neighbor_list:
            img_LQ_path = osp.join(self.LQ_root, name_a, '{:06d}.jpg'.format(v))                  # **Our data format is.jpg; image naming is also in 6-bit xxxxx format
            if self.data_type == 'mc':
                if self.LR_input:
                    img_LQ = self._read_img_mc(img_LQ_path)
                else:
                    img_LQ = self._read_img_mc_BGR(self.LQ_root, name_a, '{:06d}'.format(v))      # ** Image naming is in 6-bit xxxxx format
                img_LQ = img_LQ.astype(np.float32) / 255.
            elif self.data_type == 'lmdb':
                img_LQ = util.read_img(self.LQ_env, '{}_{:06d}'.format(name_a, v), LQ_size_tuple) # ** Image naming is in 6-bit xxxxx format
            else:
                img_LQ = util.read_img(None, img_LQ_path)
            img_LQ_l.append(img_LQ)
        ...
Next, near line 133.(
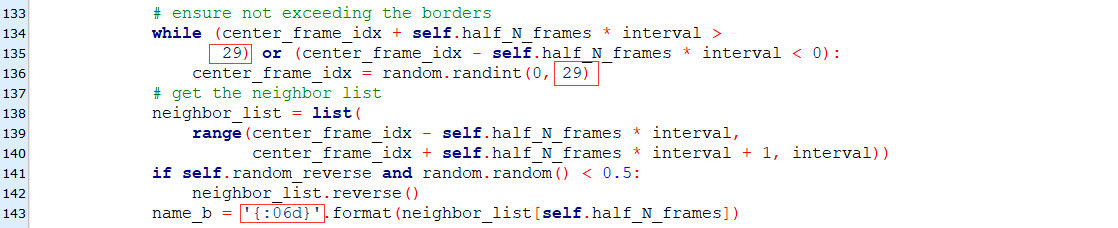
Here are a few values that we need to modify:
1) The above two red boxes, the original value is 99; this is because the training data used by the author contains 100 frames per clip (xxxx_00000000, xxxx_00000001,..., xxxxx_00000099). In order to ensure that the frames of the two clips are not read, the index of the frames needs to be checked.The number of frames per clip in the data we're preparing is 30, so here's 29.
2) If the reader uses the same naming format as the author: "{xxx_xxxxxx", then the box at the bottom does not need to be modified; but if not, the name given here in the small edition is "xxxxxx_xxxxxx", then it needs to be changed to "{06d}" instead of "{08d}".
The most interesting thing here is why the above "99" is not set as a hyperparameter?
The final step is to resize the image to the size of our own data, in the same file

5. Training Instructions
During the training, you may find problems with data encoding. Note that Chinese cannot appear in the code, (||)!Xiaobian is here just for easy explanation in Chinese!
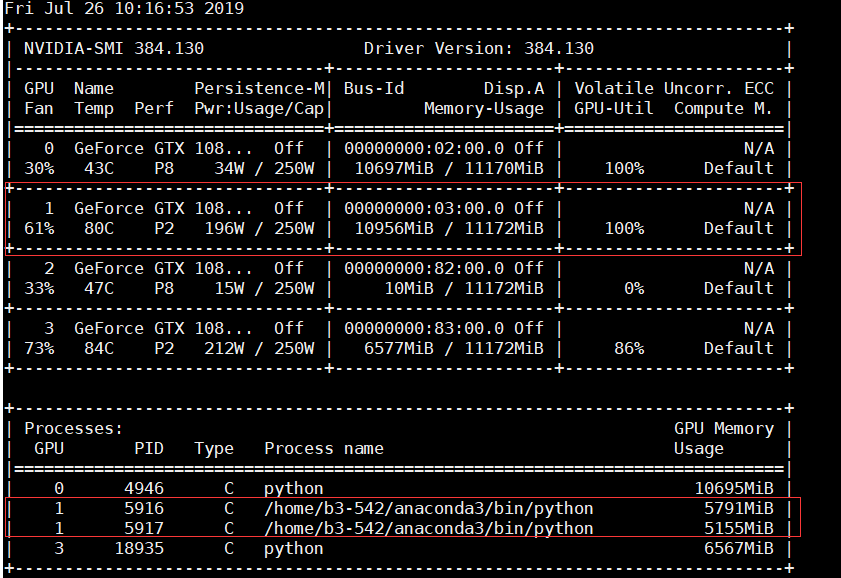
python -m torch.distributed.launch --nproc_per_node=2 --master_port=21688 train.py -opt options/train/train_EDVR_OURS_M.yml --launcher pytorch

## nproc_per_node is how many sub-processes we use, 2 here, so the figure below shows 2
## master_port is the pid of the main process, if occupied, modify to use another process
Okay, so far, the training is complete.If there are faults or errors, please let the reader point out warmly, thank you very much!(