Implementation of ElasticSearch cluster encrypted communication based on TLS
Author: "the wolf with hair bumping", welcome to reprint
Catalog
Application
▪ ES node information
Step 1. Turn off service
Step 2. Create CA certificate
Step 3. Create CERT certificate
Step 4. Create a keystore
Step 5. Delete CA certificate
Change the elasticsearch.yml configuration
Step 7. Start the service
Appendix. Reference documents
purpose
Previously:
▷ in the first EFK tutorial - Quick Start Guide, it describes the installation and deployment of EFK, in which the ElasticSearch architecture is three nodes, that is, the master, ingest, and data roles are deployed on three servers at the same time.
▷ in the second EFK tutorial - ElasticSearch high performance and high availability architecture, the purpose of EFK's role of data/ingest/master and the deployment of three nodes respectively are described to maximize performance and ensure high availability.
▷ in the third EFK tutorial (3) - ElasticSearch cold and hot data separation, the multi instance deployment of ES is described. The data with different heat degrees are stored on different disks to realize the cold and hot data separation and reasonable resource allocation.
In the first three articles, the data interaction between ES clusters is plaintext interaction. In this paper, CA and CERT certificates are created for ES clusters to realize the two-way encryption interaction between ElasticSearch clusters through TLS.
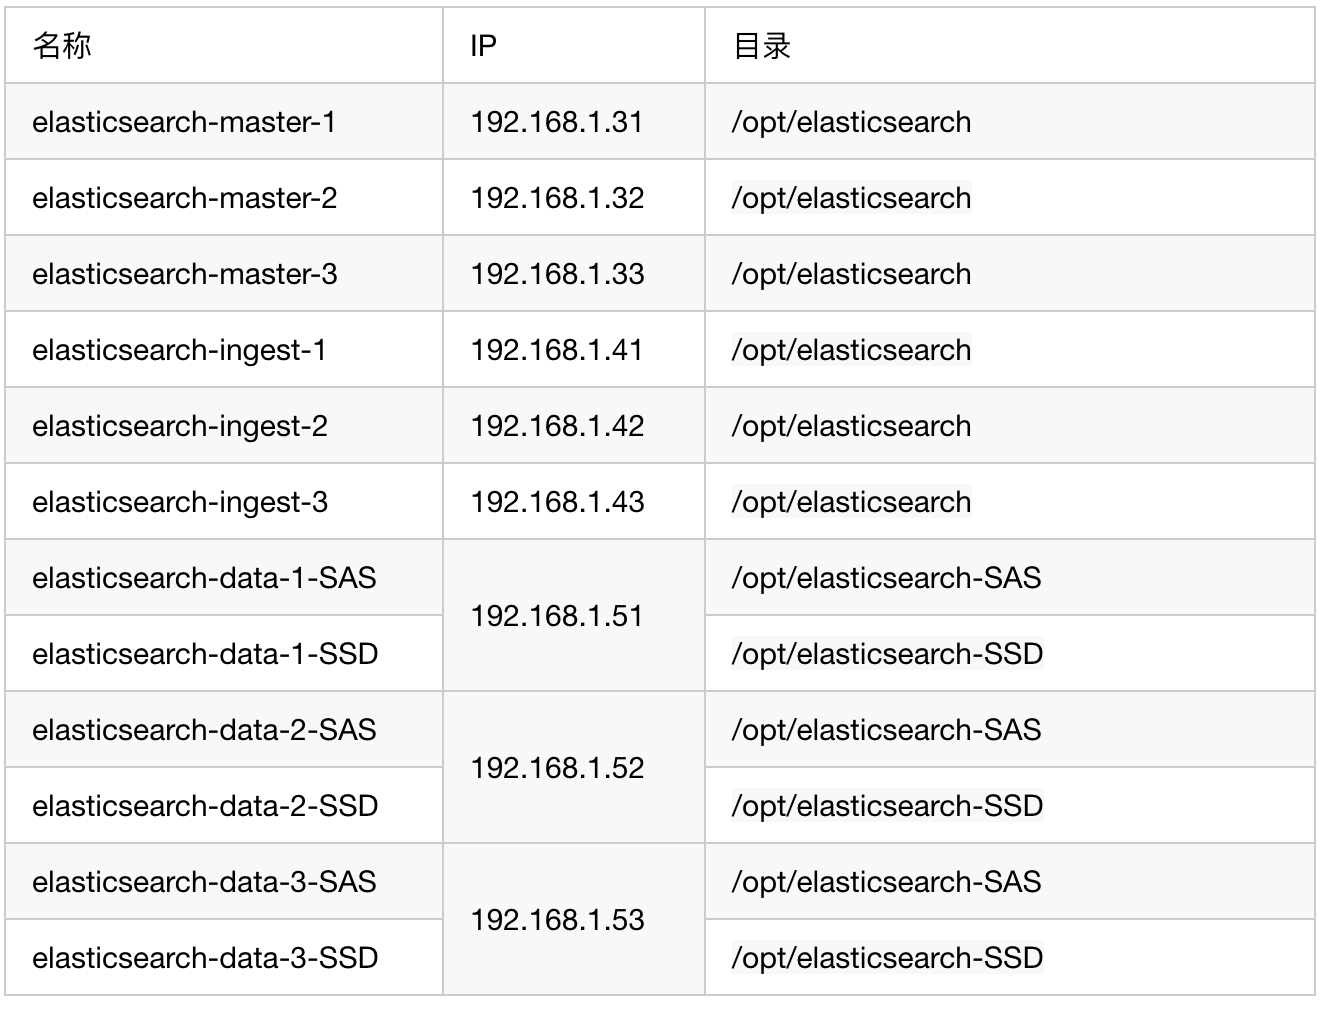
ES node information
Since this paper is based on the previous article "EFK tutorial (3) - ElasticSearch cold and hot data separation", the node information is consistent with the previous article:
Step 1. Close the service
First, you need to stop all ElasticSearch, kibana and filebeat services, and start them after certificate configuration is completed
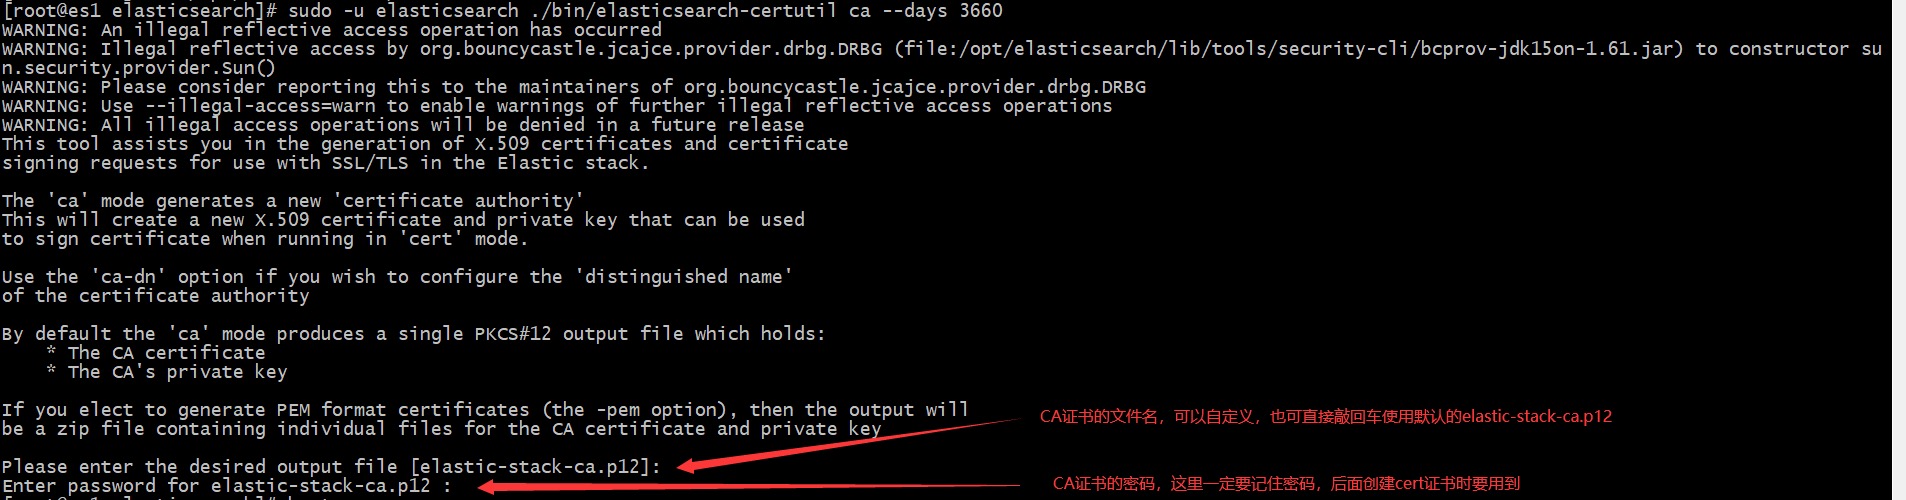
Step 2. Create CA certificate
1. Find any ElasticSearch node server to operate
cd /opt/elasticsearch/
# --days: how long is the validity period
sudo -u elasticsearch ./bin/elasticsearch-certutil ca --days 3660
2. Be sure to transfer the generated CA certificate to a safe place for permanent storage, because if the ES node needs to be added later, the certificate will also be used
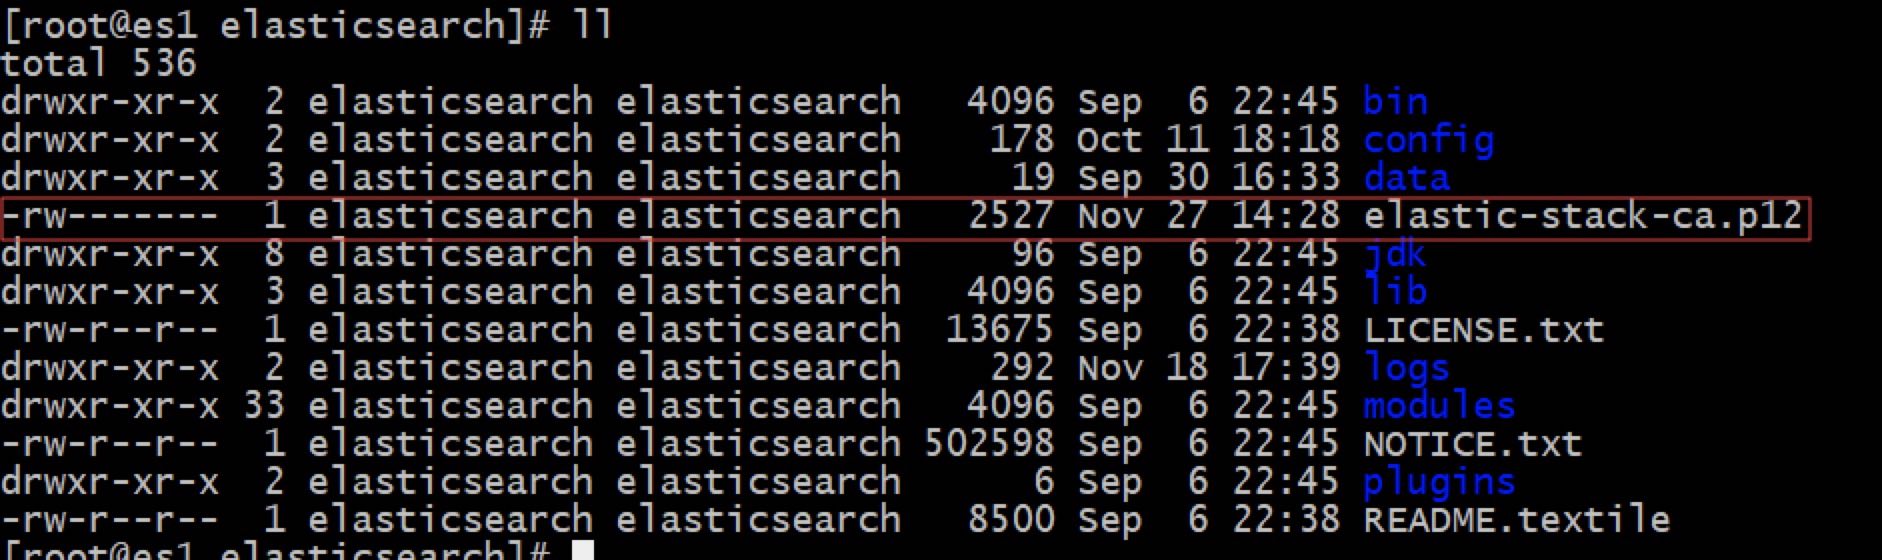
3. Please send elastic-stack-ca.p12 certificate to all ES instance servers
Step 3. Create CERT certificate
Follow the above table to enter the corresponding directory to create CERT certificate
# Establish certificate directory in ES directory and give elastic search permission
mkdir -p config/certs;chown elasticsearch.elasticsearch config/certs -R

# One certificate for each instance
# --File name of ca CA certificate, required parameter
# --dns server name, multiple server names separated by commas, optional parameters
# --IP server IP, multiple IP separated by commas, optional parameters
# --out where to output, optional parameters
# --days validity period, optional parameters
sudo -u elasticsearch ./bin/elasticsearch-certutil cert --ca elastic-stack-ca.p12 --ip ${This machine IP},127.0.0.1 --out config/certs/cert.p12 --days 3660
# For example, elasticsearch-master-1 (192.168.1.31) executes the command: sudo - u elasticsearch. / bin / elasticsearch certutil cert -- Ca elastic stack ca.p12 -- IP 192.168.1.31127.0.0.1 -- out config / certs / cert.p12 -- days 3660


If you want to generate CERT certificates in batch, please refer to the appendix link by yourself. However, in batch generation, sometimes the generated certificates are not available, so it is recommended to build one by one
Step 4. Create a keystore
Follow the above table to enter the corresponding directory to create a keystore
# Every instance needs operation
# Create keystore
sudo -u elasticsearch ./bin/elasticsearch-keystore create
# Password of PKCS 12 file
sudo -u elasticsearch ./bin/elasticsearch-keystore add xpack.security.transport.ssl.keystore.secure_password
# Password for the truststore
sudo -u elasticsearch ./bin/elasticsearch-keystore add xpack.security.transport.ssl.truststore.secure_password


Confirm that keystore and truststore have been entered into the keystore
sudo -u elasticsearch ./bin/elasticsearch-keystore list

Step5. Delete CA certificate
Because the elastic-stack-ca.p12 created above contains a private key, it is recommended to delete the file for security purposes (please make sure to back it up in advance, because nodes will be added later)
Follow the above table to enter the corresponding directory to delete CA certificate
rm -f elastic-stack-ca.p12
Step6. Modify the elasticsearch.yml configuration
Configure elasticsearch.yml under the conf directory according to the instance corresponding to the above table
# Add the following configuration to all instances
# Enable transport.ssl authentication
xpack.security.transport.ssl.enabled: true
# xpack authentication mode full is host or IP authentication and certificate authentication, certificates is certificate authentication, not host and IP authentication, default to full
xpack.security.transport.ssl.verification_mode: full
# xpack path to PKCS 12 file containing private key and certificate
xpack.security.transport.ssl.keystore.path: certs/cert.p12
# xpack path to the PKCS 12 file containing the certificate to trust
xpack.security.transport.ssl.truststore.path: certs/cert.p12
Step 7. Start the service
# Open all ES instances
sudo -u elasticsearch ./bin/elasticsearch

# Open filebeat
/opt/filebeat/filebeat -e -c /opt/filebeat/filebeat.yml -d "publish"

# Open kibana
sudo -u kibana /opt/kibana/bin/kibana -c /opt/kibana/config/kibana.yml
Attached. Reference documents
https://www.elastic.co/guide/en/elasticsearch/reference/current/configuring-tls.html
https://www.elastic.co/guide/en/elasticsearch/reference/7.3/certutil.html